Note: Use Bookmarks panel to navigate
Product: GEN SET ENGINE
Model: 3508 GEN SET ENGINE 23Z
Configuration: 3508 Generator Set Engine (High Speed) 23Z03489-UP
Disassembly and Assembly
N3 Series Brushless Alternators
Media Number -SENR2082-01
i01688996
Alternator - Assemble
SMCS - 1405-016
Assembly Procedure
Table 1
Tooling that is needed A B
Soldering iron (180 watt)
Vise or clamping support with vee blocks
Press
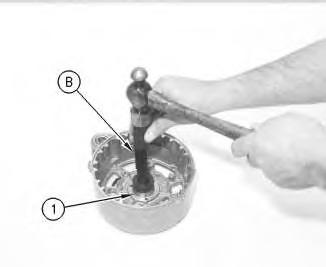
Illustration 1
1. Install the roller bearing (1) with tooling (B) .
Note: If necessary, apply grease to the bearing.
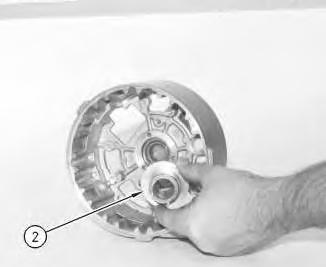
Illustration 2
2. Install the ring (2) in the rear frame.
g00871460
g00871248
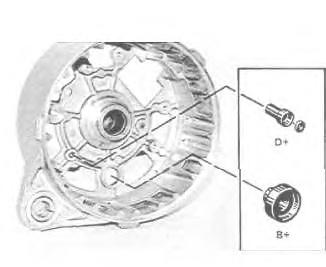
Illustration 3 g00871252
3. Install the insulators for terminal "B+" and terminal "D+".
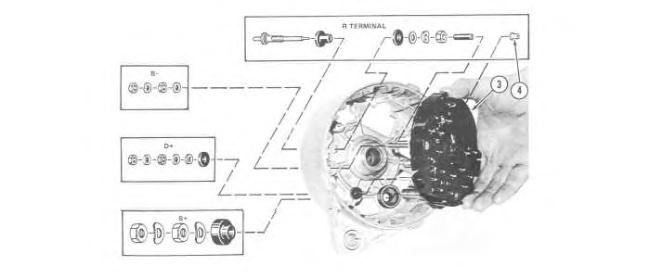
Illustration 4
4. Install the "R" terminal, if the "R" terminal was replaced.
5. Install the rectifier (3) in the rear frame.
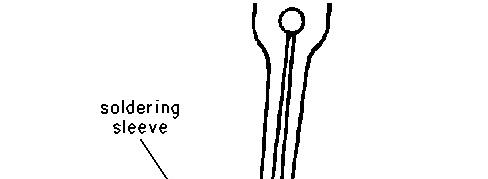
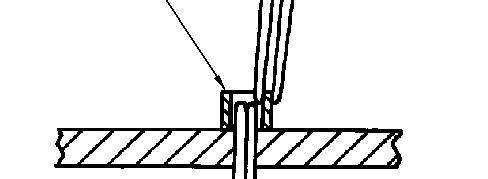
6. Install the two screws. Solder the sleeve (4) over terminal "R".
7. Install the following components on terminals: "D+", "B+" and B-: terminal insulators, washers and nuts.
g00871347
Illustration 5
g00871376
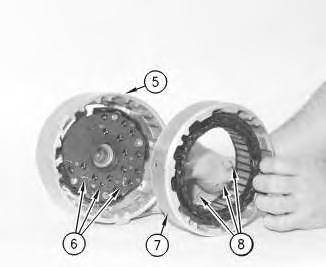
8. Position the stator frame (7) on the rear frame (5). Use the marks on the alternator that were made in the disassembly procedure for alignment.
Illustration 6
g00871382
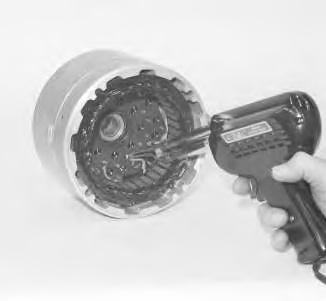
9. Solder the leads for the stator winding (8) to the terminals for the rectifier (6) .
DOWNLOAD LINK
For some reason if link does not work download this pdf and then click
7
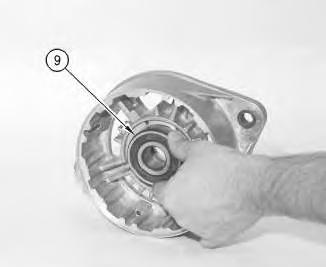
10. Install the bearing (9) in the rear frame.
Note: The bearing is a loose fit.
Illustration 8
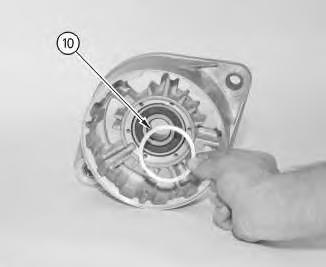
11. Install the intermediate ring (10) .
Illustration
g00871385
g00871389
9
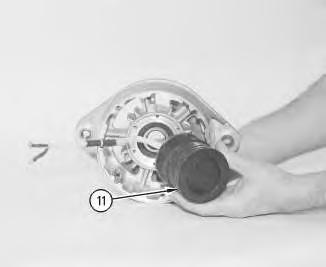
12. Install the field winding (11). The leads for the winding must fit in the deep groove. Install the six screws on the reverse side of the frame.
13. Apply the epoxy putty 5P-3321 Adhesive over the lead and the groove.
Illustration 10
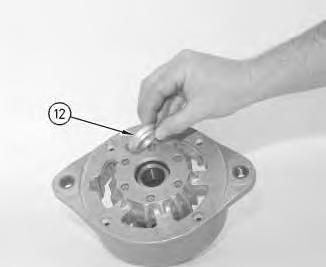
14. Install the spacer ring (12) .
g00871407
NOTICE
In the next step you must support the spacer ring. The spacer ring is supported in order to support the bearing inner race.
Illustration
g00871402
Illustration 11
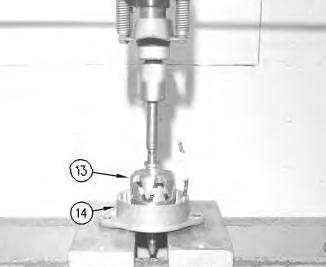
15. Install the rotor assembly (13) in the drive end frame (14).
12
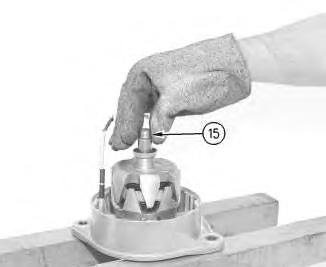
16. Heat the bearing race (15) to 135 °C (275 °F). Install the bearing race on the shaft.
g00871415
Illustration
g00871417
Illustration 13
g00871447
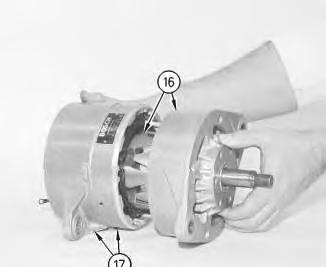
17. Connect the drive end and the rotor (16) to the rear housing and the stator frame (17). The marks that were made during the disassembly procedure will help align the alternator. Install the four hex socket screws. Do Not Tighten the hex socket screws.
Illustration 14
g00871452
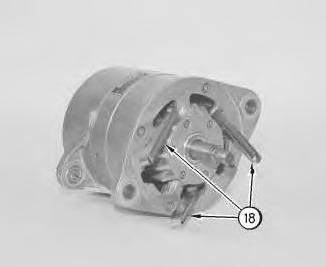
18. Insert three 0.3 mm (0.01 inch) feeler gauges (18) between the rotor and the stator. Tighten the screws to a torque of 4.8 ± .7 N·m (3.5 ± .5 lb ft).
Illustration 15
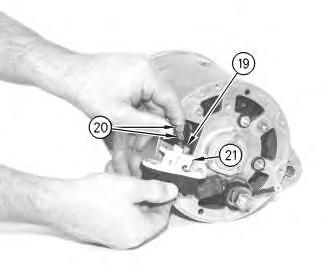
19. Connect the lead for the field coil to the regulator (21). The screw is large in diameter (19) .
20. Connect the lead for the rectifier and the remaining lead for the field coil (20) to the regulator terminal.
Note: In order to maintain the proper polarity, one lead for the field coil has a hole that is small in diameter.
Illustration 16
g00871458
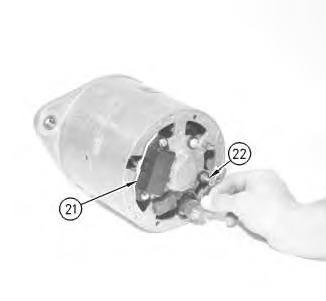
21. Install the regulator (21) on the rear frame assembly. Install the two screws for the regulator.
22. Install the lead for the suppression capacitor on the "D+" terminal (22) .
g00871457
Illustration 17
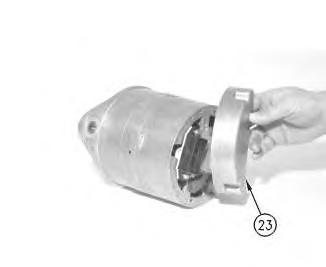
23. Install the regulator cover (23). Install the screws for the regulator cover.
Copyright 1993 - 2024 Caterpillar Inc.
All Rights Reserved. Private Network For SIS Licensees.
Tue Oct 1 00:08:31 UTC+0530 2024
Product: GEN SET ENGINE
Model: 3508 GEN SET ENGINE 23Z
Configuration: 3508 Generator Set Engine (High Speed) 23Z03489-UP
Disassembly and Assembly
N3 Series Brushless Alternators
Alternator - Disassemble
SMCS - 1405-015
Disassembly Procedure
Start By:
A. Remove the alternator from the machine. Refer to Disassembly and Assembly, "AlternatorRemove" for the machine that is being serviced.
Note: Before disassembly, clean the exterior of the alternator in order to prevent dirt from entering the unit. Table 1
Tooling that is needed
Soldering iron (180 watt)
Vise or clamping support with vee blocks Press
5B-9603 Bolt (3/8 - 16 NC)
5/8 - 18 Hardened Flat Washer
5/8 - 18 Jam Nut
The following disassembly procedure shows the disassembly of the N3 series alternator (35 amperes).
NOTICE
Care must be taken in the following step not to damage the alternator. Do not overtighten the vise.
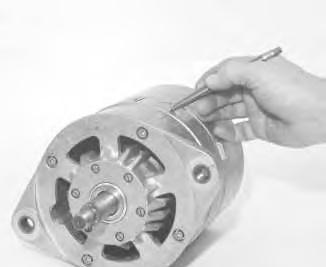
1. Position the alternator in a vise or a similar clamping device.
2. Remove the following components: the pulley nut, the pulley and the fan.
Illustration 1
g00870070
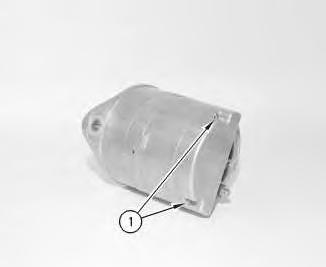
3. Remove the two screws (1). Then remove the regulator cover.
Illustration 2
g00870086
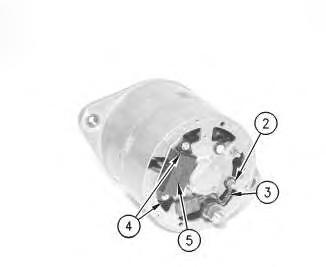
4. Remove the nut from the "D+" terminal (2) .
5. Disconnect the lead for the suppression capacitor (3) .
6. Remove the two screws (4) that mount the regulator.
Note: The step may be unnecessary, if the component will not be tested or replaced.
Illustration 3
g00870144
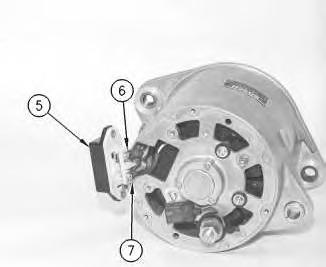
7. Pull the regulator (5) partially away from the frame. This will expose the terminals for the regulator. The terminals for the regulator are the "D+" (7) and the "DF" terminals (6) .
8. Disconnect the two leads for the "D+" terminal (7). Disconnect the one lead for the "DF" terminal (6) .
Illustration 4
g00870150
9. Mark the following components with a marker for proper alignment during assembly:front frame, stator, end frame and drive end housing face
Illustration 5
g00870170
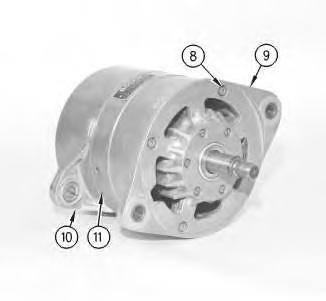
10. Remove the four hex socket head bolts (8). Separate the drive end housing face (9) and the rotor as an assembly from the rear housing (10) and the stator frame (11) .
Illustration 6
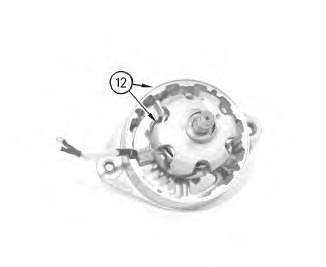
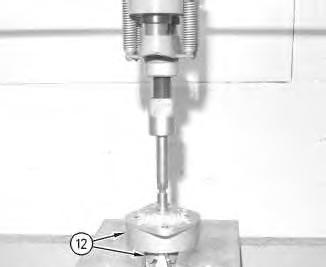
11. Position the following items in the press: drive end housing face, rotor assembly and the tooling (12) .
NOTICE
In the next step, the bearing may be damaged.
Illustration 7 g00870539
12. Use the press to remove the rotor assembly from the drive end housing face.
Illustration 8
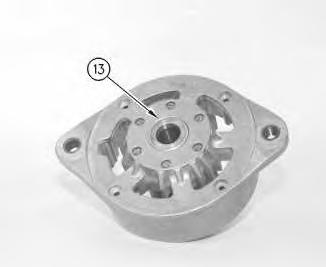
13. Remove the spacer ring (13) .
g00870541
Illustration 9
g00870558
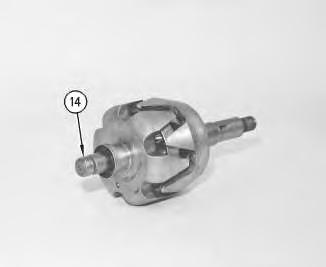
14. Inspect the bearing inner race (14). Replace the bearing inner race (14), if the bearing inner race is worn, damaged, or the bearing has been replaced.
Illustration 10 g00870562
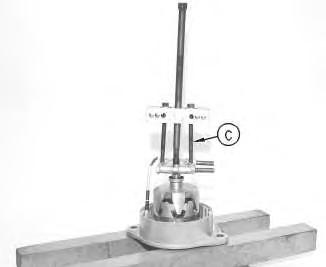
15. Use tooling (C) to remove the bearing race.
Illustration 11 g00870563
NOTICE
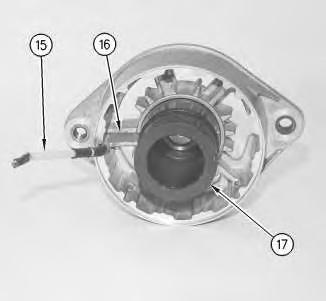
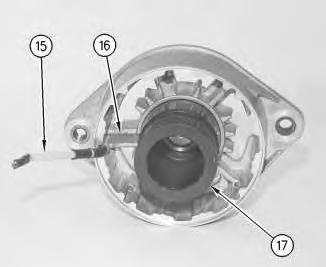
Epoxy putty (16) covers the lead for the field winding (15). Care must be taken in the next step when removing the epoxy, so that the lead is not damaged.
16. Remove the epoxy (16) from the deep groove in the drive end housing face.
Illustration 12 g00870583
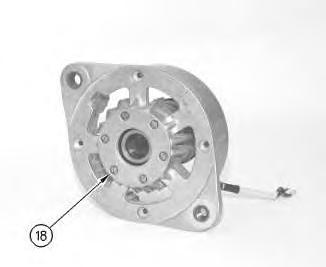
17. Remove the six screws (18) on the front side of the drive end housing face.
Illustration 13 g00870563
18. Remove the lead for the field winding (15) and the field winding (17) .
Illustration 14
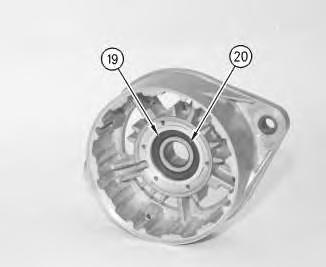
19. Remove the intermediate ring (19) .
g00870589
20. Remove the bearing (20) from the seat in the drive end housing face.
Illustration 15
g00870592
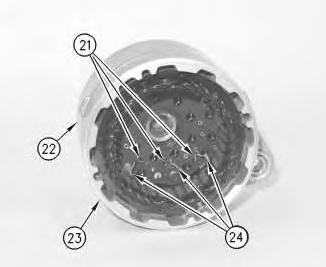
21. Disconnect the three leads for the stator windings (24) from the three rectifier bridge terminals (21).
22. Remove the stator frame (23) from the rear frame assembly.
Illustration 16 g00870596
NOTICE
When unsoldering the "R" terminal in the next step, do not grip both of the outside edges of the sleeve. The sleeve will collapse with too much pressure. While heating with the soldering iron, grip the edge with long nose pliers.
Illustration 17 g00870559
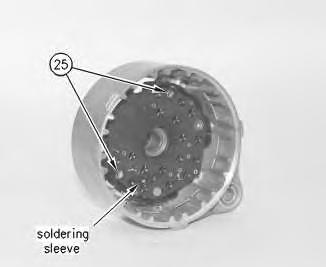
23. Unsolder the soldering sleeve from the "R" terminal.
24. Remove the two screws (25) .
Illustration 18
g00870600
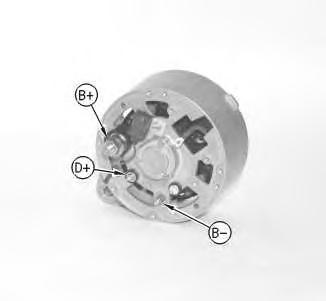
25. Remove the following retaining nuts for the rectifier terminal on the outside of the rear frame assembly: (B+), (D+) and (B-) .
26. Remove the following components: rectifier, washers for the rectifier terminal and insulators.
Illustration 19 g00870601
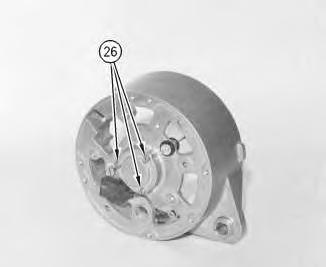
27. Remove the three screws (26) .
Illustration 20 g00870602
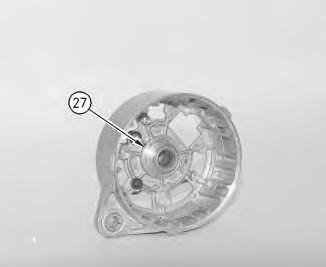
28. Remove the ring (27) from the rear frame.
Illustration 21
Illustration 22
NOTICE
Do not remove the bearing in the next step. The bearing will be destroyed if removed in the next step.
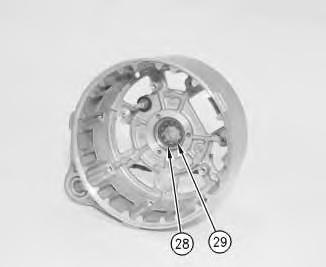
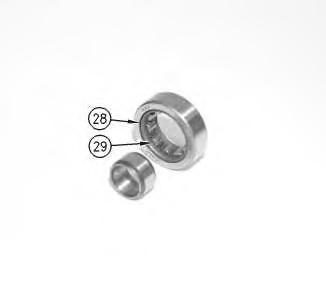
29. Use tooling "A" in order to remove the roller bearings (29) and the retaining cage (28) .
g00870603
g00870604
Illustration 23 g00870605
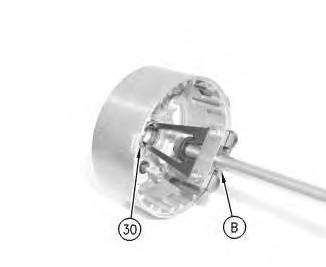
30. Remove bearing outer race (30) with tooling (B) .
Copyright 1993 - 2024 Caterpillar Inc. All Rights Reserved. Private Network For SIS Licensees.
Tue Oct 1 00:07:44 UTC+0530 2024
Product: GEN SET ENGINE
Model: 3508 GEN SET ENGINE 23Z
Configuration: 3508 Generator Set Engine (High Speed) 23Z03489-UP
Disassembly and Assembly
SR4 GENERATOR (THREE
Media Number -SENR2180-01
Publication Date -01/04/1984 Date Updated -14/05/2012
Bridge Rectifier And Exciter Armature
SMCS - 4470-11; 4470-12
Remove
And
Install
Bridge Rectifier And Exciter Armature
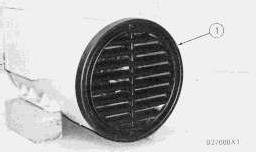
1. Remove cowl cover (1) from the cowl assembly.
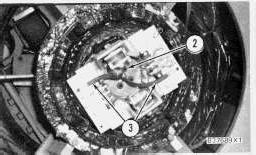
2. Disconnect wires (3) from the bridge rectifier.