

Note: Use Bookmarks panel to navigate

Product: SKID STEER LOADER
Model: 216 SKID STEER LOADER 4NZ
Configuration: 216 226 228 Skid Steer Loader 4NZ00001-03399 (MACHINE) POWERED BY 3034 Engine
Disassembly and Assembly
RA1.2, R1.4, R2.0, R2.2, R2.5, R2.7, R3.0, R4.5 and R5.5 Series Reduction Starting Motors
Media Number -SENR3828-02
Publication Date -01/07/1999 Date Updated -09/10/2001
General Information
SMCS - 4351-012
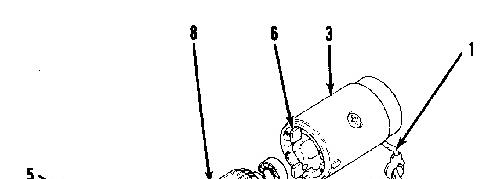
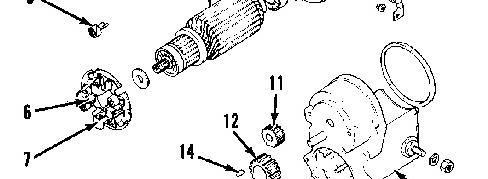
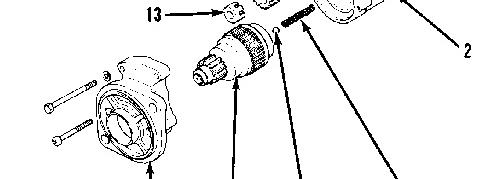

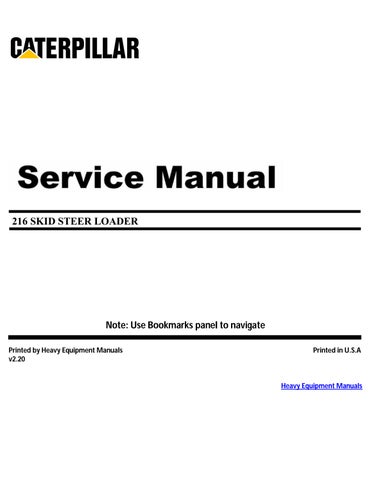
Illustration 1 g00585231
(9) Overrunning clutch
(10) Steel ball
(11) Armature reduction gear
(12) Idler gear
(13) Retainer
(14) Roller
(15) Return spring
Note: The following information is for the disassembly and assembly of a "R2.0 series" starting motor. All other series of starting motors are similar.
Copyright 1993 - 2023 Caterpillar Inc. All Rights Reserved. Private Network For SIS Licensees. Thu Sep 28 11:25:22 UTC+0530 2023
Product: SKID STEER LOADER
Model: 216 SKID STEER LOADER 4NZ
Configuration: 216 226 228 Skid Steer Loader 4NZ00001-03399 (MACHINE) POWERED BY 3034 Engine
Disassembly and Assembly
RA1.2, R1.4, R2.0, R2.2, R2.5, R2.7, R3.0, R4.5 and R5.5 Series Reduction Starting Motors
Media Number -SENR3828-02
Publication Date -01/07/1999
Starting Motor - Assemble
SMCS - 1453-016
Date Updated -09/10/2001

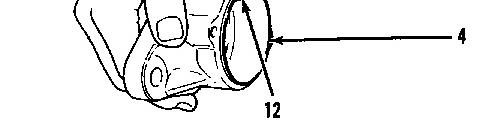
Illustration 1 g00585386
1. Install the return spring (15) into the solenoid (2) .
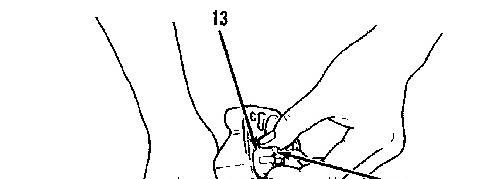

Illustration 2 g00585389
2. Install the rollers (14) and the retainer (13) into the drive end housing (4) .
Illustration 3 g00585386
3. Put the idler gear (12) and the armature reduction gear (11) onto the drive end housing (4) .
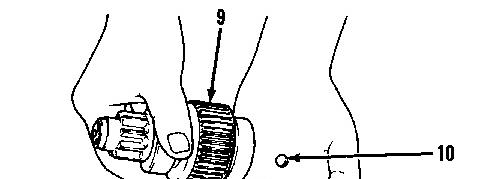

Illustration 4 g00585348
4. Put the steel ball (10) into the overrunning clutch (9) .
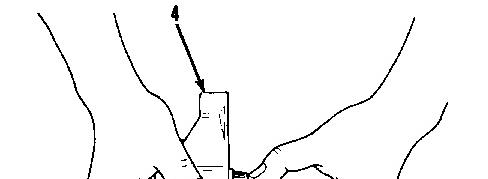

Illustration 5 g00585337
5. Put the overrunning clutch (9) into the drive end housing (4) .


Illustration 6 g00585327
6. Put the drive end housing (4) on the solenoid (2) and install the screws. Tighten the screws to a torque of 0.6 N·m (5.3 lb in) to 0.9 N·m (7.9 lb in).

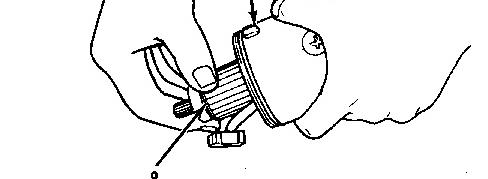

Illustration 7 g00585312
7. Put the armature (8) into the case of the starting motor (3) .
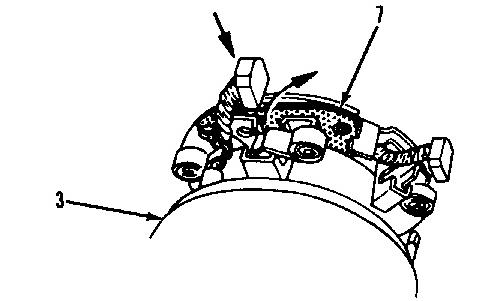
Illustration 8 g00585753
8. Put the brush holder (7) in position over the commutator. Put the positive brushes, which are connected to motor case (3) into the positive holders. The positive holder is separated from the plate by an insulator. Put the negative brushes into the negative uninsulated holders. The negative brushes are connected to brush holder (7) .


Illustration 9 g00585304
9. Make sure that the wires for the positive brush lead are not grounded. Put the brush springs (5) on top of the brushes (6) with a pair of long nose pliers. Make sure that the brush holder (7) and the commutator are free of oil.
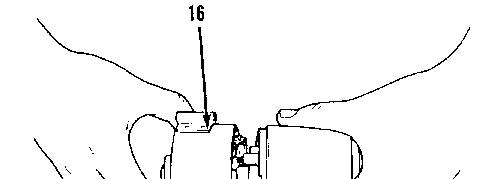
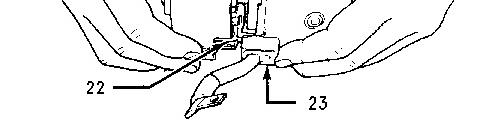
Illustration 10 g00586185
10. If the motor case has an end frame (16), install the end frame onto the case of the starting motor. Tab (22) that is on the end frame must line up with the lead wire grommet (23) that is on the case of the starting motor.
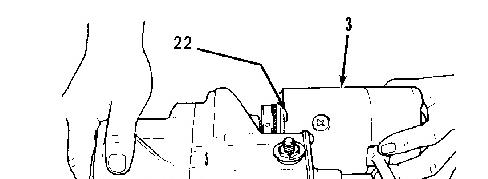
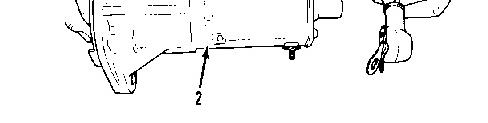
Illustration 11 g00586190
11. Put the case of the starting motor (3) in position onto the solenoid (2). Engage the TAB (22) on the case of the starting motor with the notch in the solenoid. Install the through bolts and tighten the through bolts to a torque of 1.5 N·m (13 lb in) to 2.4 N·m (21 lb in).


Illustration 12 g00585273
12. Connect the lead wire (1) to the motor terminal of the solenoid (2) .
Install the starting motor onto the machine.
Copyright 1993 - 2023 Caterpillar Inc. All Rights Reserved. Private Network For SIS Licensees.
Thu Sep 28 11:25:59 UTC+0530 2023
Product: SKID STEER LOADER
Model: 216 SKID STEER LOADER 4NZ
Configuration: 216 226 228 Skid Steer Loader 4NZ00001-03399 (MACHINE) POWERED BY 3034 Engine
Disassembly and Assembly
RA1.2, R1.4, R2.0, R2.2, R2.5, R2.7, R3.0, R4.5 and R5.5 Series Reduction Starting Motors
Media Number -SENR3828-02 Publication Date -01/07/1999 Date Updated -09/10/2001
Starting Motor - Disassemble
SMCS - 1453-015
Remove the starting motor from the machine. The procedure for removal of the starting motor may vary slightly with a different series of starting motor.
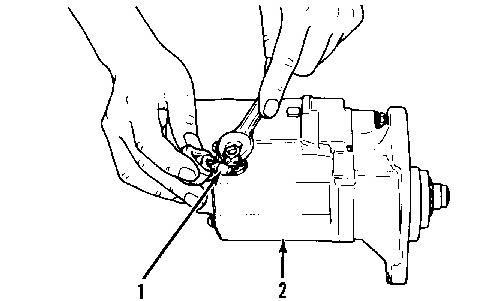
Illustration 1 g00585273
1. Disconnect the terminal lead wire (1) from the solenoid (2) .
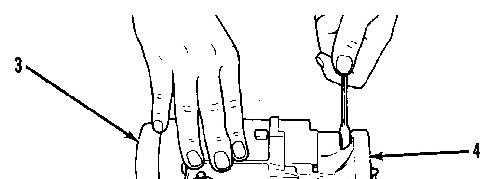

Illustration 2 g00585281
2. Remove the through bolts from the drive end housing (4). The through bolts holds the case of the starting motor (3) onto the solenoid.
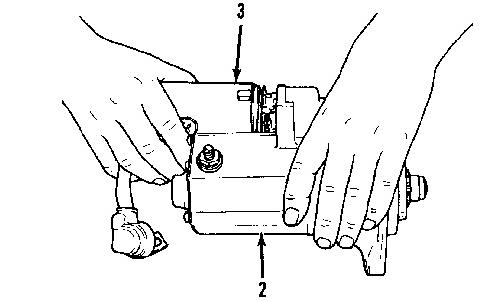
Illustration 3 g00585290
3. Remove the case of the starting motor (3) from the solenoid (2) .
Illustration 4 g00585304
4. If the case of the starting motor has an end frame, remove the end frame. Release the tension of the brush springs (5) with a pair of long nose pliers. Pull the brushes (6) away from the commutator. Remove brush holder (7) .
Illustration 5 g00585312
5. Remove the armature (8) from the case of the starting motor (3). A plastic or rubber hammer may be necessary in order to drive the case of the starting motor from the armature.

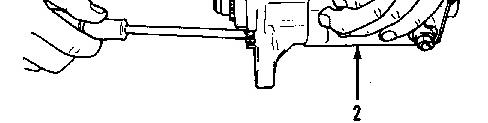
Illustration 6 g00585319
6. Remove the screws that hold the drive end housing (4) to the solenoid (2) .
Illustration 7 g00585327
7. Remove the drive end housing (4) from the solenoid (2) .
Illustration 8 g00585337
8. Remove the overrunning clutch (9) from the drive end housing (4) .
Illustration 9 g00585348
9. Remove the steel ball (10) from the overrunning clutch (9) .
Illustration 10 g00585386
10. Remove the armature reduction gear (11) and the idler gear (12) from the drive end housing (4) .
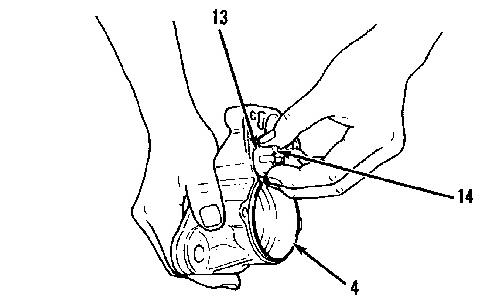
Illustration 11 g00585389
11. Remove the retainer (13) and the rollers (14) from the drive end housing (4) .
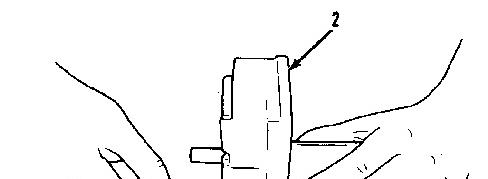

Illustration 12 g00585396
12. Remove the return spring (15) from the solenoid (2) .
NOTICE
Do not use a liquid cleaning agent to clean the armature, field winding, or overrunning clutch. A liquid cleaning agent can damage the insulation in the armature and field windings. The liquid cleaning agent could also dissolve the grease in the overrunning clutch.
13. Clean the armature, the field winding and the overrunning clutch with mineral spirits and brush.
14. If the commutator is dirty, the commutator may be cleaned with "No. 00" sandpaper. Do not use emery cloth.
15. Inspect all parts for wear and damage.
Copyright 1993 - 2023 Caterpillar Inc. All Rights Reserved. Private Network For SIS Licensees. Thu Sep 28 11:25:39 UTC+0530 2023
Product: SKID STEER LOADER
Model: 216 SKID STEER LOADER 4NZ
Configuration: 216 226 228 Skid Steer Loader 4NZ00001-03399 (MACHINE) POWERED BY 3034 Engine
Disassembly and Assembly 216, 226 and 228 Skid Steer Loaders Engine Supplement Media Number -RENR2853-02
Air Cleaner - Remove and Install
SMCS - 1051-010
Removal Procedure
1. Open the engine access door.
Updated -16/11/2001
i01293705
2. Release the latch on the radiator. Raise the radiator. This will allow access to the air cleaner.
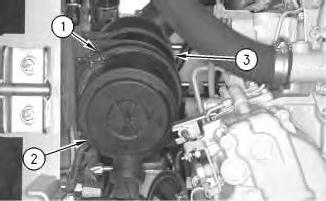
Illustration 1
g00566975
3. Disconnect two clamps (1). Remove air cleaner housing cover (2) from air cleaner housing (3) .
4. Remove the air filter from inside air cleaner housing (3) .