
Previous Screen
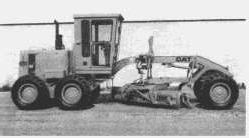
Product: MOTOR GRADER
Model: 120G MOTOR GRADER 87V
Configuration: 120G MOTOR GRADER 87V01138-05274 (MACHINE) POWERED BY 3304 ENGINE
Operation and Maintenance Manual
120G AND 130G MOTOR GRADERS
Media Number -SEBU5215-07
Date -01/12/1989 Date Updated -11/10/2001
Coolant, Fuel and Lubricant Specifications
Coolant Specifications
NOTICE
Use a mixture of water, ethylene glycol (antifreeze) and cooling system conditioner. Pure, undiluted antifreeze will freeze at -23°C (-10°F).
Do not use Caterpillar coolant conditioner elements with Dowtherm 209 Full-Fill coolant. Follow the instructions provided with the Dowtherm 209 Full-Fill coolant.
Refer to "Know Your Cooling System," Form SEBD0518, for more detailed specifications.
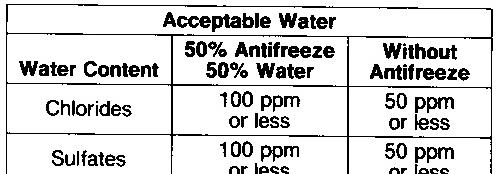
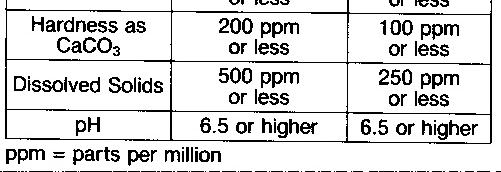
Water
Acceptable water for use in the ethylene glycol and water mixture is shown in the chart below:
Antifreeze
Use the correct amount of Caterpillar antifreeze or ethylene glycol low silicate equivalent mixed with water, to provide freeze protection to the lowest expected outside temperature.
Conditioner
NOTICE
Always add liquid cooling system conditioner to water. Never use water only.
Use Caterpillar liquid cooling system conditioner or a coolant conditioner element (if equipped). This will provide a 3% to 6% concentration of conditioner in the cooling system to help prevent corrosion.
Conditioner can be purchased from your Caterpillar dealer.
Fuel Specifications and Information
Types of Fuel
Caterpillar diesel engines have the ability to burn a wide variety of fuels. These fuels are divided into two general groups, preferred and permissible.
The preferred fuels provide maximum engine service life and performance. They are distillate fuels. They are commonly called diesel fuel, furnace oil, gas oil or kerosene.
The permissible fuels are crude oils or blended fuels. Use of these fuels can result in higher maintenance costs and reduced engine service life.
Refer to "Fuels for Caterpillar Diesel Engines," Form SEHS7067, for a detailed summary of preferred and permissible fuels and their specifications.
Refer to S.A.E. J313 Diesel Fuels for information about better quality fuels, such as ignition quality, gravity/density, viscosity, cloud point, sulfur content, etc.
Fuel Sulfur Content
The percentage of sulfur in the fuel will affect the engine oil recommendations (see "Engine Oils" under "Lubricant Specifications").
Fuel sulfur is chemically changed during combustion to form sulfuric acid. The acid chemically attacks metal surfaces and causes corrosive wear. Higher engine oil Total Base Number (TBN) values are essential to minimize corrosive wear.
Periodically request fuel sulfur content information from your fuel supplier. Fuel sulfur content can change with each bulk delivery.
Fuel Cetane Requirement
The minimum fuel cetane number recommended for the direct injection engine is 40.
Fuel Cloud Point
Fuel waxing can plug the fuel filters in cold weather. The fuel cloud point must be below the temperature of the surrounding air to prevent filter waxing and power loss. Fuel heating attachments are available from your Caterpillar dealer to minimize fuel filter waxing.
Lubricant Specifications
General Information
Certain abbreviations follow S.A.E. J754 nomenclature and some classifications follow S.A.E. J183 abbreviations. The MIL specifications are U.S.A. Military Specifications. The definitions other than Caterpillar's will be of assistance in purchasing lubricants. The recommended oil viscosities can be found in the "Lubricant Viscosity Recommendations" chart in this publication.
Diesel Engine Oil (DEO)
Caterpillar has two engine oils. To achieve the maximum engine life and performance in your diesel engines, Caterpillar's first recommendation is:
* Cat Diesel Engine Oil (DEO)
Cat Diesel Engine Oil is specially formulated for Caterpillar Diesel Engines, to reduce piston and ring deposits and thus provide longer engine life and stable oil control.
Engine Oil (EO)
Cat Engine Oil is Caterpillar's second recommendation for an engine oil specifically intended for use in mixed fleets. This oil is only for the convenience of having the same oil for gasoline and diesel engines.
For mixed fleet convenience, use Caterpillar's:
* Cat Engine Oil (EO)
If circumstances require the use of an oil other than the Cat Diesel Engine Oil or Cat Engine Oil, the following oil specifications can be used; European oil specification CCMC D3, API specification CD, CD/SF, CE or military specifications MIL-L-2104C or MIL-L-2104D.
Oil with these specifications may require shortened oil change periods as determined by close monitoring of oil condition with Scheduled Oil Sampling (S·O·S) and infrared analysis.
NOTE: The percentage of sulfur in the fuel will affect the engine oil recommendations. If the fuel has over 0.5% sulfur, the engine oil must have a Total Base Number (TBN) of twenty times the percentage of fuel sulfur (TBN as measured by the ASTM D2896 method). When operating with a fuel sulfur above .7%, (Cat Diesel Engine Oil is a 14 TBN oil), consult with your Caterpillar dealer for an engine oil that has a higher TBN.
For more information on oil and fuel sulfur content, refer to "Oil and Your Engine", Form SEBD0640.
NOTICE
Failure to follow these recommendations can cause shortened engine life due to carbon deposits or excessive wear.
Always consult with your Caterpillar dealer for the latest lubrication recommendations.
Hydraulic Oil (HYDO)
Cat Hydraulic Oil should be used to achieve maximum life and performance from hydraulic system components and hydrostatic transmissions. Use of Cat Hydraulic Oil is recommended in most hydraulic and hydrostatic systems.
* Cat Hydraulic Oil (HYDO)
If different viscosities are required because of extreme ambient temperatures, the following oils can be used, use Caterpillar's:
* Cat Engine Oil (EO)
* Cat Diesel Engine Oil (DEO)
If Cat Hydraulic Oil or Engine Oil is not available, use an engine oil that meets one of these API service classifications; CC, CC/SF, CD or CE. Any military specification of MIL-L-2104 oils can also be used.
Industrial-type hydraulic oils that are certified by the oil supplier to have antiwear, antifoam, antitrust and antioxidation additives for heavy duty use are also acceptable.
Transmission Oil (TDTO)
Maximum transmission life and performance can be achieved, by using Caterpillar's:
* Cat Transmission/Drive Train Oil (TDTO)
NOTE: Failure to follow this recommendation can cause shortened transmission life due to material incapability and inadequate frictional requirements for disk materials.
If circumstances require the use of an oil other than Cat Transmission/Drive Train Oil, use an oil that meets API CD/TO-2 or military specification MIL-L-2104D.
NOTICE
This oil is formulated for Transmissions and Drive Trains only, and should not be used in engines. Shortened engine life will result.
Differential, Tandem Drive, Circle Drive, and Front Wheel Spindle Housing Oil (TDTO)
For maximum life and performance of the differential and final drive components, select the correct viscosity of Caterpillar's:
* Cat Transmission/Drive Train Oil (TDTO)
If circumstances require the use of an oil other than Cat, use an API classification CD/TO-2 MIL-L2104D.
Lubricating Grease (MPGM)
Use Multipurpose Molybdenum Grease for all lubrication points. Caterpillar grease will maximize life of Caterpillar equipment, use:
* Multipurpose Molybdenum Grease (MPGM)
If MPGM grease cannot be used, a multipurpose-type grease which contains 3% to 5% molybdenum disulfide can be used.
NLGI No. 2 grade is suitable for most temperatures. Use NLGI No. 1 or No. 0 grade for extremely low temperature.
Copyright 1993 - 2024 Caterpillar Inc. All Rights Reserved. Private Network For SIS Licensees.
Tue Jan 9 23:19:29 UTC+0530 2024
This is the sample of the manual click on the download link for complete manual
DOWNLOAD LINK
For some reason if link does not work download this pdf and then click
Previous Screen
Product: MOTOR GRADER
Model: 120G MOTOR GRADER 87V
Configuration: 120G MOTOR GRADER 87V01138-05274 (MACHINE) POWERED BY 3304 ENGINE
Operation and Maintenance Manual 120G AND 130G MOTOR GRADERS
Media Number -SEBU5215-07 Publication Date -01/12/1989 Date Updated -11/10/2001
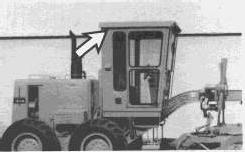
Every 10 Service Hours or Daily
Walk-Around Inspection
Inspect Lines, Tubes, Hoses and the Machine
Inspect Lines, Tubes and Hoses

See topic in the Safety Section "Lines, Tubes and Hoses" for the correct Maintenance Procedures.
Inspect the Machine
See, "Walk Around Inspection", in the "Before Starting the Engine" section of the Operator's Guide for your machine. Engine Crankcase
Measure Oil Level
Machine must be level, equipment lowered, parking brake applied, engine running at LOW IDLE or stopped.
1. Measure the oil level.
2. Engine Stopped: Maintain oil level between ADD and FULL marks on dipstick.
3. Engine Running: Maintain oil level between ADD and FULL marks on ENGINE RUNNING side of dipstick.
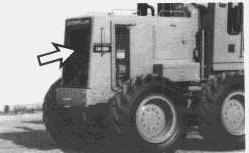
Precleaner
Check - Clean if Necessary
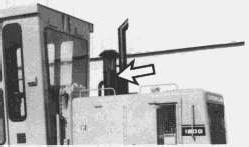
Inspect the precleaner screen for accumulation of dirt or debris. Remove precleaner screen and clean if it is necessary.
Radiator
Check Coolant Level
At operating temperature, the engine coolant is hot and under pressure.
Steam can cause personal injury.
Check the coolant level only after the engine has been stopped and the fill cap is cool enough to touch with your bare hand.
Remove the fill cap slowly to relieve pressure.
Cooling system conditioner contains alkali. Avoid contact with the skin and eyes to prevent personal injury.
If it is necessary to add make-up coolant daily, inspect for leaks.
Remove radiator cap slowly to relieve pressure. Observe coolant level. Maintain coolant level above the level indicator plate in the bottom of the fill pipe.
Clean Outside of Radiator
Pressure air can cause personal injury.
When using pressure air for cleaning, wear a protective face shield, protective clothing and protective shoes.
The maximum air pressure must be below 205 kPa (30 psi) for cleaning purposes.
Use all cleaning solutions with care.
Compressed air, high pressure water or steam can be used to remove dust, leaves and general debris from the radiator. Clean as required by condition of radiator.
The use of compressed air is preferred.
Refer to "Know Your Cooling System," Form SEBD0518, for the complete procedure and instructions.
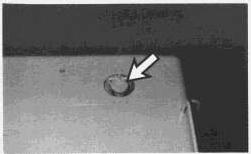
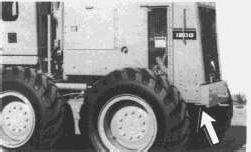
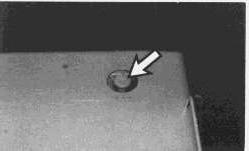
Fuel Tank
Drain Water and Sediment

Open drain valve. Allow water and sediment to drain.
Close drain valve. If water or sediment is not present, the drain interval may be extended.
Air Reservoir
Drain Water and Sediment
Drain water and sediment from both sections of the air reservoir.
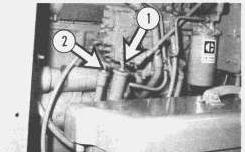
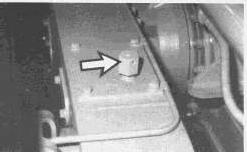
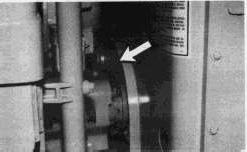
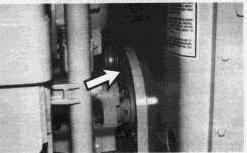
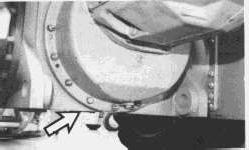
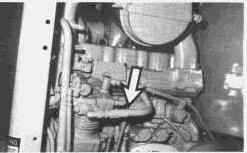
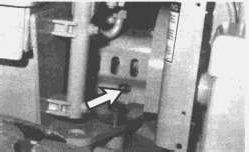
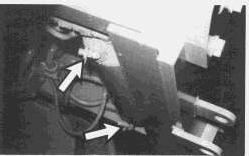
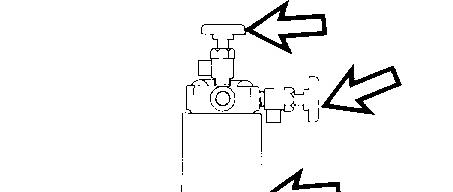
Water Separator (If Equipped)
Drain Water and Sediment
NOTICE
Observe water separator. Drain any water before starting the engine. Anytime the water separator becomes half full of water, stop the engine and drain the water separator.
When the inside of the water separator becomes contaminated enough that the water level cannot be seen through the transparent cover, remove and discard the old element. See "Water Separator" in the "When Required" section.
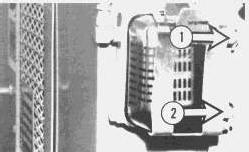
Open the vent valve (1) and drain valve (2). Drain the water. Close the drain and vent valves.
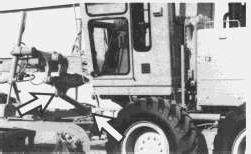
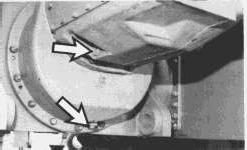
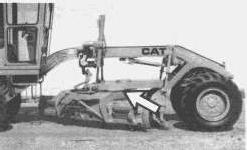
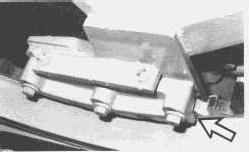
Circle Guide Shoes-Earlier Machines
Lubricate
Lubricate 4 fittings, (one on each shoe) on the 130G and apply lubricant with a paddle to the front and back of each shoe and the top and bottom of the circle and to the teeth of the circle on the 120G.
Previous Screen
Product: MOTOR GRADER
Model: 120G MOTOR GRADER 87V
Configuration: 120G MOTOR GRADER 87V01138-05274 (MACHINE) POWERED BY 3304 ENGINE
Operation and Maintenance Manual 120G AND 130G MOTOR GRADERS Media Number -SEBU5215-07
Date -01/12/1989 Date Updated -11/10/2001
Every 100 Service Hours or 2 Weeks
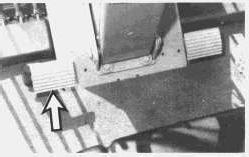
Wear Strips (If Equipped)
Adjust if necessary
Check the clearance between the bottom of the circle and top of the shoe wear strip, the first 100 to 250 service hours of operation. The clearance should be 0.5 mm (.02 inch).
For adjustment procedures, see topic "Blade Circle and Drawbar" in the "When Required" section of this guide.
Hydraulic System
Check Oil Level
Hot oil can cause burns.
At operating temperature, the hydraulic tank is hot and under pressure.
Remove the fill cap only when the engine is stopped, and the cap is cool enough to touch with your bare hand. Remove the fill cap slowly to relieve pressure.
Machine must be level, equipment lowered, parking brake applied, engine stopped, key start switch OFF and key removed.
1. Observe oil level.
2. Maintain oil at FULL mark in sight gauge.
3. Remove oil fill cap to add oil.
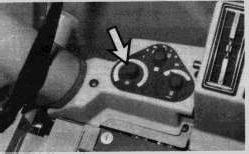
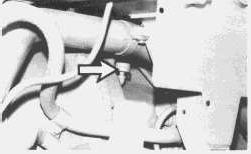
Upper Articulation Pivot
Lubricate Fitting
Lubricate one fitting.
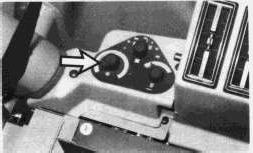
Brakes
Test and Adjust Service Brake
When testing the parking and service brake, fasten seat belt and be ready for the sudden stop.
1. Drain the moisture and sediment from the air reservoir.
2. Start the engine and wait until maximum air pressure is obtained.
3. To check the air system, stop the engine, depress the brake pedal and observe the air pressure gauges for loss of system pressure.
4. Start the engine, release the brake pedal and operate the machine in 3rd gear forward at maximum engine speed on hard packed dirt.
5. Apply the service brake. If the engine stalls, the service brakes are satisfactory.
6. If the wheels did not skid (slide), consult your Caterpillar dealer for service and inspection of the service brake.
Parking Brake
NOTICE
Do not perform the parking brake test repeatedly. Damage to the brake disc can result.
1. Drain the moisture and sediment from the air reservoir.
2. Start the engine and wait until maximum air pressure is obtained.
3. Operate the machine in 2nd gear forward, at maximum engine speed and on hard packed dirt.
4. Depress the transmission modulator pedal, shift the transmission to neutral and apply the parking brake.
5. The parking brake is satisfactory if wheels skid (slide).
6. If the wheels do not skid (slide), consult your Caterpillar dealer for service inspection of the parking brake.
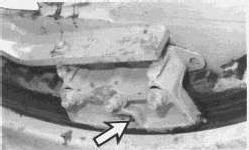
Engine Crankcase
Change Oil and Filter
Hot oil and components can cause personal injury. Do not allow hot oil or components to contact skin.
1. Open drain valve and allow oil to drain. Drain valve is accessible through opening in the frame. Close drain valve. Remove and discard the used filter.
2. Clean filter housing base and be sure all of old seal is removed.
3. Apply a thin film of clean engine oil to the new filter seal. Install new filter by hand. Turn filter 3/4turn after seal contacts base. Do not overtighten the filter.
The filter may have rotation index marks spaced 90° apart. These marks should be used when tightening the new filter an additional 3/4 turn.
4. Fill crankcase to FULL mark on ENGINE STOPPED side of dipstick. See "Refill Capacities," "Lubricant Specifications," and "Lubricant Viscosity Recommendations."
5. Start the engine and measure the oil level. Inspect for leaks. Maintain oil level between ADD and FULL marks on ENGINE RUNNING side of dipstick. Add oil as necessary.
Cooling System
Add Conditioner
At operating temperature, the engine coolant is hot and under pressure.
Steam can cause personal injury.
Check the coolant level only after the engine has been stopped and the fill cap is cool enough to touch with your bare hand.
Remove the fill cap slowly to relieve pressure.
Cooling system conditioner contains alkali. Avoid contact with the skin and eyes to prevent personal injury.
NOTICE
Excessive coolant conditioner (greater than the recommended 6% inital fill) together with concentrations of antifreeze greater than 65%, cause a mud-like deposit to form. This may result in radiator blockage and overheating.
1. Remove the radiator coolant fill cap.
2. Add 0.5 liters (1/2 qt) of liquid coolant conditioner.
Coolant Conditioner Element-(If
Equipped)

1. Close the inlet valve and outlet valve. Turn both valves clockwise to close.
2. Remove the coolant conditioner element. Discard the used element.
3. Clean the element mounting base. Be sure to remove all of the old gasket from the base.
4. Install a new coolant conditioner element. Contact your caterpillar dealer for the correct element to use.
5. Coat the seal of the element with a thin film of clean engine oil. Install the element until the seal contacts the base, then tighten 3/4 turn more.
6. Open the inlet and outlet valves. Start the engine and check for leaks.
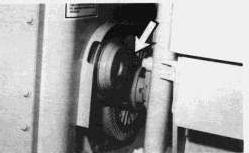
Fan and Alternator Drive Belts
Check - Adjust if Necessary

1. Inspect condition and measure deflection of belts. Belt should deflect 12 mm (1/2 inch) under 110 N·m (25 lbs) force.
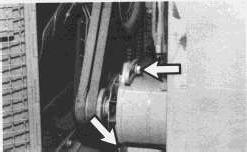
2. Loosen alternator mounting bolts. Move alternator to tighten belts. Tighten bolts and check amount of deflection. Repeat if necessary.
Fan Bearing
Lubricate Fitting

Lubricate one fitting.