001_PMM_OCT26_Layout 1 01/09/2026 01:53 Page 2
PROFESSIONAL MOTOR MECHANIC
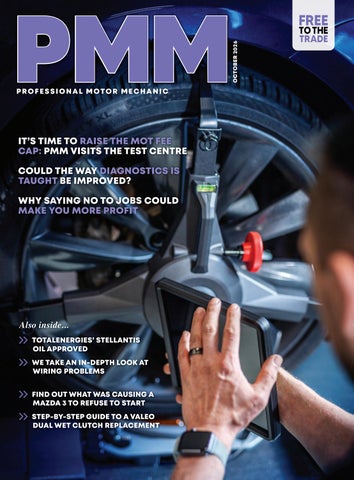
IT’S TIME TO RAISE THE MOT FEE CAP: PMM VISITS THE TEST CENTRE COULD THE WAY DIAGNOSTICS IS TAUGHT BE IMPROVED? WHY SAYING NO TO JOBS COULD MAKE YOU MORE PROFIT
Also inside... TOTALENERGIES’ STELLANTIS OIL APPROVED WE TAKE AN IN-DEPTH LOOK AT WIRING PROBLEMS FIND OUT WHAT WAS CAUSING A MAZDA 3 TO REFUSE TO START STEP-BY-STEP GUIDE TO A VALEO DUAL WET CLUTCH REPLACEMENT
OCTOBER 2026
PMM
FREE TO THE TRADE
PMM grid_Layout 1 01/09/2026 09:52 Page 1
Contents
003_PMM_OCT26.qxd_Layout 1 01/09/2026 22:58 Page 3
Regulars 8-10
OCTOBER 2026 VOLUME 27 ISSUE 9
EDITOR’S PICKS
NEWS
Find out the latest going on in the industry.
13-24 CPD ZONE Scan the QR code on page 24 to claim your free CPD credit.
27-34 IN THE MIDDLE 37
BRAKES & CLUTCHES
44
REMANUFACTURING
48
OILS, LUBRICANTS & ADDITIVES
55
TYRES, WHEELS & ALIGNMENT
Hello and welcome to the October issue of Professional Motor Mechanic! We’ve got a lot of contributions from around the garage sector in this issue, including Ben Johnson with his regular troubleshooter column on page 14, a new diagnostics whizz Lucas on page 22, workshop advice from longtime pro Dan Force on page 30 and, lastly, a comment on what is really needed in the diagnostics classroom on page 34. We’ve also got plenty of chunky technical articles to sink your teeth into, including a Valeo clutch replacement on page 37, a Stellantis EV charging issue explored on page 44 and a VW Caddy clutch job on page 41. And before I forget, I was also down at The Test Centre recently to discuss the MOT fee cap – read that on page 28. Enjoy the issue!
Turn to page 27 for the latest on our YouTube channel. Here, Ed Cockill gets to grips with the Duragun.
FEATURES
Turn to page 37
18
22
IN THE WORKSHOP
Turn to page 64
24
28
48
An AGM battery can
Poor engine
EVs now account for
When the MOT fee cap
Only 11 per cent of
deliver around 60,000
maintenance is a leading
around one in four new car
was last raised, Gordon
drivers say they would
engine starts, roughly
cause of DPF
sales globally and 28 per
Brown was the PM.
always choose the
three times a flooded
regeneration failure.
cent of the European
battery's life.
Total Average Net Distribution 57,460 July – December 2025
cheapest option.
market. Image credits: Pg.8 – © AdobeStock/Whatever Pg.21– ©AdobeStock/Fabrus Pg.22 – ©AdobeStock/Somsak Pg.33 – ©AdobeStock/DusanJelicic
Pg.41– ©AdobeStock/UnPinky Pg.44 – ©AdobeStock/Southworks Pg.53 – ©AdobeStock/Fabian Ibelherr Pg.53 – ©AdobeStock/Artographer34 Pg.61 – ©AdobeStock/Jan Kliment
PMM OCTOBER 2026 3
PMM grid_Layout 1 01/09/2026 11:00 Page 1
PMM grid_Layout 1 01/09/2026 11:00 Page 2
PMM grid_Layout 1 01/09/2026 10:46 Page 1
007_PMM_OCT26.qxd_Layout 1 01/09/2026 23:03 Page 5
VIEWPOINT
RACING AHEAD?
Editor KIERAN NEE Digital Manager KELLY NEWSTEAD Group Manager ALEX DILLEIGH Advertisement Manager MARCUS HOOPER Magazine Designer ADEEL QADRI Group Production Manager CAROL PADGETT Production Assistant CLAIRE SWENDELL Distribution Manager KARL CLARK
ou may have noticed in the last issue that PMM has started sponsoring a young go-karter by the name of Hanley Yates. Hanley races in the MK championship in the midlands. We’ll be bringing you monthly updates on this rising star, along with some more in-depth interviews with him at some stage, which will reveal more about what karting means to him and how it can bring focus and determination into your life. In any case, Hanley is not what I want to talk about today, but go-karting. For some, like Hanley, go-karting is taken seriously and can lead to bigger, faster, things. For most, however, it is a thrilling diversion from work every now and then. Looking on LinkedIn, you might get the impression that to run a successful garage these days, not only do you have to turn up early and leave late, but you have to work weekends, put on evening events, spend hours on the weekend crafting the perfect LinkedIn or Facebook post, and generally just spend every waking moment thinking about the intricacies of running a car repair business. Perhaps this is true, but it doesn’t seem to me like a very healthy approach to life in general. In this issue, we have a couple of great articles which have a bearing on this theme. The first relates to the importance of turning down work. We have run articles on this theme in the past, but this one is different in that it focuses on being realistic about your abilities and your capacity for certain jobs. The typical argument for turning down work is profitability – turn down complicated, timewasting jobs, take on more simple, fast-moving jobs. Either way, the message is clear: More work isn’t always a good thing for your business. The second article relates to training, and the importance of expressing complex ideas in a way that is easy to understand and remember for vehicle technicians. The takeaway from this article is that the technician with the most learning is not necessarily the person best placed to teach those principles to others. So what does any of this have to do with the price of fish? Well, the point is that the best way ahead is not always the most straightforward. Sometimes the best thing you can do is step back and take a moment to think about a strategy. When you’re sitting in third with the whole race still left to go, maybe simply flooring it isn’t the best strategy. Maybe it’s best to take a moment to formulate a plan that works for you. I’ve always found that the best ideas come when I’m doing nothing at all – not when I’m scrolling LinkedIn!
Y
Subscriptions PROFESSIONAL MOTOR MECHANIC is a business magazine for firms and individuals involved in all aspects of the motor trade. It is published eleven times a year and is available nationally FREE to the trade through leading motor factors. It is also available through the post at a cost of £30. EUROPE and OVERSEAS UK £30 post paid Airmail £80 post paid Europe £50 post paid Printed by PCP Telford Published by HAMERVILLE MEDIA GROUP Regal House, Regal Way, Watford, Herts, WD24 4YF. Tel: Watford (01923) 237799 Fax: (01923) 246901 E-mail: pmm@hamerville.co.uk Sales enquiries: pmmsales@hamerville.co.uk Website: www.pmmonline.co.uk Copyright © 2026 The publishers and editor do not necessarily agree with the views expressed by contributors, nor do they accept responsibility for any errors of translation in the subject matter in this publication.
Kieran Nee Editor
Associate member
JOIN ME EACH MONTH ON THE PMM PODCAST Find every episode at www.pmmonline.co.uk/podcasts Also available:
008_PMM_OCT26_Layout 1 01/09/2026 23:24 Page 8
PMM NEWS For garage jobseekers, town beats the city As youth unemployment hits a decade high, new data reveals which UK towns and cities offer the best motor industry opportunities for young jobseekers The number of young people in the UK not in education, employment or training (NEET) passed 1 million in early 2026 for the first time since 2013, official figures show, with unemployment among 16-24 year-olds rising over the past year. Now, new research into the UK's motor trade sector has identified where jobseekers, and young jobseekers in particular, currently stand the best chance of finding work in the automotive industry. The research, conducted by private plate supplier Regtransfers, combines business registration records, official labour market data and job vacancy figures across nearly 100 UK towns and cities, finding that midsized towns are consistently outperforming Britain's largest cities when it comes to genuine automotive job opportunity, and that these same towns tend to have significantly lower youth unemployment. Guildford topped the indexed rankings, recording 2.5 automotive job vacancies for every existing automotive business in the area over the past 12 months, 2.8 times the national average. Exeter placed second, with 387 automotive businesses supporting 602 vacancies in the past year and an overall job vacancy rate of 34 per cent, among the highest of any location studied. Dartford rounded out the top three, with 259 automotive businesses generating 399 vacancies over the same period. By contrast, larger cities including Birmingham and Manchester, despite having some of the largest automotive business bases in the country, recorded vacancy-to-business ratios roughly six times lower than Guildford's, suggesting that scale alone does not translate into proportionate opportunity for jobseekers. Guildford was separately identified in the government's own recent interim report on youth unemployment as having one of
8 OCTOBER 2026 PMM
“Mid-sized towns are consistently outperforming Britain's largest cities when it comes to genuine automotive job opportunity, and these same towns tend to have significantly lower youth unemployment.”
the lowest rates of young people claiming Universal Credit while looking for work, in contrast to cities such as Birmingham and Bradford, where more than eight per cent of 16-24 year-olds are on Universal Credit and seeking work. Its youth claimant rate in this research (40.7 per 10,000 working-age residents) is among the lowest of any location studied. More broadly, towns with strong automotive vacancy activity also tend to have lower youth unemployment, though this is likely linked to these towns' generally strong local economies rather than the motor trade specifically. The findings come as the government rolls out its £1.5 billion Youth Guarantee, which includes new Foundation Apprenticeships launching this year, among them a route specifically for electric vehicle charging point installation and maintenance, alongside financial incentives for employers who hire young people.
Commenting on the findings, Regtransfers CEO Mark Trimbee states: “Whether the motor trade itself is contributing to lower youth unemployment in these towns – or simply reflects the same strong local economies that produce it – this data gives a detailed picture of where the motor trade is creating opportunity right now, which is valuable context as the country endeavours to think about where to focus youth employment efforts.” He continues with a message to young NEETs; “We would encourage young people seeking employment to reach out to local automotive businesses - there are plenty of roles available that don’t necessarily need you to be familiar with the internal workings of an engine!” For more information
WWW.RDR.LINK/ACJ001
008_PMM_OCT26_Layout 1 01/09/2026 23:24 Page 9
FOR UP-TO-DATE NEWS, SIGN UP FOR OUR WEEKLY E-NEWSLETTER. SIMPLY SCAN THE QR CODE
Apprenticeship Central answers: Where have all the good apprentices gone?
Every August, Apprenticeship Central has the same conversation with employers. The applications are coming in, but the 'spark' they're looking for is harder to find. There's no shortage of candidates who want an apprenticeship. There's a shortage of ones who know exactly what they want. And the question that follows is always the same: Where has all the good talent gone? “Here's what we see through our recruitment. It hasn't gone anywhere. It just went early. The young people with real drive, the ones who knew by Christmas what they wanted, sorted their options months ago. What's left applying now is a more undecided crowd, exploring everything. “That matters, because employers tell us they want the same three things: Passion, genuine interest and commitment. Those are the hardest qualities to read in someone who hasn't decided yet.”
“There are more applicants than ever, which is exactly why the screening matters more”
As recruit lead, Nicole Cochran, puts it: "There are more applicants than ever, which is exactly why the screening matters more. We're not going to send an employer ten maybes to pad a list. We'd rather put forward three we believe in. The earlier we start the stronger the field we're choosing from, because the candidates worth backing don't stay undecided for long. “The right people are there this month, and we find them, but it's worth knowing why it takes more digging in August than in February. “Earlier in the year, the picture is different. Fewer applications, but more from people who've already decided. A proper
recruitment journey, started early, doesn't just get you more candidates. It gets you in front of them while the decision is still live, before someone else makes it for them. “That's the real lesson, for next year as much as this one. The employers who consistently land committed apprentices aren't luckier. They start sooner, and give themselves the runway to choose well rather than choose fast. “The talent isn't drying up in August. The best of it just goes to the employers who start looking first.”
Ahead of its upcoming talks with Government around the MOT fee, the Independent Garage Association will be stating the case on behalf of its members that the MOT fee needs to increase significantly. Inflation alone makes the current MOT fee unsustainable; however, inflation is only part of the picture. Garages have also faced additional cost pressures relating to labour, rent, equipment, fuel, energy, compliance, administration and staff training meaning the MOT fee should be at least £95. Stuart James, chief executive of the Independent Garage Association “It is a fact that the current MOT fee has remained static for 16 years. We are being advised by garage owners that without a significant increase to the MOT fee, they cannot continue to
sustain this ever-increasing cost burden. As the representative body for the independent garage sector, the IGA will continue to challenge the Government to deliver an acceptable resolution to this issue before it causes a level of consumer detriment.”
If the MOT fee continues to fall behind the true cost of delivering the test, the consequences will increasingly be felt by motorists through reduced availability, fewer testing appointments and ultimately less consumer choice. The issue now needs to be addressed urgently. The MOT fee has remained unchanged since 2010, while the costs of running a garage and delivering the test have risen substantially. For every day that the MOT fee remains at its current level, the problem is escalating, with the potential to create serious challenges for motorists in terms of availability and consumer choice as garages are forced to reduce the capacity of the MOT testing bays they operate.
Nicole Cochran, Apprenticeship Central
For more information
IGA calls on Government to raise MOT fee to at least £95
“For every day that the MOT fee remains at its current level, the problem is escalating” A recent survey of IGA members demonstrates strong support across the independent garage sector for an increase to the MOT fee. Garages have also been clear about the commercial pressures they are facing. Comments from IGA members indicate that a growing number are already reducing MOT capacity.
WWW.RDR.LINK/ACJ002
For more information
WWW.RDR.LINK/ACJ003
PMM OCTOBER 2026 9
008_PMM_OCT26_Layout 1 01/09/2026 23:27 Page 10
PMM NEWS Sharp rise in overdue MOT bookings Motorists are increasingly leaving their MOT booking until after the expiry date, according to latest figures released by the UK’s leading comparison site for MOTs, services and repairs, BookMyGarage. A significant proportion are also putting off their MOT appointment. A year ago, almost six in 10 drivers booked their MOT at least four weeks before it was due whereas in the latest three-month period, the figure fell to fewer than four in ten. The data also suggests that reminders can play an important role in helping motorists stay compliant. Customers who received MOT reminder communications were 55 per cent less likely to have an expired MOT when arranging their next
test, indicating that missed deadlines may often be caused by motorists simply losing track of the date rather than intentionally delaying their booking. In light of the Government announcement in reviewing tougher punishments for those driving without a valid MOT for which the conclusion is imminent, BookMyGarage delved into its extensive data to understand consumer behaviours driving MOT bookings on its platform and found a worrying but consistent trend of overdue and late MOT bookings. The proportion of drivers booking an MOT after it had expired increased by around 60 per cent year-on-year, rising
“Customers who received MOT reminder communications were 55 per cent less likely to have an expired MOT when arranging their next test, indicating that missed deadlines may often be caused by motorists simply losing track of the date rather than intentionally delaying their booking.”
Greetings from the race track!
from 10.3 per cent a year ago to 16.6 per cent in the latest three-month period. New analysis of a sample size of more than 350,000 MOT bookings across a full 12-month dataset found that overall, almost one in seven drivers (13.44 per cent) booked after their MOT had expired, a further 4.3 per cent had a valid MOT at the time of booking which became overdue by the time of the appointment whilst one in five (20.32 per cent) booked within two weeks of expiry. A further telling and worrying trend is the decline in motorists booking their MOT well in advance, suggesting motorists are putting off not just the cost of the test itself, but the possibility of repairs required to obtain the certificate. The proportion of motorists booking at least four weeks before their MOT due date fell from 59.3 per cent to 38.1 per cent year-on-year. For more information
WWW.RDR.LINK/ACJ004
PMM has recently started sponsoring a young go-kart driver by the name of Hanley Yates. Each month we’ll be keeping you updated with the postcards he sends us with his progress. Here’s the first!
Dear PMM, I just wanted to share a quick update following Round 6 of the MK championship. I’m delighted to say I qualified on pole position before going on to take another race victory, putting me now at the top of the championship standings with an 11 point lead. After a difficult Friday practice, the turnaround was incredible. The kart felt fantastic yesterday from qualifying onwards, and once I settled into the race, I had the pace to control it from the front and bring home the win. This season has been a real milestone for me. My pace and consistency have improved beyond what I expected, and it’s rewarding to see all the hard work I have been doing paying off. Leading the championship at this stage is something I’m incredibly proud of, but I’m staying focused as there’s still plenty of racing left. One bit of news – I'm off to Silverstone Kart in a few weeks for practice sessions! Don't forget, I'm also on Facebook and Instagram at hy_karting Kind regards, Hanley 10 OCTOBER 2026 PMM
PMM grid_Layout 1 02/09/2026 16:06 Page 1
PMM grid_Layout 1 01/09/2026 10:48 Page 1
013_PMM_OCT26_Layout 1 02/09/2026 11:14 Page 13
READ ME TO COLLECT YOUR CPD POINT
CPD ZONE
TROUBLESHOOTER Why was the Peugeot 406 Estate experiencing an electrical fault? Once a vehicle reaches a certain age, every fault presents a new temptation to simply consign it to the scrap yard. But when a vehicle is otherwise working well, the best thing is to find the right solution and give it a new lease of life. That’s exactly what ALLDATA enabled one garage to do recently with a Peugeot 406 which has been going for a quarter of a century. LLDATA Europe’s Info Centre recently supported a specialist workshop with a diagnosis of an electrical fault on a 2001 Peugeot 406 Estate. After several unsuccessful repairs elsewhere and many components replaced, the vehicle was considered for scrap – before ALLDATA came to the workshop’s aid.
A
The problem A persistent electrical fault had not been resolved, with two important symptoms present: The battery charging warning lamp remained on, despite the charging system appearing to be working correctly, and the heater blower was broken. Previous repair attempts included three alternator replacements, a wiring repair and even a new Body Systems Interface module. None of these fixed the issue.
The solution During these diagnosis assessments and repair attempts, it became clear that this vehicle was part of a ‘transitional period’ for PSA Group electrical architecture. Peugeot and Citroën were moving from conventional wiring systems to multiplexed networks and CAN bus technology, resulting in variations in component locations and circuit design between seemingly identical models. Initial investigation using the OEM wiring diagrams available through ALLDATA
“Working with the Info Centre, however, the workshop was able to access an archived manufacturer bulletin that identified the relay’s location – beneath the under-bonnet fuse box.” Repair showed an engine-running relay within the affected circuit; however, while the diagram confirmed its existence, its physical location was not clear. Working with the Info Centre, however, the workshop was able to access an archived manufacturer bulletin that identified the relay’s location – beneath the under-bonnet fuse box. With this information, the technician quickly located the relay and performed bypass testing. This restored system operation and confirmed the fault path. Further testing showed the vehicle’s true wiring, narrowing the diagnosis to the alternator – despite multiple replacements. With access to genuine OEM data, though, the technician could fit a replacement alternator with confidence and knowledge that the faults would be resolved.
OEM wiring information Without access to the original OEM wiring information and supporting manufacturer documentation, it is likely the workshop would have replaced more components, while the customer would have faced additional labour costs and uncertainty as to the fate of their vehicle. Instead, the root cause was found, allowing a vehicle that was considered for scrap to be put back on the road. Electrical faults on transitional vehicle platforms can be challenging. Production changes, evolving electrical architectures and differing component locations can make diagnosis difficult. This Inside Intelligence bulletin, however, demonstrates the value of combining OEM repair information with expert technical support.
TO SIGN UP FOR A FREE TRIAL OF ALLDATA REPAIR go to www.rdr.link/acj005 or scan the QR code
PMM OCTOBER 2026 13
014_PMM_OCT26_Layout 1 02/09/2026 11:22 Page 14
CPD ZONE
READ ME TO COLLECT YOUR CPD POINT
TROUBLESHOOTER Why was the Mazda 3 refusing to start? PMM’s wire-chaser Ben Johnson has been at it again recently with a particularly uncommunicative Mazda. here are some diagnostic jobs where the fault practically introduces itself. A warning light comes on, the scan tool gives you a sensible code, you carry out a few tests, find a broken wire, replace the offending part and move on with your life. Then there are Mazdas.
T
The problem This Mazda 3 arrived with a simple complaint: it would not start. No crank. No starter operation. Nothing. The instrument cluster displayed a rather unhelpful start-stop button fault message, which, in the great tradition of modern vehicle diagnostics, told me almost nothing of any use whatsoever. Mazdas are particularly good at this sort of thing. They have a habit of throwing up vague starting-system warnings whenever they feel that something, somewhere, isn’t quite right. It might be a key issue. It might be an immobiliser fault. It might be a problem with the selector position. Or perhaps Saturn is in retrograde and the BCM simply isn’t in the mood. The most entertaining part was that there were no useful fault codes. Not one miserable little breadcrumb to point me in the right direction.
Finding the solution So, as is often the case, the scan tool was politely put to one side and the multimeter came out. The starter relay was in the front fuse box in the engine bay. As with a conventional automotive relay, terminal
14 OCTOBER 2026 PMM
30 carried the main battery supply, while terminal 87 was the switched output towards the starter circuit. Bridging terminals 30 and 87 operated the starter motor and, more importantly, the engine started. (Fig.2) That immediately ruled out a great many possibilities: The starter motor worked; the high-current circuit worked; the engine ran; the immobiliser was clearly not preventing the engine from operating once it had been cranked. In other words, the problem was not downstream of the starter relay. The relay was simply not being commanded. On the control side, terminal 86 received approximately 12 volts from the PCM during a start request. That voltage was present. Terminal 85, however, was supposed to be grounded by the Body Control Module. That ground was missing. So now the question was no longer, why doesn’t the starter motor work? The real question was: why was the BCM refusing to switch it on?
Narrowing it down The circuit also incorporated a monitor wire so that the PCM could supervise relay operation, because naturally, in a modern car, even a simple starter relay is no longer allowed to live a peaceful life
014_PMM_OCT26_Layout 1 02/09/2026 11:23 Page 15
Fig 1 - A green starter motor relay seemed the best place to start.
without several control units watching it. But electrically, the situation was clear. Terminal 30: Battery voltage. Terminal 86: 12 volts from the PCM. Terminal 85: No ground from the
Fig 2 - The relay terminals 85 and 86 both had 12V present even when attempting to crank – smoking gun? I should be so lucky.
Fig 3 – Note terminals A and E on the wiring diagram. Tracing the brown wire back to the BCM we can see that the BCM grounds this wire when authorised and the blue wire on terminal E is energized with 12V with a monitoring line back to the BCM – very Mazda.
“The scan-tool live data also appeared completely normal: Park showed Park. Neutral showed Neutral. Reverse showed Reverse. Drive showed Drive. Marvellous. …Except the car still wouldn’t bloody start!” BCM and instead 12 useless Volts. The BCM was deliberately inhibiting the start and now I just had to find out why. On any automatic vehicle with a no-crank complaint, one of the first obvious suspects is the transmission range information. The vehicle must know that the gearbox is in Park or Neutral before allowing the starter motor to operate. Otherwise, somebody could press the start button in Drive and unexpectedly send the car across the workshop, which tends to upset both customers and insurance companies. The selector mechanism had a simple microswitch which worked perfectly. The scan-tool live data also appeared completely normal: Park showed Park. Neutral showed Neutral. Reverse showed Reverse. Drive showed Drive. Marvellous. …Except the car still wouldn’t bloody start! Clearly the car knew something that the scan tool wasn’t showing me.
Totally wired I went back to the wiring diagram and found there was one wire running from the automatic transmission to the Body Control Module. According to the wiring diagram, this was called the clutch inhibition switch circuit (Fig.4). Immediately I wrote it off as irrelevant – after all, this was an automatic and there was no clutch pedal. Naturally, I assumed it was something used only on manual-transmission versions. It is a bit like finding a circuit labelled windscreen wiper motor on a submarine. You would be forgiven for assuming it wasn’t important. Unfortunately, in this case, it was probably the most important wire on the whole car. On the automatic transmission, this circuit was the starting-authorisation signal from the transmission to the BCM. That one wire told the BCM whether the
PMM OCTOBER 2026 15
014_PMM_OCT26_Layout 1 02/09/2026 11:23 Page 16
CPD ZONE
READ ME TO COLLECT YOUR CPD POINT
Fig 4 – The red wire here with the pink crimp connector is the feedback from what appeared to be a magneto resistive type sensor in the automatic transmission mechatronics – this was the real smoking gun.
gearbox was in a state where starting should be permitted. And this was the wire that was wrong. At the BCM, it was a red wire and I measured it at 12V. I moved the selector, still 12. I went through Park, Neutral, Reverse and Drive: all measured 12V. Suspicions raised, but still not the smoking gun. So I did what, in my opinion, is still one of the most powerful diagnostic techniques available to any technician and found another car that did work. A known-good vehicle is often worth more than twenty pages of technical documentation.
Fig 5 – Wire C-01 from the TCM terminal J to 2U on the BCM overview – note the yellow wire at the TCM. This was the affected circuit though from live data you never would have seen this as it is totally hidden and appeared to be private data for the BCM only… Hpw very wonderfully pointless
trusted the yellow wire. Which, frankly, was probably the sensible thing to do. The problem for the technician, of course, is that this important signal was not presented in the normal scan-tool live data.
Comparing with the healthy Mazda On the known-good Mazda, the same yellow wire measured approximately 12 volts in Drive and Reverse, but in Park and Neutral, it dropped dramatically to approximately 186 millivolts. I thought to myself: Now we are getting somewhere. So, although the scan tool showed Park correctly, the dedicated startingauthorisation circuit to the BCM was still effectively saying: No. Do not start. Whilst the conventional live data said Park, the yellow wire disagreed and the BCM
16 OCTOBER 2026 PMM
Fig 6 – In park, neutral, reverse or drive we had a constant 12V with no pull down to 185 mV – how very disappointing and frustrating. I only found out the correct values by comparing another car
Replicating the low voltage Before replacing anything, I wanted to push the diagnosis a little further. I had an idea to simply create the correct voltage myself. I cut the red BCM wire and built a small pulldown circuit using resistors and Ohm’s law in an attempt to drag the voltage down to the same level as the known-good car. I’m pleased to announce that it worked. For a time. I managed to bring the signal down, but then the circuit dragged itself back up to around 1V and the car still refused to start. This is something I have noticed with Mazdas before: They are extremely difficult to fool. You can sometimes trick an old car with a resistor, a jumper wire and a sufficiently determined expression. Mazdas, however, will often look at that approach and say, Nice try, I see you. The circuit may have involved an internal voltage divider, pull-up resistance, current monitoring or some other plausibility strategy. The exact internal electronics were less important at this stage than the evidence already sitting in front of me. The known-good car produced approximately 186 millivolts in Park and Neutral. The faulty car produced 12 volts. The wiring diagram showed that this was the direct transmission-to-BCM starting-
014_PMM_OCT26_Layout 1 02/09/2026 11:24 Page 17
Fig 7 – The new mechatronics installed and the wonderfully elusive 185 mV was finally present in park and neutral. In drive and reverse we had 12V
authorisation circuit. The BCM was withholding the starter relay ground. The starter motor and high-current circuit had already been proven good… There comes a point in diagnostics where further testing stops being diagnosis and starts becoming an argument with the car and I’d had enough.
Inside the transmission The fault was eventually traced to the transmission valve body assembly. As the external selector cable moved the selector shaft, an internal sliding sensor moved with the mechanism on the valve body. The precise sensing technology may have been magnetoresistive or another form of noncontact position detection, but the practical result was what mattered.
Fig 8 - Note the yellow sliding element next to my finger inside the casing. The external selector shaft pulls the circular sliding element in and out thus changing the value of the sensor inside the mechatronics. Clearly the sensor had failed
That internal assembly was responsible for generating the authorisation signal sent along the yellow wire to the BCM and it was getting it wrong. I replaced the valve body and then came the moment of truth: In Drive: approximately 12 volts. In Reverse: approximately 12 volts. In Neutral: approximately 186 millivolts. In Park: approximately 186 millivolts. The starter relay was now authorised. The BCM grounded terminal 85. The relay operated, the engine cranked and, finally, the Mazda started. Fault fixed.
Don’t rely on the scan tool
deal, but at the end of the day it only shows you the information the manufacturer has chosen to make available. Sometimes the most important signal on the entire vehicle is the one you cannot see in live data and in this case, it was one yellow wire. Once that wire finally dropped from 12 volts to 186 millivolts, the Mazda started as though nothing had ever happened. Which is always the final insult. Hours of testing, wiring diagrams, voltage comparisons, resistor experiments, a valve body replacement… And then the car starts perfectly. As if you were the idiot all along!
Jobs like this prove why electrical testing still matters. A scan tool can show you a great
TO SEE BEN JOHNSON'S YOUTUBE CHANNEL go to www.rdr.link/acj006 or scan the QR code
PMM OCTOBER 2026 17
018_PMM_OCT26_Layout 1 02/09/2026 11:35 Page 18
CPD ZONE
READ ME TO COLLECT YOUR CPD POINT
BEST PRACTICE Why is 12V maintenance different for EVs? Rotronics CEO Ken Clark offers his expertise on the 12V battery and reminds workshops that they’re just as important on EVs as on ICE vehicles. very vehicle on the road today, whether it runs on petrol, diesel or electricity, depends on a 12-volt battery to function. It's easy to overlook, especially in the EV era, when so much attention is focused on the high-voltage traction battery. But the 12V auxiliary battery remains just as critical, and neglecting its testing and charging is one of the most common and preventable causes of vehicle downtime, and one of the most overlooked revenue opportunities sitting on a workshop's doorstep. In a traditional ICE vehicle, the 12V battery's defining job is cranking the engine, alongside powering lighting, control modules and infotainment. If it can't crank the engine, the vehicle won't start, which makes battery health easy to judge with a simple cranking amps (CCA) check.
E
From flooded to AGM Flooded lead-acid batteries were the standard for decades, but stop-start technology exposed their weaknesses. An AGM battery can deliver around 60,000 engine starts, roughly three times a flooded battery's life, which is why fitting a flooded battery to a stop-start vehicle usually fails within 12 to 18 months. AGM batteries need higher, more tightly controlled charging (typically 14.4 to 14.8V absorption versus 13.8 to 14.4V for flooded) and conductance testing rather than simple voltage checks. Charging an AGM battery on flooded settings is now one of the most common causes of premature 12V failure in modern ICE vehicles.
18 OCTOBER 2026 PMM
EVs change the equation There is no starter motor and no cranking load. Instead, the 12V battery wakes the vehicle, initialises its systems, closes the high-voltage contactors, and enables module communication and charging. If it fails, the vehicle won't work, regardless of how much charge sits in the traction battery. A weak EV auxiliary battery rarely shows an obvious symptom like a slow crank; instead it appears as module dropouts, failed wake-ups, charging faults or dashboard warnings that look nothing like a battery problem.
A charged battery is not enough High-voltage and low-voltage systems are completely separate. A vehicle with a weak 12V battery may fail to unlock, refuse to communicate with diagnostic equipment, or simply refuse to charge, all while displaying warnings that seem unrelated to the battery. Without accurate 12V testing as a first step, technicians can waste hours chasing phantom high-voltage faults when the real cause is a simple low-voltage problem. ICE and hybrid batteries are judged on Cold Cranking Amps; EV auxiliary batteries depend on Reserve
Capacity (RC), their ability to sustain longer bursts of power for system startup, safety relays and accessory loads. Testing them requires specialist equipment; conductance testing alone is no longer sufficient.
Why regular testing matters Regular, scheduled testing catches degradation before it becomes a breakdown. A battery weakening under sustained electronic load won't necessarily fail a basic voltage check, but may already be heading toward wake-up failures or contactor faults. Building 12V testing into routine servicing is the single most effective way to avoid downtime, warranty comebacks and misdiagnosed high-voltage complaints. Workshops need tools built for this different load profile. The Midtronics CXP900/ROBIS handheld tester and DCA8000 diagnostic platform are designed for EV 12V auxiliary battery testing and charging. For traction battery testing, charging and module balancing, the Midtronics xMB-9640 Aftermarket is required, reflecting how distinct these two disciplines have become.
018_PMM_OCT26_Layout 1 02/09/2026 11:35 Page 19
“An AGM battery can deliver around 60,000 engine starts, roughly three times a flooded battery's life, which is why fitting a flooded battery to a stop-start vehicle usually fails within 12 to 18 months.” The ROI of testing every vehicle This is where the Rotronics Battery Management Programme pays for itself. Rotronics data shows that for every 100 vehicles tested, 30 per cent need no further action, 30 per cent need charging, and 40 per cent are at risk of failure and need replacement. Putting a price against that, at an average battery replacement value of around £100, and a charging service priced at £5 to £10. Testing 100 vehicles delivers roughly £4,150 to £4,300 in additional, immediately billable work, that would otherwise leave your workshop unnoticed and undiagnosed. That is an average of over £40 of incremental revenue per vehicle tested, from a test that takes minutes and needs no extra marketing spend, no extra footfall and no extra technician headcount. It simply captures revenue that is already driving through your door. The return compounds beyond the invoice, too. Catching a failing battery before it strands a customer avoids costly comebacks, protects your warranty position, and builds the trust that keeps customers coming back and referring others, value that doesn't show up in the initial calculation but shows up in retention. The core message is simple: if the 12V battery fails, the vehicle fails with it, no matter how much charge sits in the traction pack. Regular testing and correct charging of the auxiliary battery aren't optional extras; they are essential maintenance tasks that prevent misdiagnosis, reduce downtime, and open a genuine, low-effort revenue stream for your workshop. Not every workshop is ready to tackle EV module balancing or replacement, but every workshop can add a 12V auxiliary battery check to its maintenance routine and start capturing the revenue it's currently leaving on the table. FOR MORE INFORMATION ON ROTRONICS go to www.rdr.link/acj007 or scan the QR code
PMM grid_Layout 1 01/09/2026 10:50 Page 1
021_PMM_OCT26_Layout 1 02/09/2026 11:39 Page 21
READ ME TO COLLECT YOUR CPD POINT
CPD ZONE
COMMON FAULTS DPF regeneration European Exhaust and Catalyst (EEC) looks at some of the reasons a DPF might fail to regenerate. PF regeneration relies on a number of conditions being met, and failure in any one area can prevent the process from taking place. At EEC we regularly see that poor engine maintenance is one of the most common contributors, often leading to secondary issues such as turbocharger faults or injector problems, both of which can affect exhaust temperatures and particulate loading. Sensor-related faults are another frequent cause of regeneration failure. Faulty pressure or temperature sensors, along with condensation or blockage in sensor pipes, can prevent the engine management system from accurately monitoring DPF loading. A malfunctioning EGR valve can also disrupt combustion efficiency and exhaust gas flow, inhibiting regeneration. The condition of the exhaust system itself is critical. Damage or leaks can alter back pressure and temperature readings, preventing successful regeneration. Using incorrect engine oil or unsuitable fuel can further accelerate DPF contamination and reduce its ability to regenerate effectively an issue frequently identified by EEC’s technical team during fault diagnosis.
D
Best practice When a DPF fault is suspected, EEC recommends a systematic approach:
“Using incorrect engine oil or unsuitable fuel can further accelerate DPF contamination and reduce its ability to regenerate effectively an issue frequently identified by EEC’s technical team during fault diagnosis.” • Check for active fault codes and the status of the EML light • Verify minimum fuel levels for regeneration • Inspect pressure and temperature sensors, including pipes, for damage or condensation • Check turbocharger performance and exhaust system integrity • Assess EGR valve function and injector operation
• Confirm engine oil and fuel are correct specifications • Avoid using sealants upstream of a catalytic converter or DPF By following these steps, technicians can accurately diagnose issues and ensure successful DPF regeneration, reducing downtime and avoiding unnecessary replacement costs.
FOR MORE INFORMATION ON EEC go to www.rdr.link/acj008 or scan the QR code
PMM OCTOBER 2026 21
022_PMM_OCT26.qxd_Layout 1 02/09/2026 11:43 Page 22
CPD ZONE
READ ME TO COLLECT YOUR CPD POINT
BEST PRACTICE Top tips for diagnosing wiring issues Lucas Assimos, an automotive specialist and independent workshop operator based in Florida, provides his top advice for fellow mechanics working with wiring problems. circuit can show a healthylooking voltage on a multimeter and still be incapable of doing its job. That is one of the simplest electrical lessons in the workshop, but it is also one of the easiest to forget when a vehicle arrives with several warning lamps, communication faults or a control unit that appears to be dead.
A
22 OCTOBER 2026 PMM
The trap is treating voltage present as proof that the circuit is healthy. A digital multimeter places very little load on the circuit. That is useful for many checks, but it also means a damaged feed or earth path can sometimes show close to battery voltage while almost no current is flowing. As soon as the starter motor
turns, a relay closes, a module wakes up or a motor begins to operate, the same circuit may collapse. That difference between static voltage and voltage under load is where many difficult electrical diagnoses begin. Start with the condition that creates the fault: If the complaint happens during cranking, test during cranking. If it happens
022_PMM_OCT26.qxd_Layout 1 02/09/2026 11:43 Page 23
when a high-current component operates, test while that component is operating. If a control unit drops offline during wake-up, observe the supply and earth at that moment. A key-off battery reading is useful, but it does not tell you what the electrical system is doing when demand rises. I have seen vehicles with several apparently unrelated faults where the useful clue was not the individual fault-code description but the moment they appeared. A weak connection, poor earth or unstable battery supply can disturb several control units at once. The result may look like multiple failures when the original problem is shared power quality. That is why I like to establish the electrical baseline before condemning expensive electronic components.
Voltage drop tells you what the circuit loses For a loaded circuit, voltage-drop testing is often more useful than simply asking whether voltage is present. Instead of measuring from the feed to earth and seeing 12 volts, measure across the part of the circuit you are questioning while current is flowing. A healthy cable, connection or earth path should lose very little voltage. If a meaningful amount appears across a connection or section of cable, that voltage is being lost before it reaches the load. The exact acceptable value depends on the circuit, the manufacturer and the current involved, so I avoid treating one universal number as a rule for every vehicle. The important point is to compare the reading with service information, the opposite side of the circuit where appropriate, and the conditions under which the fault actually occurs. On a starter circuit, for example, a connection that looks perfect with the engine stopped can become obvious once cranking current flows. The same principle applies on a smaller scale to module feeds, relay contacts, fan circuits and other loads.
“Start with the condition that creates the fault: If the complaint happens during cranking, test during cranking. If it happens when a high-current component operates, test while that component is operating.” Do not forget the earth side Technicians naturally look for missing positive supply, but an unstable earth can create very similar symptoms. Engine or body earth straps may have been disturbed during previous work. Corrosion can develop between an eyelet and the body. A terminal can be tight enough to look correct but still develop resistance under load. Testing only continuity with the circuit switched off can miss this. The circuit may technically be connected, but that does not prove it can carry current without excessive voltage loss. If several systems share an earth point, one poor connection can create symptoms across systems that appear unrelated on the scan tool.
Low-voltage history matters Another question I ask early is whether the vehicle recently had a flat battery, slow crank, jump-start or chargingsystem problem. Modern vehicles can record a large number of faults during a low-voltage event. Modules may reset at different points, communication can be interrupted, and sensor values may become implausible while supply voltage is unstable. That does not mean every stored fault should be blamed on the battery. It means the event belongs in the diagnostic history. Before clearing everything, I prefer to look at the fault pattern across the vehicle. If
many modules recorded voltage or communication complaints around the same event, that pattern may be more informative than one isolated code. Once stable voltage is restored, the next step is to determine which faults return under normal conditions.
Load the circuit before replacing the component If a module has the correct feed voltage with the connector disconnected, that result alone is not enough for me to condemn the module. The circuit needs to prove it can support the load. Depending on the circuit and the test procedure, that may mean back-probing under operation, carrying out a manufacturerspecified load test, using a suitable test load, or measuring voltage drop while the component is commanded on. The method matters because inappropriate loading can damage sensitive circuits. The objective is not to force current through every wire. It is to test the circuit in a way that reflects the load it is designed to carry. This is especially important before replacing an ECU or another costly controller. A new control unit connected to the same weak feed or poor earth will not repair the original problem.
Build the baseline first When an electronic fault looks complicated, the most useful first steps are often basic ones: Confirm battery condition and system voltage under the condition that produces the fault. Verify the main feeds and earths under load. Look at voltage drop, not only static voltage. Review the full vehicle fault pattern before clearing it. Then decide whether the evidence still points to the control unit, sensor or network component. The lesson is simple: A multimeter showing 12 volts can tell you that electrical potential is present. It does not automatically tell you that the circuit is capable of work. The circuit proves that only when the load arrives.
FOR MORE INFORMATION ON LUCAS go to www.rdr.link/acj009 or scan the QR code
PMM OCTOBER 2026 23
024_PMM_OCT26_Layout 1 02/09/2026 14:10 Page 24
READ ME TO COLLECT YOUR CPD POINT
CPD ZONE
KNOW YOUR PARTS Refrigerant for EV cooling systems Orbia Fluor discusses the important role A/C systems have to play in EVs, especially against a backdrop of increasingly extreme external temperatures. s this summer has shown, Europe is experiencing increasingly frequent and intense heatwaves, meaning thermal management systems are having to work harder than ever to keep both drivers and batteries comfortable. In a market where cost, compliance and performance are all under pressure, refrigerant selection is no longer just a technical decision. It’s a business decision too. For workshops, the takeaway is that training, tools and knowledge in thermal management are becoming more valuable than ever. With thermal management becoming a higher-value service area, workshops that prepare to meet these challenges will be better placed to build customer trust and customer base with the increasing numbers of EVs and hybrid vehicles. This is where newer refrigements such as Klea Edge 444A (R-444A) become relevant and are increasingly seen in aftermarket. Developed by Orbia Fluor and Energy Materials as a more economic, direct replacement for R-1234yf, R-444A is fully compatible with existing R-1234yf systems and oils, sharing the same flammability classifications (A2L). Independent testing has shown that R-444A can deliver faster cooling and comfort that R1234yf. In Evs, where thermal management systems are required to deal with increasing heat loads, improved cooling performance can help support vehicle efficiency, charging performance and increase range. With Europe leading the EV transition, EVs now account for around one in four new car sales globally and 28 per cent of the European market.
A
Thermal management is therefore becoming for more important than simply maining cabin
comfort during summer journeys. In modern vehicles, particularly EVs and hybrids, it plays a vital role in protecting battery health, maintaining vehicle performance and supporting efficiency.
“With thermal management becoming a higher-value service area, workshops that prepare to meet these challenges will be better placed to build customer trust and customer base with the increasing numbers of EVs and hybrid vehicles.” AC’s role in EV thermal management Unlike a petrol or diesel vehicle, where air conditioning is primarily used to cool the cabin, an EV's HVAC system also helps regulate the temperature of key vehicle systems. Refrigerant-based cooling systems are increasingly used to remove heat from the battery pack and power electronics, helping to keep key components operating within their intended temperature range. During hot weather, battery temperatures can rise significantly, particularly during motorway driving, stop-start traffic or rapid charging sessions. To manage this heat, many EVs use dedicated refrigerant circuits or refrigerant-to-coolant heat exchangers that work in conjunction with the HVAC system. By transferring heat away from the battery, the air conditioning system helps prevent temperatures from reaching levels that could negatively impact performance or trigger protective measures within the vehicle. Effective battery cooling delivers several important benefits. Keeping temperatures under control helps maintain vehicle efficiency and
driving range, while enabling more consistent charging performance during periods of high demand. Just as importantly, limiting exposure to excessive heat can reduce stress on battery cells and support long-term battery durability. What does this mean for workshops? It boils down to training, equipment and following the latest developments. Air conditioning servicing has traditionally been viewed as a seasonal maintenance task, but the increasing complexity of EV and hybrid thermal management systems is raising its importance across the vehicle lifecycle. Many independent garages currently outsource air conditioning repairs and refrigerant handling to specialist providers. However, as HVAC systems become more closely integrated with battery cooling and overall vehicle performance, refrigerantrelated work is likely to become a more routine element of servicing. Training – workshops should invest in technician training, so teams understand the latest vehicle thermal-management systems and refrigerant technologies. Equipment – technicians should ensure that servicing equipment is suitable for modern A/C and heat-pump architectures and compatible with newer refrigerants. Latest developments – keep pace with F-gas and OEM developments so the workshop can advise customers confidently. Key takeaway – new refrigerants provide new opportunities for garage workshops The availability of alternative, cost effective refrigerants such as R-444A demonstrate how garage workshops can take advantage of a rapidly evolving sector. A focus on refrigerant choice as well as training, equipment and keeping up with latest developments can give garage workshops a clear edge.
FOR MORE INFORMATION ON ORBIA FLUOR go to www.rdr.link/acj010 or scan the QR code
REDEEM YOUR CPD CREDIT Congratulations, you have reached the end of the CPD Zone! To access your CPD credit from The CPD Group, scan the QR Code
24 OCTOBER 2026 PMM
PMM grid_Layout 1 28/08/2026 12:43 Page 1
MX HOUSE AD PMM - OCT26_Layout 1 02/09/2026 09:50 Page 1
THE HANDS-ON TRADESHOW FOR INDEPENDENT WORKSHOPS
MECHANEX PROFESSIONAL MOTOR MECHANIC LIVE
SANDOWN PARK, SURREY 10TH & 11TH NOVEMBER 2026
TOP AUTOMOTIVE BRANDS ● LATEST PRODUCTS AND INNOVATIONS ● SPECIAL SHOW DISCOUNTS ● FREE CPD TECHNICAL SEMINARS ● FREE ENTRY ● FREE PARKING ● FREE PROFESSIONAL MOTOR MECHANIC T-SHIRT ● FREE BACON ROLL
SPONSORED BY:
REGISTER FOR FREE AT WWW.MECHANEX.INFO
027_PMM_OCT26_Layout 1 02/09/2026 12:40 Page 27
Watch. Car repair on screen
YouTube
A look at the PMM YouTube channel: Bailcast CV Duraboot installation Ed Cockill from Uckfield Motor Services is back again to illustrate the ease with which garage technicians can replace a CV boot thanks to Bailcast. here are three methods for changing a CV boot. The first is to use a cone. We’ve all been there, a few years back, where you’re trying to put a CV boot on with a cone and stretch it over the top of the CV joint. There’s grease everywhere and you can end up slipping and injuring yourself. It’s not great. Then, there’s the OE CV boot option. These are normally stuff CV boots. You need to actually remove the CV joint from the drive shaft, normally involving whacking it with a hammer. Which is never good and you can damage the CV joint. Then there’s the third method, and my favourite: Stretchy CV boots from Bailcast. Using the Duragun, also from Bailcast, you can save time, effort and money when replacing CV boots. I’ve been using their Duraboot CV boots for years. They come in a good range of sizes and come with everything you need in the box – including the right amount of grease needed as well as the right clips, made from metal. They are made from a stretchy rubber and can stretch right over the CV joint, something the Duragun makes a lot easier.
T
Using the Duragun
Once you’ve gained access to the CV joint, carefully cut the old boot off and remove the clips. Remove the old grease but only with a rag, don’t use WD-40 otherwise the new grease will be contaminated. Next, get your Duragun. Make sure it’s clean and has no sharp edges anyway. Slide the boot onto the gun, connect the air line and press the plus button to slowly open it up. This stretches the boot till its wide enough to go over the CV joint. Then disconnect the air line. Slip it over the CV
joint and release the air, closing the tool. Then pull off the boot and pull away the tool. Next up, empty the grease packet onto the joint and clip both ends of the boot into place using a special tool. Simple. My advice when buying a CV boot tool would be to buy once, don’t buy cheap. In our garage we have several of these scattered throughout, they’ve never given us any problems and they make life so much easier.
TO WATCH THIS VIDEO go to www.rdr.link/acj012 or scan the QR code
PMM OCTOBER 2026 27
028_PMM_OCT26.qxd_Layout 1 02/09/2026 12:43 Page 28
Why won’t the Government raise the MOT cap? PMM editor Kieran Nee recently visited the UK’s busiest MOT test centre, The Test Centre, to find out why the MOT test fee cap urgently needs to be raised. hen the PMM team comes to putting together an article or a new idea for a podcast, it usually involves coming up with a topic that is relevant and topical to the aftermarket and then approaching a garage or an organisation and asking them to discuss that topic. It’s usually easier said than done. Some topics, however, are brought to you on a silver plate. And one such topic, that is perennially relevant, is the MOT. So when Ian Wills, managing director of The Test Centre, sent over an email – an open letter, no less, calling on the IMI and on the Government to raise the MOT test fee cap – we knew we had to follow up. So, the following week, I jumped on my bike and cycled down to Deptford to meet Ian and manager Michelle Glasscock. As a quick recap, not that many of you reading this will need it, the price a certified MOT test centre can legally charge a customer is capped by the Government at £54.85 for a Class 4 vehicle. A standard passenger car, for instance. This cap was set way back when Gordon Brown was still the Prime Minister, meaning that it hasn’t changed in 16 years.
W
28 OCTOBER 2026 PMM
You may have noticed in those 16 years that the price of everything else has changed in that time, including the value of the pound. You can buy less with £1 now than you could in 2010. In fact, what would cost you £1 in 2010 would today
cost you £1.60. This means that if you bought, for example, a big bag of socks worth £54.86 in 2010, in 2026 that same bag would cost you £87.56. But not an MOT. An MOT costs the same name as it did 16 years ago – despite having
028_PMM_OCT26.qxd_Layout 1 02/09/2026 12:44 Page 29
“This is a safety check, competition should have nothing to do with it. If a garage offers an MOT at 1p, what does that say about the inspection itself? Nothing good.” Ian Wills, The Test Centre
previously risen in line with inflation up to that point.
More for less As Ian points out to me, that £87.56 is still on the low side. Arguably, MOT test centres are being asked to do more than before and have particular harsh rises in operating costs, including heating and wage rises. Wages have raised spectacularly since the pandemic due to massive shortages in trained technicians in the UK. “Remember,” he tells me, “the MOT is a safety inspection of your vehicle. It’s an important job. Time should be taken over it and it should not be rushed. But to make money, we need to get as many as we can through the door.” For many cars, the MOT is the only time throughout the year that they actually see the inside of a garage. Michelle tells me that customer behaviour has changed in recent years: “It used to be that people got an annual service. Now they have the car five years without even changing the oil. They’re relying on the MOT to get by and keep their car on the road. And now with EVs, because they need less servicing, people are treating the MOT as a box that simply needs to be ticked.” But with inflation having risen so drastically in the last 16 years, and not everyone’s wages having followed suit (and accommodation costs rising disproportionately to salary), it’s a hard sell for governments. Michelle agrees, telling me, “it’s going to hurt, absolutely. Had it
One of the nicest coffees in the aftermarket!
risen each year like it used to, it would be palatable for everyone. And now a sudden increase feels unfair. It should have kept rising each year.”
Bigger picture The problem is that whilst the Government is only thinking about whether voters would appreciate a £30 increase in their annual MOT, the MOT cap is actually linked to much bigger and more serious problems within the MOT system. Ian told me that in previous conversations with the DVSA, he has been told that the MOT should act as a loss leader for garages. AKA, get customers in with the promise of a cheap MOT, make the money back on the repairs needed. Yes, the DVSA is serious. No, we can’t believe it either. This opens a big problem around biased MOT testing. In a perfect world, every MOT would carried out to the exact standard specified by the DVSA. Putting to one side any discrepancies in interpretation of that standard as written, the simple fact is that in the real world MOTs as carried out by
different testers bring different results. Brake pads are the classic case – with drivers often being given different valuations of their pads by different testers. The Test Centre only does the MOT – you have to go elsewhere for the repairs. This, Ian says, naturally removes the bias towards failure that affects other testers. It’s the same system they have elsewhere, in Germany for example. Looking to Germany, the fail rate is a lot lower, Ian says, than it is here, specifically for that reason. There are pros and cons to the system – you just have to look at Northern Ireland, for example, to see how it can wrong. But raising the MOT price cap would at least mean that test stations aren’t forced to make their money back through repairs. Perhaps more serious, though one would hope not quite as widespread, is the issue of fraudulent MOTs. These are MOTs sold online, where the car is never brought into the test station at all. The DVSA has announced that photo evidence will be rolled out across the MOT network and this should go a long way to eliminating this form of fraud. But perhaps if testers made more money from genuine MOTs and drivers’ cars were less likely to fail a genuine MOT, there would be less of a market for the fraudulent kind.
The solution I asked Ian whether test centres should be forced to charge a minimum or even be forced to charge the full amount of the MOT, or whether there should even be a price cap at all. “I remember a long time ago,” Ian tells me, “in Manchester, a group of MOT test stations all agreed to charge full price. Well, the DVSA penalised them under monopoly rules. This is a safety check, competition should have nothing to do with it. If a garage offers an MOT at 1p, what does that say about the inspection itself? Nothing good.” Michelle steps in to object to the idea of no cap at all – “for me, I think it would be taken advantage of by some garages, and that would be wrong too. It should be a set fee and a set test”
FOR MORE INFORMATION ON THE TEST CENTRE go to www.rdr.link/acj013 or scan the QR code
PMM OCTOBER 2026 29
030_PMM_OCT26.qxd_Layout 1 02/09/2026 12:47 Page 30
DRIVING FORCE
About the author
THE POWER TO SAY “NO”
Dan has written two previous articles for PMM, including one about the risks of expanding at the expense of the customer. That one ruffled a few feathers! This article is the first time Dan is stepping out of the shadows and taking his well-deserved by-line.
Workshop professional Dan Force discusses the need to say No from time to time. Quality trumps quantity in the workshop game, every time.
W
e were all told when we were starting out: Never turn work away. An empty ramp won’t pay the bills. We saw that mantra being applied day in day out – parents, early bosses, even the garage down the road. Everyone wanted to be working flat out all of the time. After all, you never knew whether the next customer was going to be the one who’ll tell all their friends and family, bringing loyal lifelong customers through the door. Saying “yes” for most garages is second nature. To the point that many of us have forgotten how to even say “no”. The thing is, when you consider the best independent garages near you, what did they really build their reputation on? Having a car on every ramp and cars piling up outside waiting to be seen? No. They built it on doing the right work and to the right standard. As vehicles become increasingly complex and customer expectations continue to rise, the pressure to accommodate every request grows with them. We all want to help. We all want a busy workshop. We all want satisfied customers. Saying Yes all the time doesn’t always achieve that.
Consider the garage that accepts a repair outside its area of expertise because it doesn't want to disappoint the customer. Or the workshop that promises an unrealistic turnaround because it doesn't want to lose the booking. Or the technician who fits the cheaper component because that's what the customer insists upon, despite knowing it may not be the best long-term solution. Even if the intention is good, each of these actions represents a compromise or a shortcut. It’s making life easier in the hope that will satisfy the customer. The problem is that whilst the invoice gets paid for today’s job, the complaint comes tomorrow when the job as done hasn’t quite lived up to expectations. This isn't an argument against ambition. Garages should continue to invest, diversify and develop new skills. Customers rightly expect us to keep pace with modern vehicles and everchanging technology. But it is important to know your own limits. Referring a customer to a specialist isn't admitting defeat. It's recognising that another business is better placed to deliver the outcome that customer deserves.
Telling a customer their vehicle can't be completed by Friday isn't poor service if Friday was never realistic in the first place. Refusing to compromise on the quality of a repair isn't being difficult. It's protecting both the customer and the reputation you've spent years building. Ironically, many of the decisions that appear to lose business in the short term often achieve the opposite: Customers may forget being told they'll have to wait another week, but they rarely forget a garage that was honest with them. One of the greatest strengths of the independent garage has always been the freedom to exercise judgement. The freedom to recommend another specialist. The freedom to refuse a shortcut. The freedom to explain why waiting is better than rushing. And, when necessary, the freedom simply to say no.
TO READ DAN’S PREVIOUS ARTICLES go to www.rdr.link/acj014 or scan the QR code
30 OCTOBER 2026 PMM
PMM grid_Layout 1 26/08/2026 16:07 Page 1
FULL PAGE_Layout 1 30/10/2024 23:13 Page 1
SCAN THE QR CODE TO LISTEN AND SUBSCRIBE NOW
AVAILABLE ON THE PODCAST PLATFORM OF YOUR CHOICE
Listen on
Listen on
Listen on
Listen on
Google Podcasts
Amazon Podcasts
Spotify Podcasts
Apple Podcasts
033_PMM_OCT26_Layout 1 02/09/2026 12:53 Page 33
6
online mistakes most garages make!
Chris Fisher, independent garage owner and creator of garage management system Clarity-GMS, tells PMM readers what he thinks are the six worst mistakes garages are making online.
I
run an independent garage and built Clarity-GMS because every GMS I tried either didn't do what I needed or took screen after screen to get there. Every fix below cost me time and money before it became software.
1. Expecting the phone to stop ringing The phone isn't the enemy – customers often prefer it. Aiming to cut calls by half or more is key. Customers, being creatures of habit, call to book unless given a reason to change. We trialled 10 per cent off for booking online. Right away customers were setting up customer accounts and adding their cars; a secondary bonus was that the system now pulled the MOT expiry date and sent a reminder out 30 days before it ran out, cutting “it ran out yesterday” calls. 10 per cent looks like it eats into the margin, but not as much as the hidden costs of a call.
know who's off that day – though it could. Capacity – how many MOTs or services can you manage a day? Without that figure, the website can overload you. The calendar – left alone, customers book the earliest date, so Monday and Tuesday fill first and Friday absorbs the rest. A good system controls which dates it offers, spreading bookings across the week instead of the front. Lastly, the clicks – reducing the number of things a customer fills in. Number plate and address lookup autofill are a must – less typing translates to fewer abandoned bookings. None of this is complicated for a good GMS — it's just the part everyone skips.
4. Guide times 2. The contact form For many garages, the first version of “online booking” is a contact form: The customer fills it in, the garage rings back to arrange a time... advantage gone. It doesn't know what's free, so it can't confirm a booking. A real booking page on a proper garage management system reads the diary and allocates the slot.
3. Not setting the booking website up properly Creating a booking website and configuring it properly are two different things. Start with staff – not every mechanic can do every job, nor does it
Book times from Autodata or Haynes are unrealistic. A turbo replacement quoted at six hours took four days — the engine had to come out to get at it. Yet jobs running over affect the jobs that come after them - I made our GMS add a user-defined real-world percentage on top of book time. We now quote and book to that figure.
5. Walk ins With walk-ins, the job gets written on paper, not entered into the GMS. The booking site thinks the slot's still free; someone books it online that evening – double booked.
The solution: Reducing the time it takes to enter the job to a few seconds – done. That's the bar a system has to clear before staff use it every time.
6. Answering the emails Not every booking request arrives by phone or through the website – some come by email, a customer asking to bring the car in, or whether there's space this week. Left unwatched, it sits in the inbox and by the time anyone reads it the slot's already taken. The fix is a GMS that reads incoming email for phrases like “can I make a booking” and replies automatically with a magic link to the customer's own booking page, no login required. A message that could have waited hours, or days, now gets a reply in seconds. The customer's booked and not gone elsewhere. None of this fixes itself. All it takes is an afternoon with your software supplier to tell them what you want your booking system to do.
FOR MORE INFORMATION ON CLARITY-GMS scan the QR code or go to www.rdr.link/acj015
PMM OCTOBER 2026 33
034_PMM_OCT26_Layout 1 02/09/2026 12:52 Page 34
Leave your ego at the door This month, industry expert and longtime former garage owner Dave Hill shares his thoughts on what is really needed in the classroom when it comes to teaching diagnostics to workshop technicians.
T
here is a common assumption within the motor trade that the best diagnostician naturally becomes the best diagnostics tutor. It is an understandable conclusion. More often than not, however, it is an erroneous one. The ability to diagnose a complex fault and the ability to teach someone else to do it are two entirely different disciplines. Many of us have attended training courses where the presenter possessed encyclopaedic technical knowledge. We left in no doubt that we had been listening to an expert. Yet, somewhere between the first slide and the last, the audience had become spectators rather than participants. We admired the speaker's expertise without necessarily acquiring any of it ourselves.
Creating problem solvers A diagnostician's role is to solve problems. A tutor's role is to develop problem-solvers. Whilst those objectives are related, they are not the same thing. One of the most common pitfalls is the assumption that everyone in the room possesses the same vocabulary. It is all too easy to pepper a presentation with acronyms and specialist terminology without first establishing a common foundation. The experienced technician may follow every word, while the less experienced delegate quietly falls behind. The tragedy is that, once
someone has lost the thread, they are often too embarrassed to admit it.
Language matters I once attended a course where an instructor repeatedly referred to a component solely by its abbreviation. Halfway through the session someone finally asked, "What does that actually stand for?" The room relaxed, because it transpired that many others had been wondering exactly the same thing. That single question taught me something rather profound. If the audience does not understand the language, they cannot understand the lesson. There is an irony here. Educational specialists might describe this as pedagogy: The theory and practice of teaching. It is a perfectly legitimate word within academic circles. However, were I to write an article for garage technicians extolling the virtues of good pedagogy, I would risk undermining my own argument. A reader unfamiliar with the term has already been placed on the back foot by the very article advocating clarity. The first thing a teacher has to learn is to choose language that serves your audience, not your ego. Good teaching is not an exhibition of knowledge. It is an exercise in communication.
Understanding is the key The finest tutors possess an unusual kind of humility. They willingly set aside
the temptation to impress and instead concentrate on illuminating. They understand that learning is not measured by the sophistication of the explanation but by the quality of understanding that remains when the explanation has ended. That often requires restraint. The temptation to demonstrate everything one knows is understandable, particularly when standing in front of a room full of experienced technicians. Yet expertise is not displayed by making the simple appear complex. Quite the contrary. Genuine mastery is revealed when complex ideas become comprehensible without being oversimplified. Richard Feynman was celebrated not merely because he understood physics, but because he could explain it with remarkable clarity. His audience left feeling enlightened rather than intimidated. Our trade deserves the same standard. If delegates leave a diagnostics course convinced that the subject is impossibly complicated, the tutor has probably failed. If they leave believing that, whilst challenging, the subject is logical, structured and ultimately within their grasp, then the tutor has achieved something of lasting value. The purpose of training is not to create admiration for the instructor. It is to cultivate confidence in the student.
FOR MORE ARTICLES ON TRAINING go to www.rdr.link/acj016 or scan the QR code
34 OCTOBER 2026 PMM
PMM grid_Layout 1 01/09/2026 09:51 Page 1
PMM grid_Layout 1 02/09/2026 18:12 Page 1
037_PMM_OCT26_Layout 1 02/09/2026 13:00 Page 37
BRAKES
& CLUTCHES
STEP-BY-STEP
DSG 02E dual wet clutch replacement Valeo guides readers through a clutch replacement. Pre-diagnostic checks Non-invasive checks first: Always check dual clutch transmission fluid (DCTF) level and quality before disassembling. Degraded fluid causes mechatronic valve scoring, solenoid sticking, and pressure loss.
remove the snap ring from the driving disk assembly.
Component extraction: Remove the protective end cap from the assembly. Step 6
Dismounting Step 1 Snap ring removal: Utilise a flat-head instrument to extract the snap ring from the clutch housing end cap with precision.
Step 4 Alignment verification: Confirm that reference marks on the driving disk and external plate carrier are clearly discernible; if they are absent, manually apply them before
Step 2 Clutch cap detachment: Carefully lever the clutch end cap away from the housing using a suitable flat-head tool.
continuing with disassembly. Step 5
Oil pump extraction: Withdraw the shaft from the ATF oil pump assembly with care.
Step 7 Remove the snap ring. Step 8 Hook installation: Attach and fasten the specialised mounting hooks to either side of the component, ensuring they are perfectly centred relative to the double clutch assembly. Clutch removal: Carefully lift the double
Step 3 Snap ring inspection: Identify the snap ring and perform a visual check for any signs of structural damage or abnormal deformation. Component extraction: Using a flathead instrument, meticulously
PMM OCTOBER 2026 37
037_PMM_OCT26_Layout 1 02/09/2026 13:01 Page 38
BRAKES
& CLUTCHES
clutch unit upward to extract it from the housing. Step 9 Flange surface inspection: Inspect the transmission flange running surface thoroughly for any indications of operational wear. Structural integrity check: Verify the absence
Secondary offset: Position the gaps for sealing rings 2 and 4 at a precise 180° rotation relative to the first and third rings. Technical requirement: Proper staggering is vital for maintaining hydraulic integrity; misaligned gaps allow high-pressure fluid bypass, which triggers clutch slippage, excessive thermal generation, and catastrophic friction degradation.
outer plate carrier are clearly perceptible and correctly oriented. Step 15 Cap detachment: Meticulously lever the assembly cover away using a flat-head
Transmission housing clutch integration Step 12 Component installation: Meticulously instrument to reveal the internal retaining ring channel. of scoring, grooves, or surface irregularities on the component face.
Step 16 Shim selection: Retrieve the 2mm calibration washer from the supplied kit
Fitting process Step 10 Seal inspection: Verify the mobility of all hub sealing rings by rotating them manually; they must move freely without any resistance or mechanical binding. System architecture: Contrasting with dry configurations, the 02E utilises dual concentric multi-plate packs (k1 and k2) submerged in
descend the double clutch unit onto the transmission input shaft assembly. Step 13 Spline engagement: Should the splines fail to mesh, partially elevate the unit and rotate it before reattempting; avoid applying excessive force or allowing the component to drop. Technical requirement: Forcing a poorly seated unit will irreparably damage internal shaft seals and spline surfaces; such
and seat it precisely onto the primary shaft assembly. Step 17 Axial clearance base setup: Secure the preliminary 2mm snap ring within its channel to define the requisite zeropoint reference for subsequent axial
fluid to enhance thermal dissipation and facilitate seamless torque modulation.
Sealing ring staggering protocol Step 11 Primary alignment: Ensure the openings for sealing rings 1 and 3 are perfectly aligned in the same position.
mechanical negligence will result in immediate warranty invalidation. Step 14 Alignment validation: Confirm that the reference indicators on the driving disk and clearance calibration.
Axial clearance calibration protocol Steps 18 & 19 Primary shaft verification: Configure a dial gauge to execute measurement 1, determining
38 OCTOBER 2026 PMM
037_PMM_OCT26_Layout 1 02/09/2026 13:01 Page 39
BRAKES
dimension. Precise axial clearance calibration is vital; the mechatronic controller depends on exact stroke
& CLUTCHES
stationary and exhibit no rotation or vertical movement. Steps 24 & 25 Housing integration: Orient the clutch end cap horizontally relative to the sleeve assembly. Component seating: Apply uniform manual pressure to the component until it is fully engaged within its respective housing channel.
tolerances to perform critical self-adaptation and clutch engagement learning protocols.
the specific axial play of the transmission input shaft assembly. Step 20 Clutch play assessment: Utilising mounting hooks, elevate the external clutch carrier vertically, ensuring zero lateral tilt, to
Step 22 Final ring installation: Extract the preliminary 2mm setup ring and meticulously install the specific snap ring derived from your calibration calculations.
Technical requirement: Refrain from utilising hammers or prying implements on the clutch end cap. Applying disproportionate force will compromise the component's structural integrity, resulting in severe lubricant leakage. Insufficient dual clutch transmission fluid (DCTF) levels trigger fluid aeration and cavitation, culminating in a total
Shaft reintegration: Carefully reinsert the drive shaft into the ATF oil pump assembly
to conclude the mechanical integration. establish measurement 2 (axial clearance relative to the shaft). Step 21 Calibration computation: Establish the requisite thickness for the shim or retaining ring by executing the following axial clearance calculation: Measurement 2 – measurement 1 + 1.85mm = requisite snap ring thickness
Step 23 Seating verification: Confirm the snap ring is fully seated within the groove channel across its entire circumference; it must remain
failure of system hydraulic pressure.
Technical requirement: If the computed result lies between available increments, increment to the subsequent larger
FOR MORE INFORMATION ON VALEO go to www.rdr.link/acj017 or scan the QR code
PMM OCTOBER 2026 39
PMM grid_Layout 1 02/09/2026 14:02 Page 1
041_PMM_OCT26_Layout 1 02/09/2026 13:04 Page 41
BRAKES
& CLUTCHES
HOW TO
REPLACE THE CLUTCH ON A VW CADDY Blue Print recently received a VW caddy into its workshop with its owner reporting all the classic symptoms of a worn-out clutch. he Volkswagen Caddy, a versatile LCV that’s now in its fourthgeneration, was launched in 1982 as a small pickup based on the Mk1 Golf. A well-known model sold internationally; the Caddy has always shared numerous mechanical components with other Volkswagen Group vehicles that will be more than familiar to workshops. Recently, a third-generation Caddy van powered by the 2.0 TDI engine partnered with the five-speed manual transmission arrived in the Blue Print workshop. Its driver was reporting the typical symptoms of a very worn and slipping clutch, perhaps unsurprisingly with an impressive 271,000 miles (436,132 KM) under this hard-working LCV’s wheels.
T
Gaining access Once the vehicle was brought into the workshop, the bonnet was opened and the battery, battery tray, and air cleaner assembly Fig. 1
Vehicle information Make Model Year Engine Mileage
Volkswagen Caddy Third generation (2003-2020) 2.0 TDI 271,000
“Its driver was reporting the typical symptoms of a very worn and slipping clutch, perhaps unsurprisingly with an impressive 271,000 miles under this hard-working LCV’s wheels.” were removed to allow access to the top of the gearbox. This revealed the gear selector, clutch slave cylinder, starter motor and gearbox mounting (Fig.1). The gear selector cables were unclipped from the selector levers and the three retaining bolts removed from the cable bracket, with the cables put to one side. The clutch slave cylinder was then unbolted and secured, followed by the reverse lamp switch, wiring harness, and starter motor, leaving only the gearbox retaining bolts in place. An engine brace was brought in to support the engine, allowing the two bolts that hold the gearbox mount in place to be removed.
be pulled free from the drive flanges. The right-hand driveshaft was then secured to one side, and the left-hand driveshaft was removed completely to give clearance for the removal of the gearbox (Fig.3). Moving underneath the vehicle, the gearbox mounting was removed along with the small gearbox shield above the right-hand Fig. 2
Lifting the vehicle The vehicle was then raised to a working height and the front wheels were removed, followed by the left-front driveshaft retaining bolt, both lower suspension arm swivel joint retaining bolts (Fig.2), and finally, the lefthand wheel arch liner. The inner driveshaft joint retaining bolts were undone which allowed the driveshafts to
PMM OCTOBER 2026 41
041_PMM_OCT26_Layout 1 02/09/2026 13:05 Page 42
BRAKES
& CLUTCHES
Fig. 3
Fig. 4
Fig. 3a
Fig. 4a
driveshaft, leaving only the upper gearbox retaining bracket and the lower gearbox retaining bolts in place.
Lowering the gearbox The engine and gearbox were lowered to an appropriate position and the mounting bracket was removed. Then, with the gearbox supported, the last retaining bolts were taken out, allowing the gearbox to be dropped down and taken out of the vehicle. The clutch pressure plate, friction disc and flywheel were removed and inspected. This revealed that both the clutch assembly and release bearing were very worn, with the latter notably sticky in operation due to the amount of clutch dust that had accumulated within the housing (Fig.4). The conclusion was that the complete clutch kit needed to be replaced. To carry out this work, Blue Print SMARTFIT Conversion Clutch Kit ADV183059 was chosen; a complete fourpiece dual mass flywheel conversion kit which includes the torsion-damper friction disc, pressure plate, solid flywheel, grease, release bearing, all necessary bolts, and a SMARTFIT installation sticker.
Inspecting and preparing the parts Before any of the new parts could be installed, the crankshaft and rear main oil seal were inspected and cleaned. Once this was done the new solid flywheel was put in
Fig. 5
position, with the new bolts tightened to manufacturer specification. The next stage in proceedings began with cleaning the contact surfaces of the new pressure plate and disc. Once done, these components were then carefully aligned and fitted against the flywheel utilising the new retaining bolts supplied in the kit; the six pressure plate bolts tightened diagonally to ensure ‘even’ contact and prevent the pressure plate and flywheel centring pins being damaged (Fig.5).
Release mechanism Our attention then turned to the release mechanism. First the bell housing was thoroughly cleaned to remove any grease, dirt, and old friction fibres from the previous clutch, this then allowing us to inspect the release fork and guide sleeve. Due to the vehicle’s high mileage it was clear that these parts also needed replacement using Release Fork ADBP330012 and Guide Sleeve ADV183313. The new release bearing was then clipped into the fork followed by the release mechanism. After checking that it operated smoothly, the grease supplied in the kit was lightly applied onto the input shaft, the final stage in the process before the transmission could be reinstalled. The gearbox was then refitted to the engine using some of the retaining bolts to hold it in place, followed by its mounting bracket.
Reinstalling the engine
position. This then allowed the gearbox mountings, driveshafts, suspension joints, and wheels to all be fitted, with all fixings tightened to manufacturer specification. Moving to the top of the gearbox, the gearbox mounting was put back on and the engine brace removed. The starter motor and wiring harness for the reverse lamp switch were fitted, the gear selector levers reassembled, and the clutch slave cylinder, selector cables, air filter, and finally, the battery all reconnected. Lastly, the clock and one-touch window operation were both reset and the clutch operation checked, followed by a full road test. As expected, the clutch fault was fixed proven by very smooth pedal ‘feel’ and flawless operation.
Vibration eliminated The vibration felt throughout the vehicle due to the very worn clutch had gone, demonstrating that the perfectly coordinated combination of a rigid flywheel and clutch disc (with torsion damper) provides an excellent vibration dampening effect resulting in a high degree of driving comfort. The vibrations generated by the engine were also filtered out (in all driving conditions), noise was reduced, and the service life of the clutch prolonged thanks to low-wear clutch linings. All in all, this was very much a SMART business decision.
The next step was to raise the engine using the support brace and put it back into
FOR MORE INFORMATION ON BLUE PRINT go to www.rdr.link/acj018 or scan the QR code
42 OCTOBER 2026 PMM
PMM grid_Layout 1 01/09/2026 10:51 Page 1
044_PMM_OCT26_Layout 1 02/09/2026 13:09 Page 44
REMANUFACTURING
TROUBLESHOOTER Why do some Stellantis EVs fail to charge at home? Vehicle electronics remanufacturer ACtronics tackles a common issue with Stellantis EVs. o you have an electric vehicle from the Stellantis Group (model year 2019 or later) in the workshop with a complaint that it will no longer charge at a standard charging station? When reading the diagnostic codes, there is a high probability you will encounter fault code P1A71: "Integrated Charger/DC Converter Unit: Internal Fault." This fault code frequently occurs in electric models such as the Peugeot e-208, Peugeot e-2008, Vauxhall Corsa-e, Vauxhall Mokka-e, Citroën ë-C4, and other vehicles based on the e-CMP platform. In many cases, a faulty on-board charger (OBC) turns out to be the cause.
D
Which cars are affected by the P1A71 fault code? Fault code P1A71 occurs in various electric vehicles from Stellantis, starting with the 2019 model year. Well-known examples include: Citroën ë-C4, DS 3 Crossback E-Tense, Fiat e-Scudo, Vauxhall Corsa-e, Vauxhall Mokka-e, Peugeot e-208, Peugeot e-2008, Peugeot e-Expert.
Fault code P1A71 variants Fault code P1A71 has a large number of sub-codes (extensions) that point more specifically to an internal fault in the OnBoard Charger (OBC). P1A71-49 and P1A71-72 are the most common, but the variants listed also almost always indicate the same underlying hardware issue within the on-board charger: P1A71-01, P1A71-04, P1A71-08, P1A71-17, P1A71-19, P1A71-1D, P1A71-48, P1A71-49, P1A71-53, P1A71-68, P1A71-72, P1A71-88, P1A71-92, P1A71-93, P1A71-96.
44 OCTOBER 2026 PMM
The problem
Other symptoms
In a nutshell: DC fast charging works, but AC charging does not. The On-Board Charger (OBC DC/DC) converts alternating current (AC) from the power grid (via a charging station or wall box) into direct current (DC) to charge the battery pack. The most characteristic symptom associated with fault code P1A71 is that AC charging (at home or at a public charging station) is no longer possible, whereas DC fast charging (e.g., along the motorway) continues to work normally. This actually makes sense: during DC fast charging, the AC/DC conversion process within the OnBoard Charger is simply bypassed, and the power flows directly to the high-voltage battery. This immediately confirms that the problem lies within the OBC rather than the battery pack itself.
In addition to the charging issue, some drivers experience other malfunctions related to the charging port. Examples include: • The charging plug lock repeatedly clicks open and closed (relay sounds) • Dashboard notifications, such as a charging time of "24 hours" or an erroneous "Battery charged / Complete" message These symptoms can be traced directly to the OBC and may occur in conjunction with fault code P1A71. The Mahle CAOBC1 onboard charger not only regulates the power flow but also communicates directly with the charging port via an internal PCB. This PCB controls both the locking motor and the LED indicators. If this communication section (or the internal 12V supply) within the OBC fails, the charging port
044_PMM_OCT26_Layout 1 02/09/2026 13:09 Page 45
REMANUFACTURING
malfunctions, resulting in the lock clicking repeatedly and incorrect data appearing on the dashboard.
What causes the Mahle CAOBC1 to fail? Although fault code P1A71 is usually caused by an internal fault in the On-Board Charger (OBC), external factors can contribute to the malfunction or shorten the unit's lifespan. Some examples include: The electricity grid voltage spikes: The grid can become unbalanced. Particularly in residential areas where many cars are plugged in, heat pumps kick in, and induction cooktops are switched on simultaneously (often in combination with solar panels). The OBC receives power outside of specified tolerances, literally blowing out its components. Overloading the 12V system (especially in commercial vehicles): In an electric vehicle, the OBC provides the voltage for the 12V electrical system, effectively replacing the function of a traditional alternator. If heavy
additional equipment is installed in commercial vehicles (such as the e-Expert), the 12V rectifier within the OBC becomes overloaded and can burn out. Moisture and contact resistance caused by the user: Drivers sometimes leave the charging cable lying on a wet street. Moisture inside the plug leads to oxidation. When the cable is reconnected, high contact resistance occurs, which damages the onboard charger.
The solution If you have diagnosed the issue and the P1A71 code indeed points to a faulty Mahle OBC, replacing it with a new (and expensive) unit is not the only option. ACtronics offers a plug-and-play remanufacturing solution for the Mahle CAOBC1 On-Board Charger, which is used
in vehicles such as the Peugeot e-208, Peugeot e-2008, Opel Corsa-e, Opel Mokkae, and various other Stellantis EVs. During the remanufacturing process, known weak components are replaced with improved parts. The on-board charger then undergoes extensive end-of-line testing to verify its operation under real-world conditions. Benefits for the workshop: Plug & Play: No need to reprogram the unit at the dealership after installation Cost-effective: Remanufacturing is significantly more affordable than ordering a new on-board charger Sustainable: Instead of discarding a heavy electronic module, raw materials are conserved, and the unit is given a second life (with a 2-year warranty)
FOR MORE INFORMATION ON ACTRONICS go to www.rdr.link/acj019 or scan the QR code
046_PMM Ad grid_Layout 1 01/09/2026 11:16 Page 46
047_PMM_OCT26_Layout 1 02/09/2026 13:17 Page 47
REMANUFACTURING
REMANUFACTURING: A SOLUTION TO A PROBLEM As cars get more complex, does remanufacturing still have a role to play in the UK workshop? Autoelectro is arguing that it does and that workshops need to take it seriously. nvironmental targets are tightening, and vehicle technology is increasing in complexity; therefore, Autoelectro believes the automotive aftermarket must rethink how it defines sustainability – and why availability, quality and long-term trust matter just as much as carbon reduction. Celebrating 40 years of service in 2026, the family-owned remanufacturer believes sustainability is no longer simply about “going green”, but about creating a resilient aftermarket capable of supporting increasingly advanced vehicle systems long into the future. Autoelectro’s Harnek Bhogal believes remanufacturing offers a critical solution for workshops facing rising complexity in rotating electrics, particularly as the market transitions towards 48V systems with mildhybrid and plug-in hybrid technology. Harnek said: “People often think sustainability is just an environmental conversation – but for us, it’s broader than that. It’s about longevity, quality, trust and ensuring there is always an answer for the customer.”
E
Four decades of standards Autoelectro’s commitment to sustainability is reinforced by decades of investment in quality and environmental management systems. The company has held ISO 9001 certification since 1995 – an internationally recognised quality management standard focused on consistency, traceability, process control and continual improvement across manufacturing operations. For Autoelectro, ISO 9001 underpins everything from testing procedures and production standards through to stock management and customer support. Alongside this, the remanufacturer also maintains ISO 14001 environmental management accreditation, a globally recognised framework designed to help businesses reduce environmental impact, improve resource efficiency and manage waste responsibly.
Within a remanufacturing environment, ISO 14001 covers material reuse, recycling processes, waste reduction, energy management and environmental monitoring throughout the production cycle.
Sustainability through availability While environmental responsibility is increasingly important for larger businesses facing ESG targets and legislation, for Autoelectro the biggest commercial value of remanufacturing lies in supply resilience. Remanufacturing protects workshops from potential supply chain disruptions that could affect imported products.
“People often think sustainability is just an environmental conversation – but for us, it’s broader than that. It’s about longevity, quality, trust and ensuring there is always an answer for the customer.” Harnek Bhogal, Autoelectro “We’re less vulnerable to external shocks because we remanufacture in Britain and maintain our own component stock,” Harnek said. “If a shipment is delayed overseas, businesses relying purely on imported product could struggle. We’re different because we can still manufacture, remanufacture or even rebuild a customer’s own unit if necessary.” The remanufacturing specialist argues this flexibility is becoming increasingly important as complex applications emerge and low-cost
aftermarket alternatives are either unavailable or commercially unviable. “There are some modern 48V MHEV applications that simply won’t come from overseas because the volumes and manufacturing complexity don’t make financial sense,” Harnek explained. “That’s where remanufacturing fills the gap.”
Price Autoelectro acknowledges that price is an emotive topic – but Harnek has urged workshops against viewing remanufacturing purely through the lens of price. “We acknowledge that premium remanufactured units can carry high upfront costs, but we’re confident the real value lies in protecting sales opportunities and customer loyalty.” Autoelectro has acknowledged that the UK remanufacturing sector has shrunk significantly in recent years, with several major remanufacturers either downsizing or exiting the market altogether. Harnek believes this trend reflects the growing complexity and cost of modern vehicle systems rather than declining demand. He said: “Everything on vehicles is becoming more expensive – hybrid systems, batteries, electronics, software. Rotating electrics are just one part of that wider technological shift.” However, Autoelectro insists remanufacturing will remain essential as vehicle parc complexity increases. Harnek concluded: “The aftermarket still needs remanufacturers to cover the difficult applications. If remanufacturing disappears, those customers are forced straight back to dealer-only pricing. That’s bad for factors, bad for garages and bad for motorists.”
FOR MORE INFORMATION ON AUTOELECTRO go to www.rdr.link/acj020 or scan the QR code
PMM OCTOBER 2026 47
048_PMM_OCT26_Layout 1 02/09/2026 13:19 Page 48
OILS, LUBRICANTS
& ADDITIVES
ARE YOU ADDING VALUE FOR YOUR CUSTOMERS? Mike Schlup, MD of Kalimex, the UK Distributor of JLM additives, provides an overview of how high-quality additives came to be the industry’s go-to product to keep customers’ cars running their best. K workshops are increasingly using and upselling high‑quality additives, driven by customer retention, cost‑saving benefits and changing consumer attitudes. This is something Kalimex have reported on and extensively so, in this very magazine for two decades. Most recently, with the UK car parc ageing (the average vehicle is now 8.8 years old with many drivers keeping cars for 20 years) additives have finally taken their seat at the top of the table. This has created strong opportunities for workshops to recommend premium lubricants and additives that extend vehicle life, reduce repair costs, and improve performance. Let’s dig further into the soaring popularity of premium quality additives. Customer retention: Workshops are being more strident in carrying the message of servicing over repair. This introduces more opportunities to recommend trade trusted additives alongside routine maintenance. And customers can use additives in between workshop visits to keep their cars motoring nicely at a reasonable cost. Cost‑saving perception: Additives can help reduce wear, improve fuel efficiency, and prolong component life, making them attractive to cost‑conscious motorists. For mechanics, being able to recommend an additive they can stake their reputation on, in some cases over a part or a repair, is a credible option. Changing consumer attitudes: Castrol research for example, revealed that 51 per
U
48 OCTOBER 2026 PMM
“Poor quality, cheaply priced additives that contain minimal active ingredients do little good and could even harm an engine.” cent of motorists would welcome more expensive, premium additives if the benefits were explained to them by their mechanic, compared to only 11 per cent who would always choose the cheapest option. The door is wide open for mechanics to recommend premium brands such as JLM Lubricants additives – Liquid Tools as they are widely known for. Marketing focus: Many UK workshops are now positioning themselves as ‘products over parts’ and ‘repair over replace’ using targeted local marketing and regular marketing to existing customers to highlight additive benefits.
Additives are a popular solution for enhancing engine performance, extending engine life, and preventing common automotive issues. Whether a motorist is driving a brand-new car or managing a highmileage vehicle, adding the right additive can offer measurable benefits. The trusted mechanic is best placed to convey these important messages to their customers and to offer the right additives for use in between servicing and MOTs. What’s more, the soaring cost of living continues to encourage motorists to hang on to their cars for longer, pushing up mileages and putting increasing strain on aging
048_PMM_OCT26_Layout 1 02/09/2026 13:20 Page 49
OILS, LUBRICANTS
& ADDITIVES
Five faves from JLM
engines. It’s a perfect storm making additives an increasingly popular option.
Additives in the workshop The question is, how can you, a timeserved, independent professional motor mechanic, use additives to help your customers keep their cars on the road for longer and for less cost?
Any vehicle, regardless of model, make and age will benefit from additives. The benefits can range from extending the life of a component to removing blockages or simply enhancing performance and reducing fuel consumption. For any mechanic, it’s not a case of ‘do I use additives’ more ‘which ones can I trust in good faith?’ Which cars benefit most from oil additives? 1. Older vehicles Vehicles with ageing engines are prone to encounter leaks, sludge, or loss of efficiency. Additives can rejuvenate these engines and prevent further damage. 2. High-mileage cars Cars with over 60,000 miles on the clock are often more susceptible to engine wear and tear. Oil additives designed for high-mileage vehicles can help maintain engine performance and prevent leaks. 3. High-performance vehicles Engines that undergo stress from high speeds, towing, or racing, benefit from the advanced protection of engine oil additives. Additives will help maintain engine performance and prevent leaks. 4. Vehicles driven in harsh conditions For these vehicles, driven in extreme temperatures, dusty environments, or engaged in heavy towing for example, the
Here are five of the most commonly used additives from JLM. Oil Flush: Use at every oil change. Why put clean oil into a dirty engine? JLM’s Oil Flush uses a gentle cleaning effect which is safe for use with welt belt engines. Oil Stop Smoke: Reduces unwanted play between worn engine components such as piston rings and valve seals and rejuvenates oil seals. This helps to prevent excess oil being burnt off via the exhaust. Oil Stop Leak: Using the latest in sealswell technology this additive helps restore seal pliability thereby reducing oil consumption. Ideal for older or high mileage engines. Ceramic Engine Protector: Using ceramic nanoparticles this additive can provide better protection during start up and high stress conditions leading to smoother operation and reduced engine noise. Hydraulic Valve Lifter Treatment: Valve lifters can become contaminated with deposits and sludge affecting their performance. This treatment will help to restore correct lifter function leading to reduced valve noise, improved performance and extended engine life. engine is subjected to more stress. Oil additives can offer additional protection against the harsh conditions, helping engines stay clean and efficient.
Avoid the bargain basement We know from daily conversations with mechanics that poor quality, cheaply priced additives that contain minimal active ingredients do little good and could even harm an engine, especially if motorists have repeatedly used them before conceding defeat and heading to the workshop. JLM Lubricants’ additives, however, contain the optimal proportion of active ingredients and have been subjected to widespread testing by technicians in several countries, before being launched.
FOR MORE INFORMATION ON KALIMEX go to www.rdr.link/acj021 or scan the QR code
PMM OCTOBER 2026 49
050_PMM_OCT26_Layout 1 02/09/2026 13:23 Page 50
OILS, LUBRICANTS
& ADDITIVES
STEP-BY-STEP Fitting a Tesla transmission oil and filter kit Febi illustrates the installation process for the transmission oil and filter service kit for Tesla Model 3 and Model Y. This relates to febi part numbers 1001620 and 1001621. lthough there is no recommended service interval from Tesla, it is highly advisable to replace the transmission oil and filter at regular intervals on these vehicles to ensure reliable transfer of power from the electric motor to the wheels. Transmission oil plays a major role in this process and is regarded as a critical transmission component, enabling it to operate smoothly and efficiently. This is made possible through the use of sophisticated ‘additive packs’ blended into the base oil. Over time the transmission fluid and additive packs deteriorate, causing these carefully engineered friction coefficients and the fluid’s viscosity to alter. If the oil is not serviced, this can lead to transmission bearing failure. Tesla recommends that the oil filter is replaced with a new one upon removal. Any oil filter with visible corrosion or leaks must be replaced.
A
7. Replace all oil pump ‘O’ rings that are included in the kit. Apply new transmission oil to the oil pump
Process for the rear drive unit
‘O’ rings and oil filter seal. 8. Refit the oil pump and tighten the two retaining bolts to 3 Nm + 20 degrees. 9. Install the new oil filter and tighten to 3 Nm + 135 degrees. Fill the transmission with fresh oil which has a recommended fill capacity of 2.1 litres. 10.It is recommended to prime the oil pump, and to do this it needs to be powered separately from the vehicle. Using a suitable breakout lead, apply a 12-volt power supply and earth to the pump. 11.The pump has three electrical connectors: positive, signal and earth (viewed from left to right).
1. Raise the vehicle. Remove the rear undertray to gain access to the transmission. Locate and remove oil fill plug. 2. Disconnect the electrical connector from the oil pump. 3. Position an oil drain collector under the rear drive unit oil pump. 4. Use an oil filter socket to remove the oil filter from the rear drive unit. 5. Remove the two bolts that attach the oil pump to the rear drive unit using a EPL10 socket. 6. Carefully remove the oil pump from the rear drive unit using a flat blade screwdriver at two different locations and then allow the gearbox fluid to drain for at least ten minutes.
50 OCTOBER 2026 PMM
12.Run the oil pump for the entire fill and then keep running the oil pump until the new fill plug is installed and tightened to 15 Nm. Remove breakout lead. Connect the oil pump electrical connector, and then engage the locking tab. Refit vehicle undertray.
Process for the front drive unit (Dual motor models only) 1. Raise vehicle. Remove the front undertray to gain access to the transmission. Support the transmission with a transmission jack.
050_PMM_OCT26_Layout 1 02/09/2026 13:23 Page 51
Remove the bolt that attaches the front drive unit to the front subframe to gain access to the oil pump. 2. Locate and remove oil fill plug. 3. Disconnect the electrical connector from the oil pump. Position an oil drain collector under the drive unit oil pump. Use an oil filter socket to remove the oil filter from the drive unit. 4. Remove the two bolts that attach the oil pump to the drive unit using a EPL10 socket. 5. Carefully remove the oil pump from the drive unit using a flat head screwdriver at two different locations and then allow the gearbox fluid to drain for at least ten minutes. Replace all oil pump ‘O’ rings that are included in the kit. Apply new
transmission oil to the oil pump ‘O’ rings and oil filter seal. 6. Refit the oil pump and tighten the two retaining bolts to 3 Nm + 20 degrees. 7. Install the new oil filter and tighten to 3 Nm + 135 degrees. Raise the transmission and install the bolt that attaches the front drive unit to the front subframe, tightening to 80 Nm. Fill the transmission with fresh oil which has a recommended fill capacity of 1.3 litres. 8. It is recommended to prime the oil pump, and to do this it needs to be powered separately from the vehicle.
Using a suitable breakout lead, apply a 12-volt power supply and earth to the pump. 9. The pump has three electrical connectors: positive, signal and earth (viewed from left to right). 10.Run the oil pump for the entire fill, then keep running the oil pump until the new fill plug is installed and tightened to 15 Nm. Connect the oil pump electrical connector and then engage the locking tab. Refit vehicle undertray. Lower the vehicle.
FOR MORE INFORMATION ON FEBI go to www.rdr.link/acj022 or scan the QR code
PMM grid_Layout 1 03/08/2026 10:39 Page 1
053_PMM_OCT26_Layout 1 02/09/2026 13:28 Page 53
OILS, LUBRICANTS
& ADDITIVES
STELLANTIS OIL PARTNERSHIP TotalEnergies and Stellantis extend long-term partnership to cover all ten vehicle brands in portfolio.
TotalEnergies and Stellantis have been collaborating from this...
fter more than half a century of collaboration, TotalEnergies and Stellantis have announced a renewal and expansion of their engine oil partnership. Originally renewed in 2021 for the Peugeot, Citroën, DS Automobiles and Opel, Vauxhall brands, the agreement now extends to encompass all ten iconic Stellantis brands: Fiat, Jeep, Lancia, Alfa Romeo, Abarth, Citroën, DS Automobiles, Opel, Vauxhall and Peugeot. With Stellantis brands accounting for around one in ten new cars registered in the UK this year, and two of the ten mostregistered vehicles currently on the road overall, the partnership continues to help workshops and vehicle owners maintain a significant portion of the UK car parc. Earlier this year, TotalEnergies became the only supplier offering officially approved lubricants across all six of Stellantis’ newly harmonised specifications. This range was recently enhanced with the addition of Quartz EV3R RCP 5W-30 – the newest product in the re-refined base oils range (EV3R), which is the only product with the latest approvals for DV5R, DW10F and DW12RU diesel engines, as well as 1.2 PureTech (EB2) petrol engines, and providing performance credentials equal to the previous virgin oil RCP 5W-30, but with enhanced circular economy benefits.
A
...to this
“Earlier this year, TotalEnergies became the only supplier offering officially approved lubricants across all six of Stellantis’ newly harmonised specifications.” Technical progress Since its beginnings with Citroën more than half a century ago, the partnership between Stellantis and TotalEnergies has evolved into a driving force for trust, performance and technological excellence. “We are proud to renew our partnership with Stellantis, built on more than fifty years of shared trust and innovation,” said Pierre Duhot, Senior Vice President Lubricants at TotalEnergies. “This new chapter extends our collaboration to all Stellantis brands and reinforces our common ambition to advance more sustainable and efficient mobility solutions.” The partnership is structured around four key pillars that embody the long-standing collaboration between TotalEnergies and Stellantis for engine oils and lubricants: Research and Development: continuous co-development focused on innovation and technical excellence, delivering cutting-edge solutions for existing and future engines. Competition: over five decades of joint passion in the most demanding motorsports
arenas, where TotalEnergies supports Stellantis’ pursuit of performance and success. After-Sales Collaboration: close cooperation to provide expert support and tailored solutions for Stellantis’ dealership, service networks, and our customers Sustainability: joint commitment to a more circular future through eco-designed products and responsible manufacturing. For UK workshops and distributors, the expanded partnership provides access to a broader range of OEM-approved lubricant solutions backed by decades of technical collaboration between a leading vehicle manufacturer and lubricant supplier. “This expanded partnership with TotalEnergies reflects our commitment to quality, innovation and sustainability across all Stellantis brands. By combining technical expertise and forward-looking approach, we are delivering solutions that meet the evolving needs of our customers, especially regarding quality” said Francesco Abbruzzesi, Head of Parts & Services for Stellantis in Enlarged Europe.
FOR MORE INFORMATION ON TOTALENERGIES go to www.rdr.link/acj023 or scan the QR code
PMM OCTOBER 2026 53
PMM grid_Layout 1 01/09/2026 10:47 Page 1
055_PMM_OCT26.qxd_Layout 1 02/09/2026 13:29 Page 55
TYRES, WHEELS
& ALIGNMENT
When interests ALIGN Two of the fastest-growing companies in the UK automotive market have formed a business partnership that stems from more than two decades of goodwill and trust. Best Autocentres and Giuliano Automotive UK started working together in late 2025, when both companies were starting a journey that is built on a combination of growth and traditional values. t was over 25 years ago that Marc Ainslie, chief operating officer of Best Autocentres, and James Boon, then heading up equipment manufacturers Hofmann, first started dealing with each other. Marc was actually using tyre equipment back then, starting on a journey into management that began with running one of the busiest tyre shops in the world. James was supplying the equipment into that facility that needed a degree of customisation and an unusually demanding level of support required for such a busy location. Fast forward to 2025 and both individuals had been on a trajectory that saw Marc join Best Autocentres as part of a management team with a clear remit to expand exponentially, and James having recently established Giuliano Automotive UK, following a 20year journey that saw him found and ultimately sell Hofmann Megaplan UK. “When I was first contacted by Best Autocentres I had no knowledge of Marc’s involvement, but I was really impressed by their passion and plans to grow”, comments James. “When I heard that Marc had joined, I immediately knew there could be a great opportunity because I had worked with him before and I know his level of appreciation for good equipment and service.” Giuliano have already equipped multiple locations with high-performance tyre and alignment equipment, which was carefully selected to ensure that future growth in volume would be catered for. The SX226 tyre changer and P43 wheel balancer, complete with additional accessories for specialist vehicles, ensure that the company is able to offer a professional tyre facility, and the i-Lign 2 CCD wheel alignment system puts Best Autocentres in the position to offer a fast but comprehensive alignment service to their customers.
I
“Giuliano have already equipped multiple locations with highperformance tyre and alignment equipment, which was carefully selected to ensure that future growth in volume would be catered for.” Based on trust Marc Ainslie, who recently announced the acquisition of Blue Peter Garage in Basingstoke to the steadily increasing portfolio, commented: “I have worked with lots of equipment suppliers over the years, and I know that I can trust James’ judgement on product recommendation, and depend on his support long after the sale, in the event we need it. We rely on partners like this to ensure we meet the standards we want to achieve as we grow our presence across the country” Best Autocentres has been operating since 2003 and take immense price in offering what they consider to be main dealer quality at independent prices and values. The business has since expanded to cover Hampshire, Berkshire, Wiltshire and Oxfordshire, and this expansion looks to show no signs of slowing down.
Giuliano Automotive was founded by James Boon, who has spent his entire working life involved in tyre fitting, balancing and alignment equipment. Giuliano is an Italian manufacturer founded in 1976 and has had a presence in the UK for decades, but decided to partner with James last year to create their own facility in the UK to better serve the market. “There is a little bit of déjà vu about this”, continued James, “because this is uncannily similar to the scenario in which I had the pleasure of working with Marc all those years ago, and I remember well the success that came from that era. I am thankful to the Best Autocentres team for putting their faith in Giuliano and look forward to being a part of their journey”.
FOR MORE INFORMATION ON GIULIANO go to www.rdr.link/acj024 or scan the QR code
PMM OCTOBER 2026 55
056_PMM_OCT26.qxd_Layout 1 02/09/2026 13:31 Page 56
TYRES, WHEELS
& ALIGNMENT
Are worn components causing your customer’s alignment issues? David Coppins, technical sales representative at Meyle UK discusses the role worn or damaged suspension components have in the overall alignment of a vehicle. wheel alignment can only be as good as the components holding the wheels in position. Meyle explains why technicians should look beyond the alignment machine when diagnosing uneven tyre wear, steering pull or poor straight-line stability. Wheel alignment is often viewed as a straightforward workshop procedure: Measure the angles and make the necessary adjustments. However, if steering or suspension components are worn, damaged or incorrectly fitted, simply adjusting the alignment may not solve the problem. Wheel alignment depends on the steering and suspension components being in good condition and holding the wheels in their correct positions. Worn or damaged components can change camber, caster, toe and other alignment angles, sometimes only when the vehicle is moving or under load. A range of steering and suspension faults can affect wheel alignment, including worn control-arm bushes, ball joints, tie rods and tierod ends, as well as worn wheel bearings. Bent control arms, steering knuckles or suspension struts can also alter alignment angles, while broken or sagging springs and worn strut mounts can affect the vehicle's geometry.
A
External impact External damage is another potential cause. A significant impact with a pothole or kerb, or a previous accident, can bend components sufficiently to change the alignment, even when the damage is not immediately obvious. Carrying out an alignment without addressing these issues first can result in inaccurate or unstable readings. Although the vehicle may initially appear correctly aligned when it leaves the workshop, the settings can change again once it is driven. The result could be uneven tyre wear, pulling to one side, an off-centre steering wheel or poor straight-line stability. The key principle is that alignment should be treated as the final adjustment, not as a way of compensating for worn or damaged mechanical components. When a vehicle presents with uneven tyre wear, steering pull or an off-centre steering wheel, technicians should first establish the symptoms before inspecting tyres and wheels. Tyre pressures, tread wear, wheel condition and any signs of abnormal wear should all be checked. This should be followed by a thorough inspection of the steering and suspension system. Technicians should check ball joints, tie rods, tie-rod ends, control-arm bushes and wheel bearings for excessive
“The key principle is that alignment should be treated as the final adjustment, not as a way of compensating for worn or damaged mechanical components.”
play, while also looking for damaged or deformed components. Springs, shock absorbers, struts, mounting points and ride height should also be assessed.
Defective components Any defective components should be repaired or replaced before the alignment is carried out. The vehicle should then be correctly prepared, alignment measurements compared with the manufacturer's specifications and any necessary adjustments made. Final readings should be checked, the steering wheel centred and, where appropriate, a road test carried out. On modern vehicles, completing the alignment may not be the end of the job. Advanced Driver Assistance Systems (ADAS), including lane-keeping assistance, traffic-sign recognition and emergency braking systems, rely on cameras and other sensors to understand the vehicle's position. Changes to wheel alignment can alter the vehicle's direction of travel in relation to a camera, meaning calibration may be required after an alignment. Technicians should therefore check the vehicle manufacturer's requirements and carry out ADAS calibration where necessary. The recommended sequence is simple: inspect the steering and suspension, repair any faults, perform the wheel alignment, centre the steering wheel, calibrate ADAS where required, and carry out a final functional check.
FOR MORE INFORMATION ON MEYLE go to www.rdr.link/acj025 or scan the QR code
56 OCTOBER 2026 PMM
057_PMM_OCT26.qxd_Layout 1 02/09/2026 13:35 Page 57
TYRES, WHEELS
& ALIGNMENT
FIVE golden rules to SELL wheel alignment to your customers! Pro-Align are getting garages engaged when it comes to convincing customers that wheel alignment is good for them and their car.
F
or more than 30 years, ProAlign has empowered workshops across the UK and Ireland by supplying Hunter wheel alignment and servicing technology. Here, they outline five essential tips to help you confidently and successfully promote and sell wheel alignment. 1. Don’t Be Afraid - Start the Conversation Many technicians hesitate to discuss additional services, fearing they may come across as pushy. However, when it comes to wheel alignment, you're not upselling - you're offering a vital service that enhances safety, extends tyre life, and improves vehicle performance. Many customers simply don’t know what alignment is or why they need it unless someone starts the conversation. Think of it this way: when you identify potential misalignment and don’t bring it up, you’re doing the customer a disservice. Misalignment can cause uneven tyre wear, reduced fuel efficiency, poor handling, and even premature wear on suspension components. These issues not only lead to expensive repairs down the road but also pose safety risks. 2. Highlight Cost-Saving Benefits Customers are more likely to agree to a wheel alignment when they understand that it’s not just a technical check; it’s an investment that can prevent larger expenses down the line. By addressing alignment, you’re helping customers avoid significant repair costs in the future while keeping them safer on the road. One of the biggest benefits is extended tyre life. Misaligned wheels can cause tyres to wear unevenly or prematurely, meaning the customer could end up replacing tyres much sooner than necessary. That’s a big, unexpected cost - and one that’s easily avoided with proper alignment.
Another vital point is improved fuel economy. Poor alignment increases rolling resistance, forcing the engine to work harder and burn more fuel. 3. Keep It Simple and Clear A major barrier to selling alignment services is technical complexity. Most customers don’t know about the angles toe, camber, or caster. Overloading them with technical language can confuse or overwhelm them - and that’s when they’ll say no. Instead, explain wheel alignment in plain terms: it ensures that the wheels are correctly positioned, allowing the car to drive straight, tyres to wear evenly, and safety to be optimised. 4. Use the Hunter Alignment Printout Visual proof is one of the most powerful tools you have in your toolkit. With Hunter’s advanced alignment systems, you get a clear before-and-after printout that shows the exact adjustments made during the service. This turns an invisible service into a visible one, allowing customers to see measurable
improvements on their vehicle following a wheel alignment service. Use this printout as a walk-through tool. Highlight where the alignment was out of specification and show the corrections made after the service. This helps the customer see the value they received - not just hear about it. 5. Leverage Marketing Tools Customers often don’t request wheel alignment simply because they are unaware of its necessity or they think it only needs to be done after hitting a pothole or curb. Raising visibility keeps the service top of mind. Use tools like posters, flyers, and social media to promote your wheel alignment service. By increasing visibility through marketing, you help make alignment part of the customer's regular service mindset. The goal is to get customers thinking about alignment before they experience a problem. When marketing is working well, customers will start asking you about alignment first, flipping the sales conversation entirely.
FOR MORE INFORMATION ON PRO-ALIGN go to www.rdr.link/acj026 or scan the QR code
PMM OCTOBER 2026 57
058_PMM_OCT26.qxd_Layout 1 02/09/2026 13:39 Page 58
TYRES, WHEELS
& ALIGNMENT
BEST PRACTICE
6
top tips for maintaining and repairing air suspensions systems
Arnott Suspension provides its expert insight into air suspension systems and the six things you need to take into account when maintaining them. ir suspension systems are no longer just for luxury vehicles. They’re showing up across the automotive landscape, offering smoother rides, precise handling and automatic load levelling. For workshops, this trend means more opportunities to guide customers, advise on replacements, and troubleshoot problems efficiently. Working on air suspension requires care, the right tools and an understanding of how components interact. Here are six tips to help you maintain and repair air suspension systems safely and effectively.
A
1. Prioritise safety before starting repairs Safety should always come first when working on automotive repairs. This includes vehicles equipped with air suspension. Following the safety guidelines below will ensure no harm to the technician or the vehicle. Since air suspension systems can operate at high pressures, verify that pressure has been relieved and disconnect power to the air suspension system before disassembly. Do not allow dirt or grease to enter the system. Always wear standard hand, ear, and eye protection when servicing the air suspension system. Finally, safely lift and secure the vehicle.
2. Depressurise carefully Proper depressurisation is a critical step in preventing accidental damage during service. To protect both the technician and the components, release the pressure in a gradual, controlled fashion, and never remove fittings suddenly. Also note that some vehicles
58 OCTOBER 2026 PMM
require a diagnostic tool to open solenoids and release air. Look for connectors on the air spring to determine this. If available, use “jack mode” to prevent the system from adjusting while the vehicle is lifted.
3. Avoid common maintenance mishaps Proper installation is essential for ensuring long-term reliability of air suspension
“Modern air suspension systems are highly integrated with vehicle electronics. After maintenance or repairs are complete, proper calibration and, in rare circumstances, software updates are essential to ensure everything works as intended.” components. Even small missteps during this stage can lead to premature failure or additional repairs down the line. Avoid damaging the air spring by always supporting the vehicle when the system is depressurised and not pressurising the air springs during installation. Not adhering to these can cause the air spring to unfold improperly when inflated and potentially damage the crimp ring. Additionally, if the vehicle is lowered without air pressure in the
air springs, the compressor may fail to generate sufficient pressure to lift the vehicle. This can lead to the compressor overheating and possibly damage the compressor relay. Always adhere to the manufacturer’s recommended torque specifications, especially with VOSS connectors. VOSS air line connectors are designed for quick, secure connections and usually do not need tightening. Over-tightening them can strip threads and cause leaks. If tightening is necessary, Arnott recommends using a torque wrench to avoid potential damage.
4. Detect faulty components early Catching failing parts before they completely fail helps avoid additional damage and reduces labour time and money. A drop in ride height of about 1 inch or more overnight is a clear sign of leakage. Start inspecting the system. Spray soapy water around the system. Bubbles will indicate a leak. If the ride height is uneven (i.e. one corner of the vehicle is sagging), the
058_PMM_OCT26.qxd_Layout 1 02/09/2026 13:40 Page 59
valve block may instead be the issue. Check the struts or shocks for oil leaks. Oil residue can damage the rubber of the air sleeves and reduce their lifespan. A leak in the damper may also hinder the shock absorber’s ability to absorb impacts. In this instance, the air spring can be overworked and fail prematurely. Continued leaks can cause the compressor to overwork. The ECU (Electronic Control Unit) will constantly determine that the vehicle's ride height is too low and direct the valve block and compressor to send more air to the failing air spring/strut. This sustained overuse may lead to burnout. In the event of an air suspension system leak, double-check the compressor. If there is discoloration, melted connectors or lines, and/or a burnt smell, the compressor may be burning out.
5. Diagnose the root cause, not just the symptoms When an air suspension failure occurs, replacing the affected component may not be
enough. Identify and address the source of the issue to avoid repeat repairs. Check for cascading damage. For example, a leaking shock may have already compromised the air spring, and a failed spring may have overworked the compressor. Replace relays with compressors. A faulty or sticky relay can cause a new compressor to fail prematurely by running continuously. Once repairs are complete, perform a full system check to ensure nothing was missed.
6. Diagnostic tools & updates Modern air suspension systems are highly integrated with vehicle electronics. After maintenance or repairs are complete, proper calibration and, in rare circumstances, software updates are essential to ensure everything works as intended.
Recalibrate ride height sensors with a diagnostic scan tool to verify and adjust ride height settings in order to avoid fault codes or incorrect operation. After test driving the vehicle, confirm that no diagnostic fault codes have reappeared in the system. Air suspension systems demand attention, knowledge, and the right tools. By prioritising safety, using proper diagnostics, and following these tips, you can maintain and repair systems efficiently, keeping them performing reliably. For shops recommending replacement parts, Arnott’s line of air springs, struts, and compressors meets OE standards and helps ensure dependable, long-lasting repairs for your customers.
FOR MORE INFORMATION ON ARNOTT go to www.rdr.link/acj027 or scan the QR code
Project4_Layout 1 11/02/2020 09:29 Page 1
061_PMM_OCT26.qxd_Layout 1 02/09/2026 13:42 Page 61
TYRES, WHEELS
& ALIGNMENT
Suspension solution for the BMW i3S Bilstein has partnered with Evolve Automotive to provide a more comfortable ride for BMW drivers. t sounds quite unusual: The tuner is setting up the vehicle to be softer. That is what Evolve Automotive and Bilstein have done, giving the i3S a more comfortable ride for urban travelling. The BMW i3S has earned a loyal following in the UK, particularly around London, where the city's Ultra Low Emission Zone gives zero-emission vehicles a compelling advantage. With its carbon fibre-reinforced plastic compact bodyshell, the i3S retains strong resale values and attracts buyers looking for a well-specified EV with longevity. The i3S comes with a noticeably firm, sporty tune from the factory — exactly what driving enthusiasts want. For the growing number of i3S owners using the car as an urban commuter, however, some simply want a bit more comfort alongside the sport character. That's the gap Luton-based BMW tuning specialist Evolve Automotive and Bilstein set out to fill. After a development time of over two years, the result is a purpose-built damper that delivers the best of both worlds: the handling precision the i3S is known for, with significantly improved everyday comfort. In particular, the
I
“The i3S comes with a noticeably firm, sporty tune from the factory — exactly what driving enthusiasts want. For the growing number of i3S owners using the car as an urban commuter, however, some simply want a bit more comfort alongside the sport character.” "pitching" motion on short undulations, which is perceived as particularly unpleasant by many drivers, was virtually eliminated.
The dampers were developed with ride comfort the primary target and handling the secondary consideration. The key engineering work centred on the valving, which is carefully tuned with Bilstein's input to provide greater body control while improving overall handling characteristics. The i3S's relatively short wheelbase was a key factor in the development process. The result is a damper that preserves the i3S's sporty DNA while making the car noticeably more settled and compliant on the road. For the workshop, installation is straightforward. The dampers are compatible with OEM springs or any aftermarket lowering springs already fitted to the car. Evolve also offers their own spring sets — lowering the i3S by 15mm — for customers wanting an additional aesthetic upgrade. However, the improved comfort characteristics are retained.
FOR MORE INFORMATION ON THIS PARTNERSHIP go to www.rdr.link/acj028 or scan the QR code
PMM OCTOBER 2026 61
062_PMM_OCT26.qxd_Layout 1 02/09/2026 13:44 Page 62
TYRES, WHEELS
& ALIGNMENT
What a result! In the performance tyre market, bold claims are easy to make. Proving them against some of the most respected products in the industry is another matter entirely. But that’s exactly what happened recently with tyre maker Kumho’s products. or Kumho, the ECSTA Sport, ECSTA Sport S and Wintercraft WP52+ offer compelling evidence of just how far the brand has progressed. Developed to combine highperformance driving characteristics with safety, stability and everyday usability, Kumho claims its range has demonstrated its credentials through independent testing against established premium competitors posting very good and even exemplary results. The results reinforce an increasingly important message for tyre fitters: Drivers looking for genuine performance no longer need to default to the traditional premium names.
F
Performance put to the test Independent comparative testing has seen the ECSTA Sport S go head-to-head with tyres from some of the industry's biggest manufacturers across demanding wet and dry disciplines. In testing by German magazine Auto Bild, the ECSTA Sport S was assessed on an Audi S5 across areas including dry braking, wet handling, aquaplaning resistance and rolling resistance, tying for first place overall against established premium competition. Wet-weather performance proved a particular strength, with the ECSTA Sport S delivering impressive handling and braking capabilities alongside standout aquaplaning resistance. That is an important attribute for UK motorists, where standing water, heavy rainfall and rapidly changing road conditions can make wet-weather capability every bit as relevant as outright dry-road performance. The ECSTA Sport has also demonstrated its credentials in independent testing by Die Reifentester. Tested on a Volkswagen Golf GTI, the tyre recorded a wet braking distance of just 23.1 metres from 80 km/h, while its
The Wintercraft WP52+
wet handling performance demonstrated high levels of grip, steering precision and control. And in the specialist winter range, Kumho again impressed, with Wintercraft WP52+ being awarded an exemplary result by Auto Bild. For workshops, these results provide tangible evidence when advising customers who want strong performance without simply buying on brand and those demanding compelling value for money without resorting to budget tyres.
“The results reinforce an increasingly important message for tyre fitters: Drivers looking for genuine performance no longer need to default to the traditional premium names.”
Built for today's vehicle parc Kumho has developed the ECSTA Sport and Sport S range around the changing demands of the modern vehicle parc. ECSTA Sport offers the perfect blend of driving dynamics, safety and mileage and is suitable for petrol, diesel, hybrid and electric vehicles. Across the range it is EV compatible, with Kumho's K-Silent noise-reduction technology also available on specified fitments. The ECSTA Sport S takes the performance proposition further. Designed to offer ultimate driving dynamics for powerful vehicles, ECSTA Sport S combines high levels of dry traction with high-speed stability and precise handling. It is also suitable for petrol, hybrid and electric vehicles, including high-load EV applications. That versatility is becoming increasingly significant as the distinction between
The Ecsta Sport S
conventional vehicles and high-powered electrified models continues to narrow. Electric vehicles can place very different demands on tyres as a result of factors including vehicle weight and the immediate torque available from electric powertrains. Being able to offer a performance tyre capable of supporting these applications gives retailers another credible option as the UK vehicle parc evolves.
Confidence when conditions change While performance tyres are naturally associated with dry grip and responsive handling, wet-weather capability remains fundamental to real-world safety. Strong braking performance, predictable handling and resistance to aquaplaning can all make a meaningful difference when road conditions deteriorate. For motorists, these characteristics provide confidence; for fitters, they provide a straightforward and evidencebased way of explaining why tyre choice matters beyond price or brand name alone. The ECSTA Sport and Sport S range is engineered to balance its dynamic capabilities with the characteristics drivers expect from a tyre used every day, including refinement, stability and durability from our increasingly hotter summers to our turbulent winters. Richard Lyons, managing director of Kumho Tyre UK, said: “Independent testing allows the performance of a tyre to speak for itself. The ECSTA Sport and ECSTA Sport S as well as Wintercraft WP52+ prove that they can compete at a very high level against some of the most established names in the market, which in turn reflects the continued investment Kumho is making in tyre technology as the requirements of both vehicles and drivers continue to evolve.”
FOR MORE INFORMATION ON KUMHO TYRES go to www.rdr.link/acj029 or scan the QR code
62 OCTOBER 2026 PMM
The Ecsta Sport PS 72
063_PMM Ad grid_Layout 1 01/09/2026 11:18 Page 63
Life can throw the odd curved ball no matter what stage of life you're at: money worries, illness, mental health issues, social isolation. It can create a downward spiral for you and your family. It's why Ben's here. At these moments our support and care services can be life-changing. Ever since there's been an automotive industry Ben has been helping its people and their loved ones keep life on track. Together we’ll tackle the challenges that get in life’s way and make sure they don’t, for life.
&IR æ 1SXSV ERH %PPMIH 8VEHIW &IRIZSPIRX *YRH 0]R[SSH 'SYVX 0]R[SSH :MPPEKI 6MWI 6SEH %WGSX 70 *+ % GLEVMX] VIKMWXIVIH MR )RKPERH ERH ;EPIW RS ERH 7GSXPERH RS 7' 6IKMWXIVIH [MXL XLI ,SQIW ERH 'SQQYRMXMIW %KIRG] RS 0, -QEKIW used are for representational purposes only.
Find plenty of advice, online chat and self-help tools on our website, or talk to us on the helpline, free and in complete GSRćHIRGI 1SRHE]æ8LYVWHE] EQæ TQ *VMHE] EQæ TQ
What’s new
064_PMM_OCT26.qxd_Layout 1 02/09/2026 13:50 Page 64
IN THE WORKSHOP? GPS tracking: A new revenue source for your garage? Rewire Security has spent over a decade
building one of the UK's most trusted GPS vehicle tracking platforms, GPSLive, helping more than 2,000 business fleets and over 94,000 connected devices stay visible, secure, and efficient. Based in Bristol and part of the RAM Tracking group – one of the UK's leading names in SME fleet management – Rewire Security combines the reach of a national telematics provider with the hands-on support of a specialist team. For UK garages and independent automotive businesses, Rewire Security is opening up a new way to grow: its Reseller Partner Programme. Rather than treating GPS tracking as a niche add-on, the programme is designed to turn it into a genuine, ongoing revenue stream – one that fits naturally alongside the services garages already offer their customers. Here's how it works. Garages and mechanics become approved resellers, supplying and fitting Rewire Security's GPS trackers for their own customers. Every device sold generates income in three ways: margin on the hardware itself, revenue from installation, and – critically – recurring monthly commission for as long as that customer stays subscribed. Resellers earn £2 per device per month for the first 12 months, and £1 per month after that, across a 5-year term. For a garage with a steady flow of customers, that adds up to a meaningful, compounding income stream long after the initial sale. The programme is built to be accessible. There's no minimum order requirement, hardware is supplied at cost with a discount of up to 100 per cent depending on the partnership arrangement, and new resellers get full onboarding support through Rewire Security's dedicated reseller portal, covering everything from order tracking to commission reporting. It's a natural fit for the automotive and garage sector. Garage owners and mechanics already have the trust of local vehicle owners and fleet operators; GPS
tracking is simply another way to serve that
the programme, alongside new independent
same customer base, with the backing of an
partners across the sector.
established UK provider handling the
low-effort income stream to their business,
subscription management behind the scenes.
Rewire Security's reseller programme offers
Rewire Security is actively recruiting
a straightforward way in – backed by over
reseller partners across the UK, with a
ten years in the UK tracking market and a
particular focus on independent garages, car
platform trusted by thousands of
accessory retailers, and automotive service
businesses nationwide.
businesses looking to diversify their revenue without adding operational complexity. Existing Rewire Security and RAM Tracking customers are also being invited to explore
64 OCTOBER 2026 PMM
For garages looking to add a recurring,
technology, support, and ongoing
FOR MORE INFORMATION ON REWIRE WWW.RDR.LINK/ACJ030
What’s new
064_PMM_OCT26.qxd_Layout 1 02/09/2026 13:50 Page 65
IN THE WORKSHOP? Chinese vehicle coverage expands for Driv
As Chinese vehicle brands continue to expand across Europe, DRiV is strengthening its coverage accordingly. By the end of 2026, the company will provide up to 70 per cent coverage in key categories such as braking, shock absorbers, steering and suspension, ignition and filtration, supporting avehicle parc close to 700,000 vehicles in operation. For braking, DRiV’s Ferodo brand continues to expand its vehicle coverage, including fast-growing Chinese vehicle applications. The coverage is expected to increase by more than 8 per cent in 2026 and by up to 20 per cent by end of 2027, adding key models from major Chinese manufacturers such as MG, Maxus and BYD. For shock absorbers, DRiV’s brand Monroe is expanding coverage in 2026 for an expected leading coverage position on major Chinese car applications, covering popular vehicle brands such as BYD and MG.
Laser Tools breaker bar
A breaker bar is one of the hardest-working tools in any professional workshop, so strength, durability and user comfort are essential. The new Laser Tools 9378 IndexPro Breaker Bar has been engineered to deliver all three, combining highquality chrome vanadium construction with an innovative indexing head and ergonomic comfort handle to provide maximum control when tackling stubborn fasteners. Manufactured from chrome vanadium steel with a durable mirror-polished finish, the 585mm (23") long breaker bar is designed to withstand the demands of daily professional use. Its 1/2" drive indexing head allows the user to select and maintain the optimum working angle, making it easier to position the socket accurately and apply controlled leverage in confined or awkward-access areas. A positive 90° stop function provides additional stability when maximum leverage is required. The ergonomically designed comfort handle features flat sides to spread hand pressure more evenly, reducing fatigue during prolonged use while providing a secure grip when applying high levels of torque. With a maximum torque capacity of 507Nm and durability proven through 50,000 test cycles at 128Nm, the IndexPro breaker bar is built for years of dependable workshop service.
EV tool kits
FOR MORE INFORMATION ON LASER TOOLS
WWW.RDR.LINK/ACJ032
The Cementex 13-Piece Electric Vehicle Tool Kit includes a FOR MORE INFORMATION ON DRIV WWW.RDR.LINK/ACJ031
focused set of insulated tools such as combination wrenches, pliers, screwdrivers, and a torque wrench, all organized in a tool roll pouch and large canvas tote. The compact design makes it a practical choice for technicians and emergency personnel who need to act quickly and safely in the field. The 18-Piece Electric Vehicle Tool Kit builds on this foundation with an expanded range of tools including open end wrenches, additional pliers, and a ratchet with drive sockets. Housed in a zippered tool bag and large canvas tote, the kit is ideal for use in more demanding environments where durability and portability are critical.
Comline’s new EV brake range
FOR MORE INFORMATION ON CEMENTEX
WWW.RDR.LINK/ACJ033
Comline’s Business Line team has been diligently expanding its product offerings to
include EV and hybrid references, meticulously analysing VIO data. With over 3,700 part numbers currently available, and new additions monthly, Comline is committed to supporting the independent aftermarket in servicing the increasing number of EVs. The EVLine brake pads are R90-approved and are engineered to deliver low-noise operation and consistent stopping performance. An additional scorching process after curing stabilises friction characteristics at higher temperatures, ensuring reduced brake noise and reliable performance throughout the pad’s service life. Also, Comline’s distinctive blue livery appears on the CEM115 friction material. WANT TO KNOW MORE?
WWW.RDR.LINK/ACJ034
PMM OCTOBER 2026 65
What’s new
064_PMM_OCT26.qxd_Layout 1 02/09/2026 13:51 Page 66
IN THE WORKSHOP? New CLS clutch kit range
The new Rymec CLS Clutch Kit range from TGL combines clutch kits and hydraulics in one reference, supporting easier ordering and clearer parts identification. Each kit includes a clutch drive plate, clutch cover, release bearing and clutch slave cylinder. The initial launch includes 20 new references, covering popular European passenger car and light commercial vehicle applications, including models from Volkswagen Group, Stellantis, Hyundai and Kia brands.
New glow plugs launched
FOR MORE INFORMATION
Vehicle prep app launched for garages
WWW.RDR.LINK/ACJ035
Elta Automotive has launched a new range of Lucas glow plugs, siming to deliver rapid warm-up, cleaner starts and dependable long-term performance. Ready to fire in under a second, even in freezing conditions, the range features extended postglow technology to help maintain optimum combustion chamber temperatures during warm-up, supporting smoother running and reduced emissions while helping eliminate white and blue exhaust smoke.
Re-usable nylon seat covers
FOR MORE INFORMATION WWW.RDR.LINK/ACJ036
A new company s helping
reduce waste with its seat and steering wheel covers. Maxpro Products has launched 100 per cent nylon covers which are re-usable and washable. The universal seat covers are made from a tough, durable, high-quality 420 denier nylon. The covers offer protection from oil, grease and dirt, as well as being water resistant. Also, the covers can be personalised
Launched specifically for independent garages, the new vAutoStock Lite vehicle preparation app is available for a 14 day trial before purchase. Designed to replace spreadsheets and written notes, the app turns the clunky and manually demanding vehicle prep process into an automated and seamless operation with no human interaction needed to bridge the gap between one stage and the next. The best part for small, independent garages is that the whole thing can be accessed from your phone.
Compact 2-in-1 mini air ratchet WANT TO KNOW MORE?
WWW.RDR.LINK/ACJ038
The 9295 Mini Air Ratchet from Laser Tools is a compact 2-in-1 tool that combines a 3/8in. square drive ratchet with an integral 1/4in. hex bit holder. Part of the company's 50th Anniversary range, it is designed to increase productivity when working in confined engine bays, dashboards, interiors and other restricted-access areas. Powered by a high-output 0.3HP five-blade air motor, the 9295 allows technicians to switch quickly between driving sockets and screwdriver bits without changing tools.
Hella remote diagnostics team expands WANT TO KNOW MORE?
WWW.RDR.LINK/ACJ039
Reflecting the growing interest in remote diagnostics in the workshop, Hella Gutmann has taken the step of expanding its macsRemote operations with the appointment of Leah Cudone as remote diagnostics technician. The hire significantly increases the service capacity of its remote diagnostic support for complex vehicle systems. Having entered the trade at 17, Leah has worked in both independent, family-run garages and within a Mercedes-Benz franchised dealer, progressing from service advisor to workshop controller.
with your company logo. WANT TO KNOW MORE? FOR MORE INFORMATION WWW.RDR.LINK/ACJ037
66 OCTOBER 2026 PMM
WWW.RDR.LINK/ACJ040
067_PMM_OCT26_Layout 1 02/09/2026 15:07 Page 67
ADVERTISEMENT INDEX
Here is a useful summary of all the adverts that appear in this issue of Professional Motor Mechanic. Each is listed with its page number and a direct URL that will get you straight to the relevant online information
AC Tronics Ltd ....................................................(page 59)
Mechanex ..............................................................(page 26)
www.rdr.link/ACJ100
www.rdr.link/ACJ111
Alldata UK Sales Ltd ............................................(page 35)
MOT Compliance Group ......................................(page 52)
www.rdr.link/ACJ101
www.rdr.link/ACJ112
Carwood Motor Units Ltd ....................................(page 63)
MS Motor Service ................................................(page 46)
www.rdr.link/ACJ102
www.rdr.link/ACJ113
CDTi ....................................................................(page 46)
NFU Mutual Ins. Society Ltd ............................(pages 4,5)
www.rdr.link/ACJ103
www.rdr.link/ACJ114
Cosan Lubricants ..................................................(page 36)
Pico Technology ..................................................(page 31)
www.rdr.link/ACJ104
www.rdr.link/ACJ115
Elta Automotive Ltd ............................................(page 19)
Ring Automotive Ltd ............................................(page 45)
www.rdr.link/ACJ105
www.rdr.link/ACJ116
Ferdinand Bilstein UK Ltd ......................................(page 6)
Robert Bosch Ltd ..................................................(page 25)
www.rdr.link/ACJ106
www.rdr.link/ACJ117
Ing.Werner Pletzer ................................................(page 51)
Stanley Black & Decker UK Ltd ....................(page 2/IFC)
www.rdr.link/ACJ107
www.rdr.link/ACJ118
Kumho Tyre (UK) Ltd ..........................................(page 54)
Valeo Service (UK) Ltd ........................................(page 20)
www.rdr.link/ACJ108
www.rdr.link/ACJ119
Lucas Oil Products Ltd ................................(page 68/OBC)
Valeo Service (UK) Ltd ........................................(page 43)
www.rdr.link/ACJ109
www.rdr.link/ACJ120
Mann & Hummel (UK) Ltd ..................................(page 12)
Wynn Oil UK ........................................................(page 11)
www.rdr.link/ACJ110
www.rdr.link/ACJ121
PMM grid_Layout 1 01/09/2026 10:48 Page 1