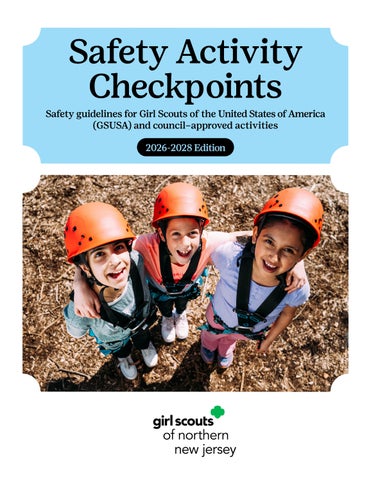
Safety Activity Checkpoints Safety guidelines for Girl Scouts of the United States of America (GSUSA) and council–approved activities 2026-2028 Edition
Contents Introduction................................................................................................................................................................................................. 6 How to Use Safety Activity Checkpoints...............................................................................................................7 Activities that Require Prior Council Approval....................................................................................................7 Activities that Are Not Permitted..........................................................................................................................7 Activities that Are Not Listed................................................................................................................................8
Safety Standards.................................................................................................................................................................................... 9 Adult Supervision Standards................................................................................................................................9 Adult Behavior Standards and Protocols.............................................................................................................11 No Tolerance for Physical or Sexual Abuse...........................................................................................11 No Tolerance for Youth Violence and Bullying......................................................................................11 Child Abuse and Mandated Reporter.....................................................................................................11 Adult-to-Child Communications...........................................................................................................11 Appropriate Behavior............................................................................................................................ 12 Drugs and Alcohol Policy...................................................................................................................... 12 Events with Alcohol............................................................................................................................... 12 Firearms and Weapons Policy.............................................................................................................. 12 Transporting Girl Scouts..................................................................................................................................... 12 Private Vehicles..................................................................................................................................... 12 Borrowing or Renting Vehicles............................................................................................................. 13 Taxis and Ride-Sharing Services (e.g., Uber, Lyft).............................................................................. 13 Recreational Vehicles, Campers, and Trailers..................................................................................... 13 Vans Designed for 15 Passengers.......................................................................................................... 13 Commercial and Public Transportation............................................................................................... 14 Chartered Vehicles................................................................................................................................ 14 Health and Well-Being........................................................................................................................................ 14 Physical Health..................................................................................................................................... 14 Buddy System........................................................................................................................................ 14 Overnights............................................................................................................................................. 15 Equity, Inclusion, and Belonging......................................................................................................... 15 Planning for Adventures...................................................................................................................................... 16 Prior Council Approval......................................................................................................................... 16 Progressive Experiences....................................................................................................................... 16 Identifying Qualified Experts............................................................................................................... 17
Safety Activity Checkpoints ©2009-2026 Girl Scouts of the USA. All Rights Reserved.
PAGE 2/190
Contents Clothing, Equipment, and Gear............................................................................................................ 18 Helmets and Life Jackets...................................................................................................................... 18 Preparing for the Unexpected.............................................................................................................................. 19 First Aid................................................................................................................................................. 19 Health Forms and Medications............................................................................................................. 21 Activity Accident Insurance.................................................................................................................. 21 Responding to Emergencies..................................................................................................................22 Minor Accidents and Illness..................................................................................................................22 Serious Accidents and Medical Emergencies.......................................................................................22 Emergency Action Plans.......................................................................................................................23
Safety Activity Checkpoints (SACs)............................................................................................................................... 25 Activities at a Glance...........................................................................................................................................26 Aerial Fitness.......................................................................................................................................................29 Amusement and Water Parks.............................................................................................................................. 31 Animal Interactions.............................................................................................................................................33 Archery.................................................................................................................................................................36 Ax, Knife, and Hatchet Throwing........................................................................................................................38 Backpacking........................................................................................................................................................ 40 Bicycling..............................................................................................................................................................43 Camping...............................................................................................................................................................46 Canoeing............................................................................................................................................................. 50 Challenge Courses...............................................................................................................................................53 Climbing, Bouldering, and Rappelling................................................................................................................56 Community Cleanups..........................................................................................................................................59 Cookie and Product Programs.............................................................................................................................62 Cross-Country Skiing..........................................................................................................................................65 Digital Technology...............................................................................................................................................67 Downhill Skiing and Snowboarding................................................................................................................... 69 Fencing................................................................................................................................................................. 71 Fishing and Ice Fishing.......................................................................................................................................73 Geocaching...........................................................................................................................................................76 Go-Karting...........................................................................................................................................................78 Hayrides.............................................................................................................................................................. 80
Safety Activity Checkpoints ©2009-2026 Girl Scouts of the USA. All Rights Reserved.
PAGE 3/190
Contents Hiking...................................................................................................................................................................82 Horseback Riding.................................................................................................................................................84 Indoor Skydiving.................................................................................................................................................87 Indoor Trampolines.............................................................................................................................................89 Inflatable Activities............................................................................................................................................. 91 Kayaking............................................................................................................................................................. 94 Miscellaneous Activities..................................................................................................................................... 98 Model Rocketry...................................................................................................................................................100 Offshore Passenger Vessels...............................................................................................................................103 Orienteering.......................................................................................................................................................106 Outdoor Cooking and Fire-Building..................................................................................................................108 Packrafting.........................................................................................................................................................112 Parades and Other Large Gatherings.................................................................................................................116 Pocket Knife and Jackknife Safety.....................................................................................................................118 Recreational Tree Climbing...............................................................................................................................120 Rowboats / Rowing............................................................................................................................................. 122 Sailing................................................................................................................................................................ 125 SCUBA Diving.................................................................................................................................................... 128 Shooting Sports / Firearms...............................................................................................................................130 Skating............................................................................................................................................................... 133 Sledding, Snow Tubing, and Tobogganing........................................................................................................ 136 Slingshots........................................................................................................................................................... 138 Snorkeling..........................................................................................................................................................140 Snowshoeing...................................................................................................................................................... 143 Spelunking / Caving.......................................................................................................................................... 145 Stand-Up Paddleboarding (SUP)....................................................................................................................... 147 Surfing................................................................................................................................................................151 Swimming.......................................................................................................................................................... 153 Tethered Balloon Rides...................................................................................................................................... 157 Tools—Hand and Power.................................................................................................................................... 159 Travel / Trips..................................................................................................................................................... 165 Tubing (Floating)............................................................................................................................................... 170 Waterskiing, Wakeboarding, and Towed Tubing.............................................................................................. 172
Safety Activity Checkpoints ©2009-2026 Girl Scouts of the USA. All Rights Reserved.
PAGE 4/190
Contents Whitewater Rafting........................................................................................................................................... 175 Windsurfing....................................................................................................................................................... 178 Zip Lining...........................................................................................................................................................180
Appendix................................................................................................................................................................................................... 182 Checklist for Drivers.......................................................................................................................................... 182 Glossary............................................................................................................................................................. 183 Sample Swim Assessment—Verification of Completion.................................................................................. 189
Important Note: Links to third-party websites are provided for convenience only. Girl Scouts of the USA (GSUSA) does not endorse or support the content of third-party links and is not responsible for the content or accuracy, availability, or privacy/security practices of other websites, and/or services or goods that may be linked to or advertised on such third-party websites. By clicking on a third-party link, you will leave the current GSUSA site whereby policies of such third-party link may differ from those of GSUSA.
TM & Copyright © 2009-2026 Girl Scouts of the United States of America. All rights reserved. No part of this publication may be reproduced, distributed, or transmitted in any form or by any means, electronic or mechanical methods, including photocopying, recording, or by any information storage or retrieval system, now known or hereinafter invented, without the prior written permission of Girl Scouts of the United States of America (GSUSA), except in the case of brief quotations embodied in critical reviews and certain other noncommercial uses permitted by copyright law. For permissions requests, write to GSUSA at the address below or visit the www.girlscouts.org website to access permission request forms. First published in 2009 by Girl Scouts of the United States of America, 420 Fifth Avenue, New York, NY 10018-2798. www.girlscouts.org
Safety Activity Checkpoints ©2009-2026 Girl Scouts of the USA. All Rights Reserved.
PAGE 5/190
Introduction Safety Activity Checkpoints (SACs) provides the standard safety guidelines for Girl Scouts of the United States of America (GSUSA) and Girl Scouts of Northern New Jersey’s approved activities. All organizations operating under the Girl Scout name, including local councils, and USA Girl Scouts Overseas (USAGSO), are responsible for ensuring that all activities are planned and executed in a way that prioritizes the health, safety, and general well-being of all participants, in line with these standard safety guidelines. Safety Activity Checkpoints offers a framework to evaluate and manage safety during Girl Scout activities. They guide your planning, help ensure that you feel confident and prepared, and highlight the rules and standards Girl Scouts expects you to follow.
Become familiar with Girl Scouts’ other resources, found on your council website or at girlscouts.org. Since states’ rules vary, most documents are provided by your council. Look for: •
Permission forms, council approval processes, health histories, and other paperwork
•
Meeting space safety expectations
•
Hosted activities and events, such as camps and program weekends
Keep in mind that safety management involves three key questions: • Risk: What can go wrong? Are there any dangers or hazards associated with this activity? • Prevention: What can we do to reduce or eliminate risk scenarios? • Response: If something happens despite our precautions, how will we handle it?
Safety Activity Checkpoints ©2009-2026 Girl Scouts of the USA. All Rights Reserved.
Build a culture of safety by guiding your group to think through and plan the activities you share together. Here’s a simple example, with horseback riding as the activity: • Risk: Riders could fall and get injured. • Prevention: Choosing a clean, well-run facility with positive reviews, well-trained instructors, and horses matched to children and/or beginners, for example, will increase the likelihood of a safe (and fun) experience. Wearing helmets and the right footwear can reduce the chance of severe injury in case of an accident. Each SAC activity section provides guidance on prevention. • Response: Be prepared with first aid training, a stocked first aid kit, parental contacts, and a way to quickly contact emergency medical assistance. Notify your council immediately with details of the incident, including names and contact information of those who were involved or who witnessed the incident.
PAGE 6/190
Introduction How to Use Safety Activity Checkpoints The Safety Activity Checkpoints resource is for the volunteers and staff who oversee youth. This resource is divided into two main sections: •
•
Safety Standards, with guidelines that apply to all outings and activities (adult supervision requirements, transportation information, etc.). Activity-specific checkpoints, with guidelines for specific adventures your Girl Scouts might choose. The activity chapters will guide you through three phases: o o o o
Decision-making Planning and preparation Day of implementation Plus: Special situations and gear guidance are included when relevant.
Use the check boxes to tick off specific steps as you complete them. Ensure that you have considered or completed each sub-bulleted item before checking off a main task.
Safety Activity Checkpoints is your roadmap for planning adventures with safety in mind, even for new activities you may not have explored yet. With clear guidance and practical resources, you can confidently explore new experiences with your group while giving Girl Scouts the chance to learn and lead right alongside you. Most checkpoints are designed primarily for beginner experiences. When your group is ready for advanced adventures, seek expert guidance and consult your council if your plans extend beyond the scope of the checkpoints. Note: Good judgment is just as important as any resource, especially when guidelines don’t precisely fit your situation. Since checkpoints are written for a national audience and “typical” activities, adjustments may be needed for beginner or advanced participation. •
Some safety standards may not apply universally.
•
Consider local conditions, participants’ skill levels, and unique circumstances.
Safety Activity Checkpoints ©2009-2026 Girl Scouts of the USA. All Rights Reserved.
•
Get expert and council staff input as you evaluate deviations from the checkpoints.
Involve your Girl Scouts whenever possible to help them develop the valuable lifelong skill of managing their own safety.
Activities That Require Prior Council Approval Some activities must be cleared with your Girl Scout council before confirming plans. These often involve added safety measures, specialized instruction, or council-approved providers. Approval helps ensure everyone is prepared and protected. Check with your council if you’re planning: •
Overnight trips (e.g., backpacking, camping, travel/trips)
•
Target sports (e.g., archery, knife, hatchet/ax throwing, and all firearms)
•
Aquatics (e.g., swimming, boating, or other water activities)
•
Horseback riding
•
International travel
•
Chartered aircraft tours or recreational flying
•
Chartered buses or ground transportation
Always follow your local council’s pre-approval process. Procedures can vary slightly in different areas of the country. Learn more about approval in Planning for Adventures.
Activities That Are Not Permitted The purpose of not permitting certain activities is first and foremost to protect Girl Scout members, but also to safeguard the financial and reputational well-being of your council and the Girl Scout organization. Girl Scouts has analyzed insurance data and industry accident trends to identify activities that are not permitted or approved in Girl Scouts.
PAGE 7/190
Introduction Each activity listed below has been evaluated based on a variety of safety factors including council feedback and historical experience, industry loss history, and insurability. This list is reviewed annually to reflect current risk considerations. Activities that are not permitted are those that generally entail extensive prior experience (for instructors and participants), involve a high risk of bodily injury (especially for minors), or necessitate a driver’s license by youth. Accordingly, GSUSA does not approve, endorse, or provide safety checkpoints for activities that are listed as not permitted. ACTIVITIES NOT PERMITTED IN GIRL SCOUTS Bungee jumping
Riding electric scooters.
Flying in privately owned planes, helicopters, or blimps
Riding jet skis
Hang gliding
Riding motorbikes (gas or electric bikes)
Hunting
Skydiving or parachuting
Outdoor/home trampoline use
Snowmobiling
Paintball tagging (shooting at other people)
Stunt skiing or snowboarding
Parasailing
Untethered hot air ballooning
Riding all-terrain vehicles (ATVs)
Zorbing
Activities That Are Not Listed In a hands-on, learn-by-doing environment like Girl Scouts, it’s natural for members to want to participate in new and exciting activities not specifically addressed in Safety Activity Checkpoints. If SACs are not available for a specific activity, the first step is to contact your Girl Scout council to ensure the activity is eligible for approval. Follow the guidelines in Planning for Adventures and consider these factors: • Compare with similar activities. Is the activity like another for which SACs are written? Can you easily adapt and/or apply the guidelines? • Expert supervision. Does the activity require specialized supervision, equipment, or instructor certification? • Evaluate quality and outcomes. Think about how the activity aligns with the Girl Scout Leadership Experience, ensuring it provides positive long-term benefits for participants.
Safety Activity Checkpoints ©2009-2026 Girl Scouts of the USA. All Rights Reserved.
PAGE 8/190
Safety Standards Adult Supervision Standards All Girl Scout volunteers and staff who oversee youth members should become familiar with and agree to adhere to Girl Scout Child Abuse Prevention Policies and Procedures. Girl Scout groups gathering in-person or virtually must follow these guidelines: •
They must have at least two unrelated, registered, background-checked adults present and actively supervising. Youth leaders cannot take their place.
•
At least one of the adults must be female.
•
The two required adults must not be related or live in the same household.
Adult supervision rules apply to all Girl Scout activities, including meetings, trip/travel, camps, events, and activities. There are no exceptions. Report any deviation from this policy to your council. Note: Invited or additional participating adults can be related, but they cannot replace the two unrelated leaders. Determine the minimum number of adult chaperones needed: •
Adult-to-youth ratios vary based on participants’ ages and the type of activity.
•
Group meetings require fewer adults; use the “Group Meetings” column.
•
Outings, activities, camping, and travel require more supervision. Use the “Events, Travel, and Camping” column.
Count all children (Girl Scouts or not) in supervision ratios unless they are under the constant care of their own parent/guardian who is not acting as a chaperone. Can We Meet in a Private Home? According to GSNNJ guidelines, Girl Scout meetings and activities in private homes are not permitted. Contact your council or service unit support team for help securing a troop meeting place. You can also check out the gsLearn course Your First Troop Meeting.
Safety Activity Checkpoints ©2009-2026 Girl Scouts of the USA. All Rights Reserved.
PAGE 9/190
Safety Standards GROUP MEETINGS
G IRL SCOU T ADULT-TO YOU TH R AT IO S
DAISY GIRL SCOUTS
(Grades K–1)
BROWNIE GIRL SCOUTS
(Grades 2–3)
JUNIOR GIRL SCOUTS
(Grades 4–5)
CADETTE GIRL SCOUTS
(Grades 6–8)
SENIOR GIRL SCOUTS
(Grades 9–10)
AMBASSADOR GIRL SCOUTS
(Grades 11–12)
EVENTS, TRAVEL, AND CAMPING
Two unrelated volunteers (at least one of whom is female) for up to this number of youth:
Add One additional volunteer for each additional:
Two unrelated volunteers (at least one of whom is female) for up to this number of youth:
Add One additional volunteer for each additional:
12
1-6
6
1-4
20
1-8
12
1-6
25
1-10
16
1-8
25
1-12
20
1-10
30
1-15
24
1-12
30
1-15
24
1-12
Safety Activity Checkpoints ©2009-2026 Girl Scouts of the USA. All Rights Reserved.
PAGE 10/190
Safety Standards Exceptions and Special Circumstances •
For multi-level groups, follow the adult-to-youth ratio for the youngest grade level. For example, if a group includes Daisies and Brownies, use the Daisy ratio.
•
High-adventure activities may need more adults than standard ratios. Specific requirements are outlined in the individual activity section.
•
Bring in additional adults as necessary to support your group’s unique needs. Involve Girl Scouts in decisions and keep their participation central.
•
Friends, family, or other guests may occasionally join Girl Scout activities. In fact, some events welcome family participation! Adults who plan to participate with Girl Scouts regularly (more than once or twice) should be registered, council-approved adult volunteers. Non-members cannot substitute for approved, background-checked adult volunteers for adult supervision ratios.
•
Adults who join overnight trips, drive, or handle money require registration, background checks, and child abuse prevention training.
•
Check with your council for specific requirements related to adult friends, family, and guests. Some councils may require fingerprinting or additional background checks, depending on local regulations.
No Tolerance for Youth Violence and Bullying Youth violence and bullying are strictly prohibited in Girl Scouts. Youth violence includes the intentional use of physical force or power to harm or threaten others, with bullying as a specific form. Volunteers must recognize the signs, risk factors, and prevention strategies. Report any such behavior to council staff immediately. For guidance, explore CDC resources on youth violence and bullying prevention: •
CDC Youth Violence
•
CDC Bullying
•
CDC Youth Violence Prevention
Child Abuse and Mandated Reporter All states and U.S. territories have laws that identify persons who are required to report suspected child abuse to an appropriate agency. Therefore, if you witness or suspect child abuse or neglect, whether inside or outside of Girl Scouting, always notify the appropriate council staff immediately. Also follow your council’s guidelines for reporting your concerns to the proper agency within your state. Volunteers must take council-approved abuse prevention training that includes resources on reporting in their area. For more information, please review these available resources:
Adult Behavior Standards and Protocols
•
Child Welfare Information Gateway about Child Abuse and Neglect
•
How to Report Child Abuse and Neglect
No Tolerance for Physical or Sexual Abuse
•
CDC Child Abuse and Neglect Prevention
Abuse of any kind—physical, verbal, emotional, or sexual—is strictly prohibited. This includes sexual pressure, advances, improper touching, communication, or activity with Girl Scout members. Immediately report any such behavior, including incidents between youth, to council staff. Volunteers must complete the required training and follow council reporting guidelines. All incidents will prompt immediate action and law enforcement notification when required.
Safety Activity Checkpoints ©2009-2026 Girl Scouts of the USA. All Rights Reserved.
Adult-to-Child Communications Adults are not permitted to make one-to-one contact with youth members in person, by phone, email, social media, text, IM, chat, etc. There should always be at least one other supervising adult or parent involved when contacting youth members.
PAGE 11/190
Safety Standards Appropriate Behavior Adult volunteers must uphold the Girl Scout Promise and Law. When with Girl Scouts or representing the organization, refrain from: •
Consuming alcohol
•
Smoking or vaping
•
Using foul language
•
Breaking laws (e.g., texting while driving, trespassing)
Drugs and Alcohol Policy •
•
Volunteers and adults may not purchase, use, or be under the influence of alcohol, recreational drugs, or impairing medications during Girl Scout activities, while conducting Girl Scout business, or in the presence of youth members. Alcohol or substances that impair judgment must not be used near youth members or before Girl Scout activities.
Events with Alcohol •
Alcohol may be served to adults of legal age at events where no youth members are present, with approval of the council’s board of directors or chief executive officer.
•
Girl Scouts may attend events at venues where alcohol is sold (e.g., stadiums or theaters) if alcohol is consumed elsewhere, away from youth members.
Firearms and Weapons Policy Firearms and weapons are prohibited at all Girl Scout activities and on Girl Scout–owned or –leased properties, except in specific cases when they are: •
Carried by a law enforcement officer
•
Held by council-authorized property staff
•
Used by licensed wildlife control personnel
•
Controlled by a certified instructor during a council-approved Girl Scout program activity
Volunteers and adults must not carry firearms or ammunition in the presence of Girl Scouts unless they have special permission from the council for target sports activities.
Safety Activity Checkpoints ©2009-2026 Girl Scouts of the USA. All Rights Reserved.
All shooting sports equipment must be kept under lock when not in active use. Ammunition must be stored in a separate locked area.
Transporting Girl Scouts Parents/guardians are individually responsible for deciding how to transport their Girl Scouts to and from meetings.
Private Vehicles Privately Owned Vehicles Individual Transportation such as with regular Girl Scout meetings, is decided and arranged by parents/ guardians. Unless Girl Scouts coordinate transportation as a group for an activity or trip, individuals are responsible for arranging their own transportation for their own child. Group Transportation such as when Girl Scouts travel as a group for an activity or trip, is typically coordinated by Girl Scout leaders and involves arranging transportation for others. When arranging group transportation with multiple drivers, ensure the following: •
Drivers are registered, background-checked adult volunteers with a valid license, safe driving record, and registered/insured vehicle, who meet council policies for driving.
•
Drivers are at least 21 years old. Experience matters, make sure drivers have the ability and maturity for driving groups of children. Note that: Girl Scout youth members are not permitted to drive other members.
•
For single-vehicle travel, at least two unrelated, background-checked adult volunteers, one of them female, must be present.
•
For multi-car travel, the entire group must include at least two unrelated, background-checked adult volunteers, one of them female. Each car must have at least one adult, and the group should travel the same route during the same time period.
PAGE 12/190
Safety Standards Plan ahead for safe driving: •
Share the Checklist for Drivers (appendix) with all drivers in advance and implement its standards. Build in extra time for potential delays to reduce stress and urgency.
•
Taxis: Ensure the taxi is properly marked.
•
Ride-sharing services: o
•
Provide clear directions to each driver.
o
•
Avoid caravanning, where vehicles try to follow closely. Each driver should be encouraged to take breaks when needed and navigate independently.
o
•
For trips longer than a few hours, schedule a stop where all vehicles can regroup.
•
Arrange relief drivers for trips exceeding six hours.
•
Each vehicle should have a first aid kit and permission and health history forms for every passenger.
Borrowing or Renting Vehicles
Verify that the vehicle’s license plate, make, and driver match the information given in the app. Confirm the driver’s name and ask, “Who are you here to pick up?” Share driver info and destination with a trip contact using the app’s sharing feature.
Recreational Vehicles, Campers, and Trailers These vehicles can be used if the driver has the proper training and license. All passengers must wear seat belts while the vehicle is moving. Riding in a trailer or truck bed is not allowed.
Vans Designed for 15 Passengers Volunteers are discouraged from using 15-passenger vans due to safety concerns. School buses, minibuses, or minivans are preferred. If no other option exists, follow these guidelines before transporting Girl Scouts:
•
Drivers may rent cars or minivans in their own names without a council staff signature.
•
Ensure the vehicle is adequately insured; check with the driver’s insurance company.
•
Confirm who is responsible for any damage or loss to the vehicle.
•
Obtain prior council approval.
•
Use vans built in 2011 or later.
•
Use the vehicle only for Girl Scout purposes to avoid compromising coverage.
•
Ensure safety features including driver-assist technology are installed:
•
Review the rental agreement carefully to understand and follow its terms, including age restrictions (usually 25–70 years).
•
If your council has a specific rental process, follow it.
Taxis and Ride-Sharing Services (e.g., Uber, Lyft)
o o o o
Electronic stability control Tire pressure monitoring Side curtain airbags Center aisle
•
Confirm valid insurance with the auto insurance provider.
•
Follow all safety measures outlined in the Checklist for Drivers.
•
An adult must ride with Girl Scouts when multiple vehicles are used.
•
Do not load gear on the roof or place heavy items in the rear.
•
Wait for rides in safe locations, like taxi stands or away from traffic. Avoid hailing taxis; instead, call ahead or use apps.
•
Avoid overloading the van.
•
Drive with headlights on and stay in the right-hand lane when possible.
•
Avoid entering the vehicle if anything feels off. If you feel unsafe, end the ride and report it.
•
Inspect tires and check pressure before each trip.
•
Ensure the driver has the required license, potentially a commercial driver’s license, for the state(s) of operation.
•
Do not share details about your travel plans with drivers or other strangers.
•
Always wear seat belts and enter/exit on the curb side.
•
In foreign countries, consult local experts for safe taxi or ride-share practices.
Safety Activity Checkpoints ©2009-2026 Girl Scouts of the USA. All Rights Reserved.
Note: These rules do not apply to professionally operated commercial vans (e.g., airport shuttles), which are permitted.
PAGE 13/190
Safety Standards Commercial and Public Transportation Public transportation includes buses, trains, airlines, ferries, and similar options. In the U.S., these are regulated and generally safe. Encourage a girl-led approach by having members compare fares and schedules with adult guidance to make informed decisions.
Learn More:
When traveling internationally, assess the available transportation options in the host country. Evaluate safety and accessibility based on local conditions.
Physical Health
Chartered Vehicles Chartered vehicles, such as buses, are hired with a driver for exclusive group use. Volunteers cannot sign charter contracts, even if free. Contact your council for approval and an authorized signature. Chartered small aircraft trips require prior council and GSUSA approval for each flight. These trips are allowed only when safety standards for aircraft, equipment, and pilots are transparent and verifiable. Note: that flying in privately owned aircraft is never allowed. •
Before booking, confirm with your council that the trip is covered under the council’s general liability or non-owned aviation liability insurance.
•
Ensure the aviation company provides proof of at least $1 million aviation liability insurance and a $5 million umbrella policy.
•
Councils are strongly encouraged to consult their insurance broker or GSUSA Risk & Insurance for guidance on insurance and safety.
Health and Well-Being Now, more than ever, we have a responsibility to our members and each other to ensure the environment in Girl Scout settings is safe for everyone. The communities we serve expect that from us. Read GSUSA’s Child Abuse Prevention Policies and Procedures.
Safety Activity Checkpoints ©2009-2026 Girl Scouts of the USA. All Rights Reserved.
•
Check the CDC’s Lyme Disease web page.
•
Discover how to use insect repellant safely on the EPA’s page.
Infectious Disease Safety The health and safety of Girl Scout members is a top priority. Stay informed on communicable diseases by following CDC guidelines, local health directives, and practical prevention habits: •
Teach proper handwashing.
•
Encourage covering coughs and sneezes.
•
Avoid sharing water bottles, utensils, and other personal items.
•
Stay home when feeling sick.
Insect-Borne Disease Know about mosquitoes, ticks, and other biting pests in your area or travel destination. Discuss concerns with caregivers and share prevention measures. Recommend protective clothing, such as closed shoes, light-colored socks, long pants, and long sleeves. Vaccinations and Immunizations Questions about vaccination requirements and exemptions may arise regarding participation. Laws vary by state and primarily apply to school attendance. Obtain local and state guidance and follow school attendance requirements. Contact your Girl Scout council for guidance if you have questions about notifying other caregivers regarding a member’s non-immunization status.
Buddy System The buddy system is a foundational practice in Girl Scouting—because it works! Pair Girl Scouts of similar age as buddies during trips or activities. Each buddy is responsible for staying with their partner, watching for danger, offering help, or seeking assistance if needed. Encourage everyone to stay near the group so help is readily available if someone feels unwell or gets injured.
PAGE 14/190
Safety Standards Overnights Prepare Girl Scouts for overnights by involving them in planning so they know what to expect. Maintain these guidelines: • General sleeping guidelines: Each participant must have their own bed. Youth members sharing a bed require parent/guardian permission. o o
Adults and youth members do not share beds, though exceptions may apply for family members in some councils. Having an adult in the youth sleeping area is not mandatory, but if an adult female stays, at least two unrelated adult females must also be present.
• Family overnights: o
Family events allow members of the same family to sleep together in designated areas, as long as no non-family youth are sharing the space.
• Male volunteer sleeping arrangements: o o o
Male volunteers must have separate sleeping quarters and bathrooms. Men should not pass through youth sleeping areas to access their quarters or restrooms. In large events (e.g., museum or mall overnights), where separation isn’t feasible, male volunteers should not supervise Girl Scouts in sleeping areas. Adjust adult-to-youth ratios
These guidelines ensure a safe, inclusive, and respectful environment for all participants. For more detailed, situation-specific instructions, refer to the SACs for Backpacking, Camping, or Travel/Trips.
Equity, Inclusion, and Belonging Girl Scouts is committed to a culture of belonging, welcoming individuals of all abilities and backgrounds. When Girl Scouts feel they belong, they’re more likely to voice concerns, report hazards, and engage in safety practices. Here’s how you can support inclusion and safety:
Safety Activity Checkpoints ©2009-2026 Girl Scouts of the USA. All Rights Reserved.
• Communicate. Discuss accommodations with participants and caregivers to ensure safe participation. Use communication formats suited to families’ needs. • Stay flexible. Be open to evolving needs over time. • Plan ahead. For each activity, assess accessibility and accommodation options with vendors and venues, making sure to ask about options for all ages and body types. If they are unable to accommodate your group, choose a vendor with more inclusive equipment and facilities. • Provide reasonable accommodations so everyone can participate fully and safely. Adapt spaces, equipment, and plans as needed to include those with disabilities, all body types, and cultural or religious practices. • Be culturally aware. Members come from diverse backgrounds, faiths, and traditions, and interest in activities may vary. Communicate openly with Girl Scouts and caregivers so they can make informed choices. • Meet participants where they are. If your group has different levels of experience, teach to the level of the least experienced so that all can be safe and successful. • Keep an eye on aquatics. When planning water sport activities, avoid making assumptions about abilities, regardless of background. Ensure water safety by confirming that accommodations for every comfort and experience level are available. When that is not possible, clearly communicate water safety guidelines and preparations to help participants and caregivers make informed decisions about which activities are suitable for them. Municipal pools, YMCAs, and other sites offer swim lessons for those who wish to build confidence and skills in and on the water. • Consider costs. Be mindful of affordability—of the activity as well as any preparation or purchases—for families. Help by thrifting, borrowing, or renting, when possible. • Educate participants. Provide clear guidance on gear, clothing, and preparation. Explain what gear is provided by the vendor, what is shared by all members, and what must be brought by each individual. • Build trust. Foster open dialogue with families and participants. • Leverage resources. Use links if provided in the activity checkpoints, or reach out to organizations near you. By embracing inclusion, we create safer, more empowering experiences for all.
PAGE 15/190
Safety Standards Council approval types:
Planning for Adventures
• Required: You must get council approval before confirming your plans. Follow all council instructions.
Prior Council Approval
• Not Required: No approval needed. Just follow the activity’s checkpoints and any of your local council’s general expectations or training.
In the Activities at a Glance chart and in each activity’s Safety Activity Checkpoints, you’ll see whether council approval is required.
Progressive Experiences
Some activities need extra preparation, such as certified instructors, safety gear, or facility vetting. In these cases, council approval promotes early coordination and clear expectations.
Guide your group to choose activities that match their readiness, considering emotional, physical, and developmental stages. Start with simple tasks and gradually progress to more challenging ones as skills grow.
EXAMPLES OF PROGRESSIVE EXPERIENCES FOLLOW CHECKPOINTS FOR EACH ACTIVITY IF YOU R G I RL SCOU TS A RE I N TERESTED I N…
Start with…
Then try…
If they love that…
Then…
A pool party at a local municipal pool. (Lifeguards are provided!)
A canoe lesson on a lake. See if a GS camp near you has one.
Take a guided ocean kayak tour at a marine reserve.
Take SCUBA or sailing lessons, or a canoe trip down a river.
CLIMBING AND ADVENTURE
A low ropes and team-building day at a nearby camp.
Climbing and bouldering at an indoor gym.
Book a weekend at a retreat center featuring a high ropes course.
Zip line and canopy walk during a jungle trip in another country.
TARGET SPORTS
Slingshot target shooting at a local camp.
An archery lesson during your next campout.
Visit a BB/ air gun range or go hatchet throwing.
Take a knife-throwing lesson or take aim with a target shooting class.
TRAVEL
A field trip to a children’s museum, with a walk to a nearby café for lunch.
A getaway to a nearby city for a weekend—see if there’s a GS facility to stay in.
Take a train to another state for college visits and sightseeing fun.
Fly away to a WAGGGS World Centre; connect with sisters from around the globe.
AQUATICS
Safety Activity Checkpoints ©2009-2026 Girl Scouts of the USA. All Rights Reserved.
PAGE 16/190
Safety Standards Notice how the above examples have layered activities, especially as you read to the right. Many adventurous activities happen during campouts or travel, which is wonderful! However, remember that overnights also follow a progression. Keep the big picture in mind and avoid introducing too many new experiences all at once. Each activity section includes grade-level recommendations. These checkpoints serve as guidelines, not strict rules, though some activities follow industry standards. If your group feels ready for activities designed for older grades, or if local circumstances make an activity suitable for younger participants than the checkpoints list, consult your council. Our shared goal is to create safe, enjoyable, and empowering experiences for Girl Scouts.
Selecting a Qualified Vendor Businesses and organizations providing facilities, equipment, activities, or instruction play a key role in safety and experience quality. Follow these steps: • Use trusted partners. See if your council has a list of pre-approved activity partners, vendors, or locations. Whenever possible, start with one of these. • Verify qualifications. If there’s no suitable pre-approved activity partner: o o o
o
Verify that instructors are credible. (See Identifying Qualified Experts, below.) Review the related Safety Activity Checkpoints chapter. Confirm that the vendor’s safety protocols are aligned. Check for inclusiveness. When possible, choose vendors that demonstrate inclusive practices and can accommodate the needs of all participants. Review insurance coverage. Vendors should carry general liability insurance (typically at least $1 million) and auto liability coverage if vehicles are used. Vendors should be willing to discuss and confirm liability insurance or provide a certificate of insurance (COI) if requested.
Safety Activity Checkpoints ©2009-2026 Girl Scouts of the USA. All Rights Reserved.
• Handle contracts carefully. Follow your council’s guidelines for written contracts. This may include verifying insurance coverage and submitting contracts for council signature before they are finalized.
Identifying Qualified Experts “Experts” refers to any adult with certification, training, and/or expertise in an activity. This includes instructors, facilitators, and individuals holding certifications, such as lifeguards. Examples include: •
A horseback riding instructor with 15 years of documented experience teaching youth and leading trail rides
•
A kayak guide who holds certification for Level 2 Essentials of Kayak Touring Instructor from the American Canoe Association
•
A lifeguard with current American Red Cross lifeguard training certification
•
A team-building facilitator who leads Girl Scouts in the council’s weekend low ropes program activities
Experts gain experience in various ways, but the key is hands-on knowledge and a proven ability to guide others safely and successfully. Their expertise ensures you’re in capable hands. For each activity, we list certifications from reputable industry organizations when available. These certifying bodies provide added protections, including structured curricula, rescue training, and insurance coverage, benefiting Girl Scout members. If certified instructors are not available in your area, consider other qualified community experts. To assess their suitability, ask about: • Training and certification. How does their training compare to the certification in the checkpoints? Contact the certifying body if needed. • Experience. Have they facilitated this activity in similar conditions? For how long? • Rescue procedures. What are their qualifications and experience in rescue situations?
PAGE 17/190
Safety Standards • Group management. Do they have experience managing groups like yours? • Safety standards. Do they follow instructor–participant ratios, equipment guidelines, and safety protocols? If not, will they comply with Girl Scout standards? • Liability insurance. Do they have the minimum $1 million liability insurance to cover their operations? What coverage do they carry? See Selecting a Qualified Vendor.
By reviewing these factors, you can confidently determine if an instructor is the right fit for your Girl Scout activity. Contact your council office if any uncertainty remains.
• Outdoor essentials. Always remind participants of these necessities for outdoor adventures: o
o o
• Safety gear and equipment. Ensure you have done the following: o o
Clothing, Equipment, and Gear When specific items, such as non-cotton clothing or long sleeves, are recommended for safety, find them listed in the activity’s Safety Activity Checkpoints (SACs). For general activities, use common sense when choosing what to wear or bring to an activity. These everyday items are not included in the Activity SACs. Check the SACs to find out what safety gear is typically required for your activity. Discuss required equipment with your expert/instructor or the rental vendor to confirm that all necessary safety gear will be available. Inform families in advance about any items they must provide. Helmets and life jackets are critical safety gear for many activities. Let’s take a closer look at key considerations: • Clothing and footwear. Tell families early what participants should wear or bring: o o o o
Check the SACs for required safety clothing or footwear, such as non-cotton layers, long pants, or hiking boots. If clothing or footwear is not specified, use common sense. Secure loose clothing and jewelry that could become entangled or caught. Hair that could get caught should be tied back, braided, or tucked safely into a head covering.
Safety Activity Checkpoints ©2009-2026 Girl Scouts of the USA. All Rights Reserved.
Use sun-protective clothing, hats, sunscreen (SPF 30+ with UVA/UVB protection), and lip balm with SPF. Reapply often and use waterproof products in wet conditions. Always prioritize nutrition and hydration. Apply insect repellent and/or wear protective clothing, when needed.
o
Review the SACs for required safety gear specific to your activity. Discuss equipment needs with your expert, instructor, or rental vendor to ensure everything is available. Inform families in advance about any items they need to provide.
Helmets and Life Jackets Since helmets and life jackets are common essentials for many activities, let’s take a closer look at key considerations. Helmets Helmets are required for activities that could involve falls or impacts. Examples include cycling, skateboarding, skiing, and sledding. Helmets also provide protection from falling objects during activities like rock climbing or spelunking. Consult your expert or instructor to determine the appropriate type of helmet for your activity and whether helmets are provided. Most adventure venues supply proper safety gear, but for activities like biking or skateboarding, participants must bring their own helmets. Inform caregivers early and provide the following guidance: • Helmet type. Specify the required helmet type and refer to the Consumer Product Safety Commission for a chart on helmet standards. • Proper fit. A well-fitting helmet is essential. Use the Seattle Children’s video on correct fit. It should cover most of the forehead and be snug enough not to slip or shift position. All clips must be fastened.
PAGE 18/190
Safety Standards • Everyone helmets up! All participants, including adults, must wear helmets if required in the Safety Activity Checkpoints.
•
o
• Helmet replacement. Follow manufacturer guidelines for replacement. Factors such as crashes, wear, age, and exposure to elements can affect helmet effectiveness.
Life Jackets U.S. Coast Guard (USCG)–approved life jackets must be worn during many aquatic activities. They should be worn on larger vessels during dangerous conditions or whenever directed by crew. They can also be used to provide buoyancy for non-swimmers during snorkeling or swimming. When the SACs list life jackets in the Safety Gear section, they are required for that activity. Note that life jackets are one type of personal flotation device (PFD). Throwable PFDs are cushions or ring buoys that can be thrown onto the water. A throwable PFD should never replace the proper use of a life jacket. Confirm the availability of life jackets when making boating or instructional reservations. Most small craft rentals include life jackets, but in rare cases, you may need to provide your own. Every state has a life jacket loaner program. When selecting a life jacket, consider the following: • Use only USCG-approved PFDs. The label will clearly show if it is approved. • Choose the right life jacket for your activity: o o o
Most entry-level recreational users will use Type II or III life jackets. They are comfortable and easy to fit, and have sufficient buoyancy for most situations. Inflatable PFDs are not meant for those under 16. Ask your expert/instructor if you’re unsure.
• Choose the right size: o •
Check the label. It should say whether it’s for an adult, youth, child, or infant.
Fit the life jacket properly:
o o
Put the life jacket on, inspecting it for wear, rips, broken buckles, straps, or zippers. Do not use a life jacket in poor condition. Zip all zippers. Buckle and tighten all straps. If the straps or zippers can’t close, it’s too small. If there is a crotch strap, use it. Lift the life jacket at the shoulders. If it rides up to the earlobes, it’s too big. Tighten the straps, if possible, or find a smaller size.
Preparing for the Unexpected First Aid Be Prepared with First Aid/CPR/AED training •
Girl Scouts recommends having a first aider at all gatherings.
•
Some activities require a first aider, as specified in the activity chapter.
•
A first aider is an adult with current certification, as outlined below.
What Type of First Aider Is Needed? For troop or group meetings and most activities, a general first aider—with standard First Aid/CPR/AED training—is sufficient. For large groups or remote activities, the first aider should have additional, current training and/or experience. *Other Qualified First Aiders Healthcare and emergency professionals can serve as first aiders if their training or licensure is current and the care required is within their scope of practice and professional standards of care. For example, a physician, physician assistant, nurse practitioner, registered nurse, licensed practical nurse, paramedic, military medic, wilderness first aider or responder, or emergency medical technician may be options for small or large groups.
Check the label for the appropriate weight or chest size. Check condition: o o
There should be no rips, tears, or broken buckles. Zippers should stay zipped.
Safety Activity Checkpoints ©2009-2026 Girl Scouts of the USA. All Rights Reserved.
PAGE 19/190
Safety Standards SETTING
FIRST AIDER TRAINING OR CERTIFICATION
Groups of up to 200 people AND access to EMS is less than 30 minutes away
Standard First Aid/CPR/AED training. Adult and Pediatric training is recommended. Training should be appropriate for the age of your group.
Access to EMS is more than 30 minutes away
Wilderness First Responder (recommended) or Wilderness First Aider. These certifications include remote assessment and evacuation techniques to use when EMS is not readily available.
Groups of 200 or more people
An individual with advanced first aid training, certification, or experience* should be present for every 200 participants, with needs varying by circumstances.
First Aid Training Providers Girl Scouts accepts standard in-person or blended (combining online instruction with in-person skills verification) certification from a recognized organization such as: •
American Red Cross
•
EMP America
•
American Heart Association
•
National Outdoor Leadership School (NOLS)
•
Health Safety Institute (formerly ASHI and MEDIC)
•
Other sponsoring organizations approved by your council
•
National Safety Council
FIRST AID/CPR/AED TRAINING TOPICS SHOULD INCLUDE: Scene safety and personal protective equipment
Choking management
Primary assessment (ABCs)
Burn management
Cardiopulmonary resuscitation (CPR)
Seizure management
Automated external defibrillator (AED) use
Musculoskeletal injuries
Emergency response procedures
Poisoning management
Bleeding control
Bite and sting management
Wound care
Heat emergencies (hypo- and hyperthermia)
Shock management
Breathing emergencies (asthma) Allergy management (anaphylaxis)
Safety Activity Checkpoints ©2009-2026 Girl Scouts of the USA. All Rights Reserved.
PAGE 20/190
Safety Standards Mental Health First Aid Training Learn about mental health. Adolescence is the peak age for the onset of mental illness, yet young people are less likely to seek or receive treatment. Adults play a key role in how quickly help is sought. A youth-focused Mental Health First Aid class can help you recognize signs of mental health or substance use challenges and better understand the unique struggles teens face in maintaining mental wellness. First Aid Kits Ensure that a first aid kit with basic supplies is available at your group meeting place and accompanies Girl Scout members on any activity, including during transportation to and from the activity. Purchase a commercial first aid kit or let your group assemble one themselves. There’s a First Aid badge for every program grade level except Daisy, so get your group involved! The American Red Cross offers a list of suggested items to include. Tip: Keep key documents—emergency contacts, roster, health forms, and a blank accident/incident report—plus a pen—in your first aid kit so they’re always handy when providing care.
health examination forms should be shared on a need-to-know basis only. Follow your council’s record retention policies. Check for: • Validity: Participants often need a health exam dated no more than 12 months before the last day of the camp or trip. • Specific requirements: Confirm details with the event organizer. • Signatures: Ensure a licensed medical provider (e.g., physician, nurse practitioner, physician’s assistant, or registered nurse) signs the form.
Medications •
Obtain written parent/guardian permission before dispensing over-the-counter medications. Authorization and dosage for common remedies can be provided on health history or permission forms.
•
Log all medications given (name, date, time, dosage); the first aider handles distribution.
•
Ensure medications are in original packaging with prescription instructions.
•
Secure medications using a luggage lock or similar method, under the first aider’s control. Exception: Emergency medications (e.g., epinephrine injectors, asthma inhalers, diabetes meds) may be carried by the Girl Scout with written permission from a parent/guardian or physician.
Health Forms and Medications
Activity Accident Insurance
Health Forms Collect a health history form for each participant, completed within the last year, that includes information about medical conditions, allergies, medications, and any restricted over-the-counter medications. Follow council guidelines, as local regulations vary.
Girl Scouts provides Activity Accident Insurance underwritten by Mutual of Omaha. Activity Accident Insurance is automatic upon membership registration and applies to all adult and youth members who may become injured during a Girl Scout–approved and –supervised activity. It works like supplemetal medical/health coverage and is intended to help with out-of-pocket medical expenses that may not be covered by personal insurance.
Key practices: •
Keep health information confidential; only the leader and first aider should access it.
•
Keep forms readily available for emergencies and responders.
Health examination forms may also be required for sleepaway camps, high adventure treks, or international travel. As with health history forms,
Safety Activity Checkpoints ©2009-2026 Girl Scouts of the USA. All Rights Reserved.
Activity Accident Insurance extends to non-members who are invited to participate in a Girl Scout–approved and –supervised activity, whether it be an adult volunteer for the day or a friend of a Girl Scout who is coming along to try out Girl Scouting.
PAGE 21/190
Safety Standards Activity Accident coverage applies to day events, overnight trips (including camp), and international travel. A summary of these coverage types for each category can be found in Mutual of Omaha’s Comparison Chart.
•
Contact your council and follow the Activity Accident claim reporting process, which includes assisting the family with completing and submitting the electronic Claim Form to your council.
•
Council staff will sign and submit the Claim Form to Mutual of Omaha.
Responding to Emergencies It’s essential to follow council protocols for serious incidents. Being prepared helps you respond effectively.
Serious Accidents and Medical Emergencies
During planning:
At the scene:
•
Learn your council’s steps for accidents and incidents. Share the steps and emergency contact info with other adults in your group.
•
Attend to the injured or ill person(s). The first aider should provide care within their training and follow emergency personnel instructions.
•
Organize health history records, permission forms (with permission to treat), and caregivers’ contact information.
•
Call 911 or other emergency services. Provide the victim’s health history, permission form, and incident details.
•
Know the emergency action plan (EAP), whether it’s developed by you or the site you’re using. See guidelines for EAPs.
•
Ask a responsible adult to move non-injured individuals away from the scene and calmly supervise them.
•
One adult should accompany the victim to the hospital while others stay with the group. It’s okay to suspend supervision ratios in emergencies. Plan to get the others settled or back home.
•
Contact your council and follow their instructions. They will arrange for help and contact parents/guardians as needed.
•
Complete a thorough Accident/Incident Report and collect key information:
•
Assign a first aider and check first aid kit contents.
•
Keep a copy of your council’s accident/incident report form with you.
•
Understand Activity Accident Insurance.
Minor Accidents and Illness Follow these guidelines for accidents and illnesses that don’t threaten life, limb, or ongoing health: •
Have the first aider care for the victim according to their training.
•
Notify a parent/guardian. Arrange for them to pick up the youth if they are not able to continue with the activity or if they’re likely to be contagious.
•
Log any medications, treatment, etc., as described in Health Forms and Medications, above.
•
Complete an Accident/Incident Report form and provide to your council if necessary.
•
o o o o
After the incident: •
Offer the family information on filing an Activity Accident claim with Mutual of Omaha for related out-of-pocket medical expenses that may be covered.
•
Contact your council and follow the Activity Accident claim reporting process, which includes assisting the family with completing and submitting the electronic Claim Form to your council.
•
Council staff will sign and submit the Claim Form to Mutual of Omaha.
Offer the family information on filing an Activity Accident claim with Mutual of Omaha for related out-of-pocket medical expenses that may be covered.
Safety Activity Checkpoints ©2009-2026 Girl Scouts of the USA. All Rights Reserved.
Exact time and location of the incident Incident description Names and contact info of those involved Names and contact info of witnesses
PAGE 22/190
Safety Standards DO NOT speak with the media. The council representative will handle that. DO NOT share accident information with anyone but the police, your council, and insurance representatives or legal counsel if necessary.
IMPORTANT In the event of a fatality or other serious accident, notify police immediately. A responsible adult must remain at the scene until they arrive; follow authorities’ instructions. If there is a fatality, do not disturb the victim or surroundings.
Emergency Action Plans An Emergency Action Plan (EAP) or Safety Management Plan (SMP) helps you anticipate potential emergencies, outline necessary steps and resources, and communicate the plan to others. Many facilities, such as public pools and overnight camps, will have established EAPs. However, when leading an activity or trip, the responsibility for creating and implementing the plan may fall to you. Start an EAP by documenting answers to the three safety management questions discussed earlier: • Risk. What dangers or risks are associated with this activity? • Prevention. What can we do to prevent those dangers? • Response. What will we do if something happens, despite our plans?
Then follow these steps: • Gather key information. Collect essential details that will be helpful in a crisis, such as: o o o o o
Contact information for emergency services Address and phone number of the activity location Council emergency contact Participant roster with parent/guardian info Any other relevant data
• Think through possible scenarios. Consider emergencies that could occur during your outing. Start by identifying the types of emergencies that might happen and assess which ones are most relevant to your activity and location. • Learn from common emergencies. While every activity and setting will be unique, using common emergency scenarios as examples can help guide your thinking and preparation:
Safety Activity Checkpoints ©2009-2026 Girl Scouts of the USA. All Rights Reserved.
PAGE 23/190
Safety Standards TYPE OF EMERGENCY
PREVENTION EXAMPLES
RESPONSE EXAMPLES
Medical emergency
Take care of yourself; stay hydrated; check in on each other.
First aider and kit handy; cell phone to call EMS if needed.
Injury
Follow instructor directions; use safety gear.
First aider and kit handy; cell phone to call EMS if needed.
Weather-related crisis
Monitor forecasts; be aware of surroundings.
Be ready to leave the area; know the lightning safety position.
Fire—structure or wildfire
Follow safe practices for cooking and campfires; monitor for alerts when in the backcountry; hold fire drill.
Use fire suppression tools, such as extinguishers or blankets; follow evacuation routes.
Missing or lost person
Maintain the buddy system; do regular head counts.
Participants know to stay put in the wilderness and wait for help.
Active shooter or other threat
Be aware of surroundings and other people.
Adults follow FBI’s “Run, Hide, Fight” or similar active shooter response training.
• Name roles and responsibilities. List predetermined emergency role assignments showing who does what in the event of an emergency. For example, the leader stays with the group while the co-leader calls for help and coordinates the arrival of emergency services. Agree on this ahead of time to help you be calm and prepared if an incident occurs. • Make an exit strategy. Be aware of all emergency exits and/or evacuation plans. Discuss and rehearse with participants, as appropriate for the setting. • Set a meeting place. Choose a designated spot in case the group or an individual becomes separated from the group. • Decide on a communication method. If camping or backpacking, consider a whistle or air horn. In town, a group text might work best. Make sure each person knows what to do if alerted. • Share your plan. Think about who needs to know your EAP and share it with them. Distribute the written plan to other adults, including someone who is not on the outing. Verbally remind group members of rules to follow, like the buddy system, and what to do in unexpected situations.
Safety Activity Checkpoints ©2009-2026 Girl Scouts of the USA. All Rights Reserved.
PAGE 24/190
Safety Activity Checkpoints (SACs) AC TI VI TI ES AT A GLA NCE For ever y acti v i t y, always follow t he adult-to-yout h ratios and al l g u idel i nes listed in t he Sa fet y Sta nda rds.
ACTIVITY
DAISY
BROWNIE
JUNIOR
CADETTE
SENIOR
AMBASSADOR
*Some acti vi t y o pt i o ns are l im i ted for t his pro g ram g rade level. See t he SACs fo r t he activity.
Is Prior Council Approval Required?
Aerial Fitness
D
B
J
C
S
A
No
Yes
Amusement and Water Parks
*
*
*
C
S
A
Yes if aquatic
Yes if aquatic
Animal Interaction
*
B
J
C
S
A
No
No
*
J
C
S
A
Yes
Yes
B
J
C
S
A
No
No
C
S
A
Yes
Yes
Archery Arts and Crafts See Miscellaneous Activities
D
Ax, Knife, and Hatchet-Throwing
Is Activity Training, Certification, or Verified Experience Required?
Backpacking
*
*
J
C
S
A
Yes
Yes
Bicycling
D
B
J
C
S
A
No
No
Camping
D
B
J
C
S
A
Yes
Yes
Canoeing
*
*
*
C
S
A
Yes
Yes
*
J
C
S
A
No
Yes
Challenge Courses (high ropes) Challenge Courses (low ropes)
D
B
J
C
S
A
No
Yes
Climbing, Bouldering, and Rappelling (bouldering and climbing designed with small children in mind)
D
B
J
C
S
A
No
Yes
Safety Activity Checkpoints ©2009-2026 Girl Scouts of the USA. All Rights Reserved.
PAGE 25/190
Safety Activity Checkpoints (SACs)
ACTIVITY
DAISY
BROWNIE
JUNIOR
CADETTE
SENIOR
AMBASSADOR
AC TI V I TI ES AT A GLA NCE (CON TI N UED) Is Prior Council Approval Required?
Climbing, Bouldering, and Rappelling (other types)
*
*
J
C
S
A
No
Yes
Community Clean-Ups
*
*
*
C
S
A
No
No
Cookie and Product Programs
D
B
J
C
S
A
No
No
Cross-Country Skiing
*
B
J
C
S
A
No
No
Digital Technology and Virtual Meetings
D
B
J
C
S
A
No
No
Downhill Skiing and Snowboarding
*
B
J
C
S
A
No
Yes
B
J
C
S
A
No
Yes
Fencing
Is Activity Training, Certification, or Verified Experience Required?
Fishing and Ice Fishing
D
B
J
C
S
A
No
Yes
Geocaching
*
B
J
C
S
A
No
No
J
C
S
A
No
No
Go-Karting Hayrides
D
B
J
C
S
A
No
No
Hiking
D
B
J
C
S
A
No
No
Horseback Riding
*
B
J
C
S
A
Yes
Yes
Indoor Skydiving
D
B
J
C
S
A
No
No
Indoor Trampolining
*
B
J
C
S
A
No
No
Inflatable Activities
*
*
J
C
S
A
Yes if aquatic
Yes if aquatic
*
*
C
S
A
Yes
Yes
Kayaking
Safety Activity Checkpoints ©2009-2026 Girl Scouts of the USA. All Rights Reserved.
PAGE 26/190
Safety Activity Checkpoints (SACs)
ACTIVITY
DAISY
BROWNIE
JUNIOR
CADETTE
SENIOR
AMBASSADOR
AC TI V I TI ES AT A GLA NCE (CON TI N UED) Is Prior Council Approval Required?
Land Sports See Miscellaneous Activities
D
B
J
C
S
A
No
No
Laser Tag See Miscellaneous Activities
D
B
J
C
S
A
No
No
Model Rocketry
*
*
J
C
S
A
No
No
Offshore Passenger Vessels
D
B
J
C
S
A
No
No
J
C
S
A
No
No
B
J
C
S
A
No
Yes
*
*
C
S
A
Yes
Yes
Orienteering Outdoor Cooking and Fire-Building
D
Packrafting
Is Activity Training, Certification, or Verified Experience Required?
Parades and Other Large Gatherings
D
B
J
C
S
A
No
No
Pocket Knife and Jackknife Safety
*
B
J
C
S
A
No
No
J
C
S
A
No
Yes
*
J
C
S
A
Yes
Yes
*
J
C
S
A
Yes
Yes
*
S
A
Yes
Yes
Recreational Tree Climbing Rowboats/Rowing
*
Sailing SCUBA Diving Shooting Sports/ Firearms (includes target paintball and BB/air guns)
*
*
*
S
A
Yes
Yes
Skating
D
B
J
C
S
A
No
No
Sledding, Snow Tubing, and Tobogganing
D
B
J
C
S
A
No
No
Safety Activity Checkpoints ©2009-2026 Girl Scouts of the USA. All Rights Reserved.
PAGE 27/190
Safety Activity Checkpoints (SACs)
CADETTE
SENIOR
AMBASSADOR
D
JUNIOR
Slingshots
BROWNIE
ACTIVITY
DAISY
AC TI V I TI ES AT A GLA NCE (CON TI N UED) Is Prior Council Approval Required?
B
J
C
S
A
No
Yes
J
C
S
A
Yes
Yes
Snorkeling
Is Activity Training, Certification, or Verified Experience Required?
Snowshoeing
D
B
J
C
S
A
No
No
Spelunking/Caving
*
*
J
C
S
A
No
No
STEM and STEAM See Miscellaneous Activities
D
B
J
C
S
A
No
No
*
C
S
A
Yes
Yes
*
J
C
S
A
Yes
Yes
B
J
C
S
A
Yes
Yes
J
C
S
A
No
No
Use varies by type of tool. See Tools section.
No
No
Stand-Up Paddleboarding Surfing Swimming
D
Tethered Balloon Rides Tools—Hand and Power
J
C
S
A
Yes if overnight
Yes if overnight
Tubing (Floating)
J
C
S
A
Yes
Yes
Waterskiing, Wakeboarding, and Towed Tubing
J
C
S
A
Yes
Yes
*
C
S
A
Yes
Yes
J
C
S
A
Yes
Yes
J
C
S
A
Yes
Yes
Travel/Trips
D
B
*
Whitewater Rafting Windsurfing Zip Lining
*
*
Safety Activity Checkpoints ©2009-2026 Girl Scouts of the USA. All Rights Reserved.
PAGE 28/190
Safety Activity Checkpoints (SACs)
JUNIOR
CADETTE
SENIOR
AMBASSADOR
Aerial Fitness
BROWNIE
ACTIVITY
DAISY
Aerial Fitness Is Prior Council Approval Required?
D
B
J
C
S
A
No
Give silks, hoops, or trapeze a try! Make it your adventure: relax, strengthen, or challenge yourself! Aerial fitness and yoga support physical and mental health with a fun fusion of stretching, cardio, strength training, and concentration.
General Checkpoints
Is Activity Training, Certification, or Verified Experience Required?
Yes
■
Make plans for access. Aerial fitness is for all body types and abilities. If ability is a concern for group members or their families, make sure the vendor you’re considering can accommodate their needs. Check out Aerial Yoga for Wheelchair Users for ideas and inspiration.
■
Select a safe site. Ensure that: Facilitators teach participants about:
•
Refer to the Safety Standards for general standards about supervision,transportation, first aid, and emergency plans, as well as inclusion and accessibility considerations.
o o o
Readiness instructions and commands. Muscle warmup and stretching. Objectives, safety expectations, and hazards of each element to be used.
•
Elements are secured or inaccessible when not in use.
•
Harnesses are worn whenever participants use elements more than 6 feet off the floor/ground.
Follow these basic reminders for each phase of planning. Check off items as you complete them, making sure to consider each sub-bullet.
•
Harnesses and nets are used for trapeze.
•
Location and equipment are clean, sanitized, and free of debris and odors.
Decision-Making Phase
•
Equipment is cared for and stored according to manufacturer specifications.
•
Broken or damaged equipment is removed immediately.
•
Safety mats/nets are clean and placed appropriately under participants.
•
Rigging is well maintained and inspected daily by a certified employee.
•
The business is inspected regularly according to the local health department or other authority.
•
Ventilation and temperature control are sufficient to keep participants warmed up but not overheated.
Activity-Specific Checkpoints for Aerial Fitness
Identify an expert. Aerial fitness requires special equipment and facilitator training. Move forward only if your proposed vendor meets the general standards listed in the Safety Standards plus: • Has training and experience teaching/supervising youth on each element available or substantial documented experience.
■
•
Follows Circus Arts Safety Network guidelines.
Safety Activity Checkpoints ©2009-2026 Girl Scouts of the USA. All Rights Reserved.
PAGE 29/190
Safety Activity Checkpoints (SACs) ■
Make it girl-led. Guide the group in deciding what elements they’ll try. Possibilities might include hoops, silks, trapeze, and more. Remind them that they may always opt out of an activity if they wish.
■
Arrange for first aid. Ensure a trained first aider and a first aid kit are handy.
■
Consider a meeting with the vendor/expert. Girl Scouts and their families may benefit from a “what to expect” virtual meeting in advance.
■
Remind participants what to wear. Clothing that is comfortable, snug-fitting, and covers the knees
• •
Appropriate footwear, as required by the vendor/expert
•
No dangling jewelry that could become entangled in equipment
Day of the Activity ■
Follow all instructor commands.
■
Secure any long hair, clothing, or jewelry that could be caught in equipment.
■
Be aware of others nearby.
Safety Activity Checkpoints ©2009-2026 Girl Scouts of the USA. All Rights Reserved.
PAGE 30/190
Safety Activity Checkpoints (SACs) BROWNIE
JUNIOR
CADETTE
SENIOR
Amusement and Water Parks
*
*
*
C
S
AMBASSADOR
ACTIVITY
DAISY
Amusement and Water Parks Is Prior Council Approval Required?
Is Activity Training, Certification, or Verified Experience Required?
A
Yes if aquatic
Yes if aquatic
*Some activities are limited; see below.
Ride, laugh, repeat! Amusement parks are all about big thrills, endless laughs, and memories that last long after the ride ends. Whether you’re racing to the coasters or splashing down waterslides, the best rule is to have fun! This guidance applies to: •
Large theme or adventure parks
•
Small amusement-type parks
•
Free-standing rides
•
Carnivals or county fairs
•
Waterparks or facilities (more than a swimming pool)
•
Parks with go-kart activities
Decision-Making Phase ■
• •
Check with your state’s regulatory agency—most have one that covers such parks—for safety records and standards compliance.
•
Water parks must follow any Safety Activity Checkpoints (SACs) for the aquatic activities they offer, such as swimming. Review those chapters and ensure that lifeguards and/or instructors are on duty.
■
Consider available activities. Girl Scouts of all ages can enjoy amusement and water parks, but some activities may be off-limits for younger members. Review Swimming and Go-Karting SACs, in particular. Hold off until the group is old enough to do the activities they’re most interested in. Some attractions, such as bungee jumping, are not permitted for any age. Review the list in the Safety Standards.
■
Make plans for access. Find out about available accommodations to ensure everyone can participate. Check age, size, and weight restrictions for rides and create a plan that includes all.
General Checkpoints Refer to the Safety Standards for general standards about supervision,transportation, first aid, and emergency plans, as well as inclusion and accessibility considerations.
Activity-Specific Checkpoints for Amusement and Water Parks
Select a safe site. Look for well-regulated, established parks or long-standing host organizations.
Follow these basic reminders for each phase of planning. Check off items as you complete them, making sure to consider each sub-bullet.
Safety Activity Checkpoints ©2009-2026 Girl Scouts of the USA. All Rights Reserved.
PAGE 31/190
Safety Activity Checkpoints (SACs) Planning and Preparation Phase Make it girl-led. Guide the group in deciding on: • A strategy for visiting features or rides that interest them—incorporate what you discovered about access and restrictions into decisions
■
•
Small groups and buddies, and how you’ll move around the park together
•
Meals and snacks
■
Arrange for first aid. In some parks, first aid support is easy to access. If not, bring a trained first aider and carry a first aid kit. Each person can carry moleskin or a few bandages to take care of blisters.
Day of the Activity ■
• •
Follow posted and announced rules.
•
Keep hands inside rides.
•
Keep seat belts and bars in place.
•
Do not stand during rides.
•
Stay with your buddy or group.
•
Discuss what to do if approached by a stranger.
■
Point out landmarks. Identify restrooms, water bottle filling sites, first aid stations, and where you will meet if someone gets separated from the group. Identify where to go for help.
■
Check ride restrictions on size and age.
■
Evaluate conditions. If a ride looks questionable or an operator does not appear to be mindful of safety, don’t allow your Girl Scouts to ride. Report your concern to leadership.
Remind participants what to wear. • Clothing that is comfortable and offers sun protection, layered to adjust throughout the day
■
•
Closed-toed, comfortable footwear
•
No dangling items that could become entangled on rides
•
Hair tied back, braided, or tucked safely into a head covering if it is long enough to get caught in equipment
Safety Activity Checkpoints ©2009-2026 Girl Scouts of the USA. All Rights Reserved.
Review basics with participants. Secure hair, clothing, or jewelry that could be caught in equipment.
PAGE 32/190
Safety Activity Checkpoints (SACs)
BROWNIE
JUNIOR
CADETTE
SENIOR
Animal Interactions
*
B
J
C
S
AMBASSADOR
ACTIVITY
DAISY
Animal Interactions Is Prior Council Approval Required?
Is Activity Training, Certification, or Verified Experience Required?
A
No
No
* Children under age five must stay away from certain animals; see below.
Visit farms, ethical wildlife programs, or rescues to learn about animals in a responsible way. Whether feeding goats, observing wildlife in their natural habitat, or meeting rehabilitated animals, these experiences offer a chance to spend time with animals, learn about their needs, and keep them—and yourselves—safe. This guidance applies to: • Animal tourism and interaction • Farm animals and home pets • Wild animals • Rescue, shelter, and therapy animals
General Checkpoints Refer to the Safety Standards for general standards about supervision,transportation, first aid, and emergency plans, as well as inclusion and accessibility considerations.
Activity-Specific Checkpoints for Animal Interactions Follow these basic reminders for each phase of planning. Check off items as you complete them, making sure to consider each sub-bullet.
Safety Activity Checkpoints ©2009-2026 Girl Scouts of the USA. All Rights Reserved.
Note: When planning your trip, be wary of places that claim to be sanctuaries, especially those overseas. They often operate for profit and are likely to exploit animals. Wildlife tourism sites, including those that offer elephant rides, the opportunity to hold newborn cubs, or the chance to pet tigers, are also potentially exploitive and dangerous. Investigate these beforehand at the Global Federation of Animal Sanctuaries. Also avoid interacting with privately owned animals that aren’t part of a business or organization. Unofficial operators may not have adequate insurance or procedures. Find additional standards for specific interactions following this section. Decision-Making Phase Select a site that is safe for your group. Look for well-regulated, established parks, shelters, or petting zoos that have: • Handwashing stations
■
•
Orientation or training for visitors
•
Sufficient staff to protect visitors and animals
•
Limits on animal visits to avoid overwhelm
•
A clean facility
•
Food stations for visitors that are separate from animal enclosures
PAGE 33/190
Safety Activity Checkpoints (SACs) ■
Select a site that is safe for the animals, too. This is especially critical in tourism. Look for places that:
•
DO keep animals healthy and cared for with food, clean water, and a sheltered place to rest
•
DO take in animals they can humanely handle
•
DO operate in the best interest of the animals, rather than for profit
•
DON’T have animals that sway or pace in their enclosures—these behaviors can be signs of stress
•
DON’T keep exotic or wild animals except while they recover, unless they’re unable to be returned to the wild
•
DON’T engage in the commercial trade of animals or animal parts
•
DON’T breed animals and have measures in place to prevent breeding unless the animals are part of an authorized release program
•
DON’T use animals for entertainment or force animals to perform acts such as rides, shows, or tricks
•
DON’T drug animals to make them “safe” for tourists to pet
•
DON’T allow venomous animals to be handled
■
■
■
Assess your group. While Girl Scouts of all ages can interact with animals, they need to be mature enough to follow rules and exercise self-control. Keep small children away from certain animals. The Centers for Disease Control warns that children under age five should not interact with reptiles, amphibians, rodents, baby chicks or ducklings, or ferrets, and should not pet zoo animals. Make plans for access. Find out about accommodations available at the site to ensure everyone can participate.
Safety Activity Checkpoints ©2009-2026 Girl Scouts of the USA. All Rights Reserved.
Planning and Preparation Phase ■
Make it girl-led. Guide the group in creating rules for behavior during the visit, guided by these checkpoints and the site’s rules. See “Day of the Activity,” below, for suggestions.
■
Arrange for first aid. Bring a trained first aider and a first aid kit.
• •
■
Be prepared to thoroughly clean and bandage any bites or scratches Remind participants what to wear. Ask the site for recommendations.
Day of the Activity ■
•
Review basics with participants. Do not pet or otherwise disturb an animal that is sleeping or eating.
•
Stay away from an animal’s food, water, and manure, unless trained to handle this type of contact.
•
Do not tease or abuse an animal.
•
Find out what warning signs—such as hissing or growling—to watch for.
•
Never pet an unfamiliar dog, cat, or other animal. If an animal is with its owner, ask before petting.
•
Be cautious interacting with young animals within view of their mother.
•
Do not run when approached by an unfamiliar dog. Running can make the dog anxious or aggressive. Stay calm. Slowly back away, avoiding sudden movements and direct eye contact.
•
Wash hands after touching animals. Sanitize footwear if directed.
PAGE 34/190
Safety Activity Checkpoints (SACs) Specific Interactions Keep these considerations in mind for the following types of animal interactions. Drive-Through Zoos and Parks •
Drive vehicles with secure roofs and doors/windows that fully close.
•
Keep windows rolled up.
•
Stay in the vehicle.
Farm Visits and Animal Husbandry •
Ask permission before entering a farm or barnyard.
•
Ask if there are areas to avoid.
•
Get an orientation and follow the facility’s safety rules.
•
Use the Horseback Riding SAC if you will work with or ride horses
Wild Animals •
Learn about the animals that live in the area you frequent or will visit.
•
Never approach wild animals. Generally, animals will not attack or bite if left alone.
•
Back away if you come across baby animals, and assume that there is a protective mother nearby. Backing away protects you and the babies.
•
Report animals that appear sick or behave strangely to the authorities.
•
Take special care in snake country: o
Do not stick your hand or foot into places you can’t see.
o o
Wear closed-toed shoes. Use a flashlight when walking at night to avoid stepping on a snake.
o
Swimming with Dolphins and Other Interactive Experiences
o
Do not handle snakes, even if you think they are dead. Back away slowly if you encounter a snake.
•
Choose a safe and responsible animal organization.
•
Never feed wild animals.
•
Review safety management with the organization before visiting the site.
•
•
Make sure predators are secured or separated from the group.
•
Do not touch, pet, or pose for photos with a wolf, big cat, or similar animals.
Store food away from tents or cabins and out of the reach of animals. If the site is in bear country, check with local authorities on precautions to take, and ask if a bearproof canister is required for food.
•
Follow any related Safety Activity Checkpoints. For example, follow the Swimming SAC when swimming with dolphins.
Safety Activity Checkpoints ©2009-2026 Girl Scouts of the USA. All Rights Reserved.
PAGE 35/190
Safety Activity Checkpoints (SACs)
JUNIOR
CADETTE
SENIOR
AMBASSADOR
Archery
BROWNIE
ACTIVITY
DAISY
Archery Is Prior Council Approval Required?
*
J
C
S
A
Yes
Is Activity Training, Certification, or Verified Experience Required?
Yes
*Brownies may participate in archery if equipment is appropriate to their size and strength. Brownies may not participate in 3D archery.
Take aim, focus, and let it fly! Hone your skills, compete with friends, or just enjoy the challenge—it’s up to you. Archery builds confidence, precision, and resilience.
Learn More: •
Fix common archery mistakes with Coach Tara.
General Checkpoints
•
Take aim at next-level skills by joining a tournament. Find National Field Archery Association or USA Archery events.
Refer to the Safety Standards for general standards about supervision,transportation, first aid, and emergency plans, as well as inclusion and accessibility considerations. •
Contact archery clubs for range suggestions and other resources. USA Archery and the National Field Archery Association (NFAA) have club-finding pages. NFAA posts names of certified ranges.
•
Confirm safe range practices. See “Confirm range setup” in the Day of the Activity section.
Activity-Specific Checkpoints for Archery Follow these basic reminders for each phase of planning. Check off items as you complete them, making sure to consider each sub-bullet.
■
Note: Hunting is not permitted in a Girl Scout setting.
•
o
Decision-Making Phase ■
■
• •
Assess readiness. Archers must be able and willing to follow instructions and handle equipment with care. Ensure that bows and arrows are appropriate for participants’ ages before booking a lesson. Find safe archery ranges. Check nearby ranges and ask if instructors can be hired. Check local camps—including those operated by your council. Try the American Camp Association’s Find-a-Camp feature.
Safety Activity Checkpoints ©2009-2026 Girl Scouts of the USA. All Rights Reserved.
Identify a qualified coach/instructor. Training and Certification: Archery requires a trained instructor. Recognized certifications include:
o
USA Archery Level 1 or higher—try their Find a Coach tool Documented experience per council guidelines
Follow instructor-participant ratios based on the instructor’s certification. • For Brownies, limit to five participants per instructor on the firing line.
■
•
For older age groups, USA Archery recommends no more than eight participants.
•
Never exceed ten participants per instructor.
PAGE 36/190
Safety Activity Checkpoints (SACs) Planning and Preparation Phase •
Be clear on gear. Review Gear for Archery at the end of this section.
•
Ask your instructor what items are provided.
•
Communicate early with participants and families about what the group leader or outfitter will supply and what individuals need to bring.
■
•
Backstops or a safety zone (of at least 50 feet) is set behind the targets.
•
Clearly delineated rear and side safety buffers (of at least 20 feet) are known to participants and facility users.
•
Shooting line is clearly defined.
•
Area is free of brush or anything that obscures visibility.
•
For 3D archery: o
Let participants know what to wear. • Sturdy, closed-toed shoes
■
•
Close-fitting clothing
•
No loose or dangling clothing or jewelry, especially around the head and neck
Line up first aid. • Ensure that at least one adult has First Aid/CPR/AED training.
■
•
•
For locations more than 30 minutes from emergency medical services, recruit a Wilderness First Aider or Wilderness First Responder. Identify the closest emergency transport and facilities. Ensure that a first aid kit will be on hand.
Day of the Activity ■
•
Check the weather. Consult your instructor; postpone or cancel if conditions are unsuitable for the group’s skill level.
•
Review procedures for sudden storms.
•
Never shoot when lightning threatens.
•
Stop activities if precipitation or cold weather reduces footing or grip.
•
Do not shoot in the dark.
Confirm range setup. Confirm during decision-making or during planning and preparation, then reconfirm the following on the day of arrival: • Range rules and commands are clearly posted.
■
• •
o
Ensure that targets are set such that archers at different stations are not aiming at each other. Targets other than a circular shape enhance targeting accuracy; however, targets in the shape of human beings are never allowed. Use good judgment when considering other shapes
■ Ensure instructor completes safety checks,
• • ■
•
such as inspecting: All equipment before each use Range and surroundings Ensure everyone learns and practices the basics. Secure hair, clothing, or jewelry that could be caught in equipment.
•
Use properly sized bows and arrows.
•
Follow all safety procedures and range commands.
•
Maintain correct body positioning.
•
Never “dry fire” a bow.
•
Keep the bow pointed in a safe direction at all times.
•
Do not use targets depicting human figures.
•
Retrieve and carry arrows safely.
Gear for Archery
Make sure Girl Scouts have everything they need for a safe and successful archery outing. Essential equipment •
Bows, sized for height and strength, with right- and left-handed bows available
Equipment is stored in a box, closet, or cabinet, and is locked when not in use.
•
Arrows with target tips; never use broadhead or hunting tips
•
Targets
Ranges are not set in pedestrian areas or near buildings, roads, trails, or tents.
•
Quivers
•
Wrist, finger, and arm protection available
Safety Activity Checkpoints ©2009-2026 Girl Scouts of the USA. All Rights Reserved.
PAGE 37/190
Safety Activity Checkpoints (SACs)
SENIOR
AMBASSADOR
Ax, Knife, and Hatchet-Throwing
CADETTE
JUNIOR
BROWNIE
ACTIVITY
DAISY
Ax, Knife, and Hatchet Throwing Is Prior Council Approval Required?
C
S
A
Yes
Few activities match the dramatic appeal of ax, knife, or hatchet throwing. Harness your good judgment, determination, and focus to manage safety for these older–Girl Scout–only adventures.
Is Activity Training, Certification, or Verified Experience Required?
Yes
Learn More: •
Find out how to score your ax or hatchet games on WATL’s page.
General Checkpoints Refer to the Safety Standards for general standards about supervision,transportation, first aid, and emergency plans, as well as inclusion and accessibility considerations.
•
o o o
Activity-Specific Checkpoints for Ax, Knife, and Hatchet Throwing Follow these basic reminders for each phase of planning. Check off items as you complete them, making sure to consider each sub-bullet.
Check associations for local ranges, competitions, or lessons. Since youth activities may not be their primary focus, ask if participation is appropriate before attending. Consider these organizations:
•
World Axe Throwing League (WATL) International Axe Throwing Federation American Knife Throwers Alliance
Confirm safe range practices using the Day of the Activity section below.
Identify a qualified coach/instructor. Universal certification programs are not widely available. Ensure that at least two adults are on hand, one of whom: • Is trained and experienced in blade throwing safety specific for the ax, knife, or hatchets being used.
■
Decision-Making Phase ■
• •
•
Find a safe place to throw. Check nearby ranges and ask if instructors can be hired. Check local camps, including those operated by your council. Try the American Camp Association’s Find-a-Camp feature. Contact facilities that offer throwing ranges. Confirm that the atmosphere is suitable for minors.
Safety Activity Checkpoints ©2009-2026 Girl Scouts of the USA. All Rights Reserved.
•
■
Is experienced with teaching proper form and technique, range rules, and emergency procedures. Check instructor–participant ratios. Ensure that ratios specified by the instructor’s training will be maintained, with a maximum of two participants per instructor, or four participants per instructor if another adult is assisting with enforcing safe practices.
PAGE 38/190
Safety Activity Checkpoints (SACs) Planning and Preparation Phase
•
Backstops or safety zones are set behind the targets.
Be clear on gear • Review Gear for Ax, Knife, and Hatchet Throwing at the end of this section.
•
Clearly delineated rear and side safety buffers are known to participants and facility users.
•
Throwing line is clearly defined.
•
Ask your instructor what items are provided.
•
Area is free of brush or anything that obscures visibility.
•
Communicate early with participants and families about what the group leader or outfitter will supply and what individuals need to bring.
■
Ensure instructor completes safety checks, such as: Inspecting all equipment before each use
■
Let participants know what to wear. • Sturdy, closed-toed shoes
■
•
Close-fitting clothing
•
No loose or dangling clothing or jewelry, especially around the head and neck
• • ■
•
Inspecting range and surroundings Ensure everyone learns and practices the basics. Secure hair, clothing, or jewelry that could be caught in equipment.
•
Follow safety procedures and range commands.
Line up first aid. • Ensure that at least one adult has First Aid/CPR/AED training.
•
Maintain correct body positioning.
•
Keep the tool pointed in a safe direction.
•
•
Use appropriate targets—never aim at anything resembling a human figure.
•
Retrieve and carry tools carefully
■
•
For locations more than 30 minutes from emergency medical services, recruit a Wilderness First Aider or Wilderness First Responder. Identify the closest emergency transport and facilities. Ensure that a first aid kit will be on hand.
Day of the Activity ■
•
Check the weather. Consult your instructor; postpone or cancel if conditions are unsuitable for the group’s skill level.
Gear for Ax, Knife, and Hatchet Throwing Make sure Girl Scouts have everything they need for a safe and successful outing. Essential equipment •
Ax, knife, or hatchet, sized for users. In general: o o
Knives should be 9–16 inches long and not overly sharp. Hatchet heads should weigh 1.25–1.75 lb. with a wooden handle at least 13 inches long. The blade face should be no more than 4 inches and not overly sharp.
•
Review procedures for sudden storms.
•
Never throw when lightning threatens.
•
Stop activities if precipitation or cold weather reduces footing or grip.
•
Targets
•
Do not throw in the dark.
•
Gloves (optional)
■
Confirm range setup. Confirm during decision-making or planning and preparation, then reconfirm on the day of arrival (follow WATL specifications for range and lane dimensions):
•
Range rules and commands are clearly posted.
•
Equipment is stored in a box, closet, or cabinet and is locked when not in use.
•
Ranges are not set in pedestrian areas or near buildings, roads, trails, or tents.
Safety Activity Checkpoints ©2009-2026 Girl Scouts of the USA. All Rights Reserved.
PAGE 39/190
Safety Activity Checkpoints (SACs)
BROWNIE
JUNIOR
CADETTE
SENIOR
Backpacking
*
*
J
C
S
AMBASSADOR
ACTIVITY
DAISY
Backpacking Is Prior Council Approval Required?
Is Activity Training, Certification, or Verified Experience Required?
A
Yes
Yes
*Daisies and Brownies may day hike.
Every step is an adventure! Backpacking takes you beyond the crowds and into the heart of nature. Hike through breathtaking landscapes you can only reach on foot. Carry only what you need and leave no trace behind.
Learn More
General Checkpoints Refer to the Safety Standards for general standards about supervision,transportation, first aid, and emergency plans, as well as inclusion and accessibility considerations.
Activity-Specific Checkpoints for Backpacking
■
Consider readiness. Take a few day hikes to evaluate interest. Start short and slow, with a low-mileage one-night trip for your first adventure. Build toward longer treks. Make plans for access. If physical ability is a factor, find navigable trails at the Trail Access Project and determine if supportive equipment is needed. Use Pack Your Tent for adaptive hike resources or consider a guided trek with an inclusive organization like Wilderness Inquiry.
Safety Activity Checkpoints ©2009-2026 Girl Scouts of the USA. All Rights Reserved.
•
Discover how to be gentle trekkers at Leave No Trace
Be inclusive. Check out Melanin Base Camp and Diversify Outdoors for tips on making the experience familiar for all.
■
Take a council-approved backpacking class with the group together if there’s one near you. You can learn tips for staying safe and healthy in the backcountry, understand gear selection criteria, and gain foundational skills like map-reading and dealing with weather. You’ll also learn whether this experience is right for the group.
■
Identify an expert to guide your group in preparation and on the trail.
■
Communicate with families. Backpacking is unfamiliar for some families, so be prepared to answer any concerns about topics like affording gear or safety measures you’ll take. Continue to keep families updated as planning continues.
Decision-Making Phase ■
Find trails, guides, and maps on the AllTrails app.
■
Follow these basic reminders for each phase of planning. Check off items as you complete them, making sure to consider each sub-bullet. Note: This information does not replace the need for training and experience.
•
Planning and Preparation Phase ■
Make it girl-led. Encourage the group to plan routes, the amount of time on the trail each day, meals, and cooking groups. Decide together on rules for group living and how to deal with any problems that might arise. Utilize your expert to help guide planning.
PAGE 40/190
Safety Activity Checkpoints (SACs) ■
■
Arrange for—and closely engage—adult supervision. Make sure attending adults join in the preparations for backpacking. It’s important that all participants be part of the bonded group. Make plans to follow guidelines for safe sleeping arrangements.
Choose a route and pace within the ability level of every person in the group. The length of the trip should reflect the backpackers’ ages, experience, and physical condition. Consider these variables: • Nature of the terrain
■
Day of the Activity ■
•
Check the weather. Consult your expert; postpone or cancel if conditions are unsuitable for the group’s skill level.
•
Review procedures for sudden storms.
•
Never hike when lightning threatens.
•
Do not hike at night.
■
•
Review trip specifics with all participants. Route and hiking plans
•
Weight of the load to be carried
•
Expected weather
•
Season and weather conditions
•
•
Water quality and quantity
Possible flora and fauna—and what to do if trekkers encounter it
•
Activities planned along the way
•
Using the buddy system and determining hiking buddies
•
Elevation—and elevation changes—of the route
•
Awareness of fatigue, “hot spots” on the feet, and other health matters
The route should be familiar to at least one attending adult. If not, obtain a report in advance to assess potential hazards. Find out about routes, campsite, available water, emergency evacuation routes, and permits (if needed).
•
Emergency action plan—roles for each person
•
Leave No Trace principles, including toileting specifics for the territory you’ll visit
•
Staying on trails unless directed by an expert
•
Staying away from waterfall edges, rock ledges, and slopes with loose rocks
■
Confirm food and gear is ready and has been distributed among the group as planned.
■
Double-check that critical items are in working order.
■
Proceed safely. Position an experienced adult with route knowledge at the front of the group.
■
■
■
■
Prepare for primitive campsites. With your expert or a park ranger, identify likely camping areas in advance. Campsites should be at least 200 feet from all water sources and below the tree line. Plan your route to arrive at campsites well before dark to allow ample time for setup. Find out about local wildlife, how to stay safe, and how to safeguard food. Do a pack check. A week or so before the trip, gather everyone with their loaded packs. A general rule of thumb is that equipment, food, and water should weigh no more than 20 percent of the carrier’s body weight. Make sure everyone has all needed gear. Divide shared items, like tent components and cooking gear, among users. Adjust straps and take a walk.
Line up first aid. • Ensure that at least one adult has First Aid/CPR/AED training.
■
•
For locations more than 30 minutes from emergency medical services, recruit a Wilderness First Aider or Wilderness First Responder. Identify the closest emergency transport and facilities.
•
Ensure that a first aid kit will be on hand
Safety Activity Checkpoints ©2009-2026 Girl Scouts of the USA. All Rights Reserved.
• •
Position a “sweep” person at the end to collect any stragglers who might pause.
•
Set a pace that all can keep; when stopping for a break, make sure to rest long enough for those who arrive last.
•
Stop at any trail junctions or places where direction is unclear. Make sure every buddy pair knows it is their responsibility to ensure the following buddy pair sees what direction to go.
PAGE 41/190
Safety Activity Checkpoints (SACs) Gear for Backpacking
Learn More
Make sure Girl Scouts have everything they need for a safe and successful backpacking outing.
•
Individual gear You may have heard of the “Ten Essentials”—the classic list of gear every hiker should carry. We’ve woven those essentials into this list of items for each person: Clothing and footwear •
Lightweight, layered clothing suitable for expected and changing weather
•
Waterproof jacket or shell
•
Sturdy hiking or trail footwear with thick soles
•
Optional: soft-soled shoes or camp sandals
•
Hiking socks (wicking or liner + outer sock combination)
•
Hat or bandana
•
Extra clothing in a dry bag or zippered bag
Hydration and nutrition •
Water bottle or hydration pack (minimum 1 quart/1 liter capacity)
•
Water-purification tablets, drops, or filter
•
Extra water container
•
Individual food and snacks (lightweight, high-energy, non-perishable)
•
Extra food for emergencies
•
Lightweight bowl, cup, and spoon
Navigation and communication •
Map and compass or GPS
•
Whistle
•
Flashlight or headlamp + extra batteries
Health and safety •
Personal first aid kit
•
Matches or lighter in waterproof container
•
Knife or multi-tool
•
Toileting supplies, according to the area’s guidelines: o o o o o
Backpack, properly fitted for the user
•
Sleeping bag (lightweight or mummy style)
•
Sleeping pad (closed-cell foam or inflatable)
•
Emergency shelter (tarp, bivy sack, or space blanket)
Safety Activity Checkpoints ©2009-2026 Girl Scouts of the USA. All Rights Reserved.
Toilet paper Trowel for cat hole Menstrual supplies Hand sanitizer Sealable waste or garbage bags
Group gear Group gear is anything that will be shared by a pair or small group that will use it. Refer to this list of essentials: •
Portable cook stove, fuel, matches, and windscreen
•
Small pot
•
Lightweight “kitchen” items needed for your recipes, such as a spatula or serving spoon
•
Shared food
•
Bear canister or other gear needed to protect food, per local regulations
•
Potable water or water purification supplies (e.g., iodine tablets) or water filter designed to remove Giardia lamblia. See Outdoor Cooking Safety Activity Checkpoints for purification tips
•
Lightweight tent; divide poles, tent body, fly, etc. among the group
•
A working cell phone, InReach, or similar communication device
•
Group first aid kit
•
Other gear appropriate for your location
Shelter and sleep •
Fun fact: The Ten Essentials were created by The Mountaineers nearly 100 years ago and have evolved with new technology and outdoor know-how.
PAGE 42/190
Safety Activity Checkpoints (SACs) BROWNIE
JUNIOR
CADETTE
SENIOR
Bicycling
D
B
J
C
S
Hop on, pedal forward, and explore! Whether you’re cruising with friends, embracing a slow and sustainable way to travel, or mastering new skills, biking builds confidence and lets you explore the world on two wheels!
General Checkpoints Refer to the Safety Standards for general standards about supervision,transportation, first aid, and emergency plans, as well as inclusion and accessibility considerations.
Activity-Specific Checkpoints for Bicycling Follow these basic reminders for each phase of planning. Check off items as you complete them, making sure to consider each sub-bullet.
■
•
Find a safe place to ride bikes. Explore short rides in paved areas or parks, away from shared roadways, when learning.
•
Use designated bike paths whenever possible. Avoid routes with heavy traffic.
•
View the Adventure Cycling Association’s interactive map of shared roadways and off-road trails.
Is Prior Council Approval Required?
Is Activity Training, Certification, or Verified Experience Required?
A
No
No
Identify a qualified expert/instructor. While no formal certification is required to teach cycling, instructors should have experience teaching youth to ride safely. Look for someone skilled in: • Cycling instruction, safety, and proper bike handling
■
•
Basic bike maintenance and on-the-road repairs—a visit to a local bike shop could be a valuable learning experience
•
Selecting and leading a safe route; the expert should be familiar with the area and potential hazards ■ Make plans for access. If physical ability is a factor, find navigable trails at the Trail Access Project and determine if supportive equipment is needed.
Planning and Preparation Phase ■
•
Be clear on gear. Review Gear for Bicycling at the end of this section.
•
Communicate early with participants and families about what the group leader will provide and what individuals need to bring.
■
Line up first aid. Ensure that at least one adult has First Aid/CPR/AED training.
Note: E-bikes are never permitted in a Girl Scout setting. Decision-Making Phase
AMBASSADOR
ACTIVITY
DAISY
Bicycling
• •
For locations more than 30 minutes from emergency medical services, recruit a Wilderness First Aider or Wilderness First Responder. Identify the closest emergency transport and facilities.
•
Bring a first aid kit.
Learn More
•
Discover mountain biking trails in your area at MTBproject.com.
•
For tips on readiness, teaching strategies, and more, check out REI’s cycling resources.
•
Check with local bicycle shops for suggestions.
•
•
Get permits or permission for backcountry routes if required by forest management or other agencies
Check out crowd-sourced route-planning information in an app like Komoot.
Safety Activity Checkpoints ©2009-2026 Girl Scouts of the USA. All Rights Reserved.
PAGE 43/190
Safety Activity Checkpoints (SACs) ■
Leave your plan with a reliable adult. Share your route and participant roster with someone who is not participating. Let them know what to do if you don’t arrive by the expected time.
•
o o o o
Day of the Activity Check the weather. • Consult your expert; postpone or cancel if conditions are unsuitable for the group’s skill level.
■
•
Review procedures for sudden storms.
•
Never ride when lightning threatens.
•
Stop activities if weather reduces visibility or traction.
•
Do not ride at night.
Communicating: Signaling to other riders and drivers Signaling for help Indicating intent to pass another rider Using a light to increase visibility
•
Stowing gear: Pack light, and keep gear in panniers or packs on the back of the bike.
■
Organize groups for safety. Travel in groups of five or six, if on shared roadways.
• •
Groups should be separated by at least 150 feet so vehicles can pass safely.
•
Position an adult at the head of each group.
•
A chase car, if used, should drive at a steady pace and maintain a safe following distance, allowing additional space and patience on downhills and tight corners.
Confirm safety checks. With supervision by your expert, teach riders to check the ABCs: • Air: Tire pressure meets manufacturer requirements.
■
•
Brakes: Pads and controls are adjusted properly.
Gear for Bicycling
•
Chain: Chain is engaged with gears and shifting smoothly.
Make sure Girl Scouts have everything they need for a safe and successful bicycle outing.
■
Ensure everyone learns and practices the basics. Properly fitted helmets, seats, and handlebars.
•
•
Bicycle, with brakes, chain, tires, and gears in good working order
Yield to hikers and horseback riders on trails.
•
Bell
Bicycle handling:
•
Reflectors
o
•
Front and rear lights for visibility
•
Water bottle cages and bottles (or hydration pack)
•
Map of route, for trips of any length; a maps app on a smartphone is acceptable
•
Obey traffic signals and signs.
•
Ride on bike paths or roads, not sidewalks or walking trails.
• •
o o
•
Essential equipment
Braking and steering, especially on downhills and tight turns Avoiding hazards like drainage grates, utility covers, wet leaves, sand, gravel, litter, etc. Emergency moves: dodging, quick stop, and instant turn; see Cycling Savvy for descriptions and videos.
Riding in traffic: o o o o o o
Riding single file in the same direction as traffic Yielding to oncoming traffic for left turns Keeping distance from vehicle or bike ahead Riding defensively, not aggressively Stopping fully, looking in all directions before continuing Walking bikes across intersections
Safety Activity Checkpoints ©2009-2026 Girl Scouts of the USA. All Rights Reserved.
PAGE 44/190
Safety Activity Checkpoints (SACs) Safety gear •
Helmet, properly fitted
•
Repair kit—for each group: o o o o o
Tire pump Spare tubes Tire patch kit Tools, including tire lever, screwdriver, adjustable wrench, pliers, Allen wrenches Lubricating fluid
Clothing and footwear •
Stiff-soled athletic shoes, if using flat pedals
•
Bicycle shoes, if using clip-in pedals (an advanced feature)
•
Layered clothing; consider reflective clothing or a high-visibility vest
•
Athletic leggings or bicycle shorts; if wearing loose pants, secure them away from the chain
•
Cycling gloves (optional)
Safety Activity Checkpoints ©2009-2026 Girl Scouts of the USA. All Rights Reserved.
PAGE 45/190
Safety Activity Checkpoints (SACs) BROWNIE
JUNIOR
CADETTE
SENIOR
Camping
D
B
J
C
S
Take in fresh outdoor air and learn about the environment and yourself. A treasured Girl Scout tradition, group camping builds lifelong skills and confidence. Camping checkpoints apply to overnights in: Public or private campgrounds or retreat centers Tent, recreational vehicle, or cabin locations Overnights or “lock-ins” at museums or similar sites Travel camping—camping as you travel (see below)
■
• •
Activity-Specific Checkpoints for Camping Follow these basic reminders for each phase of planning. Check off items as you complete them, making sure to consider each sub-bullet. Learn More •
Improve your impact on the earth by following Leave No Trace principles.
Safety Activity Checkpoints ©2009-2026 Girl Scouts of the USA. All Rights Reserved.
Is Activity Training, Certification, or Verified Experience Required?
A
Yes
Yes
Select a safe site. Look for Girl Scout camps or other properties Girl Scout councils operate. Consider these additional resources: o o o o o
•
o
o ■
American Camp Association’s Find-a-Camp listing Recreation.gov or Reserve America State parks Camps operated by other youth-serving organizations Private or public campgrounds
When considering listings or facilities, look for: o
General Checkpoints Refer to the Safety Standards for general standards about supervision,transportation, first aid, and emergency plans, as well as inclusion and accessibility considerations.
Is Prior Council Approval Required?
Decision-Making Phase
Home sleepovers and backyard campouts are not recommended. See the Travel/Trips SAC for guidance on overnights in hotels, hostels, and vacation rentals. Follow the Outdoor Cooking and Fire Building SAC for guidance on cooking with camp stoves and fire.
AMBASSADOR
ACTIVITY
DAISY
Camping
Group sites, where all participants share the camping and cooking areas Several family-sized sites close together; ask about limitations on the number of campers per site, or allowable “footprint” (tent size) to ensure you reserve enough space Excellent online reviews by users; look for comments about safety and cleanliness
Identify an expert Ensure at least one adult in your group has the necessary training. Most Girl Scout councils offer regular outdoor training courses. If local training is not available, recruit a volunteer with experience in:
•
Leading youth in outdoor living experiences away from home
•
Safety management
•
Planning and logistics for outdoor program activities
•
Outdoor cooking and fire building (if applicable to your outing)
PAGE 46/190
Safety Activity Checkpoints (SACs) ■
Consider progression and readiness. Help group members build confidence in camping by gradually increasing the level of ruggedness:
•
Day trips to camps or parks are a great way to ensure interest in staying overnight.
•
Follow a step-by-step progression, such as: 1. Overnight in a cabin or indoor facility: Start with a location close to home (within 25 miles or so) to provide a sense of comfort and familiarity. 2. Campout in a cabin farther away or a nearby tent campground: Gradually increase the distance (up to 100 miles for a cabin, or stay closer for tent camping). 3. Tent camping farther away: Introduce the group to more independent camping experiences in a tent. 4. Primitive tent camping, backpacking, or travel camping: Transition to camping without services or incorporate travel for a more adventurous experience
•
Ease group members into camping gradually. Address common concerns—bugs, wildlife, homesickness, privacy, and toileting—by respecting both individual and group comfort levels. Allow each group and member to set their own pace.
■
Welcome new group members. Members who join without camping experience can be welcomed by taking the time to understand their comfort levels and concerns. Assign a buddy or a supportive adult to help them feel prepared and included. This approach fosters confidence, encourages bonding, and ensures that newcomers have someone to guide them through new experiences. It is not necessary to have the whole group restart their progressive journey from the beginning.
■
Planning and Preparation Phase ■
Make it girl-led. Guide the group in deciding what they’ll do during the campout, what they’ll eat and how they’ll cook it. Decide together on patrols (small groups) and kapers (tasks) each will do.
■
Review checkpoints for the chosen activities. Hiking, swimming, and horseback riding are just a few examples of the many adventures a group might enjoy during a campout. Work with the group to understand safety measures and follow the checkpoints as usual.
■
Line up first aid. Ensure that at least one adult has First Aid/CPR/AED training
• •
For locations more than 30 minutes from emergency medical services, recruit a Wilderness First Aider or Wilderness First Responder. Identify the closest emergency transport and facilities.
•
Bring a first aid kit in a waterproof container.
■
Consider hosting a meeting with families. Girl Scouts and their families may benefit from an advance “what to expect” meeting. Make sure everyone knows what gear they should bring and what the group will provide. Share the clothing list under Gear for Camping, below.
■
Gather and check group gear. Essentials may include: Cookware and other equipment for the types of cooking you’ll do
• •
Tents, if needed, and other campsite items
•
Any other must-have items from the Gear for Camping list at the end of this section
■
Plan to follow guidelines for safe sleeping arrangements.
Make plans for access. Find campgrounds that fit your group’s needs by searching national, state, and local parks. REI’s Guide to Adaptive Camping has robust information on gear, finding a campsite, and other considerations when physical ability is a factor.
Safety Activity Checkpoints ©2009-2026 Girl Scouts of the USA. All Rights Reserved.
PAGE 47/190
Safety Activity Checkpoints (SACs) Day of the Activity ■
Check gear. Before departing, make sure each camper has their sleeping bag, warm clothes, and water bottle, at a minimum. Check that any critical group items, such as food and water, have been loaded into a vehicle.
Set up camp safely. Aim to set up before dark, and choose locations with the following in mind: • Stay away from dead tree limbs or leaning trees.
■
Travel Camping: Additional Considerations In travel camping, the group stays in multiple campgrounds during a single trip. Careful planning of transportation between sites is crucial to ensure safety and efficiency. Here’s a breakdown of key planning items: ■
Review and follow the Transporting Girl Scouts section.
■
Distribute the Checklist for Drivers and ensure all drivers follow them.
■
Create a schedule that includes travel time, stops for meals or breaks, and arrival times at each site.
•
Use a level surface for tents, free of sharp rocks or sticks that might damage tents or disturb sleeping campers.
•
Avoid gullies or areas where water might drain during rain. Do not dig trenches around tents or disturb the environment.
•
Camp away from poisonous plants, such as poison oak or ivy. Educate campers on how to identify these hazards.
■
•
Store food in a secure location away from tents and out of reach of animals. Ask a ranger or the camp office for protocols.
Plan extra time in case of delays, weather, or traffic. Rushing can stress drivers and cause undue urgency.
■
•
Where necessary, follow directions from local officials. You may be required to use a bearproof container or hang food in a specific manner.
Have a plan for managing which vehicle carries what gear, and repeat the loading sequence each time you leave a campsite. Load lanterns, food, and tents last. This ensures you can find your key gear and set up efficiently, even if you’re running late.
■
Keep the ecosystem safe. Camp, wash dishes, and do personal bathing at least 200 feet away from all water sources to protect ecosystems.
■
If using watercraft for transportation, follow the specific checkpoints for the vessels (e.g., canoe, whitewater rafts, or large vessels) involved.
• •
Use a previously established campsite if possible, to minimize environmental impact.
•
Use existing fire rings, if present, if fire is a necessity. Use wood from the local area to avoid transporting invasive species to the campground. Ask a ranger or the camp office for protocols—collecting firewood is not permitted in some protected areas.
•
Avoid fragile areas, such as meadows or areas with wet soil.
•
If a latrine is not available, use individual cat holes—holes for solid human waste—at least 200 feet from the trail and known water sources. Follow local directives, as some areas will have other sanitary procedures.
■
Review safety guidelines. Discuss areas to avoid, what to do if there’s an animal encounter, and any other site-related specifics. Refer to your emergency action plan for reminders.
Safety Activity Checkpoints ©2009-2026 Girl Scouts of the USA. All Rights Reserved.
Gear for Camping Here’s a list of basic items to bring on a tent camping trip to keep everyone warm, dry, fed, and hydrated. Your list may vary and will probably include some extras (like games) or comfort items (like sit-upons or chairs). Tips: •
Share your list early.
•
Confirm what each participant will bring and communicate with families to avoid duplication or omissions.
•
Check the weather shortly before departure and share any updates.
PAGE 48/190
Safety Activity Checkpoints (SACs) Individual essentials:
Group supplies
Clothing and footwear
Safety
•
Layers for warmth or cooling (poly fleece or wool over cotton)
•
Hat, gloves, and thermal underwear for very cool weather
•
Rain jacket or poncho for staying dry
•
Sun protection (hat or bandana)
•
Sturdy socks and shoes (hiking boots or sneakers). Bring a second pair. No sandals, flip-flops, or bare feet
•
Shelter •
Sleeping bag rated for anticipated temperatures
•
Insulating sleeping pad (required for cold weather, recommended in all weather for comfort)
•
•
Pots, pans, and cooking utensils
•
Portable cook stove and fuel (propane or butane canisters recommended), or fire-building items if cooking over a fire (hatchet, wood, fire starters, and shovel)
•
Matches or lighter
•
Cooler with ice for food storage; bring enough ice to keep perishable food below 40°F until consumed
Mosquito netting, if needed
Lighting
Lighting •
Flame-resistant tents or tarps
Food cooking and storage
Sleep system •
First aid kit
Flashlight or headlamp + extra batteries
Eating and hydration •
Mess kit (plate, bowl, utensils)
•
Cup and refillable water bottle
•
Battery-operated lanterns for indoor/outdoor use
•
Propane-fueled lanterns (outdoor use only)
Water •
Sufficient drinking water for the group or a water purification kit, if the camp’s water is not potable
Personal care and safety •
Sunscreen
•
Insect repellent
•
Toileting supplies, according to the area’s guidelines: o o o
Toilet paper Menstrual supplies Hand sanitizer
Safety Activity Checkpoints ©2009-2026 Girl Scouts of the USA. All Rights Reserved.
PAGE 49/190
Safety Activity Checkpoints (SACs) BROWNIE
JUNIOR
CADETTE
SENIOR
Canoeing
*
**
***
C
S
AMBASSADOR
ACTIVITY
DAISY
Canoeing Is Prior Council Approval Required?
Is Activity Training, Certification, or Verified Experience Required?
A
Yes
Yes
*Daisies may canoe only on flat water with an experienced adult in each canoe. **Brownies may canoe only on flat water and must stay within swimming distance of shore. ***Juniors may canoe on flat water within swimming distance of shore or on Class I river sections.
Connect with nature and friends by canoeing! Paddling can be as gentle or extreme as you like: take a leisurely trip on a quiet lake or river, or work up to extreme whitewater canoeing and racing. Experience a new culture with dragon boats or Hawaiian outrigger canoes. The choice is yours, and the memories are unforgettable.
General Checkpoints Refer to the Safety Standards for general standards about supervision,transportation, first aid, and emergency plans, as well as inclusion and accessibility considerations.
Decision-Making Phase ■
•
•
Paddling.com and American Whitewater offer interactive maps of paddling locations.
•
Canoeing is not permitted in whitewater above Class III.
■
•
o o
Follow these basic reminders for each phase of planning. Check off items as you complete them, making sure to consider each sub-bullet.
o •
Learn More
•
Safety Activity Checkpoints ©2009-2026 Girl Scouts of the USA. All Rights Reserved.
o ■
American Canoe Association (ACA)—various certification levels Girl Scouts Small Craft Safety Course (with canoe module) American Red Cross Lifeguarding with Waterfront Module (for flat water, near shore only) Prior expertise, with documented experience per your council’s guidelines
In addition, ensure the instructor has the appropriate background: o
Urge all participants to take ACA’s free online Paddlesports Safety course. Improve your skills with these short video tutorials from Paddling.com.
Identify an expert. Look for someone with one or more of the following certifications or qualifications: o
Activity-Specific Checkpoints for Canoeing
•
Find a safe place to canoe. Nearly any body of water is suitable for canoeing with the right instruction, equipment, and experience. Start on flat water with little to no current. Progress to more advanced conditions like trips on moving rivers and later, whitewater.
Experience teaching and supervising canoeing for the ages involved Firsthand knowledge of the hazards and conditions at the canoeing location
Check ratios. Ensure that the proper instructor-student ratio will be followed, per the instructor’s certification, with a maximum of 6 learners per instructor. An ACA instructor with a qualified assistant may supervise up to 12 learners.
PAGE 50/190
Safety Activity Checkpoints (SACs) Planning and Preparation Phase
■
Instructors or lifeguards must be well-positioned for supervision. Supervision from shore is only allowed on flat water near shore. Instructors must accompany the group if paddling away from shore or on moving rivers.
■
Ensure everyone learns and practices the basics. Proper body position and balancing, especially when entering and exiting the canoe
•
Be clear on gear. Review Gear for Canoeing at the end of this section.
•
Ask your instructor or outfitter what items are provided.
•
Communicate early with participants and families about what the group leader or outfitter will supply and what individuals need to bring.
• •
Launching and landing techniques
Line up first aid. • Ensure that at least one adult has First Aid/CPR/AED training.
•
Propelling and steering the canoe with effective strokes
•
Maneuvering through waves and wakes
•
For locations more than 30 minutes from emergency medical services, recruit a Wilderness First Aider or Wilderness First Responder. Identify the closest emergency transport and facilities.
•
Self-rescue techniques in case of capsize
•
Signaling for help
•
Staying seated in fast-moving water
Bring a first aid kit in a waterproof container.
•
In whitewater canoeing, how to read and manage rapids, and how to float through if separated from the canoe
•
Any site-specific instructions
■
■
•
Assess swimming ability. Strong swimming skills are important for paddlers’ safety and confidence. A swim assessment is highly recommended to evaluate participant readiness. • Advance swim assessments are recommended to avoid disappointment.
■
•
Same-day assessments may be conducted if necessary.
•
If swim assessments are not feasible, assume all participants are non-swimmers.
Day of the Activity Check the weather. • Consult your instructor; postpone or cancel if conditions are unsuitable for your group’s skill level.
■
•
Never canoe during a storm.
•
If contact with the water is planned (such as when practicing capsize and recovery), check water quality reports such as on Surfrider’s interactive map, especially after rainfall.
•
Check boats for condition; ensure seats and thwarts are in place and any air bags are functioning and secure.
■
Inspect the area upon arrival. Point out and avoid hazards such as strainers, sieves, hydraulics, waterfalls, bridges, dams, fences, and low power lines. Surf zones, rapids, and standing waves must be avoided unless part of a planned whitewater experience.
Safety Activity Checkpoints ©2009-2026 Girl Scouts of the USA. All Rights Reserved.
■
•
Follow canoeing right-of-way rules. Stay clear of swimmers, sailboats, and less maneuverable watercraft.
•
Expect powered boats to yield, but stay alert and paddle defensively to prevent accidents.
•
Stay clear of large vessels (motorboats, ships, ferries) that cannot easily change course.
•
Ask your instructor to demonstrate other right-of-way rules.
•
Control your canoe to prevent collisions.
■
•
Prepare for emergencies. Discuss emergency action plans with your instructor.
•
Know who to contact and how to call for help.
•
Be aware of your location to communicate effectively with authorities.
Canoe Trips: Additional Considerations Canoe trips are longer day or overnight excursions. Plan canoe trips only after progressive skill-building experiences. Follow these additional tips for a safe and satisfying experience. ■
•
Ensure basic skills. Make sure that participants: Have the skill and stamina to finish the trip, even if headwinds or other challenges arise
PAGE 51/190
Safety Activity Checkpoints (SACs) •
Learn how to keep boats balanced when loading canoes and how to secure gear
•
Learn how to cross busy channels, if necessary (generally, by crossing at a 90-degree angle to channel traffic)
•
Learn universal signals
■
• •
File a float plan for any trip. Provide a reliable adult with information about your boat(s) and the people aboard. This fillable Coast Guard Float Plan includes steps for your contact to take if they are concerned about your safety.
■
Use a guide who has the additional training needed for the trip type. Guiding on river, whitewater, coastal, touring, and open water (ocean) trips are advanced certifications.
■
See the additional gear needed for trips under Gear for Canoeing. Consult your guide about what else may be needed.
Safety gear •
Coast Guard–approved life jackets, properly sized and fitted for each person (required)
•
Rescue whistle
•
Throwable personal flotation device (Type IV cushion, ring buoy, or equivalent) available for each group on the water
•
Tow line, throw bag, and/or other rescue gear (carried by the instructor)
•
Rescue sling, to get participants back into a boat, if needed
•
Helmets are required in Class II or higher rapids, or if going in or near sea caves.
•
Painter(s)—lines at the bow (and optionally, stern) of the boat, used for securing the canoe. They should be at least half the length of the canoe.
•
Canoeing at night requires additional gear; contact your outfitter
Clothing and footwear •
Layered, non-cotton clothing
Do not exceed capacity or overload boats with gear.
•
Paddling gloves for comfort and grip
■
Keep boats close enough together so that a group decision can be made if wind or water conditions change.
•
Knee pads or foam mat (optional)
■
Be aware of possible changes in water level due to tides or dam releases, and consider how these may impact your route.
■
Gear for Canoeing Make sure Girl Scouts have everything they need for a safe and successful canoe outing.
Gear for trips For trips, consult your expert about what to bring in addition to the gear listed above. They may recommend items such as: •
Navigation items, such as GPS or compass
•
Communication tools, such as two-way, satellite, or weather/VHF radios
Individual and group essentials
•
Essential equipment: •
Canoe, suited to participants’ skill level and water conditions o o o
Canoes 12 feet or less in length are for solo paddlers. Canoes 12–15 feet in length are for two paddlers. Large canoes, like “war canoes,” dragon boats, or Hawaiian outriggers, vary in capacity. Do not overload.
•
Properly sized paddle for each person
•
Bailing scoop or sponge to remove water from hull.
Safety Activity Checkpoints ©2009-2026 Girl Scouts of the USA. All Rights Reserved.
Dry bags (and a way to secure them) to carry food, extra clothing, first aid kit, etc.
•
Repair kits: duct tape, tools, etc.
•
Spare paddle(s)
•
Emergency equipment, such as signaling mirror, tarp, space blanket, extra clothing and food, matches, flashlight, etc.
PAGE 52/190
Safety Activity Checkpoints (SACs) AMBASSADOR
A
No
Yes
A
No
Yes
CADETTE
S
JUNIOR
Is Activity Training, Certification, or Verified Experience Required?
BROWNIE
Is Prior Council Approval Required?
ACTIVITY
DAISY
SENIOR
Challenge Courses
Challenge Courses (high ropes)
*
**
J
C
Challenge Courses (low ropes)
D
B
J
C
S
* Daisies may use ground initiatives and low elements only. **Brownies may use ground initiatives, low elements, and indoor high elements that are designed specifically for small children.
Build strength and confidence on a challenge course! Tackle team-building puzzles with friends or push your limits on an individual challenge. Whether climbing, balancing, or strategizing, you’ll develop strength, problem-solving skills, and a deep sense of accomplishment.
See Safety Activity Checkpoints (SACs) for these specific elements that can be part of a challenge course: • Climbing, Bouldering, and Rappelling (including artificial climbing walls) • Recreational Tree Climbing • Zip Lining
General Checkpoints
Key terms
Refer to the Safety Standards for general standards about supervision,transportation, first aid, and emergency plans, as well as inclusion and accessibility considerations.
Activity-Specific Checkpoints for Challenge Courses Follow these basic reminders for each phase of planning. Check off items as you complete them, making sure to consider each sub-bullet.
Learn More •
Anyone can lead the activities in Ultimate Camp Resource’s list of team-building games and initiatives!
Safety Activity Checkpoints ©2009-2026 Girl Scouts of the USA. All Rights Reserved.
• Challenge course (or ropes course): A series of activities designed to foster teamwork, problem-solving, and resilience. Courses may include high elements, low elements, or a combination of both. • Experiential (or outdoor) education: A teaching method that involves learning by doing, reflection, and critical thinking, often in an outdoor setting. • High elements (or high ropes): Activities built above the ground, often using platforms, trees, or utility poles. These require a belay system for safety. For Girl Scouts, a high element is one where participants climb more than 6 feet overhead. • Initiative: A general term for challenge course activities that focus on teamwork or personal challenge, often involving little or no equipment. • Low elements (or low ropes or ground initiatives): Activities on or near the ground, including ground-based initiatives or permanent structures. For Girl Scouts, a low element is one with a fall distance of less than 6 feet.
PAGE 53/190
Safety Activity Checkpoints (SACs) • Slackline: A suspended length of webbing between two anchor points, designed to be walked across. Similar to tightrope walking but with less tension. Slacklines are considered part of low elements (low ropes or ground initiatives).
o o •
■
•
Find a safe challenge course. Refer to the program grade level chart (above) for acceptable challenge course elements for your group.
•
Check local camps, including those operated by your council, universities, and private facilities, to see if a challenge course is available.
•
Seek out accredited operators. Ask facilities you’re considering or find listings from these organizations: o o o
•
Courses must have written documentation schedules that include: o o o
•
o
•
•
Periodic inspections of structures and equipment by qualified outside professionals Use logs for all equipment that is subject to stress, wear, or deterioration A process for monitoring and retiring equipment once it reaches the end of its useful life Lines are securely attached to sturdy trees (with tree protectors) or reinforced concrete pillars. Light poles, road signs, handrails, or similar structures are never used. Lines are set no higher than knee height.
Identify a qualified facilitator/instructor. Ensure facilitators are trained and certified in accordance with the location, elements, and conditions of the challenge course.
ACCT Level 1 or higher Association for Experiential Education (AEE) Documented experience per council guidelines
Check facilitator–participant ratios. • Follow the ratios specified by each facilitator’s certification.
■
•
Maximum of eight participants per instructor for high elements.
•
Maximum of ten participants per instructor for low elements. Additional adult helpers may allow more participants.
•
A minimum of two trained facilitators must be present for high elements.
■
Ensure course knowledge and safety. Facilitators must have firsthand knowledge of course hazards, conditions, and emergency action planse.
Planning and Preparation Phase ■
•
Be clear on gear. Review Gear for Challenge Courses at the end of this section.
•
Ask your facilitator what items are provided.
•
Communicate early with participants and families about what will be supplied by the group leader or outfitter and what individuals need to bring.
■
Line up first aid. Ensure that at least one adult has First Aid/CPR/AED training.
Ensure slacklines are set up properly: o
■
Association for Challenge Course Technology (ACCT) Professional Ropes Course Association (PRCA) Association of Experiential Education (AEE)
Recognized certifications—required for high ropes, recommended for low ropes—include: o o o
Decision-Making Phase
Hands-on training Teaching and facilitation experience with the age group
• •
For locations more than 30 minutes from emergency medical services, recruit a Wilderness First Aider or Wilderness First Responder. Identify the closest emergency transport and facilities.
•
Ensure that a first aid kit will be on hand.
For high ropes courses, facilitators must be certified by a verified agency and demonstrate competence in: o o o
Equipment maintenance Safety and rescue techniques Proper course use
Safety Activity Checkpoints ©2009-2026 Girl Scouts of the USA. All Rights Reserved.
PAGE 54/190
Safety Activity Checkpoints (SACs) Day of the Activity Check the weather. • Consult your instructor; postpone or cancel if conditions are unsuitable for your group’s skill level.
■
•
Review procedures for sudden storms.
•
Never climb or use elements when lightning threatens.
•
Stop activities if precipitation or cold weather reduces traction or grip.
■
•
Gear for Challenge Courses Make sure Girl Scouts have everything they need for a safe and successful challenge course outing. Essential equipment •
o
Confirm facilitator safety checks, such as: Inspecting equipment, course components, and landing areas before each use
•
Maintaining a use log for gear subject to wear, stress, or deterioration
•
Supervising helmet and harness fit for each participant
•
Overseeing all tie-ins, belays, and climbs on high ropes
•
Monitoring spotting on low ropes
Belaying equipment, for climbing and high ropes
o o •
Initiative-specific equipment
Safety gear •
Helmet, properly fitted, for climbing and high ropes
Ensure everyone learns and practices the basics. • Proper fitting of helmets, harnesses, and gear
o
•
Muscle warming and stretching before activities
o
•
Readiness and action commands for climbing, spotting, and belaying
•
Safe spotting techniques for group activities
•
Objectives and safety reminders for all initiatives used.
■
■
•
Review physical safety guidelines. Never stack more than three levels high (e.g., in a pyramid).
•
Never stand on another person’s middle back.
•
No aerial tricks permitted on high or low elements.
•
Review off-limits areas and equipment.
Safety Activity Checkpoints ©2009-2026 Girl Scouts of the USA. All Rights Reserved.
Harness, properly fitted and sized for the user. Full-body harnesses may be required for certain elements or small-framed climbers. Belay devices and other hardware, as needed for the course Ropes, webbing, and other essential gear specific to the course
•
Climbers and those in the “fall zone” must wear helmets. Exception: Helmets should not be worn if the hosting facility/course designer deems them hazardous for belay, such as when using an auto-belay system on an artificial wall.
Rescue equipment must be available for use by the facilitator in an emergency.
Clothing and footwear •
Sturdy, closed-toed shoes
•
Close-fitting clothing—no loose or dangling clothing, especially around the head and neck
•
Hair that could get caught should be tied back, braided, or tucked safely into a head covering.
•
Long pants or athletic leggings for activities that may lead to leg abrasions
PAGE 55/190
Safety Activity Checkpoints (SACs)
SENIOR
AMBASSADOR
Natural rock walls, challenge course–type climbing walls, and rappelling
CADETTE
*
JUNIOR
Bouldering and artificial climbing activities specifically designed with small children in mind
BROWNIE
ACTIVITY
DAISY
Climbing, Bouldering, and Rappelling Is Prior Council Approval Required?
*
J
C
S
A
No
Yes
J
C
S
A
No
Yes
Is Activity Training, Certification, or Verified Experience Required?
*Daisies and Brownies may boulder and may climb on artificial walls that are designed for young children. They may not rappel or climb on natural rock faces.
Sharpen your skills, strength, and focus by climbing! Use problem-solving skills to challenge yourself and reach new goals. Whether you’re in a climbing gym or enjoying the outdoors, your sense of accomplishment will climb, too.
Learn More
General Checkpoints Refer to the Safety Standards for general standards about supervision,transportation, first aid, and emergency plans, as well as inclusion and accessibility considerations.
Activity-Specific Checkpoints for Climbing, Bouldering, and Rappelling Follow these basic reminders for each phase of planning. Check off items as you complete them, making sure to consider each sub-bullet. See Safety Activity Checkpoints (SACs) for these related activities: • Challenge Courses • Recreational Tree Climbing Slacklines are included in Challenge Courses as a low ropes element.
Safety Activity Checkpoints ©2009-2026 Girl Scouts of the USA. All Rights Reserved.
•
Get the top tips for bouldering from Climber News.
•
Understand the International Mountaineering and Climbing Federation (UIAA)’s safety standards.
Key terms • Belaying: Techniques used to create friction within a climbing system (usually on a climbing rope) to stop a climber’s fall. A belayer is the person who controls the belaying device. • Bouldering: Climbing or scrambling on rocks at a height no more than 6 feet off the ground. Ropes are not used. Spotters provide support and protect the upper body and head of a climber in case of a fall. • Free climbing: (not permitted over 6 feet): This style of climbing on rocks or walls without a belay system is never permitted in a Girl Scout setting.
PAGE 56/190
Safety Activity Checkpoints (SACs) • Multi-pitch climbing (experienced climbers only): Long-route climbing that requires several pitches (a section of a route between two belay points). The group climbs to the top of the first pitch. The lead climber climbs to the next pitch, anchors in, and belays each remaining climber individually to the anchor. • Top roping: A rope is anchored from the top of the climbing route, using belays. A belayer at the bottom of the route controls a safety line to prevent long fallst.
•
Maximum of three participants per instructor for multi-pitch climbing. The instructor must be the lead climber.
•
For rappelling, top roping, or multi-pitch climbing, a minimum of two trained instructors must be present.
•
For artificial walls, a minimum of one instructor and an additional adult are required.
•
For bouldering, no instructor certification is required
■
Decision-Making Phase Find a safe place to go climbing, bouldering, and rappelling. • View natural rock and climbing gyms near you on Mountain Project’s interactive maps. Climbing gyms may have suggestions for natural rock climbing near you.
■
•
•
Contact accredited American Mountain Guides Association (AMGA) climbing schools and guiding services.
Identify a qualified instructor/guide. • Ensure the instructor’s training and certification aligns with the location, elements, and conditions of the course and route. For top rope and multi-pitch climbing, the instructor must be trained and certified by a verified agency, demonstrating competence in: o o o o o
•
Planning and Preparation Phase ■
•
Equipment maintenance Safety and rescue techniques Proper route choice use Hands-on training Teaching and facilitation experience with the age group
Ask your instructor what items are provided.
•
Communicate early with participants and families about what the group leader or outfitter will supply and what individuals need to bring.
■
Line up first aid. Ensure that at least one adult has First Aid/CPR/AED training.
• •
For locations more than 30 minutes from emergency medical services, recruit a Wilderness First Aider or Wilderness First Responder. Identify the closest emergency transport and facilities.
•
Ensure that a first aid kit will be on hand.
Day of the Activity ■
Check the weather. Consult your facilitator; postpone or cancel if conditions are unsuitable for the group’s skill level.
Recognized certifications include:
•
o o o
•
Review procedures for sudden storms.
•
Never climb when lightning threatens.
•
Stop activities if precipitation or cold weather reduces traction or grip.
■
Confirm facilitator safety checks, such as: Inspecting equipment and conditions before each use
AMGA guides and instructors—certifications vary Manufacturer requirements when using artificial walls Documented experience per council guidelines.
Check facilitator–participant ratios. • Maintain instructor–participant ratios specified by each instructor’s certification.
■
•
Be clear on gear. Review Gear for Climbing, Bouldering, and Rappelling at the end of this section.
•
Obtain permission or permits for the site
■
Confirm expertise. Make sure the facilitator has firsthand knowledge of hazards, conditions, and emergency action plans for the course.
Maximum of six participants per instructor for bouldering and top roping.
Safety Activity Checkpoints ©2009-2026 Girl Scouts of the USA. All Rights Reserved.
• •
Maintaining a use log for gear subject to wear, stress, or deterioration
PAGE 57/190
Safety Activity Checkpoints (SACs) •
Supervising helmet and harness fit for each participant
•
Overseeing all tie-ins, belays, and climbs
•
Monitoring spotting when bouldering
■
•
Ensure everyone learns and practices the basics. Proper fitting of helmets, harnesses, and gear
•
Muscle warming and stretching before activities
•
Readiness and action commands for climbing, spotting, and belaying
•
Safe spotting techniques if used for bouldering
•
Review off-limits areas and equipment
Gear for Climbing and Rappelling Make sure Girl Scouts have everything they need for a safe and successful outing. Essential equipment •
Belaying equipment, required for rappelling, top roping, or multi-pitch climbing o o o
•
Harness, properly fitted and sized Belay devices and hardware, as needed for the route Ropes, webbing, and other essential gear specific to the climbing route
Chalk bag or liquid chalk (optional to enhance grip)
Safety gear •
Helmet, properly fitted: required for rappelling, top roping, and multi-pitch climbing o o
Must be worn by climbers, rappelers, and those in the “fall zone” Exception: Helmets should not be worn if the hosting facility/wall manufacturer deems them hazardous for belay, such as when using an auto-belay system on an artificial wall.
•
Crash pads for bouldering, if appropriate
•
Rescue equipment must be available for use by the facilitator in an emergency.
Clothing and footwear •
Sturdy shoes or climbing shoes
•
Close-fitting clothing—no loose or dangling clothing, especially around the head and neck
•
Athletic leggings or close-fitting, stretchy, long pants for comfort, mobility, and protection from abrasions
•
Hair that could get caught should be tied back, braided, or tucked safely into a head covering.
Safety Activity Checkpoints ©2009-2026 Girl Scouts of the USA. All Rights Reserved.
PAGE 58/190
Safety Activity Checkpoints (SACs)
Community Clean-Ups
AMBASSADOR
SENIOR
CADETTE
JUNIOR
BROWNIE
ACTIVITY
DAISY
Community Cleanups
Varies. See “Specific Situations” below for grade level guidance.
Make a difference, one piece at a time! Your neighborhood, park, or beach is yours to enjoy— so why not help keep it clean? Grab some gloves, team up with friends, and see how much good you can do! You’ll beautify your neighborhood and be a role model for environmental stewardship
Activity-Specific Checkpoints for Community Cleanups Follow these basic reminders for each phase of planning. Check off items as you complete them, making sure to consider each sub-bullet. Note: Some cleanup environments—such as along roadsides or waterways—require vigilant safety strategies.
•
Beware of potentially dangerous waste products. Michigan’s Department of Transportation has a safety overview video.
No
Consider readiness and interest. Participants need to be able to follow directions and be aware of their surroundings.
■
Make plans for access As you investigate possible sites, think about any support needed for members to fully participate.
Planning and Preparation Phase ■
•
Make it girl-led. Lead the group in discussing possible locations.
•
Have Girl Scouts develop a list of supplies needed and safety precautions they can take.
•
Let even young Girl Scouts determine a few rules for behavior.
•
Supplement with your knowledge of the site and potential concerns—see the notes for specific projects below.
■
Choose a safe, public space. Avoid remote areas and choose a place with ample human activity.
■
Check with the authorities. Contact the landowner or government agency for permission.
■
Be clear on gear. See Gear for Community Cleanups at the end of this section. Discuss with participants and families well in advance so they know what to bring versus what will be provided.
■
Line up first aid. Ensure that at least one adult has First Aid/CPR/AED training
• •
For locations more than 30 minutes from emergency medical services, recruit a Wilderness First Aider or Wilderness First Responder. Identify the closest emergency transport and facilities.
•
Bring a first aid kit.
See list of suspect items at the end of this chapter.
Safety Activity Checkpoints ©2009-2026 Girl Scouts of the USA. All Rights Reserved.
No
■
Learn More •
Is Activity Training, Certification, or Verified Experience Required?
Decision-Making Phase
General Checkpoints Refer to the Safety Standards for general standards about supervision,transportation, first aid, and emergency plans, as well as inclusion and accessibility considerations.
Is Prior Council Approval Required?
PAGE 59/190
Safety Activity Checkpoints (SACs) Day of the Activity Check the weather. • Postpone or cancel if conditions are unsuitable for the group’s skill level.
■
•
Review procedures for sudden storms.
•
Stop work if precipitation or cold weather reduces traction or grip.
•
Do not enter water deeper than knee-deep.
•
Water shoes with a hard sole and closed toe and heel may be used in place of regular shoes.
River, Waterway, Lake, or Pond Cleanups (Brownies and above) •
Stay away from swiftly moving water.
•
Do not enter water deeper than 6 inches without an adult trained in American Red Cross Water Safety for Parents and Caregivers (a free, online class) or equivalent experience, unless a lifeguard is present at the cleanup.
•
Do not enter water deeper than knee-deep.
Gear for Community Cleanups Make sure Girl Scouts have everything they need for a safe and successful outing. Individual gear •
Hard-sole, closed-toed, closed-heel shoes or boots
•
Long pants and long-sleeved shirt if vegetation, hazardous plants, or insects might be present
•
High-visibility vest or other reflective clothing for roadside cleanups or when group is spread out
• •
Highway/Road Cleanups (Cadettes and above) •
Get permission from your state’s department of transportation or other governing agency. Many states and local governments have specific guidelines and safety rules to follow or required safety training videos. Wisconsin’s Department of Transportation has a helpful Adopt-a-Highway safety video.
Pickup tool
•
Stay away from rural and winding two-lane roads and highways.
Heavy garbage bags
•
Work only in areas where the speed limit is 40 mph or less.
•
Avoid high-risk areas such as bridges, overpasses, medians, roundabouts, and steep slopes.
•
Wear high-visibility vests or other reflective clothing.
•
Place cones and/or large, bright signs to indicate a cleanup is in progress.
•
Ensure you have ample adult watchers to help your group.
Group gear •
First aid kit
•
Two-way radios, especially if cell phone service is unreliable
•
Cones, markers, or other visual warnings for drivers, if near a roadway
•
Red flags to alert drivers, if near a roadway
•
Emergency warning device (air horn or whistle) for adult lookouts required; whistles recommended for all others
Specific Situations
o o •
Keep these considerations in mind for the following specific community cleanup situations.
•
Follow guidance above.
Beach Cleanups (Daisies and above) •
Do not enter water deeper than 6 inches without an adult trained in American Red Cross Water Safety for Parents and Caregivers (a free, online class) or equivalent experience, unless a lifeguard is present at the cleanup.
Safety Activity Checkpoints ©2009-2026 Girl Scouts of the USA. All Rights Reserved.
Station adult watchers strategically: o o o
Public Parks and Community Cleanups (Daisies and above)
Watchers do not participate in cleaning the area; they observe the roadway and participants to identify hazards and activate warnings of danger. Watchers use air horns to activate an emergency response. At least one ahead of the group, facing traffic, to flag cars to slow down At least one at the back of the group Additional watchers in the middle, if the front and back watchers cannot keep each other in sight
•
Do not work within 10 feet of the road’s shoulder.
•
Face traffic while working.
PAGE 60/190
Safety Activity Checkpoints (SACs) Potentially Hazardous Waste Be sure all participants understand that some types of waste are potentially dangerous and should not be touched or picked up. For younger Girl Scouts, it may be easier to say what they can pick up: food trash, for example. This partial list of things to avoid is provided to prompt discussion:
Abandoned barrels
Antifreeze
Anything labeled RADIOACTIVE
Any container with liquid in it
Broken automotive batteries
Bulging or dented containers
Chemical containers
Containers with unidentifiable contents
Dead animals, sea creatures
Gas cans, propane canisters, or other fuel containers
Hypodermic needles
Unidentified liquids or powders
Narcotics or drug paraphernalia
Paint cans
Pesticide or herbicide containers
Sharp objects
Sexual paraphernalia
Used oil
Safety Activity Checkpoints ©2009-2026 Girl Scouts of the USA. All Rights Reserved.
PAGE 61/190
Safety Activity Checkpoints (SACs)
ACTIVITY
DAISY
BROWNIE
JUNIOR
CADETTE
SENIOR
AMBASSADOR
Cookie and Product Programs Is Prior Council Approval Required?
Cookie and Product Programs
D
B
J
C
S
A
No
Sharpen your business skills—goal-setting, decision-making, money management, people skills, and business ethics—as a part of the world’s largest girl-led entrepreneurial program.
Activity-Specific Checkpoints for Cookie and Product Programs Follow these basic reminders for each phase of planning. Check off items as you complete them, making sure to consider each sub-bullet. These general guidelines apply to the Girl Scout Cookie Program and Fall Product Program. Your council will provide specific training and resources, including information about other money-earning activities
■
Consider readiness. Discuss with the group the different options for engaging customers. Online, door-to-door, and booths are all ways Girl Scouts can run their cookie business. Choose the option(s) that work best for your group based on their readiness, time commitments, and skill progression.
■
Daisy Girl Scouts. Help Daisies focus on engaging with their circle of family, friends and neighbors—only people they know—during product programs.
•
•
Daisies may need to start with fewer, shorter booths, rotating workers throughout a shift.
•
Role-play scenarios with Daisies and set safety and behavior expectations at a meeting prior to the booth.
Planning and Preparation Phase ■
•
Get cookie history, resources, and inspo at GSUSA.
•
Cookie Seller Resources
•
Volunteer Cookie Resources
Safety Activity Checkpoints ©2009-2026 Girl Scouts of the USA. All Rights Reserved.
Arrange for adult supervision. Adults must accompany Daisies, Brownies, and Juniors when they are marketing, taking orders, and delivering products.
•
Adults oversee Cadettes, Seniors, and Ambassadors, must be aware of how, when, and where they are conducting their business, and must be readily accessible. Girl Scouts should never market or deliver products alone. Instead, they should bring either an adult or a buddy along.
•
Parents, guardians, or caregivers must approve all member-delivered online orders and supervise all communications and deliveries.
•
Follow your council’s instructions for volunteer training and background checks.
Learn More •
No
Decision-Making Phase
General Checkpoints Refer to the Safety Standards for general standards about supervision,transportation, first aid, and emergency plans, as well as inclusion and accessibility considerations.
Is Activity Training, Certification, or Verified Experience Required?
PAGE 62/190
Safety Activity Checkpoints (SACs) Teach Girl Scouts safety skills. Discuss and role-play so Girl Scouts: • Don’t share personal information like last name, address, phone, email address, or school.
■
•
Don’t interact online or through social media platforms with people you don’t know.
•
Always use the secure sales link from product program vendors, not personal platforms.
•
Keep a first aid kit handy at booths and during “walkabouts.”
•
Have immediate phone access to an adult—and to 911—for Cadettes, Seniors, and Ambassadors.
•
Know what to do when someone says or does something that makes Girl Scouts uncomfortable.
o
o o
Set up online marketing. Girl Scouts may use the internet to share their Cookie or Product Program order links, stories, and learnings with these guidelines: • Follow GSUSA and your local council’s policies.
■
•
Partner with their family to review Digital Marketing Tips for Cookie Entrepreneurs and Families.
•
Review and adhere to the Girl Scout Internet Safety Pledge and the Digital Technology SAC.
•
Follow the Digital Cookie Safety Pledge when using that platform.
•
Avoid using personal email or street addresses. Instead, use one of the following: o
o o
An anonymous return address hosted on a secure site. Product program vendors provide such addresses, where personal info is not revealed to customers. A group email account monitored by an adult. An adult’s email account.
Specific Situations Keep these considerations in mind for the following specific cookie sale situations. Connecting with Customers • Connecting with customers virtually. o
With caregiver supervision, Girl Scouts may call, text, and send email messages to alert friends and family about product programs. Girl Scouts may accept customer commitments sent via email, text, or phone.
Safety Activity Checkpoints ©2009-2026 Girl Scouts of the USA. All Rights Reserved.
Sales links should never be posted to online resale sites (eBay, Facebook Marketplace, Facebook Swap). Be aware. Posts on Facebook containing the use of a dollar sign ($) may automatically move the post to Facebook Marketplace. To prevent this, the posting party must disable the automated function. All web pages and postings should be approved by a parent/caregiver. Be aware of social media and website legal guidelines. r Youth under 13: • Parents/caregivers should post on behalf of children under 13. • Parents/caregivers must personally upload any photos or videos to their under-13 child’s social media accounts. r Youth 13 and older: • May use social networking sites to market products, including posting images.
• Door-to-door sales. Share reminders for group members going door to door: o o o o o o
Identify yourself. Wear a membership pin, uniform, or Girl Scout clothing to signify you’re a Girl Scout. Stick to familiar areas. Avoid alleys. Go during daylight, unless accompanied by an adult. Walk safely. Use crosswalks and signal lights when available. Be careful of backing cars when crossing driveways. Never enter someone’s home or vehicle. Do not carry large amounts of money. Have a plan for safeguarding cash.
Cookie Booth Participation • Adult supervision is required for all cookie booths. o o
Booths where any Girl Scout is not accompanied by their own parent/caregiver require two registered, background-checked Girl Scout volunteers. Cookie booths that have all members under the direct supervision of their own parent/caregiver do not require adults to be registered, background-checked Girl Scout volunteers. r Best practice would be to still have two adults present in case of accidents or necessary breaks. r Parents/caregivers are still encouraged to register as volunteers to help support the full experience.
PAGE 63/190
Safety Activity Checkpoints (SACs) Types of Booths Below are examples of the types of cookie booths that a Girl Scout may use in marketing cookies. For ALL types of booths: •
Adults must always oversee Girl Scouts’ interactions with customers.
•
Always follow your council’s policies for booth approval and sign-up.
•
Locations that Girl Scouts are not legally allowed to patronize are not appropriate for booths.
Standard Cookie Booth •
Set up at the entrance or exit of a business or retailer.
•
Locations may be secured through the council’s sign-up system (via your baker software) or by volunteers with business permission.
•
Usually run by two to four girls with appropriate adult supervision.
Safety Tips for All Booth Types •
Make sure Girl Scouts wear their uniforms, other Girl Scout–branded clothing, or their membership pin to clearly identify themselves as Girl Scouts.
•
Follow all council safety guidelines.
•
Watch for traffic while unloading supplies.
•
Ensure there’s enough space for the booth, products, and Girl Scouts while keeping pedestrian pathways clear.
•
Keep a safe distance from cars and bicycles.
•
Never block store entrances or exits.
•
Let Girl Scouts handle making change, but supervising adults should safeguard the cash.
•
Keep cash out of sight; use a front-facing zippered pouch if possible.
•
Deposit cash frequently to reduce the risk of theft.
Cookie Stand •
•
A small, lemonade-stand-style booth run by one or more Girl Scouts from the same household, supervised by their parent/caregiver(s). For safety, two adults are recommended. Check council guidelines to determine where stands are allowed (such as your own property, or with permission, a local business).
Drive-Thru •
Set up in a parking lot or open area where customers stay in their vehicles.
•
Create a safe lane and keep Girl Scouts away from traffic.
•
Always obtain permission from the property owner before setting up.
•
Typically run by a larger group of Girl Scouts with appropriate adult supervision.
Safety Activity Checkpoints ©2009-2026 Girl Scouts of the USA. All Rights Reserved.
PAGE 64/190
Safety Activity Checkpoints (SACs)
ACTIVITY
DAISY
BROWNIE
JUNIOR
CADETTE
SENIOR
AMBASSADOR
Cross-Country Skiing Is Prior Council Approval Required?
Cross-Country Skiing
*
B
J
C
S
A
No
Is Activity Training, Certification, or Verified Experience Required?
No
*Cross-country skiing is not recommended for Daisies due to dexterity and supervision challenges. However, councils in regions where young children commonly ski may choose to allow it.
Hit the snow-covered trails on skis! Also called Nordic or XC skiing, cross-country skiing uses your own body movement to make progress rather than relying on lifts and gravity. Glide your way to stunning new views in a winter wonderland.
General Checkpoints Refer to the Safety Standards for general standards about supervision,transportation, first aid, and emergency plans, as well as inclusion and accessibility considerations.
■
Make plans for access. If ability is a concern for members or their families, make sure the vendor you’re considering can accommodate needs. Check out AllTrails.com and filter for “wheelchair friendly” or review this Athletics for All resource about adapted Nordic skiing.
Planning and Preparation Phase Mark your route. Plan a route that includes the following, and share it with someone not going with you: • Clearly marked and well-groomed trails
■
•
Trail difficulty suitable for your most inexperienced skiers
Activity-Specific Checkpoints for Cross-Country Skiing
•
Away from potential hazards such as avalanche-prone areas or untested frozen lakes
Follow these basic reminders for each phase of planning. Check off items as you complete them, making sure to consider each sub-bullet.
•
Areas to rest
•
Areas to toilet; if a latrine is not available, ask the site authorities how you’re expected to dispose of waste.
•
A designated meeting spot in case of separation
•
Possible evacuation routes.
See the Safety Activity Checkpoints for these related activities: Downhill Skiing and Snowboarding. Decision-Making Phase
■
•
Line up first aid. Ensure that at least one adult has First Aid/CPR/AED training
■
Find a safe place to ski. Designated cross-country ski trails are recommended. Many have lessons, rental gear, and groomed tracks for beginners. AllTrails.com lists locations and difficulty levels on an interactive map.
•
For locations more than 30 minutes from emergency medical services, recruit a Wilderness First Aider or Wilderness First Responder. Identify the closest emergency transport and facilities.
■
Identify an expert. Arrange for instruction by an adult with experience teaching and supervising cross-country skiing for the ages involved.
•
Bring a first aid kit in a waterproof container.
Safety Activity Checkpoints ©2009-2026 Girl Scouts of the USA. All Rights Reserved.
PAGE 65/190
Safety Activity Checkpoints (SACs) ■
•
Prepare for conditions. Get training in winter survival if your route or location is remote. Snow-cave building, whiteout tips and tricks, and avalanche-avoidance techniques may be appropriate for advanced adventures.
•
Include search and rescue procedures in your Emergency Action Plan.
•
For cross-country skiing trips, see the Backpacking SACs for additional guidelines.
Day of the Activity ■
•
Check the weather. Know the forecast for temperature, snow conditions, wind speed, visibility, precipitation, and avalanche risk.
•
Consult location authorities for any necessary plan adjustments.
•
Monitor for storms, blizzards, or lightning; postpone if conditions are unsafe.
■
•
Follow cross-country skiing safety and etiquette standards. Learn how to recover from a fall.
•
Practice enough to be able to ski under control and avoid other skiers and objects.
•
Follow right-of-way norms: o o o
Stay clear of those already on the trail. Step aside to let a descending skier go by. Step aside to let a faster skier pass.
•
Say “track, please” if you wish to pass a slower skier.
•
Never ski close to the edge of an embankment or cliff.
•
Do not walk on ski trails.
Gear for Cross-Country Skiing Discuss with participants and families well in advance what the group leader or outfitter will provide and what each person should bring themselves. Essential equipment •
Skis and ski poles
•
Ski boots (different from downhill boots; these attach only at the toe)
Clothing and footwear •
Waterproof outer layer, including pants and jacket
•
Thermal or long underwear, as needed
•
Heavy, insulating socks
•
Water-resistant, insulating gloves or mittens
•
Winter hat
•
Sunglasses or ski goggles (to protect eyes from glare)
Safety Activity Checkpoints ©2009-2026 Girl Scouts of the USA. All Rights Reserved.
PAGE 66/190
Safety Activity Checkpoints (SACs)
ACTIVITY
DAISY
BROWNIE
JUNIOR
CADETTE
SENIOR
AMBASSADOR
Digital Technology Is Prior Council Approval Required?
Digital Technology and Virtual Meetings
D
B
J
C
S
A
No
Build a website, write a blog, research a badge, or create digital art—it’s all at your fingertips.
General Checkpoints Refer to the Safety Standards for general standards about supervision,transportation, first aid, and emergency plans, as well as inclusion and accessibility considerations.
Activity-Specific Checkpoints for Digital Technology Follow these basic reminders for each phase of planning. Check off items as you complete them, making sure to consider each sub-bullet. Note: This information does not replace the need for training and experience.
■
Consider readiness and interest. Have a conversation about what the group would like to try or learn. They may wish to build on their experiences with their product program websites, or discover coding or artificial intelligence. Balance virtual and in-person experiences. Virtual gatherings can eliminate barriers due to busy schedules, physical ability, lack of childcare, transportation, and distance. Explore ways to bond the group in the digital space to ensure meaningful connections.
Make plans for access. Source options for computer or internet access, especially for those without tech at home. • School, local libraries, college computer labs, or retail computer stores may have learning or screen-time possibilities. •
Consider contacting your council office to see if they have a suggestion.
•
When arranging group activities, make sure assistive devices are in place for anyone who can benefit from visual, hearing, or other aids.
Planning and Preparation Phase ■
Distribute the Girl Scout Internet Safety Pledge. All youth, as well as their caregivers, must read, agree to, and abide by the pledge when participating in Girl Scout activities online.
■
Identify and use only secure sites. Web applications and social media sites are used only if the identity of users can be verified. Keep an eye on participant postings.
■
Keep virtual meeting security top of mind. Keep meetings set to private; do not post meeting links or passcodes publicly.
• •
Learn to turn off screen sharing and block intruders.
•
Keep devices updated. Patches and updates often include security enhancements.
Learn More •
Safety Activity Checkpoints ©2009-2026 Girl Scouts of the USA. All Rights Reserved.
No
■
Decision-Making Phase ■
Is Activity Training, Certification, or Verified Experience Required?
Find out which emblems and words are protected on the GSUSA Terms and Conditions web page.
PAGE 67/190
Safety Activity Checkpoints (SACs) ■
•
•
Know the rules. Get caregiver permission—and ensure all participants are at least 13—before setting up a social networking site for Girl Scout participation. Adult caregivers may use a social networking site to manage a younger group.
•
■
•
Keep in mind that money-earning activities online are permitted for GSUSA-approved product programs only.
Day of the Activity ■
Monitor websites. Ensure Girl Scouts are using safe and actively controlled internet site.
Safeguard privacy. Protect Girl Scouts’ information from unintended audiences who may have harmful intent. Remind Girl Scouts of these basic online safety principles: • Use only first names. Never post addresses, phone numbers, or email addresses of members on any public site.
•
Never post information about group meeting places, dates, or times, or post details of trips or events while still at that location.
•
Be careful with captured images that have the potential to be misused in the future.
•
Use a troop or group email address—or contact info for an adult—when public postings are required for program needs such as event listings.
•
Get caregiver permission before using images of Girl Scouts on social media or other digital sites.
•
Stay up-to-date on technology developments that could impact security.
■
Establish virtual meeting norms. Lead the group in deciding on respectful protocols like when to mute, keeping on task, checking in with each other, and so one.
■
■
• •
Remain engaged in meetings. Continue to monitor for security and conduct even if members are conducting the meeting. Maintain adult supervision as if you were in person. Beware of shared content. When linking to other websites, make sure the site contents align with Girl Scout Mission. Avoid linking to commercial sites selling merchandise, to avoid implied endorsement of those products. Instead, seek out sites that support Girl Scouting and are tasteful and program-level appropriate.
Safety Activity Checkpoints ©2009-2026 Girl Scouts of the USA. All Rights Reserved.
Respect copyrighted material. The basic principle is: If it’s not yours, don’t use it. A group’s website may not use copyrighted designs, text, graphics, or trademarked symbols without specific permission from the copyright or trademark holder.
•
Some commercial products or animated characters are trademarked and can’t be used on most websites.
•
Get permission from the artist, author, or publisher before using videos or music on your website. This includes words from copyrighted songs, poems, or books.
■
Protect the Girl Scout brand. Girl Scouts may use trademarks owned by GSUSA, which include the trefoil shape, membership pins, badges, highest award, and other images.
■
•
As a courtesy, contact the site’s webmaster for permission to link to the site.
•
•
■
• •
Certain terms, like Girl Scout Cookies or Junior Girl Scout, are safeguarded, too. Use them only in accordance with guidelines for their use. The Girl Scout trefoil, for example, may not be animated or used as wallpaper for a website. Follow legal protections. Get caregiver permission before launching social networking sites that youth will use. Participants must be 13 years old—or older in some states—and must meet U.S. Child Online Privacy and Protection Act (COPPA) guidelines.
Girl Scout Programs As part of Girl Scout programs, members may create their own unique websites to highlight their activities. These site links should only be shared with family, friends, and other people the Girl Scout knows. Keep in mind: •
A caregiver must review and approve a Girl Scout’s website before it goes live.
•
A caregiver must manage the website for a Girl Scout under 13 years old and be responsible for all content, communication, and information posted.
•
A caregiver must review and approve any images before they are posted. If the Girl Scout is under 13 years old, the caregiver must post the pictures and videos themselves—youth under 13 are not permitted to do so.
PAGE 68/190
Safety Activity Checkpoints (SACs)
ACTIVITY
DAISY
BROWNIE
JUNIOR
CADETTE
SENIOR
AMBASSADOR
Downhill Skiing and Snowboarding Is Prior Council Approval Required?
Downhill Skiing and Snowboarding
*
B
J
C
S
A
No
Experience the thrill of gliding down snowy slopes, carving turns amid stunning mountain scenery. Skiing and snowboarding offer a sense of achievement as you master new skills alongside friends.
General Checkpoints Refer to the Safety Standards for general standards about supervision,transportation, first aid, and emergency plans, as well as inclusion and accessibility considerations.
Activity-Specific Checkpoints Skiing and Snowboarding Follow these basic reminders for each phase of planning. Check off items as you complete them, making sure to consider each sub-bullet. See the Safety Activity Checkpoints for related activities: Cross-Country Skiing. Note: Aerial tricks on skis or snowboards are never permitted as part of a Girl Scout activity.
•
Find out about ski slope ratings. Get inspired by the world’s best skiers and snowboarders.
Safety Activity Checkpoints ©2009-2026 Girl Scouts of the USA. All Rights Reserved.
Yes
Decision-Making Phase ■
Find a safe place to ski or ride. Established ski and snowboard runs are a must. Most facilities have lessons, rental gear, and rated runs.
Identify an expert. Arrange for instruction by an adult with experience teaching and supervising skiing and snowboarding for the ages involved. Recognized certifications include: • Professional Ski Instructors of America (PSIA)
■
•
American Association of Snowboard Instructors (AASI)
•
Equivalent certification or documented experience according to your council’s guidelines
■
Make plans for access. Read Move United’s page about adaptive skiing methods and finding local programs. Search the internet for “adaptive skiing near me” for supportive instruction and facilities.
Planning and Preparation Phase ■
Be clear on gear. See Gear for Downhill Skiing and Snowboarding at the end of this section. Discuss with participants and families well in advance what the group leader or an outfitter will provide and what each person should bring themselves.
■
Line up first aid. Ensure that at least one adult has First Aid/CPR/AED training
Learn More •
Is Activity Training, Certification, or Verified Experience Required?
• •
For locations more than 30 minutes from emergency medical services, recruit a Wilderness First Aider or Wilderness First Responder. Identify the closest emergency transport and facilities.
•
Bring a first aid kit in a waterproof container.
PAGE 69/190
Safety Activity Checkpoints (SACs) Day of the Activity Check the weather. • Know the forecasts for temperature, snow conditions, wind speed, visibility, precipitation, and avalanche risk.
■
•
■
•
Consult the facility for any necessary plan adjustments.
•
Monitor for storms, blizzards, or lightning; postpone if conditions are unsafe.
Know the slopes. With all participants: • Review the trail ratings and trail maps for the area you’ll ski or ride. Plan lifts and runs according to ability.
•
Especially for beginners, consider having one adult in front of a group and one in the back, so that any who struggle have support and don’t fall behind.
•
Experienced skiers or riders may take runs in pairs, reconnecting at the bottom of the slope.
•
Make sure everyone knows what to do if they are separated.
■
•
Identify the nearest medical clinic.
•
Learn how to obtain help.
•
Learn where participants can rest and use a toilet.
•
Designate a meeting spot in case of separation.
Ensure everyone learns the basics. • How to steer and stop
■
•
How to recover from a fall
•
How to ride the lifts
•
How to identify and avoid obstacles like trees, rocks, growth coming up under thin snow, melted snow, or puddles
•
Sufficient skiing control to avoid other skiers and objects
Follow skiing and snowboarding safety and etiquette standards. • Follow right-of-way norms:
■
o o o o
Yield to those already on the slope. Do not cross the path of other skiers or snowboarders. Make others aware before you turn. Move quickly to the side of a trail or slope after falling, unless injured.
•
Summon the ski patrol if someone is injured. They are often dressed in red.
•
Never ski close to the edge of an embankment or cliff.
•
Do not walk on ski trails.
•
Follow all staff instructions and observe posted rules
Safety Activity Checkpoints ©2009-2026 Girl Scouts of the USA. All Rights Reserved.
Make plans to reconnect. Decide on a time and place for the group to gather and check in.
Gear for Downhill Skiing and Snowboarding Discuss with participants and families well in advance what the group leader or outfitter will provide and what each person should bring themselves. Essential equipment •
Skis and ski poles, or snowboard
•
Ski or snowboarding boots with bindings
Safety gear •
A protective helmet with a properly fitting safety harness that meets Snell RS-98/S-98 or ASTM F2040 standards and displays the SEI seal
Clothing and footwear •
Waterproof outer layer: pants and jacket
•
Thermal or long underwear, as needed
•
Heavy, insulating socks
•
Water-resistant, insulating gloves or mittens
•
Winter hat
•
Sunglasses or ski goggles (to protect eyes from glare)
Optional equipment •
Daypack
•
Water bottle
•
High-energy food (e.g., fruits and nuts)
PAGE 70/190
Safety Activity Checkpoints (SACs) BROWNIE
JUNIOR
CADETTE
SENIOR
Fencing
*
B
J
C
S
AMBASSADOR
ACTIVITY
DAISY
Fencing Is Prior Council Approval Required?
Is Activity Training, Certification, or Verified Experience Required?
A
No
Yes
*Daisies may learn about fencing games and rules but should only use foam swords.
Experience the exciting blend of skill and strategy that fencing offers. Use a foil, saber, or épée to outmaneuver your opponent and score touches while avoiding theirs. With proper protective gear and the right foil selection, fencing remains a safe and low-risk activity.
General Checkpoints Refer to the Safety Standards for general standards about supervision,transportation, first aid, and emergency plans, as well as inclusion and accessibility considerations.
Activity-Specific Checkpoints Skiing and Snowboarding Follow these basic reminders for each phase of planning. Check off items as you complete them, making sure to consider each sub-bullet. Note: Aerial tricks on skis or snowboards are never permitted as part of a Girl Scout activity.
Decision-Making Phase ■
Find a safe place to fence. Find a club or academy that offers instructional sessions with equipment. USA Fencing offers club listings by state as well as competitions to attend as spectators.
■
Identify an expert. Arrange for instruction by an adult with experience teaching and supervising fencing for the ages involved. Recognized certifications include:
•
U.S. Fencing Coaches Association
•
Equivalent certification or documented experience according to your council’s guidelines
■ Make plans for access. Refer to USA Fencing’s
Parafencing 101 and discuss needed accommodations with participants and coach to ensure compliances.
Planning and Preparation Phase ■
Be clear on gear. See Gear for Fencing at the end of this section. Discuss with participants and families well in advance what the group leader, club, or gym will provide and what each person should bring themselves.
■
Line up first aid. Ensure that at least one adult has First Aid/CPR/AED training
•
Learn More •
Find out what these terms mean at USA Fencing:
•
En garde!
•
Prêts?
•
Allez!
Safety Activity Checkpoints ©2009-2026 Girl Scouts of the USA. All Rights Reserved.
•
Ensure a first aid kit is readily available.
Day of the Activity Dress appropriately. Make sure all participants follow these guidelines: • Sneakers or fencing shoes
■
•
Long socks that go to the knees; soccer socks work well.
•
Hair or jewelry that could be caught is secured.
PAGE 71/190
Safety Activity Checkpoints (SACs) ■
• •
Make sure all fencers learn the basics. Listen to the coach and follow all instructions. Review rules and expectations for safe behavior.
Gear for Fencing Ensure that equipment is in good condition. It should be clean and in good working order, with nothing broken, loose, or torn. Required items include. Essential equipment •
Foil, saber, or épée, with handle in good repair
•
Protective clothing and equipment: o o o o o
•
Mask with a sewn-in-bib; must pass 12K punch test Jacket Plastron (underarm protector worn on fencing arm) Knickers (fencing pants that cover knees) Chest protector
Lame and cords for foil and sabre fencers air
Clothing and footwear •
Clothing and shoes as mentioned above
Safety Activity Checkpoints ©2009-2026 Girl Scouts of the USA. All Rights Reserved.
PAGE 72/190
Safety Activity Checkpoints (SACs)
ACTIVITY
DAISY
BROWNIE
JUNIOR
CADETTE
SENIOR
AMBASSADOR
Fishing and Ice Fishing Is Prior Council Approval Required?
Fishing and Ice Fishing
D
B
J
C
S
A
No
Fish in fresh or salt water anywhere in the world, whether from shore, dock, or boat. Fishing fosters a connection to nature while building patience and problem-solving skills. In colder climates, try ice fishing by cutting a hole in the ice to catch fish.
Is Activity Training, Certification, or Verified Experience Required?
Yes
Learn More: •
Avoid causing harm to animals or the earth when fishing. Discover fishing tips from Leave No Trace.
•
Get a quick video overview on how to go ice fishing.
General Checkpoints Refer to the Safety Standards for general standards about supervision,transportation, first aid, and emergency plans, as well as inclusion and accessibility considerations.
■
•
Activity-Specific Checkpoints for Fishing Follow these basic reminders for each phase of planning. Check off items as you complete them, making sure to consider each sub-bullet. Decision-Making Phase ■
•
■
• •
Find a safe place to fish. Work with your group to decide what type of fishing they want to do, from available choices in your area. Follow the guidance for Fishing Locations and Types found below. Browse Take Me Fishing’s interactive, crowd-sourced site, or ask a local bait or fishing supply shop for locations. Identify an expert. Arrange for instruction by an adult with experience teaching and supervising fishing. Never exceed ten participants per instructor.
Safety Activity Checkpoints ©2009-2026 Girl Scouts of the USA. All Rights Reserved.
■
•
Be ready for rescues. Ensure someone with relevant rescue experience is on hand. At a minimum, ensure at least one adult per ten participants has completed the American Red Cross’s free online course Water Safety for Parents and Caregivers or has equivalent experience. See the Fishing Types section, below, for additional rescue training needed for certain conditions. Make plans for access. Make sure your location is accessible for everyone in your group. Plan for secure footing and be aware of sloping shorelines that pose a rolling hazard for wheelchair users.
Planning and Preparation Phase ■
Observe regulations. Determine fishing and environmental regulations for your location. Licenses, catch limits, and allowed type and size of fish vary. Determine the bait and fishing gear permitted.
■
Be clear on gear. See Gear for Fishing and Ice Fishing at the end of this section. Discuss with participants and families well in advance what will be provided by the group leader, the outfitter or site (if used), or individuals.
•
PAGE 73/190
Safety Activity Checkpoints (SACs) ■
• •
•
Line up first aid. Ensure that at least one adult has First Aid/CPR/AED training. For locations more than 30 minutes from emergency medical services, recruit a Wilderness First Aider or Wilderness First Responder. Identify the closest emergency transport and facilities.
Additional Requirements for Fishing Locations and Types From a dock or pier. •
Bring a first aid kit in a waterproof container. For ice fishing, include supplies to treat hypothermia.
Arrange for “water watchers.” • Ensure adult watchers are present for supervision, especially for scattered groups.
■
•
Use a minimum watcher-to-participant ratio of 1:6 for Daisies and 1:10 for older participants.
•
Watchers must actively monitor children, providing undivided attention.
•
Designate watcher(s) and inform children about who is on duty.
•
Watchers do not replace lifeguards, when lifeguards are required.
Wading in water that is above the knee, without waves or current. •
Ensure that a person with rescue training is on hand. Acceptable training includes lifeguard certification, water safety instructor, Basic Water Rescue, or Water Safety for Parents and Caregivers (a free online course) or the equivalent.
•
All participants wear a U.S. Coast Guard (USCG)–approved life jacket.
Wading in water that is below the knee, without waves or current •
A person with rescue training is encouraged. See above bullet for acceptable training.
•
Ensure USCG-approved flotation devices or other water rescue equipment are readily available.
Day of the Activity Make sure all anglers learn safety basics. • Areas to avoid, such as surf, slippery rocks, etc.
■
•
How to behave and move about in the boat, if using one
•
Rules for catch size and type, or if you are fishing catch and release
•
How to safely cast a line
•
Using the buddy system
•
What to do if someone needs help
Verify ice thickness when ice fishing. • Ensure that ice is at least 4 inches thick—solid enough to support anglers’ weight. The Department of Natural Resources of the State of Minnesota offers these guidelines for ice thickness.
■
•
Check ice thickness frequently—at least every 150 feet— as you move across a body of water, as thickness can vary significantly.
Safety Activity Checkpoints ©2009-2026 Girl Scouts of the USA. All Rights Reserved.
Ensure that a person with rescue training is on hand. Acceptable training includes lifeguard certification, water safety instructor, Basic Water Rescue, or Water Safety for Parents and Caregivers (a free online course) or the equivalent.
Fishing from small craft •
Ensure the small craft operator or group instructor has Girl Scout–approved training. See the Safety Activity Checkpoints for that type of vessel (e.g., canoe or rowboat).
•
Follow USCG requirements for the vessel, including wearing life jackets. See details in Gear for Fishing and Ice Fishing, below.
•
Have at least one USCG-approved throwable flotation device immediately available for each group on the water.
•
Select appropriate boats for the water conditions and passengers. Do not overload.
•
Arrange for additional watchers as the situation allows. Watchers may be on the boat, or on a near shore if using kayaks or canoes.
PAGE 74/190
Safety Activity Checkpoints (SACs) •
File a float plan for extended boating trips. Provide a reliable adult with information about your boat(s) and the people aboard. This fillable Coast Guard Float Plan includes steps for your contact to take if they are concerned about your safety.
Gear for Fishing and Ice Fishing Ensure that all equipment is in good condition. Needed items include:
o o o
Clothing and footwear •
Shoes with grippy soles to prevent slips
•
Layered non-cotton clothing for sun protection and warmth
•
Waterproof jacket and pants for ice fishing or other wet/cold conditions
•
Hair, clothing, or jewelry secured if it could be caught in equipment
•
Sunglasses, to protect from the sun and from hooks or lures
•
Other items your expert suggests, such as waders for fly fishing
•
For ice fishing, add these items:
Essential Equipment •
Fishing tackle, including rods, reels, line, net, etc. for expected conditions
•
Barbless hooks and lures
•
Pliers to remove hooks and cut line
•
Cooler with ice to keep fish from spoiling
•
For ice fishing, add these items: o o o o o
Chisel, spike, or drill to check ice Ice auger, bucket, and scoop to open and maintain hole Tape measure to measure thickness Shanty (optional)—follow ventilation and safety instructions if using a heater Ice sled (optional)
Cell phone and personal locator beacon Rope to throw to someone who has fallen through the ice Throwable flotation device immediately available
o o o
Snowsuit, warm coat, hat, and mittens Lightweight rubber gloves or hunting/fishing gloves Waterproof, insulated boots with ice cleats or crampons
Safety gear •
Life jacket (PFD). If wading in water more than knee-deep, or fishing from a boat, wear a USCG-approved life jacket (Type II or III recommended) that fits according to weight and height specifications. Inspect for working buckles and zippers, and ensure that fabric has no tears.
•
Rescue items appropriate for conditions, such as ring buoy, throw rope, throw cushion, pole, or chase boat. Check with your instructor and/or the facility you’ll use to see what’s on hand.
•
Whistle for each person
•
For ice fishing, add these items: o o o
Foam life jacket or flotation suit Ice picks for self-rescue; provide instruction on use. Flashlight/lantern
Safety Activity Checkpoints ©2009-2026 Girl Scouts of the USA. All Rights Reserved.
PAGE 75/190
Safety Activity Checkpoints (SACs)
ACTIVITY
DAISY
BROWNIE
JUNIOR
CADETTE
SENIOR
AMBASSADOR
Geocaching Is Prior Council Approval Required?
Geocaching
*
B
J
C
S
A
No
Is Activity Training, Certification, or Verified Experience Required?
No
*Daisies may geocache when working with older girls and adults. Hunt for hidden treasures, navigate with GPS, and solve clues in geocaching—where adventure and fun await! Geocaching is a GPS-powered treasure hunt, where map-reading and problem-solving lead you to hidden caches.
Learn More:
General Checkpoints Refer to the Safety Standards for general standards about supervision,transportation, first aid, and emergency plans, as well as inclusion and accessibility considerations.
Activity-Specific Checkpoints for Geocaching Follow these basic reminders for each phase of planning. Check off items as you complete them, making sure to consider each sub-bullet. Decision-Making Phase Find a safe place to geocache. Anywhere humans go, there’s likely to be a geocache nearby. • Look for caches well away from traffic, unstable or steep terrain, and other hazards.
■
• •
■
•
Cache postings include terrain and difficulty ratings from 1 to 5; start low. Learn to geocache. No certification or formal training is needed for geocaching, but it will help to review tutorials on the Geocaching website or mobile app.
Safety Activity Checkpoints ©2009-2026 Girl Scouts of the USA. All Rights Reserved.
Send a trackable on an adventure—and follow it! A trackable is an object that travels from cache to cache. Give one a mission and see the world through other geocachers’ logs and photos.
•
Find and follow Other Girl Scouts’ trackables.
Make plans for access. Utilize accessible GPS devices, designed for blind and visually impaired users. Find route surface and obstruction information at Handicaching.com, a crowd-sourced site where users rate the accessibility of caches.
Planning and Preparation Phase ■
Be clear on gear. See the list at the end of this section. Discuss with participants and families well in advance what the group leader will provide and what each person should bring themselves.
■
Line up first aid. Ensure that at least one adult has First Aid/CPR/AED training.
■
•
•
• •
For locations more than 30 minutes from emergency medical services, recruit a Wilderness First Aider or Wilderness First Responder. Identify the closest emergency transport and facilities.
•
Bring a first aid kit.
PAGE 76/190
Safety Activity Checkpoints (SACs) Day of the Activity Dress appropriately. Make sure all participants are wearing: • Sneakers or hiking boots
■
•
Layered clothing appropriate for the weather
•
Sun protection (hat, sunglasses)
•
Whistle for emergencies
Gear for Geocaching Make sure Girl Scouts have everything they need for a safe and successful outing: Essential Equipment •
A smartphone or GPS device o o
If possible, each person or pair should have a device. If devices are limited, make sure each person gets to try navigating. Cache coordinates downloaded if using a GPS device
Make sure all geocachers learn the basics. • Use the buddy system.
•
Reusable water bottle and snack in a daypack
•
•
Pen for signing the log found in many caches
•
Small SWAG (toy, keychain, sticker, etc.) or SWAPS to trade (optional) for items in the cache
■
•
Be careful where you step; beware of traffic, bodies of water, other pedestrians, and uneven or steep terrain. Avoid reaching into unknown nooks, crannies, or vegetation.
•
Watch for sharp edges, branches, insects, and poisonous plants.
•
Follow geocaching etiquette: o o o o o o o o
Safety gear •
Map and compass as backup if going to an unknown or wilderness area
Follow CITO: cache in, trash out. Avoid tramping vegetation. Do not climb walls or fences. Do not damage property. Do not dig; geocaches are never buried. Be discreet in busy areas so curious onlookers don’t interfere with the cache. Do not leave candy or other food in a cache. Take a trackable only if you can help move it toward its goal.
Safety Activity Checkpoints ©2009-2026 Girl Scouts of the USA. All Rights Reserved.
PAGE 77/190
Safety Activity Checkpoints (SACs)
CADETTE
SENIOR
AMBASSADOR
Go-Karting
JUNIOR
BROWNIE
ACTIVITY
DAISY
Go-Karting Is Prior Council Approval Required?
J
C
S
A
No
Hop into a go-kart, buckle up, and take off around the track, feeling the rush of speed as you navigate every turn. It’s all about the joy of zooming, laughing, and soaking up the thrill of a ride you won’t forget!
General Checkpoints Refer to the Safety Standards for general standards about supervision,transportation, first aid, and emergency plans, as well as inclusion and accessibility considerations.
•
Follow these basic reminders for each phase of planning. Check off items as you complete them, making sure to consider each sub-bullet. Decision-Making and Planning Phases ■
•
•
■
•
Find a safe place to drive. Use only concession-type go-karting establishments such as those found at amusement parks or other public facilities. Privately owned tracks and go-karts are not permitted. Check the track and kart features before making arrangements. Confirm conditions meet standards on arrival. Evaluate the track. Go-kart tracks must have: A fixed rail or a continuous containment system (e.g., curbs) around the entire track except for the pit entrance and exit
Safety Activity Checkpoints ©2009-2026 Girl Scouts of the USA. All Rights Reserved.
No
Fire extinguishers easily accessible to the pit attendants and within 70 feet of any point on the track o
At minimum, extinguishers must be 10BC-rated, properly mounted, marked, and charged.
•
A restricted perimeter to keep unauthorized persons from the track area
•
Safety, warning, and instructional signage clearly visible
•
At least two attendants on duty at all times
■
•
Activity-Specific Checkpoints for Go-Karting
Is Activity Training, Certification, or Verified Experience Required?
Evaluate the karts. Karts must: Be built for one driver and no more than one passenger, side by side
•
Be regularly maintained
•
Have, in good condition: o o o o o o o o o o
Passenger padding: seat bottom, seat back, steering wheel and column, and headrest A speed governor to limit speed to 25 mph Brake and gas controls that automatically return to their default positions when released Controls that are clearly labeled or color-coded to distinguish braking from acceleration Rollover protection Chain and/or belt guards Guarded or shielded hot or moving parts Gas caps and all components in place and in proper working condition Fuel tanks secured, with no leaks No fiberglass laceration hazards
PAGE 78/190
Safety Activity Checkpoints (SACs) ■
• • ■
• •
Verify that safety gear is available. Protective helmet with properly fitting safety harness that meets the American Society for Testing and Materials (ASTM) F2416 or F1492 requirements, displaying the Safety Equipment Institute (SEI) seal See the Helmets section of the Safety Standards for more information. Line up first aid. Ensure that at least one adult has First Aid/CPR/AED training. Verify that a first aid kit is readily available.
Day of the Activity ■
• •
Dress appropriately. Make sure all participants: Are wearing sneakers or other sturdy shoes Have secured hair, clothing, or jewelry that could be caught in equipment
Gear for Go-Karting As long as Girl Scouts are appropriately dressed, they shouldn’t need any other gear—the facility will supply whatever they need. Just show up and have fun!
Safety Activity Checkpoints ©2009-2026 Girl Scouts of the USA. All Rights Reserved.
PAGE 79/190
Safety Activity Checkpoints (SACs)
ACTIVITY
DAISY
BROWNIE
JUNIOR
CADETTE
SENIOR
AMBASSADOR
Hayrides Is Prior Council Approval Required?
Hayrides
D
B
J
C
S
A
No
Take a gentle ride through scenic farmland in a wagon filled with hay—sometimes called a hayrack ride—and enjoy a peaceful tradition with friends. Note: While hayrides are usually safe and fun, overturning or veering off the road can lead to severe outcomes. Take safety precautions seriously and check the host or vendor’s qualifications beforehand.
General Checkpoints Refer to the Safety Standards for general standards about supervision,transportation, first aid, and emergency plans, as well as inclusion and accessibility considerations.
Activity-Specific Checkpoints for Hayrides Follow these basic reminders for each phase of planning. Check off items as you complete them, making sure to consider each sub-bullet. Decision-Making Phase Find a safe place to go on a hayride. Before booking, confirm that farms or locations: • Do not operate on or cross public roads or highways, or snowmobile tracks in winter
■
•
Is Activity Training, Certification, or Verified Experience Required?
No
Make plans for access. If accommodation is needed for a hayride, discuss with the farm how participants will enter the wagon and how any mobility devices, such as wheelchairs, can be securely accommodated. Communicate with participants and caregivers to ensure the arrangements meet their needs and preferences.
Planning and Preparation Phase ■
Make it girl-led. Engage participants by exploring Safe Agritourism’s interactive hayride safety page to learn what to look for.
■
Line up first aid. Ensure that at least one adult has First Aid/CPR/AED training.
• •
For locations more than 30 minutes from emergency medical services, recruit a Wilderness First Aider or Wilderness First Responder. Identify the closest emergency transport and facilities.
•
Bring a first aid kit.
Day of the Activity
■
Dress appropriately. Make sure all participants are wearing: • Sneakers or other closed-toed shoes
■
•
Have routes with no steep grades
•
Layered clothing appropriate for the weather
•
Use only qualified, licensed drivers (at least 21 years old, 25 preferred) with training in towing wagons
•
Sun protection (hat, sunglasses)
•
Hair secured
•
Inspect the wagon and tractor/truck before each use
•
No dangling jewelry
•
Never tow more than one wagon at a time
•
You may want to ask about other safety details which you’ll confirm upon arrival. See the list in “Evaluate scene safety” below.
Safety Activity Checkpoints ©2009-2026 Girl Scouts of the USA. All Rights Reserved.
PAGE 80/190
Safety Activity Checkpoints (SACs) ■
•
Evaluate scene safety (on the day of or during an advance trip) by checking the following details: Route/site: o o
•
Wagon: o o o o o o o o
•
•
Sturdy steps and handrails for loading and unloading Sturdy side walls with railings, and entry gates that are secured while moving Adequate seating for all riders, with no standing allowed Hay or straw securely stacked to prevent slipping License plate or permit as required in your area Rear running/brake lights Safety chain attached to the towing tractor or truck Not overloaded with passengers
Tractor/truck: o o o
■
Located on sectioned-off property, such as fields, with clear, unobstructed paths Free of other traffic, including visitor parking areas
Weighs more than the gross weight of the loaded wagon for traction and braking Attached to the wagon during passenger loading Passengers not allowed to sit with driver
Review rules and expectations for safe behavior. Remain seated.
•
Keep arms and legs inside the wagon.
•
Do not hang over the side walls/railings.
•
Do not ride on or in the towing tractor or truck.
•
Adults ride with youth, following ratios for their program grade level.
Gear for Hayrides As long as Girl Scouts are appropriately dressed, they shouldn’t need any other gear—the facility will supply whatever they need. Just show up and have fun!
Safety Activity Checkpoints ©2009-2026 Girl Scouts of the USA. All Rights Reserved.
PAGE 81/190
Safety Activity Checkpoints (SACs)
ACTIVITY
DAISY
BROWNIE
JUNIOR
CADETTE
SENIOR
AMBASSADOR
Hiking Is Prior Council Approval Required?
Hiking
D
B
J
C
S
A
No
Go on an adventure and take a hike anywhere! Whether it’s for a few minutes or a few hours, enjoy the fresh air, explore nature, and have fun with friends.
■
Note: These checkpoints refer to day hikes. Follow the Backpacking SAC for hikes with an overnight component.
navigable trails in your area at the Trail Access Project, or search local reviews online. ■
■
Make it girl-led. Encourage the group to plan their destination and identify things they’d like to see along the way. Help participants understand distance, terrain features like hills, and other factors to ensure everyone is on the same page.
■
Line up first aid. Ensure that at least one adult has First Aid/CPR/AED training.
•
For locations more than 30 minutes from emergency medical services, recruit a Wilderness First Aider or Wilderness First Responder. Identify the closest emergency transport and facilities.
•
Bring a first aid kit. Be sure to include blister treatment supplies.
■
Find out about the hiking area and how to stay safe. Talk to a park ranger or local hiking expert or do online research about rules and potential hazards such as poisonous plants, animals, cliffs and drop-offs, etc.
Learn More: Check out Environmental Volunteers’ list of fun activities for nature hikes.
•
Find trails, guides, and maps on the AllTrails app.
•
Hike gently with Leave No Trace tips.
•
•
Safety Activity Checkpoints ©2009-2026 Girl Scouts of the USA. All Rights Reserved.
Check out Melanin Base Camp and Diversify Outdoors for tips on making the experience familiar for all.
Planning and Preparation Phase
•
•
Consider readiness and interest. Start short and slow, with a brief walk in the neighborhood. Build endurance toward more challenging or remote hikes if the group is interested.
■ Make plans for access. If ability is a factor, find
Activity-Specific Checkpoints for Hiking Follow these basic reminders for each phase of hike planning. Check off items as you complete them, making sure to consider each sub-bullet.
No
Decision-Making Phase
General Checkpoints Refer to the Safety Standards for general standards about supervision,transportation, first aid, and emergency plans, as well as inclusion and accessibility considerations.
Is Activity Training, Certification, or Verified Experience Required?
Apply for a permit, if required.
PAGE 82/190
Safety Activity Checkpoints (SACs) Day of the Activity Check the weather. • Postpone if conditions are unsuitable for the group’s skill level.
■
Gear for Hiking Make sure Girl Scouts have everything they need for a successful day. Individual essentials, carried by each person
•
Review procedures for sudden storms.
•
Daypack to carry belongings
•
Never hike when lightning threatens.
•
Water bottle or hydration pack
•
Individual food/snacks: high-energy, lightweight foods such as nuts and dried fruits
■
•
Review trip specifics with all participants. Go over: Route and hiking plans
•
Expected weather
•
Whistle
•
Possible flora and fauna—and what to do if trekkers encounter it
•
•
Awareness of fatigue, “hot spots” on the feet, and other health matters
Toileting supplies (toilet paper, garbage bag, menstrual supplies, trowel for cat hole, hand sanitizer), as appropriate for the area you’ll visit
Clothing and footwear
•
Emergency action plan—roles for each person
•
•
Leave No Trace principles, including toileting specifics for the territory you’ll visit
Lightweight, layered clothing and outerwear appropriate for the weather conditions
•
Sturdy hiking/trail footwear
•
Key safety rules:
•
Socks designed for hiking, with either wicking technology or a liner/thicker sock combination
•
Hat, bandana, and/or sunglasses for sun protection
o o o
Follow the buddy system. Stay on trails unless directed by an expert. Stay away from the edges of waterfalls, rock ledges, and slopes with loose rocks.
■
Confirm gear is ready. Double-check that critical items— water bottles, snacks, sunscreen, etc.—are on hand.
■
Proceed safely. Determine hiking buddies.
•
“Ten Essentials” emergency survival kit (optional) While not needed for short day hikes in the neighborhood, you can use the Ten Essentials to build self-sufficiency and skills for distance hiking. Use your good judgment on when to introduce these items: •
Flashlight or headlamp
•
Personal first aid kit
•
Extra clothing (including a waterproof jacket)
•
Position an experienced adult with route knowledge at the front of the group.
•
Position a “sweep” person at the end to collect any stragglers who might pause.
•
Snacks
•
Tablets for purifying water and/or extra water
Set a pace that everyone can keep; when stopping for a break, make sure to rest long enough for those who arrive last.
•
Emergency shelter
•
Matches in a waterproof container
•
Knife
•
Map
•
Compass or GPS
•
•
Stop at any trail junctions or places where direction is unclear. Make sure every buddy pair knows it is their responsibility to ensure the following buddy pair sees what direction to go.
Safety Activity Checkpoints ©2009-2026 Girl Scouts of the USA. All Rights Reserved.
Group gear •
A working cell phone, InReach, or similar communication device
•
Other gear appropriate for your location
PAGE 83/190
Safety Activity Checkpoints (SACs)
ACTIVITY
DAISY
BROWNIE
JUNIOR
CADETTE
SENIOR
AMBASSADOR
Horseback Riding Is Prior Council Approval Required?
Horseback Riding
*
B
J
C
S
A
Yes
Is Activity Training, Certification, or Verified Experience Required?
Yes
*Daisies may participate in hand-led pony or horseback walks only. Learn responsibility, patience, and empathy through horseback riding, building confidence and respect for horses while understanding human-animal communication.
•
For other locations, inquire about accreditation by or membership of the Certified Horsemanship Association or a similar organization. While this certification is not required, it’s a sign of safe, quality operations.
•
Visit in person if possible. Look for conditions listed under “Evaluate scene safety” in the “Day of the Activity” phase below.
General Checkpoints Refer to the Safety Standards for general standards about supervision,transportation, first aid, and emergency plans, as well as inclusion and accessibility considerations.
Activity-Specific Checkpoints for Horseback Riding
■
•
•
Follow these basic reminders for each phase of planning. Check off items as you complete them, making sure to consider each sub-bullet.
• •
■
•
Assess readiness. Riders must: Have sufficient physical coordination and balance for riding Be mature enough to understand and practice safety procedures, use good judgment in reacting to situations, and take responsibility for themselves and their horses Find a safe stable. Check with your council staff to see if an approved vendor list is offered. If so, use one of those vendors.
o ■
•
•
Safety Activity Checkpoints ©2009-2026 Girl Scouts of the USA. All Rights Reserved.
Engage a certified riding instructor. Instructors must be certified by an accredited horsemanship instructor training organization or have approved alternative credentials, such as: o o o
Decision-Making Phase ■
Identify an expert. Arrange for instruction by an adult with experience in teaching and supervising riding for the ages involved. Assistant instructors must be 16 or older.
Certified Horsemanship Association (CHA) American Riding Instructors Association (ARIA) Documented proof of a minimum of three years’ experience successfully instructing in a general horseback riding program Documented experience per your council’s guidelines
Make plans for access. Many riding facilities can accommodate people with different needs, if arranged in advance. Discuss with the staff how a rider will mount, lead their horse, and dismount. Communicate with participants and caregivers to ensure the arrangements meet their needs and preferences. For rider and horse safety, there are rider weight limits. Ask the stable about their policies before booking.
PAGE 84/190
Safety Activity Checkpoints (SACs) Planning and Preparation Phase
■
Ensure riders learn and follow safety basics. Learn how to mount, dismount, start, stop, steer, and maintain balance.
Be clear on gear. • Review Gear for Horseback Riding at the end of this section.
•
•
•
Learn how to ask the instructor for help.
•
Only one rider is permitted per horse at one time.
•
Eating or drinking are not permitted while riding.
•
Dismount before going through small gates.
•
Do not adjust clothing, such as by putting on a jacket, while on the horse. Ask to dismount to make any clothing adjustments.
•
For arena rides, non-riding adults stay nearby. On trail rides, adults ride with the group, following ratios for their program grade level.
•
Horses displaying uncomfortable or unexpected behavior should be dismounted and checked for injuries and ill-fitting equipment. They may need to be walked back to the stable on foot.
•
If a horse gets loose, do not chase it; an adult should calmly attempt to retrieve the horse.
■
Respect trail-riding standards. Riders should learn horse control (how to start, stop, steer, and adjust speed to maintain distance between horses) with an arena ride before taking a trail ride.
■
• ■
• •
•
Communicate early with participants and families about what the group leader or outfitter will supply and what individuals need to bring. Helmets, long pants, and footwear are required. Line up first aid. Ensure that at least one adult has First Aid/CPR/AED training. For locations more than 30 minutes from emergency medical services, recruit a Wilderness First Aider or Wilderness First Responder. Identify the closest emergency transport and facilities. Bring a first aid kit.
Day of the Activity Evaluate scene safety. Look for or ask about these items during the decision-making phase. Double-check on arrival. • Are the horses properly cared for?
■
•
•
Is the riding area away from traffic and outside distractions?
•
Is the riding area free of debris, exposed barbed wire fencing, and other hazards?
•
•
Are the instructional arenas, corrals, paddocks, and stables clean and uncluttered?
Trails should be marked, mapped, and regularly inspected/maintained.
•
Avoid trails that cross or follow a road. If a group must cross a road, the instructor should halt the group in a line well before the road, check for traffic, and then signal the group to cross. At the signal, all horses are to be turned to face the highway and all cross at the same time.
•
Choose trails with good footing, free of low-hanging branches or other dangerous obstructions.
•
Avoid overly muddy or frozen ground.
•
Base the length of the ride and the gait (speed) of the horses on the ability of the least experienced rider.
•
Ride single file, one full horse length apart, with instructors at the head and rear of the group.
•
Horses are walked up and down hills, not ridden fast, and should be walked for the final ten minutes of any riding period to cool down.
•
Do the instructional arenas, corrals, paddocks, and stables have clearly posted rules and regulations?
•
Does the ring have good footing for the horses?
•
Is the ring fencing at least 42 inches high, easily visible, and well maintained?
•
Are the gates to the ring shut when the ring is in use?
•
Is the tack (e.g., saddles, bridles, stirrups, girth) clean and in good condition?
Safety Activity Checkpoints ©2009-2026 Girl Scouts of the USA. All Rights Reserved.
PAGE 85/190
Safety Activity Checkpoints (SACs) Gear for Horseback Riding Make sure Girl Scouts have everything they need for a successful day. Essential equipment •
Saddle, appropriately sized for each rider. Cinches must be checked for tightness, twigs, folds, and bends.
•
Stirrups, adjusted so the rider can raise their behind off the saddle about one hand’s depth.
•
Tapaderos (leather stirrup covers) to protect the rider’s feet and prevent slipping in the stirrup. Tapaderos are used when boots or shoes with a heel under 1 inch are worn.
•
Saddlebag for lengthy trail rides, to carry water bottles, clothing layers, and lunch
Safety gear •
Helmet—protective headgear designed for equestrian use, with a fitted safety harness (look for the SEI seal)
•
Extra halter and lead ropes, carried by the instructor during trail rides
•
Cell phone or walkie-talkies in case of emergency
Clothing and footwear •
Riding boots or closed-toed shoes with a smooth sole and at least a half-inch heel, to prevent feet from sliding through the stirrups
•
Well-fitting gloves to protect hands from blisters, rope burns, and cuts
•
Long pants and clothing appropriate for the weather
•
Hair secured
•
No dangling jewelry
•
No backpacks, daypacks, cross-body bags, or other bags while riding
Safety Activity Checkpoints ©2009-2026 Girl Scouts of the USA. All Rights Reserved.
PAGE 86/190
Safety Activity Checkpoints (SACs)
ACTIVITY
DAISY
BROWNIE
JUNIOR
CADETTE
SENIOR
AMBASSADOR
Indoor Skydiving Is Prior Council Approval Required?
Indoor Skydiving
D
B
J
C
S
A
No
Feel the rush of skydiving—without a plane or parachute! A vertical wind tunnel keeps you floating a few feet above a trampoline-type net.
■
•
Refer to the Safety Standards for general standards about supervision,transportation, first aid, emergency action plans, and more, as well as reminders about inclusion and accessibility.
o o o o
Activity-Specific Checkpoints for Indoor Skydiving
o o
Follow these basic reminders for each phase of planning. Check off items as you complete them, making sure to consider each sub-bullet. Decision-Making Phase ■
• •
•
Select a safe site. Look for a facility designed for recreational and training use; only vertical wind tunnels are permitted by Girl Scouts. Instructors are adults who hold certification from the International Bodyflight Association or who have documented experience and skill in coaching/supervising indoor skydiving. Ensure that instructors lead fliers to the wind tunnel, spot them during the entire flight experience, and lead them out of the chamber.
Safety Activity Checkpoints ©2009-2026 Girl Scouts of the USA. All Rights Reserved.
o •
No
Ask about physical requirements. Ask the facility’s manager what conditions may prevent or limit participation. Possible constraints include: o o
General Checkpoints
Is Activity Training, Certification, or Verified Experience Required?
History of heart trouble History of back issues; arching the back with hips forward is required in this activity History of shoulder dislocation Range-of-motion limitations Pregnancy Height and weight restrictions, which may vary by location Discomfort with being touched by the instructor; touch is required to adjust positioning Any other serious health issues; these participants should be cleared by a physician prior to flying Other mobility or ability needs
Talk with group members and caregivers to confirm their ability to join in; consider alternative plans if everyone can’t participate.
Planning and Preparation Phase ■
Arrange for first aid. Confirm that someone trained in first aid is on hand.
■
Remind participants about what to wear. Closed-toed, athletic shoes, securely tied
• •
No dangling jewelry that could become entangled
•
Hair secured
PAGE 87/190
Safety Activity Checkpoints (SACs) Day of the Activity ■ Learn safe flight practices. Ensure participants:
•
Learn how to wear and adjust gear (see Gear for Indoor Skydiving below)
•
Learn how to float and move in the wind tunnel
•
Practice body positions before entering the tunnel
■
Stow your stuff. Put valuables into a locker or leave them with someone in the group; nothing should be brought into the tunnel.
Gear for Indoor Skydiving Make sure Girl Scouts have everything they need for a successful day. Essential equipment •
Helmet (full face or open face), approved by the facility, properly fastened
•
Goggles; ask facility about goggles for people who wear glasses or contacts.
•
Flight suit
•
Ear protection
Safety Activity Checkpoints ©2009-2026 Girl Scouts of the USA. All Rights Reserved.
PAGE 88/190
Safety Activity Checkpoints (SACs)
BROWNIE
JUNIOR
CADETTE
SENIOR
Indoor Trampolining
*
B
J
C
S
AMBASSADOR
ACTIVITY
DAISY
Indoor Trampolining Is Prior Council Approval Required?
Is Activity Training, Certification, or Verified Experience Required?
A
No
No
*Girl Scouts must be at least six years old to participate.
Bounce into fun while enhancing strength, balance, and coordination. Indoor trampoline parks and gyms offer a variety of apparatus in a contained environment. Note: Home trampoline use is not permitted for Girl Scouts of any age.
General Checkpoints Refer to the Safety Standards for general standards about supervision,transportation, first aid, emergency action plans, and more, as well as reminders about inclusion and accessibility.
Activity-Specific Checkpoints for Indoor Trampolining Follow these basic reminders for each phase of planning. Check off items as you complete them, making sure to consider each sub-bullet.
Decision-Making Phase Select a safe site. Trampolines are associated with a high risk of injury. Outdoor trampolines and personally owned trampolines are not permitted. Look for an indoor facility that: • Staffs each area with trained personnel who actively monitor jumpers and enforce rules
■
•
Separates participants by size
•
Regularly cleans and sanitizes equipment
•
Has padded covers over all springs
•
Has a system of nets below the trampolines
•
Has a trampoline under any foam pits
•
Provides a safety and rules briefing
•
Provides instruction on how to safely use the equipment
•
Has clearly posted rules
■
• •
Safety Activity Checkpoints ©2009-2026 Girl Scouts of the USA. All Rights Reserved.
Make plans for access. Ask the manager what conditions may prevent or limit participation, such as past injury or pre-existing conditions. Talk with group members and caregivers to confirm ability to join in; consider alternative plans if everyone can’t participate.
PAGE 89/190
Safety Activity Checkpoints (SACs) Planning and Preparation Phase ■
Arrange for first aid. Confirm that someone trained in first aid is on hand.
■
Remind participants about what to wear. Socks with non-slip surface on soles—sometimes provided by the trampoline park
• •
No hard or sharp items, such as belt buckles
•
No dangling jewelry
•
Hair secured
•
Comfortable, stretchy, close-fitting clothing, such as yoga pants or leggings
Day of the Activity ■
Check facility and equipment. Look for general condition of equipment and ensure staffing is in place as promised.
■
Ensure participants receive instruction and a safety briefing.
■
Ensure participants understand and follow the rules. To avoid injury or loss, leave keys, phones, and other objects in a locker or with someone not jumping. Keep pockets empty and avoid loose or dangling clothing.
• •
Nothing in the mouth (gum, candy, or other objects) while jumping.
•
Maintain control: Jump safely and stay aware of your movements.
•
Follow designated areas: Stay within sections assigned by size, age, or ability.
•
Be mindful of others: Give priority to slower or smaller jumpers.
•
No roughhousing: Avoid pushing, running, racing, or horseplay.
•
No double bouncing: Do not land close to another jumper landing at the same time.
•
Rest off the court: No sitting or lying on the trampoline; exit the area to take breaks.
•
No grabbing or hanging on the top pad.
Gear for Indoor Trampolines As long as Girl Scouts are appropriately dressed, they shouldn’t need any other gear—the facility will supply whatever they need. Just show up and have fun!
Safety Activity Checkpoints ©2009-2026 Girl Scouts of the USA. All Rights Reserved.
PAGE 90/190
Safety Activity Checkpoints (SACs) BROWNIE
JUNIOR
CADETTE
SENIOR
Inflatable Activities
*
*
J
C
S
AMBASSADOR
ACTIVITY
DAISY
Inflatables Is Prior Council Approval Required?
Is Activity Training, Certification, or Verified Experience Required?
A
Yes if aquatic
Yes if aquatic
*Some activities are limited; see below.
Bounce, slide, and climb your way to adventure! Take on challenges on land or splash through fun on the water. See also: Amusement and Water Parks and Swimming SACs. This guidance applies to the following apparatus found in public facilities or privately rented: • Aquatic inflatables—Includes climbing walls, slides, obstacle courses, or bounce platforms; “blobs” in deep pools, lakes, or bays; and log rolling, where participants try to balance on synthetic logs anchored in a lake or pool. Equipment may be filled with air or foam. *Daisies may not participate in aquatic bounce houses. Daisies and Brownies may not participate in aquatic climbing walls. • Bounce houses and land inflatables—Includes closed inflatable trampolines, bouncy castles, moon bouncers, moonwalks, jumpers, obstacle courses, and other temporary inflatable structures for recreational use. *Daisies may participate in bounce houses that are specifically designed for young children. • Bubble soccer or similar games—Players wear inflatable bubble suits while running, kicking, and scoring with teammates. *Daisies and Brownies may not participate in bubble soccer.
Safety Activity Checkpoints ©2009-2026 Girl Scouts of the USA. All Rights Reserved.
General Checkpoints Refer to the Safety Standards for general standards about supervision, transportation, first aid, emergency action plans, and more, as well as reminders about inclusion and accessibility.
Activity-Specific Checkpoints for Inflatables Follow these basic reminders for each phase of planning. Check off items as you complete them, making sure to consider each sub-bullet. Decision-Making Phase ■
•
Select a safe site. Look for well-regulated, established parks or long-standing host organizations. Find a location that: o o o o o
Limits the number of participants allowed, following manufacturer recommendations Has age requirements for activities; limits ages participating together Has a secure zone around the activity area Inspects all apparatus daily Has inflatables that are well anchored and properly inflated, free of nearby hazards
PAGE 91/190
Safety Activity Checkpoints (SACs) •
For aquatic inflatables, also confirm the site: o
•
Has adequate, specially trained lifeguards with a clear view and active supervision of all areas o Limits the amount of swimming time to avoid fatigue o Operates during daylight only o Inspects water depth daily and checks for underwater hazards o Provides life jackets For log rolling, also confirm: o o o o o o
•
Has adequate lifeguards with a clear view and active supervision of all areas The activity takes place in water at least 2 feet deep Logs are aligned perpendicular (as a T) to a dock, pool edge, or hard object Logs are anchored so that long edges are at least 10 feet from any obstructions, such as a pool edge, rocks, trees, beach, etc. Attendants are available to hold the log while beginners climb on, and/or training fins are attached to the log to slow rotations Non-swimmers wear life jackets if water is above the knee
Planning and Preparation Phase ■
Arrange for first aid. In some settings, such as aquatic parks, first aid support is easy to access. If not, recruit least one adult with First Aid/CPR/AED training. Bring a first aid kit.
■
Remind participants about what to wear. For non-aquatic inflatables:
•
o o o o o o o •
o o o o
The site is flat, free of obstacles such as trees, rocks, pillars, and roots, and is away from streets and roads Playing surface is grass, astroturf, or gym floor Bubble balls are fitted with shoulder straps that position the ball at least 8 inches above the head, to protect the head Bubble balls are clear to allow visibility
•
Check with your state’s regulatory agency for safety records and standards compliance. (Inflatable facilities may be listed under amusement parks.)
■
When renting an inflatable, choose a reputable vendor. Check with the governing agency for permits needed in public spaces.
Safety Activity Checkpoints ©2009-2026 Girl Scouts of the USA. All Rights Reserved.
For aquatic inflatables: o o o
•
For bubble soccer, also confirm:
Clothing that is comfortable and offers sun protection, layered to adjust through the day Socks When allowed, closed-toed, securely tied footwear No jewelry No eyeglasses; ask about prescription goggles that might be suitable. No sharp objects, phones, or other items in pockets Hair secured
Swimsuit Rash guard Water shoes for shore and, if permitted, on inflatable
For bubble soccer: o
Shin guards and knee pads (recommended)
Arrange for a swim assessment for aquatic parks/ inflatables. Aquatic inflatables require strong swimming ability or use of a life jacket. • Advance swim assessments are recommended to avoid disappointment.
■
•
Same-day assessments may be conducted if necessary.
•
If swim assessments are not feasible, assume all participants are non-swimmers.
PAGE 92/190
Safety Activity Checkpoints (SACs) Day of the Activity • Arrange for “water watchers.” Ensure adult watchers are present for supervision, especially for scattered groups. Use a ratio of 1:6 for Daisies and 1:10 for older participants. Watchers must actively monitor participants, providing undivided attention. •
Designate a rotating watcher and inform children about who is on duty at all times.
•
Watchers are not a substitute for lifeguards.
■
•
Evaluate conditions Refer to the “Select a Safe Site” section (above) to confirm area is set up appropriately. Because inflatables are moveable, locations and conditions can change.
•
Look for full inflation.
•
If an element looks questionable or an operator does not appear to be mindful of safety, don’t allow your group to use that element.
■
•
Review basics with participants. For all inflatable activities: o o o o o o o
•
For aquatic parks: o o
•
Wear a life jacket if instructed. Swim and play in designated areas only.
For bubble soccer: o o o o o o o
■
Enter an inflatable only when an attendant is on duty. Follow attendants’ and posted instructions. On slides and obstacle courses, take turns and wait for the person ahead to exit before starting. Jump only with others of similar size. No tumbling, flipping, wrestling, chasing, or horseplay. Stick with your buddy. Know where to go for help or if you’re separated from your group.
Only one person is allowed in a ball at a time. No rolling down hills while wearing a ball. Run and bump at slow or moderate speed only. Do not bump others from behind. Allow other players to get up before being bounced again. Use sides of the ball for bouncing against others—never the top. Lift the ball by the handles only to get up after falling.
Point out landmarks. Landmarks include restrooms, water bottle filling sites, first aid stations, and where you will meet if someone gets separated from the group.
Gear for Inflatables See the Planning and Preparation notes about what to wear. Other equipment is generally provided. Just show up and have fun!
Safety Activity Checkpoints ©2009-2026 Girl Scouts of the USA. All Rights Reserved.
PAGE 93/190
Safety Activity Checkpoints (SACs)
JUNIOR
CADETTE
SENIOR
AMBASSADOR
Kayaking
BROWNIE
ACTIVITY
DAISY
Kayaking Is Prior Council Approval Required?
*
**
C
S
A
Yes
Is Activity Training, Certification, or Verified Experience Required?
Yes
**Brownies may paddle only on flat water and must stay within swimming distance of shore. **Juniors may paddle only on flat water within swimming distance of shore, or on sections of river rated Class I. Kayaking is fun and easy to learn! Whether you’re splashing around with friends, touring on a peaceful river, or tackling thrilling whitewater rapids, it’s an adventure for all skill levels—and a sport you can enjoy for life.
General Checkpoints Refer to the Safety Standards for general standards about supervision,transportation, first aid, emergency action plans, and more, as well as reminders about inclusion and accessibility.
Activity-Specific Checkpoints for Kayaking Follow these basic reminders for each phase of planning. Check off items as you complete them, making sure to consider each sub-bullet.
Decision-Making Phase ■
•
Find a safe place to kayak. Nearly any body of water is suitable for kayaking with the right instruction, equipment, and experience. Start on flat water with little to no current. Progress to more advanced conditions like whitewater or surf.
•
Paddling.com and American Whitewater have interactive maps of paddling locations.
•
Kayaking is not permitted in whitewater above Class III.
■
Identify an expert.
•
Arrange for instruction by an adult with experience teaching and supervising kayaking for the ages involved.
•
Girl Scouts Small Craft Safety Course (with kayak module)
•
Engage a certified instructor with training suited to your location and conditions: o
Learn More: • •
o
Urge all participants to take ACA’s free online paddlesports safety course. Match skill levels with river conditions by understanding the American version of the International Scale of River Difficulty.
Safety Activity Checkpoints ©2009-2026 Girl Scouts of the USA. All Rights Reserved.
o
American Canoe Association (ACA)—various certification levels American Red Cross Lifeguarding with Waterfront Module (for flat water, near shore only) Documented experience per your council’s guidelines
•
Maintain proper instructor–student ratio, per the instructor’s certification, with a maximum of five learners per instructor. An ACA instructor with a qualified assistant may supervise up to ten learners.
•
Ensure instructors have firsthand knowledge of the hazards and conditions at the kayaking location.
PAGE 94/190
Safety Activity Checkpoints (SACs) Planning and Preparation Phase ■
•
Be clear on gear. Review Gear for Kayaking at the end of this section.
•
Ask your instructor or outfitter what items are provided.
•
Communicate early with participants and families about what the group leader or outfitter will supply and what individuals need to bring.
■
• •
•
Line up first aid. Ensure that at least one adult has First Aid/CPR/AED training. For locations more than 30 minutes from emergency medical services, recruit a Wilderness First Aider or Wilderness First Responder. Identify the closest emergency transport and facilities. Bring a first aid kit in a waterproof container.
■ Assess swimming ability. Strong swimming skills
are important for paddlers’ safety and confidence. A swim assessment is highly recommended to evaluate participant readiness. • Advance swim assessments are recommended to avoid disappointment. •
Same-day assessments may be conducted if necessary.
•
If swim assessments are not feasible, assume all participants are non-swimmers.
■
•
•
Inspect the area upon arrival. Point out and avoid hazards such as strainers, sieves, hydraulics, waterfalls, bridges, dams, fences, and low power lines. Surf zones, rapids, and standing waves must be avoided unless part of a planned whitewater experience.
Verify instructors or lifeguards are well-positioned for supervision. • Supervision from shore is only allowed on flat water near shore.
■
•
Instructors must accompany the group if paddling away from shore or on moving rivers.
■
Ensure everyone learns and practices the basics. Proper body position and balance
• •
Kayak entry, launching, and landing techniques
•
Propelling and steering the kayak with effective strokes
•
Maneuvering through waves and wakes
•
Self-rescue techniques in case of capsize
•
Signaling for help
■
•
Consider special conditions. Before padding with decked kayaks, paddlers must learn and successfully practice “wet exits” (escaping the boat if upside down). Practice with spray skirts, if used.
•
In surf, learn and practice navigating around the break, as well as recognizing and managing rip currents.
Check the weather. • Consult your instructor; postpone or cancel if conditions are unsuitable for your group’s skill level.
•
In whitewater kayaking, learn and practice how to read and manage rapids and how to float through if separated from the kayak.
•
Never kayak during a storm.
•
Understand and follow any site-specific instructions.
•
Monitor river or wave conditions, as they change daily. Use resources like Wannasurf.com and Surfline.com for live updates, or local river conditions resources.
•
Check water quality reports on Surfrider’s interactive map, especially after rainfall.
Day of the Activity ■
• Check boats for condition. Ensure plugs are in place and any air bags are functioning and secure.
Safety Activity Checkpoints ©2009-2026 Girl Scouts of the USA. All Rights Reserved.
PAGE 95/190
Safety Activity Checkpoints (SACs) Follow kayaking right-of-way rules. • Yield to swimmers and less maneuverable watercraft, such as paddleboards.
■
See the additional gear needed for trips under Gear for Kayaking. Consult your guide about what else may be needed.
•
Expect powered watercraft and sailboats to yield, but stay alert and paddle defensively to prevent accidents.
■
Do not exceed capacity or overload boats with gear.
•
Stay clear of large vessels (motorboats, ships, ferries) that cannot easily change course.
■
Keep boats close enough together so that a group decision can be made if wind or water conditions change.
•
Ask your instructor to demonstrate other right-of-way rules.
■
•
Be aware of others in surf zones or whitewater.
Be aware of possible changes in water level due to tides or dam releases, and how these may impact your route.
•
Control your kayak to prevent collisions.
■
Prepare for emergencies. • Discuss emergency action plans with your instructor.
■
•
Know who to contact and how to call for help.
•
Be aware of your location to communicate effectively with authorities.
Kayak Trips: Additional Considerations Kayak trips are longer day or overnight excursions. Plan kayaking trips only after progressive skill-building experiences. Follow these additional tips for a safe and satisfying experience. ■
• •
• ■
• •
■
Ensure basic skills. Make sure that participants: Have the skill and stamina to finish the trip, even if headwinds or other challenges arise Learn how to cross busy channels, if necessary (generally, by crossing at a 90-degree angle to channel traffic)
Gear for Kayaking Make sure Girl Scouts have everything they need for a successful outing. Individual and group essentials Essential equipment •
Kayak suited to participants’ skill level and water conditions
•
Beginners: stable, easy-to-paddle, sit-on-top kayak
•
Intermediate: decked kayak, built for surf or whitewater
•
Advanced: decked kayak with spray skirt for more challenging conditions
•
Properly sized, double-bladed paddle
•
Bailing scoop to remove water from hull (not needed for self-bailing boats)
Safety gear •
Coast Guard–approved life jacket, properly sized and fitted for each person (required)
•
Rescue whistle
•
Throwable personal flotation device (Type IV cushion, ring buoy, or equivalent) available for each group on the water
•
Tow line, throw bag, and/or other rescue gear (carried by the instructor)
•
Helmets (required in Class II or higher rapids, or if going in or near sea caves)
•
Kayaking at night requires additional gear; contact your outfitter.
Learn universal signals. File a float plan for any trip. Provide a reliable adult with information about your boat(s) and the people aboard. This fillable Coast Guard Float Plan includes steps for your contact to take if they are concerned about your safety. Use a professional guide with the additional training needed for the trip type. Guiding on river, whitewater, coastal, touring, and open water (ocean) trips are advanced certifications.
Safety Activity Checkpoints ©2009-2026 Girl Scouts of the USA. All Rights Reserved.
PAGE 96/190
Safety Activity Checkpoints (SACs) Clothing and footwear •
Layered, non-cotton clothing; rash guards and board shorts are ideal.
•
Water shoes, neoprene booties, or non-slip sport sandals with a heel strap (no flip-flops)
•
Wetsuit or neoprene top and shorts if the water temperature is below 65°F
•
Paddling gloves for comfort and grip
Gear for trips For trips, critical gear should be secured to the kayak. Consult your expert about what to bring in addition to the gear listed above. They may recommend items such as: •
Navigation items, such as GPS or compass
•
Communication equipment such as two-way, satellite, or weather/VHF radios
•
Dry bags (and a way to secure them) to carry food, extra clothing, first aid kit, etc.
•
Repair kit: duct tape, tools, spare plugs, etc.
•
Spare paddle(s)
•
Emergency equipment, such as signaling mirror, tarp, space blanket, extra clothing and food, matches, flashlight, etc.
Safety Activity Checkpoints ©2009-2026 Girl Scouts of the USA. All Rights Reserved.
PAGE 97/190
Safety Activity Checkpoints (SACs)
BROWNIE
JUNIOR
CADETTE
SENIOR
Miscellaneous Activities
*
*
*
*
S
AMBASSADOR
ACTIVITY
DAISY
Miscellaneous Activities Is Prior Council Approval Required?
Is Activity Training, Certification, or Verified Experience Required?
A
No
No
*Some activities are limited; see below.
Check out these reminders for various activities. Don’t see the activity you’d like try? Visit the Safety Standards’ Activities That Are Not Listed section.
General Checkpoints Refer to the Safety Standards for general standards about supervision,transportation, first aid, emergency action plans, and more, as well as reminders about inclusion and accessibility.
Activity-Specific Checkpoints for: Arts and Crafts From crafts made of natural materials to highly technical creations, a vast array of activities, equipment, and supplies are possible. •
Do not use hazardous chemicals.
•
Follow manufacturer directions.
•
Learn and teach proper techniques.
•
Refer to the Tools—Hand and Power SAC for specific age-related information.
•
Review the U.S. Consumer Product Safety Commission’s Art and Craft Safety Guide.
•
Wear personal protective equipment, such as goggles or gloves, when appropriate.
•
Keep long hair tied back; do not wear dangling jewelry.
•
Control environmental measures, such as ventilation, when indicated.
•
Clean and store materials properly.
Safety Activity Checkpoints ©2009-2026 Girl Scouts of the USA. All Rights Reserved.
Land Sports Includes soccer, basketball, flag football, softball, hockey, basketball, tennis, pickleball, and much more. •
Recruit someone with experience in the sport and in teaching youth.
•
Identify safe places to play, away from traffic and other hazards.
•
Source equipment according to the sport’s norms: o o
•
Helmets and other protective equipment Balls, bats, racquets, etc.
Learn the rules and techniques.
Laser Tag This popular activity can be played indoors or out. While no projectiles are launched at other players, some families may object to the game’s warlike nature. Bring up the subject in advance and get everyone’s approval before proceeding with plans. •
Choose a location away from pedestrian and vehicle traffic.
•
Follow rules set by the venue.
•
Wear closed-toed, athletic shoes and comfortable clothing layered for the weather.
PAGE 98/190
Safety Activity Checkpoints (SACs) Segways (Powered Scooters) For Seniors and Ambassadors only Covering more ground than walking, Segway tours are a popular activity in tourist areas. •
Find a reputable tour guide who can teach safe Segway use.
•
Use Segways designed for touring, with top speeds between 10 and 15 mph.
•
Choose a route away from steep hills, uneven terrain, vehicles, and heavy pedestrian traffic, where scooter use is permitted.
•
Wear a well-fitting helmet.
•
Wear wrist guards.
•
Keep both hands on the handlebar at all times.
•
Avoid using a mobile phone or wearing earphones while riding.
•
Ride one person per scooter.
•
Practice before you get going. You should be able to get on or off, stop smoothly, lean to turn left or right, lean forward to propel, and lean backward to reverse.
•
Yield to pedestrians and be careful of others.
STEM and STEAM Activities are broad and ever-evolving, and are not addressed individually in this resource. Consult with experts in the specific activity and ask about safety measures. •
Avoid using hazardous chemicals.
•
Follow manufacturer directions for other materials.
•
Learn and teach proper techniques.
•
Refer to the Tools—Hand and Power SAC for specific age-related information. Make sure equipment is appropriate for the group you’re working with.
•
Wear personal protective equipment, such as goggles or gloves, when appropriate.
•
Keep long hair tied back; do not wear dangling jewelry.
•
Control environmental measures, such as ventilation, when indicated.
•
Clean and store materials properly.
Safety Activity Checkpoints ©2009-2026 Girl Scouts of the USA. All Rights Reserved.
PAGE 99/190
Safety Activity Checkpoints (SACs)
BROWNIE
JUNIOR
CADETTE
SENIOR
Model Rocketry
*
*
J
C
S
AMBASSADOR
ACTIVITY
DAISY
Model Rocketry Is Prior Council Approval Required?
Is Activity Training, Certification, or Verified Experience Required?
A
No
No
*Daisies and Brownies may participate in simple science experiments, such as air-powered drinking straw, balloon, or stomp rockets, or water-powered pump rockets. They may observe fueled model rocket launches from a safe distance. Build your own rocket using lightweight materials, then put your engineering, physics, and chemistry skills to the test by launching it with an electrifying blast! Discover the science behind liftoff and imagine where your rocket could go—the Moon, Mars, or beyond. Are you ready for liftoff?
Learn More: • Get Educator Tips from Estes—a collection of helpful rocketry info for groups.
General Checkpoints Refer to the Safety Standards for general standards about supervision,transportation, first aid, emergency action plans, and more, as well as reminders about inclusion and accessibility.
Activity-Specific Checkpoints for Rocketry and Model Rocketry Follow these basic reminders for each phase of planning. Check off items as you complete them, making sure to consider each sub-bullet.
Planning and Preparation Phase ■
•
•
Build the right rockets for your group. Girl Scouts of any age can construct and launch rockets powered by balloons, water, or the chemical reaction of simple ingredients like baking soda and vinegar. Find instructions like these from Science Sparks in books or online. Single-engine model rocket starter kits are available in bulk quantities and are easy to assemble and launch. o o
Decision-Making Phase ■
■
Find an expert. While no formal qualifications are needed for low-powered model rocketry (up to 125 grams of propellant), an experienced enthusiast offers valuable tips. Connect with a sport rocketry club for launch guidance. Higher-powered rockets require a trained range safety officer. Make it girl-led. You may want to kick off with a rocket launch event to spark interest, then progress to launching rockets built by your group. Scouts must be mature enough to follow instructions and handle materials safely
Safety Activity Checkpoints ©2009-2026 Girl Scouts of the USA. All Rights Reserved.
Look for “beginner level” options. Engines (small tubes containing stable fuel, also called motors), some additional supplies, and launch systems are generally sold separately.
•
Higher-powered or multi-stage designs require experience and skill. They should be built under the supervision of an adult with experience in these models.
•
Girl Scouts do not build or launch: o o o
Skyrockets (a form of fireworks) High-powered rockets (with G or more powerful engines) Rockets with liquid or hybrid engines
PAGE 100/190
Safety Activity Checkpoints (SACs) ■ Read the FAA amateur rocket regulations, including not crossing into the territory of a foreign country and not creating
a hazard to persons, property, or other aircraft. ■
• •
Select a safe launch site. Consider using a site already designated by a local club. Get permission: o o
From the property owner or municipality to launch rockets To recover rockets from neighboring property
•
Check local ordinances and ensure sufficient distance from airports, military installations, and international borders.
•
Choose a large, open area or field that is free of crowds and away from power lines, buildings, tall trees, and low-flying aircraft.
•
Use the National Association of Rocketry (NAR) table below to determine how large the launch site should be for the engines being used:
LAUNCH SITE DIMENSIONS
INS TALLED TOTA L I M P UL SE
0.00 – 1.25
EQU IVA LEN T MOTOR T YPE
M IN IM U M S ITE D IM ENSIONS ( F T.)
1/4 A, 1/2 A
50
A
100
B
200
C
400
D
500
E
1000
F
1000
1.26 – 2.50 2.51 – 5.00 5.01 – 10.00 10.01 – 20.00 20.01 – 40.00 40.01 – 80.00
•
Set up safety zones for launch and observation (at least 15 feet away for D or smaller motors, and 30 feet away for larger motors).
Safety Activity Checkpoints ©2009-2026 Girl Scouts of the USA. All Rights Reserved.
PAGE 101/190
Safety Activity Checkpoints (SACs) •
Follow Estes’ recommended launch area setup:
Be clear on rocket gear. Inform families if rockets will be provided or if they need to bring their own. If bringing their own, specify that they meet these requirements: • Model rocket has:
■
o o o o o o •
Launch equipment has: o o o o o
■
• •
Stable, aerodynamic design Lightweight, non-metal parts for the nose, body, and fins Pre-manufactured engine mount, designed to securely hold an approved model rocket engine Commercially made model rocket engine (motor) of appropriate size Launch lug to guide rocket along the launch rod recovery system Streamer or parachute, with fire-safe wadding, for safe retrieval
Electrical ignition system with motor igniters (no fuse-lit ignition) Safety interlock on the ignition system Launch switch that automatically returns to “off” Launch rod, tower, or rail to guide the rocket to vertical flight (cap rod when not in use unless it’s above eye level) Blast deflector to prevent ground impact from exhaust
Ensure safety equipment is present. Eye protection for each participant Fire extinguisher, sand, or other means of stopping a small grass fire
Line up first aid. • Ensure that at least one adult has First Aid/CPR/AED training.
■
Safety Activity Checkpoints ©2009-2026 Girl Scouts of the USA. All Rights Reserved.
•
For locations more than 30 minutes from emergency medical services, recruit a Wilderness First Aider or Wilderness First Responder. Identify the closest emergency transport and facilities.
•
Bring a first aid kit.
Day of the Activity ■
Check the weather. Postpone if winds over 20 mph are expected or if clouds are low.
■
Check for fire hazards. Double-check that there’s no dry grass near the launch pad.
■
Dress appropriately. Make sure all participants are wearing: Clothing layered for the weather, including hats or other sun protection
• •
Closed-toed shoes
•
Hair secured
■
•
Make sure participants follow safety rules. Follow all manufacturer and instructor directions.
•
Do not put any flammable or explosive payload in or on the rocket.
•
Wear eye protection when launching and as a spectator.
•
Stay in designated launch safety zones.
•
Ensure all observers are alert and at a safe distance before launching.
•
Never launch toward people or objects, into clouds, or near airplanes.
•
Always count down before launch.
•
If a rocket fails to launch, disconnect the electrical system and wait 60 seconds before approaching.
PAGE 102/190
Safety Activity Checkpoints (SACs) BROWNIE
JUNIOR
CADETTE
SENIOR
Offshore Passenger Vessels
D
B
J
C
S
Step aboard to embark on an exciting adventure. Discover new sights and make unforgettable memories on your choice of commercial or recreational vessels meant to carry passengers: •
Ferries
•
Cruise ships
•
Airboats
•
Pontoon boats (on calm lakes or bays only)
•
Whale watching or tour boats
•
Privately owned sailboats, powerboats, or yachts
Note: •
•
See individual Safety Activity Checkpoints (SACs) for swimming or small craft such as canoes, kayaks, sailboats, waterski boats, etc.
•
See also: Travel/Trips SACs.
Activity-Specific Checkpoints for Offshore Vessels Follow these basic reminders for each phase of planning. Check off items as you complete them, making sure to consider each sub-bullet.
Safety Activity Checkpoints ©2009-2026 Girl Scouts of the USA. All Rights Reserved.
Is Activity Training, Certification, or Verified Experience Required?
A
No
No
•
Find free basic boating safety courses, and where you can borrow life jackets in all 50 states, at Boat U.S. Foundation.
•
Protect marine life on your whale-watching trip with National Geographic’s tips for choosing an ethical operator.
Decision-Making Phase •
Select a qualified operator and vessel. Commercial vessels: o o o
General Checkpoints Refer to the Safety Standards for general standards about supervision, transportation, first aid, emergency action plans, and more, as well as reminders about inclusion and accessibility.
Is Prior Council Approval Required?
Learn More:
■
Amphibious duck boats are not recommended due to their hybrid land-and-sea nature, lack of regulation, and the severity of accidents.
AMBASSADOR
ACTIVITY
DAISY
Offshore Passenger Vessels
o •
In the U.S., commercial vessel operators are licensed through the U.S. Coast Guard (USCG). In the U.S., passenger vessels (ferries, cruise ships, and whale watching boats) for more than six passengers are also regulated by the USCG. Vessels should have professional, licensed crew members who maintain and operate the vessel as designed, and provide life jackets and other safety gear. Use caution outside the United States. Standards may vary. Seek expert input before booking.
Privately owned boats; ensure that: o o o
USCG standards are met Necessary safety gear—including life jackets—is on hand for all participants Throwable personal flotation device (Type IV cushion, ring buoy, or equivalent) is available
PAGE 103/190
Safety Activity Checkpoints (SACs)
■
o
The owner/operator:
•
Is an adult with training and experience for that type of watercraft, and that sufficient, experienced crew will be on hand
•
Is willing to follow Girl Scout safety standards
•
Maintains and operates the vessel in accordance with USCG and local regulations
•
Maintains insurance and registration as required by law
•
Is familiar with local waters and hazards
Make plans for access. Commercial passenger vessel access is covered by the Americans with Disabilities Act, but guidance continues to develop. Other vessels may be less accessible. Check with the operator to be sure everyone in your group can be included.
Planning and Preparation Phase ■
Be clear on gear. See Gear for Offshore Passenger Vessels at the end of this section. Discuss with participants and families well in advance what the operator will provide and what each person should bring themselves.
Line up first aid. • Ensure that at least one adult has First Aid/CPR/AED training.
■
•
For locations more than 30 minutes from emergency medical services, recruit a Wilderness First Aider or Wilderness First Responder. Identify the closest emergency transport and facilities.
•
Ensure a first aid kit is available.
•
Be ready for motion sickness. o o o
Ask caregivers of those prone to motion sickness to consider administering Dramamine, Bonine, or a homeopathic remedy before the trip. Bring mint, ginger candies, ginger snaps, or plain crackers for queasy stomachs. Have seasick passengers stay on deck in fresh air if possible, with eyes on the horizon. Going below deck can worsen symptoms. The stern (back) of the boat bounces and rocks the least, but stay away from nauseating exhaust fumes.
Safety Activity Checkpoints ©2009-2026 Girl Scouts of the USA. All Rights Reserved.
■
• •
File a float plan for any trip. Provide a reliable adult with information about your boat(s) and the people aboard. This fillable Coast Guard Float Plan includes steps for your contact to take if they are concerned about your safety.
Day of the Activity ■
Check the weather. Consult your operator or owner; postpone or cancel if conditions are unsuitable, especially for small craft. Lightning, high winds, or high sea state (waves) impact vessel types differently.
Follow state laws and operator instructions about life jackets. • For passenger vessels like ferries or cruise ships, life jackets are worn only when instructed.
■
•
For smaller boats, life jackets may be required on deck or on the dock.
•
In most cases, life jackets should not be worn in an enclosed area, like a cabin.
■
Evaluate and monitor conditions. Check the boat and conditions on arrival. Report any safety concerns.
• •
■
•
Be aware of carbon monoxide risks from “teak surfing” or standing near the swim platform at the stern. Never run an engine or generator while participants are swimming or near the exhaust, as deadly fumes can cause unconsciousness and death. Arrange for watchers. Ensure adult watchers are present for supervision, especially for scattered groups.
•
Use a ratio of 1:6 for Daisies and 1:10 for older participants.
•
Watchers must actively monitor participants, providing undivided attention.
•
Designate a rotating “water watcher” and inform children about who is on duty. Watchers are not a substitute for lifeguards.
PAGE 104/190
Safety Activity Checkpoints (SACs) ■
•
Ensure participants learn the basics. Do not run near the water or on the vessel or dock.
•
Listen to the safety orientation and follow the rules noted.
•
Know the location of life jackets.
•
Follow crew instructions in an emergency.
•
Know what to do if someone falls overboard or if other accidents occur.
•
Use the buddy system.
•
Learn how to use the “head” (marine toilet).
•
Stay away from the swim platform, ladder, or step while the engine or generator are running.
Specific Situations Keep these considerations in mind for the following offshore passenger vessel situations. Chartered Vessels Chartered vessels are boats that are rented for a specific length of time, from hours to days. • Crewed charters include a captain and crew. o o o o
Use the guidelines above for privately owned recreational vessels. Confirm ahead that all crew members have had a criminal background check. Keep youth under adult supervision. Never allow them to be solo or in close quarters with either crew members or other adult passengers. Remember that captain, crew members, or other adult passengers cannot be counted for youth supervision ratios or used as extra adult chaperones.
Cruise Ships •
Check the CDC’s Vessel Sanitation Program for ship inspection scores and health tips before booking a cruise.
•
Reserve cabins close together, either across the hall or side by side.
•
Use the buddy system at all times.
•
Plan a communication strategy in case of separation, as cell service may be unreliable.
•
Follow Safety Activity Checkpoints for high-risk activities like swimming, climbing walls, and snorkeling. Choose excursions carefully, as cruise ships and vendors may not follow Girl Scout safety standards—ask thorough safety questions.
•
Be aware that boating laws in other countries may be less strict than those in the United States. o o
Research the safety standards of your destination. If they seem inadequate, look for ways to enhance safety or avoid risky situations altogether. Contact your council office for guidance.
Gear for Offshore Passenger Vessels As long as Girl Scouts are appropriately dressed, they shouldn’t need any other gear—life jackets and other safety gear are generally supplied by the vessel. Look for their recommendations in the booking communications.
• Bareboat charters are staffed by the group chartering. o o
You must provide your own trained captain and crew. Since requirements for training and licensing vary based on the size and type of vessel, carefully evaluate qualifications.
• For all charters: o o
Use additional care in international locations, where USCG regulations do not apply. Take time to understand local waters, navigation, hazards, and norms.
Safety Activity Checkpoints ©2009-2026 Girl Scouts of the USA. All Rights Reserved.
PAGE 105/190
Safety Activity Checkpoints (SACs)
ACTIVITY
DAISY
BROWNIE
JUNIOR
CADETTE
SENIOR
AMBASSADOR
Orienteering Is Prior Council Approval Required?
Orienteering
*
*
J
C
S
A
No
Is Activity Training, Certification, or Verified Experience Required?
No
*Daisies and Brownies may participate in beginner orienteering events when working with adults in established parks.
Use a map, a compass, and your critical thinking skills to explore a new area. Join a meet to compete with others for accuracy and speed, or simply enjoy time outdoors with your friends.
Learn More:
General Checkpoints Refer to the Safety Standards for general standards about supervision, transportation, first aid, emergency action plans, and more, as well as reminders about inclusion and accessibility.
Activity-Specific Checkpoints for Orienteering Follow these basic reminders for each phase of planning. Check off items as you complete them, making sure to consider each sub-bullet. Note: These checkpoints cover organized or competitive orienteering, where a director provides a map and places markers or waypoints (“controls”) along a set course. They do not cover wilderness navigation, where participants use their own map, compass, or GPS to find their way.
Consider taking part in an orienteering meet during your travels! Check for events all over the world at World of O.
•
Get to know orienteering map symbols and how terrain changes are marked.
Decision-Making Phase ■
•
• ■
•
• ■
Safety Activity Checkpoints ©2009-2026 Girl Scouts of the USA. All Rights Reserved.
•
Find a safe place to go orienteering. Check for local orienteering clubs hosting nearby events. Most offer beginner, intermediate, and advanced courses at the same time. Or find a permanent or “DIY” course you can try anytime. Never go orienteering when and where hunting is allowed. Learn to go orienteering. No formal certification is required for orienteering, but reviewing tutorials on the Orienteering USA website can help you decide if the activity is right for your group—and help you feel ready. Clubs also offer brief, on-site how-to clinics. Make plans for access. Adaptive orienteering, known as TrailO, is available at some meets and international competitions. Ask your local club for recommendations on accessible opportunities.
PAGE 106/190
Safety Activity Checkpoints (SACs) Planning and Preparation Phase ■
Be clear on gear. See Gear for Orienteering at the end of this section. Discuss with participants and families well in advance what the group leader will provide and what each person should bring themselves.
■
Line up first aid. Ensure that at least one adult has First Aid/CPR/AED training.
• •
•
For locations more than 30 minutes from emergency medical services, recruit a Wilderness First Aider or Wilderness First Responder. Identify the closest emergency transport and facilities.
•
o o o o o o
Dress appropriately. Make sure all participants are wearing: • Sneakers or hiking boots
■
Avoid tramping vegetation. Do not climb walls or fences. Do not damage property. If participating as a group (if permitted), stay together. Yield to faster runners and other trail users. Pick up trash when possible.
■ Make it girl-led. Start with a “white” course,
designed for absolute beginners. Girl Scouts may want to progress to “yellow” and “orange” on the same day, or return to a future meet for more beginner experiences
Bring a first aid kit.
Day of the Activity
Follow orienteering etiquette:
Gear for Orienteering Make sure Girl Scouts have everything they need for a successful outing. Essential equipment
•
Layered clothing suitable for the weather
•
•
Long pants and sleeves to protect against foliage and sun (with pants tucked into socks to protect against ticks)
An orienteering compass* (with a round housing and clear, flat plate) for every participant
•
E-punch device,* used for some organized courses
•
Sun protection (hat, sunglasses)
•
Map**
•
Whistle for emergencies*
•
Reusable water bottle and snack in a daypack
■
■
• •
Check in—and out. Always report to the finish line, even if you’re not finishing a course. Meet organizers use the participant roster to ensure no one is lost. Make sure all participants learn the basics. Understand the boundaries of the meet and be aware of course limits to avoid going too far. Use the buddy system. Cadettes and older can compete independently in established parks once they have experience.
•
Be cautious where you step—watch for traffic, bodies of water, urban buildings, and uneven or steep terrain.
•
Avoid reaching into unknown areas, including nooks, crannies, or dense vegetation.
•
Watch out for sharp objects, insects, snakes, and poisonous plants.
Safety Activity Checkpoints ©2009-2026 Girl Scouts of the USA. All Rights Reserved.
*Often available to borrow or rent at meets; check with organizers in advance. **Provided by organizers if participating competitively in a meet.
PAGE 107/190
Safety Activity Checkpoints (SACs)
ACTIVITY
DAISY
BROWNIE
JUNIOR
CADETTE
SENIOR
AMBASSADOR
Outdoor Cooking and Fire-Building Is Prior Council Approval Required?
Outdoor Cooking and Fire-Building
D
B
J
C
S
A
No
o
Enjoy a tasty snack, try your hand at outdoor cooking, or have fun experimenting with cool cooking techniques— the choice is yours! Everything tastes better when it’s cooked outside!
General Checkpoints Refer to the Safety Standards for general standards about supervision, transportation, first aid, emergency action plans, and more, as well as reminders about inclusion and accessibility.
o ■
•
■
•
Activity-Specific Checkpoints for Outdoor Cooking and Fire-Building Follow these basic reminders for each phase of planning. Check off items as you complete them, making sure to consider each sub-bullet.
■
Make it girl-led. Get group input on what and how to cook outdoors. Especially for younger participants, keep it simple by trying one or two cooking methods during a cookout or campout, allowing adults to focus on safety while young cooks develop skills. Recruit an adult with appropriate training or experience. No certification is required for outdoor cooking, but your council may have guidelines or a class on fire building or propane use. Follow their instructions. Make sure someone in your group: o Knows safe food storage, outdoor dishwashing, and sanitation techniques o Has experience with cooking methods to be used
Safety Activity Checkpoints ©2009-2026 Girl Scouts of the USA. All Rights Reserved.
Yes
Has experience managing and extinguishing wood and charcoal fires Has experience teaching youth skills, such as safe cutting techniques
Ask about allergies early. Find out if any participants have allergies, which foods to avoid, and what to do in case of accidental exposure. If allergies are severe, avoid those foods entirely. Find a safe space for outdoor cooking. Look for community parks and campsites with designated fire pits or grills. Find out about any fire restrictions and if permits are required.
Planning and Preparation Phase ■
Be clear on gear. See Gear for Outdoor Cooking at the end of this section. Discuss with participants and families well in advance what the group leader will provide and what each person should bring themselves.
■
Test critical gear before leaving. Set up, start, and operate any stoves or essential equipment, whether they’re new, borrowed, or have been stored for a while.
Decision-Making Phase ■
Is Activity Training, Certification, or Verified Experience Required?
•
•
Ensure you have everything you need—and the knowhow—to safely teach participants.
■
Plan ahead for safe food handling. Plan sufficient ice or cold packs to keep food below 40°F. Consider freezing some foods, especially those to be used at the end of a campout.
•
•
Use shelf-stable foods (canned, bottled, or dehydrated) for extended trips.
PAGE 108/190
Safety Activity Checkpoints (SACs) Line up first aid. Ensure that at least one adult has First Aid/CPR/AED training.
o
•
For locations more than 30 minutes from emergency medical services, recruit a Wilderness First Aider or Wilderness First Responder. Identify the closest emergency transport and facilities.
o
•
Bring a first aid kit.
■
•
■
Check for fire restrictions. If weather conditions do not permit open flames, adjust your plans accordingly.
Day of the Activity Set up for safety. • In a primitive campsite, set up at least 200 feet from all water sources, avoiding fragile areas of plant growth (particularly mountain meadows) and areas of wet soil.
Always use clean, potable water for drinking and preparing food. Check with authorities. If the water supply is untested or not potable, treat it. Strain water through a clean cloth to remove sediment. Then use one of these methods: •
Boil water rapidly for one minute. Above 6,500 feet in elevation, boil for three minutes.
•
Disinfect using water-purification tablets or solution that eliminates Giardia lamblia. Follow the manufacturer’s instructions, including contact time.
•
Use a water purifier or filtration device designed to remove Giardia lamblia.
•
Treat with UV. Ultraviolet light devices kill most bacteria and viruses. Follow manufacturer directions.
■
•
Double-check fire restrictions to see if anything has changed since the planning phase.
•
Obtain firewood from local sources to avoid bringing pests and diseases from another location. Where wood gathering is allowed, use only dead, fallen wood.
•
•
Avoid spreading germs. Review safe sanitary principles with all participants: o o o o
Arrange secure food storage, away from tents and out of reach of animals. Check with authorities to see if a bear canister is required.
o
Dress appropriately. Make sure all participants are wearing: • Closed-toed shoes
■
•
Layered clothing suitable for the weather (with long sleeves rolled back)
•
Hair, clothing, or jewelry that could get in the food or fire is secured
•
No plastic garments, such as disposable ponchos, around flames
■
Practice food and water safety. Use safe water. Giardia lamblia, a parasite often found in backwoods water sources like streams, can cause diarrhea and other symptoms. It is difficult to treat. To avoid problems:
•
o o
o
o
•
Wash hands frequently, especially after using the restroom or handling raw meat. Do not share cups, water bottles, or other dishes. Do not allow anyone who is sick to prepare food. Keep food in the cooler, with the lid shut, until it’s time to use it. Keep utensils and surfaces clean; items that have touched raw meat should be removed from the area until sanitized. Use a meat thermometer to ensure doneness. Do not use cracked or chipped cups and plates; they harbor bacteria. Allow leftovers to cool to ambient temperature, then immediately refrigerate or place in a cooler with ice. Discard leftovers you can’t properly store.
Wash dishes thoroughly. Use an approved method, such as the three-bucket method demonstrated by Girl Scouts of Utah. Teach participants these steps: o o
Remove food particles from dishes and utensils; discard them into a trash container. Wash dishes in warm, soapy water, replacing the water when it gets dirty.
Bring enough potable water to last until you can treat water on site.
Safety Activity Checkpoints ©2009-2026 Girl Scouts of the USA. All Rights Reserved.
PAGE 109/190
Safety Activity Checkpoints (SACs) o o
o
■
•
Cook safely. Practice safe cooking over fire. o o
o o o o
•
Store wood away from the fire area. Build fires in designated areas and avoid creating new fire sites. An established site should be clear of overhanging branches, steep slopes, stumps, logs, dry grass, pine needles, leaves, and any other burnable material. Have a bucket or other fire extinguishing method close by. Keep cooking fires small. Watch for flying sparks and put them out immediately. If using charcoal, avoid using fire-starting fluid. Use fire starters instead. Never add lighter fluid to a fire once it has started.
If using a camp stove, follow stove manufacturers’ directions. o o
o o o o o •
Rinse dishes in hot, clear water. Sanitize dishes by putting them in a dunk bag. Then dip in clear, scalding water, or immerse in a chemical sanitizing solution (chlorine bleach or other sanitizer), following manufacturer directions. Soak for two minutes. Allow dishes to air dry. Hang up dunk bags or let dishes dry on a rack or a flat, clean surface. Do not use towels to dry, as they can re-contaminate dishes.
Use recommended fuel canisters. Avoid overheating fuel tanks. Keep extra fuel away from heat and out of direct sunlight or enclosed areas where the temperature is high. Do not dispose of pressurized cans in a fire. If fuel should spill, relocate the stove before lighting it. Keep stove parts clean. Place stoves on stable, level surfaces, away from wind and foot traffic. Do not pile rocks or other items around the stove for stability. Avoid overloading stoves with heavy pots.
Never cook inside a tent!
Safety Activity Checkpoints ©2009-2026 Girl Scouts of the USA. All Rights Reserved.
Closely supervise cooking and encourage all Girl Scouts to participate. Use good judgment to match activities to your group’s readiness, building skills progressively, such as: • Measuring, adding, and stirring ingredients
■
•
Roasting marshmallows or hot dogs over a fire built by an adult
•
Chopping soft foods like bananas, then moving to harder foods like carrots
•
Lighting and cooking on a portable stove
•
Building, tending, and extinguishing a wood cooking fire
■
Use care with novelty cooking methods. Alternative techniques, like solar cooking, can heat food even if the equipment doesn’t feel hot. Use insulated gloves when handling.
■
Extinguish all fires completely. Ask authorities for the preferred method in the area.
• •
Never douse a fire by pouring water over it; this can result in severe steam burns.
•
Use the “sprinkle and stir” method: sprinkle the fire with water or smother it with earth or sand, stirring with a shovel, rake, or stick, and then smother again.
•
Hold a hand a few inches over coals, ashes, partially burned wood, or charcoal for one minute to verify coolness.
•
Follow authorities’ instructions for disposing of cold ashes and partially burned wood or charcoal. Never leave ashes or partially burned items near buildings or on wooden decks, and avoid placing them in plastic buckets.
■
•
Handle wastewater and garbage appropriately. Find out how to handle gray water (such as dirty dishwater), garbage, and sanitary supplies.
•
Keep trash away from tents.
•
If no garbage pickup is available, take it with you when you leave.
PAGE 110/190
Safety Activity Checkpoints (SACs) Gear for Outdoor Cooking Make sure Girl Scouts have everything they need for safe, successful outdoor cooking. Group gear and supplies for planned recipes Girl Scouts NorCal has a menu planning resource that may be useful. Gather items based on the cooking methods you’ll use. Involve the group in creating the list. If a potluck approach is used, inform participants in advance. Don’t forget to list: •
Food, including spices, condiments, and other basics
•
Stove with fuel and/or firewood, matches, or lighter
•
Fire control items, such as a bucket and shovel
•
Ice chest
•
Mixing or serving bowls
•
Knives and cutting boards
•
Pots and pans, plus hot pads for handling
•
Utensils, including a can opener (if needed) and items to stir, flip, and serve with
•
Dishwashing supplies
Additional cooking-related gear •
Potable water and/or treatment supplies, if needed for your site
•
Handwashing supplies
•
Mess kit for each person. Specify the type needed: o o
Plate, bowl, cup, and personal utensils, or cookset-style mess kit with personal pans that lock compactly together, plus eating utensils Dunk bag for each person. Use mesh lingerie bags with a string to tie to a dunk line (like a clothesline) for drying. Air drying is essential for sanitation.
Safety Activity Checkpoints ©2009-2026 Girl Scouts of the USA. All Rights Reserved.
PAGE 111/190
Safety Activity Checkpoints (SACs)
JUNIOR
CADETTE
SENIOR
AMBASSADOR
Packrafting
BROWNIE
ACTIVITY
DAISY
Packrafting Is Prior Council Approval Required?
*
**
C
S
A
Yes
Is Activity Training, Certification, or Verified Experience Required?
Yes
*Brownies may paddle only on flat water and must stay within swimming distance of shore. **Juniors may paddle only on flat water within swimming distance of shore, or on sections of river rated Class I. Packrafting is your ticket to adventure! These lightweight, portable boats let you reach remote backcountry waters with ease. Whether you’re gliding on a calm lake or tackling whitewater rapids, packrafts offer new possibilities for exploration and fun.
Decision-Making Phase ■
•
Find a safe place to packraft. Nearly any body of water is suitable for packrafting with the right instruction, equipment, and experience. Start on flat water with little to no current. Progress to more advanced conditions, such as whitewater or surf.
Note: The term “packraft” refers to the raft’s portability, not what is packed inside.
•
Paddling.com and American Whitewater offer interactive maps of paddling locations.
General Checkpoints
•
Packrafting is not permitted in whitewater above Class III.
■
Identify an expert. Arrange for instruction by an adult with experience teaching and supervising packrafting for the ages involved.
Refer to the Safety Standards for general standards about supervision,transportation, first aid, emergency action plans, and more, as well as reminders about inclusion and accessibility.
• •
Activity-Specific Checkpoints for Packrafting
Engage a certified instructor with training suited to your location and conditions. Consider the following qualifications: o
Follow these basic reminders for each phase of planning. Check off items as you complete them, making sure to consider each sub-bullet.
o o
Learn More: •
Urge all participants to take ACA’s free online paddlesports safety course.
•
Match skill levels with river conditions by understanding the American version of the International Scale of River Difficulty.
Safety Activity Checkpoints ©2009-2026 Girl Scouts of the USA. All Rights Reserved.
o •
American Canoe Association (ACA)—various certification levels Girl Scouts Small Craft Safety Course (with kayak module and familiarity with packrafting equipment) American Red Cross Lifeguarding with Waterfront Module (for flat water, near shore only) Documented experience per your council’s guidelines
Maintain proper instructor–student ratio, per the instructor’s certification, with a maximum of five learners per instructor. An ACA instructor with a qualified assistant may supervise up to ten learners.
PAGE 112/190
Safety Activity Checkpoints (SACs) •
Maintain proper instructor–student ratio, per the instructor’s certification, with a maximum of five learners per instructor. An ACA instructor with a qualified assistant may supervise up to ten learners.
■
•
•
Planning and Preparation Phase Be clear on gear. • Review Gear for Packrafting at the end of this section.
■
•
Ask your instructor or outfitter what items are provided.
•
Communicate early with participants and families about what the group leader or outfitter will supply and what individuals need to bring.
■
• •
•
Line up first aid. Ensure that at least one adult has First Aid/CPR/AED training. For locations more than 30 minutes from emergency medical services, recruit a Wilderness First Aider or Wilderness First Responder. Identify the nearest emergency transport and facilities. Bring a first aid kit in a waterproof container.
Inspect the area upon arrival. Point out and avoid hazards such as strainers, sieves, hydraulics, waterfalls, bridges, dams, fences, and low power lines. Surf zones, rapids, and standing waves must be avoided unless part of a planned whitewater experience.
Instructors or lifeguards must be well-positioned for supervision. • Supervision from shore is only allowed on flat water near shore.
■
•
Instructors must accompany the group if paddling away from shore or on moving rivers.
•
Ensure everyone learns and practices the basics. Proper body position and balance
•
Packraft entry, launching, and landing techniques
•
Propelling and steering the packraft with effective strokes
•
Maneuvering through waves and wakes
•
Self-rescue techniques in case of capsize
•
Signaling for help
■
■
Consider special conditions. Before paddling with decked packrafts, paddlers must learn and successfully practice “wet exits” (escaping the boat if upside down). Practice with spray skirts, if used.
Assess swimming ability. Strong swimming skills are important for paddlers’ safety and confidence. A swim assessment is highly recommended to evaluate participant readiness. • Advance swim assessments are recommended to avoid disappointment.
•
•
In surf, learn and practice navigating around the break, as well as recognizing and managing rip currents.
•
Same-day assessments may be conducted if necessary.
•
•
If swim assessments are not feasible, assume all participants are non-swimmers.
In whitewater packrafting, learn and practice how to read and manage rapids and how to float through if separated from the kayak.
•
Understand and follow any site-specific instructions.
■
Follow kayaking right-of-way rules when packrafting. Yield to swimmers and less maneuverable watercraft.
■
Day of the Activity Check the weather. • Consult your instructor; postpone or cancel if conditions are unsuitable for your group’s skill level.
■
•
Never paddle during a storm.
•
Monitor river or wave conditions, as they change daily. Use local resources for live updates on rivers.
■
Check boats for condition. Ensure air chambers are functioning and secure.
Safety Activity Checkpoints ©2009-2026 Girl Scouts of the USA. All Rights Reserved.
• •
Expect powered watercraft and sailboats to yield, but stay alert and paddle defensively to prevent accidents.
•
Stay clear of large vessels (motorboats, ships, ferries) that cannot easily change course.
•
Ask your instructor to demonstrate other right-of-way rules.
•
Be aware of others in surf zones or whitewater.
•
Control your boat to prevent collisions.
PAGE 113/190
Safety Activity Checkpoints (SACs) ■
•
Prepare for emergencies. Discuss emergency action plans with your instructor.
Gear for Packrafting
•
Know who to contact and how to call for help.
Make sure Girl Scouts have everything they need for a successful packraft outing.
•
Be aware of your location to communicate effectively with authorities.
Individual and group essentials
Packrafting Trips: Additional Considerations Packrafting trips are longer day or overnight excursions. Plan trips only after progressive skill-building experiences. Follow these additional tips for a safe and satisfying experience. Ensure basic skills. Make sure that participants: • Have the skill and stamina to finish the trip, even if headwinds or other challenges arise
■
•
Learn how to cross busy channels, if necessary (generally, by crossing at a 90-degree angle to channel traffic)
•
Learn universal signals
Essential equipment •
Packraft suited to participants’ skill level and water conditions
•
Beginner or intermediate: bucket or self-bailing hull
•
Advanced: decked packraft with spray skirt, built for surf or whitewater
•
Properly sized, double-bladed paddle
•
Bailing scoop or sponge to remove water from hull (not needed for self-bailing boats)
Safety gear •
Coast Guard–approved life jackets, properly sized and fitted for each person (required)
File a float plan for any trip. • Provide a reliable adult with information about your boat(s) and the people aboard.
•
Rescue whistle
•
Throwable personal flotation device (Type IV cushion, ring buoy, or equivalent) available for each group on the water
•
This fillable Coast Guard Float Plan includes steps for your contact to take if they are concerned about your safety.
•
Tow line, throw bag, and/or other rescue gear (carried by the instructor)
•
■
Use a professional guide with the additional training needed for the trip type. Guiding on river, whitewater, coastal, touring, and open water (ocean) trips are advanced certifications.
Helmets (required in Class II or higher rapids, or if going in or near sea caves)
•
Hull repair kit and air pump
•
Paddling at night requires additional gear; contact your outfitter.
■
■
See the additional gear needed for trips under Gear for Packrafting. Consult your guide about what else may be needed.
■
Do not exceed capacity or overload boats with gear.
■
Keep boats close enough together so that a group decision can be made if wind or water conditions change.
■
Be aware of possible changes in water level due to tides or dam releases, and how these may impact your route.
Safety Activity Checkpoints ©2009-2026 Girl Scouts of the USA. All Rights Reserved.
Clothing and footwear •
Layered, non-cotton clothing; rash guards and board shorts are ideal.
•
Water shoes, neoprene booties, or non-slip sport sandals with a heel strap (no flip-flops)
•
Wetsuit or neoprene top and shorts if the water temperature is below 65°F
•
Paddling gloves for comfort and grip
PAGE 114/190
Safety Activity Checkpoints (SACs) Gear for trips For trips, critical gear should be secured in or to the boat. Consult your expert about what to bring in addition to the gear listed above. They may recommend items such as: •
Navigation items, such as GPS or compass
•
Communication equipment, such as two-way, satellite, or weather/VHF radios
•
Dry bags (and a way to secure them) to carry food, extra clothing, first aid kit, etc.
•
Tool/repair kit: duct tape, tools, spare plugs, etc.
•
Spare paddle(s)
•
Emergency equipment, such as signaling mirror, tarp, space blanket, extra clothing and food, matches, flashlight, etc.
Safety Activity Checkpoints ©2009-2026 Girl Scouts of the USA. All Rights Reserved.
PAGE 115/190
Safety Activity Checkpoints (SACs)
ACTIVITY
DAISY
BROWNIE
JUNIOR
CADETTE
SENIOR
AMBASSADOR
Parades and Other Large Gatherings Is Prior Council Approval Required?
Parades and Other Large Gatherings
D
B
J
C
S
A
No
Be part of the celebration! Parades are all about energy, excitement, and community spirit. March or dance along the route, or ride on a float—it’s your chance to shine and make memories!
General Checkpoints Refer to the Safety Standards for general standards about supervision, transportation, first aid, emergency action plans, and more, as well as reminders about inclusion and accessibility.
Activity-Specific Checkpoints for Parades and Other Large Gatherings
Is Activity Training, Certification, or Verified Experience Required?
No
■
Additionally, parade organizers should:
•
Lay out a clear route without cross traffic
•
Communicate guidelines about parade vehicles and floats
•
Set minimum ages and qualifications for drivers of vehicles and floats
Planning and Preparation Phase Plan floats safely. Floats drawn by trucks and automobiles must be: • Constructed with safe, nontoxic, flame-retardant materials
■
•
Secured to the body of the vehicle or trailer
Follow these basic reminders for each phase of planning. Check off items as you complete them, making sure to consider each sub-bullet.
•
Equipped with ABC fire extinguisher(s)
•
Driven by a licensed driver, at least 21 years old, approved by your council
Decision-Making Phase
•
Covered by automobile insurance
•
Secured with an appropriate trailer coupling and safety chain
Check event organizers’ plans. Organizers of any large gathering should:
■
•
Provide sufficient restroom facilities
•
•
Provide water stations
•
Provide police or other security protection
•
Arrange for lighting at evening or indoor events
•
Observe fire safety protocols, including having sufficient exits if indoors
■
•
Allow only licensed food preparation
•
Have written safety and emergency management plans
Safety Activity Checkpoints ©2009-2026 Girl Scouts of the USA. All Rights Reserved.
Plan drop-off and pickup. Identify the starting and ending meeting spots for one-way parade routes and communicate them to families in advance. Choose locations away from traffic
•
Arrange for participants to be dropped off at the start and picked up at the end.
■
Line up first aid. Ensure that at least one adult has First Aid/CPR/AED training.
• •
Bring a first aid kit.
PAGE 116/190
Safety Activity Checkpoints (SACs) Day of the Activity ■
•
Dress appropriately. Make sure all participants are wearing: For parades: Girl Scout uniform or pin, or parade costume that is easy to walk in, with good visibility; layer clothing for the weather.
•
Sneakers or other walking shoes
•
No name tags or other identifying information
•
Sun protection, if appropriate
■
•
Riders on floats or vehicles must: Remain seated, or have a secure handhold or safety harness if standing
•
Have ample room, with sufficient space for all riders
•
Keep arms and legs inside; no dangling or leaning out
•
Not distribute candy or other items to onlookers
•
Have an adult on the float with them
■ Walkers in parades must:
•
Stay away from vehicles, floats, and animals
•
Have an adult walking with them
■
•
Make sure all participants: Know what to do in an emergency or if separated from the group
•
Know not to take candy or other items from floats or vehicles
•
Carry a refillable water bottle
Gear for Parades and Other Large Gatherings As long as Girl Scouts are appropriately dressed, they shouldn’t need any other gear. Check with organizers for recommendations. Otherwise, just show up and have fun!
Safety Activity Checkpoints ©2009-2026 Girl Scouts of the USA. All Rights Reserved.
PAGE 117/190
Safety Activity Checkpoints (SACs) BROWNIE
JUNIOR
CADETTE
SENIOR
Pocket Knife and Jackknife Safety
*
B
J
C
S
AMBASSADOR
ACTIVITY
DAISY
Pocket Knife and Jackknife Safety Is Prior Council Approval Required?
Is Activity Training, Certification, or Verified Experience Required?
A
No
No
*Daisies may learn basic knife safety with cardboard/wood models.
Make the most of this iconic, versatile tool by learning safe and effective techniques. Take the Girl Scout Pocket Knife/Jackknife Safety Pledge to show your commitment to safety.
Learn More: •
Gather some tips on teaching kids knife safety at Montana Knife Company’s blog.
General Checkpoints
•
Girl Scouts Western Pennsylvania has a Knife Safety badge with instructions—plus a template for a cardboard knife to practice with.
Refer to the Safety Standards for general standards about supervision,transportation, first aid, emergency action plans, and more, as well as reminders about inclusion and accessibility.
Activity-Specific Checkpoints for Pocket Knives and Jackknives
Planning and Preparation Phase
Follow these basic reminders for each phase of planning. Check off items as you complete them, making sure to consider each sub-bullet.
■
Decision-Making Phase
■
■
• •
■
Assess readiness and interest. Knife users must be mature enough to listen, follow directions, and hold responsibility. Start with a fixed blade, such as a butter or table knife, to assess whether your Girl Scouts can follow the safety rules needed for sharper folding knives.
Get ready to teach! Build your confidence before teaching, if needed, by finding a training plan. Check if your council offers a knife skills class or ask an experienced instructor for help.
Be clear on gear. Inform families whether knives will be provided or if they should bring their own. If bringing their own, specify acceptable types: • Allowed: Folding pocket knives or jackknives •
Not allowed: Switchblades, butterfly knives, or automatic-opening blades
•
Fit matters: Handle comfortably fits the user’s palm
•
Avoid: Large multi-tools/utility knives or tiny keychain knives, for beginners
Confirm caregiver agreement. Ensure that parents/ caregivers are ready, too. Come to an agreement on when and where pocket knives can be stored and used.
Safety Activity Checkpoints ©2009-2026 Girl Scouts of the USA. All Rights Reserved.
PAGE 118/190
Safety Activity Checkpoints (SACs) ■
• •
•
Line up first aid. Ensure that at least one adult has First Aid/CPR/AED training. For locations more than 30 minutes from emergency medical services, recruit a Wilderness First Aider or Wilderness First Responder. Identify the closest emergency transport and facilities. Ensure a first aid kit is available.
Day of the Activity ■
• •
Dress appropriately. Make sure all participants are wearing: Closed-toed shoes Hair tied back
Make it girl-led. Encourage your group to review and customize these rules. You may wish to transfer the final text to small cards to be carried with the knives to remind Girl Scouts of their agreements to be safe. Girl Scout Pocket Knife/Jackknife Safety Pledge Carrying a knife is both an honor and a responsibility. I have completed a workshop on pocket knife/jackknife handling and safety. For my safety and that of others, I agree to these guidelines. I will always: • Respect my pocket knife/jackknife and use it as a tool •
Make sure all participants learn the basics. You can break skills into several sessions. Be sure to cover: • Safety first: Set up an “arc” or “circle of safety”
Keep my pocket knife/jackknife closed and safely stored when not in use.
•
Use my pocket knife/jackknife only when it is safe for everyone around me
•
Handling: Open, close, and carry a knife safely.
•
Never throw or toss my pocket knife/jackknife
•
Practical use: Cut food, whittle, and more
•
Use my pocket knife/jackknife safely and as I was taught
•
Passing a knife: Transfer it safely to others
•
Maintenance: Clean, sharpen, and store knives properly
•
Pledge: You can use the sample below or develop/use your own safety promise.
■
Date
Gear for Pocket Knives/Jackknives Make sure Girl Scouts have everything they need for safe pocket knife/jackknife handling, practice, and maintenance.
Girl Scout name/signature
Essential Equipment •
Folding knife that fits the user’s hand
•
Soft cloth for cleaning
Responsible adult name/signature
Optional items •
Practice material: Soap, balsa wood, or similar
•
Maintenance: Sharpening stone and honing oil
Safety Activity Checkpoints ©2009-2026 Girl Scouts of the USA. All Rights Reserved.
PAGE 119/190
Safety Activity Checkpoints (SACs) CADETTE
SENIOR
AMBASSADOR
Recreational Tree Climbing
JUNIOR
BROWNIE
ACTIVITY
DAISY
Recreational Tree Climbing Is Prior Council Approval Required?
J
C
S
A
No
Experience nature up close while challenging yourself and gaining a unique perspective on the environment. Whether you’re seeking an adrenaline rush or a peaceful escape, tree climbing offers an unforgettable adventure.
Is Activity Training, Certification, or Verified Experience Required?
Yes
Learn More: •
Take care of our trees! Find out how to Leave No Trace outdoors.
General Checkpoints Refer to the Safety Standards for general standards about supervision,transportation, first aid, emergency action plans, and more, as well as reminders about inclusion and accessibility.
Activity-Specific Checkpoints for Recreational Tree Climbing Follow these basic reminders for each phase of planning. Check off items as you complete them, making sure to consider each sub-bullet. Note: Recreational tree climbing does not mean scrambling up trees in a park or yard. The recreational activity evolved from professional arborists’ need to care for trees and involves elements of rock climbing. The Safety Activity Checkpoints (SACs) here apply to organized, facilitated experiences that are highly protective of the trees. Tree climbs and canopy tours can be part of a challenge course, or can feature other included activities. See SACs for these related elements: •
Challenge Courses
•
Climbing, Bouldering, and Rappelling (including artificial climbing walls)
•
Slacklines—now listed in Challenge Courses as a low element
•
Zip Lining
Safety Activity Checkpoints ©2009-2026 Girl Scouts of the USA. All Rights Reserved.
Decision-Making Phase ■
•
Find a safe place to go tree climbing. While some tree-climbing locations are permanent, most are set up temporarily.
•
The Global Organization of Tree Climbers maintains an interactive map of facilitators and instructors to engage. Ask for advice on climbing options nearby.
•
Tree Climbing Planet offers instructor training, events, and excursions.
•
Treetop Explorer hosts open climbs in limited locations.
•
Obtain permission or permits for the site.
■
• •
Identify a qualified facilitator/instructor. Ensure the instructor’s training aligns with the conditions found in the chosen setting. Climbing over 6 feet requires an instructor trained and certified by a verified agency, demonstrating competence in: o o o o o o
Equipment maintenance Safety and rescue techniques Proper setup Hands-on training Practices to protect trees Teaching and facilitation experience with the age group
PAGE 120/190
Safety Activity Checkpoints (SACs) •
Recognized certifications include: o o o o o o
•
•
Global Organization of Tree Climbers (GOTC) Tree-Climbing Facilitator Tree Climbing Planet Facilitator Documented experience per council guidelines Hands-on training Practices to protect trees Teaching and facilitation experience with the age group
•
Ensure everyone learns and practices the basics. Proper fitting of helmets, harnesses, and gear
•
Muscle warming and stretching before activities
•
Readiness and action commands for climbing, spotting, and belaying
•
Safe spotting techniques for group activities
•
Objectives and safety reminders
•
Off-limits areas
Maintain instructor–participant ratios specified by the facilitators’ certification, with a maximum of six participants per instructor for high elements. A minimum of two trained facilitators must be present.
■
Confirm that the facilitator has firsthand knowledge of hazards, conditions, and emergency action plans for the area.
•
Maintaining a use log for gear subject to wear, stress, or deterioration
•
Supervising helmet and harness fit for each participant
•
Overseeing all tie-ins, belays, and climbs
Planning and Preparation Phase ■
■
Be clear on gear.
•
Confirm facilitator safety checks. . Climbing the route to inspect equipment and tree(s) before each use
•
Review Gear for Recreational Tree Climbing at the end of this section.
•
Ask your facilitator what items are provided.
Make sure Girl Scouts have everything they need for a safe, successful climbing experience.
•
Communicate early with participants and families about what the group leader or outfitter will supply and what individuals need to bring.
Essential Equipment
Line up first aid. • Ensure that at least one adult has First Aid/CPR/AED training.
■
•
Hair tied back
•
For locations more than 30 minutes from emergency medical services, recruit a Wilderness First Aider or Wilderness First Responder. Identify the closest emergency transport and facilities.
•
Gear for Recreational Tree Climbing
•
Harness, properly fitted and sized for the user
•
Belay devices and other hardware, as needed for the setting
•
Ropes, webbing, and other essential gear specific to the setting
Safety gear •
Helmet, properly fitted—climbers, belayers, and those in the “fall zone” must wear helmets.
•
Rescue equipment must be available for use by the facilitator in an emergency.
Ensure that a first aid kit will be on hand.
Day of the Activity Check the weather. • Consult your facilitator; postpone or cancel if conditions are unsuitable for the group’s skill level.
■
•
Review procedures for sudden storms.
•
Never climb when lightning threatens.
•
Stop the activity if precipitation or cold weather reduces traction or grip.
Safety Activity Checkpoints ©2009-2026 Girl Scouts of the USA. All Rights Reserved.
Clothing and footwear •
Sturdy, closed-toed shoes
•
Layered clothing to adjust for weather
•
Hair, clothing, or jewelry secured if it could be caught in equipment
PAGE 121/190
Safety Activity Checkpoints (SACs)
ACTIVITY
DAISY
BROWNIE
JUNIOR
CADETTE
SENIOR
AMBASSADOR
Rowboats/Rowing Is Prior Council Approval Required?
Rowboats/Rowing
*
*
J
C
S
A
Yes
Is Activity Training, Certification, or Verified Experience Required?
Yes
*Daisies may go rowing only on flat water with an experienced adult in each rowboat. ** Brownies and Juniors may use rowboats; only Cadettes and older may use sculls or shells.
Row your way to adventure! Whether gliding across a peaceful lake, powering through open water, or racing to the finish line, every stroke brings rhythm, strength, and a deeper connection to the water.
Learn More: •
Visit a local college or university crew team to see training in action and learn about women’s rowing.
General Checkpoints
•
Check out Olympic rowing.
Refer to the Safety Standards for general standards about supervision,transportation, first aid, emergency action plans, and more, as well as reminders about inclusion and accessibility.
•
Get to know rowboat terms, history, and equipment at Christine DeMerchant’s vast web page.
Activity-Specific Checkpoints for Rowing Follow these basic reminders for each phase of planning. Check off items as you complete them, making sure to consider each sub-bullet.
■
• •
Note: This guidance does not include information about whitewater rowing or rowing trips
•
•
Find a safe place to go rowing. Row on flat water with little to no current; possibilities may include a lake, calm river, bay, or pond. Oceans and moving rivers can be used if rowers have advanced instruction and skills. Check with local rowing clubs for lessons or suggested locations.
Safety Activity Checkpoints ©2009-2026 Girl Scouts of the USA. All Rights Reserved.
Engage a certified instructor with training suited to your location and conditions. Consider the following qualifications: o o o
Decision-Making Phase ■
Identify an expert. Arrange for instruction by an adult with experience teaching and supervising rowing for the ages involved.
o
USRowing coaching certification—various levels Girl Scouts Small Craft Safety Course American Red Cross Lifeguarding with Waterfront Module (for flat water, near shore only) Documented experience per your council’s guidelines
•
Maintain proper instructor–student ratio, per the instructor’s certification, with a maximum of five learners per instructor.
•
Ensure instructors have firsthand knowledge of the hazards and conditions at the rowing location.
PAGE 122/190
Safety Activity Checkpoints (SACs) Planning and Preparation Phase
■
Inspect the area upon arrival. Point out and avoid hazards such as strainers, sieves, hydraulics, waterfalls, bridges, dams, fences, and low power line.
■
Check boats and equipment for general condition. Make sure any plugs are intact.
■
Instructors or lifegards must be well-positioned for supervision. Supervision from shore is only allowed on flat water near shore. Instructors must accompany the group if rowing away from shore.
■
Ensure everyone learns and practices the basic.. Proper body position and balance
Be clear on gear. • Review Gear for Rowing at the end of this section.
■
•
Ask your instructor or outfitter what items are provided.
•
Communicate early with participants and families about what the group leader or outfitter will supply and what individuals need to bring.
■
• •
•
Line up first aid. Ensure that at least one adult has First Aid/CPR/AED training. For locations more than 30 minutes from emergency medical services, recruit a Wilderness First Aider or Wilderness First Responder. Identify the closest emergency transport and facilities. Bring a first aid kit in a waterproof container.
Assess swimming ability. Strong swimming skills are important for rowers’ safety and confidence. A swim assessment is highly recommended to evaluate participant readiness. • Advance swim assessment is recommended to avoid disappointment.
■
•
Same-day assessments may be conducted if necessary.
•
If a swim assessment is not feasible, assume all participants are non-swimmers.
•
Competitive rowers (sculls and shells) must be strong swimmers.
Day of the Activity ■
•
Check the weather. Consult your instructor; postpone or cancel if conditions are unsuitable for your group’s skill level.
• •
Launching, entering the rowboat, and landing techniques
•
Using the oars to propel and steer with effective strokes
•
Maneuvering through waves and wakes
•
Staying with the boat in case of capsize
•
Signaling for help
•
Any site-specific instructions
■
•
Follow rowing right-of-way rules. Yield to swimmers and less maneuverable watercraft.
•
Expect powered watercraft and sailboats to yield, but stay alert and row defensively to prevent accidents.
•
Stay clear of large vessels (motorboats, ships, ferries) that cannot easily change course. If a busy channel cannot be avoided, cross at a 90-degree angle.
•
Ask your instructor to demonstrate other right-of-way rules.
•
Control your boat to prevent collisions.
■
•
Prepare for emergencies. Discuss emergency action plans with your instructor.
•
Never paddle during a storm.
•
Know who to contact and how to call for help.
•
Check tides and dam releases.
•
Be aware of your location to communicate effectively with authorities.
Safety Activity Checkpoints ©2009-2026 Girl Scouts of the USA. All Rights Reserved.
PAGE 123/190
Safety Activity Checkpoints (SACs) Rowing Boat Trips Since rowing boat trips are uncommon, they are not covered in these checkpoints. Consult a qualified expert and obtain council approval before planning a trip.
Gear for Rowing Make sure Girl Scouts have everything they need for a safe, successful rowing experience. Essential Equipment •
Rowing boat suited to participants’ skill level and water conditions o o o
Beginner or intermediate: stable boats like dories, skiffs, dinghies, etc. Advanced: racing scull or shell Do not exceed manufacturer capacity for weight and/or passengers.
•
Oars and oarlocks (pivot points for the oars, positioned on the boat’s gunwales)
•
Seat: fixed for rowboats, sliding for sculls or shells
•
Outrigger: for racing shells
•
Bailing scoop or sponge, to remove water from the hulls
Safety gear •
Coast Guard–approved life jackets, properly sized and fitted for each person (required)
•
Exception for competitive racing (sculls and shells): Life jackets may be carried in a nearby chase boat to prevent rowers’ entanglement with oars.
•
Rescue whistle
•
Throwable personal flotation device (Type IV cushion, ring buoy, or equivalent) available for each group on the water
•
Tow line, throw bag, and/or other rescue gear (carried by the instructor)
•
Rowing at night requires additional gear; contact your outfit
Clothing and footwear •
Layered, non-cotton clothing (rash guards and board shorts are ideal for rowing boats)
•
Water shoes, neoprene booties, or non-slip sport sandals with a heel strap (no flip-flops)
•
Paddling gloves for comfort and grip
•
Ask the coach about what to wear for a shell or scull.
Safety Activity Checkpoints ©2009-2026 Girl Scouts of the USA. All Rights Reserved.
PAGE 124/190
Safety Activity Checkpoints (SACs)
JUNIOR
CADETTE
SENIOR
AMBASSADOR
Sailing
BROWNIE
ACTIVITY
DAISY
Sailing Is Prior Council Approval Required?
*
J
C
S
A
Yes
Is Activity Training, Certification, or Verified Experience Required?
Yes
*Sailing for individual Brownies is allowed with a careful evaluation of maturity and decision-making skills
Harness the wind to power an adventure afloat! Sailboats of all sizes let you build solo skills or work as a team, whether seeking a peaceful escape or an exciting challenge.
Learn More: •
Head over to Animated Knots to tie up your knot-tying skills!
General Checkpoints Refer to the Safety Standards for general standards about supervision, transportation, first aid, emergency action plans, and more, as well as reminders about inclusion and accessibility. This SAC offers guidelines for small sailboats operated by participants. For large sailboats with a qualified captain, refer to the SAC for Offshore Passenger Vessels.
■
• •
Follow these basic reminders for each phase of planning. Check off items as you complete them, making sure to consider each sub-bullet.
■
•
Find a safe place to sail. Contact local yacht club youth sailing programs, municipal rental sites, and university sailing programs that provide community sailing lessons. US Sailing maintains a dynamic “Where to Sail” directory that includes adaptive programs.
•
Beginners should start on flat water with little current, in light to moderate wind.
•
Stay clear of areas with low power lines.
Safety Activity Checkpoints ©2009-2026 Girl Scouts of the USA. All Rights Reserved.
Engage a certified instructor with training suited to your location and conditions. Consider the following qualifications: o o o
Activity-Specific Checkpoints for Sailing
Decision-Making Phase
Identify an expert/instructor. Arrange for instruction by an adult with experience teaching and supervising sailing for the ages involved.
o
US Sailing certification Girl Scouts Small Craft Safety Course American Red Cross Lifeguarding with Waterfront Module (for flat water, near shore only) Documented experience per your council’s guidelines
•
Operators of any safety (rescue) boats must also be appropriately trained.
•
Follow the instructor–student ratios for which your instructor is qualified. Ratios vary based on the ages of students, whether an assistant coach or instructor is on hand, and the type of boat(s) to be used. When uncertain, follow a ratio of 1:4 (1:3 if under eight years).
PAGE 125/190
Safety Activity Checkpoints (SACs) Planning and Preparation Phase ■
Be clear on gear. See Gear for Sailing at the end of this section. Discuss with participants and families well in advance what the group leader or sailing center will provide and what each person should bring themselves.
Evaluate swimming ability. Confidence in the water is key to sailing success. Sailors should be competent swimmers, and a swim assessment is highly recommended. • Advance swim assessment is recommended to avoid disappointment.
■
■
•
Inspect the area upon arrival. Point out and avoid hazards such as bridges, dams, fences, reefs, and low power lines.
•
Surf zones and areas of heavy waves must be avoide.
■
•
Check equipment. Ensure safety gear, boats, sails, and hardware appear to be in good repair.
•
Report any concerns to the vendor or instructor.
•
Ensure everyone learns and practices the basics. Parts of the boat and how they function
•
Proper body position, including how to avoid the boom
•
Launching and landing techniques
Line up first aid. • Ensure that at least one adult has First Aid/CPR/AED training.
•
Points of sail: catching the wind, tacking, and jibing
•
Maneuvering through waves and wakes
•
•
Capsize recovery, person overboard, and rescue procedures
•
Staying with the boat if unable to recover from a capsize
•
How to signal for help
•
For boats with engines: Never linger near the engine exhaust discharge while the engine in running. Carbon monoxide can collect in the area and cause death
■
Follow sailing right-of-way rules. Yield to human-powered watercraft (kayaks, canoes) and swimmers.
•
Same-day assessments may be conducted if necessary.
•
If not feasible, assume all participants are non-swimmers.
■
• ■
• •
For locations more than 30 minutes from emergency medical services, recruit a Wilderness First Aider or Wilderness First Responder. Identify the closest emergency transport and facilities. Bring a first aid kit in a waterproof container. File a float plan for any trip. Provide a reliable adult with information about your boat(s) and the people aboard. This fillable Coast Guard Float Plan includes steps for your contact to take if they are concerned about your safety.
Day of the Activity Check the weather. • Consult your instructor; postpone or cancel if weather is not favorable.
■
•
Monitor for wind speed and gusts.
•
Monitor sea state (waves and swells).
•
Never sail when thunderstorms are predicted.
•
Use caution when currents or tidal action are present.
Safety Activity Checkpoints ©2009-2026 Girl Scouts of the USA. All Rights Reserved.
■
• •
Expect powered watercraft and kiteboarders to yield, but stay alert and sail defensively to prevent accidents.
•
Stay clear of large vessels (ferries, ships) that cannot maneuver easily.
•
Ask your instructor to explain additional right-of-way rules.
■
•
Prepare for emergencies. Discuss emergency action plans with your instructor.
•
Know who to contact and how to call for help.
•
Be aware of your location to communicate effectively with authorities.
PAGE 126/190
Safety Activity Checkpoints (SACs) Gear for Sailing Make sure Girl Scouts have everything they need for a safe, successful sailing experience. Individual and group essentials Essential Equipment •
Suitable sailboat(s) for the participants’ skill level and water conditions, including sails and rigging. Boats must meet USCG and local regulations. Never exceed a boat’s capacity for weight or passengers.
Safety gear •
Coast Guard–approved life jacket, properly sized and fitted for each person
•
Rescue whistle for each person
•
Throwable personal flotation device (Type IV cushion, ring buoy, or equivalent) available for each group on the water
•
Emergency sound device, such as an air horn or whistle
•
Bailer (bucket or scoop to remove water from a boat)
•
Paddle (backup means of propulsion)
•
Safety boat(s), if used; instructors use safety (rescue) boats when teaching dinghy sailing.
Clothing and footwear •
Layered, non-cotton clothing
•
Non-slip boat shoes, non-slip sport sandals with a heel strap, water socks, or neoprene booties (no flip-flops)
•
Wetsuit, if the water temperature is below 65°F, for “wet” boats
•
Hair, clothing, or jewelry secured if it could be caught in equipment
•
Sailing gloves
Gear for trips In addition to the above gear, which is primarily for short sails on small boats, ask your instructor about items to bring for a sailing trip. They may recommend items such as: •
First aid kit in a waterproof container
•
Emergency repair kit with tools, duct tape, extra line, spare hardware, etc.
•
Rigging knife
•
Emergency survival items
•
Refer to the SAC for Offshore Passenger Vessels as needed.
Safety Activity Checkpoints ©2009-2026 Girl Scouts of the USA. All Rights Reserved.
PAGE 127/190
Safety Activity Checkpoints (SACs)
SENIOR
AMBASSADOR
SCUBA Diving
CADETTE
JUNIOR
ACTIVITY
BROWNIE
DAISY
SCUBA Diving Is Prior Council Approval Required?
*
S
A
Yes
Is Activity Training, Certification, or Verified Experience Required?
Yes
*Girl Scouts must be at least 12 years of age for SCUBA certification.
Experience a sense of weightlessness and become a visitor in a new, underwater world. See shipwrecks, coral colonies, and geological formations, and meet creatures you never knew existed!
Learn More:
General Checkpoints Refer to the Safety Standards for general standards about supervision,transportation, first aid, emergency action plans, and more, as well as reminders about inclusion and accessibility.
Activity-Specific Checkpoints for SCUBA Diving Follow these basic reminders for each phase of planning. Check off items as you complete them, making sure to consider each sub-bullet. Note: See the Snorkeling SAC for a terrific preparatory activity. Freediving is never permitted in a Girl Scout setting
■
•
Did you know that touching coral can cause damage that takes 100 years to recover? Find out how to protect coral reefs—in the water and at home.
Identify a qualified SCUBA instructor. Certified instructors will have significant personal diving experience, rescue and emergency response training, and other key qualifications. Recognized instructor certifications include: SCUBA Schools International (SSI)
•
Professional Association of Diving Instructors (PADI)
•
National Association of Underwater Instructors (NAUI)
•
Documented experience per council guidelines
Decision-Making Phase Evaluate readiness and build progressive skills. • First, ensure all participants are strong, confident swimmers.
Learn Dive Speak: Learn terms, phrases, and slang for SCUBA divers.
•
■
■
•
Maintain proper instructor–student ratios per the instructor’s certification and the conditions present, with a maximum of eight learners per instructor.
Select a safe SCUBA location. Discuss suitable options with your instructor. Look for: • Pools, recommended for initial training
■
•
Try snorkeling to gauge interest.
•
Calm water with high visibility
•
Take a non-certification SCUBA experience in a dive agency pool. This is a great way to explore the sport before “diving in.”
•
Minimal current
•
Areas away from boating traffic
•
Established marine sanctuaries
•
Pursue SCUBA certification if your group is interested.
Safety Activity Checkpoints ©2009-2026 Girl Scouts of the USA. All Rights Reserved.
PAGE 128/190
Safety Activity Checkpoints (SACs) Planning and Preparation Phase ■
Be clear on gear. Communicate early with participants and families about what the group leader or facility will provide and what individuals need to bring.
Line up first aid. • Ensure that at least one adult has First Aid/CPR/AED training.
■
•
• ■
For locations more than 30 minutes from emergency medical services, recruit a Wilderness First Aider or Wilderness First Responder. Identify the closest emergency transport and facilities. Ensure that a first aid kit will be on hand. Recruit watchers, if needed. Ask your SCUBA instructor whether watchers (lookouts) are needed or desired; additional adults may be a distraction. If watchers are requested, use the information in the Swimming SAC to help guide preparation.
Day of the Activity Check the weather. • Check weather.com or another reliable source for the big weather picture.
■
Gear for SCUBA Diving Make sure Girl Scouts have everything they need for a safe, successful SCUBA experience. Essential Gear •
Buoyancy control device (BCD)
•
Regulator
•
Tanks
•
Mask/defog
•
Snorkel
•
Wetsuit
•
Fins and booties
•
Surface marker buoy/dive flag
•
Dive weight, if local diving
•
Dive computer
Advanced gear •
Diving knife
•
Dive light
•
Tank bangers
•
Compass
•
Check the local dive report for local conditions, including water quality, tides, and currents.
•
Never dive on a stormy or windy day.
•
Never dive when lightning threatens.
•
Dive only in daylight or with proper experience
•
Writing slate
and equipment.
•
Dry box
•
Underwater camera
•
Dive log
■
■
Evaluate swimming ability. Assessing swimming ability in advance is required. Refer to the Swimming SAC or consult your SCUBA instructor for guidance.
Optional gear
Ensure everyone learns and practices the basics.
•
Fitting and operating all equipment
•
Dive planning
•
Using the buddy system
•
Entering and exiting the water
•
Achieving neutral buoyancy
•
Clearing the mask of water
•
Recovering the regulator if it comes out of the mouth, and purging the regulator
•
Hand signals, including signaling for help
Safety Activity Checkpoints ©2009-2026 Girl Scouts of the USA. All Rights Reserved.
PAGE 129/190
Safety Activity Checkpoints (SACs) AMBASSADOR
SENIOR
CADETTE
JUNIOR
BROWNIE
SHOOTING SPORT/ FIREARM TYPE
DAISY
Shooting Sports/Firearms Is Prior Council Approval Required?
Is Activity Training, Certification, or Verified Experience Required?
Girl Scout program levels permitted Participant to instructor ratios
Target Paintball
5:1 ratio
10:1 ratio
Yes
Yes
BB/Air Guns
5:1 ratio
10:1 ratio
Yes
Yes
Rifle
Age 12 and up 8:1 ratio
Yes
Yes
Shotgun, Trap, or Skeet Shooting
Age 12 and up 8:1 ratio
Yes
Yes
Muzzle Loading
Age 12 and up 8:1 ratio
Yes
Yes
Pistol
Age 12 and up 8:1 ratio
Yes
Yes
Automatic firearms and hunting are never permitted in Girl Scouts.
Find focus, precision, and confidence! Learning to shoot is about more than marksmanship—it’s about discipline, responsibility, and control. Whether for sport, recreation, or skill-building, mastering firearms teaches focus, safety, and confidence with every shot. Learn More: •
In Olympic shooting, athletes compete in rifle, pistol, and shotgun events. See how points are scored and competition progresses.
Safety Activity Checkpoints ©2009-2026 Girl Scouts of the USA. All Rights Reserved.
General Checkpoints Refer to the Safety Standards for general standards about supervision,transportation, first aid, emergency action plans, and more, as well as reminders about inclusion and accessibility.
Activity-Specific Checkpoints for SCUBA Diving Follow these basic reminders for each phase of planning. Check off items as you complete them, making sure to consider each sub-bullet.
PAGE 130/190
Safety Activity Checkpoints (SACs) Note: In this guidance, Shooting Sports/Firearms are defined as those where a propellant emits a projectile. See Archery and Slingshots SACs for those guidelines
•
o o o o o o
Decision-Making Phase ■
Check with your council first. Some areas may have restrictions or concerns about shooting sports. Before making any plans, obtain written permission from council staff to ensure compliance with local policies.
Confirm caregiver agreement. Parents and guardians may have strong feelings about their child handling or being around firearms. Engage in open dialogue, listen to concerns, and ensure each family can make an informed decision without judgment. • Obtain specific, written permission from caregivers in advance.
■
• ■
Respect individual choices—participation should always be optional. Assess maturity and readiness. Shooting participants must be able and committed to following instructions and handle equipment with care. Build progressive experiences with target sports like slingshots, archery, and BB guns before taking on rifles or more advanced firearms.
Find a safe and suitable shooting range. • Locate nearby shooting ranges and ask if instructors are available.
■
•
•
•
■
•
Check local camps. Some camps, including those operated by your council, may offer shooting sports. The American Camp Association’s Find-a-Camp tool can help locate options. Explore youth shooting programs. Contact organizations and clubs that include youth-focused target shooting in their activities. Confirm safe range practices. An advance visit is recommended to assess safety measures. See “Confirm range setup” in the Day of the Activity section below for key safety criteria. Identify an expert/instructor. All shooting sports require a trained instructor. Ensure that the instructor you choose has the qualification to teach and supervise the type of firearm to be used.
Safety Activity Checkpoints ©2009-2026 Girl Scouts of the USA. All Rights Reserved.
Recognized certifications include:
•
4-H Shooting Sports Appleseed Project Civilian Marksmanship Program (CMP) National Shooting Sports Foundation (NSSF) National Rifle Association (NRA) Documented experience per council guidelines
Maintain instructor–participant ratios specified by the instructor’s certification, with a maximum of those listed in the table above.
Planning and Preparation Phase Be clear on gear. • Review Gear for Shooting Sports/Firearms at the end of this section.
■
•
Ask your instructor what items are provided.
•
Communicate early with participants and families about what the group leader or outfitter will supply and what individuals need to bring.
■
Line up first aid. Ensure that at least one adult has First Aid/CPR/AED training.
• •
For locations more than 30 minutes from emergency medical services, recruit a Wilderness First Aider or Wilderness First Responder. Identify the closest emergency transport and facilities.
•
Ensure that a first aid kit will be on hand.
Day of the Activity ■
•
Check the weather. Consult your instructor; postpone or cancel if conditions are unsuitable for the group’s skill level.
•
Review procedures for sudden storms.
•
Never shoot when lightning threatens.
•
Stop activities if precipitation or cold weather reduces footing or grip.
•
Do not shoot in the dark. Confirm range.
PAGE 131/190
Safety Activity Checkpoints (SACs) Confirm range setup. Check these items during decision-making or planning and preparation. Double-check on arrival to ensure that • Range rules and commands are clearly posted
•
Firearm handling and safety procedures
•
No “dry” firing
•
Sighting and aiming
•
Equipment is stored in a box, closet, or cabinet and is locked when not in use
•
•
Ammunition and firearms are stored in separate, locked containers or areas with different locks and combinations
No collecting of casings as souvenirs (to avoid lead exposure)
•
No use of targets in the image of human beings
•
How to retrieve disposable targets, if used
•
Caliber firearms have working trigger locks for storage (exceptions: BB and air guns)
•
Shooting line is clearly defined
•
Facility with soap and cold water is available; wash face and hands as soon as possible to limit lead exposure.
•
For outdoor ranges:
■
o o o o o •
Targets are not set in pedestrian areas or near buildings, roads, trails, or tents Backstops or a safety zone (at least 100 yards) is set behind the targets Clearly delineated rear and side safety buffers (at least 30 yards) are known to participants and facility users Area is free of brush or anything that obscures visibility The range is not used in the dark
Make sure Girl Scouts have everything they need for a safe, successful shooting experience. Consult with your expert about any other recommendations. Essential equipment •
Firearm
•
Ammunition
•
Targets
•
Wet wipes
Paintball gear
For indoor ranges:
•
Barrel-blocking device (sleeve)
o o
•
CO2 or compressed air tank
•
Paintball hopper
o
Targets are well lit Doors or entries to the range are locked or blocked from the inside Fire exits are not blocked
Ensure instructor completes safety checks. This includes inspecting: • All equipment before each use
■
•
Gear for Shooting Sports/Firearms
Range and surroundings
Ensure everyone learns and practices the basics. • Range commands
■
•
Body positioning and form
•
Safety clip on until time to shoot
•
Gun kept pointed in a safe direction
Safety Activity Checkpoints ©2009-2026 Girl Scouts of the USA. All Rights Reserved.
Safety gear •
Safety glasses
•
Ear protection
Clothing and footwear •
Sturdy, closed-toed shoes
•
Layered clothing for the weather
•
Hair, clothing, or jewelry secured if it could be caught in equipment
PAGE 132/190
Safety Activity Checkpoints (SACs) BROWNIE
JUNIOR
CADETTE
SENIOR
Skating
D
B
J
C
S
Glide, twirl, and try cool new moves to the beat of roller rink music. Feel the fresh air as you skate on the ice. Take on a new challenge on a skateboard. Get out and skate!
General Checkpoints Refer to the Safety Standards for general standards about supervision,transportation, first aid, emergency action plans, and more, as well as reminders about inclusion and accessibility.
Activity-Specific Checkpoints for Skating Follow these basic reminders for each phase of planning. Check off items as you complete them, making sure to consider each sub-bullet. Note: Skating includes ice skating, roller and inline skating, and skateboarding.
Check the ice before venturing out! Use guidance from the Minnesota Department of Natural Resources.
•
Discover roller skating tips with Skatie.
•
Practice how to stop on ice skates with Coach Mary.
Safety Activity Checkpoints ©2009-2026 Girl Scouts of the USA. All Rights Reserved.
Is Prior Council Approval Required?
Is Activity Training, Certification, or Verified Experience Required?
A
No
No
Decision-Making Phase Find a safe place to skate. Check with your Girl Scout network for suggestions or consider • An indoor rink for roller or ice skating—contact the rink manager to arrange for large groups or lessons.
■
•
Outdoor roller skating during the day or in well-lit areas at night
•
Skateboarding in a designated park
•
Skating on streets or in parking lots (only if they are closed to traffic)
■
Identify an expert. Arrange for beginner instruction by an adult with experience teaching skating, if needed.
■
Make plans for access. Make sure your location is accessible for all in your group. Inclusive Skating has resources for accommodation..
Planning and Preparation Phase ■
Practice falling. On grass or a soft surface, teach participants to land on the fleshy parts of the body and roll, rather than breaking a fall with arms and hands.
■
Line up first aid. Ensure that at least one adult has First Aid/CPR/AED training.
Learn More: •
AMBASSADOR
ACTIVITY
DAISY
Skating
• •
For locations more than 30 minutes from emergency medical services, recruit a Wilderness First Aider or Wilderness First Responder. Identify the closest emergency transport and facilities.
•
Bring a first aid kit.
PAGE 133/190
Safety Activity Checkpoints (SACs) ■
Be clear on gear. See the items needed for each activity. Discuss with participants and families well in advance what the group leader or facility will provide and what each person should bring themselves.
Ice Rink Skating on an indoor or maintained outdoor ice rink: •
Follow rink signage and stay within designated skating areas.
•
A certified rink staff or instructor should be present.
•
Helmets are strongly recommended. Choose one rated for ice sports; wrist, knee, and elbow pads are encouraged.
Review skating safety basics. • Avoid rough surfaces, debris, or untested ice.
•
Gloves and layered clothing are recommended.
•
Inspect skates for fit and blade condition before skating.
•
Make sure wheels turn freely, or that ice skate blades are smooth and sharp.
•
Avoid games or speed skating unless permitted by the rink.
•
Tie skates securely and inspect laces.
•
Learn how to move, turn, and stop safely.
•
Do not push, shove, or race.
•
If falling, don’t grab another skater.
•
Get up quickly after a fall, unless injured.
•
Do not use headphones or earbuds while skating.
•
Leave sharp or loose items in a safe place.
■
Review the key safety points below to plan your activity.
Day of the Activity ■
■
•
Follow right of way rule. Skate in the same direction as others.
•
Pull to the side if stopping.
•
Yield to skaters already in motion or on a ramp.
Key Safety Points Roller Rink Skating in an indoor facility with smooth, maintained floors: •
Follow all posted rink rules and staff directions.
•
Beginners should stay near the wall or in designated learner areas.
•
Helmets are strongly recommended; wrist, knee, and elbow pads are encouraged.
•
Check rental skates for proper fit and wheel condition.
•
Avoid weaving through crowds or forming long skating chains
Safety Activity Checkpoints ©2009-2026 Girl Scouts of the USA. All Rights Reserved.
Outdoor Roller or Inline Skating on an indoor or maintained outdoor ice rink: •
Avoid wet, sandy, or uneven surfaces.
•
Skate only in daylight or well-lit areas.
•
Always wear a helmet and wrist, knee, and elbow guards.
•
Use bright or reflective clothing for visibility.
•
Skate in single file, yield to pedestrians and cyclists, and follow traffic rules.
Skateboarding at designated skateboard parks or in smooth, open paved areas closed to traffic: •
Skate only in approved or designated skate parks.
•
Beginners should practice on level ground before attempting ramps or tricks.
•
Always wear a helmet and wrist, knee, and elbow pads.
•
Wear closed-toed, flat, non-slip shoes.
•
Observe skate park etiquette: o o o o
Wait your turn; stay out of ramps and bowls unless riding. Don’t wax obstacles without permission. Make room for others using the space. If your board flies loose, yell “Board!” to alert others.
•
Never hitch a ride from a bike, car, or other vehicle.
•
Choose a board suited to the conditions. Cruiser boards are stable; shorter boards turn sharply. Wheels must spin freely. Soft wheels grip rough surfaces, while hard wheels offer more speed.
PAGE 134/190
Safety Activity Checkpoints (SACs) Ice Skating on Natural Bodies of Water on frozen lakes or ponds only where ice has been determined to be safe: •
Never skate on rivers, moving water, or untested ice.
•
Ensure ice thickness is at least 4 inches for individuals and 8 inches for groups; check every 150 feet.
•
A qualified adult or expert with ice rescue experience must be present.
•
Designate watchers to monitor all skaters. Maintain a watcher-to-participant ratio of 1:6 for Daisies, 1:10 for older Girl Scouts.
•
Wear a helmet rated for ice sports; wrist, knee, and elbow pads are encouraged.
•
Gloves and layered clothing are recommended.
•
Have ice picks, a throw rope, and hypothermia supplies available.
•
Teach self-rescue techniques and what to do if someone falls through ice.
Gear for Skating Gear is individualized to the specific skating activity. Consider your needs and plan accordingly.
Safety Activity Checkpoints ©2009-2026 Girl Scouts of the USA. All Rights Reserved.
PAGE 135/190
Safety Activity Checkpoints (SACs) BROWNIE
JUNIOR
CADETTE
SENIOR
Sledding, Snow Tubing, and Tobogganing
D
B
J
C
S
Whether you’re zipping down a hill on a plastic disc sled, bouncing on a snow tube, or gliding on a classic wooden toboggan, sledding on fresh snow is an unforgettable thrill!
Activity-Specific Checkpoints for Sledding Sports Follow these basic reminders for each phase of planning. Check off items as you complete them, making sure to consider each sub-bullet. Decision-Making Phase ■
• •
Find a safe place to go sledding. Established sledding areas are preferred. Some offer lessons. Select a gentle slope free of roads, obstacles, and hazards, with a clear run-out zone.
•
Do not sled near bodies of water or where skiers or snowboarders are present.
•
Ensure sledding is permitted by the property owner or municipality.
• Identify an expert. No formal training or certification is required for sledding, snow tubing, or tobogganing. Identify an experienced sledder to help assess safe routes. For additional guidance, read these tips on sledding from the National Safety Council.
Safety Activity Checkpoints ©2009-2026 Girl Scouts of the USA. All Rights Reserved.
Is Prior Council Approval Required?
Is Activity Training, Certification, or Verified Experience Required?
A
No
No
Learn More: •
General Checkpoints Refer to the Safety Standards for general standards about supervision,transportation, first aid, emergency action plans, and more, as well as reminders about inclusion and accessibility.
AMBASSADOR
ACTIVITY
DAISY
Sledding, Snow Tubing, and Tobogganing
Check out the U.S. Olympic and Paralympic Bobsled and Skeleton teams.
Planning and Preparation Phase ■
Be clear on gear. See the list at the end of this section. Discuss with participants and families well in advance so they know what to bring versus what will be provided.
■
Line up first aid. Ensure that at least one adult has First Aid/CPR/AED training.
• •
For locations more than 30 minutes from emergency medical services, recruit a Wilderness First Aider or Wilderness First Responder. Identify the closest emergency transport and facilities.
•
Bring a first aid kit in a waterproof container.
Day of the Activity ■
Check the weather. Know the forecast for temperature, snow conditions, wind speed, visibility, precipitation, and avalanche risk. Postpone if severe weather threatens.
■
Know the slopes. With all participants: Check for hazards such as trees, rocks, bodies of water, icy patches, and roads. Show your group how to avoid these hazards.
•
•
Point out the sledding area boundaries and ensure all participants stay within sight of an adult.
•
Learn how to obtain help.
PAGE 136/190
Safety Activity Checkpoints (SACs) •
Learn where participants can rest and use a toilet.
•
Designate a meeting spot in case of separation.
■ Teach the basics.
•
Ride feet-first only.
•
Learn to steer and stop safely.
•
Walk uphill on a separate path from sledding tracks.
•
Understand how to ride lifts or tow ropes, if available.
•
Never tow sleds behind vehicles, including snowmobiles.
■ Follow safety and etiquette rules.
•
Yield to those already on the slope.
•
Do not cross another sledder’s path.
•
Signal before turning.
•
Move quickly to the side of the slope after a fall (unless injured).
•
Obey all staff instructions and posted rules.
Gear for Sledding, Snow Tubing, and Tobogganing Essential equipment •
Sled, tube, or toboggan, in good condition, with no sharp edges or cracks
Safety gear •
Helmets are strongly recommended; use a properly fitting bicycle or ski helmet.
Clothing and footwear •
Waterproof boots, jacket, and pants
•
Thermal or long underwear, if needed
•
Insulating socks and gloves or mittens
•
Winter hat
•
Sunglasses or ski goggles for glare protection
Safety Activity Checkpoints ©2009-2026 Girl Scouts of the USA. All Rights Reserved.
PAGE 137/190
Safety Activity Checkpoints (SACs)
BROWNIE
JUNIOR
CADETTE
SENIOR
Slingshots
D
B
J
C
S
Ready, Aim, Fun! Slingshots are an exciting way to build focus, coordination, and aim. Whether you’re hitting targets for fun or honing your skills, you’ll love the challenge of precision and control!
Note: Hunting is not permitted in a Girl Scout setting. Decision-Making Phase Find a safe place to shoot. Check nearby ranges, and ask if instructors can be hired. • Check local camps—including those operated by your council. The American Camp Association’s Find-a-Camp tool can help you to locate options.
■
•
•
Public slingshot ranges are rare, but you can set one up for your group! Follow Summer Camp Programming’s guidelines and make safe, creative targets from found objects. Ensure safe range practices are in place. See “Confirm range setup” in the Day of the Activity section, below
Safety Activity Checkpoints ©2009-2026 Girl Scouts of the USA. All Rights Reserved.
Is Activity Training, Certification, or Verified Experience Required?
A
No
Yes
•
■
•
Activity-Specific Checkpoints for Slingshots Follow these basic reminders for each phase of planning. Check off items as you complete them, making sure to consider each sub-bullet.
Is Prior Council Approval Required?
Learn More:
General Checkpoints Refer to the Safety Standards for general standards about supervision, transportation, first aid, emergency action plans, and more, as well as reminders about inclusion and accessibility.
AMBASSADOR
ACTIVITY
DAISY
Slingshots
■
Get targeted tips from SimpleShot’s 101 video.
Identify a qualified instructor. While no formal certification is required to teach slingshots, instructors should have experience teaching youth to shoot. Look for someone who: o Is trained and experienced in the slingshots, ammunition, and range type being used o Is experienced with teaching proper form and technique, range rules, and emergency procedures Maintain instructor–participant ratios specified by the instructor’s training, with a maximum of five participants per instructor for Daisies and Brownies or ten participants per instructor for older shooters.
Planning and Preparation Phase ■
• • •
■
•
Be clear on gear. Review Gear for Slingshots at the end of this section. Ask the range operator or your instructor what items are provided. Communicate early with participants and families about what the group leader or outfitter will supply and what individuals need to bring themselves. Line up first aid. Ensure that at least one adult has First Aid/CPR/AED training.
•
For locations more than 30 minutes from emergency medical services, recruit a Wilderness First Aider or Wilderness First Responder. Identify the closest emergency transport and facilities.
•
Ensure that a first aid kit will be on hand.
PAGE 138/190
Safety Activity Checkpoints (SACs) Day of the Activity Check the weather. • Consult your instructor; postpone or cancel if conditions are unsuitable for the group’s skill level.
■
•
Review procedures for sudden storms.
•
Never shoot when lightning threatens.
•
Stop activities if precipitation or cold weather reduces footing or grip.
•
Do not shoot in the dark.
Confirm range setup. Ask about the following items during decision-making or planning and preparation, then confirm on the day of the activity. • Range rules and commands are clearly posted.
Gear for Slingshots Make sure Girl Scouts have everything they need for a safe and successful slingshot experience. Essential equipment •
Slingshot appropriate for user age
•
Ammunition (biodegradable clay is preferred; dog food kibbles, marshmallows, ping pong balls and half-inch paintballs are acceptable). Clean up any food or non-biodegradable items.
•
Targets (manufactured targets or found objects)
■
•
Equipment is stored in a box, closet, or cabinet, and is locked away when not in use.
•
Ranges are not set in pedestrian areas or near buildings, roads, trails, or tents.
•
Backstops or a safety zone exist behind the targets.
•
Clearly delineated rear and side safety buffers are known to participants and facility users.
•
Shooting line is clearly defined.
•
The area is free of brush or anything that obscures visibility.
Safety gear •
Safety glasses.
Clothing and footwear •
Hard, closed-toed shoes
•
Hair, clothing, or jewelry secured if it could be caught in equipment
Ensure instructor completes safety checks, such as inspecting: • All equipment before each use
■
•
Range and surroundings
•
Ensure everyone learns and practices the basics. Safety procedures and range commands
•
Determining your dominant eye for effective aim
•
Body positioning
•
Keeping the slingshot pointed in a safe direction
•
How to load and fire ammunition
•
Using appropriate targets—never aim at anything resembling a human figure
■
Safety Activity Checkpoints ©2009-2026 Girl Scouts of the USA. All Rights Reserved.
PAGE 139/190
Safety Activity Checkpoints (SACs) CADETTE
SENIOR
AMBASSADOR
Snorkeling
JUNIOR
BROWNIE
ACTIVITY
DAISY
Snorkeling Is Prior Council Approval Required?
J
C
S
A
Yes
Open a new world, underwater! Discover colorful fish, coral reefs, and marine life up close. Use simple equipment to glide through the water and experience nature.
•
Activity-Specific Checkpoints for Snorkeling Follow these basic reminders for each phase of planning. Check off items as you complete them, making sure to consider each sub-bullet.
•
Find a safe place to snorkel. Look for: Calm water with high visibility
•
Minimal current
•
Areas away from boating traffic
•
Established marine sanctuaries
■
•
Identify a qualified instructor/guide and rescuer. Recognized instructor certifications include: o o o o
SCUBA Schools International (SSI) Professional Association of Diving Instructors (PADI) National Association of Underwater Instructors (NAUI) Documented experience per council guidelines
Safety Activity Checkpoints ©2009-2026 Girl Scouts of the USA. All Rights Reserved.
•
Get ready for your adventure with these Snorkeling 101 tips.
•
Did you know that touching coral can cause damage that takes 100 years to recover? Find out how to protect coral reefs—in the water and at home.
Ensure rescue proficiency. If the instructor’s training does not include rescue procedures, identify a lifeguard trained for the location. The primary guard must be an adult; secondary guards must be at least 16. Training may include: o o o
Decision-Making Phase ■
Yes
Learn More:
General Checkpoints Refer to the Safety Standards for general standards about supervision, transportation, first aid, emergency action plans, and more, as well as reminders about inclusion and accessibility.
Is Activity Training, Certification, or Verified Experience Required?
American Red Cross Waterfront Lifeguarding YMCA Waterfront Lifeguarding Open water lifeguard training
Planning and Preparation Phase ■
Be clear on gear. Communicate early with participants and families about what the group leader or facility will provide and what individuals need to bring.
■
Line up first aid. Ensure that at least one adult has First Aid/CPR/AED training.
• •
For locations more than 30 minutes from emergency medical services, recruit a Wilderness First Aider or Wilderness First Responder. Identify the closest emergency transport and facilities.
•
Ensure that a first aid kit will be on hand.
■
Encourage skill-building. Swim strength and endurance improve the snorkeling experience—and safety. Encourage group members to take lessons at their local pool.
PAGE 140/190
Safety Activity Checkpoints (SACs) Prepare for emergencies. • An adult with rescue experience and/or certification must be present.
■
•
If snorkeling from a boat, at least one adult should have Girl Scouts Small Craft Safety training or equivalent experience.
Recruit watchers. • Plan adequate watchers for the number of snorkelers in your group: one watcher for every ten swimmers. Note that watchers never replace a certified lifeguard:
■
•
o o
o o o
American Red Cross Water Safety for Parents and Caregivers course. This free, 20-minute online course deepens awareness of drowning risks and how to minimize those risks. YMCA Aquatic Safety Assistant or equivalent training. Alternatively, instructors may be able to give an orientation to watchers; ask in advance. Assist the group by watching for possible emergencies. Focus on the group (no phones, reading, etc.). Remind participants of the buddy system and other safety rules. Watch for fatigue and suggest rest breaks. Stay out of the water, unless needed in an emergency. Follow the directions of the instructor
Day of the Activity •
Same-day assessments may be conducted if necessary.
•
If swim assessments are not feasible, assume all participants are non-swimmers.
•
Non-swimmers must wear a snorkeling vest and stay in very calm waters
■
•
Check the weather. Check weather.com or another reliable source for the big weather picture.
•
Check the local dive report for local conditions, including water quality, tides, and currents.
•
Never snorkel on a stormy or windy day.
•
Never snorkel when lightning threatens.
•
Check water quality reports with a resource such as the EPA’s How’s My Waterway? interactive map, especially after rainfall.
•
Snorkel only in daylight or with proper experience and equipment
Safety Activity Checkpoints ©2009-2026 Girl Scouts of the USA. All Rights Reserved.
Ensure everyone learns and practices the basics. How to properly fit a snorkeling vest or belt, if used
•
How to fit mask/snorkel and fins
•
Preventing fogging and clearing a mask
•
Entering and exiting the water
•
Use of the buddy system:.
Let them know what watchers do: o o o
■
•
Provide training options. Consider the following: o
•
Assess swimming ability. Strong swimming skills are important for snorkelers’ safety and confidence. A swim assessment is highly recommended to evaluate participant readiness. • Advance swim assessments are recommended to avoid disappointment.
■
o o o • ■
•
Buddies should be of the same swimming ability. Buddies enter and leave the water together. Buddies stay near each other so they can call for help if the other is in trouble
How to signal for help Provide guidelines. Stay within designated snorkeling area.
•
Never touch coral; it’s harmful to the coral and to your skin.
•
Avoid contact with any animals present.
PAGE 141/190
Safety Activity Checkpoints (SACs) Gear for Snorkeling Make sure Girl Scouts have everything they need for a safe and successful snorkeling experience. Essential equipment •
Mask and snorkel
•
Fins (required for snorkeling in open water)
Safety gear •
Wearable flotation device; consult your instructor about availability. o o o
Snorkeling vests are required for non-swimmers. Vests or belts are recommended for all, especially where current, swells, or poor visibility are present. If snorkeling vests or belts are not available, non-swimmers should wear life jackets. Use only US Coast Guard–approved life jackets, properly sized and fitted.
•
Throwable personal flotation device (Type IV cushion, ring buoy, or equivalent) available for each group on the water
•
Dive flag
•
Other gear may be indicated for certain conditions
Clothing and footwear •
Wetsuit when water temperature is below 70°F
•
Gloves or neoprene booties for cold, or when sharp shore or surfaces are present
Safety Activity Checkpoints ©2009-2026 Girl Scouts of the USA. All Rights Reserved.
PAGE 142/190
Safety Activity Checkpoints (SACs)
ACTIVITY
DAISY
BROWNIE
JUNIOR
CADETTE
SENIOR
AMBASSADOR
Snowshoeing Is Prior Council Approval Required?
Snowshoeing
D
B
J
C
S
A
No
Turn your favorite parks and trails into a snowy playground with snowshoeing! This fun winter activity is perfect for all ages and skill levels. Strap in and start your adventure!
General Checkpoints Refer to the Safety Standards for general standards about supervision, transportation, first aid, emergency action plans, and more, as well as reminders about inclusion and accessibility.
Activity-Specific Checkpoints for Snowshoeing Follow these basic reminders for each phase of planning. Check off items as you complete them, making sure to consider each sub-bullet.
■
Find a safe place to snowshoe. • Start with mostly flat trails with groomed or packed snow. • •
Check with your council office, park rangers, cross-country ski areas, or AllTrails for suggested locations.
No
Identify an expert. No formal training or certification is required for snowshoeing. Identify someone with experience teaching youth who can provide instruction and help assess safe routes.
Planning and Preparation Phase ■
Be clear on gear. See the list at the end of this section. Discuss with participants and families well in advance so they know what to bring versus what will be provided.
■
Plan for skill-building. Especially for new or inexperienced snowshoers, start with a 30-minute hike. Build up to longer treks and more challenging routes.
■
Line up first aid. Ensure that at least one adult has First Aid/CPR/AED training.
• •
For locations more than 30 minutes from emergency medical services, recruit a Wilderness First Aider or Wilderness First Responder. Identify the closest emergency transport and facilities.
•
Bring a first aid kit in a waterproof container.
Decision-Making Phase ■
Is Activity Training, Certification, or Verified Experience Required?
Day of the Activity ■
Check the weather. Know the forecast for temperature, snow conditions, windspeed, visibility, precipitation, and avalanche risk. Postpone if severe weather threatens.
■
Know the area. With all participants: Check for hazards such as trees, pits, rocks, bodies of water, icy patches, and roads. Show your group how to avoid these hazards.
Ask the property owner or authority for permission to snowshoe.
Make it Girl Scout–led. • Since snowshoeing is possible on almost any snow-covered path, ask your group where they’d like to go.
•
•
Have participants plan distance, rest breaks, and what high-energy food they want to bring.
•
Learn how to obtain help.
•
Learn where participants can rest and use a toilet.
•
Guide participants in deciding what items to bring with them.
•
Designate a meeting spot in case of separation.
■
Safety Activity Checkpoints ©2009-2026 Girl Scouts of the USA. All Rights Reserved.
PAGE 143/190
Safety Activity Checkpoints (SACs) ■
•
Teach the basics. Refer to L.L. Bean’s How to Snowshoe video to learn: How to put on snowshoes
•
How to move forward, go up and down hills, and change directions
•
How to use poles
•
How to recover from a fall; have participants practice getting back up
■
•
Follow safety and etiquette rules. Yield to cross-country skiers. Skiers will say, “Track, please” to indicate they’d like to pass a slower snowshoer.
•
Avoid stepping on cross-country ski tracks. Walk next to them instead.
•
When going downhill, yield to those going uphill.
•
Do not snowshoe near the edges of embankments or cliffs.
•
Obey all staff instructions and posted rules.
•
Stay off bodies of water unless ice has been tested.
•
Know how to recognize and manage hazards like creek crossings, changing weather, avalanche conditions, and depressions that might be disguised by snow.
Gear for Snowshoeing Make sure Girl Scouts have everything they need for a safe and successful snowshoeing experience. Essential equipment •
Snowshoes, sized and adjusted, and strapped securely around the shoe or boot
•
Poles sized for each person’s height
Clothing and footwear •
Waterproof boots, jacket, and pants
•
Thermal or long underwear, if needed
•
Insulating socks and gloves or mittens
•
Winter hat
•
Sunglasses or ski goggles for glare protection
Safety Activity Checkpoints ©2009-2026 Girl Scouts of the USA. All Rights Reserved.
PAGE 144/190
Safety Activity Checkpoints (SACs) BROWNIE
JUNIOR
CADETTE
SENIOR
Spelunking/ Caving
*
*
J
C
S
AMBASSADOR
ACTIVITY
DAISY
Spelunking/Caving Is Prior Council Approval Required?
Is Activity Training, Certification, or Verified Experience Required?
A
No
No
*Daisies and Brownies may visit tourist or commercial caves with safety features like paths, lighting, stairways, and guided tours.
Spelunking, or caving, is an exciting way to discover hidden worlds! Learn about caves (speleology) and ancient fossils (paleontology) while climbing, crawling, and using ropes to navigate rocky passages. Get ready to explore the underground!
Learn More:
General Checkpoints Refer to the Safety Standards for general standards about supervision, transportation, first aid, emergency action plans, and more, as well as reminders about inclusion and accessibility.
Activity-Specific Checkpoints for Spelunking Follow these basic reminders for each phase of planning. Check off items as you complete them, making sure to consider each sub-bullet.
•
Find a safe place to go caving. Assess group interest with a tour in a “show cave” (a natural cave prepared for public tours). Check the National Caves Association’s list or a cave in a national park.
•
When ready for a more rugged adventure, choose a known cave with identified routes. Consult a National Speleological Society grotto (club) for local recommendations. Some show caves have off-tour expeditions.
•
Get written permission from the site owner/operator and get current conditions and warnings about the cave
Safety Activity Checkpoints ©2009-2026 Girl Scouts of the USA. All Rights Reserved.
Care for your caves! Practice responsible caving with the National Speleological Society’s guide.
•
Learn about white-nose syndrome and how to protect bats in your area.
Identify an expert. Engage a knowledgeable guide who has: • Advice on cave selection
■
•
Ability to accompany the group into the cave
•
Documented experience in cave exploration
•
For non-vertical cave exploration, experience leading trips
•
For vertical cave exploration, appropriate Level 1 or Master Trainer certification from the National Speleological Society (NSS) or equivalent certification
Decision-Making Phase ■
•
Planning and Preparation Phase •
Be clear on gear Review Gear for Spelunking/Caving at the end of this section.
•
Ask your instructor or outfitter what items are provided.
•
Communicate early with participants and families about what the group leader or outfitter will supply and what individuals need to bring themselves.
■
PAGE 145/190
Safety Activity Checkpoints (SACs) Educate in advance. Participants should learn about basic caving guidelines before planning their adventure. Review: • What to expect in the cave
■
•
Learn how to review the cave map and identify your location.
•
Use three points of contact with the cave at all times.
•
Contact points include hands, feet, knees, elbows, and at times, rear end—when doing the “cave scoot.”
•
How to handle equipment to be used
•
Use the buddy system.
•
Precautions for protecting the fragile and sensitive environment in a cave, including how to recognize and use resistance surfaces for travel
•
Make sure everyone knows what to do if separated: stay calm, remain in a safe location, and signal for help by making noise.
•
How to take care with food (the smallest food crumbs can impact the site)
•
How to pack out all human waste (solids and fluids) if no latrine is available
■
Learn special skills, if needed. For vertical caving, all participants must have basic-level vertical caving skills as noted by the NSS. Ask your guide what preparatory training is needed.
■
Line up first aid. Ensure that at least one adult has First Aid/CPR/AED training.
• •
•
For locations more than 30 minutes from emergency medical services, recruit a Wilderness First Aider or Wilderness First Responder. Identify the closest emergency transport and facilities.
Gear for Spelunking/Caving Make sure Girl Scouts have everything they need for a safe and successful spelunking/caving experience. Essential equipment •
Helmet: properly fitting helmet that meets UIAA (International Climbing and Mountaineering Federation) ratings; climbing helmets are designed to absorb force from objects falling from above.
•
Headlamp to keep hands free, ideally helmet-mounted
•
Padding for knees and elbows if crawling is expected
•
Compass
•
Low-profile, waterproof pack for belongings, water, high-energy food, and a trash bag
Bring a first aid kit in a waterproof container.
Day of the Activity Check the weather. • Know the temperature forecast.
■
•
Postpone if severe weather threatens.
•
Be especially cautious about wet weather; avoid caves with stream passages, as some can flood.
Safety gear •
Belt and harness, if recommended by your expert
•
Two backup headlamps or flashlights
•
Spare bulbs and batteries
Clothing and footwear •
Boots with ankle protection and good traction o o
Hiking boots for dry areas Wellies or rubber boots for wet caves
•
Stick together for safety. Never go caving with fewer than four people in your group.
•
Appoint a reliable, experienced caver as the lead or guide.
Layered, synthetic clothing to adjust to changing cave temperatures
•
Appoint another reliable person as the “sweep” whose job it is to keep the group together.
o o
■
■
•
Review the basics. Never enter an unstable cave or a mine that has been closed or condemned.
Safety Activity Checkpoints ©2009-2026 Girl Scouts of the USA. All Rights Reserved.
•
Wear long pants and sleeves to protect from scrapes. Consider taking an extra set of clothing.
•
Gloves to protect hands from scrapes and mud
•
Avoid dangling items like jewelry or scarves.
PAGE 146/190
Safety Activity Checkpoints (SACs)
CADETTE
SENIOR
AMBASSADOR
Stand-Up Paddleboarding
JUNIOR
BROWNIE
ACTIVITY
DAISY
Stand-Up Paddleboarding (SUP) Is Prior Council Approval Required?
*
C
S
A
Yes
Is Activity Training, Certification, or Verified Experience Required?
Yes
*Juniors may paddle only on flat water and must stay within swimming distance of shore.
Chill or thrill—it’s up to you! Stand-up paddleboarding is easy to learn and tons of fun, with challenging advanced options like racing, surfing, whitewater, or even yoga on the water.
Learn More:
General Checkpoints Refer to the Safety Standards for general standards about supervision, transportation, first aid, emergency action plans, and more, as well as reminders about inclusion and accessibility considerations.
Activity-Specific Checkpoints for Paddleboarding Follow these basic reminders for each phase of planning. Check off items as you complete them, making sure to consider each sub-bullet.
Find a safe place to paddleboard. Nearly any body of water is suitable for SUP with the right instruction, equipment, and experience. Start on flat water with little to no current. Progress to more advanced conditions, such as rivers or surf.
•
Paddling.com and American Whitewater have interactive maps of paddling locations.
•
A soft bottom (such as sand or mud) is generally best. Avoid areas with sharp rocks or coral, as falls are inevitable.
Safety Activity Checkpoints ©2009-2026 Girl Scouts of the USA. All Rights Reserved.
•
Discover ACA’s guidance on when (and when not) to wear life jackets and leashes when paddleboarding.
Paddling is not permitted farther than 1 mile from the nearest shore. Avoid shipping lanes.
•
Note: The U.S. Coast Guard considers SUPs to be vessels when they are used outside of designated swim areas or ocean surfing zones. Follow all regulations about life jackets, sound devices, lights, etc.
■
Decision-Making Phase •
Urge all participants to take ACA’s free online paddlesports safety course.
•
•
■
•
•
Identify an expert. Arrange for instruction by an adult with experience teaching and supervising paddleboarding for the ages involved. Engage a certified instructor with training suited to your location and conditions from: o o o o o
American Canoe Association (ACA)—various certification levels National Surf/SUP Schools & Instructors Association Girl Scouts Small Craft Safety Course (with SUP module) American Red Cross Lifeguarding with Waterfront Module (for flat water, near shore only) Documented experience per your council’s guidelines
PAGE 147/190
Safety Activity Checkpoints (SACs) •
Follow the instructor–student ratio, following the instructor’s certification, with a maximum of five learners per instructor. An ACA instructor with a qualified assistant may supervise up to ten learners.
•
Ensure instructors have firsthand knowledge of the hazards and conditions at the paddling location.
•
Monitor wave conditions, as surf height and form change daily. Use resources like Wannasurf.com and Surfline.com for live updates.
•
Check water quality reports on Surfrider’s interactive map, especially after rainfall.
•
Inspect the area upon arrival for potential weatherrelated hazards.
■
Ensure everyone learns and practices the basics. Proper body position and balancing on the board
Planning and Preparation Phase Be clear on gear. • Review Gear for Stand-Up Paddleboarding (SUP) at the end of this section.
■
• •
Launching and landing techniques
•
Ask your instructor or outfitter what items are provided.
•
Popping up from kneeling to a standing position
•
Communicate early with participants and families about what the group leader or outfitter will supply and what individuals need to bring themselves
•
Propelling and steering the board with effective strokes
•
Maneuvering through waves and wakes
•
Falling safely away from the board during a wipeout, and how to self-rescue
Line up first aid. Ensure that at least one adult has First Aid/CPR/AED training.
•
In surf, navigating around the break, and recognizing and managing rip currents
For locations more than 30 minutes from emergency medical services, recruit a Wilderness First Aider or Wilderness First Responder. Identify the closest emergency transport and facilities.
•
Marine life precautions, such as shuffling feet to avoid stingrays
•
Signaling for help
•
Any site-specific instructions
■
• •
•
Bring a first aid kit in a waterproof container.
■
Assess swimming ability. Strong swimming skills are important for paddlers’ safety and confidence. A swim assessment is highly recommended to evaluate participant readiness. • Advance swim assessments are recommended to avoid disappointment.
■
•
Same-day assessments may be conducted if necessary.
•
If swim assessments are not feasible, assume all participants are non-swimmers.
•
Very competent swimming ability is required for SUP surfing and river SUP due to stronger currents and waves.
Day of the Activity Check the weather. • Consult your instructor; postpone or cancel if conditions are unsuitable for your group’s skill level.
■
•
•
•
■
•
Inspect the area upon arrival. Point out and avoid hazards such as strainers, sieves, hydraulics, waterfalls, bridges, dams, fences, and low power lines. Surf zones, rapids, and standing waves must be avoided unless part of a planned whitewater experience. Follow paddling right of way rules. Yield to swimmers and less maneuverable watercraft.
•
When traveling in the same general direction, the paddler on the left yields to the one on the right.
•
When approaching head-on, both paddlers steer to the right.
•
In narrow channels, keep to the right and yield to larger vessels.
•
In surf zones, the person closest to the wave peak has priority; avoid cutting others off.
•
Maintain control of your board to avoid collisions.
Never SUP during a storm.
Safety Activity Checkpoints ©2009-2026 Girl Scouts of the USA. All Rights Reserved.
PAGE 148/190
Safety Activity Checkpoints (SACs) Prepare for emergencies. • Discuss emergency action plans with your instructor.
■
•
Know who to contact and how to call for help.
•
Be aware of your location to communicate effectively with authorities.
Stand-Up Paddleboarding Trips: Additional Considerations Stand-up paddleboarding trips are longer day or overnight excursions. Plan trips only after progressive skill-building experiences. Follow these additional tips for a safe and satisfying experience. ■
• •
■
• •
•
File a float plan for any trip. Provide a reliable adult with information about your boat(s) and the people aboard. This fillable plan includes steps for your contact to take if they are concerned about your safety. Ensure basic skills. Participants must have the skill and stamina to finish the trip, even if headwinds or other challenges arise. Participants must learn how to cross busy channels, if necessary. Generally, cross at a 90-degree angle to channel traffic. Participants must learn universal signals.
■
•
Plan a safe route. Be aware of possible changes in water level due to tides or dam releases, and how these may impact your route.
•
Avoid hazards such as strainers, sieves, hydraulics, waterfalls, bridges, dams, fences, and low power lines. Rapids must be avoided unless part of a planned whitewater route.
■
See the additional gear needed for trips under Gear for Stand-Up Paddleboarding. Consult your guide about what else may be needed.
Gear for Stand-Up Paddleboarding Make sure Girl Scouts have everything they need for a safe and successful stand-up paddleboarding experience. Essential equipment •
Boards suited to participants’ skill level and conditions; stable, easy-to-paddle boards are best for beginners.
•
Properly sized paddle
•
Fins for directional control
•
Coiled ankle leash for board security o o
•
Straight leash for SUP surfing Quick-release leash for river SUP
Pump, if using inflatable SUPs
Safety gear
Use a professional guide with the additional training needed for the trip type. Guiding on river, whitewater, coastal, touring, and open water (ocean) trips are advanced certifications.
•
Coast Guard-approved life jacket, properly sized and fitted for each person (required). Exception: life jackets are not worn when SUP surfing. Review this ACA video for explanation.
Stick together. • Assign a lead paddler to set a pace that meets the group’s needs.
•
Rescue whistle
•
Throwable personal flotation device (Type IV cushion, ring buoy, or equivalent) available for each group on the water
•
Assign a strong “sweep” paddler to support and encourage anyone who falls behind.
•
Tow line and/or throw bag for rescues (carried by the instructor)
•
Keep boards close enough together so that a group decision can be made if wind or water conditions change.
•
For river SUP:
■
■
Safety Activity Checkpoints ©2009-2026 Girl Scouts of the USA. All Rights Reserved.
o o
Helmets for Class II or higher rapids Chest, arm, and leg protection recommended
PAGE 149/190
Safety Activity Checkpoints (SACs) Clothing and footwear •
Layered, non-cotton clothing (rash guards are ideal)
•
Water shoes, neoprene booties, or non-slip sport sandals with a heel strap (no flip-flops)
•
Wetsuit or neoprene top and shorts if the water temperature is below 65°F
•
Paddling gloves for comfort and grip
Gear for trips Consult your expert about what to bring in addition to the gear listed above. They may recommend items such as: •
Navigation items, such as GPS or compass
•
Communication equipment, such as two-way, satellite, or weather/VHF radios
•
Dry bags—and a way to secure them—to carry food, water, first aid kit, etc.
Safety Activity Checkpoints ©2009-2026 Girl Scouts of the USA. All Rights Reserved.
PAGE 150/190
Safety Activity Checkpoints (SACs)
JUNIOR
CADETTE
SENIOR
AMBASSADOR
Surfing
BROWNIE
ACTIVITY
DAISY
Surfing Is Prior Council Approval Required?
*
J
C
S
A
Yes
Is Activity Training, Certification, or Verified Experience Required?
Yes
*Brownies may use body boards instead of surfboards.
Catch a wave for an exhilarating thrill that provides an unmatched rush. Surfing deepens your connection to nature, fosters patience and resilience, and elevates skill.
Learn More: •
The International Surfing Association (ISA) is a one-stop spot for international competitions, parasurfing, and more.
•
Surfline posts maps and video feeds of surf spots all around the globe.
General Checkpoints Refer to the Safety Standards for general standards about supervision, transportation, first aid, emergency action plans, and more, as well as reminders about inclusion and accessibility considerations.
Activity-Specific Checkpoints for Surfing Follow these basic reminders for each phase of planning. Check off items as you complete them, making sure to consider each sub-bullet.
•
A soft bottom (such as sand or mud) is generally best. Avoid areas with sharp rocks or coral, as falls are inevitable.
■
Identify an expert. Arrange for instruction by an adult with experience teaching and supervising surfing for the ages involved. After participants gain some proficiency, they can continue surfing on public beaches where a lifeguard is on duty.
•
Decision-Making Phase ■
■
•
•
Evaluate readiness. Consider surfing only if all group members are known to be competent swimmers. A swim assessment is still required; see Planning and Preparation for details. Find a safe place to surf. Ask local surfers where to go. Search for surfing lessons in your area or where you will visit. Be aware that looking for “best surf spots” will probably lead you to areas for advanced surfers; make sure to choose an area appropriate for your group’s experience and skill level.
•
Engage a certified instructor with training suited to your location and conditions. Look for: o
National Surf/SUP Schools & Instructors Association
o
Equivalent certification or documented experience according to your council’s guidelines
o
•
International Surfing Association
Follow the instructor–student ratios for which your instructor is certified, with a maximum of four learners for each instructor.
Surfing typically takes place on the ocean, but some rivers and large lakes may have suitable surf.
Safety Activity Checkpoints ©2009-2026 Girl Scouts of the USA. All Rights Reserved.
PAGE 151/190
Safety Activity Checkpoints (SACs) Planning and Preparation Phase ■
■
• •
•
Be clear on gear. See Gear for Surfing at the end of this section. Discuss with participants and families well in advance what the group leader or surf school will provide and what each person should bring themselves. Line up first aid. Ensure that at least one adult has First Aid/CPR/AED training. For locations more than 30 minutes from emergency medical services, recruit a Wilderness First Aider or Wilderness First Responder. Identify the closest emergency transport and facilities. Bring a first aid kit in a waterproof container.
Assess swimming ability. Strong swimming skills are important for surfing. A swim assessment is required to ensure participant readiness. • Advance swim assessments are recommended to avoid disappointment.
■
•
Follow surfing right of way rules. • Avoid the break and other surfers’ paths when paddling out. •
Control your board to prevent it from hitting others.
•
Respect the right of way; the surfer closest to the peak has priority.
•
Don’t “snake” in front of another surfer riding a wave.
•
Ask your coach to explain additional right-of-way rules
■
•
Prepare for emergencies. Discuss emergency action plans with your instructor.
•
Know who to contact and how to call for help.
•
Be aware of your location to communicate effectively with authorities.
Gear for Surfing Make sure Girl Scouts have everything they need for a safe and successful surfing experience
Same-day assessments may be conducted if necessary.
Essential equipment Day of the Activity ■
•
Surfboards, suited to participants’ skill level and conditions (soft deck or foam longboards are best for beginners)
Check the weather.
•
Consult your coach; postpone or cancel if conditions are unsuitable for your group’s skill level
•
Surf wax for better board grip
•
Never surf during a storm.
•
Fins for directional control
•
Monitor wave conditions, as surf height and form change daily. Use resources like Wannasurf.com and Surfline.com for live updates.
•
Ankle leash for board security
•
Check water quality reports on Surfrider’s interactive map, especially after rainfall.
•
Inspect the area upon arrival for potential weather-related hazards.
Ensure everyone learns the basics. • Proper body position on the board
■
Safety gear •
Throwable personal flotation device (Type IV cushion, ring buoy, or equivalent) available for each group on the water
Clothing and footwear •
Rash guard for sun and skin protection
•
Wetsuit recommended if the water temperature is below 70°F; ask instructor about rentals.
•
Popping up from paddling to a standing position
•
Paddling out and navigating waves to get past the break line
•
Neoprene booties for cold water or rocky shore
•
Catching a wave and maintaining balance
•
Goggles or alternative eyewear for those who wear glasses
•
Falling safely away from the board during a wipeout
•
Recognizing rip currents and paddling parallel to shore if caught in one
•
Marine life precautions, such as shuffling feet to avoid stingrays
•
Signaling for help
Safety Activity Checkpoints ©2009-2026 Girl Scouts of the USA. All Rights Reserved.
PAGE 152/190
Safety Activity Checkpoints (SACs)
BROWNIE
JUNIOR
CADETTE
SENIOR
Swimming
D
B
J
C
S
Jump in, cool off, and have fun! Whether you’re floating with friends, racing to the finish, or mastering new skills, swimming is a great way to build confidence for all kinds of water adventures.
General Checkpoints Refer to the Safety Standards for general standards about supervision, transportation, first aid, emergency action plans, and more, as well as reminders about inclusion and accessibility considerations.
Activity-Specific Checkpoints for Swimming Follow these basic reminders for each phase of planning. Check off items as you complete them, making sure to consider each sub-bullet.
AMBASSADOR
ACTIVITY
DAISY
Swimming Is Prior Council Approval Required?
Is Activity Training, Certification, or Verified Experience Required?
A
Yes
Yes
Decision-Making Phase ■
Select a safe swimming location. Swimming is possible in many natural bodies of water, as well as pools and water parks. Look for:
•
Municipal or Parks & Recreation department pools
•
YMCAs or local clubs with pools and waterfronts
•
County or state park beaches
•
Established water parks
•
Private (backyard) pools; ensure the pool is well-maintained and that the property owner is adequately insured.
■
Determine lifeguard and watcher (or lookout) needs. Confirm in advance whether a lifeguard will be present.
•
When using a staffed facility, like a public pool, lifeguards are provided.
•
At public beaches, lifeguards must be on duty. Check on-duty hours before making plans.
Learn More: •
Level up your skills! Take Safety Around Water or swim lessons at a local YMCA.
•
Ready to play? Try these 24 Fun Swimming Pool Games with your Girl Scout friends.
Safety Activity Checkpoints ©2009-2026 Girl Scouts of the USA. All Rights Reserved.
•
For backyard pools and other unstaffed pools and locations (such as some hotels or cruise ships), you must recruit a lifeguard. Use this table to determine how many you’ll need. Ask your council about references or available lifeguard training.
PAGE 153/190
Safety Activity Checkpoints (SACs) SWIMMING LIFEGUARD AND WATCHER RATIOS NUMBER OF SWIMMERS
LIFEGUARDS
WATCHERS 1:10 RATIO
1–10
One adult (16 or older is acceptable for pools)
1
11–25
One adult (16 or older is acceptable for pools)
2–3
26–35
Two lifeguards, at least one of whom is an adult; additional lifeguards may be 16 years of age or older
3–4
36–50
Two lifeguards, at least one of whom is an adult; additional lifeguards may be 16 years of age or older
4–5
Ensure lifeguards have appropriate certifications for your location. Public facilities will be staffed appropriately. If you arrange your own lifeguards, check that they’re qualified, as follows:
VENUE
RECOGNIZED CERTIFICATIONS
Pools
American Red Cross Lifeguarding YMCA Lifeguard Equivalent certification approved by your council
Lakes, rivers, or streams
American Red Cross Waterfront Lifeguarding YMCA Waterfront Lifeguarding Equivalent certification approved by your council
Open water or beaches
Professional lifeguards certified in accordance with local and state norms and standards
Shallow water
No lifeguard is necessary for wading in calm, shallow water. If wading water is deeper than typical participants’ knees, an adult should complete the American Red Cross Water Safety for Parents and Caregivers training, or equivalent.
Safety Activity Checkpoints ©2009-2026 Girl Scouts of the USA. All Rights Reserved.
PAGE 154/190
Safety Activity Checkpoints (SACs) Planning and Preparation Phase ■
■
• •
•
■
•
•
Be clear on gear. Communicate early with participants and families about what the group leader or facility will supply and what individuals need to bring themselves.
For locations more than 30 minutes from emergency medical services, recruit a Wilderness First Aider or Wilderness First Responder. Identify the closest emergency transport and facilities.
Recruit watchers. Plan adequate watchers (sometimes called “lookouts”) for the number of swimmers in your group: one for every ten swimmers. Note that watchers never replace a certified lifeguard.
American Red Cross Water Safety for Parents and Caregivers course. This free, 20-minute, online course deepens awareness of drowning risks and how to minimize those risks. YMCA Aquatic Safety Assistant or equivalent training Alternatively, lifeguards may be able to give an orientation to watchers; ask in advance.
Check the site on arrival. Confirm that: Diving areas are separate from swim areas and have 10 feet of clearance on all sides Pool and water park: o o o o o
•
o o
■
Shallow areas are marked “No Diving” Water is clear for effective lifeguarding Chlorine levels are monitored Health department status is posted (public pools) Decks are free of clutter and electrical appliances are not present
Natural bodies of water: o
Provide training options:
All participants are aware of tides and currents, especially rip currents Diving areas are clear; if tides, drought, or other forces affect water depth, check depth each time before diving is permitted. Sharp, rocky, or heavily shelled areas are avoided, if possible
Evaluate swimming ability. Assessing swimmers based on their confidence and skill level helps ensure safety and allows participation in appropriate activities. Swim assessments are required for some aquatic activities and recommended for others, with the rigor of the test depending on the sport or conditions.
Example assessments: •
Pool: Slowly enter the water, stay near the edge, swim across the pool, and float for 30 seconds.
Let them know what watchers do:
•
o o o
Lake (e.g., for windsurfing): Jump from a dock, swim 50 yards, then tread water for two minutes.
•
Surfing (assessed in advance): Jump into deep water, swim 100 yards using freestyle and elementary backstroke, then tread water for two minutes.
o o o
Assist the group by watching for possible emergencies. Focus on the group (no phones, reading, etc.). Remind swimmers of the buddy system and other safety rules. Watch for fatigue and suggest rest breaks. Stay out of the water, unless needed in an emergency. Follow the directions of the lifeguard.
Day of the Activity
•
•
Ensure that a first aid kit will be on hand.
o o
■
•
Line up first aid. Ensure that at least one adult has First Aid/CPR/AED training.
o
•
■
Check the weather. Never swim when lightning threatens.
•
Check water quality reports on the EPA’s How’s My Waterway? interactive map, especially after rainfall.
•
Swim only in daylight or in well-lit pools.
Safety Activity Checkpoints ©2009-2026 Girl Scouts of the USA. All Rights Reserved.
General guidelines: •
A sample swim assessment form is included in the Appendix and can be customized based on expert recommendations. Use the form when you need to record evaluation.
•
If a pool operator does not require a swim assessment, assume all participants are non-swimmers.
•
In large groups, it’s helpful to have color-coded wristbands or another indicator so guards can easily tell who should be in certain areas.
PAGE 155/190
Safety Activity Checkpoints (SACs) ■
•
Ensure everyone learns and practices the basics. Use the buddy system:: o o o
Buddies should be of the same swimming ability. Buddies enter and leave the water together. Buddies stay near each other so they can call for help if the other is in trouble.
•
Practice safe behavior, such as walking (not running) on the pool deck and not roughhousing.
•
Stay within designated swimming areas.
•
Never run or dive at water parks.
•
Never dive in unknown depths or conditions.
•
Never dive off the side of a diving board.
•
Understand how to recognize and manage rip currents, if present.
•
Know how to avoid contact with any animals present, such as stingrays.
•
Provide any site-specific reminders, including areas that are off-limits.
Gear for Swimming Make sure Girl Scouts have everything they need for a safe and successful swimming experience. Safety gear for pools (ask the facility about available equipment) •
Reaching pole
•
Rescue tube
•
Backboard
•
Ring buoy
•
Throw bag with line (typically 30 feet)
Safety gear for open water •
Paddleboard or kayak
•
Rescue can
•
Rescue gear
Clothing and footwear •
Water shoes for hot or sharp pool decks or beaches
•
Swimsuit, rash guard, etc. (no swimming in cotton clothing)
•
Goggles, swim cap, and nose clip (optional)
Safety Activity Checkpoints ©2009-2026 Girl Scouts of the USA. All Rights Reserved.
PAGE 156/190
Safety Activity Checkpoints (SACs)
JUNIOR
CADETTE
SENIOR
AMBASSADOR
Tethered Balloon Rides
BROWNIE
ACTIVITY
DAISY
Tethered Balloon Rides Is Prior Council Approval Required?
J
C
S
A
No
Experience breathtaking views of the city or countryside as you gently rise above the ground! A tethered hot air or helium balloon ride offers the thrill of floating while staying securely anchored.
Is Activity Training, Certification, or Verified Experience Required?
No
Learn More: •
Look for tethered balloon rides at balloon festivals, like Albuquerque’s famously colorful fiesta each October.
Note: Untethered hot air balloon rides are not permitted.
General Checkpoints Refer to the Safety Standards for general standards about supervision, transportation, first aid, emergency action plans, and more, as well as reminders about inclusion and accessibility considerations.
Activity-Specific Checkpoints for Tethered Balloon Rides Follow these basic reminders for each phase of planning. Check off items as you complete them, making sure to consider each sub-bullet. Decision-Making Phase Understand tethered balloon options. • Helium Balloon Rides: Permanently installed and inflated with helium, these balloons feature a donut-shaped gondola (or “basket”) beneath them. A single cable runs through the gondola to the ground, allowing the operator to control ascent and descent.
■
•
Tethered Hot Air Balloons: Using heated air for lift, these colorful balloons suspend a passenger gondola below. A licensed pilot controls altitude with propane-fueled heat. The balloon is secured to the ground by three anchors, with the crew monitoring wind conditions and assisting riders.
Safety Activity Checkpoints ©2009-2026 Girl Scouts of the USA. All Rights Reserved.
■
Find a safe place to go on a tethered balloon ride. You might find vendors at:
•
Well-established venues: amusement parks, zoos, or similar facilities that have a permanent ride
•
Festivals or fairs: temporary attractions
•
Private events where the organizer has rented a balloon
Select a qualified operator. When choosing a balloon ride, ensure the operator meets safety and regulatory standards: • Confirm the pilot is licensed by the Federal Aviation Administration (FAA) and holds a Letter of Agreement for the specific airspace.
■
•
Ensure the pilot is rated for the specific aircraft and will be present when passengers are on board.
•
Ask about the operator’s safety record and their experience flying in the area.
•
Confirm that the operator follows all local and FAA regulations.
•
Ask how the balloon will be tethered. (See Gear for Tethered Balloon Rides below for acceptable methods.)
•
Ask if the operator participates in the FAA Wings program. This voluntary program indicates a pilot’s willingness to pursue elevated safety and professional standards.
•
Do not accept rides from private balloon owners.
PAGE 157/190
Safety Activity Checkpoints (SACs) Ensure all participants can safely enjoy the ride. • Ask about basket height and access in advance.
■
•
• ■
Confirm that all group members can comfortably see over the side of the basket, either by meeting the necessary height requirement or through available accommodations provided by the operator.
Check gear. The operator will provide and inspect the necessary safety gear. Look for: • Tether system: Hot air balloons use a three-point tether; helium may have a single cable.
■
•
Tethers: ropes or straps, in good condition
•
Anchors: must be sturdy (poles, trees, or large vehicles), supporting thousands of pounds. If using a vehicle as an anchor, tethers must be attached to the frame, not the bumper. Small cars, trucks, or trailers are unsuitable.
•
Rescue and safety gear: Includes fire extinguishers and weights, meeting industry standards for the aircraft type.
Never lift a participant so they can see. Know local laws. Flight standards vary by country. Research regulations and enforcement before riding. Choose destinations with strict safety standards. Contact your Girl Scout council for guidance.
Ensure riders follow safety rules. All participants must listen to the pilot’s orientation and: • Stay clear of the balloon during inflation and deflation.
■
Planning and Preparation Phase ■
• •
Line up first aid. Ensure that at least one adult has First Aid/CPR/AED training. Bring a first aid kit.
Day of the Activity ■
•
•
Check the weather. Postpone or cancel if conditions are poor. Winds of as little as 5 mph can be risky—consult your balloon operator or pilot. Ensure no lightning storms are predicted within 50 miles.
Dress appropriately. Make sure all participants are wearing: • Layered clothing for the weather
■
•
Comfortable pants to climb in and out of the basket
•
No dangling items like scarves
Safety Activity Checkpoints ©2009-2026 Girl Scouts of the USA. All Rights Reserved.
•
Avoid ropes, anchors, and tethers.
•
Follow pilot and crew instructions for boarding and exiting.
•
Never lift someone to see over the basket.
•
Keep feet firmly planted; do not lean over, sit, hop, or jump on the side rail.
•
Use the buddy system and ensure adult supervision.
•
Follow emergency instructions carefully.
Gear for Balloon Rides As long as Girl Scouts are appropriately dressed, they shouldn’t need any other gear—the operator and pilot will supply whatever they need. Just show up and have fun!
PAGE 158/190
Safety Activity Checkpoints (SACs)
Tools—Hand and Power
AMBASSADOR
SENIOR
CADETTE
JUNIOR
BROWNIE
ACTIVITY
DAISY
Tools—Hand and Power
No
No
■
Verify expert/instructor knowledge and experience. At least one adult needs to be trained in proper tool usage, including safety precautions, equipment use, emergency procedures, and which grade levels are permitted to use which tools.
■
Check with families to ensure interest and manage any concerns.
General Checkpoints Refer to the Safety Standards for general standards about supervision, transportation, first aid, emergency action plans, and more, as well as reminders about inclusion and accessibility considerations.
Activity-Specific Checkpoints Follow these basic reminders for each phase of planning. Check off items as you complete them, making sure to consider each sub-bullet.
Planning and Preparation Phase Arrange for protective equipment. The following may be relevant or appropriate: • Eye goggles
■
•
Earplugs or hearing-protective earmuffs
•
Leather gloves
•
Head protection
•
Closed-toed or reinforced footwear
■
Arrange for high-quality tools that are right for the job. Consider having extra tools handy in case the tool you had planned to use is damaged.
■
Be clear on gear. Inform families whether tools will be provided or if they should bring their own. If bringing their own, specify acceptable types.
■
Line up first aid. Ensure that at least one adult has First Aid/CPR/AED training.
Note: See specific guidelines in the Pocket Knife and Jackknife SAC. Decision-Making Phase
■
Is Activity Training, Certification, or Verified Experience Required?
Use varies by type of tool. See Tools section.
Build, craft, make, and repair! Whether you’re crafting with hand tools or powering up for a bigger project, working with tools builds skill, confidence, and creativity. Measure, cut, drill, and shape—there’s no limit to what you can achieve!
■
Is Prior Council Approval Required?
Assess maturity level. Participants must be old enough to understand safety procedures and handle equipment successfully and safely. See the chart below for guidance. Use expert advice and your good judgment if you’re considering tools not listed. Guidelines for similar tools may be applied.
Safety Activity Checkpoints ©2009-2026 Girl Scouts of the USA. All Rights Reserved.
• •
For locations more than 30 minutes from emergency medical services, recruit a Wilderness First Aider or Wilderness First Responder. Identify the closest emergency transport and facilities.
•
Ensure a first aid kit is available.
PAGE 159/190
Safety Activity Checkpoints (SACs) o
Day of the Activity ■
• •
Dress appropriately. Closed-toed shoes
Use grounded (three-pronged) tools in threepronged outlets only. Never allow the grounding plug to be removed. Use a ground-fault circuit interrupter (GFCI) outlet or an assured grounding program.
Hair, clothing, or jewelry secured if it could be caught in equipment
■
Inspect tools and surroundings for safety. Ensure that: • Power tools have intact cords and plugs—no exposed wires.
•
Body positioning and handling
■
Make sure tool specifics are taught and practiced. Cover the following: • How to power up a tool
•
Tools have no damage, such as unexpected sharp edges.
•
Safe and effective use
•
Tools are stored properly and are well-maintained.
•
Any rules specific to the type of tool
•
The shop area is free of trip hazards.
•
•
A fire extinguisher is on hand.
How to care for the tool, such as cleaning, storing, or changing blades or belts.
•
The area is well ventilated
Make sure all participants learn the basics. You can break skills into several sessions. Be sure to cover: • Safety first: Set up an “arc” or “circle of safety.”
■
•
Walk: Keep feet planted while working.
•
Never carry tools in a pocket; use a toolbox or cart instead.
•
Never carry tools up a ladder by hand; use a bucket or bag to hoist tools from the ground to a worker.
•
When working at heights, secure tools with a lanyard to avoid dropping them, and/or mark off-limits areas so others are not underneath.
•
Gear for Tool Use Make sure Girl Scouts have everything they need for a safe and successful tool-using experience. Essential equipment •
Tool
•
Tool cleaning and maintenance items
Safety gear, as appropriate for the tool and use, such as: •
Eye protection
•
Ear protection
For power tools: o o o o o o o o
Never disable safety guards. Never carry a tool by its cord or hose. Never yank the cord or hose to disconnect the tool. Keep cords and hoses away from heat, oil, and sharp edges. Keep them from being a trip hazard. Disconnect tools when not in use, or when changing bits or blades. Carry tools with fingers away from the power button to avoid accidental starts. Secure work with clamps or a vice so both hands are free to use the tool. Stay dry: Do not use power tools in wet conditions unless the tool is made for those conditions. Keep floors dry and clean to avoid electrical shock or slips.
Safety Activity Checkpoints ©2009-2026 Girl Scouts of the USA. All Rights Reserved.
Clothing and footwear •
Gloves
•
Heavy apron
•
Closed-toed shoes
•
Hair secured
PAGE 160/190
AMBASSADOR
X
X
X
X
X
X
X
X
X
Cutting tool, handheld (chisel, retractable utility knife, tin snips, X-Acto, etc.). Use discretion. See Pocket Knife SAC for specific tips.
X
X
X
X
X
Clippers
X
X
X
X
X
BROWNIE
SENIOR
HAND TOOLS
CADETTE
Grade level(s) recommended if the girl scout has the maturity, strength, and dexterity to use it safely
JUNIOR
TYPE OF TOOL
DAISY
Safety Activity Checkpoints (SACs)
Ax or hatchet. See Ax, Knife, and Hatchet Throwing for checkpoints on using these tools as a target sport. Drill, crank
X
Crowbar or pry bar
X
X
X
X
X
X
Hammer, small (e.g., nail or tack)
X
X
X
X
X
X
Hammer, large (e.g., sledge)
X
X
X
X
Hedge trimmer (scissor-type)
X
X
X
X
Hose spray washer
X
X
X
X
X
X
Lawn edger
X
X
X
X
X
X
Level
X
X
X
X
X
X
Loppers
X
X
X
X
Mattock (pickax with adze and chisel ends)
X
X
X
X
Measuring tools (tape, square, calipers, protractor, etc.)
X
X
X
X
X
X
Paint roller
X
X
X
X
X
X
X
X
X
X
Paint roller with extension pole
Safety Activity Checkpoints ©2009-2026 Girl Scouts of the USA. All Rights Reserved.
PAGE 161/190
SENIOR
AMBASSADOR
Pocket knives and jackknives (see SAC)
CADETTE
HAND TOOLS
JUNIOR
Grade level(s) recommended if the girl scout has the maturity, strength, and dexterity to use it safely
BROWNIE
TYPE OF TOOL
DAISY
Safety Activity Checkpoints (SACs)
X
X
X
X
Post-hole digger
X
X
X
X
X
Sanding block (handheld)
X
X
X
X
X
Saw (carpenter, coping, keyhole, hacksaw, miter, bowsaw, etc.). Pruning saw: Cadette and older
X
X
X
X
X
X
Screwdriver, hand
X
X
X
X
X
X
Staple gun, manual
X
X
X
X
Vice
X
X
X
X
Wheel cart/wheelbarrow (one-, two-, or four-wheeled)
X
X
X
X
X
X
Wrench (Allen, crescent, ratchet, etc.)
X
X
X
X
X
X
Yard tool (trowel, shovel, spade, hoe, rake, pitchfork, etc.)
X
X
X
X
X
X
Safety Activity Checkpoints ©2009-2026 Girl Scouts of the USA. All Rights Reserved.
PAGE 162/190
SENIOR
AMBASSADOR
Belt sander (electric or cordless)
CADETTE
POWER TOOLS
JUNIOR
Grade level(s) recommended if the girl scout has the maturity, strength, and dexterity to use it safely
BROWNIE
TYPE OF TOOL
DAISY
Safety Activity Checkpoints (SACs)
X
X
X
Chainsaw
Not permitted
Chop saw
Not permitted
Circular, reciprocating, or radial saw
Not permitted
Cutting or engraving tool, small (e.g., Dremel)
X
X
X
Drill, battery or corded
X
X
X
X
X
Hedge trimmer, double-edge blade Hot glue
Not permitted X
X
Heat gun
Not permitted
Jointer
Not permitted
Kiln
X
X
X
Lathe
X
X
X
Safety Activity Checkpoints ©2009-2026 Girl Scouts of the USA. All Rights Reserved.
PAGE 163/190
Lawn edger (gas, electric, or battery)
Not permitted
Lawn mower (push, self-propelled, or riding)
Not permitted X
Leaf/grass blower (gas, electric, or battery) Line trimmer (gas, electric, or battery)
Not permitted
Log splitters
Not permitted X
Paint sprayer (≤ 50 PSI) Pressure washer (≤ 100 PSI)
Saw (e.g., band, scroll, jig, orbital)
Soldering iron Woodchipper
Safety Activity Checkpoints ©2009-2026 Girl Scouts of the USA. All Rights Reserved.
X
X
X
X
Not permitted
Router/planer
Screwdriver, small electric or battery. Impact drivers are not permitted.
AMBASSADOR
SENIOR
CADETTE
POWER TOOLS
JUNIOR
Grade level(s) recommended if the girl scout has the maturity, strength, and dexterity to use it safely
BROWNIE
TYPE OF TOOL
DAISY
Safety Activity Checkpoints (SACs)
X
X
X
X
X
X
X
X
X
X
X
X
X
Not permitted
PAGE 164/190
Safety Activity Checkpoints (SACs)
Travel Type See Progression Chart for descriptions*
DAISY
BROWNIE
JUNIOR
CADETTE
SENIOR
AMBASSADOR
Travel/Trips Council approval required?
Local field trip
D
B
J
C
S
A
No
Day trip
D
B
J
C
S
A
No
Overnight
D
B
J
C
S
A
Yes
B
J
C
S
A
Yes
J
C
S
A
Yes
International trip
C
S
A
Yes
Individual travel
C
S
A
Yes
Short trip Extended trip
* Travel experience within Girl Scouting is required at each level before progressing to the next.
Embark on unforgettable adventures with your fellow Girl Scouts! Whether it’s a local getaway with your group or an international leadership journey, Girl Scout travel sparks curiosity, builds confidence, and creates lifelong friendships. Explore, learn, and grow—one adventure at a time!
General Checkpoints Refer to the Safety Standards for essential supervision, transportation, first aid, sleeping guidelines and emergency plans, as well as inclusion and accessibility considerations. The guidance below applies specifically to the travel journey itself. For safety guidelines and requirements related to activities during the trip—such as camping, outdoor cooking, aquatic adventures, horseback riding, or ferry rides—refer to the individual Safety Activity Checkpoints.
Safety Activity Checkpoints ©2009-2026 Girl Scouts of the USA. All Rights Reserved.
Activity-Specific Checkpoints for Travel/Trips Follow these basic reminders for each phase of planning. Check off items as you complete them, making sure to consider each sub-bullet. Decision-Making Phase ■
•
Consider interest, readiness, and progression. Build experiences one step at a time, using the recommendations in the Travel Progression chart.
•
Help your group reflect on experiences and future goals as you wrap up each trip.
•
Assess individual and group readiness for travel by considering independence, flexibility, and curiosity about different cultures, as well as the group’s ability to work and live together. If the group is eager to travel but not quite ready, identify steps to build their skills and confidence. Readiness markers include:
PAGE 165/190
Safety Activity Checkpoints (SACs) o o o o o
Comfort being away from parents/caregivers and home Adaptability to unfamiliar surroundings and situations Ability to make decisions for themselves and the group’s well-being Strong interpersonal skills and the ability to navigate challenges Previous cross-cultural experiences, skills, interests, or language proficiency
Learn about approval requirements. Check the SAC guidelines (below) and also contact your council office about: • Required training
■
•
Expectations for leader experience and Girl Scout progression
•
Approval process and timeline
■
•
•
■
Consider a behavior contract. Lead Girl Scouts to outline what behavior is expected of participants and the consequences of not following the agreement.
■
Work together on big decisions. Let parents/caregivers know when you are starting to plan the trip and talk with them often about safety, cost, gear, and clothing needed, as well as chaperones who will accompany the group.
•
•
Work with participants to set money-earning goals.
•
Decide early if additional family members will be included. o o
Determine chaperone needs. Consider the number of adults you need, depending on the type of trip you are taking, the location and logistics, and the needs of Girl Scouts in your group. You may consider adding chaperones above the minimum required number for ratios, in case of emergency or to meet group needs; however, always prioritize including all Girl Scouts before adding additional adults, and ensure the Girl Scouts themselves are making decisions to include additional adults.
o
o
■
•
Planning and Preparation Phase ■
•
Make it girl-led. What is the purpose of our trip? What do we want to do, learn, or accomplish?
•
How can we make sure everyone in our group can participate (schedules, cost, etc.)?
•
When should we go? How much time do we need to plan and earn money?
•
How long should our trip be?
•
How much will the trip cost, and how will we earn the money?
•
Where will we stay? (See Overnight Accommodations below.)
•
What should we do along the way, and once we get there?
•
Will we cook for ourselves or eat out?
•
Should we find an Organized Girl Scout event, use a tour company, or have a self-led adventure?
•
How will we stay healthy and safe on our trip?
Safety Activity Checkpoints ©2009-2026 Girl Scouts of the USA. All Rights Reserved.
•
The addition of non-youth members, such as additional parents/guardians, should be a decision made by the Girl Scouts themselves. Ensure that all participating adults have a current background check. Siblings included should be the same approximate age as participating Girl Scouts. For example, an eight-year-old sibling of a Senior Girl Scout should not join an international trip. WAGGGS World Centres or your Girl Scout council may have other guidelines regarding additional travelers or age requirements
Plan transportation in advance. Follow the guidelines for Transporting Girl Scouts in the Safety Standards, including driver qualifications, rental and charter vehicles, and ride sharing. Follow the Offshore Passenger Vessels SAC for ferries and cruise ships
Hold a pre-trip orientation. Ensure everyone knows, if applicable: • Transportation plans and timing
■
•
Overnight accommodation arrangements
•
Gear and clothing needed
•
Geographic, weather, and other background information
•
Buddy system arrangements and expectations
•
What to do if separated from the group
•
What to do if something significant is lost: money, passport, or luggage
•
What to do if emergency help is needed
•
How to perform basic first aid procedures
PAGE 166/190
Safety Activity Checkpoints (SACs) •
How to practice cultural awareness and understand local customs
•
How to stay safe and calm in crowded situations
■
• •
Line up first aid and health protocols. At least one adult must have First Aid/CPR/AED training. For locations more than 30 minutes from emergency medical services, recruit a Wilderness First Aider or Wilderness First Responder. Identify the closest emergency transport and facilities.
•
Bring a first aid kit, including over-the-counter remedies (with parent/guardian permission) in case ailments come up.
•
Each traveler should carry basic first aid supplies, such as Band-Aids and moleskin. Teach Girl Scouts how to practice simple self-care and when to ask the first aider for help.
Plan for contingencies. • Especially for extended and international travel, budget additional funds in case unexpected changes occur. Examples include rising fuel costs, a canceled accommodation, a missed train, or an illness that requires quarantine or recuperation.
■
•
Recruit a trusted person to be an in-town contact o o
• ■
•
Provide the contact with a roster of travelers, contact info for families, and all travel plans. Use them to relay updates and get help, in case of emergency or urgent changes in plans.
See insurance section below, especially for international travel. Remind participants about what to wear. What to bring will vary greatly based on length of trip, expected weather, planned activities, etc. Work with the group to develop a sensible list. Insist on comfortable shoes, layered clothing, and protection from the elements.
•
If there are limitations on luggage type, size, or weight, let participants and families know early.
•
Consider a gear check to confirm everyone has items that comply with logistical needs.
•
Ensure that participants can be responsible for their own belongings.
Safety Activity Checkpoints ©2009-2026 Girl Scouts of the USA. All Rights Reserved.
Day of the Activity ■
•
Review basics with participants at the start of the trip. What to do if separated from the group, and what to do in relevant emergency situations
•
How to stay safe and healthy
•
Behavior expectations
•
Schedule and logistics
■
• •
Include time each day for reflections. Reflection time allows Girl Scouts to process their experience and learn life lessons. Reflection time also gives Girl Scouts space to share feelings and can help everyone feel safe and comfortable as the trip continues.
Overnight Accommodations Use the following guidelines when considering overnight accommodations. Evaluate lodging options. Consider safety, cost, amenities, distance to planned sights or transportation, privacy, and parking. Pay attention to online reviews and ratings and read comments. Consider: • Girl Scout camps and other properties Girl Scout councils operate; rent for a weekend or as a stopover during travel.
■
•
National, state, or local parks where cabins or campgrounds are available; see the Camping SACs for recommendations.
•
Hostels that provide dorm-style space so your group can stay together
•
Hotels—consider suites and adjoining rooms to enhance supervision, and avoid motels with doors opening to the outside.
•
World Association of Girl Guides and Girl Scouts (WAGGGS) World Centres or member organizations in other countries
•
Short-term (or vacation) rentals such as Airbnb and VRBO. Before booking, ensure that: o o
Use of the space is exclusive for your group; no other renters or the owner will have access. Smoke alarms, carbon monoxide detectors, and fire extinguishers are installed (noted in amenities section on booking sites)
PAGE 167/190
Safety Activity Checkpoints (SACs) o o o
There are substantial, positive visitor reviews of the home and host. Do not book places with negative, few, or no reviews. Look for Airbnb “Superhost” status or similar listings. The host’s profile or identity are verified in the booking app. You can request this, and may be asked to do the same as a renter. The local host or manager is available for immediate needs. Share their contact info with a trusted person not on the trip.
■
Make plans to follow guidelines for safe sleeping and bathroom arrangements. Ensure participants and parents/guardians understand the arrangements.
■
Check accommodations on arrival. No matter what housing you book, inspect premises with your group immediately. Let the front desk or host know of any deficiencies.
• •
If you find a property to be unsafe, and there is no immediate resolution, move to another location.
•
Ensure that: o o o o o o
•
All points of entry are secure and lockable Evacuation routes are clear of obstructions Exit points, stairs, and fire escapes are identified and shown to group members Basic safety systems are in place, as required by law for that type of building, such as fire extinguishers, smoke alarms, and carbon monoxide detectors Everyone knows how to contact emergency services, such as 911 in the U.S.; numbers and access to phones will be different in foreign countries. Provided Wi-Fi and phones are working properly.
Name an exterior meeting place in case of evacuation.
International Travel Use the following guidelines when considering international travel. Check U.S. State Department warnings for international travel before deciding where to go. Monitor status during planning and before departure. • Confirm the travel advisory level for countries you’re considering. The State Department classifies travel advisories with four alert levels. This chart includes Girl Scouts’ expectations for travel:
■
STATE DEPARTMENT ADVISORY LEVEL
GIRL SCOUT EXPECTATIONS
Level 1
Exercise Normal Precautions
Travel permitted
Level 2
Exercise Increased Precautions
Travel permitted; follow warnings
Level 3
Reconsider Travel
See “Reconsider” section, below
Level 4
Do Not Travel
Travel not permitted under any circumstances
Safety Activity Checkpoints ©2009-2026 Girl Scouts of the USA. All Rights Reserved.
PAGE 168/190
Safety Activity Checkpoints (SACs) •
Pay attention to in-country travel alerts for the region you’re interested in. A country may be classified as Level 2, but a particular state or region may be classified as Level 3.
•
Reconsider if your destination is Level 3. Follow these steps in order: 1. Deeply consider selecting a different location. 2. Contact the host destination facility and ask if they are aware of the travel alert level, and what extra security measures are in place. 3. Inform participants and families, and determine if there is still a compelling interest in traveling to this location. Get parents’/guardians’ explicit written approval to travel to the location. 4. Talk with your council’s safety or risk representative to fully understand the specific concerns at play. Request approval in writing. They may need to consult in-house or outside legal counsel. Confirm approval from your council’s senior management.
■
Register with the State Department’s. Smart Traveler Enrollment Program (STEP). You’ll receive updates about safety, and the State Department will know when and where you are traveling.
■
Check the Centers for Disease Control’s (CDC) Travelers Health for disease notices and vaccine or screening requirements for your destination, and for return to the United States.
■
Get special consent for travel with minors. In addition to Girl Scout written parent/guardian permission, pay attention to documents needed to travel with minors. A notarized letter of consent from both parents and any custody documents may be required. Check with the embassy of your foreign destination and with your Girl Scout council office to see what you need.
■
Line up insurance. Insurance that provides medical care for injuries and illness is required—and provided by Girl Scouts of the USA with membership. Most U.S. healthcare insurance will not cover international expenses. Girl Scouts of the USA partners with Mutual of Omaha for Activity Accident Insurance for international trips, Plan 3PI. Coverage includes emergency assistance and repatriation (evacuation of a severely ill or injured person). Coverage is automatic and at no cost to participants traveling on approved Girl Scout trips.
•
•
■
Consider commercial cancellation insurance. This type of insurance can help cover expenses due to unexpected challenges that can occur before or during a trip. Coverage can include canceled flights, lost luggage, weather disruptions, and similar expenses. The group or individual families may decide to enroll to protect the significant investment in international travel. Read the fine print carefully, as plans vary widely. The Mutual of Omaha plan described above is a medical plan and does not cover these travel-related expenses Share information with family. Share and explain the above information. Regularly keep parents/guardians up to date as plans progress.
Individual Travel Girl Scouts participating in individual travel experiences, such as Destinations, will receive information directly from the event organizer. The above guidelines may be helpful in planning transit to or from organized events.
Safety Activity Checkpoints ©2009-2026 Girl Scouts of the USA. All Rights Reserved.
PAGE 169/190
Safety Activity Checkpoints (SACs)
JUNIOR
CADETTE
SENIOR
AMBASSADOR
Tubing (Floating)
BROWNIE
ACTIVITY
DAISY
Tubing (Floating) Is Prior Council Approval Required?
J
C
S
A
Yes
Whether you’re drifting with the current or bouncing over gentle rapids, float tubing is the perfect mix of adventure and relaxation. Soak up the sun, splash with friends, and let the water carry you to great memories!
Is Activity Training, Certification, or Verified Experience Required?
Yes
Learn More: •
Encourage all adults to complete the free, online American Red Cross Water Safety for Parents and Caregivers training.
General Checkpoints Refer to the Safety Standards for essential supervision, transportation, first aid, and emergency plans, as well as inclusion and accessibility considerations.
Activity-Specific Checkpoints for Tubing Follow these basic reminders for each phase of planning. Check off items as you complete them, making sure to consider each sub-bullet.
•
Arrange transportation if no shuttle is available.
•
Follow transportation guidelines in the Safety Standards to ensure a safe and organized return.
■
• •
Note: This entry refers to free-floating tubing. For towed tubing, see the Water Skiing, Wakeboarding, and Towed Tubing SAC.
•
o o
Find a safe place to go tubing. Choose calm, slow-moving bodies of water: o o o
•
Rivers up to Class II Artificial “lazy rivers” at water parks; see Amusement and Water Parks and Swimming SACs. Calm lakes or ponds
Check river run classifications and route information at American Whitewater’s interactive map.
o
Factor in your return trip. Since river tubing is a one-way journey, explore return options in advance: • Check for shuttle services provided by outfitters or local parks.
Safety Activity Checkpoints ©2009-2026 Girl Scouts of the USA. All Rights Reserved.
American Canoe Association (ACA)—various certification levels Girl Scouts Small Craft Safety Course American Red Cross Lifeguarding with Waterfront Module; American Red Cross Lifeguarding for Water Parks is acceptable for artificial lazy rivers. Documented experience per your council’s guidelines
•
Maintain proper instructor–student ratio per the instructor’s training.
•
Ensure instructor has firsthand knowledge of the hazards and conditions at the tubing location.
Planning and Preparation Phase •
Be clear on gear. Review Gear for Tubing (Floating) at the end of this section.
•
Ask your instructor or outfitter what items are provided.
■ ■
Engage an instructor with training suited to your location and conditions. Consider the following training: o
Decision-Making Phase ■
Identify an expert. Arrange for instruction by an adult with experience teaching and supervising tubing for the ages involved.
PAGE 170/190
Safety Activity Checkpoints (SACs) •
■
• •
•
Ensure everyone learns and practices the basics. Tube entry, launching, and landing techniques
Communicate early with participants and families about what the group leader or outfitter will supply and what individuals need to bring themselves.
■
•
Self-rescue techniques in case the tuber falls out or capsizes
Line up first aid. Ensure that at least one adult has First Aid/CPR/AED training.
•
Signaling for help
•
Staying seated in fast-moving water
•
How to read and manage rapids and how to float through if separated from the tube
•
How to secure tubes—if tubes are rafted (tied) together, they are tied snugly, and long ends are secured to avoid snagging on obstacles
•
Any site-specific instructions
For locations more than 30 minutes from emergency medical services, recruit a Wilderness First Aider or Wilderness First Responder. Identify the closest emergency transport and facilities.
•
Bring a first aid kit in a waterproof container.
Assess swimming ability. Strong swimming skills are important for tubers’ safety and confidence. • Advance swim assessment is recommended to avoid disappointment.
■
•
Same-day assessments may be conducted if necessary.
•
If a swim assessment is not feasible, assume all participants are non-swimmers.
Day of the Activity Check the weather. • Consult your instructor; postpone or cancel if conditions are unsuitable for your group’s skill level.
■
■
•
Prepare for emergencies. Discuss emergency action plans with your instructor.
•
Know who to contact and how to call for help.
•
Be aware of your location to communicate effectively with authorities.
Gear for Tubing (Floating) Make sure Girl Scouts have everything they need for a safe and successful tubing experience. Essential Equipment •
Tube for each person; handles and/or grab rope preferred.
•
Check water and air temperature.
•
Never go tubing during a storm.
•
Monitor river conditions, as they change daily.
•
•
Check water quality reports on the EPA’s How’s My Waterway? interactive map, especially after rainfall.
Coast Guard–approved life jacket, properly sized and fitted for each person (required)
•
Rescue whistle
•
Throwable personal flotation device (Type IV cushion, ring buoy, or equivalent) available for each group on the water
•
Tow line, throw bag, and/or other rescue gear (carried by the instructor)
■
•
Inspect the area upon arrival. Point out and avoid hazards such as strainers, sieves, hydraulics, waterfalls, bridges, dams, fences, and low power lines.
Safety gear
Clothing and footwear
•
Surf zones, rapids, and standing waves must be avoided.
•
Non-cotton clothing or swimwear (rash guards and board shorts are ideal)
■
Inspect tubes. Ensure tubes are properly inflated and that all handles, ropes, and other gear are in good condition.
•
Water shoes, neoprene booties, or non-slip sport sandals with a heel strap (no flip-flops)
■
•
Instructors must be well-positioned for supervision. Supervision from shore is only allowed on flat water near shore or at water parks.
•
Wetsuit or neoprene top and shorts if the water temperature is below 65°F
•
Instructors must accompany the group on moving rivers.
Safety Activity Checkpoints ©2009-2026 Girl Scouts of the USA. All Rights Reserved.
PAGE 171/190
Safety Activity Checkpoints (SACs)
CADETTE
SENIOR
AMBASSADOR
Waterskiing, Wakeboarding, and Towed Tubing
JUNIOR
BROWNIE
ACTIVITY
DAISY
Waterskiing, Wakeboarding, and Towed Tubing Is Prior Council Approval Required?
J
C
S
A
Yes
Ride the waves, feel the rush! Whether you’re carving across the water on skis, catching air on a wakeboard, or laughing through every splash on a tube, towed water sports bring nonstop thrills and endless fun. Hang on tight!
■
• •
Refer to the Safety Standards for essential supervision, transportation, first aid, and emergency plans, as well as inclusion and accessibility considerations.
Activity-Specific Checkpoints for Waterskiing, Wakeboarding, and Towed Tubing Follow these basic reminders for each phase of planning. Check off items as you complete them, making sure to consider each sub-bullet. Note: Refer to the Tubing (Floating) SAC for floating tube experiences. Decision-Making Phase Find safe places to go waterskiing, wakeboarding, or towed tubing. • Flat, open bodies of water, such as lakes, bays, and wide rivers, are ideal. Do not use ocean sites without explicit council approval.
■
•
Contact camps or schools—like those listed by USA Water Ski and Wake Sports—about lessons or programs.
•
Beginners should start on flat water with little current, in light to moderate wind conditions.
•
Stay clear of areas with low power lines.
Safety Activity Checkpoints ©2009-2026 Girl Scouts of the USA. All Rights Reserved.
Yes
Identify an expert/instructor and boat driver. Arrange for instruction by an adult with experience teaching and supervising towed water sports for the ages involved. Engage a certified instructor with training suited to your location and conditions. Consider the following training: o o
General Checkpoints
Is Activity Training, Certification, or Verified Experience Required?
USA Water Ski coach or instructor certification Documented experience per your council’s guidelines
•
Confirm boat driver qualifications. Boat drivers must be at least 21 years of age, have an appropriate license, and be skilled in operating the watercraft.
•
Follow the instructor–student ratios for which your instructor is qualified. Ratios may vary. When uncertain, follow a ratio of two instructors per five skiers. There should always be at least two people in the towing boat.
Confirm responsibilities with the boat owner. If using a privately owned boat, ensure that: • The owner is a knowledgeable adult with an understanding of Girl Scout standards
■
•
The vessel is maintained according to USCG and local regulations
•
Required safety gear is available for all participants
•
Insurance and registration are current
Planning and Preparation Phase ■
Be clear on gear. See Gear for Waterskiing, Wakeboarding, and Towed Tubing at the end of this section. Discuss with participants and families well in advance what the group leader or facility will provide and what each person should bring themselves.
PAGE 172/190
Safety Activity Checkpoints (SACs) Assess swimming ability. Strong swimming skills are key to success on the water. A swim assessment is highly recommended to evaluate participant readiness. • Advance swim assessments are recommended to avoid disappointment.
■
■
Check equipment. Ensure the tow boat, life jackets, skis, wakeboards, and tubes appear to be in good condition.
Ensure everyone learns and practices the basics. Start with a dry-land lesson to demonstrate skills and rules, then practice on the water. • Skills:
■
•
Same-day assessments may be conducted if necessary.
•
If swim assessments are not feasible, assume all participants are non-swimmers.
o
Line up first aid. • Ensure that at least one adult has First Aid/CPR/AED training.
o o o
■
•
•
For locations more than 30 minutes from emergency medical services, recruit a Wilderness First Aider or Wilderness First Responder. Identify the closest emergency transport and facilities. Bring a first aid kit in a waterproof container.
o o o •
•
o o
This fillable float plan from the Coast Guard includes steps for your contact to take if they are concerned about your safety.
Day of the Activity Check the weather. • Consult your instructor and postpone or cancel if weather is not favorable.
■
Rules: o o
File a float plan for any trip. • Provide a reliable adult with information about your boat(s) and the people aboard.
■
■
•
Communication with the spotter, including hand signals and signaling for help Safety rules for the conditions or equipment used Spotter responsibilities Keeping track of participants on a list or checkboard system Launching and landing techniques Body positioning When to release the towline Only one skier, wakeboarder, or tuber at a time. Stay behind the boat (no curving around to the side or outside the wake unless advanced). No aerial or acrobatic tricks. Never linger near running engine exhaust, to avoid carbon monoxide poisoning.
Ensure driver follows safety standards. Follows right-of-way rules
•
Never pulls more than one tube or skier at a time
•
Maintains safe speed
•
Throttles down immediately after a fall
•
Shuts down motor before riders swim up to the boat, and when riders are getting into the water or on the tube
•
Avoids obstacles like docks or pilings and keeps whip/ swing of towed people in mind
■
Prepare for emergencies. Discuss emergency action plans with your instructor.
•
Monitor for wind speed and gusts.
•
Monitor sea state (waves and swells) or river conditions, as they change daily.
•
Check water quality reports on the EPA’s How’s My Waterway? interactive map, especially after rainfall.
•
Never go out on the water when thunderstorms are predicted.
•
•
Use caution when currents, dam releases, or tidal action are present.
•
Know who to contact and how to call for help.
•
Be aware of your location to communicate effectively with authorities.
Check the site for hazards. • Point out and avoid hazards such as strainers, sieves, hydraulics, waterfalls, bridges, dams, fences, and low power lines.
■
•
Surf zones, rapids, and standing waves must be avoided.
Safety Activity Checkpoints ©2009-2026 Girl Scouts of the USA. All Rights Reserved.
PAGE 173/190
Safety Activity Checkpoints (SACs) Gear for Waterskiing, Wakeboarding, and Towed Tubing Make sure Girl Scouts have everything they need for a safe and successful waterskiing, wakeboarding, or towed tubing experience. Essential Equipment •
Towing boat with: o o
•
For skiing: o o o
•
Sufficient power to tow Side-angle rearview mirror
Ski (tow) lines, at least 75 feet long, with a single handle Wakeboard or round-tipped skis that are appropriate for the skill and size of the user Foot bindings sized to the user and towing speed
For tubing: o o
Tube designed for towing with a secure tow harness or strap Tow rope between 50 and 75 feet long
Safety gear •
Coast Guard–approved life jacket, properly sized and fitted for each person
•
Rescue whistle
•
Water ski flag
•
Throwable personal flotation device (Type IV cushion, ring buoy, or equivalent) available for each group on the water
•
Throw bag
•
First aid kit
•
Fire extinguisher, paddle, horn, bailing device, two gas tanks, mooring lines, and any other items required by USCG regulations
Clothing and footwear •
Swimwear
•
Neoprene booties (no flip-flops or loose water shoes)
•
Wetsuit if the water temperature is below 70°F
•
Gloves
Safety Activity Checkpoints ©2009-2026 Girl Scouts of the USA. All Rights Reserved.
PAGE 174/190
Safety Activity Checkpoints (SACs)
Whitewater Rafting
AMBASSADOR
SENIOR
CADETTE
JUNIOR
BROWNIE
ACTIVITY
DAISY
Whitewater Rafting
Refer to the Safety Standards for essential supervision, transportation, first aid, and emergency plans, as well as inclusion and accessibility considerations.
■
•
Activity-Specific Checkpoints for Whitewater Rafting Follow these basic reminders for each phase of planning. Check off items as you complete them, making sure to consider each sub-bullet.
•
•
Yes
Find a safe place to go whitewater rafting. Refer to the program grade level chart (above) for acceptable whitewater classes for your group. Match skill levels with river conditions by understanding the American version of the International Scale of River Difficulty.
Urge all participants to take ACA’s free online paddlesports safety course.
•
Learn how to read whitewater in Boreal River’s fascinating Hydrology 101 video.
Confirm that the guide’s training matches the location and conditions. Certifications may include:
o o o
American Canoe Association (ACA)—Rafting Level 4 or higher International Rafting Federation (IRF) Guide certification Swiftwater Rescue Training Documented experience per your council’s guidelines
•
Whitewater rafting outfitters will supply trained guides for the trip.
•
Maintain proper instructor–student ratio, per the guide’s certification, with a maximum of 6 learners per instructor. An ACA instructor with a qualified assistant may supervise up to 12 learners.
•
Ensure guides have firsthand knowledge of the hazards and conditions at the whitewater rafting location.
American Whitewater has an interactive map of rated rivers. Raft only on rivers that have been run and rated.
Safety Activity Checkpoints ©2009-2026 Girl Scouts of the USA. All Rights Reserved.
•
Identify a professional guide. Ensure instruction is provided by a qualified adult with experience teaching and supervising rafting for the ages involved, and who subscribes to the American Whitewater Safety Code.
o
Decision-Making Phase
•
Yes
Learn More:
General Checkpoints
•
Is Activity Training, Certification, or Verified Experience Required?
R i v e r R i v e r R i v e r R i v e r R i ve r Class Class Class Class Class I–II I–III I–IV I–IV I–IV
Feel the rush of the river and take in breathtaking scenery while whitewater rafting. Challenge yourself, work as a team, and navigate the rapids with the help of a trained guide for an unforgettable adventure!
■
Is Prior Council Approval Required?
PAGE 175/190
Safety Activity Checkpoints (SACs) Planning and Preparation Phase
■
Check the site. Ask the guide about avoiding hazards such as strainers, sieves, hydraulics, waterfalls, bridges, dams, fences, and low power lines.
■
•
Ensure everyone learns and practices the basics. Proper body position and balance
•
Launching, entering the raft, and landing techniques
•
Guide’s commands for body movement and paddle strokes
•
Maneuvering through waves and wakes
•
What to do in case of capsizing or falling overboard:
Be clear on gear. • Review Gear for Whitewater Rafting at the end of this section.
■
•
Ask your instructor or outfitter what items are provided.
•
Communicate early with participants and families about what the group leader or outfitter will provide and what individuals need to bring themselves.
■
• •
•
Line up first aid. Ensure that at least one adult has First Aid/CPR/AED training. For locations more than 30 minutes from emergency medical services, recruit a Wilderness First Aider or Wilderness First Responder. Identify the closest emergency transport and facilities.
o o o o
Ensure that a first aid kit in a waterproof container will be on hand.
Assess swimming ability. • Strong swimming skills are important for paddlers’ safety and confidence. A swim assessment is highly recommended to evaluate participant readiness.
■
How to float through the rapids How to breathe while in rapids How to swim to safety Staying away from strainers, downed trees, holes, and other dangers
•
Not attempting to stand in fast-moving water—if your foot wedges on the bottom, fast water can push you under and keep you there
•
Signaling for help
•
Any site-specific instructions
•
Advance swim assessments are recommended to avoid disappointment.
•
Same-day assessments may be conducted if necessary.
•
•
If swim assessments are not feasible, assume all participants are non-swimmers.
•
Know who to contact and how to call for help.
•
Be aware of your location to communicate effectively with authorities.
■
Day of the Activity
Prepare for emergencies. Discuss emergency action plans with your instructor.
■
Whitewater Rafting Trips: Additional Considerations
•
Review what to do in a sudden storm.
•
Monitor river conditions and dam releases. Check with the outfitter and/or local water authority about the dam(s) on your route.
Whitewater rafting trips are longer excursions. Plan trips only after progressive skill-building experiences. Follow these additional tips for a safe and satisfying experience.
Check the weather. • Consult your instructor; postpone or cancel if conditions are unsuitable for your group’s skill level.
■
Check boats for condition. Make sure air chambers appear secure and gear appears complete and well-maintained.
Safety Activity Checkpoints ©2009-2026 Girl Scouts of the USA. All Rights Reserved.
■
• •
Ensure basic skills. Participants must have the skill and stamina to finish the trip, even if headwinds or other challenges arise. Participants must learn universal signals.
PAGE 176/190
Safety Activity Checkpoints (SACs) ■
•
File a float plan for any trip. Provide a reliable adult with information about your boat(s) and the people aboard.
Safety gear •
Coast Guard–approved life jackets, properly sized and fitted for each person (required)
•
Helmet, properly fitted, when rafting in Class II or higher conditions
•
Rescue whistle
Use a professional guide with the additional training needed for the trip type. Guiding on river, whitewater, coastal, touring, and open water (ocean) trips are advanced certifications.
•
Throwable personal flotation device (Type IV cushion, ring buoy, or equivalent) available for each group on the water
•
Tow line, throw bag, and/or other rescue gear (carried by the guide)
■
Do not exceed capacity or overload boats with gear.
•
Hull repair kit and air pump
■
Keep boats close enough together so that a group decision can be made if wind or water conditions change.
•
■
■
■
This fillable float plan from the Coast Guard includes steps for your contact to take if they are concerned about your safety.
Be aware of possible changes in water level due to tides or dam releases, and how these may impact your route. See the additional gear needed for trips under Gear for Whitewater Rafting. Consult your guide about what else may be needed.
Gear for Whitewater Rafting Make sure Girl Scouts have everything they need for a safe and successful whitewater rafting experience. Individual and group essentials
•
Layered, non-cotton clothing; rash guards and board shorts are ideal when air and water are warm.
•
Water shoes, neoprene booties, or non-slip sport sandals with a heel strap (no flip-flops or loose water shoes)
•
Wetsuit or drysuit if the water temperature is below 70°F
•
Paddling gloves for comfort and grip
•
Eyeglass keepers or goggles for those who need them
Gear for trips Consult your expert about what to bring in addition to the gear listed above and how to secure it in the boat. They may recommend items such as: •
Navigation items, such as GPS or a compass
Raft, suited to group size and water conditions, that meets the following criteria:
•
Communication devices, such as two-way, satellite, or weather/VHF radios
o
•
Dry bags (and a way to secure them) to carry food, extra clothing, first aid kit, etc.
•
Tool/repair kit: duct tape, tools, spare rope, etc.
•
Emergency equipment, such as a signaling mirror, tarp, space blanket, extra clothing and food, matches, flashlight, etc.
Essential equipment •
Clothing and footwear
o o o
Is constructed of durable material with at least four air compartments Has an adequate number of large D-rings securely attached to the sides Has snug hand lines along the sides Does not exceed the capacity of people or gear
•
Properly sized paddles (including spares)
•
Bailing scoop or foot pump to remove water from hull (not needed for self-bailing boats)
Safety Activity Checkpoints ©2009-2026 Girl Scouts of the USA. All Rights Reserved.
PAGE 177/190
Safety Activity Checkpoints (SACs)
CADETTE
SENIOR
AMBASSADOR
Windsurfing
JUNIOR
BROWNIE
ACTIVITY
DAISY
Windsurfing Is Prior Council Approval Required?
J
C
S
A
Yes
Combine the excitement of surfing with the skill of sailing! Windsurfing (or sailboarding) connects you to the wind and water while building balance and coordination.
General Checkpoints
■
• •
Activity-Specific Checkpoints for Windsurfing Follow these basic reminders for each phase of planning. Check off items as you complete them, making sure to consider each sub-bullet. Decision-Making Phase ■
• •
•
A soft bottom (such as sand or mud) is best. Avoid areas with sharp rocks, as falls are inevitable.
•
Stay clear of areas with low power lines.
Learn More: •
Take a very “quick” look at the anatomy of a windsurfer.
Safety Activity Checkpoints ©2009-2026 Girl Scouts of the USA. All Rights Reserved.
US Windsurfing certification Windsurfing Instructors and Programs Association (WIPA) certification Girl Scouts Small Craft Safety Course Equivalent certification or documented experience according to your council’s guidelines
Follow the instructor–student ratios for which your instructor is certified.
Planning and Preparation Phase ■
Be clear on gear. See Gear for Windsurfing at the end of this section. Discuss with participants and families well in advance what the group leader or outfitter will provide and what each person should bring themselves.
■
Line up first aid. Ensure that at least one adult has First Aid/CPR/AED training.
Find a safe place to windsurf. Windsurfing can be done on fresh or salt water. Beginners should start on flat water with light to moderate wind blowing toward shore, ideally in waist- to chest-deep water.
Consider the following qualifications:
o o •
Yes
Identify a qualified expert. Arrange for instruction by an adult with experience teaching and supervising windsurfing for the ages involved. o o
Refer to the Safety Standards for essential supervision, transportation, first aid, and emergency plans, as well as inclusion and accessibility considerations.
Is Activity Training, Certification, or Verified Experience Required?
• •
For locations more than 30 minutes from emergency medical services, recruit a Wilderness First Aider or Wilderness First Responder. Identify the closest emergency transport and facilities.
•
Bring a first aid kit in a waterproof container.
■
Assess swimming ability. Strong swimming skills are important for windsurfers’ safety and confidence. A swim assessment is highly recommended to evaluate participant readiness.
PAGE 178/190
Safety Activity Checkpoints (SACs) •
Advance swim assessments are recommended to avoid disappointment.
Gear for Windsurfing
•
Same-day assessments may be conducted if necessary.
Make sure Girl Scouts have everything they need for a safe and successful windsurfing experience.
•
If swim assessments are not feasible, assume all participants are non-swimmers.
Essential Equipment
Day of the Activity ■
•
Check the weather. Monitor wind speed and direction. High or offshore winds (blowing from shore toward the water) should be avoided for beginners.
•
Monitor surf. Consult your expert. Only experienced windsurfers will be safe and successful in surf.
•
Check water quality reports on Surfrider’s interactive map, especially after rainfall.
■
•
Pulling up the mast
•
Catching the wind, tacking, and jibing
•
Falling safely and climbing back on the board
•
Staying with the board when resting
•
Securing the sail and paddling or walking back when exhausted
•
Signaling for help
•
Expect powered watercraft and kiteboarders to yield, but stay alert and sail defensively to prevent accidents.
•
Stay clear of large vessels (ferries, ships) that cannot maneuver easily.
•
Ask your instructor to explain additional right-of-way rules.
•
•
Board with good deck traction and a suitable hull for the water surface
•
Daggerboard and/or fin(s) for directional control and stability
•
Uphaul line for sail management
Safety gear •
Coast Guard–approved life jacket, properly sized and fitted for each person
•
Throwable personal flotation device (Type IV cushion, ring buoy, or equivalent) available for each group on the water
Clothing and footwear •
Wetsuit recommended if the water temperature is below 65°F
Follow windsurfing right-of-way norms. Yield to human-powered watercraft (kayaks, canoes) and swimmers.
•
■
Sail and boom sized appropriately for the participant and conditions
Ensure everyone learns the basics. Proper body position on the board
•
■
•
Prepare for emergencies. Discuss emergency action plans with your instructor.
•
Know who to contact and how to call for help.
•
Be aware of your location to communicate effectively with authorities.
Safety Activity Checkpoints ©2009-2026 Girl Scouts of the USA. All Rights Reserved.
PAGE 179/190
Safety Activity Checkpoints (SACs) BROWNIE
JUNIOR
CADETTE
SENIOR
Zip Lining
*
*
J
C
S
AMBASSADOR
ACTIVITY
DAISY
Zip Lining Is Prior Council Approval Required?
Is Activity Training, Certification, or Verified Experience Required?
A
Yes
Yes
*Daisies may participate in playground zip lining. Daisies and Brownies may not participate in canopy zipline tours.
Experience the thrill of zip lining! Soar through the air between trees, over a gorge, or above a cityscape for the adventure of a lifetime. Zip lining offers breathtaking views and a whole new perspective on the world around you.
• Playground zip lines: Participants hold on to a handle or sit on a seat, traversing a short distance on a track. Low to the ground, these zip lines are found in playgrounds and recreational venues. All Girl Scouts are permitted to use them, and approval is not required.
General Checkpoints
• Zip lines: Participants wear a helmet and harness. The harness is tied into a “truck” that glides along a long cable. Gravity pulls the participant down the cable to a landing zone. Typical zip lines are launched from a platform accessed by a ladder, staircase, or climbing wall. Ask the operator about access if mobility is a concern.
Refer to the Safety Standards for essential supervision, transportation, first aid, and emergency plans, as well as inclusion and accessibility considerations.
Activity-Specific Checkpoints for Zip Lining Follow these basic reminders for each phase of planning. Check off items as you complete them, making sure to consider each sub-bullet. Note: Zip lines can be part of a challenge course, often in combination with other activities. See Safety Activity Checkpoints (SACs) for these related elements: •
Challenge Courses
•
Climbing, Bouldering, and Rappelling (including artificial climbing walls)
•
Recreational Tree Climbing
Decision-Making Phase ■
•
•
Find a safe place to go zip lining. Check local camps—including those operated by your council, universities, and private facilities—to see if a zip line is available. Seek out accredited facilities. Ask facilities you’re considering, or find listings from these organizations: o o o
•
Zip lines must have written documentation schedules that include: o
Key Term • Backyard zip lines: Self-constructed zip lines are never permitted in a Girl Scout setting. Zip lines must be professionally engineered and maintained. • Canopy zip line tours: A series of treetop elements that may include climbing, aerial walkways, bridges, zip lining, and rappelling. Make sure the operator and facilitator meet standards for each element.
Safety Activity Checkpoints ©2009-2026 Girl Scouts of the USA. All Rights Reserved.
Association for Challenge Course Technology (ACCT) Professional Ropes Course Association (PRCA) Association of Experiential Education (AEE)
o o
Periodic inspections of structures and equipment by qualified outside professionals Use logs for all equipment that is subject to stress, wear, or deterioration A process for monitoring and retiring equipment once it reaches the end of its useful life
PAGE 180/190
Safety Activity Checkpoints (SACs) Identify a qualified facilitator. Professionally run zip lining facilities provide facilitators. Ask about their qualifications and practices. • Training and certification. Ensure the facilitator has training in:
■
o o o o •
Recognized certifications include: o o o
•
Equipment maintenance Safety and rescue techniques Proper setup Facilitation experience with the age group ACCT Level 1 or higher Association for Experiential Education (AEE) Documented experience per council guidelines
Strict supervision. Ensure the following: o o o o o o
Facilitators clip or tie zip liners to a safety line before they enter the launch platform. Facilitators allow only the next zip liner (or in pairs if using a double zip line) onto the launch platform at one time. Facilitators check with zip liners before launching. A minimum of two trained facilitators are always present. A facilitator is stationed at the landing zone to offload, and signals to the top when it’s safe to launch the next zip liner. The facilitator has firsthand knowledge of hazards, conditions, and emergency action plans for the area.
Planning and Preparation Phase ■
•
Be clear on gear. Review Gear for Zip Lining at the end of this section.
Day of the Activity ■
•
Check the weather. Consult your facilitator; postpone or cancel if conditions are unsuitable.
•
Review procedures for sudden storms.
•
Never zip line when lightning threatens.
•
Stop the activity if precipitation or cold weather reduces traction or grip.
■
•
Ensure everyone learns the basics. Proper fitting of helmets, harnesses, and gear
•
Body positioning, especially where (and where not) to put hands
•
Readiness and action commands for launching and landing
•
Safe spotting techniques for group activities
•
Objectives and safety reminders
•
Off-limits areas, such as the landing zone for observers
■
•
Confirm facilitator safety checks. Inspecting equipment before each use
•
Maintaining a use log for gear subject to wear, stress, or deterioration
•
Supervising helmet and harness fit for each participant
•
Overseeing all tie-ins, belays, and climbs
Gear for Zip Lining
•
Ask your facilitator what items are provided.
Make sure Girl Scouts have everything they need for a safe and successful zip lining experience.
•
Communicate early with participants and families about what the group leader or outfitter will supply and what individuals need to bring themselves.
Essential Equipment
Line up first aid. • Ensure that at least one adult has First Aid/CPR/AED training.
•
Harness, properly fitted and sized for the user.
•
Belay devices and other hardware if high climbing is part of zip line access.
•
Gloves designed for the activity
■
•
•
For locations more than 30 minutes from emergency medical services, recruit a Wilderness First Aider or Wilderness First Responder. Identify the closest emergency transport and facilities. Ensure that a first aid kit will be on hand.
Safety gear •
Helmet, properly fitted, is required unless the zipline has been specifically designed for use without helmets.
•
Rescue equipment must be available for use by the facilitator in an emergency.
Clothing and footwear
Safety Activity Checkpoints ©2009-2026 Girl Scouts of the USA. All Rights Reserved.
•
Sturdy shoes
•
Close-fitting, layered clothing to adjust for weather
•
Hair, clothing, or jewelry secured if it could be caught in equipment
PAGE 181/190
Appendix Checklist for Drivers Driving Guidelines for Cars, RVs, and Campers When transporting Girl Scouts, ensure the following precautions are followed by all drivers. Volunteer Drivers:
Vehicle Preparation:
■
Must be at least 21 years old
■ Carry directions, a road map, a first aid kit,
■
Must be background-checked according to council guidelines
■
Inspect lights, signals, tires, windshield wipers, horn, and fluid levels before trips.
Keep licenses, registration, inspections, and auto insurance up to date
■
Load gear safely, avoiding overloading or placing heavy items on top or in the back.
passengers’ health forms, and a flashlight.
■
■
Maintain a safe following distance (at least two car Caravanning:
lengths) ■ Avoid distractions: no texting, phone use,
■
earbuds, or headphones ■
No caravanning (following closely in a line). Each driver must have route details, the destination, and other drivers’ contact information.
Turn headlights on when using windshield wipers Breakdowns or Accidents:
Driver Readiness: ■ ■
Familiarize yourself with any new or rented vehicle.
■
Plan rest stops on long trips and use relief drivers for drives longer than six hours.
■
Know how to handle breakdowns. Carry reflectors, tools, and a spare tire
*Check with your council for additional specific guidelines or requirements.
Do not drive while tired or on medications that cause drowsiness.
Passenger Safety: ■
Everyone must wear their own, fixed seat belt.
■
Children under 12 must ride in the back seats. Follow state laws for car seats and boosters.
■ Never transport passengers in flatbeds,
panel trucks, pickup beds, or camper-trailers.
Safety Activity Checkpoints ©2009-2026 Girl Scouts of the USA. All Rights Reserved.
PAGE 182/190
Appendix Glossary TERM
DEFINITION
Activity
Any Girl Scout–sponsored and –supervised meeting, event, camp, sport, or other program with defined goals and safety requirements.
Activity Accident Insurance
Supplemental medical insurance that provides limited coverage for medical expenses resulting from accidents or injuries that occur during approved and supervised Girl Scout activities. All participants are automatically covered, including registered Girl Scouts, volunteers, and non-member invited participants such as friends, siblings, and tagalongs, if your council allows them. Overnight trips and travel, including camp and international travel, are covered under this policy. This coverage is separate from liability insurance.
Adult
A person aged 18 or older, or the age of majority in the state of residence, whichever is older. Note: If a Girl Scout turns 18 during the membership year, she is still considered a youth and should follow the same rules and guidelines as other youth members, and may not serve as a supervising adult
Adult Volunteer
A registered, background-checked adult (aged 18 or older) who supervises Girl Scouts. Must complete required training. Only adults can serve as leaders or meet adult-to-youth ratio requirements.
Adventure
A series of engaging, challenging, or exploratory activities designed to promote personal growth, skill-building, and teamwork. For example, an adventure might be a weekend that includes transportation, camping, outdoor cooking, and kayaking.
Approved Activity
An activity that meets GSUSA safety standards and, when required, has been reviewed or approved by the local council.
Aquatic Activity
Any activity that takes place in, on, or around water—such as swimming, boating, or paddle sports—and requires water-safety procedures and trained supervision.
Belaying
Techniques used to create friction within a climbing system (usually on a climbing rope) to stop a climber’s fall. A belayer is the person who controls the belaying device.
Bouldering
Climbing or scrambling on rocks at a height no more than 6 feet off the ground. Ropes are not used.
Safety Activity Checkpoints ©2009-2026 Girl Scouts of the USA. All Rights Reserved.
PAGE 183/190
Appendix Glossary TERM
DEFINITION
Buddy System
A safety method where two Girl Scouts are paired to watch out for each other and stay together during activities.
Camping
An activity that involves staying overnight in the outdoors or at a designated site, ranging from cabin camping to tent and wilderness camping. In Girl Scouting, this is an experience in outdoor group living that builds outdoor skills, teamwork, and confidence.
Checkpoints
A section in Safety Activity Checkpoints that outlines safety standards and planning tips for a specific activity. Each activity has its own checkpoints.
Council
A regional Girl Scout organization that supports troops and groups, and determines local requirements, such as pre-approvals or volunteer screenings.
Council Approval
Some activities must be reviewed and approved by your local council before plans are finalized. This may include higher-risk activities, overnights, or those requiring expert instructors.
Destinations
A travel program that offers individual Girl Scout members the chance to join peers from across the country on trips in the U.S. and abroad. Destinations provide opportunities for adventure, cultural exchange, and leadership development beyond the local experience.
Emergency Action Plan (EAP)
A plan that outlines steps to take in case of an emergency. It includes contact information, response roles, and scenario planning to keep Girl Scouts safe.
Emergency Medical Services (EMS)
A system of pre-hospital care by professional responders such as paramedics or emergency medical technicians (EMTs) who provide urgent medical care and transportation to a hospital during a health emergency.
Experiential Education
A learning approach where participants gain knowledge and skills through direct experience, reflection, and active participation in activities rather than only through instruction.
Safety Activity Checkpoints ©2009-2026 Girl Scouts of the USA. All Rights Reserved.
PAGE 184/190
Appendix Glossary TERM
DEFINITION
Expert/Instructor/Facilitator
An adult with training, certification, or experience who provides supervision, instruction, or guidance during an activity. In Girl Scout safety materials, these terms are often used interchangeably to indicate a qualified person responsible for teaching skills, maintaining safety, and supporting participants.
Firearms
Weapons such as rifles, shotguns, and handguns that launch a projectile by means of gunpowder or another explosive force. Check with your council to ensure Girl Scout use of firearms is permitted in your area.
First Aid
Immediate medical care given to a sick or injured person until professional medical help can be provided. In Girl Scouts, it also refers to the ability of a trained adult “first aider” to treat minor injuries or illnesses within the scope of their certification.
First Aider
An adult with current certification in First Aid/CPR/AED, required at some Girl Scout events. Wilderness First Aid training may be required for remote settings.
Float Plan
A written outline of a boating trip that includes details such as the route, destination, schedule, and names of participants. It is shared with someone on land to help ensure safety in case of an emergency.
Free Climbing
This style of climbing on rocks or walls without a belay system is never permitted in a Girl Scout setting unless the potential fall distance is 6 feet or less.
Girl Scouts of the USA (GSUSA)
The national organization that provides safety standards and program guidelines for all Girl Scout councils and members across the country.
Heath Examination Form
A confidential form, completed by a health professional, that confirms a participant’s readiness to participate in activities or events. This may be required by organizers of overnight camps, high adventure experiences, or extended travel.
Health History Form
A confidential form that details a participant’s medical conditions, allergies, medications, and emergency contacts. Required for all Girl Scouts participating in activities.
Safety Activity Checkpoints ©2009-2026 Girl Scouts of the USA. All Rights Reserved.
PAGE 185/190
Appendix Glossary TERM
DEFINITION
Helmet
A required piece of safety equipment for activities involving falls, impacts, or falling objects. The correct helmet type and proper fit are essential.
Leave No Trace
An outdoor ethic that encourages people to minimize their impact on nature by respecting wildlife, disposing of waste properly, leaving what they find, and caring for the environment so others can enjoy it. Also, the name of a nonprofit organization that promotes the ethic.
Liability Insurance
Insurance coverage that protects Girl Scouts, volunteers, and the council from alleged negligence in case of accidents, property damage, or claims of bodily injury during approved Girl Scout activities.
Life Jacket/Personal Flotation Device (PFD)
A U.S. Coast Guard–approved flotation device required for many water activities. Must be the correct type, size, and condition for the participant and activity.
Mandated Reporter
An adult who is legally required to report suspected child abuse or neglect to the appropriate authorities.
Membership Year
October 1 to September 30. Members may join anytime. Some councils offer an extended-year membership combining the remaining months of the current year with the next full year for one fee.
Mental Health First Aid
A training program that teaches people how to recognize signs of mental health challenges, provide initial support, and connect individuals to professional help when needed.
Mental Health First Aider
An adult who has completed Mental Health First Aid training and is prepared to offer initial support to someone experiencing a mental health challenge or crisis, and to guide them toward professional resources.
Multi-Pitch Climbing
Long-route climbing that requires several pitches (a section of a route between two belay points). The group climbs to the top of the first pitch. The lead climber climbs to the next pitch, anchors in, and belays each remaining climber individually to the anchor. For highly experienced climbers only.
Not Permitted Activity
Activities that are considered too risky or inappropriate for Girl Scouts. These are prohibited by GSUSA and are not covered by insurance or checkpoints.
Safety Activity Checkpoints ©2009-2026 Girl Scouts of the USA. All Rights Reserved.
PAGE 186/190
Appendix Glossary TERM
DEFINITION
Overnight
Any activity or event where participants sleep away from home for one or more nights. Includes camping, travel, or council events like program weekends or lock-ins. Specific sleeping guidelines apply.
Participant
Anyone participating in a Girl Scout outing, activity, or trip, whether they are youth or adult, member or non-member. Members of the public who are nearby are not considered participants.
Permission Form/Slip
A signed form from a caregiver granting a Girl Scout permission to participate in a specific trip or activity.
Progression
The practice of preparing Girl Scouts for longer or more complex activities by starting with short learning outings and gradually building toward more challenging experiences.
Qualified Vendor
A business or organization providing instruction, equipment, or facilities that meet Girl Scout safety standards. Must carry liability insurance and follow checkpoint requirements.
Ratio (Adult-to-Youth Ratio)
The minimum number of unrelated, registered, background-checked adults required per number of Girl Scouts, based on age and activity type.
Safety Activity Checkpoints (SACs)
Girl Scouts’ official safety guide outlining required standards, planning tips, and equipment needs for Girl Scout activities. It is divided into general safety standards that apply to all we do in Girl Scouts and activity-specific checkpoints.
Safety Management Plan (SMP)
A safety plan that focuses on communication and prevention, as well as responses to potential emergencies. See also: Emergency Action Plan.
Small Craft
A boat or watercraft that is lightweight and typically designed for a few passengers. Examples include canoes, kayaks, rowboats, small sailboats, or similar vessels. Small craft are more affected by wind, waves, and weather than larger boats, and require special attention to safety guidelines.
Specialized Equipment
Gear or items designed to protect participants from injury during an activity. Examples include helmets, harnesses, life jackets, or other protective gear.
Safety Activity Checkpoints ©2009-2026 Girl Scouts of the USA. All Rights Reserved.
PAGE 187/190
Appendix Glossary TERM
DEFINITION
Target Sports
Activities where participants aim at targets using tools like slingshots, bows and arrows, BB guns, shotguns, rifles, pistols, or throwing axes. These require council approval and trained instructors. See also: Firearms.
Travel Camping
A form of camping where Girl Scouts move from one location to another, usually by car. Travel may also be accomplished by foot (backpacking), canoe, kayak, or other small craft, with Girl Scouts carrying their own gear and camping overnight at different sites along the route.
Trip/Activity Leader
The adult designated to plan, coordinate, and supervise a Girl Scout outing or trip, ensuring compliance with safety guidelines and council requirements. This person may or may not be the group’s leader.
Troop Leader
A registered, trained adult volunteer responsible for guiding a Girl Scout troop. Ensures activities meet safety standards and fosters girl-led experiences.
USA Girl Scouts Overseas (USAGSO)
The division of Girl Scouts that supports families and volunteers living outside the United States, typically on U.S. military bases.
Vendor
See Qualified Vendor.
Vessel
A boat, ship, or other watercraft that can be used for transportation or recreation on water.
Waiver/Release of Liability
A signed document in which an adult participant or a youth’s caregiver acknowledges the risks of an activity and agrees not to hold the organizer, vendor, or sponsoring group legally responsible for accidents or injuries that may occur. A waiver does not replace required safety practices or insurance coverage.
Youth Member
A registered Girl Scout who falls within the youth membership age range (typically grades K to 12). Youth membership extends through the membership year of the year the Girl Scout turns 18.
Safety Activity Checkpoints ©2009-2026 Girl Scouts of the USA. All Rights Reserved.
PAGE 188/190
Appendix Sample Swim Assessment—Verification of Completion Swim assessments are required for many aquatic activities and recommended annually for Girl Scouts. Requirements vary by facility, instructor, or provider—some may waive assessments, while others require more rigorous evaluations. Certain activities require strong swimming skills. Refer to Safety Activity Checkpoints (SACs) for specific requirements. At sleepaway camps, swim assessments are typically conducted weekly, regardless of prior completion. Many camps and pools use wristbands or similar identifiers to indicate ability. This form confirms swim level and ability, documenting demonstrated skills. Lifeguards and instructors: Use this tool to record assessments as needed but follow any facility- or activity-specific evaluations. Assessment criteria: Each participant should be evaluated in both forward motion and resting, without support or flotation devices. Mark the assessment used:
ASSESSMENT
DEFINITION
A.
Enter water, stay near edge, swim 25 yards, float for 30 seconds.
B.
Jump feet first into deep water, swim 50 yards, tread for one minute.
C.
Jump feet first into deep water, swim 100 yards (using a combination of freestyle and elementary backstroke), tread for two minutes.
Other
Describe assessment:
Safety Activity Checkpoints ©2009-2026 Girl Scouts of the USA. All Rights Reserved.
EXPERT NAME & TITLE
DATE
PAGE 189/190
Appendix Swimmer Classifications Beginner/Non-Swimmer (unable to complete Assessment A—or no assessment made) •
Limited to shallow water or standing-depth areas
•
Must wear a Coast Guard–approved life jacket for applicable activities per SACs
•
Cannot participate in activities requiring strong swimming skills (e.g., surfing, SCUBA)
Intermediate Swimmer (completes Assessment A or B) •
May swim in deep water
•
Must wear a life jacket when required by SACs
•
Cannot participate in high-risk activities like surfing or SCUBA
Proficient/Strong Swimmer (completes Assessment C) •
Eligible for most aquatic activities
•
Must wear a life jacket when required by SACs
•
May participate in all aquatic activities
Safety Activity Checkpoints ©2009-2026 Girl Scouts of the USA. All Rights Reserved.
PAGE 190/190