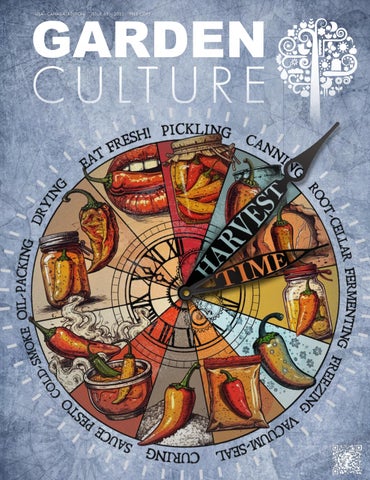
USA - CANADA EDITION · ISSUE 63 · 2025 · FREE COPY
propagation made . predetermined pH & EC
fixed air-towater ratio
air pruning effect
unmatched water uptake
no transplant shock
self-regulating consistent moisture levels
100% compostable
unsurpassed success rate
Eazy Plug starter plugs make propagation easier with amazingly fast & powerful germination & rooting. Proudly Distributed by Quality Horticulture Now serving the USA and Canada Eazy Plug Eazy Plug CT66 Tray | SKU # Q112530 Mondi Products™ Mini GreenhouseTM 12" with Easy Vents | SKU # Q113682 Premium Propagation Tray Black & White | SKU # Q100576
new 12" dome!
a perfect pairing, season after season. Eazy Plug CT66 trays fit perfectly into Mondi™ 1020 trays, with the Mondi Mini Greenhouse™ dome snapping securely into place for a complete propagation system. Trusted by growers worldwide, these propagation tools deliver reliable results cycle after cycle.
1.866.421.5858
sales@qualityhort.com
@qualityhorticulture
qualityhort.com
Isn’t harvest time the most anticipated reward for growing an edible garden?
I
sn’t harvest time the most anticipated reward for growing an edible garden? Picking homegrown produce for meals, medicine, and herbal teas is one of life’s joys. These are a few techniques I use to extend the harvest, optimise yields,
CONTENT
flavour and nutrient value, and minimise waste.
NITRO
BY GARETH HOPCROFT
Harvesting root crops in the waning moon has helped me prolong their storage life, as they are less likely to rot. This is also idealbetter if the product is b Bigger isn’tan always moon phase to collect seeds for storage andou’vedrying probably seen it before—plants that look absolutely perfect during the grow. Fat leaves
Finishing
STRONG2
Harvesting
tips
MARKETpLACE Y
Everything’s firing. But then harvest rolls around, and the final product doesn’t quite hit. It’s n hoped for after months of effor t.
Timing the Harvest
Regrowing Food Crops After Harvest
Maximise Nutrient Value – Harvest food as close to eating to reduce the loss of valuable nutrients. For example, snow peas lose 50% of their vitamin C within the first twelve hours after picking. Alternatively, blanch and snap-freeze surplus fresh produce immediately after harvesting to preserve the nutrients.
than not,harvest. the issue canA befew nitrogen. specifically, Many crops can be replantedMore for aoften second of Or themore vegetoo much nitrogen too late in the game. tables and fruits I regrow from plant material include:
Harvest Early Morning – Leafy greens have the highest water content early in the day before the plants start transpiring. A quick rinse after harvesting and storing in the fridge helps preserve nutrients. It may be more convenient to pick salad ingredients or leafy greens late in the day before making dinner, but this is when they are often heat-stressed and may be wilted.
Getting Nitrogen Right in Living Soil
In living soil, we’re not just feeding the plant—we’re managing a whole ecosystem. That means playing the long game. Getting the Leeks – Slice the stem at basefinish butisn’tleave roots and bestthe possible about the stripping things awayabout in a panic at the end. setting things up from the start sofaster, the soil winds 1-2 cm of the stem in the soil.It’sAabout new leek regrows much down naturally, right in sync with your crop.
•
so you get two for the price of one!
The Power of the Fade
•
Spring Onions – Leave these vegetables theyour soilplants andstartsnip When things are dialled in, you’llinnotice to “fade” toward the end—those deep greens shifting into golds, purples, the outer leaves from several plants, rotating around the garden. and reds. That’s not just visual drama. It’s part of a natural shutdown This allows each plant to photosynthesise and keep producing process. leaves for longer.
•
plant’s way of tying up loose ends. It breaks down chlorophyll (which Celery, Asian Greens and Lettuce – Regrow these leafy contains a lot of nitrogen) and moves those nutrients to where they greens in two ways. Cut above matter most. the stalk base of these leafy greens and leave the roots in situ in the garden bed or pot. After liquid fertilising, new leaves appear. Alternatively, add the base to Plants make choices. When there’s a shallow plate with a bit of water, andnitrogen then, once new roots and lots of around, they choose stems, and shoots have grown, transplant it togrowth—leaves, a pot or the garden. size. But there’s a trade-off
As harvest approaches, plants begin to pull nitrogen from older leaves and transfer it to their flowers. That’s senescence—the
Extend Storage - Harvesting root crops in the waning moon has helped me prolong their storage life, as they are less likely to rot. This is also an ideal moon phase to collect seeds for storage and drying. Optimise Flavour and Medicinal Potency of Herbs – We don’t just pick flavour-packed herbs to improve the taste of our meals. They also have medicinal properties, and the harvesting time affects their therapeutic vitality. Maximise the nutrient value, phytochemicals and essential oils when making remedies. Harvest herbs like basil, lemon balm, and mints before they flower or snip the blooms off as they form if not saving seeds. If the goal is to dry herbs, the best time is just after the full moon. The sap is at its highest, but the energy and moisture in the plants are being drawn down into the roots, making it easier to dry the leaves.
for Vegetables, Herbs & Flowers
Berries and Fruits – The best time to pick is when they are fully ripe, when natural sugars are highest, producing optimum flavour and nutrient value.
24
88
BY XAVI KIEF
86
Flowers – The ideal time to pick flowers for maximum fragrance and phytochemicals is early morning when the dew has dried on the petals. With edible blooms like nasturtiums, dianthus, and cosmos, pick just before eating as garnishes in salads or baking to maximise flavour and nutritional value.
30
As harvest approaches, p begin to pull nitrogen from leaves and transfer it to flowers. That’s senescenc plant’s way of tying up loos
Techniques to Optimise the Harvest One of the ways I maximise the value of each plant in my garden is to use different edible parts during the growth phase. This depends on the vegetable, fruit, or herb but can include the leaves, fruit, seeds, stem, immature seed pod, flowers, peel, bulb, or root. These are a few examples:
If your soil is still pumping out nitrogen at this stag stalls. The plant thinks it has time, stays green, an grow. The result? More chlorophyll in the final pr time for those finishing touches—aroma, flavour, an
When Plants Keep Growing Instead of Ge
Plants make choices. When there’s lots of nitroge choose growth—leaves, stems, and size. But there’s that rapid expansion can come at the cost of res secondary compounds that define quality.
Growers call this “soft growth.” The plants look spongy. Stems bend under the weight. Pests and dis The canopy becomes dense and humid, making it e like powdery mildew to thrive. Meanwhile, the plant ing into fluff, not into the stuff that tastes amazing.
And if you’re growing for flavour or effect—whethe herbs, or peppers—this is where quality can get l always better if the product is bland.
Bigger Flowers, Weaker Punch? That’s the Dilution Effect
Here’s something that surprises a lot of newer grow huge flowers that still feel underwhelming. That’s be trogen keeps pushing the plant to bulk up, it can vour and aroma compounds too thin. The r product. Flashy on the outside, forgettabl
Allowing nitrogen to taper off as the helps shift the focus from volume t mass to quality. That’s where the ma
Root Crops I use a cutlery fork to gently lever out root vegetables so I don’t damage delicate roots or flesh. Carrots: When thinning seedlings, snip off the immature roots and add these raw, young shoots to salads. After harvesting the mature carrot root, trim the leaves immediately to reduce moisture loss, then rinse and use the tops in pesto or chop and freeze to make soup stock. THE PAPER BAG NEMATODES METHOD
91
Radishes: These crunchy root crops offer so much more than just a peppery Harvest tender as salad greens or herbs grown for their essential oils, pre-dawn harvesting is salad ideal.ingredient. It’s at this timeyoung, during theirleaves sleep-wake Seeds – Collect seeds for saving when they are fully mature, and while balancing enough solar panels to encourage healthy root develcycle that desirable phytochemicals are most abundant in the trichomes. Unfor tunately, dewy conditions in the the pods are crisp, brown and dry. This indicates they have the maxopment. The flowers are a delicious addition to salads, provided they summer and fall germination can createand moisture (namelydon’t mould) in the plants if they not able dry out. form seed heads. Radish plantsare produce a hugetoquantity of seeds imumlate nutrients for successful the nextissues generation on long stems with pods. The seeds are a great substitute for mustard of plants. To mitigate this, I use a harvest strategy that combines a traditional approach to herb drying in paper bags or baskets seeds; add them to pickled vegetables, along with some of the young with a typical “trim and hang in the dark” method. For optimal results, a two-day window with no rain in the forecast seed pods.
F
is ideal for using this tactic. 28
Assess plants in full sunlight about 20 hours before you plan to harvest. Ruthlessly (with very clean and sharp tools) remove plant matter showing any signs of damage. All of this goes into a deep bucket with a lid or bag held closed with a clip as you move around the garden. You can deal with this material (through whatever destructive means you choose) later once all the good stuff has been safely taken in and processed.
29
For optimal results, a two-day window with no rain in the forecast is ideal for using this tactic
Day 1: Quality Control Check and Harvest Pre-Staging
LOCAL GROWERS BY TYLER SIMMONS
CROP STEERING
After cleaning yourself and your tools, return to the plants and defoliate the majority of the remaining fan leaves. You have the choice to keep the best ones for eating (adding a little more green goodness into your diet) or make them into food for garden microbes and a future generation of plants. It’s a perfect time to brew up some FPJ (fermented plant juice) from these leaves, especially if you’re running an indoor cycle before next spring and could benefit from practically free, bespoke nutrients.
How advanced cultivators use environmental manipulation to optimise plant performance and profitability.
Mastering
CR P steering
If you have no direct use for the leaves elsewhere, one option is to defoliate and drop them directly onto the garden soil. It’s the same as any other natural autumnal process, as they form a mulch layer that can be beneficial for soil renewal and the health of microbial populations. Should that be too untidy for your situation, plants that are small enough may be carried to a spot where the leaves will be welcome when merely dropped. Alternatively, lay out a sheet or use a cardboard box or tote to collect them and then carry them to a compost bin or pile.
I
The Science of Precision Day 2: Plant Control Chop, Drop, and Roll
IN THIS ISSUE OF GARDEN CULTURE: 9 Foreword 10 Author Spotlight Using The 14 Marketplace Method to 20 Professional Paper POV withBag Genevieve Newton Preserve Flavour and Effect 24 Harvesting Tips for Vegetables, Herbs and Flowers 28 Drying Cannabis at any Scale 30 A Herbal Harvest: Using The Paper Bag Method to Preserve Flavor and Effect 34 Seed to Success with Jose Dominguez 36 Chaos Potato Gardening 40 Notes from a Dirty Old Gardener Harvest Happiness and Heartbreak 42 Harvest by Recipe to Preserve Self-Compassion 54
exceptional cultivation outcomes often comes down to one critical factor : the ability to direct plant growth through precision environmental control. This practice, known as crop steering, represents the cutting edge
Tip:
The Foundation: Understanding Plant Communication
Thethick interaction between these forces, combined with atmospheric Plants are than many growers realise. Everyto a Tiemoreorsophisticated tape the lid of a marker demand measured as Vapour Pressure Deficit (VPD), creates the moment, they process environmental information through lanyard or sturdy stringpathways, to hang fromadjusting a belt around yourequation for water potential. When more energy is complete complex signalling constantly theiror growth required to move water through the plant—whether from high patterns in response to the conditions they perceive. These neck, allowing you to use it one-handed. (Safety first:EC,if low you substrate moisture, or high VPD—plants respond with responses are mediated by plant hormones that act as chemical reduced cell expansion and growth, triggering stress responses messengers throughout work around anything withtheaplant. motor, like if you’re driving out that can be precisely controlled. the red-to-far-red detect whether to a guerrillaConsider grow spot on ratio. an Leaves ATVdon’torjusttractor, don’t put it lights are on or off; they evaluate the spectral composition to around yourmake neck.) Environmental Control: critical decisions about germination timing, shade avoidance
62
Bearing the next day’s expected weather report in mind, seek a place where air circulates well, out of the direct sun. This will be your staging area for post-chop, pre-trimmed plants. String up a temporary ‘laundry line’ that can bear the wet weight of your harvest.
n the rapidly evolving world of controlled environment agriculture, the difference between average and
of modern cultivation science, where data-driven decisions replace guesswork and intuition.
responses, and flowering initiation. When plants detect a high farred ratio, they interpret this as competition from neighbouring plants and respond by stretching toward the light source, a response that experienced growers can manipulate through spectrum control.
The Steering Mechanisms
Effective crop steering requires mastering environmental control factors, each offering distinct leverage points for influencing plant behaviour. Soil moisture management through precise irrigation
Bigger plants canMostbecritically, collected the stress same way,earlier by flowering sectioning parts orto modulate perceived water stress while allows growers simulated water promotes growth. The key isn’t simply maintaining adequate via a generative effect. This stress response system becomes a individual branches into a bag and then cutting them from optimising the central moisture—it’s about creating controlled moisture variations that powerful tool when growers understand how to apply controlled signal specific responses. Strategic irrigation timing can support stress at strategic growth phases. stalk. root health during vegetative growth while inducing beneficial stress responses during flowering phases.
the difference between The Water Equation: Managing Temperature, VPD, and humidity control affect Plant Hydration Dynamics average and exceptional transpiration rates and internal water potential, offering another CentralGo to effective crop steering is understanding water potential: Grade As You cultivation outcomes often precision tool for crop steering. Proper humidity management the dynamic underlying many of the tools a grower might use. This comes down to one critical reduces disease risk while ensuring efficient water use, but more concept grocery encompassesbags, several or components that growers must Medium-sized paper even small “packed lunch”-type importantly, it provides a mechanism for controlling the plant’s monitor and manipulate. factor: the ability to direct bags, are good for separating any questionable or damage-adjacent water uptake and energy requirements. Lower humidity increases plant growth through precision transpiration demand, effectively increasing the plant’s water Osmotic potential reflects the concentration of solutes in flowers from theyourmost pristine branches. A simple rating system (e.g. stress level even with adequate root zone moisture. nutrient solution, measured as electrical conductivity (EC). environmental control
Using a wheelbarrow or rolling cart saves a lot of work and effort while bringing in the harvest. You can choose to travel a row or among beds and pick or cut everything into this bin as though you were moving down a supermarket aisle. Employing a reusable tarp or old sheet as a liner can help keep the harvest clean from dirt and fungal spores.
EC levels are high, plants expend more energy to keeps things Grade A, B, C)When in combination withmustthe plant’s name Nutrient availability management extends far beyond uptake water, creating a form of controlled stress that can be basic plant nicely organised.strategically It can also to use other symbols, suchnutrition. as The application or restriction of specific applied.be This helpful principle allows growers to influence nutrients at targeted growth phases, combined with precise plant behaviour through fertigation management, not just nutrient stars or exclamation timing,branchtemperature, and concentration control, interacts with delivery. points, to mark the bags containing top water potential to influence hormonal pathways. This creates es if large plants Matric are brought down piece by piece. opportunities for targeted nutrient partitioning and selective potential becomes relevant for soil-based systems,
Large paper garden waste bags are handy for keeping individual plants separated. If a plant will fit entirely inside one, put it over the plant and gather the opening of the bag around its base without letting the paper touch the dirt. Holding firm with one hand, use the other to chop the stem. Mark the bag with the name of the plant.
Hang your bags up on the line you strung the day before, leaving a gap open at the top to allow moisture to escape. Now that you have your plants suspended upside-down in paper bags, the UV rays from the sun are blocked, preventing the degradation of the essential oils. Volatile oils are better retained than they would otherwise be as dawn turns to day.
46 Trending Now: Long-Term Storage Solutions for Your Vegetable Harvest 48 Forever Cannabis Hang ‘em High 52 Too Many Chilies? A Spicy Survival Guide 56 Take What You Want, Pay What You Can 62 Mastering Crop Steering - Part 1 66 Eco-Optimism: Making Something out of Nothing 70 A Scientific Guide to Preserving Quality 74 Getting Fruity with Mushrooms - Harvesting, Drying and Processing your Crops 82 Growing and Harvesting Healthy Cannabis Roots 86 Finishing Strong: Getting Nitrogen Right in Living Soil 91 Local Growers 95 5 Cool Ways to Preserve Your Harvest 74
representing the energy required to overcome adhesive forces between soil particles and water. While less applicable in hydroponic systems where water yields easily, understanding matric potential helps explain why substrate choice profoundly impacts plant responses.
metabolic effects.
Pruning, defoliation, light spectrum, and temp DIFF are also coordinated strategically in a coherent crop steering plan.
75
55
7
NOW AT NEW LOWER PRICING! www.HEAVY16.COM - 877 YO HEAVY (964 3289) SCAN THE QR CODE TO LEARN MORE OR VISIT US AT HEAVY16.COM
FOREWORD & CREDITS
FOREWORD
H
arvest season is the heart of the gardening year. It’s when all the planning, planting, and care finally pays off. For gardeners, it’s not just about collecting flowers, fruits, or
vegetables; it’s the reward for months of patience, observation, and nurturing. There’s a deep satisfaction in holding something you grew yourself from seed or clone and knowing exactly what went into it. Whether you’re pulling tomatoes off the vine or digging up fragrant garlic, harvest season connects you to nature and your effort. If you’re like me, much of what gets harvested gets eaten immediately. Berries, sugar snap peas, and carrots are devoured quickly, but others, like tomatoes, potatoes, and herbs, are grown in such abundance that I have to learn different methods for long-term storage. This edition offers many insights into this exciting time of year for any gardener. To quote Colin Bell, “Preserving herbs is a high-stakes race against degradation—the natural breakdown of key compounds after harvest. Whether you’re drying basil for culinary excellence or chamomile for soothing teas, one wrong move in curing can turn your prize harvest into flavorless rubble.” Fear not, because in “A Scientific Guide to Preserving Quality”, Colin explains what we need to do, and perhaps more importantly, why we need to do it to get the drying and curing stage just right. From harvesting healthy cannabis roots to curing at scale or preserving flowers forever, there are many takeaways from this edition. Before the harvest season starts, ensure that your plants have everything they need, or eliminate anything they don’t. In “Finishing Strong: Getting Nitrogen Right in Living Soil”, by Gareth Hopcroft, he offers advice on how to avoid having too much available nitrogen in living soil towards the end of the plant’s life. Check out the Author Spotlight to learn more about Gareth.
CREDITS SPECI A L TH A N KS TO: Adam Clarke, Alex Field, Anne Gibson, Catherine Sherriffs, Colin Bell, Everest Fernandez, Gareth Hopcroft, Haley Nagasaki, Jennifer Cole, Luke Sumpter, Regi Oneton, & Xavi Kief. PRESIDENT Eric Coulombe eric@gardenculturemagazine.com +1-514-233-1539
USA - CANADA EDITION · ISSUE 63 · 2025 · FREE COPY
VICE PRESIDENT Celia Sayers celia@gardenculturemagazine.com +1-514-754-1539 E XECU T I V E ED I TO R Catherine Sherriffs cat@gardenculturemagazine.com DESIGN Job Hugenholtz job@gardenculturemagazine.com I NTEGR ATED SA L ES & B USI N ESS D E V ELO PM ENT Haley Nagasaki Haley@gardenculturemagazine.com +1 (604) 401-7209 D I G I TA L & SO CI A L M A R K E T I N G social@gardenculturemagazine.com ADVERTISING ads@gardenculturemagazine.com PUBLISHER 325 Media INC 44 Hyde Rd, Mille-Isles QC, Canada J0R 1A0 GardenCultureMagazine.com ISSN 2562-3567 (Print) · ISSN 2562-3575 (Online)
Whether it’s fruits, vegetables, or herbs, this edition will provide you with tons of tips and advice on how to store and preserve your precious crops so that you can enjoy them for months to come. If the idea of closing down your garden and having to wait half a year to start up again makes you sad, this doesn’t have to be the end. Take a trip to your local indoor gardening shop. They have everything you need to grow indoors, all year round. Happy Harvest.
Garden Culture is published six times a year, both in print and online. @GardenCulture
@GardenCulture
@GardenCultureMagazine
@Garden_Culture
D I ST R I B U T I O N PA R T N ER S • Hydrofarm • Biofloral • pHive.8 • Autopot USA • Central Coast • Hydrofarm Canada Garden Products • Quality Wholesale
© 325 Media INC
All rights reserved. No part of this publication may be reproduced, stored in a retrieval system or transmitted in any form or by any means, electronic, electrostatic, magnetic tape, mechanical, photocopying or otherwise, without prior permission in writing from 325 Media Inc.
9
Author Spotlight
Gareth Hopcroft G
areth Hopcroft has been passionate about plants for most of his life, and we’re fortunate to have his voice in Garden Culture Magazine. The owner of Ecothrive, Gareth is a veteran in the UK hydro industry and has a wealth of knowledge to offer when it comes to both indoor and outdoor growing. We know you’ll love his
articles, so you should probably get to know him a little better, too.
You are a self-proclaimed ‘plant geek’. How did you become so interested in the growing world? Plants have always fascinated me. I remember growing cacti on my windowsill when I was about 10 or 12 years old; some of them are still with me. I was also intrigued by my grandad’s vegetable patch at the bottom of his garden, and my best mate’s dad was a passionate orchid grower with all kinds of gadgets rigged up in his greenhouse. All of that must have rubbed off on me. I got properly into plant biology at school, which led me to study Natural Environmental Science at Sheffield University, where I chose mostly plant science modules. After graduating in 2004, I started working at a local hydroponics shop that also made liquid nutrients. I eventually managed their showroom and research greenhouse—that’s where I really got hooked on greenhouse veg production. Since then, the ball’s just kept rolling. Now, I’m surrounded by plants both at home and at work, and I wouldn’t have it any other way.
Do you prefer growing plants indoors or outdoors? I honestly love both. At one point, I had three allotments, mostly for growing fruit and veg. These days, I spend more time indoors, caring for my collection of over 100 tropical Aroids. They’ve definitely taken over!
What is one of your favorite plants to grow? It’s so hard to pick just one, but right now I’m really into Alocasias. I’ve been experimenting with cross-pollinating a few varieties this year— fingers crossed I get some viable seeds!
How do you like to spend your time outside of work? If I’m not fussing over my tropical houseplants, I’m probably out walking in the Peak District or grinding curbs on my skateboard.
What’s your favorite food? That’s a tough one! Right now, it’s either purple Heartthrob tomatoes or some good, sloppy scrambled eggs. 3
Are you interested in writing for Garden Culture Magazine? We’d love to hear from you! Send us an email introducing yourself with a sample of your work. 10
editor@gardenculturemagazine.com
CLEAN STEAM AS150 Steam Humidifier With
High Capacity – 1,200 pints (150 gallons) of moisture per day Built-in Fan Pack – Mounts directly on top of or above the humidifier at canopy height for easy, ductless installation Included Vapor-logic® Control – Web-based interface for easy remote monitoring and data backup Power Options – Available in 240V, 208V, and 480V 3-phase configurations
Get Serious, Get anden.com
The Grower’s Source... 2024
2021
2023
Voted Canada's
TOP DISTRIBUTOR
Canadian owned and operated since 1999
Canada’s leading wholesaler for licenced producers & growshops - Contact Us Today!
INFO@BIOFLORAL.COM
BIOFLORAL EAST 450.664.4844 EAST.BIOFLORAL.COM
BIOFLORAL WEST 604.438.4025 WEST.BIOFLORAL.COM
fro m Co ast to coa st. NURTURING ROOTS, GROWING TOGETHER CANNA x BIOFLORAL
to Canadian growers.
Our partnership with BioFloral spans over 20 years and has been rooted in trust, shared values, and an unwavering dedication
As CANNA’s distribution partner, BioFloral has played a critical role in building our presence from the ground up ever since CANNA entered the Canadian market. Originally founded in the Netherlands, CANNA is a global leader in highquality fertilizers and substrates, trusted by professional cultivators around the world. Thanks to BioFloral’s deep product knowledge, logistical excellence, and commitment to customer service, we've been able to reach growers across Canada with consistency and care. From product education and national distribution to supporting events and the growing community, BioFloral continues to be true partners in every sense of the word.
Frans de Vries Canada Business Unit Manager CANNA
We’re proud of what we've accomplished together and excited for all that’s still to come.
From legacy days to the newly regulated industry, CANNA is a company we have put our trust in over the last 15 years. CANNA provides quality and consistency in all their products we’ve used. From their coco to their nutrients, we buy CANNA, and we know what we’re paying for. But it’s not just the products, it’s the people behind them that sets CANNA apart. Their team is knowledgeable, approachable, and always ready to help troubleshoot or provide guidance. Whether we had questions about feeding schedules or needed tailored advice, their support was prompt and genuinely helpful. They have earned our loyalty throughout many years and many successful crops. As happy customers of theirs, we can tell you, if you want to grow great cannabis with the Tyler Hass Owner/operator - Verte West help of a brand you can rely on, you can’t grow wrong with CANNA.
HEAVY16 FIRE Feed yo ur F ire
ALERT, ALERT!! PERMANENT 35% PRICE REDUCTION! HEAVY16 FIRE is a hand-crafted P/K booster and versatile bloom supplement that can be incorporated into any existing plant system and nutrient program. Starting FIRE in the last one to two weeks of Veg and going through the entire bloom cycle with a gradual ramp will provide prebloom support and supply intermediate and latephase cascading delivery of Phosphorus. Using FIRE in the late phase of vegetative growth can lead to a larger, more resilient root mass and bigger, branched foliage. Visit HEAVY16.com for more information on the entire range.
Aurora Peat Products Founded in 2001 by Arnold Stang in Edmonton, Alberta, Aurora Peat Products brings over 30 years of experience in the peat industry to its customers. Located about 100 kilometers northwest of Edmonton, the company was originally known as Alaska Peat. In 2015, it was purchased by long-time customers and fellow family-owned business, Aurora Innovations. Now operating as Aurora Peat, the team remains committed to delivering the same high-quality peat and dependable service customers have come to expect. Learn more at AuroraPeat.com.
Green Cleaner Your all-natural solution for pest-free crops! This powerful, non-toxic spray eliminates spider mites, aphids, whiteflies, and powdery mildew on contact, while being safe for people, pets, and the environment. Green Cleaner suffocates pests and their eggs without the use of harmful chemicals, ensuring clean, healthy plants from seed to harvest. Perfect for organic gardening, Green Cleaner is easy to use, biodegradable, and EPA-exempt. Protect your fruits, vegetables, and flowers with confidence—apply anytime, even on harvest day, for thriving, pest-free crops. Learn more: CentralCoastGarden.com
MiiM Horticulture
Miicrobial Mass Pro MIICROBIAL MASS PRO from MIIM Horticulture is a microbial product specially developed to maximize plant yield using five bacterial strains shown to promote plant growth and enhance microbial life in and around plant roots. Suitable for soil and hydroponic systems, MIICROBIAL MASS PRO increases the bioavailability of phosphate, calcium (Ca), and iron (Fe) to the plant through the use of phosphate- and calcium-solubilizing and siderophore-producing bacteria. Ask for MiiM Horticulture at your local grow shop. Distributed by Quality Horticulture. For more info, visit Qualityhort.com
14
MARKETpLACE Biobizz Liquid Nutrition Grow, Bloom & Max It Out
Discover PRO-MIX® CCX AGTIV® REACH™
Biobizz’s trio of organic liquid fertilizers delivers a full-cycle feeding program designed to bring out the best in your plants, naturally. Bio·Grow is a foundational growth fertilizer made from 100% organic Dutch sugar beet extract. Rich in natural sugars and potassium, it feeds soil microbes and boosts vitality from seedling to harvest. Expect lush green growth and strong root development. As plants transition to the flowering stage, Bio·Bloom steps in with the perfect balance of nitrogen, phosphorus, and potassium to support vibrant blossoms and fruitful yields. For the final flourish, Top·Max enhances flower size, nutrient uptake, and aroma. Packed with humic and fulvic acids derived from ancient Leonardite, it unlocks minerals and supercharges plant metabolism for full-bodied flavor and aroma. Together, this trio powers plants through every stage the Biobizz way: clean, sustainable, and packed with life. Check out Biobizz.com for the full range of products.
Divine Pine
PRO-MIX® CPX AGTIV® REACH™ is a 70% coir and 30% perlite blend designed for high porosity.This formulation improves the root system by increasing aeration and drainage. By combining premium coir with horticultural-grade perlite, a lightweight medium with excellent porosity is created. This blend enables high-value crop producers to feed their plants with confidence, minimizing the risk of overwatering. Choose PRO-MIX® CPX AGTIV® REACH™ and provide your plants with the perfect conditions for thriving growth! Go to PTHorticulture.com for more info.
Canna Country 30, also known as Divine Pine, is a mountain-grown favorite renowned for its massive vigor, lush leaves, and beautifully balanced structure. She’s remarkably resilient to pests and disease, making her one of the most rewarding cultivars to grow. In the garden, she’s easy to love and even easier to work with. Her standout traits - flavor, form, beauty, density, and resilience - shine through in her offspring, making her a go-to in Canna Country’s breeding work.Whether expressed as a “he” or “she,” CC30 holds a prime place in their stable, and they’re thrilled to continue exploring her full genetic potential. Divine Pine crosses are available at AlpineSeedGroup.com
15
12TH EDITION
PREMIER GROWER’S CONFERENCE & EXPO • SINCE 2017
MA ST E R GROWERS • RETAIL BUYERS • SUPPLIERS • EXTRAC TORS • MANUFAC TURERS • D ISTRIB UTORS
GR WUP
CONFERENCE AND EXPO JANUARY 20-21, 2026
VANCOUVER CONVENTION CENTRE • VANCOUVER, BC PRESENTED BY
2,200+ ATTENDEES • 120+ SPEAKERS • 120+ EXHIBITORS • 35,000 SQ. FT. EXPO • BEST GROWERS IN CANADA
GROW UP RETURNS TO BC EARLY BIRDODAY PRICINGunStilASeVptemE beTr 30, 2025 ns Early bird run’ Now. Do t wait. Book
EXECUTIVE CONFERENCE SEED EXCHANGE SPEED NETWORKING CANNABIS CHAMPIONSHIP
HOTTEST CANNABIS BRANDS 2-DAY CONFERENCE & EXPO NETWORKING PARTIES 100+ RETAIL BUYERS
RESERVE YOUR BOOTH TODAY
1-866-GROW-UP-1 • ONTARIO • BC • ALBERTA • WWW.GROWUPCONFERENCE.COM
MARKETpLACE Quest Hi-E Dry 140 Efficient. Portable. Built to Perform. The Quest Hi-E Dry 140 delivers serious moisture removal with industry-leading energy efficiency, powered by patented M-CoRR Technology. Designed for growers who require power and flexibility, this portable unit is easy to move and install in a variety of cultivation spaces, including flower rooms and drying rooms.The Hi-E Dry 140 puts precision climate control on wheels, so you have extra dehumidification power ready when you need it. questclimate.com
Specialized Predator Mite Solutions Spidex (Phytoseiulus persimilis), Spical (Neoseiulus californicus), or a combination of the two are highly versatile and practical in almost all situations. Phytoseiulus persimilis, found in Spidex Vital, Spidex Red, and Spidex Boost, is a type 1 specialized predator mite particularly adapted to hunting in heavy webbing. It also has the highest numeric response to spider mites. Unlike other predatory mites, the Phytoseiulus persimilis does not require specialized plant hairs to lay eggs, so it is better able to reproduce on plants lacking these hairs, such as cannabis or many ornamentals. Visit Koppert.ca to discover how to select the ideal predators for your plants.
Botanicare Cal-Mag Plus
Biobizz World Wide Organics
Botanicare® Cal-Mag™ Plus is a highly fortified calcium, magnesium and iron plant supplement formulated to correct common deficiencies. Supplementing your preferred nutrient program with Cal-Mag Plus is strongly recommended when using reverse osmosis water and when growing in coco coir-based medias to compensate for natural calcium draw. Cal-Mag Plus can also be applied as a foliar spray to further enhance growth. Ask for Botanicare at your local grow shop. Distributed by Quality Horticulture.
Biobizz World Wide Organics has championed sustainable, plantbased agriculture since 1992. Starting as a small family business in Groningen, the Netherlands, it now operates in 70 countries, with Hydrofarm as its premier U.S. distributor. Biobizz produces high-quality plant-based fertilizers to deliver outstanding results while minimizing environmental impact. Guided by a vision of a healthier Earth, it promotes natural farming, self-sufficiency, and sustainability, retaining its family-like atmosphere despite becoming a global leader in plant-based solutions.
Check out Qualityhort.com for more great products.
Visit Hydrofarm.com to learn more.
17
SunBlaster Nano GrowLight Garden The SunBlaster Nano GrowLight Garden is a simple, passive hydroponic growing system with full-spectrum, dimmable LED lighting—no pump or app required. Perfect for growing herbs, vegetables, fruits, or flowers indoors, this feature-rich grow light boasts adjustable light height and angle, a natural white LED spectrum, and an automatic timer with 8– to 16–hour settings. Easy to clean and ready to use out of the box, it supports customizable growing media and connects via USB or AC adaptor for added flexibility. Check out Hydrofarm.com to find out more.
SILICBASTIC is coming soon to strengthen and improve the health of your crops! SILICBASTIC contains a high concentration of a stable and plantavailable form of silicon. Silicon is not an essential element, but it plays some interesting roles for plants! Plants incorporate silicon into their cell walls, creating a stronger physical barrier that helps them resist mechanical and physical damage, such as wind or the weight of fruit, while also improving their overall strength and increasing their resistance to biotic stress and environmental challenges. Silicon will even enhance nutrient uptake, thereby increasing crop yield and quality. Add SILICBASTIC and increase the resistance of your plants! Visit ATAMI.com for more information.
MARKETpLACE General Hydroponics® FloraSeries® With FloraSeries® from General Hydroponics, growers have a precise and consistent method to meet their plants’ nutrient requirements. By adjusting the combinations of FloraGro®, FloraBloom®, and FloraMicro, growers can customize nutrient delivery to suit various growth stages and environmental conditions. With a proven track record dating back to 1976, FloraSeries exemplifies General Hydroponics’ commitment to providing growers with reliable and effective nutrient solutions. Ask for General Hydroponics at your local grow shop. Distributed by Quality Horticulture. Learn more: Qualityhort.com
Gavita Pro RS 2400e LED The Gavita® Pro Pro RS 2400e LED produces 2400 μmol s-1 PAR and an impressively efficient 3.0 μmol/J, and delivers a broad white light with an enhanced blue spectrum, which some studies show may intensify terpene and cannabinoid profiles.This powerful, full-spectrum light source is intended for full-term plant growth from the vegetative stages to higher-light-requiring bloom and finishing stages. Ask for Gavita at your local grow shop. Distributed by Quality Horticulture. Visit Qualityhort.com for more details.
18
BY HALEY NAGASAKI
Professional POV
Genevieve Newton
Farm Supervisor, Mera Cannabis
F
rom Saskatchewan to Alber ta, then east to New Brunswick and now Ontario, Genevieve Newton refines her skills with every move she makes. Now, with seven years in Canada’s regulated cannabis industry, she’s taken on her biggest challenge yet – overseeing 50 acres of outdoor cannabis as Farm Supervisor at Mera
Cannabis in St. Thomas, Ontario. To indoor growers, she says get outside, and to corporate cannabis, she’s in, but only if it works with her lifestyle, keeping the passion alive while avoiding burnout. The Prairie-born Indigenous grower aligns work with personal purpose, and three months into her new role, riding tractors and toiling in the torrential rain and blistering sun, Newton is loving every minute as a ganja farmer. Here’s what she had to say from her Jeep office in the field.
20
How is the cultural aspect of the job, along with farming outdoors and working in the elements, unique from an indoor position?
to start planting at the end of May, then we had an entire month of heat. It’s not ideal to be planting in 30-degree weather; we were praying for rain.
GN: This morning, we were recognizing that today is Indigenous Peoples’ Day. I work with a lot of temp people from different cultures. So, not just today, but every day, we’re teaching each other about different words, different foods, and about what smudge is, and teaching people why we smudge – for protection and for cleansing. To clear the air and to keep everyone and everything happy and healthy.
But the best thing you can do before hitting the ground is have them absolutely as healthy as possible so that they can withstand that kind of drought stress, that kind of heat stress. The wind all of a sudden decided to be crazy for a whole week. I’d race there in the morning and be running out there to make sure everyone’s still standing, and day after day, they’re still standing. Weed is resilient; I’m impressed by these plants. A bad day growing outside is still better than a medium day growing indoors.
Working outdoors is not for the faint of heart because you have to be willing to be out here in all sorts of weather conditions; you need to really love nature.
On the 100-acre farm, how many acres are in cultivation?
I started out here at the beginning of April, so we still had snow. May was just complete rain, rain, rain, here. We couldn’t get in any of the tractors – the disker, the cultivators, the tillers – nothing. We couldn’t do anything to the ground, so everything was late going in. I had wanted
GN: I’d say we’re going to be taking up about half of that this year. So, 50 acres and then the other 50 we’re amending with organic inputs under the guidance of a consultant and scientist, and it’s like a three-to-five-year plan.
PROFESSIONAL POV
ffoorr mmee e e l l t t t t a a b b a a s s a IItt wwa aatt aass h h t t e e s s u u o o t t e e d ttoo ddeecciid ee II ddiidd,, c c n n o o t t u u B B . . e e n n i i mmeeddiicc yyssiiccaallllyy h h p p e e f f i i l l y y m m d iitt ssaavveed There are different strains going in first and then second. Because we have one tractor and one planter, you can only get so much done in a day. I received unrooted clones from a nursery, and we rooted them in an indoor facility and then transported them two weeks later into the hoop houses, and they acclimated fantastically. “The Queen of Clones”; this year, I earned that title because I got 35,000 at once, while having to train a couple of people so that you could start being in two places at once, right? As soon as they moved into the hoop house, there’s another 35,000, so that will stagger the harvest. They’re getting two weeks of veg time and then out into the field. I’ve been working with the guys from the nursery, Rick and Brad. They’ve been amazing at helping me, supporting me, guiding me. So, I’m picking it up; everything that I can get. It’s not my first rodeo with large-scale cannabis, but it is my first time using tractors, and I’m becoming a full-time farmer – a ganja farmer.
Let’s talk a little bit about your experience and your history. You were Canada’s 2023 Top Grower. You’ve just been headhunted. How did all of this come to be? GN: I will start with when I was young and in my twenties, weed wasn’t even a thought in my mind. I’m from that generation where it was very taboo, just like any other drug. And I went into social work. I started my degree in Regina, but then ended up moving to Edmonton, and I finished over at the University of Alberta. That’s where I started my work with children and youth. I did that until 2018, then I decided to quit family services. I was a couple of years into having been diagnosed with a type of ulcerative colitis, and marijuana was offered to me at a desperate time. And at that time, I was four years sober from all drugs and alcohol. It was a battle for me to decide to use that as medicine. But once I did, it saved my life physically. It doesn’t cure everything. But for the stomach issues, it cured it better than any pharmaceutical. It was so lifesaving to me and valuable. 21
DLI ZENITH 900W
Full Spectrum
Unsurpassed Cooling
Uniform Light Distribution
Low Degradation
Visit our website:
Redefine Grow Light Designed and made in The Netherlands
WWW.DLI.NL
PROFESSIONAL POV
Shout-out to all the womeng still grindin in cannabis Home grow
To say I came in hot is an understatement. I want to learn everything about it. I started putting it in foods and infusing it in different oils and butter. And I started growing because it got to be expensive. I love growing flowers and thought that weed is just another flower. There wasn’t a lot of info at the time, and that’s the reason I started making these ridiculous YouTube videos on how to use an Instant Pot to infuse your oil, where you can decarb it at the same time and not have any smell if you’re in an apartment. Then on social media channels and podcasts, people wanted to interview me about home growing. That’s how I got my start. Which brings me back to 2018 when I quit my job as a social worker and became a horticulturalist.
Tell us about your time home growing in New Brunswick. GN: I moved to New Brunswick on another beautiful farm, 66 acres, on the same land as the lady that turned out to be my best friend. Best case scenario, again.
My passion is home growing, and I want people to know that I’m still home growing.
Last season was my biggest harvest. My biggest plant – I got one kilogram of baggable bud off of it. I’ve been growing outside since I lived in Edmonton, so I had to get used to the different climate in New Brunswick. I love the climate, it was better. Longer season, the flowers look better, the structure is better. But as soon as everything starts to get nice, hurricanes start hitting. My plants get really big, and I had a few huge stalks that broke in half. The second year I prepared for it, I built a few structures, but I had these CBDs in the ground that were bigger than me, and they were flattened in 120-kilometer winds, and I ran out there in my pink robe, propping them back up with a wheelbarrow and cement blocks. Last year, I built a Hügelkultur in a pallet-sized box. I built these structures with pieces of lumber and netting. There was zero loss because they were completely caged in. My passion is home growing, and I want people to know that I’m still home growing. My New Brunswick genetics traveled all the way with me like VIPs, and they are doing great. So, I might flower some things out! Shout-out to all the women still grinding in cannabis. 3
23
BY ANNE GIBSON
Isn’t harvest time the most anticipated reward for growing an edible garden?
Harvesting
tips for Vegetables, Herbs & Flowers
24
HARVESTING TIPS
I
sn’t harvest time the most anticipated reward for growing an edible garden? Picking homegrown produce for meals, medicine, and herbal teas is one of life’s joys. These are a few techniques I use to extend the harvest, optimize yields, flavor and nutrient value, and minimize waste.
Harvesting root crops in the waning moon has helped me prolong their storage life, as they are less likely to rot. This is also an ideal moon phase to collect seeds for storage and drying Timing the Harvest
Regrowing Food Crops After Harvest
Maximize Nutrient Value – Harvest food as close to eating to reduce the loss of valuable nutrients. For example, snow peas lose 50% of their vitamin C within the first twelve hours after picking. Alternatively, blanch and snap-freeze surplus fresh produce immediately after harvesting to preserve the nutrients.
Many crops can be replanted for a second harvest. A few of the vegetables and fruits I regrow from plant material include:
Harvest Early Morning – Leafy greens have the highest water content early in the day before the plants start transpiring. A quick rinse after harvesting and storing in the fridge helps preserve nutrients. It may be more convenient to pick salad ingredients or leafy greens late in the day before making dinner, but this is when they are often heat-stressed and may be wilted. Extend Storage - Harvesting root crops in the waning moon has helped me prolong their storage life, as they are less likely to rot. This is also an ideal moon phase to collect seeds for storage and drying. Optimize Flavor and Medicinal Potency of Herbs – We don’t just pick flavor-packed herbs to improve the taste of our meals. They also have medicinal properties, and the harvesting time affects their therapeutic vitality. Maximize the nutrient value, phytochemicals and essential oils when making remedies. Harvest herbs like basil, lemon balm, and mints before they flower or snip the blooms off as they form if not saving seeds. If the goal is to dry herbs, the best time is just after the full moon. The sap is at its highest, but the energy and moisture in the plants are being drawn down into the roots, making it easier to dry the leaves. Berries and Fruits – The best time to pick is when they are fully ripe, when natural sugars are highest, producing optimum flavor and nutrient value. Flowers – The ideal time to pick flowers for maximum fragrance and phytochemicals is early morning when the dew has dried on the petals. With edible blooms like nasturtiums, dianthus, and cosmos, pick just before eating as garnishes in salads or baking to maximize flavor and nutritional value. Seeds – Collect seeds for saving when they are fully mature, and the pods are crisp, brown and dry. This indicates they have the maximum nutrients for successful germination and the next generation of plants.
•
Leeks – Slice the stem at the base but leave the roots and about 1-2 cm of the stem in the soil. A new leek regrows much faster, so you get two for the price of one!
•
Spring Onions – Leave these vegetables in the soil and snip the outer leaves from several plants, rotating around the garden. This allows each plant to photosynthesize and keep producing leaves for longer.
•
Celery, Asian Greens and Lettuce – Regrow these leafy greens in two ways. Cut above the stalk base of these leafy greens and leave the roots in situ in the garden bed or pot. After liquid fertilizing, new leaves appear. Alternatively, add the base to a shallow plate with a bit of water, and then, once new roots and shoots have grown, transplant it to a pot or the garden.
Techniques to Optimize the Harvest One of the ways I maximize the value of each plant in my garden is to use different edible parts during the growth phase. This depends on the vegetable, fruit, or herb but can include the leaves, fruit, seeds, stem, immature seed pod, flowers, peel, bulb, or root. These are a few examples:
Root Crops I use a cutlery fork to gently lever out root vegetables so I don’t damage delicate roots or flesh. Carrots: When thinning seedlings, snip off the immature roots and add these raw, young shoots to salads. After harvesting the mature carrot root, trim the leaves immediately to reduce moisture loss, then rinse and use the tops in pesto or chop and freeze to make soup stock. Radishes: These crunchy root crops offer so much more than just a peppery salad ingredient. Harvest young, tender leaves as salad greens while balancing enough solar panels to encourage healthy root development. The flowers are a delicious addition to salads, provided they don’t form seed heads. Radish plants produce a huge quantity of seeds on long stems with pods. The seeds are a great substitute for mustard seeds; add them to pickled vegetables, along with some of the young seed pods. 2525
Celery regrowing from base with roots
Many crops can be replanted for a second harvest
Cut-and-come again lettuces and leafy greens planted closely to optimize space
Harvest carrots when young and sweet and use the tops to minimize waste Large striped green yellow marrow fruit ready for harvest - a little too late 26
LOW-TILL VS. NO-TILL
I’m out daily collecting fresh ingredients, even in small quantities, as this helps stimulate the plant to produce new leaves, flowers, and pods Beetroot: The young beet leaves are delicious and colorful additions to our salads. Chop up the pretty red or purple stems as a substitute for rainbow chard. Add them raw to salads or cook the stems in stir-fries and curries. Sweet Potatoes: These grow year-round in my garden, and we dig up young tubers as needed. I use tender new leaves in curries, stir-fries, and salads, both cooked and raw. Turmeric and Ginger: Instead of digging up the root ball in winter when the leaves and stems die back, leave it in the soil. Harvest immediately before cooking or making tea to preserve nutrients, flavor, and medicinal properties. Use a knife to slice off a knob, and let the ‘mother’ plant focus energy on next season’s harvest. Beans and Peas: The pods, young leaves, and tendrils of sugar snap and snow peas are delicious raw or lightly cooked. When harvests are abundant, pick a few edible flowers for salads and sacrifice the future peas. Extend the harvest for these vegetables by sowing both dwarf/bush peas and beans, as well as climbers, simultaneously. The bush varieties are fast to flower and produce pods for a quick harvest, while the pole beans or peas are still climbing their trellis. Broccoli and Broccolini: Maximize these winter vegetables by harvesting the flower heads, side shoots, tender stems and young leaves. Save the mature seed pods for future seed sowing as microgreens during the warmer months when the main crop won’t grow outdoors. Pumpkins: Pumpkins are ready to harvest when the stem closest to the fruit turns brown. Leave at least 8-10 cm of the stalk, wash and dry well, and then cure the pumpkins for long-term storage. As most gardeners know, pumpkins and squash self-sow easily from food scraps. Scrape out the fresh seeds and sow them in a clump to encourage pumpkin sprouts to germinate in one spot. When they have their first two smooth leaves, snip the stems with scissors just
above the soil and enjoy raw in salads like microgreens, or cook them in omelettes, stir-fries, curries, soups and casseroles. Alternatively, dry and season scraped-out seeds, then lightly toast them in the oven for a protein-rich snack. The pulp and stringy flesh go straight into soups. Cucumbers, Zucchini and Squash: These fruiting crops are heavy producers. Cut the stems with a sharp knife before the zukes, cukes, or squash grow too large. Zucchinis can rapidly grow into marrows within days during the new moon phase, especially when soil moisture and sunlight are abundant. Harvest the male flowers to stuff with savoury fillings or add them to salads or stir-fries. Leave the pollinated female blooms to finish fruiting. Herbs: Harvest herb leaves throughout the season to encourage vegetative regrowth before flowers form.
Harvesting Tips Save Planting Space: Loose-leaf cut-and-come-again lettuce varieties can be planted up close. The outer, larger, mature leaves are harvested one at a time from several plants to make a salad. Harvest Often: I’m out daily collecting fresh ingredients, even in small quantities, as this helps stimulate the plant to produce new leaves, flowers, and pods. Pick Small: I pick leafy greens when young and tender. Beetroot and carrots are best picked before they grow too big, as their texture becomes woody and they lose their sweetness. Beans and peas become tough when pods grow too thick and large. These techniques have provided me with a bountiful harvest, and I hope they help you, too. 3
BIO Anne Gibson, The Micro Gardener, is an author, speaker and urban garden community educator on the Sunshine Coast,
in Queensland, Australia. Anne is passionate about inspiring people to improve health and wellbeing, by growing nutrient-dense food gardens in creative containers and small spaces. Anne regularly presents workshops, speaks at sustainable living events, coaches private clients and teaches community education classes about organic gardening and ways to live sustainably. She has authored several eBooks and gardening guides. Anne shares organic gardening tips and tutorials to save time, money and energy on her popular website - TheMicroGardener.com. 27
BY ADAM CLARKE
s i b a n n a C g n i y Dr le l a c S y n a at
D
rying cannabis is, without question, the most crucial step in all growing operations, and it is often the most neglected. People spend eight weeks or more growing their plants, only to treat them horribly during the drying process. Drying is not a particularly special process; however, it does require time and attention to
maintain specific parameters for your dry room’s environmental conditions and airflow.
I often hear the industry talk about ‘60°F at 60%’ as the optimal conditions for drying I often hear the industry talk about ‘60°F at 60%’ as the optimal conditions for drying. I know these conditions work well; however, I can’t say that these are the best conditions for drying cannabis. These conditions are the lowest temperature and humidity that off-the-shelf “commercial/residential” air conditioning can deliver to a space. Old-school growers always speak of “low and slow” when it comes to drying, and this approach also aligns with the lowest temperature they can easily maintain throughout the year. Sixty percent humidity is already reaching a point where the surface tension of a cold surface in the room will overcome the vapor pressure. When you hit 70%, we start to see condensation form on surfaces. As soon as you have condensation, you have a risk of mold. I recommend never letting your dry room approach 70% humidity; in fact, even 65% is too risky. Condensation is a terrible thing in a dry room as it offers mold a space to thrive. If our goal is “60°F at 60%,” we need to consider how we will achieve and maintain those conditions. To size equipment properly, you must determine your wet cannabis weight and dry cannabis weight. The final weight will be about 20-30%
28
of the starting weight. Depending on strain and bud density, the final water content removed varies. We always strive to design the system to remove the maximum potential water content. We need to remove 25% of the water content in each of the first two days, and then we need to slow down the remainder of the removal over 7-14 days. By happenstance, 60°F at 60% allows cannabis to remove a high moisture content in the first couple of days and not over-dry the crop in the remainder of the time. After day two, your equipment may remove too much moisture; in this case, you will need a humidifier. If you can not over-dry the space, then a humidifier isn’t required. If we start with 120 pounds of product, we need to size the system to remove 24 pounds per day (120 pounds* 20% = 24 pounds per day). This means we need to remove a pound of moisture per hour. It’s essential to have a separate air conditioner and dehumidifier so you can set one for temperature and the other for humidity. Remember, every time the air conditioning turns on, the moisture in the room will decrease. It’s vital not to oversize the air conditioning, or it will overdry the space when it turns on. In general, it’s best to size the system very close to your load in small rooms;
DRYING CANNABIS
Remember, every time the air conditioning turns on, the moisture in the room will decrease
oversizing or undersizing will cause you grief. In the first two days, I prefer to see the product dry a bit faster and not reach 70% RH, then take my time. Again, 70% is hazardous for mold growth and microbial development. As with all HVAC systems, I recommend a quality building automation system, such as reliable controls, so you can customize your setup and maintain optimal conditions every time. All proprietary or “grow room” specific systems tend to be suitable for small-scale grows, but please don’t use these residential grow controls and expect to maintain perfect conditions. Drying isn’t rocket science, but it does require some time and effort. I also recommend having a proper setup for curing available. In the past, we have used products like C-vault, which are stainless steel containers that require periodic burping. The modern version is a “grove bag” or similar that allows moisture to flow, but only at a defined rate. Cannabis drying is the last and most crucial step in your grow. Don’t rush and abuse your flower out the door. Take your time and relax; you will be rewarded for your patience. 3
Drying isn’t rocket science, but it does require some time and effort.
BIO Adam has provided planning and design services for
cultivation and processing facilities over the last seven years with Stratus. His projects involve outdoor cultivation, indoor cultivation, drying, processing, extraction, storage, bottling and packaging, and more. Living on a hobby farm, Adam loves all plants, including flowers, vegetables, and microgreens, but is most passionate about hemp and is in awe of the fast-growing plant and all of the benefits it offers to humans and the environment alike.
29
BY XAVI KIEF
Using The Paper Bag Method to Preserve Flavor and Effect 30
THE PAPER BAG METHOD
F
or cannabis and other herbs grown for their essential oils, pre-dawn harvesting is ideal. It’s at this time during their sleepwake cycle that desirable phytochemicals are most abundant in the trichomes. Unfortunately, dewy conditions in the late summer and fall can create moisture issues (namely mold) in the plants if they are not able to dry out. To mitigate this, I
use a harvest strategy that combines a traditional approach to herb drying in paper bags or baskets with a typical “trim and hang in the dark” method. For optimal results, a two-day window with no rain in the forecast is ideal for using this tactic.
Day 1: Quality Control Check and Harvest Pre-Staging Assess plants in full sunlight about 20 hours before you plan to harvest. Ruthlessly (with very clean and sharp tools) remove plant matter showing any signs of damage. All of this goes into a deep bucket with a lid or bag held closed with a clip as you move around the garden. You can deal with this material (through whatever destructive means you choose) later once all the good stuff has been safely taken in and processed. After cleaning yourself and your tools, return to the plants and defoliate the majority of the remaining fan leaves. You have the choice to keep the best ones for eating (adding a little more green goodness into your diet) or make them into food for garden microbes and a future generation of plants. It’s a perfect time to brew up some FPJ (fermented plant juice) from these leaves, especially if you’re running an indoor cycle before next spring and could benefit from practically free, bespoke nutrients. If you have no direct use for the leaves elsewhere, one option is to defoliate and drop them directly onto the garden soil. It’s the same as any other natural autumnal process, as they form a mulch layer that can be beneficial for soil renewal and the health of microbial populations. Should that be too untidy for your situation, plants that are small enough may be carried to a spot where the leaves will be welcome when merely dropped. Alternatively, lay out a sheet or use a cardboard box or tote to collect them and then carry them to a compost bin or pile. Bearing the next day’s expected weather report in mind, seek a place where air circulates well, out of the direct sun. This will be your staging area for post-chop, pre-trimmed plants. String up a temporary ‘laundry line’ that can bear the wet weight of your harvest.
Day 2: Chop, Drop, and Roll Using a wheelbarrow or rolling cart saves a lot of work and effort while bringing in the harvest. You can choose to travel a row or among beds and pick or cut everything into this bin as though you were moving down a supermarket aisle. Employing a reusable tarp or old sheet as a liner can help keep the harvest clean from dirt and fungal spores. Large paper garden waste bags are handy for keeping individual plants separated. If a plant will fit entirely inside one, put it over the plant and gather the opening of the bag around its base without letting the paper touch the dirt. Holding firm with one hand, use the other to chop the stem. Mark the bag with the name of the plant.
Tip:
Tie or tape the lid of a marker to a thick lanyard or sturdy string to hang from a belt or around your neck, allowing you to use it one-handed. (Safety first: if you work around anything with a motor, like if you’re driving out to a guerrilla grow spot on an ATV or tractor, don’t put it around your neck.)
Bigger plants can be collected the same way, by sectioning parts or individual branches into a bag and then cutting them from the central stalk.
Grade As You Go Medium-sized paper grocery bags, or even small “packed lunch”-type bags, are good for separating any questionable or damage-adjacent flowers from the most pristine branches. A simple rating system (e.g. Grade A, B, C) in combination with the plant’s name keeps things nicely organized. It can also be helpful to use other symbols, such as stars or exclamation points, to mark the bags containing top branches if large plants are brought down piece by piece.
Hang ‘em High Hang your bags up on the line you strung the day before, leaving a gap open at the top to allow moisture to escape. Now that you have your plants suspended upside-down in paper bags, the UV rays from the sun are blocked, preventing the degradation of the cannabinoids. Volatile oils are better retained than they would otherwise be as dawn turns to day. 31
THE SMART STANDARD FOR COMMERCIAL DRYING, CURING & STORAGE OPERATIONAL EFFICIENCY, HIGHER RETURNS, AND GMP CONFIDENCE GMP Readiness: Cannatrol systems stabilize environmental factors, ensuring repeatable post-harvest processes that maintain product integrity and compliance while enhancing credibility in medical, pharmaceutical, and export markets. Greater Yield: Cannatrol systems prevent over-drying and unnecessary weight loss through controlled drying and curing control, allowing cultivators to retain more sellable product per harvest and directly increase profitability. Labor Efficiency: Automated environmental control reduces the need for endless monitoring of cure rooms and product minimizes product touch points. Call us today 802-738-0709 Visit us at Cannatrols.com email us inquiry@cannatrols.com ©2025 VT Dry & Cure Technologies, All Rights Reserved
THE PAPER BAG METHOD
You won’t keep the plants here for long, but using this process affords time for all of the plants to start drying while you work your way through breaking them down individually. Furthermore, the marked bags keep plants organized and inventoried while they pass to the next steps of trimming and hanging.
While the paper bag method isn’t for everyone, it’s a technique that allows outdoor growers to harvest in sync with the plant’s circadian rhythm and slow down degradation
Paper bags also provide a privacy bonus, keeping curious eyes off your plants while they hang somewhat innocuously in an open garage or side yard. Carry on with your harvest process. If you’re running out of time to get everything trimmed to your liking and hung up in the dark before the day is over, take the bags inside to prevent the dew from condensing on them the following morning. Spread them out and dehumidify the environment as much as you can. There’s a risk of mold from trapped moisture in the bags, so you may need to sacrifice some terpene preservation and cut slits or holes in the paper, possibly even cutting off the square bottom entirely, to allow more water to escape into the air.
Special Note to Growers in Especially Dry Climates Should you be lucky enough not to have to worry about high humidity, to the point that your herbs could easily become too dry too quickly, modifying the method by keeping your plants strung up in bags might just be your ticket to conserving moisture and volatile compounds.
Do’s and Don’ts
of the Paper Bag Method: Do: • • • •
Overestimate how many bags you’ll need, and have extras Be consistent with labeling and grading standards Compost or use the bags as a mulch layer on garden beds being shut down for winter Use the natural ‘V’ of a cut branch or a clip to keep the tops of flowers from being crushed at the bottoms of the bags
Don’t: • • •
Pack bags more than about 50% full Let paper bags get wet or dirty before or while the plants are in them Forget about any plants still in bags the next day because they are “out of sight, out of mind”
Final Thoughts While the paper bag method isn’t for everyone, it’s a technique that allows outdoor growers to harvest in sync with the plant’s circadian rhythm and slow down degradation. I’ve found the method takes some stress out of timing the chop perfectly and lets me see fairly quickly if I’ve estimated and prepared enough indoor drying space. That ultimately informs decisions about what goes where, how much is going to be frozen instead of dried, and what takes priority when the clock (or labor energy) is running down on a day’s worth of trimming.
Paper Bag Harvest Method Checklist: • • • •
Large ‘lawn waste’ paper bags or other paper bags appropriately sized to fit your plants Big, bold marker on a string Strong sheers Rope, laundry line, or other sturdy drying rack 3
BIO Xavi Kief is a writer, (re)searcher, and lifelong learner with their hands in the dirt and imagination traversing the universe. Seeking always to deepen and integrate their connection with the living planet and its diverse inhabitants, Xavi finds joy by infusing their practical and playful approach to cultivation with a healthy dose of science. They grow food and medicine for their family and community on the northeast coast of Turtle Island. Instagram: @xavi_kief
33
BY HALEY NAGASAKI, IN PARTNERSHIP WITH CANNA
with Award-Winning Medical Grower, Formulator, and CANNA-Backed Consultant
F
rom Sherbrooke to the Karma Cup podium, Jose Dominguez has spent over two decades turning cultivation into craft and passion into precision. A medical grower since 2003, Dominguez has built a name rooted in consistency, community, and care. He’s the mind behind Neptune brands, Panhash and Mood Ring, the holder of 46 Cannabis
Cup awards, and the founder of Cannacopeia Consulting. Jose’s story is one of intention—guided by science, supported by CANNA, and driven by a belief that great cannabis begins with climate, watering, canopy, and a whole lot of love. Jose Dominguez entered the medical cannabis industry in 2003, at the same time as his introduction to CANNA as a product line of medium-specific nutrients. He spent 12 years working in retail, where he discovered the standardized product.
“That was very important because, originally, I was growing for medical purposes for people who had pretty severe illnesses,” he says. Rather than mixing recipes with limited knowledge, Dominguez leaned into the consistent, high-quality CANNA line, crafted by Dutch chemists. Born and raised in Sherbrooke, Quebec, as soon as the medical market opened in Canada, Dominguez began growing for patients who are all close friends. “Some of them, I was with them until their last day, and some of them are still around today,” he says. Paired with working in head shops and then a hydroponic store, he cultivated high-quality products using the CANNA lineup, coaching customers about how to grow better cannabis without looking any further. At the time, there were fewer than 500 registered cannabis patients in Canada, most of whom had a designated grower. The rarity of his role propelled his name and reputation. Dominguez also refined his craft with the expertise of CANNA advisors in the past. His goal was to introduce different cultivars to patients to improve their lives by harnessing several beneficial effects. Standardization, he found, was key to building a variety of genetics under the same climate, growing medium, and nutrient inputs. This is how he developed his expertise during the MMAR medical cannabis program before 2014.
34
SEED TO SUCCESS
Award-Winning Medical Cultivator In 2010, Dominguez began winning Cannabis Cup awards, a total of 46 in various product categories, which led to the creation of his two leading brands: Panhash and Mood Ring. In 2014, Karma Cup gained mainstream recognition and became the premier competition for medical products in Canada. “I cleaned up three awards at the first edition, and from there, mostly every year, I was granted a few first-place awards at the Karma Elite,” he explains. He won every category, including vape pens, solventless extracts, edibles, hash, flower, and CBD, as one of the pioneers in the industry. Dominguez calls the era between 2003 and 2014 “an education crusade” because he was working for himself, his patients, and the community, winning awards, rather than benefiting corporate interests. He became an independent sommelier and was later among the first licensed producers in Canada, licensed in 2016 with Canveda. He then moved on to Neptune Wellness Solutions, where he exercised expertise in areas such as extraction and formulation, quality control, and R&D.
guez jose domin
“You can ask every grower – the biggest challenge in the room is maintaining the climate at all costs,” he explains. AI is only as good as the equipment being implemented, and the grower is only as good as their fertigation routine. Plants grow differently in each environment, and due to the consumers’ changing tastes and preference for novelty, “as a grower, you always have to innovate… and [as a sommelier] you have to pick what you think is going to be the best.” That’s why the practice of phenohunting should be in the growers’ wheelhouse.
The rule to live by is the one CANNA reps taught him in 2003: Climate, watering, and canopy
“You need to always keep your hand on something, like creating your strains,” he says.
various departmental improvements, while continuing his work in genetics and phenohunting. More important than the grow, however, is the effort you put into it.
Why CANNA?
Passion for the Job
Dominguez says CANNA has always been a good supporter, which is a benefit to the work he currently does in the space with his company, Cannacopeia Consulting. Warmly, he calls his relationship with CANNA “like old family [because] they were there from the beginning to help me and have always been happy for me when I was earning cups.
“A good grower is no one without a good team,” especially when it comes time to harvest, he says. The identity of a product is derived from the drying, curing, and packaging processes.
“I always promote CANNA because I think it’s still one of the best standard nutrients there is on the market. I think there are other strong brands out there, but ultimately, I put my trust into the people I believe have the most extensive and deep understanding of the chemistry of their product. So, for me, CANNA is number one. CANNA is family; that’s what it is.”
In as complex an industry as cannabis, no one survives without intention and a passion for the job. The rule to live by is the one CANNA reps taught him in 2003: Climate, watering, and canopy.
Throughout his decades in the field, Dominguez has acquired a strong set of skills beyond cultivation, spanning engineering, chemistry, and quality assurance. He now spends his time helping people from an educational perspective, focusing on audits and
“Once it’s in batches, it becomes the identity of what you’re trying to create – the vision of your brand,” Dominguez says.
“Three simple words for everyone out there that wants to grow better cannabis,” he affirms. “The rest is your love and passion.” 3 35
BY HALEY NAGASAKI
A
couple of years ago, I star ted a garden at my family’s proper ty in central Ontario. We bought a small poly greenhouse, built a sturdy foundation for it, and turned a Shelter Logic structure from Marketplace into a large hoop house using vapor barrier sheets. A friend in construction gave me rebar and wire fencing
about three feet high to wrap around the enclosure with zip ties. The greenhouse served as a nursery, while the hoop house became a dual-row garden bed using topsoil I had delivered. Truth be told, the dirt was too sandy to begin with, and after two seasons of sitting fallow, I decided to rework the space. One row got the hügelkultur treatment by installing a raised bed with decaying matter from the property. The second became the site of my Ruth Stout (also known as a “chaos potato”) garden bed.
What is the Ruth Stout Method? Drop sprouted potatoes on the ground, cover with hay, soak the hell out of it and walk away, to put it plainly. I had no idea if it would work, but I’d seen others online be successful with the seemingly foolproof method. With some leftover hay mulch lying around, I had nothing to lose! It took about a month before the first shoots appeared, during which time I was convinced I’d failed. Now, as the green stalks poke through the mulch and begin to grow, I’ve been layering hay to support them and provide more room for tuber development. This is why the Ruth Stout method is referred to as “deep mulch” gardening.
Potato Towers You’ve probably seen the trending potato towers online, too. One woman even used a tall plastic laundry basket with holes in the sides for the shoots. So, off to the dollar store I went because I had more eyed potatoes and another bale of old hay to layer, lasagna-style. I didn’t find a tall basket, but I did grab two shorter ones to experiment with. I used sandy soil, added some potatoes, covered 36
it with decaying hay, followed by another thin layer of soil and potatoes, repeating this process about five or six times in each basket. Again, soaking the shit out of it. As of mid-to-late June, my potato stalks are growing rapidly, and the laundry baskets are bursting from the top and out the sides, with green-purple stalks likely from the pink and purple fingerling varieties. In the garden bed are red potatoes and a few Yukon Golds, which I read aren’t ideal due to deeper soil requirements. In any case, they all came from our local CSA grower, so I’ve nicknamed the whole crop “Kyle’s Potatoes.” I’m going to reverse-engineer my potato experiment and dog-ear the most successful varieties at the end of the season.
CHAOS POTATO GARDENING
g n i n e d r Ga
t Ruth Stou d: Potato Methoh well, mulc Throwdown, , and water deeply
Drop sprouted potatoes on the ground, cover with hay, soak the hell out of it and walk away, to put it plainly.
37
CHAOS POTATO GARDENING
“Don’t overthink it; seed potatoes want to grow!” sunchokes are a lovely addition to the edible home garden and make an excellent, elevated starchy food full of gut-bug-feeding inulin prebiotic fiber Pre-harvest We’re still a few months out from harvest, but I’m pleasantly surprised and excited by this gardening hack! One thing to keep in mind with the Ruth Stout Method is sunlight requirements. Potatoes prefer at least six hours of full sun per day. Exposure will boost your yield! If you’re growing in containers, try rotating them if the sun exposure is inconsistent. We had a cool, rainy spring in eastern Canada, so I was concerned that consistently wet conditions would lead to mold or rot beneath the hay. Good airflow helps, so try not to compact your mulch. I also set up a basic sprinkler timer; no explanation is needed! However, overall, I’ve found it’s better to soak deeply once a week or so, weather permitting, rather than doing frequent light watering. Note: I removed the vapor barrier this year for an even more handsoff approach by allowing rain to reach my crops. Finally, consider nearby companion plants, such as calendula, marigolds, and nasturtiums, to ward off pests. Fellow Garden Culture writer Adam Clarke also suggests planting potatoes as a trap plant for cannabis. “Potatoes are a great sacrifice crop to prevent wireworms,” he says. But that’s an article for another day!
Surprise Sunchokes
So far, the artichokes also seem forgiving, but they may not be quite as accessible as the chaos potatoes. No fancy growing media or nutrient inputs, just fallow soil to throw your potatoes on and fresh or funky straw or hay to cover them with. If you’ve got chickens, ducks or rabbits, you can reuse the nutrient-rich livestock bedding as mulch. My theory is that the Ruth Stout Method works on any garden bed, regardless of its condition. Deep mulch potatoes can even be “planted” on a balcony or back deck in dollar store laundry baskets with a bit of dirt scraped off the side of the road.
We also bought a bag of Kyle’s Jerusalem artichokes, also known as sunchokes, and promptly forgot about them. They, too, began to sprout!
Don’t overthink it; seed potatoes want to grow! Offer them a lot of mulch, a little neglect and some space to stretch their roots. Place ‘em in the sun; who says frugality can’t be fun? 3
There’s a garden bed outside the house where hostas and daylilies grow every year. I dug some holes and chucked in my sunchokes. They are now growing tall green stalks!
BIO Haley Nagasaki is a legacy journalist and former B2B mag-
From the daisy and sunflower family (Asteraceae), sunchokes are a lovely addition to the edible home garden and make an excellent, elevated starchy food full of gut-bug-feeding inulin prebiotic fiber. 38
Hostas and sunchokes
azine editor in the Canadian cannabis sector. Now a strategist for Garden Culture Magazine, she drives content and business development, advocating for small-scale organic farming and global community-building initiatives. Connect with her on Instagram @haleynagasaki
Join me as I visit some of the best growers in the world. In addition to giving you updates on the HydroMatrix trials going on across the continent and around the globe, I’ll also be sharing tips, advice, and learnings along the way. Follow me and learn more about HydroMatrix – the only scientifically engineered and thermally refined hydroponic cannabis growth matrix made with 100% compostable, 100% recycled Southern Yellow Pine.
GrowHydroMatrix.com
@HydroMatrix
@GrowHydroMatrix
@HydroMatrix
BY REGI ONETON
ARDENE G D L O Y T IR D A M NOTES FRO
R
s s e n i p p a H HarvensdtHeartbreak
A
a
s I write this, my plants are only ankle-high and still have their zest for life well intact. They are months away from any type of harvest, and that’s if they make it to that point. I whispered that last part because I don’t want my leafy friends to hear any negativity so early on in life. Let me turn up the classical music for them and give them a good
misting while I get into what makes me a happy harvester and what causes absolute heartbreak in the garden and grow tents over in my neck of the woods. Buckle up; it’s the proverbial “angry old man” checking in.
Oh-Oh
The Peak of the Season
Let’s treat this article like a rollercoaster and work our way up before we come crashing down to reality. Sometimes, it just comes easy; you don’t even remember planting zucchini and here before you is a monster of a specimen, spewing out more fruit than anyone could ever eat, leaving you with extras to bless neighbors for miles around. The garden gods blew tiny kisses all summer long, blessing both the plant and the gardener. Life is good, sometimes. These are mostly unicorn events, so enjoy them while you have them, like girlfriends and clean underwear.
The harvest itself is the apex of gardening happiness. Deciding when everything is ready to pluck and filling up stainless steel bowls with whatever the hell you have been blessed with. I’ll find myself looking over at the pile of cayenne peppers taller than my French Bulldog and exclaim, “Wow, all mine and all for FREE”. It’s similar to Easter as a child when you come home from family events with your haul of chocolate bunnies, with enough sugar in your system to plow a field. Something about a decent harvest that feels like a security blanket for me. One that smells like a golden retriever but a security blanket nonetheless. He’s been farting a lot lately, making bedtime challenging. Can I interest anyone in a rescue dog? I kid.
I whispered that last part because I don’t want my leafy friends to hear any negativity so early on in life Another happy little miracle I enjoy is when I fight off all the challenges a growing season can throw at me while still managing a reasonable crop. With seasons and storms getting more challenging, I find myself playing doctor and not the fun kind. Whether it’s managing blight or infestation, it’s a morale boost to save a plant from certain death. Last year the storms were so violent I lost quite a few large trees, but the goddamn tomatoes still made it because Papa is a helicopter parent. If anyone has a 20-inch chainsaw to lend me, I have about three years’ worth of firewood to process. An impromptu “harvest”, if you will.
40
If you have been gardening for any length of time, you know that its challenges are equal to its benefits. Nothing knocks the emotional piss out of me harder than when you harvest a perfect-looking crop, whether it be green beans or Afghani Hashplant and let it go to shit during drying and curing. A little ambient microbial and a few percentage points of humidity in the wrong direction, and you won’t be smoking or eating anything at all. I had a record-breaking plant both in size and yield, but after two days in the wrong part of the house, it turned into a moldy mess that Alexander Flemming would be proud of. I’ll save you the Google search; he discovered penicillin. If you want to feel absolute heartbreak, the kind that teenagers lament over, then toss a quarter pound of cannabis you have been coddling for six months in the trash. The Ganja gods are some of the least forgiving of the plant realm. You’d better
NOTES FROM A GARDENER
Last year the storms were so violent I lost quite a few large trees, but the goddamn tomatoes still made it because Papa is a helicopter parent. If anyone has a 20-inch chainsaw to lend me, I have about three years’ worth of firewood to process. The Joys of Harvest know what you’re doing come harvest time, or you’ll be smoking roaches out of your ashtrays and asking your neighbors for canna handouts.
Canning and Preserving Any bountiful harvest comes hand in hand with some sort of canning or preservation. Any gardener worth his salt has a basement full of Mason jars ready to be filled. A concept that has been around for ages, removing the oxygen while sanitizing the vessel preserves your bounty and means you don’t starve come winter. There is one thing that rings in my head when doing any canning, and that is to make sure that everything is cleaner than a baby’s police record before starting because a case of Botulism, AKA Clostridium botulinum, will send someone to the funeral parlor. And all I wanted to do was enjoy some eggplant! Remember to double-boil all the jars, buy new lids, wash your hands, and salt generously. If you see signs like a bulging or leaking container, unusual odors, or spurting liquid or foam when opened, toss that. Wait… squirting liquid or foam when opened? Me too, Botulism! Me too! Good lord, what’s wrong with me?
Harvesting used to be something my grandmother and I would do together; it’s a good bonding experience and gets the love swelling to agreeable levels. It turns a chore into an event when doing it with people whose company you enjoy. It can bring people together. If you are a loner like myself and you don’t want anyone’s filthy mits touching your Jalapeños, may I suggest turning it into a game? Time how long it takes you to trim an ounce and then try and beat your personal best. I have the fastest scissors in Eastern Canada. I will put my scissors up against any machine; the winner takes the weed. With all four of my grow tents empty and a minimal selection of plants in the ground this year, my focus is more on landscaping and the environment than harvesting anything exceptional. Then again, with the looming cost of replacing my septic tank, growing and harvesting my own food is becoming increasingly necessary. My shitter just crapped out; it would take roughly 200 000 tomatoes to offset the cost, but I am trying to remain positive. This is something you should do in the garden: stay positive, keep planting and harvesting, and enjoy the small victories that nature provides. Have a great season, and may your harvest be bountiful and pest-free, my little bean sprouts. If you come over, just don’t flush. If it’s yellow, let it mellow, as we say in the country. 3
BIO Regi Oneton is a multi-disciplinary artist and daytime executive. He’s been a member of Socan since his first album release
at the age of 20, and is a self-taught audio engineer and self-proclaimed studio rat. Regi is a late-blooming street artist and painter whose works can be found hanging in the offices of Burton and Vans Canada. Long-time contributor to the Under Pressure Graffiti Festival and lover of the Arts. As the years plow forward, he has added botanical enthusiast/plant father to his litany of passions. His interests include writing and spending too much time looking at his phone.
41
BY XAVI KIEF
e p i c e R y b t s e Harv f-Compassion l e S e v r e s e r to P
I can find myself a little sad at harvest, and I don’t think I’m the only one 42
HARVEST BY RECIPE
O
nce you’ve got the growing ‘bug’, it’s hard to picture life without some kind of plant to care for. It’s why so many cultivators have perpetual harvest rotations indoors, or at the very least, a few houseplants and perhaps a windowsill or tabletop herb garden that remains active throughout the year. Perennial
and biennial plants grace our landscapes, and trees, par ticularly evergreens, invite us to believe that life continues even after the sun sets on summer. Still, I can find myself a little sad at harvest, and I don’t think I’m the only one. There’s sometimes a touch of grief for what feels like lost opportunities, the potential that didn’t come to fruition, or the uncontrollable factors that produced undesirable outcomes. There can be a sense of wanting to have made better choices, of having not done enough, of ambition being unmet by reality. Even if I’m feeling generally satisfied by how things worked out that growing year, it’s not always easy to say goodbye to the plants I’ve raised from seed, watched fight through adversity, and flourish in the outdoor growing environment.
Even if I’m feeling generally satisfied by how things worked out that growing year, it’s not always easy to say goodbye to the plants I’ve raised from seed, watched fight through adversity, and flourish in the outdoor growing environment
As a response to this, I have developed a ritualistic mindset when it comes to harvest. Not unlike a death doula or minister of last rites, there’s an honor and gratitude I feel when stewarding an annual plant through the end of its growing cycle. I have deep respect for its change from a living and vital member of a community into something I will consume and be transformed by, both in body and mind.
Harvest and Preserve Whole Recipes One trick I use to make harvesting more celebratory and productive is harvesting by recipe. This approach both highlights the seasonal timing of fresh ingredients and limits the chance of destruction of stored goods by mold, insects, and oxidation. For example, if I am lucky enough to wildcraft or harvest an abundance of mushrooms (or other short-shelf-life produce), I consider which dishes the “future me” would enjoy. I also imagine future events, such as special feasts, gift-giving occasions, and periods of potential “winter blues,” selecting recipes to make those days brighter. There are two main options for harvesting and preserving by recipe. First, you can harvest the other fresh ingredients and cook a massive batch of a favorite recipe. Divide it into containers sized for a single serving, a family dinner, or whatever you’re likely to use up before it spoils—process in a pressure cooker or freeze.
Tip: This works well for dishes that are “saucy,” such
as soups, stews, curries, chili, marinara, ragout for pasta, and condiments like gravies, chutneys, and salsas.
A second option is to dehydrate the entire harvest and create “just add water” meals for your pantry. Cut away damaged parts, compost them, and separate the woody stems from the tender caps. After drying, the stems can be packed together in bulk and stored for use in making stock or ground into powder and used as a flavor booster in various meals. While the dehydrator is running, prepare portioned Mason jars or vacuum-sealable bags in an assembly line with (in this order, from bottom to top:) bouillon powder, grains (e.g. barley, steel-cut oats, or rice), dried herbs, and spices. Dried vegetables and/or mushrooms are the last ingredients to add before sealing the lid. This is because, in many recipes, these ingredients are rehydrated and lightly sautéed with spices in oil to bring out flavors and infuse medicinal compounds first before adding the rest of the jar’s contents. For best results, use a jar vacuum sealer. If you don’t have a vacuum sealer, make strong herbs the “top layer” between the other dry ingredients and the air because their concentrated terpenes repel damage-causing insects. Undamaged, dried cannabis fan leaves can also be used for this purpose.
4343
HARVEST BY RECIPE
This approach both highlights the seasonal timing of fresh ingredients and limits the chance of destruction of stored goods by mold, insects, and oxidation
Should you feel so inclined, making a cheesecloth sachet for the herbs means you can have them on top, keep them intact with flavor-packed stems remaining attached, and easily move them aside to get the mushrooms out when it’s time to cook.
Tip: This works exceptionally well for recipes like
soups and stews that are typically slow-cooked and rely less on the included ingredients to retain any crunch or “al dente” quality.
You can come up with endless options for elements to add textural ‘bite’, nuance and seasonal character to this base recipe when they’re served. A thick-crusted hunk of winter bread, a sprinkle of toasted nuts and seeds, raw or roasted root vegetables, and even the spring’s first fresh greens combine with the goodness of autumn abundance with practically no additional effort. With this method, you can easily make variations on the base recipe by changing which flavors, grains, and proteins are in each jar, and also get creative at the time you’re ready to cook the meal by choosing in-season or ‘need-to-be-used-up’ veggies. Meanwhile, the same mushrooms are starring in easy-to-make dishes all year long and aren’t being continuously opened and resealed in bulk storage.
Harvesting by Recipe for Cannabis Growers For the cannabis cultivator, harvesting by recipe could look like first harvesting and processing all the best buds intended for consumption as flower, followed by harvesting all the material destined for extraction.
Since fresh freezing is a popular step before making concentrates and infusions, when the goal is to make everything into concentrates, harvesting by recipe might be simply batching together the top colas and then returning to the garden to collect the smaller flowers. This strategy gives the harvest flexibility to allow an additional few days for any flowers growing closer to the center of the plant to reach their peak potential. Many gardeners lack sufficient material to make extracting individual plants worthwhile. When working with different cultivars, a “mixed” concentrate, batch of tincture, or cooking oil infusion brings the best of them together. Of course, if the unique phytochemistry of particular plants is sought, at the very least, keep the ratio of cannabinoids in mind when blending.
Final Thoughts Harvesting by recipe healthily frames the ‘loss’ of living plants in a context of respect for everything they worked so hard to build throughout the season. It makes the labor of post-harvest tasks more enjoyable and helps maximize the preservation of everything at peak freshness and potency. Of course, in an ecosystem designed by nature for regeneration, there’s no real physical waste of plants and mushrooms at or after harvest. If not the cultivator, a microbe or other organism will take over the job of breaking down and returning those molecules to the nutrient cycle. Harvesting by recipe includes processing materials for compost and making plant food; in essence, joining the kitchen team to nourish the non-human members of the community. 3 4545
BY CATHERINE SHERRIFFS
GardenCultureMagazine.com
trending
now!
H
ow can you enjoy garden harvests through the cold months ahead? With proper storage, of course! Our guide will help you prepare your veggies and root cellar. Find this harvest guide and a whole lot more on our blog at GCMag.co.
Y
ou’ve been lovingly tending to your garden for several months, and now it’s time to reap the rewards. Harvest season is the most wonderful time of year for many gardeners. It is essential to know how to store fruits and vegetables to preserve and enjoy them through-
out the colder months ahead. Below is a list of common fall crops and the best ways to prepare your root cellar, courtesy of The Old Farmer’s Almanac: Vegetable Gardener’s Handbook.
How to Store Corn There’s nothing sweeter than corn harvested straight from the garden. Unfortunately, this crop doesn’t keep too long. For maximum flavor and nutrition, eat corn within a few days of harvest. If you want to keep it longterm, blanch the cobs, remove the kernels, and freeze. You can also use a pressure canner for preservation.
How to Store Carrots Don’t harvest these babies too early! A frost will encourage carrots to produce sugars, resulting in a sweeter taste. Store fresh carrots by removing all but a ½ inch of the tops. Clean the carrots well and air-dry them before sealing them in a plastic bag in the fridge. Keep carrots longer by storing in tubs of moist sand or dry sawdust in a cool, dry area.
How to Store Beets Fresh beets will keep well in the fridge for about a week, but they’ll be good longer if you remove the greens and store them separately. To enjoy beets throughout winter, brush the soil from the roots and bury them (not touching) in dry sand, peat moss, or sawdust. Keep the bin in a cool, dry place.
How to Store Brussels Sprouts Brussels sprouts are another crop that can handle a frost. After it gets cold, remove all the leaves, pull up the stalk, including the roots, and hang it upside down in a cool, dry basement or garage. Without the roots, you can store stalks in a root cellar or 46
basement for about a month. Only wash them immediately before eating. If you’re harvesting Brussels sprouts fresh from the garden, they’ll keep in the fridge for about five days.
How to Store Kale Kale is one of those magical greens that will grow even in the coldest of temperatures. It won’t stop until it drops to about 20°F (-6.6°C). Harvest continually, but don’t harvest too much at once because this leaf is good in the fridge for only about a week.
How to Store Onions Storing a bumper harvest of onions is a bright idea if it’s a go-to in your kitchen. Pull the onions from the garden when the tops are brown; cut the roots and trim the tops back to an inch or two. Rest the onions on dry ground for a few days to allow them to cure, and once they’re dry, hang them in a mesh bag or store them in a box in a dry, well-ventilated area. The farmer’s almanac recommends storing onions away from pears or apples because an ethylene gas produced by the fruit will interrupt the onion’s dormancy. Sweet onions don’t keep well.
How to Store Parsnips Harvest parsnips after a couple of frosts so they turn nice and sweet. Trim their leaves to about two or three inches and store parsnips at 32°F to 35°F with 95% humidity. You can store parsnips for up to six months if you keep them in damp sand, sawdust, or leaves.
Long-Term Storage Solutions for your Vegetable Harvest
How to Store Potatoes If you like eating the most delicious potatoes from the garden all winter, you’re lucky because they store very well. Put freshly dug potatoes in a dry, cool place for about two weeks to let the skin cure. After that, brush off the remaining soil and store in a cool (and somewhat humid), dark place. Like onions, don’t keep potatoes near apples!
How to Store Pumpkins
To enjoy beets throughout winter, brush the soil from the roots and bury them (not touching) in dry sand, peat moss, or sawdust
Harvest pumpkins in time to decorate your porch for Halloween, then cure them for a week in a sunny spot that is 80°F to 85°F, with 80-85% humidity. This will toughen the pumpkin’s skin and boost its flavor for cooking. After ten days, place the pumpkins in a cool, dry cellar about 50°F for up to three months.
How to Store Rutabaga You can enjoy rutabagas in soups and stews or roasted all winter with proper storage techniques. Cut off the foliage and keep rutabaga just above the freezing mark in a space with 90-95% humidity. They will store well for about four months.
How to Store Winter Squash Harvest winter squash when the skin is tough, and the leaves have turned brown. The Farmer’s Almanac recommends washing in a low-concentration bleach rinse (½ cup bleach to 5 cups water) to remove all bacteria. Air-dry the fruit, then store it in a cool (40°F) dark space with good ventilation. Most varieties will keep the entire winter, except acorn squash, which typically lasts a few weeks. 3 47
BY EVEREST FERNANDEZ
Forever
cannabis “I have enough cannabis to last me several lifetimes.”
48
FOREVER CANNABIS
I
have enough cannabis to last me several lifetimes. I don’t mean to brag; these days, I get by on a minuscule amount of herb—just 100–200 mg every other weekend. I ingest it via homemade gelatin capsules filled with ground-up, dried flower. The effects are subtle yet appreciable, lasting reliably through two back-to-back
episodes of Bosch, followed by eight or nine hours of dreamless sleep. My tinnitus almost completely disappears, and as a purely hypothetical bonus, my choice of natural, homegrown medication remains undetectable by saliva tests—provided I swallow the capsules without chewing them.
But here’s the thing. After finally figuring out a drying and storage method to keep my cannabis in tip-top condition for up to a decade or more, I discovered something oddly counterintuitive. When I filled my capsules with some old schwag that had been languishing around in a spare room for months in an unsealed bag, it proved more effective than high-potency, terpene-rich, wellstored buds! Some of you will no doubt know what’s up here, but please read on if you’re as confused as I was! First, my hot, arid climate. The desert-low relative humidity here destroys the terpenes in premium cannabis in weeks if left unchecked, transformed by some misanthropic alchemy into hay. What about professional herbal storage solutions? Even purposebuilt containers, supplemented with humidity packs, afforded me partial success, albeit for a limited time. A friend suggested Mason jars, but their plastisol seals merely infused my flowers with a synthetic rubbery aroma. (That was an expensive lesson.) So, preserving that “premo” feel of cannabis has been a challenge, but—these days—with my consumption levels so low (an ounce can technically last me more than two years), I needed a longterm, efficacious solution more than ever. The solution is based on proper drying, shielding from heat, removing oxygen, and maintaining very low temperatures.
Timing, Timing, Timing If you have a climate-controlled drying room at 60°F and 60% relative humidity, good for you. Most of us don’t. We’re at the mercy of our environment—mine’s unforgiving. Cannabis drying largely depends on location and timing. Harvest fully mature plants at the end of a dark period, when terpene loss is minimal. Aim to harvest in the cool season when environmental conditions support slow drying. Mid-summer heat isn’t ideal. My cool basement in winter proves optimal—consistent and protected.
Vacuum sealing helps, but adequate dryness is crucial. No oxygen. No heat. No light. Time stands still
The Gentle Art of Drying Drying cannabis is a delicate balancing act: slow enough to preserve terpenes and fully degrade chlorophyll, fast enough to avoid mold. Whole-plant drying is crucial—especially in arid conditions—and it’s also easier. Just hang upside down on makeshift washing lines in a dark place. Remove the large fan leaves to reduce the risk of mold. There’s genuine plant physiology at play here. Moisture migrates internally via water potential gradients. Stems retain moisture, sending it gradually into buds via capillary action, balancing drying if you give it time. On the other hand, cutting up the buds individually and drying them on nets or racks risks a too-quick drying process because they don’t have access to the reservoir of moisture in the stems. You risk locking in chlorophyll and grass-like flavors. If you have particularly large, dense colas or you’ve spotted any sign of mold at all, feel free to disregard this advice and cut the bud up into its constituent florets. But never, ever wet trim; always wait for your buds to dry first.
The Long Wait I dry my whole plants for four weeks. Just a little air movement— nothing directly on the buds. Extraction on minimum. Whole plant drying in a cool environment affords me this low-andslow option. Why so long? Because enzymes continue working. Chlorophyllase breaks down green pigment; slow oxidation subtly alters cannabinoid precursors. Rush drying locks in chlorophyll and the taste of hay. Think of it like a combination of drying and curing in one process.
49
FOREVER CANNABIS
When Is It Done? Most growers use the snap test: if a small branch snaps rather than bends, the moisture content is around 10–12%. For accuracy, a water activity (aw) meter should read below 0.65 aw before sealing, ensuring microbial stability and dramatically slowing chemical reactions. I also use a tactile method: gently squeeze a sacrificial bud. It should feel dry yet sponge-like. Brittle means too dry; damp and cool isn’t ready. Ideal buds are smokable but still squishable. That’s when I deploy my secret weapon—the vacuum sealer.
Sous Vide Magic I carefully pack my spongy, dried buds into sous vide bags. Vacuum sealing removes oxygen, one of the primary agents of degradation, and compresses buds enough to eliminate air pockets. It’s a squish, not a crush. The resulting compact block is perfect for freezing. A warning, though: freezing can rupture trichomes if moisture remains. Ensure buds are thoroughly dry below 0.65 aw before sealing. Vacuum sealing helps, but adequate dryness is crucial. No oxygen. No heat. No light. Time stands still.
Practical Proof Months—years—later, I open vacuum-sealed cannabis, and aromas burst forth, remarkably fresh. Citrus, pine, spice, earthy funk—still vibrant. Admittedly, lemon and pine terpenes hold up best; however, the overall results are impressive. THC degrades very slowly at −4°F (-20°C), though terpene profiles evolve subtly. Monoterpenes fade faster, but a long, careful drying process plus rapid vacuum sealing preserves the original aromatic spectrum better than any alternative.
Decarboxylate Before Consumption Now it’s time to solve that quandary I posed earlier. Why did gelatin capsules stuffed with schwag prove more effective than a well-stored premium grade? The answer can be summed up in one word: decarboxylation. Raw cannabis contains Tetrahydrocannabinolic Acid (THCA), which is non-psychoactive. It is the dominant cannabinoid in raw cannabis flower before it is heated or aged. It does not bind effectively to CB1 receptors in the brain, meaning it does not cause intoxication.
Dry it slowly. Sous vide, compress, deep freeze. Then—after all that—put it in a low oven!
When cannabis flower is heated (or aged over a long time), the THCA loses its carboxyl group to become THC. So, while that old schwag may have lost the majority of its terpenes, the prolonged room-temperature storage aided the slow conversion of THCA to THC. This explains why those capsules were more effective. For the best, most reliably potent capsules, I need to deliberately decarboxylate my well-stored cannabis. After retrieving it from my sous vide bags in the freezer, I grind the cannabis coarsely and then bake it at 110–115°C (230–240°F) for 30–40 minutes, turning halfway through. Once cooled, I can grind it a little more and place it into capsules. This controlled process guarantees consistent potency and is vastly superior to relying on natural aging. One gram of 20% THC flower delivers roughly 200 mg THC. Divided into ten capsules, that’s 20 mg each—a decent therapeutic dose. After going through all this hassle, be sure to store the capsules themselves in an airtight container, away from heat and light. Refrigeration further extends their shelf life and is particularly recommended for oil-infused preparations. So, there you have it. Dry it slowly. Sous vide, compress, deep freeze. Then—after all that—put it in a low oven! Who knew? Oh, and before you ask, yes, my freezer has a key. 3 51
BY EVEREST FERNANDEZ
? s e i l i h C y n a Too M I
f you time planting your chilies out just right, when nighttime temperatures are reliably warm (preferably above 18°C / 64°F), you can grow true monsters. Many novice growers plant out too early, leading to premature flowering and fruiting—and, accordingly, paltry harvests.
If you follow my advice, start them early indoors and plant them out when summer has properly kicked in, you’ll have another problem to deal with. By late August and early September, those six small plants you hatched indoors under grow lights back in February will be dripping with hundreds of garish red pods. The Trinidad Scorpions are practically daring you to touch them. The Lemon Drops are almost embarrassing you with their overachievement. And somewhere, buried under the Cayenne bush riot, even the weeds are crying for help. So, what can you do with shopping bags full of freshly harvested chilies? Eat them all in one heroic sitting? No, you preserve them. Because few things say “grown-up gardener”, like casually producing your own smoky chipotle paste in the dead of winter while wearing an apron that says “Chili Daddy.” Here’s your spicy survival guide. I’ve listed eight different preservation methods below, but I describe the easiest and most popular in the most detail—these first three will handle 90% of your chili surplus with minimal fuss and maximum satisfaction.
Drying chilies actually concentrates the capsaicin, so be prepared for the result to be significantly hotter than when fresh
1. Drying: The Desert Treatment First, a polite word of warning. Drying chilies actually concentrates the capsaicin, so be prepared for the result to be significantly hotter than when fresh. This method works well in various climates with proper technique and patience.
Air Drying / Ristras Air drying works beautifully for thin-skinned varieties like cayenne, Thai, or Ají Amarillo. The traditional method is simple: thread them onto strong cotton string or fishing line, leaving gaps between pods for airflow, then hang them somewhere with good ventilation and low humidity. In 2-6 weeks, depending on conditions, you’ll have your very own garland of concentrated fire. Here’s a useful pointer: for very small varieties like Bird’s Eye chilies, don’t string them individually. (You’ll age too much in the process.) Cut entire branches with clusters and hang those instead. They dry more slowly, which preserves more flavor compounds. The key rule for air drying: thick, fleshy varieties like jalapeños or habaneros can be challenging unless you slice them first or have exceptionally dry conditions. Otherwise, you risk mildew and disappointment.
Top Tip: Never hang them over your cooker! Grease and humidity will ruin them. Also, nothing ruins dinner like a chili dripping into your stir-fry.
Dehydrators and Oven Drying For dehydrators, set to 55°C (52°C for delicate varieties) to preserve nutrients and prevent case hardening. Slice thick chilies and expect 8-12 hours. Oven drying works too—door ajar, lowest temperature setting (ideally under 60°C), check regularly to prevent overheating. 52
PRESERVATION TECHNIQUES
e id u G l a iv v r u S y ic p S A Everest Fernandez explains how to solve this wonderful problem with the easiest preservation techniques.
2. Freezing: My Favorite “Lazy Genius” Solution Freezing preserves heat and flavor excellently for 6-12 months in home freezers. I’ve used year-old frozen chilies that were still wonderfully potent. The texture goes soft—useless for garnishing but perfect for cooking. Freeze whole chilies on trays first, then bag them. This stops them from clumping together so you can grab exactly what you need.
Purée Cubes: Portion Control Blend chilies with a splash of water, freeze them in ice cube trays, and then bag the cubes. One cube typically equals 1-2 fresh chilies. Perfect for precise dosing in recipes.
Once you’ve mastered these three foundational techniques, you can explore more complex preservation methods that reward patience with exceptional results 53
PRESERVATION TECHNIQUES
Pickling: 3. The Vinegar Vacation Pickling transforms chilies—the acetic acid preserves them while mellowing heat and adding a sharp tang. My favorite is Giant Jalapeño sliced into rings for wraps and pizza.
Quick Pickle Method For relatively quick gratification, try quick pickling. (It feels very ‘cheffy’!) Slice your chilies, toss with salt and sugar, add coriander seeds and black peppercorns, and cover with quality vinegar. Store in the fridge and wait at least 2-3 hours, though they’re best after 24 hours as flavors properly meld. They’ll keep for several weeks refrigerated.
Proper Pickling for Long-term Storage For shelf-stable pickles that last a year or more, sterilize your jars in boiling water, prepare a proper brine (made from equal parts vinegar and water, with added salt and sugar), and process them in a boiling water bath for 10 minutes. The extra effort pays dividends when you’re pulling perfectly preserved chilies from your pantry in February, remembering the abundance of summer.
The Advanced Arsenal: Quick-Fire Methods Once you’ve mastered these three foundational techniques, you can explore more complex preservation methods that reward patience with exceptional results. Fermenting uses beneficial bacteria to transform chilies over 2-4 weeks, creating complex, funky flavors. Chop the chilies, submerge them in a 2-3% salt brine, weigh them down, and wait. Great for preserving and developing the character of Scotch Bonnets. Chili Oil & Confit creates liquid gold. But don’t mess about with safety—botulism is real with chilies in oil. Even with dried chilies, add acid (vinegar or citric acid) or keep them refrigerated for safety. Fresh chilies should always be acidified or kept frozen/refrigerated. Bay leaves and Sichuan pepper are welcome additions. Jam, Paste & Sauces turn surplus into condiments. One year, I made habanero-mango sauce that looked like baby food and punched like Tyson. People still talk about it. Some in therapy. Salt Preservation is criminally underrated. Chop chilies, mix with 20-25% salt by weight (this percentage is crucial for safety), pack into sterilized jars, and ignore for a week. The result looks terrible but tastes incredible—a spicy sludge that lasts months and transforms anything it touches. Candying works with mild varieties—simmer in a sugar syrup until they are sticky and translucent. Using Ghost Peppers is how family feuds begin.
54
Preserving chilies is an act of faith, a celebration of excess, and a sneaky way to make winter bearable
The Philosophy of Preservation Preserving chilies is an act of faith, a celebration of excess, and a sneaky way to make winter bearable. Next time your chili plants go nuclear, don’t panic. Pick your method. Channel your inner spice whisperer. Make things in jars and give them names like “Molten Midnight” or “The Regret.” And if your neighbors start being overly friendly come September, it’s because they remember last year’s gift jar of Inferno Jam. They’re back for more—or possibly vengeance. Now, if you’ll excuse me, I’ve got a ferment bubbling ominously and a label to redesign. Currently thinking: “Caution—May Ruin Lunch.” Stay spicy, you glorious maniac. 3
Fernandez is a well-respected indusB i o Everest try educator, veteran hydroponic grower and grow light enthusiast, based in France. He works primarily as a marketing and cultivation consultant and was the founding editor of Urban Garden Magazine in the UK, US and Canada. He also writes and researches for the popular hobby horticulturalist YouTube channel, Just4Growers.
High Concentration
Labor Efficiency
No Pest Resistance
IPM Compatibility
Cost-Effectiveness
Safe For Use
Environmentally Friendly
Broad Spectrum Control
Sustainability
Reduced Application Frequency
Join us on Social Media
These points highlight how Green Cleaner can be an integral part of pest management in large commercial cultivation settings, promoting sustainability while maintaining efficacy.
www.centralcoastgarden.com info@centralcoastgarden.com 831-757-4733
@centralcoastgarden
SCAN ME
FOR MORE
e k a T
BY JENNIFER COLE
From ‘honesty boxes’ to ‘pay-what-you-can’ farm stands, a new era in community-first farming is emerging, making fresh, healthy food more accessible to everyone.
56
, t n a W u o Y t a h W
y a P
PAY-WHAT-YOU-CAN
n a C u o Y t a h W T
he farm stand at EarthDance Organic Farm School in Ferguson, Missouri, displays prices on each item it sells; however, since 2021, those prices have been mere
suggestions: you pay only what you can afford [1]. “’Pay-what-you-can’ makes sense for us,” says Operations Manager Margaret Gerker. “We are trying to make our produce more accessible to our community. Our farm is situated in an area highly affected by food apartheid, so our neighbors benefit from having greater access to fresh fruits, vegetables, and eggs from our farm.” According to statistics from the United States Department of Agriculture (USDA), food-insecure households, defined as those uncertain of or unable to acquire enough food to meet the needs of all their members, accounted for 13.5% (18 million) of the American population in 2023 [2]. The ‘pay-what-you-can’ system takes inspiration from the farm gate’ honesty box.’ Driving along country roads, it was common to find unmanned lean-tos or tables laden with fresh produce nestled by the farm gate. The autonomy of the ‘honesty box’ allowed customers to pay what they could afford for produce without fear of judgment and with dignity. The ‘honesty box’ can still be found at farm gates, although it’s not as prevalent as it once was. Now, the same idea of the community helping the community and providing fresh farm produce at a price that a person can afford is found at ‘pay-what-you-can’ farm stops and farm stands. Approximately 24 miles north of San Diego, Coastal Roots Farms has been operating its pay-what-you-want farm stand since 2016 [4].
57
the farm views the investment in the ‘pay-what-you-can’ model as socially and ethically designed, not for profit but for community health, food equity, and resilience
Photo Credit Jeff Coffin
EarthDance Organic Farm School
58
EarthDance Organic Farm School is a 14-acre organic, urban farm. Programmes throughout the year focus on teaching people how to farm and garden, ranging from fermentation to pruning.
OCEAN PAY-WHAT-YOU-CAN IRON FERTILIZATION
Coastal Roots Farm “One in four San Diegans is food insecure, “says Erin Taylor, the farm’s marketing manager. “While there are other excellent emergency food providers, few can offer produce as fresh, organic, and nutrient-dense as what we grow. The farm stand fills a unique and vital role in this ecosystem.”
Coastal Roots Farm is a non-profit Jewish community farm practicing regenerative agriculture on ancestral Kumeyaay land in Encinitas, California. Its mission is to cultivate healthy, connected communities. Among other things, the farm offers environmental education and hands-on learning.
How ‘Pay-What-You-Can’ Works At ‘pay-what-you-can’ farm stands or farm stops, shoppers are invited to pay 25 to 100% more or less than the suggested price displayed. “Maybe two out of five customers take a discount. One out of ten customers donate. The rest typically pay retail value for their produce,” Gerker says. Additional amounts vary from three extra dollars paid at the register to 100. The same is true at Coastal Roots Farms, where it’s estimated that two-thirds of customers rely on the ‘pay-what-you-can’ option, while one-third either pay the suggested amount or contribute more.
The Drawbacks Although the ‘pay-what-you-can’ model has been shown to boost customer satisfaction and attract price-sensitive shoppers, it also presents challenges. “The ‘pay-what-you-can’ model is not designed for profit,” Taylor says. The Farm Stand at Coastal Roots Farms operates at a financial loss—but it’s a planned and purposeful one, according to Taylor. Relying on generous philanthropic support, grants, and community donations to subsidise the cost of food and sustain the model, the farm views the investment in the ‘pay-what-you-can’ model as socially and ethically designed, not for profit but for community health, food equity, and resilience. From an operational perspective, integrating a ‘pay-what-you-can’ system into a point-of-sale process can also be tricky, according to Taylor. Point-of-sale systems are typically designed to read pre-set barcodes that feed the price into a computerised system. However, when customers change the amounts they pay, this can challenge the system and the staff. At Coastal Roots, staff are trained to facilitate a private ‘pay-what-you-can’ process outside of the standard point-of-sale purchase. According to Gerker, the farm stand at EarthDance is also likely losing money.
“However, it is extremely profitable for the community,” she says while explaining that they encourage social connections through corporate pop-up markets that fundraise and help support the farm stand. “I imagine a for-profit farm may have a hard time pulling this model off.”
Community Benefits It’s no coincidence that both Gerker and Taylor point to the community benefits of the ‘pay-what-you-can’ model. The people who can afford to pay more compensate for those who need a discount. The reciprocal community approach is also part of a personal investment strategy for some. “One customer I know gives more at the beginning of the year when she has more funds and then is more likely to take a discount later in the year when she needs to,” Gerker says. The system creates a culture of mutual care and respect while fulfilling a community’s needs. While specific monthly averages can vary seasonally, Coastal Roots sees approximately 315 weekly transactions, which translates to about 1,000 people per week. During the first quarter of 2025, more than 12,000 people were served through the Farm Stand and broader distribution efforts. Across North America, the ‘pay-what-you-can’ farm stand may have replaced the ‘honesty box’ by the farm gate, but the idea of community helping community has just taken on a new approach that’s growing. When EarthDance first opened its “pay-what-youcan” farm stand, it was challenging to find farms adopting similar models. Now, if you search the term online, there is a plethora of options across North America. “It’s a reminder that food is about more than nourishment. It’s about belonging, dignity, and justice,” Taylor explains. 3
Footnotes 1. Earthdance Organic Teaching Farm | Ferguson, Missouri earthdancefarms.org 2. Food Security in the U.S. - Key Statistics & Graphics | Economic Research Service 3. Coastal Roots Farm coastalrootsfarm.org. . 59
NOTES FROM A GARDENER
Don’t want to miss out?
Grow your own – no matter where you live. Sustainable, efficient gardening. New hints and tips from our blog delivered to your inbox weekly, and be the first to know when the latest print magazine lands in a progressive garden shop near you.
Truly local. Beyond fresh.
Visit GardenCultureMagazine.com
and subscribe now!
Follow Us GardenCulture GardenCulture Garden_Culture
GardenCultureMagazine
BY TYLER SIMMONS
Mastering
CR P steering
The Science of Precision Plant Control
62
the difference between average and exceptional cultivation outcomes often comes down to one critical factor: the ability to direct plant growth through precision environmental control
CROP STEERING
How advanced cultivators use environmental manipulation to optimize plant performance and profitability.
I
n the rapidly evolving world of controlled environment agriculture, the difference between average and exceptional cultivation outcomes often comes down to one critical factor : the ability to direct plant growth through precision environmental control. This practice, known as crop steering, represents the cutting edge
of modern cultivation science, where data-driven decisions replace guesswork and intuition.
The Foundation: Understanding Plant Communication Plants are more sophisticated than many growers realize. Every moment, they process environmental information through complex signaling pathways, constantly adjusting their growth patterns in response to the conditions they perceive. These responses are mediated by plant hormones that act as chemical messengers throughout the plant. Consider the red-to-far-red ratio. Leaves don’t just detect whether lights are on or off; they evaluate the spectral composition to make critical decisions about germination timing, shade avoidance responses, and flowering initiation. When plants detect a high farred ratio, they interpret this as competition from neighboring plants and respond by stretching toward the light source, a response that experienced growers can manipulate through spectrum control. Most critically, simulated water stress promotes earlier flowering via a generative effect. This stress response system becomes a powerful tool when growers understand how to apply controlled stress at strategic growth phases.
The Water Equation: Managing Plant Hydration Dynamics Central to effective crop steering is understanding water potential: the dynamic underlying many of the tools a grower might use. This concept encompasses several components that growers must monitor and manipulate. Osmotic potential reflects the concentration of solutes in your nutrient solution, measured as electrical conductivity (EC). When EC levels are high, plants must expend more energy to uptake water, creating a form of controlled stress that can be strategically applied. This principle allows growers to influence plant behavior through fertigation management, not just nutrient delivery. Matric potential becomes relevant for soil-based systems, representing the energy required to overcome adhesive forces between soil particles and water. While less applicable in hydroponic systems where water yields easily, understanding matric potential helps explain why substrate choice profoundly impacts plant responses.
The interaction between these forces, combined with atmospheric demand measured as Vapor Pressure Deficit (VPD), creates the complete equation for water potential. When more energy is required to move water through the plant—whether from high EC, low substrate moisture, or high VPD—plants respond with reduced cell expansion and growth, triggering stress responses that can be precisely controlled.
Environmental Control: The Steering Mechanisms Effective crop steering requires mastering environmental control factors, each offering distinct leverage points for influencing plant behavior. Soil moisture management through precise irrigation allows growers to modulate perceived water stress while optimizing growth. The key isn’t simply maintaining adequate moisture—it’s about creating controlled moisture variations that signal specific responses. Strategic irrigation timing can support root health during vegetative growth while inducing beneficial stress responses during flowering phases. Temperature, VPD, and humidity control affect transpiration rates and internal water potential, offering another precision tool for crop steering. Proper humidity management reduces disease risk while ensuring efficient water use, but more importantly, it provides a mechanism for controlling the plant’s water uptake and energy requirements. Lower humidity increases transpiration demand, effectively increasing the plant’s water stress level even with adequate root zone moisture. Nutrient availability management extends far beyond basic plant nutrition. The application or restriction of specific nutrients at targeted growth phases, combined with precise timing, temperature, and concentration control, interacts with water potential to influence hormonal pathways. This creates opportunities for targeted nutrient partitioning and selective metabolic effects. Pruning, defoliation, light spectrum, and temp DIFF are also coordinated strategically in a coherent crop steering plan. 63
CROP STEERING
Mastering
CR P steering
Crop Steering is precision tuning, not a magic bullet
Practical Application: Phase-Based Steering Successful crop steering requires aligning tactics with cultivar-specific growth phases, each of which demands different environmental setpoints to optimize development outcomes. During the vegetative phase, the focus shifts to low stress and high water availability to promote vigorous growth and optimal plant structure. This means maintaining moderate VPD levels, adequate soil moisture, and moderate EC levels that support rapid cell division and expansion. Early flowering demands a strategic shift toward higher simulated stress, lower water availability, and elevated EC levels. This combination promotes dense node spacing and earlier flower initiation, critical factors for maximizing eventual yield potential. Mid-flowering requires reducing stress levels, increasing water availability, and lowering substrate EC to promote rapid growth and cellular expansion. This phase prioritizes bulk building and flower development. Late flowering returns to higher simulated stress conditions, lower water availability, and reduced nitrogen availability, prioritizing secondary metabolic pathways—the biochemical processes that produce the compounds growers ultimately harvest.
Implementation Strategy: Starting Your Crop Steering Journey
Monitor plant responses carefully, documenting changes in node spacing, stem diameter, flower onset, and overall plant morphology. These physical changes provide feedback on your steering effectiveness, allowing for adjustments. Remember that crop steering is cultivar-specific. What works for one variety may not translate directly to another. Develop steering protocols through careful observation and documentation, building a library of successful strategies for each cultivar in your operation.
Looking Ahead: Advanced Metrics and Revenue Optimization While understanding plant signaling pathways and environmental control factors provides the foundation for crop steering, the true power emerges when growers learn to quantify their results and optimize for financial outcomes. In Part 2 of this series, we’ll explore advanced crop metrics analysis, including key measurements that separate successful crop steering from simple environmental control. We’ll also examine how to evaluate crop steering effectiveness through revenue optimization, moving beyond simple yield metrics to focus on the composite factors that determine true profitability.
For growers ready to implement crop steering principles, success depends on a systematic approach and patience. Begin by establishing a baseline for environmental monitoring across all critical parameters, including light intensity and spectrum, temperature, VPD, EC, WC, and pH. Without accurate data collection, crop steering becomes impossible.
Crop steering represents the evolution of cultivation from art to science, where data-driven decisions replace intuition and guesswork. For growers ready to embrace this approach, the rewards extend far beyond improved plants—they include optimized business outcomes and sustainable competitive advantages in an increasingly challenging market.
Start with simple interventions during obvious growth transitions. The shift from vegetative to flowering growth provides an ideal opportunity to test basic steering principles. Gradually increase EC levels while slightly reducing irrigation frequency to create controlled stress conditions that promote flower initiation.
It goes without saying, but crop steering only works if your basics are dialed. Without validated sensors and uniform irrigation, any adjustments you make won’t yield the results you expect. Crop Steering is precision tuning, not a magic bullet. Ensure the fundamentals are in place first. 3
BIO Tyler Simmons is a cultivation consultant specializing in controlled environment agriculture and crop steering optimization. Cultivation science communicator and Technical Advisor for Front Row Ag, Tyler has been a pioneer of data-driven cultivation methodologies. He is known for co-founding the California flower brand Northern Emeralds and his contributions to AROYA Education. 65
eco-optimism
Making
something out of nothing Turning food scraps into meals, snacks, and homemade cleaning products is one of the easiest ways we can save money and reduce waste at home
66
RECYCLING FOOD SCRAPS
W
e live in an era where almost anything the hear t desires is at our finger tips or easily accessible with the click of a few buttons. Cars drive themselves, and people have conversations with AI bots. However, we’re all feeling the pinch in today’s world, and every dollar counts. Reducing our waste
and consumption is essential to the health of the planet. We can find great optimism during challenging times by exploring the past and learning how our ancestors weathered the storms of famines, the Great Depression, and World Wars. Some incredible philosophies emerged throughout these dark moments in history to bring people hope and help them make ends meet. The ‘waste not, want not’ mentality is a prime example: a budget-friendly, sustainable lifestyle that celebrates simplicity and resilience. Turning food scraps into meals, snacks, and homemade cleaning products is one of the easiest ways we can save money and reduce waste at home.
Thrift and practicality are our jam; speaking of jam, you can make a tasty spread out of just about any leftover fruit scraps Something out of Nothing
Around the House
Take a look at anything bound for the compost bin and think creatively. Can you make something out of nothing? Thrift and practicality are our jam; speaking of jam, you can make a tasty spread out of just about any leftover fruit scraps. In her book Preserving with a Purpose, canning guru Sarah Thrush offers a variety of delicious recipes that nourish both the body and the soul, like turning apple peels and cores into Apple Scrap Jelly. Are you looking for something to do with all of those leftover corncobs this time of year? After removing the kernels for canning, boil the cobs down for an hour and get going on some Honey Corncob Jelly. Don’t stop there; give the cobs a third use by cutting them into sections, drying them in a well-ventilated room, and using them as kindling for your winter fires! Thrush recommends transforming the husks into tamales and the silk into a corn silk tea.
The David Suzuki Foundation offers several suggestions for repurposing food scraps to create household cleaning and personal care items:
Use vegetable peels, tops, and greens to make a homemade broth, and turn stale bread into croutons or bread crumbs. Clean eggshells make excellent garden fertilizer, seed starters, or homemade toothpaste! After peeling your bountiful harvest of tomatoes for a sauce, grab your dehydrator and make a flavorful Tomato Peel Powder (recipe follows).
• • • • •
Add lemon and orange peels to vinegar to make a DIY all-purpose cleaning spray. Simmer citrus peels in some hot water on the stove to freshen the air in the house. Use the inside of a banana peel to clean and polish houseplant leaves. Transform fruit and veggie scraps into wholesome pet treats. Coffee grounds make an excellent body scrub or face exfoliant. They’re also ideal for boosting soil health in the garden!
Compost whatever you can’t repurpose, and if you’re not ready to start on any of the above recipe ideas or projects, consider freezing the scraps until you have the time.
Lemon and orange DIY cleaning spray
67
NOTES FROM A GARDENER
RECYCLING FOOD SCRAPS
A Recipe from
Preserving with a Purpose: Next Generation Canning Recipes & Kitchen Wisdom, by Sarah Thrush (@peeliesnpetals)
Dehydrating Tomato Scraps into Tomato Peel Powder Typically discarded as waste, tomato peels can now be easily dehydrated and turned into a vibrant, flavorful powder that can enhance your meals. 1. 2.
3. 4.
Peel the tomatoes and spread the skins on a baking sheet. Let them air-dry, place them in an oven set at the lowest temperature (around 150°F) until completely dry, or use a food dehydrator for 8-10 hours. Once dry, grind the tomato skins into a fine powder using a blender or coffee grinder. Store in an airtight container.
Tomato Powder can be used in the following ways: • A seasoning for roasted vegetables, popcorn, or homemade potato chips. • A soup and sauce enhancer to boost the tomato flavor without adding liquid. • For pizza and pasta toppings. • As a Bloody Mary mix with an extra tomato profile. • In marinades for meats and tofu. • In dips and dressings for a subtle tomato twist. • For a flavor boost in rice and grain dishes. 3
69
BY COLIN BELL, PHD
A Scientific Guide to
Preserving
quality
70
PRESERVING QUALITY
Y
our garden’s herbs—think rosemary, thyme, lavender, or others—are flavor vaults, their vibrant aromas and vivid colors locked in by nature’s design. In biology, nature’s design refers to the universal principle that structure equals function. Just as a house needs a solid foundation, a plant’s cells and compounds determine its resilience and
quality. From sturdy cell walls to delicate terpenes, these structures define your harvest’s potency and shelf life. This article dives into the science of preserving dried herbs, offering cultivators and home gardeners proven strategies to keep their plants fresh and potent. Yo, herb lovers, get ready to geek out and keep your garden’s goodies bursting with flavor!
The Science of Plant Preservation Preserving herbs is a high-stakes race against degradation—the natural breakdown of key compounds after harvest. Whether you’re drying basil for culinary excellence or chamomile for soothing teas, one wrong move in curing can turn your prize harvest into flavorless rubble. But don’t sweat it! By mastering a few environmental controls, you can lock in freshness and keep your herbs poppin’.
Environmental Factors Causing Degradation Degradation is the ultimate buzzkill, stemming from environmental triggers—light, heat, oxygen, humidity, time, and contaminants— that mess with your herbs’ quality chemistry. Here’s the science behind each:
Light Kills Quality Sunlight or ultraviolet (UV) light acts like a flavor thief, washing out your herbs’ vibrant colors and aromas. It triggers a process called photooxidation, generating free radicals (unstable molecules) that break down terpenes, flavonoids, and cell walls.
Ready, set, preserve! Let’s explore science and practical steps to make it happen.
Key Structures in Plant Quality The quality of dried herbs hinges on five critical structures, each vulnerable to post-harvest mishaps:
•
•
•
•
•
Cell Walls: Composed of pectin and cellulose, these structures provide the plant’s framework. Poor drying weakens them, crumbling quality. Trichomes: Tiny resin glands, like flavored capsules, store aromatic terpenes (e.g., limonene). Damage them, and potency fades. Active Compounds: Some herbs contain potent molecules (like THC or CBD) that degrade into less effective forms over time. Terpenes: These scent powerhouses deliver piney or citrusy notes but evaporate or oxidize easily, dulling flavor and aroma. Flavonoids: Responsible for color and health benefits (e.g., anti-inflammatory effects), they fade easily under suboptimal environmental conditions.
Yo, herb lovers, get ready to geek out and keep your garden’s goodies bursting with flavor!
Science Bite: A 1976 study found active compounds degrading 10–20% in 4 weeks under UV light, with faster losses in sunlight (Turner et al., Journal of Pharmaceutical Sciences). A 2018 study showed terpene β-myrcene turning into less aromatic forms (Sommano et al., Molecules).
Heat Hijacks Potency Heat speeds up reactions, which can rob your herbs of their quality by breaking down key compounds. Above 70°F (21°C), terpenes evaporate like water in a hot pan, active compounds weaken, and flavonoids lose their health benefits.
Science Bite: A 2020 study reported 30–50% terpene loss in herbs stored at 86°F for 2 weeks (Shapira et al., Cannabis and Cannabinoid Research).
Oxygen Erodes Aromas Air exposure dulls the quality of your herbs. It transforms terpenes and active compounds into less potent versions, muting aromas and fading colors.
Science Bite: A 1995 study noted 5–10% monthly loss of key compounds in poorly sealed herbs at room temperature (Mechoulam et al., Progress in the Chemistry of Organic Natural Products).
71
BY JENNIFER COLE
Just as a house needs a solid foundation, a plant’s cells and compounds determine its resilience and quality Humidity Hinders Harvests
Strategies for Optimal Preservation
Humidity is tricky: too much or too little, and your herbs suffer.
If you want your herbs’ potency, flavor, and quality to be on point, the journey begins long before harvest. Optimizing preservation starts in the garden, with nutrient-rich plants equipped to fortify plants against degradation, ensuring robust cannabinoids, terpenes, and structural integrity. Elements like calcium, silicon, and magnesium function as natural armor, protecting the quality post-harvest. Experiment with these nutrient tips in your next grow!
Too Wet (>62% RH): Excess moisture invites mold and microbes, which chew through cell walls like termites and leave harmful toxins.
Science Bite: A 2017 study found mold (e.g., Aspergillus) in herbs at 65% RH within 10 days, while 55–62% RH prevented growth (Thompson et al., Journal of Mycology).
Too Dry (<55% RH): Low humidity makes trichomes brittle, letting terpenes escape like air from a popped balloon.
While curing locks in quality after harvest, building resilient plants starts in the garden.
Nutrient Enhancements for Resilience •
Science Bite: A 2021 study recorded 20% terpene loss in herbs dried below 50% RH (Jin et al., Planta Medica).
Time Tarnishes Quality
•
Even with perfect care, time slowly chips away at your herbs’ freshness. Terpenes and active compounds naturally break down, losing 20–50% of their punch after 12 months.
•
Science Bite: A 2007 study estimated an 18–24-month half-life for key compounds in optimal storage (60°F, 55% RH, dark) (Hazekamp et al., Journal of Cannabis Therapeutics).
Contaminants Corrupt Curing Dirty tools or residual chemicals are unwanted guests, allowing microbes (e.g., E. coli, Aspergillus) to spoil your harvest’s quality by breaking down plant-quality structures via enzymes. Pesticides or heavy metals can react to break down terpenes, spoiling quality.
Science Bite: A 2019 study detected mold in 13% of mishandled herbs, with toxins in 5% (McKernan et al., FEMS Microbiology Letters). A 2020 study found pesticides in 10% of dried herbs, accelerating terpene loss (Taylor et al., Environmental Science & Technology).
Grower’s Tale: During my first grow, I watched green dreams fade to brown timber. Dumb rookie move…. I switched to UVproof jars on the next batch, and the harvest kept its fire!
72
•
Calcium (Ca): Strengthens cell walls, reducing mold risk by 15% (White et al., 2000, Plant Physiology; Jones et al., 2023, Agronomy Journal) Silicon (Si): Reinforces trichomes, locking in terpenes and boosting aroma retention (Currie & Perry, 2007, Annals of Botany; Smith et al., 2024, Plant Science) Magnesium (Mg): Boosts photosynthesis, fueling terpene production (Brown et al., 2023, Journal of Plant Nutrition). Boron (B) and Zinc (Zn): Supports plant physiology and cell wall stability (Green et al., 2024, Horticulture Research).
Nutrient Application Examples Apply calcium-rich inputs and functionally targeted microbial biostimulants to enhance nutrient uptake, fortifying plant cell walls against mold, and preserving aroma and punchy flavors. Use soluble silicon supplements to strengthen trichomes and retain signature floral aroma during curing, ensuring top-quality. Integrate magnesium sulfate for robust terpenes. With strong plants ready for harvest, the next step is to master moisture management to preserve aromas and compounds.
While curing locks in quality after harvest, building resilient plants starts in the garden
PRESERVING QUALITY
Preserving the quality of your herbs is a science-driven art. Understanding Moisture Dynamics Effective drying and curing depend on three metrics: moisture content, water activity, and relative humidity. These distinct yet interrelated concepts significantly impact product quality and shelf life. Let’s quickly define these terms and how to measure each and highlight their roles in drying and curing: • • •
Moisture Content: Total water in herbs (target 10–12%). Use a moisture meter. Water Activity: Free water available for microbes (keep at 0.6–0.65). Measure with a water activity meter. Relative Humidity (RH): Air moisture (maintain 58– 62% in curing). Track with a hygrometer.
Key differences: Aspect
Moisture Content
Water Activity
Relative Humidity (RH)
Definition
Total water (% weight)
Free water for reactions (0–1)
Air’s water vapor (% max)
Role in Drying
Ensures stability
Prevents microbial growth
Controls drying rate
Role in Curing
Maintains quality
Ensures safety
Stabilizes water activity
Target Metric
10–12%
0.6–0.65
58–62%
Practical Preservation Techniques Follow these science-backed tips to preserve your harvest: Practice
Recommended
Avoid
Storage
Use UV-proof, airtight jars
Use clear plastic or bags
Humidity
Maintain 55–62% RH with humidity packs
Allow >62% or <55% RH
Temperature
Store at 60–66°F (15-18 °C)
Exceed 70°F (21 °C)
Curing Duration
Cure for 2–4 weeks
Rush or skip curing
Handling
Use clean tools, minimize contact
Handle often or with dirty tools
Additional Strategies: • Long-Term Storage: Vacuum-seal jars or use nitrogen flushing; store at 41°F (5°C). • Equipment: Invest in humidity packs, hygrometers, and amber glass jars. • Monitoring: Check for mold (fuzzy spots) or off-odors every 1–2 months. Discard contaminated herbs safely. • Batch Management: Store small batches separately to reduce air exposure.
Conclusion Preserving the quality of your herbs is a science-driven art. By understanding how light, heat, oxygen, humidity, and contaminants degrade key structures, cultivators and home gardeners can take control. Feed your plants essential nutrients, cure with precision, and store strategically to ensure your harvest—whether thyme, sage, or medicinal herbs—stays vibrant, aromatic, and potent for the long haul. Try these curing tips on your next harvest and share your results with Garden Culture! 3
BIO Colin Bell is VP of US Business Development at MIIM Horticulture. He has worked as a PhD Research Scientist in Federal and Academic institutions for years. He builds businesses, develops products, and grows brands for indoor cultivation. Reach out: colin@miimhort.com
73
BY ALEX FIELD
getting fr ui ty I
remember my first mushroom harvest. I picked and processed my new babies with an awe I hadn’t expected. These alien-like lifeforms had, with my care, become mat-
ter in the world. They were the fruits of my labors – and of the indefinable magic of life’s yearning for more of itself.
There’s lots of talk out there about mushroom cultivation methods – but what about aftercare? Many mushrooms lose much of their potency, flavor, or texture before they are consumed due to improper drying, processing, or storage. A careful harvest also enables future ‘flushes’ to grow well on the original substrate. Above all, harvest day is a time to form a relationship with these magical organisms, which, for me, has enhanced my experience of mushrooms as both food and medicine. So, are you ready for some mushroom midwifery and postnatal classes? Whether it’s your first grow or you want to get the most out of future crops, this ar ticle will guide you through when and how to harvest, as well as options for effectively drying, processing and storing your grows in tinctures, chocolates and powders.
Knowing When to Harvest Pick too soon, and your fruits won’t have reached their full potential – but wait too long, and you can find a mess of spores and dried-out caps or decomposing mushrooms. There are different signs to look for, depending on the species you are cultivating; however, there is generally a sweet spot when most mushrooms are mature before they start to decline. For species with a cap and veil-like Agaricus or Psilocybe strains – a common sign that it’s time for harvest is when the veil begins to break away from the stem. Oysters don’t have a veil, but they’re good to pick as the cap edges start to lift. Avoid waiting until mushroom caps open completely and drop their spores over the growing medium and onto each other. This can make them bitter, potentially less potent and can also deter future flushes from growing on the surface of the substrate. Capless fungi are more species-specific. Lion’s Mane is ready when its spines are long and white before they start to turn yel-
74
So, are you ready for some mushroom midwifery and postnatal classes? low. Reishi is good to go when it’s fully colored and hardened, with no pale growth ring around the edge. It’s always worth checking your specific variety for any pre-harvest quirks.
Harvesting Techniques My favorite method for harvesting most species is to gently twist and pull the single mushrooms (or clusters) away from the substrate. The art is to do this with minimal disturbance to the substrate beneath if you intend to grow a second ‘flush’ of mushrooms from the same block. Ensure your hands and forearms are clean before reaching inside any containers, and hold the mushrooms lightly to avoid damaging or bruising them. It can be useful to use a clean knife to hold down the substrate surface while you twist the mushrooms off. Some growers prefer to cut with a knife, but the above method removes stumps and leaves the growing surface clear of rotting debris for the next round of mushrooms to grow. For fungi with a larger surface area attached to the substrate, a clean knife is your best bet. Cut mushrooms like Lion’s Mane just above the substrate. If you want a second ‘flush’, try exposing some virgin substrate for new growth to come through (for example, you could cut a new “X” into a mushroom grow bag). If your mushrooms are growing at a uniform rate, harvest them all at once. If you have a mixture of monsters and babies, you can gently harvest the big ones as they reach their prime and wait until the others catch up. If you’re expecting more flushes of mushrooms from the same container, you needn’t worry too much about picking too soon – the mycelial power is still in the block and will come through for future harvests. You can cut or peel off any remaining substrate from the harvested fruits and then use, cook, or process them as soon as possible to keep them at their best.
DRYING MUSHROOMS
with m u s h r o o m s Harvesting,
Fresh pink oyster mushrooms laid out to dry
drying and processing your crops
Dried king oysters after 24 hours at 70 0C 75
DRYING MUSHROOMS
Storage and Drying Methods Fresh mushrooms typically have a high surface area and can lose their potency and textural quality quickly. For short-term storage, I like to wrap my harvests loosely in a kitchen roll or a paper bag and keep them in the fridge. Most mushrooms will keep for around 3–5 days this way.
Make sure the mushrooms are bone dry (they should snap like a cracker), and put them straight into a sealed bag or jar with some silica gel sachets to suck up any remaining humidity. You can store these in a dark, cool and dry place – or for extra security, stick them in the freezer to store them long-term.
Dehydration is my preferred method for storing mushrooms longterm. With proper fast-drying and suitable storage, you can retain the majority of a mushroom’s active compounds for months or even years. Rehydrate dried mushrooms in soups and teas, or process them in other ways, as discussed below.
If you don’t have a dehydrator, a fan and a bit of patience can do the job. Spread your mushrooms out on a mesh tray or wire rack in a dry, well-ventilated area, and direct a fan at them for a couple of days. They’ll usually start to dry on the surface, and from there, you can finish them off in a container with silica gel sachets or even uncooked rice to help draw out the last bit of moisture. When they’re cracker dry, move them to a new container with a fresh desiccant.
Tear or cut bigger mushrooms lengthways before drying and lay them out with some space between them, not piled on top of each other. If you’ve got a dehydrator, set it to around 70°C (158°F) for most species – although more delicate varieties may benefit from temperatures around 40°C (100°F). Generally, 12-24 hours does the job.
Cutting and twisting King Oysters
Avoid ovens if you can. Even on the lowest setting, most ovens run too hot and dry things unevenly. You also risk roasting off anything delicate — whether that’s flavor, medicine, or magic.
Harvesting,
g n i s s e c o r p drying uarndcrops yo Pick too soon, and your fruits won’t have reached their full potential – but wait too long, and you can find a mess of spores and dried-out caps or decomposing mushrooms
Harvesting Lion’s Mane 77
LEARN MORE
Want a STRONGER & thicker stem?
A stable silicon product in plant available form
DRYING MUSHROOMS
Harvesting, Storing cracker dry mushrooms in an airtight container with silica gel
Processing Mushrooms If you want to ingest a lot of mushrooms and you’re not in it for the taste, here are a few ways to process them for easy use.
Capsules: This is a common way to take daily supplements or for a microdosing regime. Put your mushrooms in a dry blender or coffee grinder and whizz them into a fine powder. Let the dust settle before opening it up, and consider using a mask if you’re processing a large quantity of mushrooms. Fill capsules by hand or with a basic capsule machine; you can purchase empty capsules online (size 0 or 00 is common). Store in a jar away from heat and light. Chocolates: The acidic nature of dark chocolate can enhance the effects of certain psychoactive compounds – and is a delightful way to eat mushrooms. Melt dark chocolate in a glass bowl over hot water and stir in your powdered mushrooms (see above for instructions on how to make the powder). Pour into molds and put them in the fridge to set. I like to wrap chocolates in foil and freeze them for long-term storage. It’s possible to fill a 10-gram chocolate mold with 1 gram of powder, but you may want much less than this.
cess o r p d n a g dryin r crops
ing
you
Tinctures (basic double extraction): Tinctures are a popular method for processing a range of medicinal mushrooms. Tinctures can retain their potency for years and are a very palatable way to ingest a significant amount of powerful medicine. Break your dried mushrooms into small pieces. Put them in a glass jar with a lid and cover with strong alcohol (40% vodka works well). Leave it in a cool, dark place, giving it a shake every day or so. After around two weeks, strain the liquid (a cheesecloth bag works well for this) and set it aside. Your alcohol extract is ready.
“Dehydration is my preferred method for storing Next, simmer the same mushrooms in water for a few hours, mushrooms long-term uncovered, until the liquid reduces to about half. Strain it through a fine mesh and let it cool before combining the two extracts. A 2:1 vodka-to-water mix typically yields a final alcohol content of at least 25%. Bottle the final tincture in dark glass, label it clearly and store it in a cool place.
Honey: This is a popular method for preserving the compounds of certain mushrooms over the long term. Mix dried, ground mushrooms into raw honey at whatever strength you like — a tablespoon of powder per jar is a decent start. Let it sit in a dark place for a few weeks. The honey may darken or turn blue (especially with certain species) as the compounds oxidize. Use a dry spoon each time you tuck in to avoid introducing moisture.
Alex loves empowering people to grow their own food and medicine. He has taught over 6,000 students worldwide to cultivate mushrooms at home. Stay tuned for more specific guides from Alex in future issues of Garden Culture Magazine. Follow on Instagram: @fungi_tribe 3 7979
If you DIG GROWING...
follow us on INSTAGRAM! o c . G A M C G @gardenculturemagazine
BY LUKE SUMPTER
g n i t s e v r a H d n a g n i Grow
y h t l H ea s i b a n n Ca s t o o R are c t s o m t u r rve ou roots dese l, and l e w m e h t n; treat io t n e t t a d an ealthy h s t n a l p r you you’ll keep harvest l u if t n u o b and yield a 82
HEALTHY CANNABIS ROOTS
Cannabis roots are complicated, but caring for them is simple.
R
oots are a vital component of the cannabis plant anatomy. Growers sometimes overlook these impor tant subterranean structures. However, roots deser ve our utmost care and attention; treat them well, and you’ll keep your plants healthy and yield a bountiful har vest.
Most cannabis growers are aware of the basic functions of roots, but these soil-dwelling tendrils fulfill many more duties than merely capturing water and minerals. Advances in soil science have shown that plant roots don’t work as a one-way system. It turns out that plants pump a large portion of the sugars they make during photosynthesis underground. They do this to farm microorganisms in the rhizosphere—the soil that surrounds plant roots. By attracting and taming certain microbes, cannabis plants reduce their susceptibility to pathogens and increase their access to water and nutrients. Root care involves a holistic approach that leverages natural processes that are mutually beneficial to many of the organisms involved. Below, you’re going to discover the key tenets of growing strong and healthy cannabis roots.
Root Form and Function Just like cannabis leaves take on several different forms, the cannabis root network features varying morphological features that underscore unique functions. If you’ve ever germinated cannabis seeds outside of the soil, you’ll have noticed the white sprout that emerges not long after introducing water into the equation. Although it looked relatively small and unimpressive at the time, this structure extends deep into the soil and develops into the taproot. It helps to anchor plants into the soil, absorbs large quantities of water and nutrients, and also stores these substances in times when the going gets tough. Next up, we have fibrous roots. Much thinner than the larger taproot, these thin structures span out into the soil in much larger numbers and cover a greater surface area. They also help anchor plants in the ground, take up water and nutrients, and function like a net to prevent soil erosion. Finally, we have adventitious roots. This term describes roots that grow from areas of plants away from the main root system. They don’t typically appear under normal growing conditions; these are the types of roots that emerge from cuttings.
All of these root forms possess small hairs that enable cannabis plants to uptake nutrients through several different mechanisms, including diffusion and active transport. But roots aren’t just biological pumps; they’re a complex interface between plants and the complex microbial population of the soil.
The Four Tenets of Healthy Root Development Cannabis roots are complicated, but caring for them is simple. By focusing on four particular variables, you can ensure that the needs of your roots are met.
1. Nutrition Cannabis plants require 17 essential nutrients to thrive and develop. Many of these minerals originate from rocks, but microbial activity and weather events have liberated them into the soil over time. Of these substances, seven are particularly important for root health. Nitrogen plays a vital role above ground, but it’s also fundamental to root development. As a core component of amino acids, nitrogen plays a crucial role in forming the building blocks of proteins. These larger molecules are used to build root architecture and facilitate cell division and growth. Both phosphorus and potassium, the remaining two macronutrients, contribute to root elongation, lateral root development, root hair formation, nutrient uptake, and stress tolerance. Next, we have the two secondary macronutrients: calcium and magnesium. Often applied together in supplement form, these minerals stimulate root tip growth and facilitate the uptake of other essential nutrients from the soil. Finally, we have two of the many micronutrients that cannabis plants demand. Although only needed in trace quantities, sulfur and iron also promote healthy root growth. Iron assists in the production of ATP, the cellular unit of energy. Likewise, sulfur forms components of several amino acids and contributes to secondary metabolites that bolster plant defences.
83
There are various ways to deliver these nutrients to plant roots during the growing cycle. Some growers prefer the simple route of administering synthetic bottled nutrients according to a pre-made feeding schedule. Others favor the organic route and work hard to introduce compost and other nutrient-rich forms of organic matter into the soil.
2. Inoculation Cannabis roots have an interesting relationship with the soil life that exists around them. But you don’t have to wait for your roots to expand out into the soil to meet beneficial microbes. By actively administering microbes during specific phases of the growing cycle, you can ensure that your root system engages in biological alliances early on. Arbuscular mycorrhizal fungi are extremely valuable microbes in the arsenal of any cannabis grower. Species of fungi that fall into this category form a symbiotic relationship with cannabis roots. They possess small, hair-like structures called hyphae that work their way into root cells and act as microscopic hose pipes. These fungi send hyphae out into the soil to mine for valuable nutrients, including phosphorus, that they deliver to plant cells. In return, plants pay the fungi in sugars, amino acids, and other exudates. Growers can apply both mycorrhizal spores and propagules when transplanting to inoculate root systems with these synergistic life forms. Some of the well-studied species, often combined into the same product, include Rhizophagus intraradices and Glomus mosseae.
ichoderma r T ly p p a n Growers ca root drench a s a s t c u d pro cycle to g in w o r g e h t throughout eases is d t s in a g a ts y protect roo crops if the te a t s a v e d that can old gain a footh 84
Trichoderma serves as another effective inoculant. Several members of this genus of soil fungi are known to protect roots by competing with soil-borne pathogens. Growers can apply Trichoderma products as a root drench throughout the growing cycle to protect roots against diseases that can devastate crops if they gain a foothold.
Cannabis roots have an interesting relationship with the soil life that exists around them.
HEALTHY CANNABIS ROOTS
Enhance oxygen flow through the soil by mixing in amendments such as perlite, vermiculite, and coco coir
3. Hydration
How To Harvest and Use Cannabis Roots
Roots need to absorb water, but too much can quickly harm the network and even result in disease. Beginner growers often make the mistake of being overly cautious of dehydration, so they end up administering far too much water. Eventually, excess fluids flood the pore spaces within the growing medium, pushing out oxygen. This creates an anaerobic (oxygenless) environment that several cannabis root pathogens need to flourish.
It’s no secret that buds get most of the attention around harvest time. However, to make the most out of every cannabis plant, consider harvesting the roots after trimming the flowers. Cannabis roots remain relatively understudied, but historical documents show that ancient physicians used them as a traditional therapy for myriad ailments, including fever, inflammation, skin burns, and as a stomach tonic. While the efficacy of these traditional applications remains unsubstantiated by modern science, researchers have discovered an array of unique compounds in cannabis roots. These constituents include cannabisativene, an alkaloid that has demonstrated potential anti-inflammatory, pain-killing, and neuroprotective properties in early studies. Other compounds found in the roots include monoterpenes, triterpenes, and sterols.
Allow the growing medium to dry out before watering again. Test this by inserting a finger into the soil. Alternatively, weigh the container plants before and after a heavy watering, and then water them again once their containers return to their original weight.
4. Aeration Plants “breathe in” carbon dioxide from the atmosphere, but did you know that plant roots require oxygen to conduct respiration and to grow and function properly? Without adequate levels, roots quickly perish. The soil might seem like an odd place to try to procure oxygen, but it does exist down there. As a grower, there are several actions you can take to either enhance or restrict oxygen availability to your roots—it all boils down to the design of your growing medium. To promote aeration, you need to create a growing medium with sufficient pore spaces. However, too many spaces can lead to excess drainage and soil that dries out too quickly—you need to strike a balance. Enhance oxygen flow through the soil by mixing in amendments such as perlite, vermiculite, and coco coir. When growing outdoors and directly in the ground, adding well-rotted compost to the soil helps boost the organic matter content and improves soil structure, ultimately increasing aeration while enhancing water retention.
After taking care of the buds, grab a shovel and loosen the soil around your plant. Avoid getting too close to the main stem, as this can damage the roots in the process. After dislodging the root ball, gently pull on the main stem and remove it from the ground. Spray down your root system to remove any lingering soil particles. Next, break up the root system into smaller chunks. If you have a dehydrator, use a knife to cut your roots into thin slices and dry them out for a day. If you’re without one, simply load them onto a drying rack away from direct sunlight and allow their moisture content to drop over several days. Once dried, you can use your roots in several different ways. Some cannabis users prefer to make a decoction by boiling roots into a tea for several minutes. Others prefer cutting the roots into smaller chunks and adding them to a mason jar filled with alcohol for several weeks to create a tincture. You can also add dried roots to a food processor to make a powder that can be added to capsules. Before you get too hog-wild with your cannabis root preparations, remember that human studies are lacking. Always consult your medical professional before ingesting cannabis roots to avoid interactions with medications and health conditions. 3
BIO Luke has been a horticulture writer for over 10 years, covering soil science, cultivation, plant nutrition, integrated pest management, and organic practices. Fascinated by natural processes, he spends much of his time reading the latest scientific research on how microbes can help humanity grow better food without using chemicals. He’s growing produce in the north of England using a no-dig approach and homemade organic inputs.
85
BY GARETH HOPCROFT
Finishing
STRONG2 Getting Nitrogen Right in Living Soil
86
NITROGEN IN LIVING SOIL
Bigger isn’t always better if the product is bland
Y
ou’ve probably seen it before—plants that look absolutely perfect during the grow. Fat leaves. Rich color. Everything’s firing. But then harvest rolls around, and the final product doesn’t quite hit. It smells green, tastes harsh, and burns hot. It’s not what you hoped for after months of effor t.
More often than not, the issue can be nitrogen. Or more specifically, too much nitrogen too late in the game. In living soil, we’re not just feeding the plant—we’re managing a whole ecosystem. That means playing the long game. Getting the best possible finish isn’t about stripping things away in a panic at the end. It’s about setting things up from the start so the soil winds down naturally, right in sync with your crop.
The Power of the Fade When things are dialed in, you’ll notice your plants start to “fade” toward the end—those deep greens shifting into golds, purples, and reds. That’s not just visual drama. It’s part of a natural shutdown process. As harvest approaches, plants begin to pull nitrogen from older leaves and transfer it to their flowers. That’s senescence—the plant’s way of tying up loose ends. It breaks down chlorophyll (which contains a lot of nitrogen) and moves those nutrients to where they matter most.
Plants make choices. When there’s lots of nitrogen around, they choose growth—leaves, stems, and size. But there’s a trade-off
As harvest approaches, plants begin to pull nitrogen from older leaves and transfer it to their flowers. That’s senescence—the plant’s way of tying up loose ends If your soil is still pumping out nitrogen at this stage, that process stalls. The plant thinks it has time, stays green, and continues to grow. The result? More chlorophyll in the final product and less time for those finishing touches—aroma, flavor, and smoothness. That grassy or “hay-like” taste some growers dread? That’s often a sign the fade never happened properly.
When Plants Keep Growing Instead of Getting Better Plants make choices. When there’s lots of nitrogen around, they choose growth—leaves, stems, and size. But there’s a trade-off. All that rapid expansion can come at the cost of resin, oils, and secondary compounds that define quality. Growers call this “soft growth.” The plants look huge but feel spongy. Stems bend under the weight. Pests and diseases creep in. The canopy becomes dense and humid, making it easier for things like powdery mildew to thrive. Meanwhile, the plant’s energy is going into fluff, not into the stuff that smells and smokes amazing. And if you’re growing for flavor or effect—whether it’s cannabis, tomatoes, herbs, or peppers—this is where quality can get lost. Bigger isn’t always better if the product is bland.
Bigger Flowers, Weaker Punch? That’s the Dilution Effect Here’s something that surprises a lot of newer growers: you can get huge flowers that still feel underwhelming. That’s because when nitrogen keeps pushing the plant to bulk up, it can stretch the flavor and aroma compounds too thin. The result? A diluted product. Flashy on the outside, forgettable on the inside. Allowing nitrogen to taper off as the plant matures helps shift the focus from volume to depth, from mass to quality. That’s where the magic happens.
87
MOISTURE IN LIVING SOIL
NITROGEN IN LIVING SOIL
Good inputs. Solid timing. A little patience. That’s how you finish strong
Building the Right Nitrogen Curve Living soil doesn’t come with a feeding chart. Instead, you rely on amendments and biology to do the work over time. The trick is to set things up so nitrogen peaks during veg and naturally fades as flowers ripen. One way to do that is by layering different types of nitrogen inputs: • Fast-release (short burst): These are like kindling— great for getting young plants going, but used up quickly. Think blood meal or soluble soy amino acids. • Medium-release (steady burn): These carry you through the bulk of the vegetative stage. Meals made from fish, feather, or insect frass fit here. • Slow-release (long tail): These take their time, offering a slow trickle of nitrogen even late in flower. Neem cake, alfalfa, bone meal and well-aged compost are solid options. Start with a mix of all three, and you’ll build a nutrient curve that rises and falls with your plant’s life cycle. By the time you’re approaching harvest, the soil has eased off the gas pedal all on its own.
It’s Not Just About Nitrogen Nitrogen gets a lot of attention, but it doesn’t work in isolation. If you want to steer your plants toward a proper finish, there are two other nutrients to pay close attention to: •
•
Potassium helps with flower development, sugar movement, and enzyme activity. It’s like the engine room for the final push. As nitrogen drops, potassium should take the lead. Calcium keeps the structure strong. Without it, fast-growing tissue from earlier nitrogen loads can end up soft and floppy. With enough calcium, your plants build sturdy frames that can carry heavy flowers without breaking down.
Get the balance right, and you’ll see it in every part of the plant— from root zone to resin production.
If you can get the fade to happen on time—and let your soil wind down gracefully—you’re going to see it (and smell it, and taste it) in your final harvest Skip the Flush, Plan the Finish Forget the old-school idea of flushing everything at the end to “clean things out.” That might help in synthetic systems, but in living soil, it’s too late by then. What really works is building a taper—a soft landing, not a crash. When nitrogen naturally fades during the final stretch, the plant wraps up its cycle smoothly. That’s how you get clean-burning, fragrant flowers or fruit with true-to-type flavor.
Wrapping It Up Managing nitrogen in living soil isn’t about cutting corners or chasing shortcuts. It’s about planning ahead, feeding with intention, and listening to your plants as they finish. If you can get the fade to happen on time—and let your soil wind down gracefully—you’re going to see it (and smell it, and taste it) in your final harvest. Good inputs. Solid timing. A little patience. That’s how you finish strong. 3
BIO Gareth Hopcroft is a certified plant geek and all round organic gardening devotee. Gareth has been involved in the UK hydro industry for 15 years and is currently the owner of Ecothrive; known mostly for bringing frass to the UK scene through his product ‘Charge’. When he’s not talking about indoor growing or microbes, you’ll find Gareth getting his hands dirty on his allotment or falling off his skateboard. Follow Gareth@ecothrive
89
LARGER
Yields
At , we're all about developing products that enhance your green thumb.
HEALTHIER
Plants
But we're not just a brand; we're your partner in turning seeds into thriving plants with dynamic roots. TRUSTED
YOU'LL NEVER GROW WITHOUT IT AGAIN
THOU HUNDRED SAND S OF S OF GROW ERS N
SI
WHAT IS MYCORRHIZA?
BY
So, let's cultivate stronger gardens together.
CE
STRONGER
Roots
2018
UNTREATED
TREATED with
is powered by mycorrhiza, a fungal-plant symbiosis that effectively extends plant roots with a mycelial network Mycorrhizae help plants absorb water and soil nutrients, resulting in increased yield and stress resistance.
INCREASES NUTRIENT UPTAKE YIELD INCREASE
ECO-FRIENDLY
Better looking plants & high-quality yields
Suitable for various organic cultivation methods SUITABLE FOR
ALLEVIATES PLANT STRESS
CREATES BIO-PLATFORM
Including transplant shock
Upon which beneficial microbes prosper
Contact the team for further inquiries, FREE samples, and trials: info@dynomyco.com
LOCAL GROWERS
USA
& Canad a
Local
Growers
Operation Grow
O
Midland, ON
peration Grow is a social enterprise in downtown Midland focusing on more
than just producing locally grown food. Run by Huronia Transition Homes, the vision for OG stems from the women it serves and their desire to acquire skills for the workforce, gain confidence, and break free from violence, poverty, and food insecurity. Operation Grow was launched in 2017 in response to those needs and features a state-of-the-art hydroponic farm that cultivates produce in a controlled environment. Low-barrier employment and apprenticeship training opportunities are available for members of OG, allowing them to work on the farm. The nutritious produce grown by OG is sold at a reduced cost to low-income women, and in retail and wholesale markets at competitive prices. The social implications for struggling women are significant. The non-profit farm boosts their employment opportunities, stability, standard of living, community engagement, self-awareness, and more. Vertical farming is touted as one of the solutions to addressing food insecurity in urban areas, as it offers year-round production that is free from weather and space constraints. There is no agricultural runoff associated with this growing method, pesticides and herbicides aren’t needed, and it uses 70 to 80% less water than conventional growing methods. At Operation Grow, a ZipFarmTM features a vertical hydroponic setup where lettuce greens, arugula, kale, Swiss chard, microgreens, and culinary herbs grow in stacked columns. The gardeners start seeds in peat plugs, placing them in warm, moist conditions under LED grow lights. Once the plants have their first set of true leaves, they’re transplanted into ZipGrowTM Towers, which are unique because they use “matrix media” made from recycled water bottles instead of soil. The matrix media is lined with cotton polymer wicking strips that transfer water and nutrients to the plants as they grow.
Since its inception, OG has developed key technical insights to successfully maintain a vibrant vertical farm and plans to launch a second phase, aiming to expand its range of produce to include other crops, such as strawberries. In addition to selling it fresh immediately after harvest, customers can also enjoy the produce in homemade dressings, soups, spreads, and sweet treats, all available at Operation Grow’s in-store retail market. Purchasing locally grown products is already a bonus for customers; knowing that they’re supporting women in need when they do brings that feel-good vibe over the top. Learn more: operationgrow.ca facebook.com/HTHoperationgrow operationgrow 91
INTRODUCING A NEW CULTIVATION INDUSTRY AND LIFESTYLE PODCAST FROM THE MAJESTIC REDWOOD COAST OF HUMBOLDT COUNTY IN NORTHERN CALIFORNIA. JOIN YOUR HOSTS MICHAEL BECK AND RICK ELLIOTT AND GUESTS FROM ALL ASPECTS OF CANNABIS CULTIVATION, INDUSTRY NEWS, MUSIC, SCIENCE , & MORE
BROUGHT TO YOU BY
LOCAL GROWERS
Would you like to be featured as one of our local growers? If you’ve got a garden, grow room, or farm and have a story to share, contact us at growers@gardenculturemagazine.com.
Wheat Ridge, CO
C
hris and Liz McCune had long dreamed of having a farm where they could grow organic food for their family of six and the community of Wheat Ridge, CO. Their dream was fast-tracked in 2013 when Chris ordered 100 adorable baby chickens to their Denver home, which quickly took over the garage. They needed a farming space, and they needed it fast.
Photo credits: DavidLynnPhotography
Roost Farms
WHO’S
ERE
T WH A H W G IN GROW
The couple found a one-acre property that they have lovingly transformed into a thriving farm full of life above and below the soil surface. They grow fruits, vegetables and cut flowers, tending to them using no-till practices and organic inputs. They also raise goats, bees, and, of course, the chickens that helped make their dream come true. This year marks the twelfth season of the 16-week harvest share program at Roost Farms. The seeds are sown in late winter, and the contents of the weekly bags begin to take shape. The farm share offers a diverse selection of seasonal vegetables, herbs, salad greens, and fruits. Members roll with what Mother Nature provides and understand that some weeks, they may receive more of one item than another. They also know that they’re receiving the finest quality locally grown produce, eggs, and honey around. Everything in the baskets is produced on Roost Farms. The baskets come with “cut your own” flower bouquets (beginning mid-summer) and recipe ideas for their harvests. As a token of appreciation for their support, each month, harvest share members also enjoy a dozen free organic eggs, mushrooms provided by Furst Class Fungi and Liz’s Denver County Fair Blue Ribbon Multi-Grain Bread, which starts with home-ground flour. Chris and Liz have raised their four children outdoors in nature, and they want others to experience the same joys. They open the farm gates so people can spend a day with their hands in the dirt. Children enjoy the zipline or play in a massive sandbox before visiting the animals. Chris also offers tours through the vegetable patch. A summer camp program teaches the basics of caring for animals and plants, revealing the simple yet meaningful aspects of farm life. Every moment at Roost Farms has the potential to spark imagination and a connection with nature. For those looking to stay in this urban paradise longer, two rentals are available on the property, including
a historic trolley car that has been beautifully transformed into a one-bedroom, one-bathroom retreat. The rentals are perfect for unwinding after exploring nearby downtown Denver. They also host private events, yoga retreats, member events, and volunteer opportunities. Chris and Liz are forever grateful for the opportunity to work with the dirt, water, and plants, feeding their community healthy food. Dreams can come true (but you don’t necessarily need 100 chicks to make it happen!). 3 Learn more: roostfarms.com roostfarms
93
central_coast_grown_2.0 (40% and easy): this is why I use this product man ravenchief1111 Fantastic product/ I've tried them all and I am a believer with the results craftcannabisohio Love the product hands down the best, Si doesn't hold a matchstick to the double G as we call it round here michigannja Multiply everything by 40.... talesofchronica I bought a bottle of GG Mono months ago and I still have about 10% left. Great stuff. I even went heavy with it at times! 4twentygrow ! Want your babies to super grow? BUY THIS PRODUCT!!! I use it in all my projects! ROGUE_VALLEY_FARMS_OMMP Absolutely love this stuff! canberracrops Definitely one of the best products I've ever used
40X stronger, pH neutral, easier to use, #detailsmatter
much better
value ...and no shill
squad: just real people & real results - real fast! www.grow-genius.com / @grow_genius /
Available in the US @autopot_usa
ral co
t
Available in Canada
nt
as
c e n t r a l co a s t
ce
USA Distribution @centralcoastgarden / Canada Distribution @biofloral_ca
GREEN ADVICE
WAYS
to Preserve Your Harvest
A
s grocery prices continue to rise and people seek more effective ways to nourish their bodies, food preservation techniques are gaining renewed attention. The simple act of preparing and enjoying meals with homegrown produce throughout the year is incredibly gratifying! The first step to successfully
preserving your bounty is proper harvest. This edition has offered many tips on that topic. Now that you’ve foraged in the garden like a pro let’s explore some of the 5 Cool Ways to Preserve a Harvest.
1 Curing and Storing
To cure and store cannabis, read the article by Everest Fernandez on page 48.
There is nothing more nightmarish than harvesting pounds of onions and garlic and storing them for the winter, only to find them rotting.This real-life horror show will play out for gardeners who fail to properly cure their harvest before storing it in their cold rooms. Several food and medicine crops require curing before storage, including garlic, onions, potatoes, sweet potatoes, winter squash, dry beans, and peas.The curing process doesn’t require much effort, just time.To prepare onions and garlic for storage, harvest them from the garden without puncturing their skin. Spread them out in a dry and wellventilated room for about two weeks; they’re ready when their necks have hardened. Like potatoes destined for storage, refrain from washing them until you’re ready to cook with them. Peas and beans are cured in their pods and can dry on the vine. Bring them indoors only once the pods are brown and papery. Once inside, place them in a warm, dry spot for two weeks, then open the pods and remove the seeds. Store them in a Mason jar with a lid or a paper bag.
2 Freezing If you have the extra space, freezing a harvest is a quick and easy process. Freezing preserves the taste and nutritional value of a crop by stopping the growth of microorganisms and slowing enzyme activity. Use ecofriendly packaging, squeeze out all the air, and properly label the produce type and the date you froze it. Place the items in an even layer and wait until they’re fully frozen before stacking. Some vegetables, such as broccoli, kale, green beans, corn, and cauliflower, require quick blanching before freezing. Boil them for a few minutes, then transfer to ice water to stop the cooking process. Berries can be placed directly into the freezer after washing and drying, but fruits like apples and peaches should be dipped into a lemon juice solution to prevent browning. Pro tips: Consider dicing peppers, onions, and carrots to freeze for a ready-to-go spaghetti mix. If you live in a region where corn is abundant, buy it in bulk from a local farmer at a fair price toward the end of the season. Spend an afternoon peeling and blanching the corn, then removing the kernels from the cobs. Freeze it in bags and enjoy delicious, locally grown corn all winter long!
95
WAYS
3 Canning Have you ever blanched, peeled, and slowly simmered 40 pounds of tomatoes on the stove into a mouth-watering pizza sauce or marinara, canned it, and enjoyed it almost weekly for months after? If your answer is no, then you haven’t really lived. Garden Culture’s executive editor (and first-time canner), Catherine Sherriffs, is still opening cans of sauce from last summer’s tomato harvest! Sarah Thrush, author of Preserving with a Purpose: Next-Generation Canning Recipes & Kitchen Wisdom, is a phenomenal teacher of this tried-and-true preservation method. Whether it’s a water bath (for high-acid foods) or pressure canning (for low-acid foods), when done safely and correctly with the proper materials, canning can result in significant savings at the supermarket and boost the nutritional content of all your meals. A pressure canner is a one-time investment that pays for itself quickly when you consider the number of jars of preserved food you’ll have in your pantry.We won’t claim that this is the easiest way to preserve your harvest, but we will say that, from start to finish, it’s one of the most enjoyable processes we’ve ever experienced— slow, delicious, and incredibly worthwhile.
Read Catherine’s interview with Sarah Thrush in The Canning Comeback: Preserving with a Purpose here:
4 Drying Drying food simply involves removing moisture from fruits and veggies to inhibit bacterial growth. If you have an abundance of herbs you’d like to preserve for cooking or steeping, air-drying on screens or hang-drying them in a well-ventilated area will do the trick. Oven drying is an option, and freeze-drying or dehydrating are also effective methods, but they require special equipment. Produce that has been properly freeze-dried can last up to 25 years because the process removes approximately 99% of the moisture. Other methods typically only remove 70-90% of a food’s moisture content and can only be stored for about a year.
5 Fermenting Fermented foods are taking the world by storm for their incredible nutritional value, their benefits for gut health, and because they’re super fun to make! Fermentation uses beneficial bacteria to preserve and boost the nutrients in our food, even adding essential probiotics to support digestive health. It involves cleaning and chopping fruits or vegetables and either placing them in a brine solution with salt and water (or their natural juices) or packing the sliced produce in a fermentation vessel and covering it with brine. For the latter, use a weight to keep the veg submerged. Fermentation takes place at room temperature; check it often and remove surface mold. Once complete, store your fermented product in jars in the fridge. 3
96
Great Gardening Resources: • Nettles & Petals: Grow Food, Eat Weeds, Save Seeds by Jamie Walton • Kitchen Garden Living: Seasonal Growing and Eating from a Beautiful, Bountiful Food Garden by Bailey Van Tassel
READY-TO-USE GROW BAGS COIR OR PEAT SOLUTIONS
FOLLOW US
VISIT PTHORTICULTURE.COM/OTGB The information in this document was up-to-date at the time of printing. Because of its continuous improvement policy, Premier Horticulture reserves the right to halt manufacturing, change products, or revise technical data and prices without further warning or liability. Product availability may vary depending on the territory. Premier Horticulture is not responsible of the use of its products in territories where cannabis is prohibited. © 2025 Premier Horticulture Ltd. All rights reserved. PRO-MIX® is registered trademark of Premier Horticulture Ltd.
MILLS OR
FOLLOW US!
#MILLSPAYSTHEBILLSAMSTERDAM
www.mills-nutrients.com
RGANICS AVANOW ILA BLE
NATURALLY BETTER!
SECRET INGREDIENT
UNL
CKED
PRECISION NUTRIENTS. PROVEN ADDITIVES. ZERO GUESSWORK.
@cannausaofficial cannagardening.com
Discover the input behind some of the industry’s most consistent success stories. With over 30 years of global cultivation expertise, delivers streamlined nutrient programs and clean, high performance substrates, that scale effortlessly from propagation to flush.
@cannacanadaofficial canna.ca
When yield, quality, and consistency matter — is your secret advantage.