

• The Fly Line
• The Leader
• The Rigging
• Getting the Fly Down
• Knots
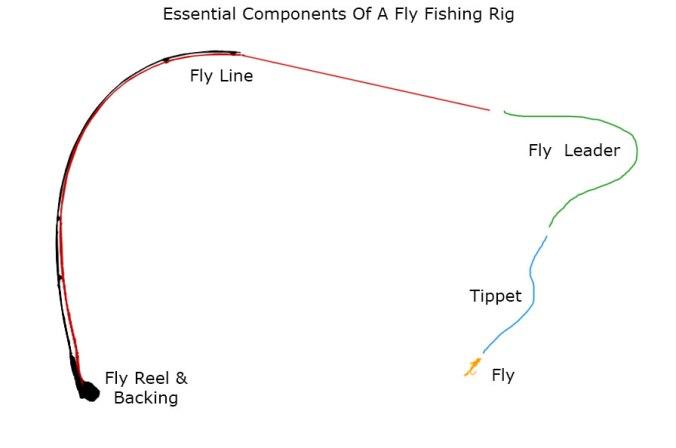
• Connects the fly line to the reel
• Increases reel diameter under the fly line for faster retrieve
• Extends distance a fish can “run”
• Typically made of braided Dacron
• Reel specs usually suggest length of backing
• Typically, 90 to 100 ft. in length
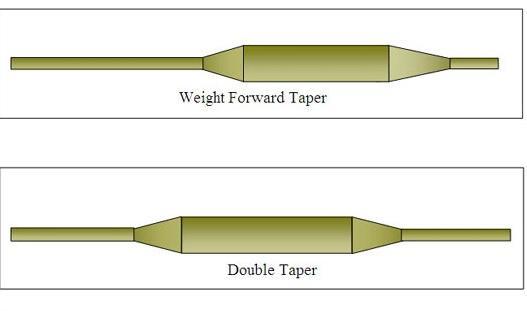
• Majority of length is thin “running line”
• Thicker “head” provides weight for easier casting
• Most lines come with welded loop to connect with leader, many with loops at both ends
• Summary specs are type of line, rod weight & sink type
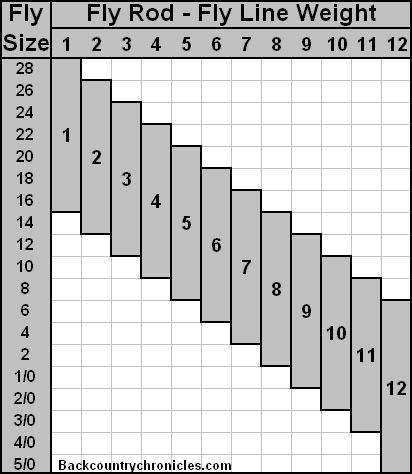
• WF 5 F is weight forward, 5 Wt. rod, floating line
• Using line 1 weight above rod design makes easier casting
• Many manufacturers design line weights above rod standards
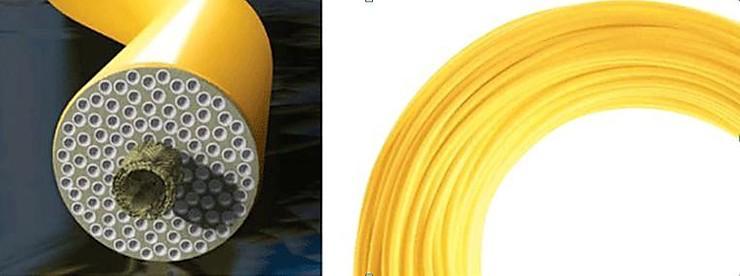
• Technology has provided improvements in material surfaces and head designs for your fishing preference/style
• Surface options often determine quality/price levels
• Head designs – typically related to length & taper – can vary by target fish and fishing style
• Many fly line options driven by marketing for target audiences
• Start with a standard “weight forward, floating” line which will work in most situations
• The Fly Line
• The Leader
• The Rigging
• Getting the Fly Down
• Knots
• Connects the highly visible fly line with the apparently independent/unconnected fly
• “Turns Over” the fly, dissipates the casting energy
• Stiffer butt section, including taper, and flexible tippet section
• Size usually defined by tippet size
• Material is usually monofilament
• Many options of tapered leaders driven by marketing for target audiences
• Many options for your fishing preference/style
• Monofilament is not a material, it simply means “single filament”
• The single filament can be made of nylon, fluorocarbon, PVC, or anything
• The typical monofilament options for fly fishing are nylon and fluorocarbon
• Leader and tippet material can be continuous, knotted, or mechanically connected
Nylon Monofilament
• Illuminated by sunlight rays
• Effected by abrasion
• Weakens over time, especially when exposed to UV rays
• Slow sink rate
• $
Fluorocarbon Monofilament
• Low visibility in water
• More abrasion resistant
• Does not weaken over time
• Not degradable
• Sinks slightly faster
• Some concern for knot strength
• $$$
• A new leader, right out of the packet
- Loop to loop connection to line
- Knotless
- Tapered
- Last 2+ feet of leader is “tippet”
- “Butt” Section reduces diameter to the tippet section
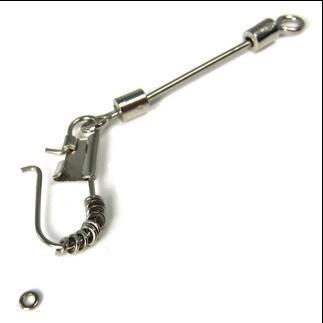
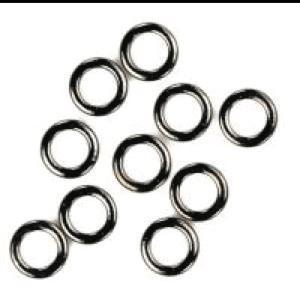
• Connecting butt and tippet with tippet ring or swivel saves $$
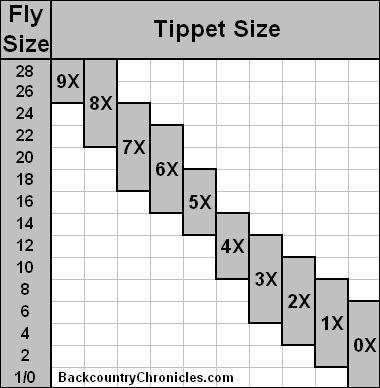
Tippet Size Breaking Strength Species 0X 15.5
Steelhead, Pike, Muskie 1X 13.5
Bonefish, Redfish, Permit 2X 11.5 Large and Smallmouth Bass
8.5 Bass and Large Trout
0X: 2, 1/0
1X: 4, 6, 8
2X: 6, 8, 10
3X: 10, 12, 14
4X: 12, 14, 16
5X: 14, 16, 18
6X: 16, 18, 20, 22
7X: 18, 20, 22, 24
Smaller “X” number = larger fly
• Integrated monofilament
• Monofilament butt section
- Loop to line
- Ring or swivel to tippet
• Furled leader (butt section)
- Braided monofilament
- Floats well
- Usually for dry fly fishing
• Wire tippet for “Toothy Fish”
• Add tippet as appropriate
• The Fly Line
• The Leader
• The Rigging
• Getting the Fly Down
• Knots
“RIGGING”
• Dry Fly Rig
• Nymph Rig
• Dropper Rig
• Double Dropper Rig
• Swinging Rig
• Placing the strike indicator
• Getting the fly down
• WF-F Line
• Nominal 9’ tapered leader - May be longer
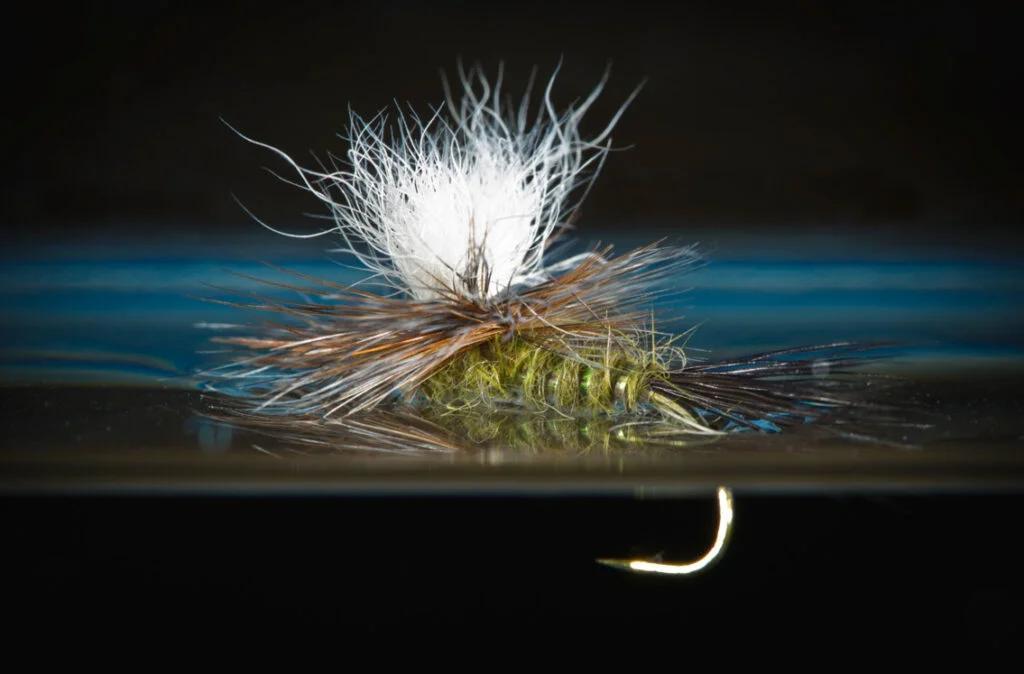
• Dry fly imitates adult aquatic insect
• Floats on top of the water
• No strike indicator needed
• WF-F Line
• Nominal 9’ tapered leader
- May be shorter
• One wet fly or nymph fly suspended under the surface of the water
• Use split shot or weighted fly
• Use a strike indicator
• WF-F Line
• Tapered leader, 9’ total length
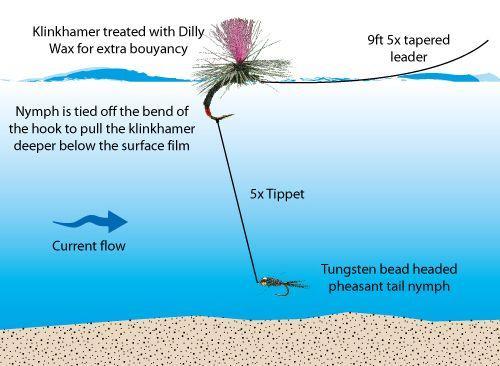
• One dry fly, add 18” of smaller tippet, tie on a nymph or wet fly
• Dry fly is the indicator
• WF-F Line
• Tapered leader, 9’ total length
• One nymph fly, add 18” of tippet, tie on a second nymph or wet fly
• Use a strike indicator
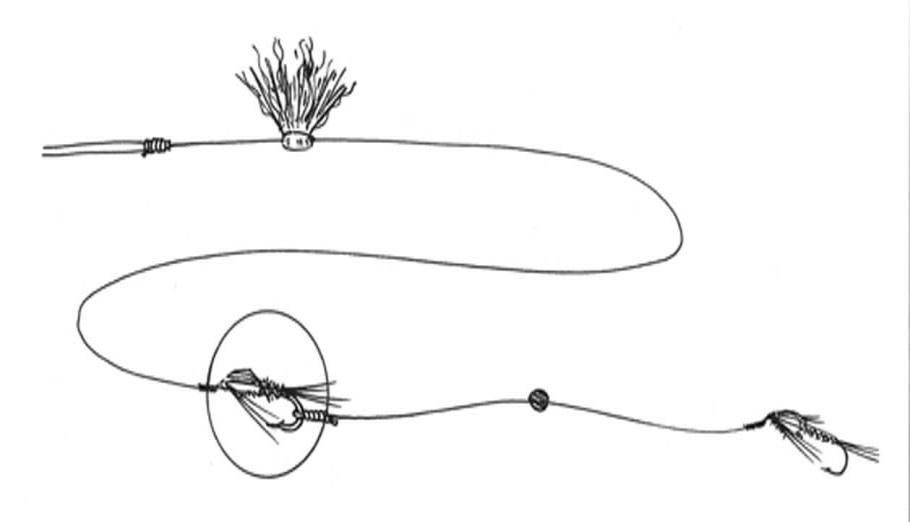
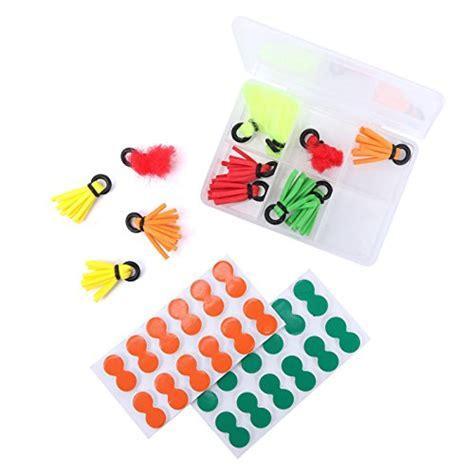
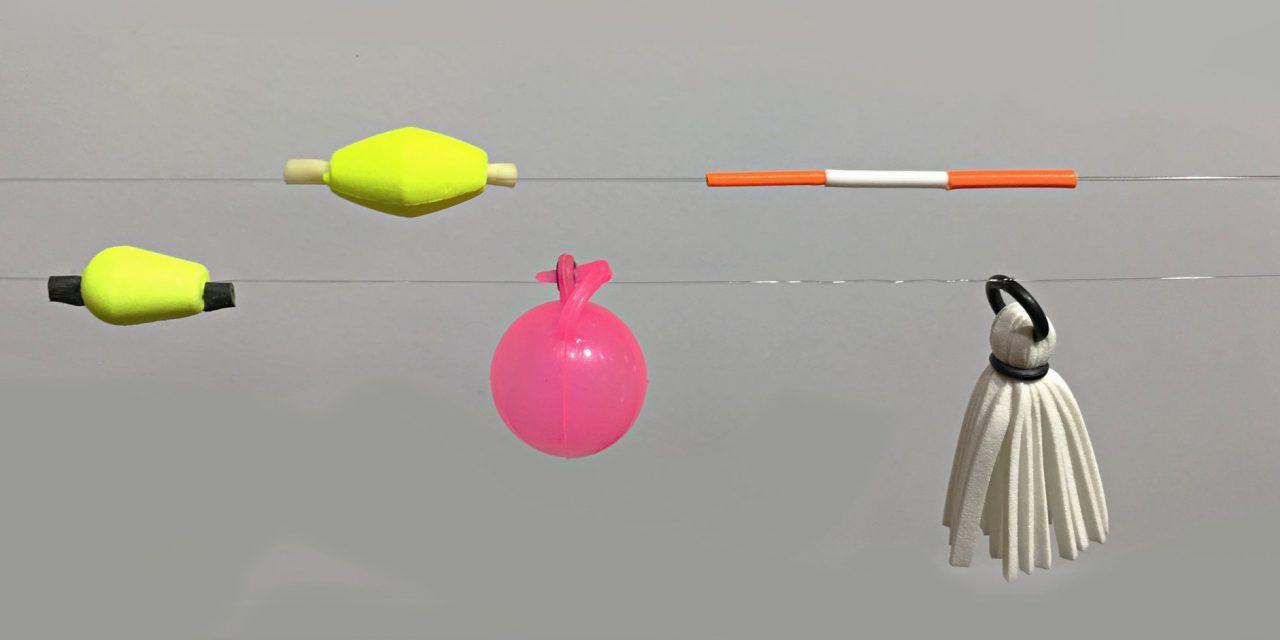
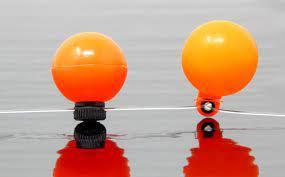
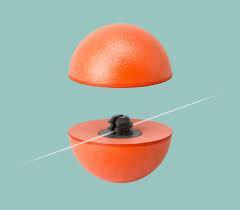
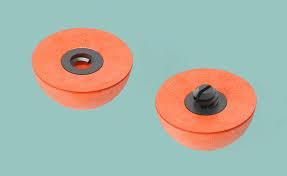
• Typically point fly is heaviest fly -- to get the fly down
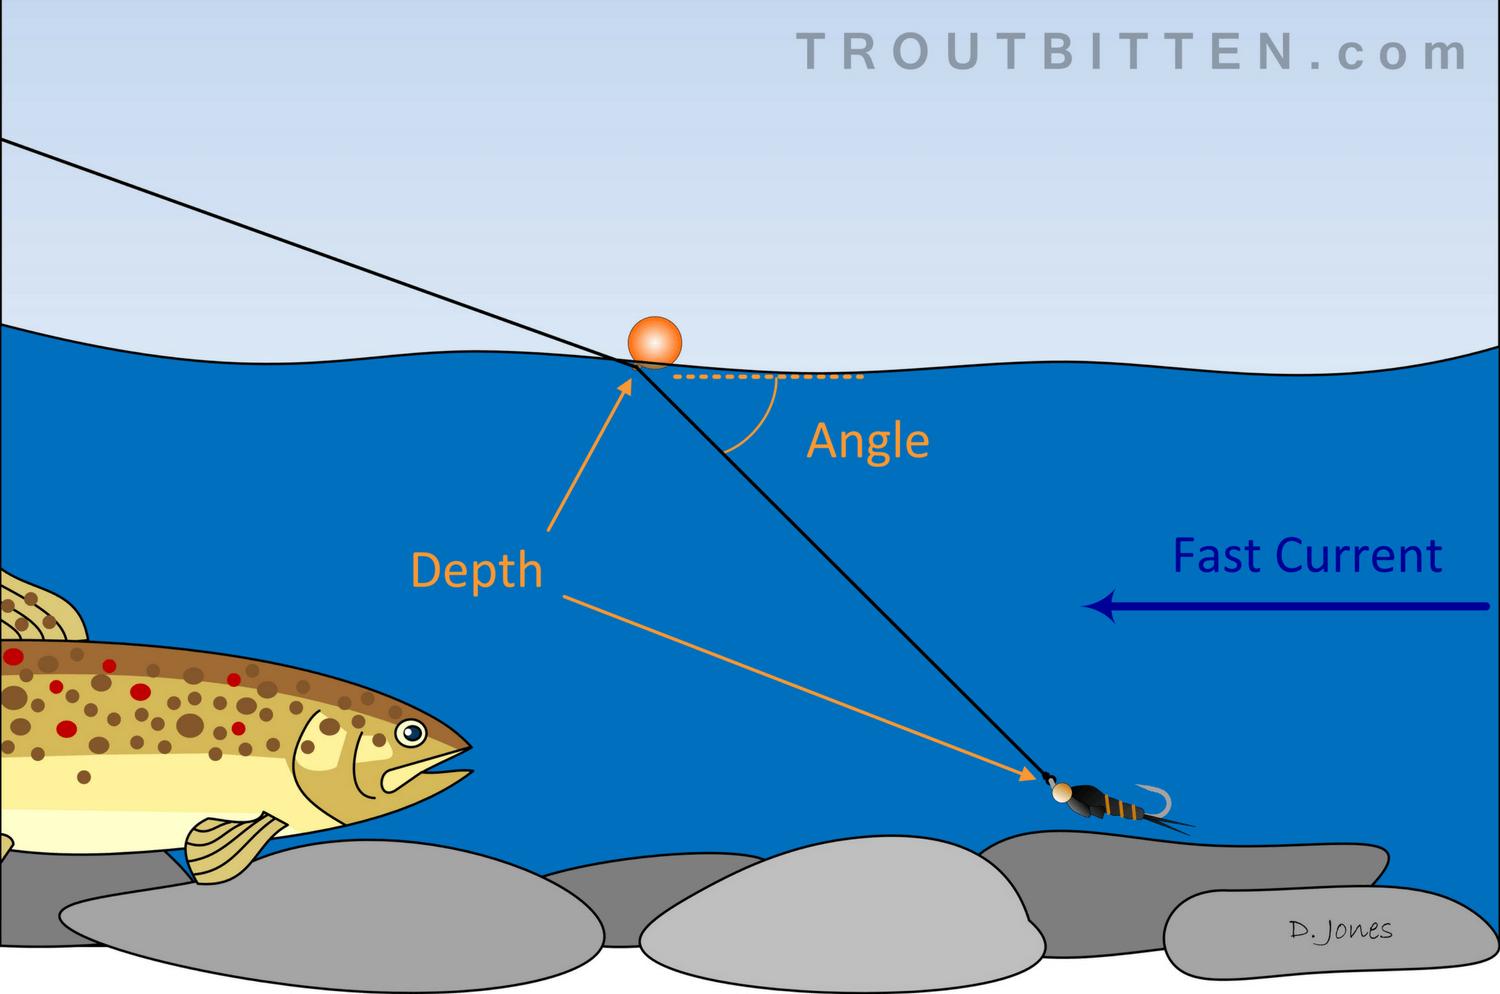
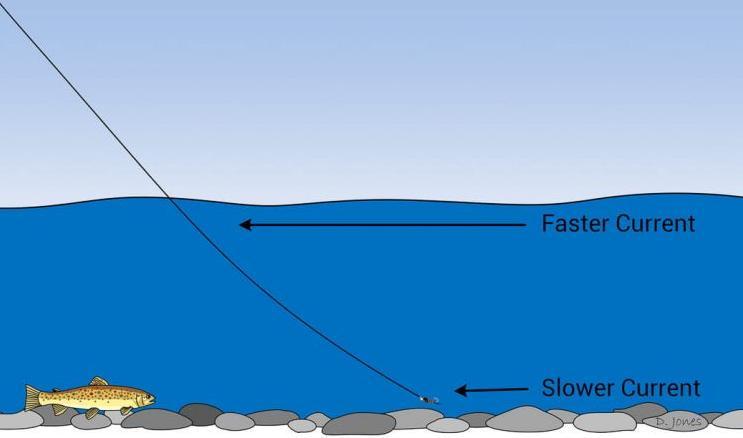
• In moving water, indicator to point fly -- nominally 1.5 times depth -- slower current, less -- faster current, more
• In still water, e.g., lake -- slightly less than depth -- fly hangs straight down
• Streamer, nymph, or wet fly suspended under the surface of the water
• WF-F or sinking line
• Shorter leader, 4’ to 9’
• No strike indicator
• Options for right depth
• The Fly Line
• The Leader
• The Rigging
• Getting the Fly Down
• Knots
• Sinking line, sink tips or sinking leader
• Split shot or weighted fly
-- more movement with lighter fly
• Split shot placement
-- on leader or tippet
-- on tag end of butt -tippet knot
-- on short line from tippet ring
• Your innovative combinations
• Sinking line: major portion of fly line designed to sink –good for deep presentation
• Sink tip: section of sinking material added to floating fly line – common length 8 -20 ft – good for intermediate depths
• Sinking leader: leader made with sinking material –good for shallow depth presentation
• Sink rate depends on line density
• Key measurement – inches per second
• Common definitions – vary widely - intermediate – typically 1.5 - 2.0 ips
- type 3 / sink 3 – approx. 3 ips - type 5 / sink 5 – approx. 5 ips
- T-8 – 6-7 ips
- T-11– 7-8 ips
- T-14 – 8-9 ips
Steelhead, Pike, Muskie 1X 13.5
Bonefish, Redfish, Permit 2X 11.5
Large and Smallmouth Bass 3X 8.5 Bass and Large Trout
Pick a Couple Sizes, Build on Them
• Dry / Surface Flies -- Longer leader, tight loops
• Nymphs / Wet Flies -- Medium leader, open loops
• Streamers -- Shorter leader, more open loops
• Tight Loop demonstrates maximum energy in cast -- helpful in high wind
• Benefits of more open loops
-- less tangle with complex rigging
-- safety with heavier flies
• Fly Line – typically floating
• Euro -Nymph Leader
-- 16’ 0.016” 15# Maxima
-- 1’ 0.01” 2X Indicator
-- 1’ 0.016” 15# Maxima
-- 1’ 0.01” 2X Indicator
• Swivel
• Tippet
• Running/shooting fly line
• Skagit head for submerged, wt. to match rod
• Scandi head for surface, wt. to match rod
• Tip designed for depth, sink rate
• Tippet – 3 to 6 feet
• Optional swivel – tip to tippet
• Integrated fly lines are available
• The Fly Line
• The Leader
• The Rigging
• Getting the Fly Down
• Knots
• Backing to Reel Arbor
- Uni, Arbor, or 2 Half Hitches Knot
• Fly Line to Backing
- Nail Knot
- Loop to Loop Connection
• Leader to Fly Line
- Loop to Loop Connection
- Perfection Loop
- Nail Knot (permanent)
• Monofilament to Monofilament
- Double Surgeons Knot
- Tippet Ring or Swivel
• Fly to Tippet
- Clinch / Improved Clinch Knot
- Pitzen, Eugene Bend, Fisherman’s Knot
- Perfection Loop
• Butt: leader section connecting to the fly line
• Tippet: leader section connecting to the fly
• Tag End: short end of line in which the knot is being tied
• Standing End or Standing Line: long end of line in which the knot is being tied
• Loop: line doubled back on itself so that tag end is parallel to or across the standing end, forming a loop
• Closing the Knot: process of tightening the wraps assuring all wraps are properly aligned
• Setting the Knot: process of finally tightening the knot so that it is ready to fish
• Go slow
• Old pieces of line, leader, and backing work fine for practice materials
• Practice with the same size of material you will likely use on the river
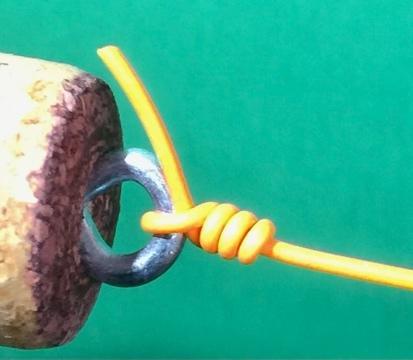
• Your finished knot should look like an illustration of the finished knot
• Note the challenge of smooth slippery vs rough surfaces
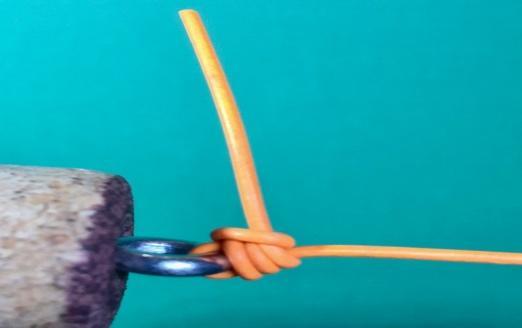
• Pull standing line or tag end slowly
• When tightening turns, wraps, or loops of a knot, be sure they are pulled in a neat spiral, and each wrap coil aligns edge -to-edge with the next wrap coil as the knot closes
• Do not let the loops / wraps cross over each other. If loops are pulled up quickly, the loops may cross over one another causing the upper loops to cut the ones beneath as tension is applied.
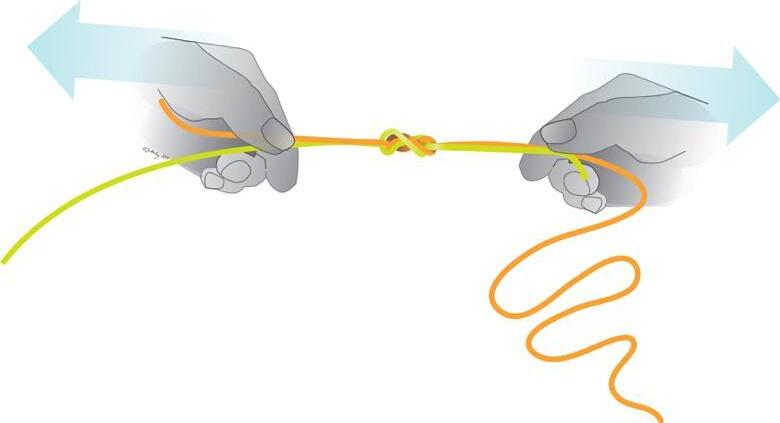
• Before “closing” the knot tight, moisten it with saliva, water or Chapstick causing it to close more tightly
• After carefully “closing” a knot, “set” the knot
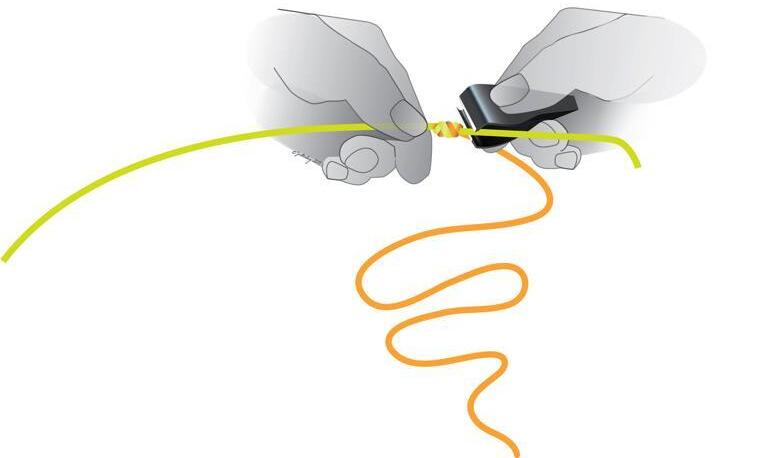
• For knots in stiff or heavy material (large diameter), have a pair of pliers or hemostat handy to close the knot tight
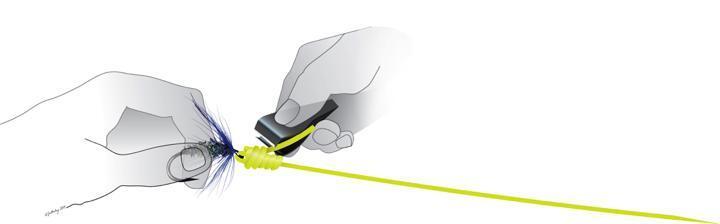
• When the knot is properly set, trim the tag end(s) close to the knot
• With tippet, understand the nylon and diameter may differ from one brand to another
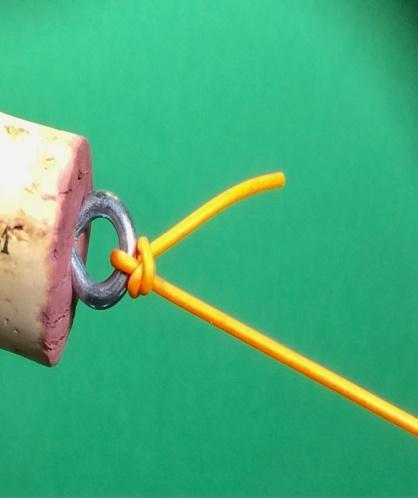
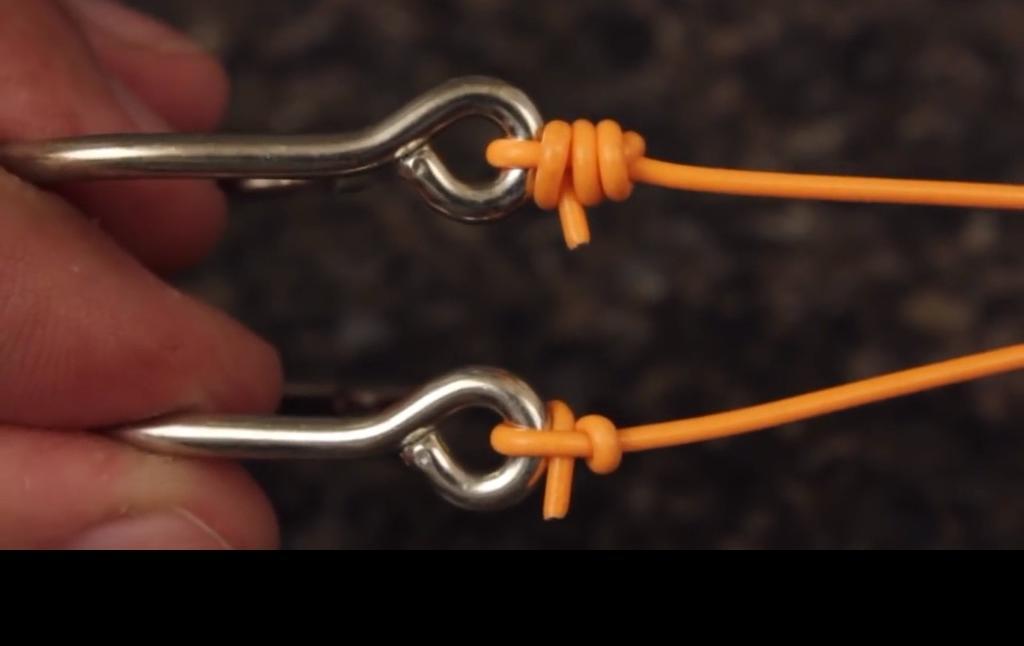
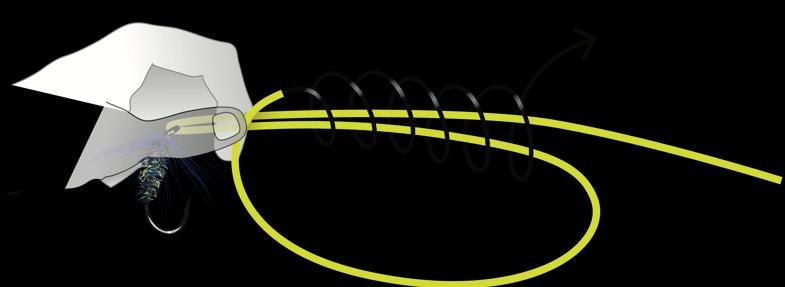
Make 4 -6 turns (depending on size of tippet diameter) with the tag end around the double line and through the loop
• Hold backing and fly line parallel to each other, about 5 inches
• Hold tool or tube parallel to fly line at end of fly line
• Make 5 to 7 tight wraps of tag end of backing around line, backing, and tip of the tool working away from your thumb
• Pass tag end of backing back thru tool or tube
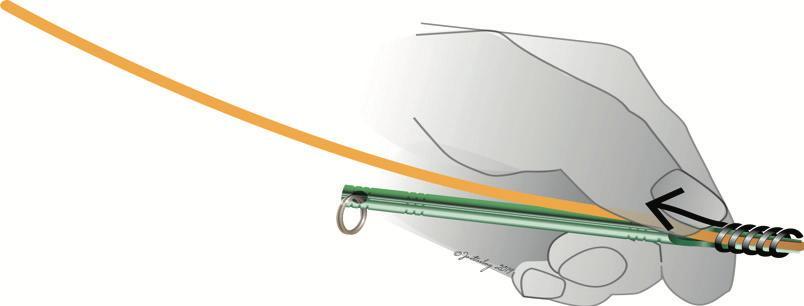
• Carefully pull backing and tag end tight as you remove tool or tube
• Trim tag end
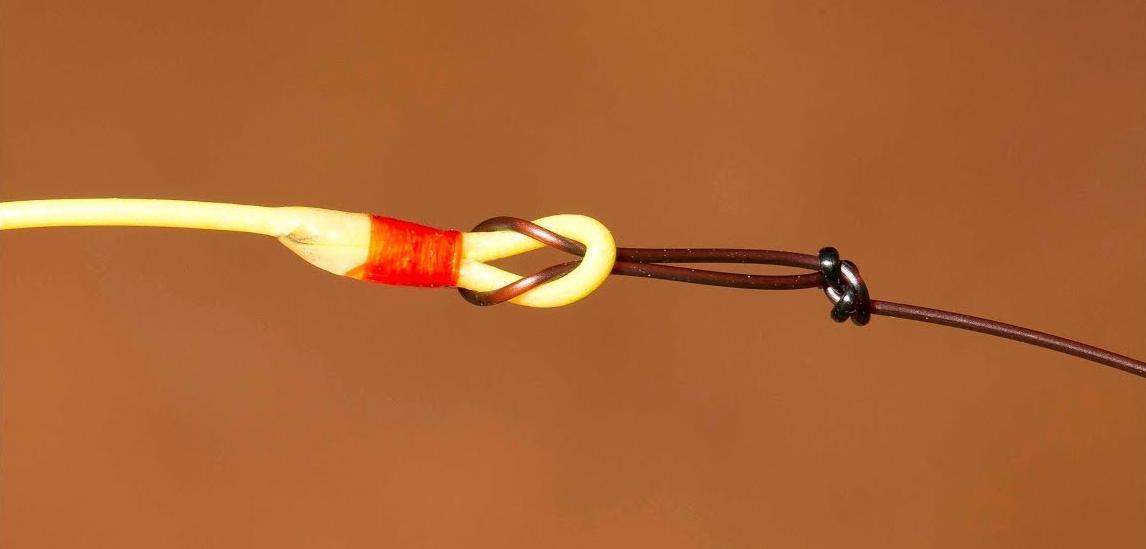
• The Loop -to-Loop connection is a simple and very strong method of interconnecting two loops, often referred to as interlocking loops. The method is simple, but there is one pitfall to be avoided -- where one loop folds the wrong way making a girth hitch.
• Most leaders and many fly lines come with pre -made loops. If desired, a braided loop can be added to a fly line. A Perfection Loop or Surgeon's End Loop can be tied to the end of the leader.
1. Slip one loop over the other
leader loop over fly line loop
2. Run leader line thru fly line Loop
3. Pull lines to lock loops together, being careful that loops join endto-end and that one does not fold back forming a girth hitch
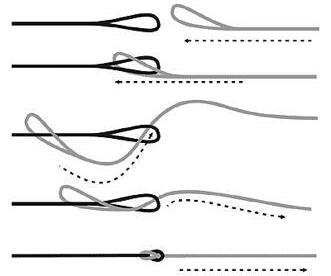
Smallest diameter loop (leader, shorter line) ALWAYS goes over the larger diameter loop (fly line)
Fly Line
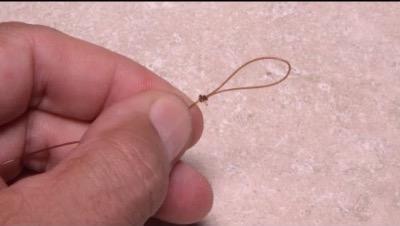
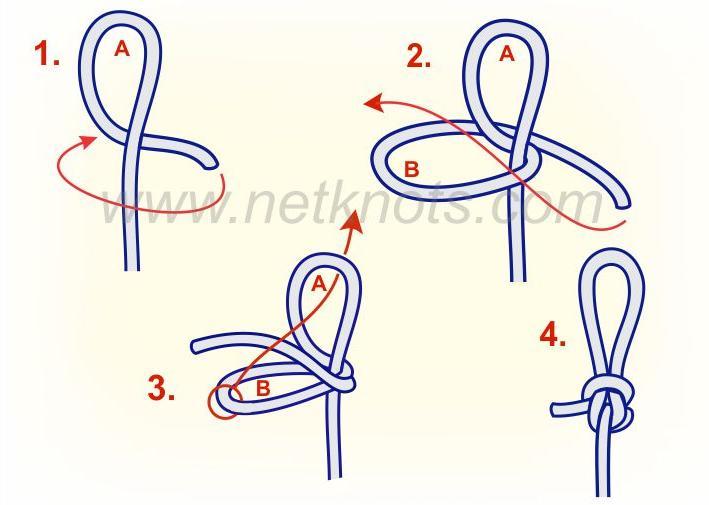
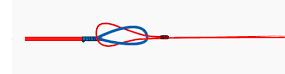
Form a loop at the end of the line by passing the tag end behind the standing line
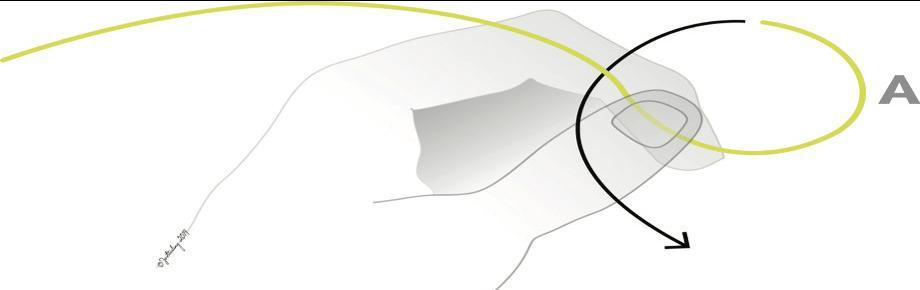
Pass the tag end around the first Loop (A)
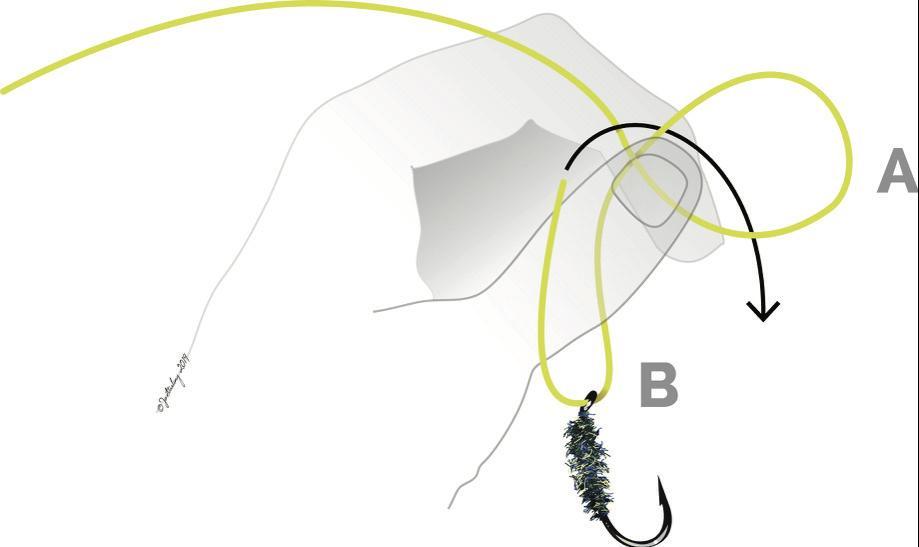
Continue the tag end around the first Loop (A) then between the two loops
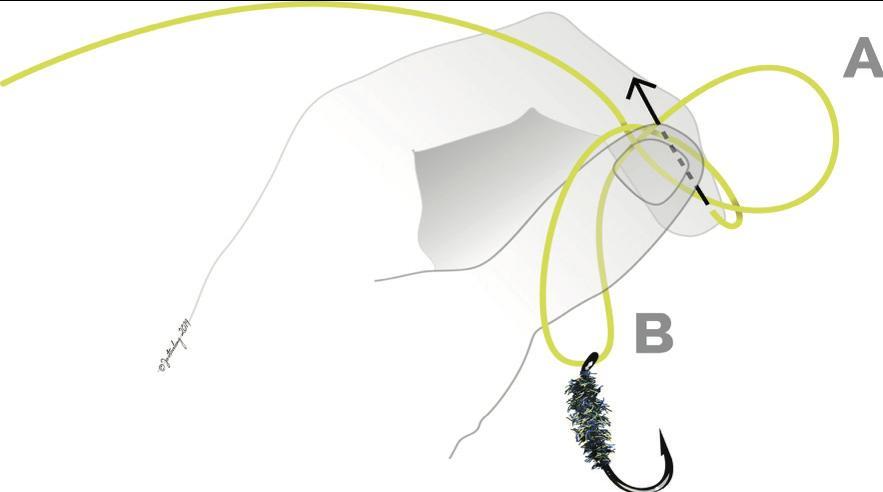
Drop the Loop (B) and fly through the first Loop (A)
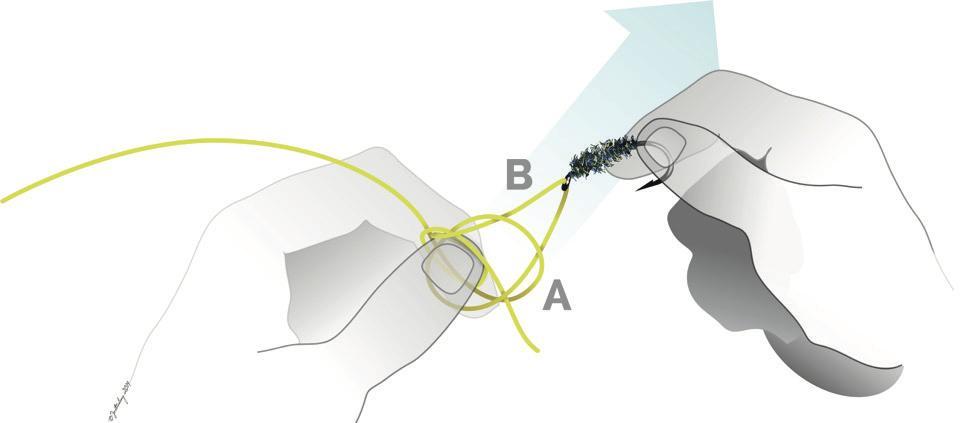
Close and seat the knot, cut the tag end
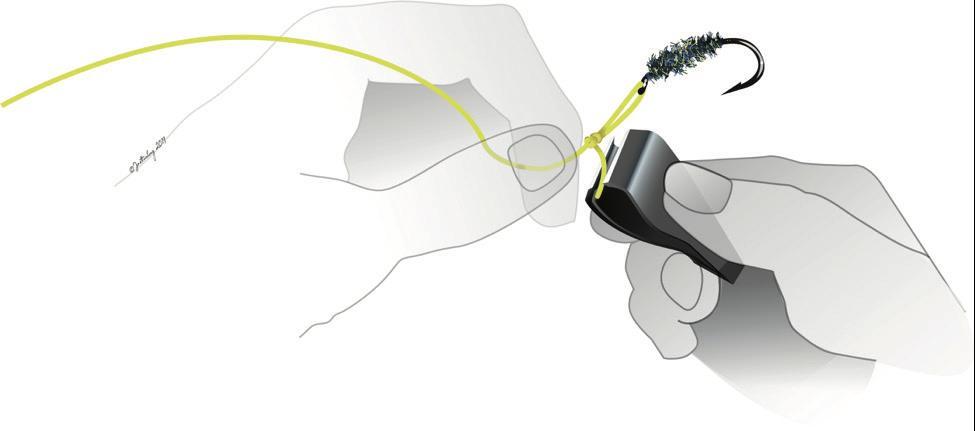
• While fly fishing, each time you change your fly, the tippet becomes shorter. When the tippet length has been reduced by 2 to 3 ft, it is time to add tippet.
• A good knot to use when adding tippet to leader is the Double Surgeon’s Knot
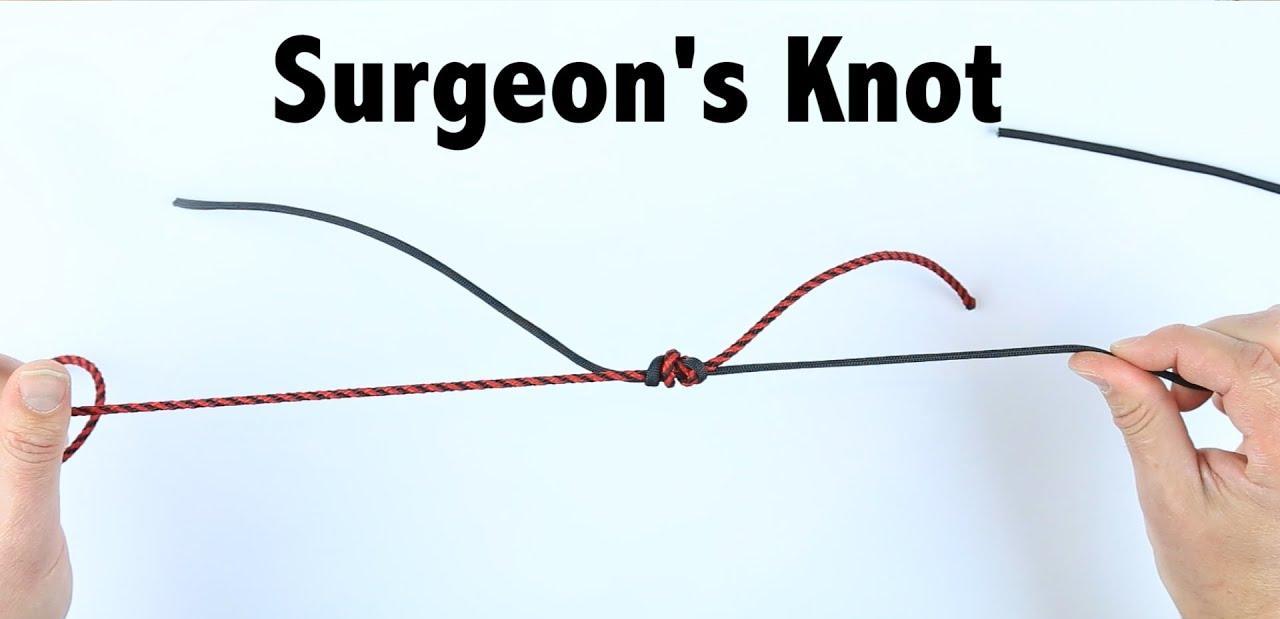
• This knot ranks as one of the best and easiest to tie tippet to the leader
• It is simply two overhand knots with the entire leader pulled through the knot each time.
• When properly tied, the Surgeon’s
Knot approaches 100 -percent line strength
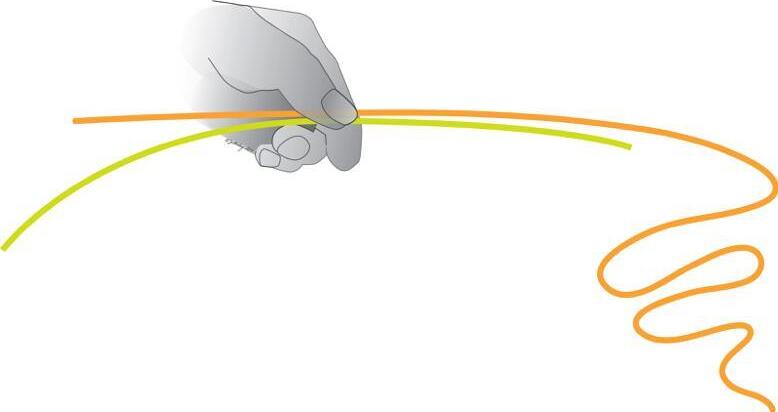
Lay the line and tippet on top of one another overlapping each other by several inches
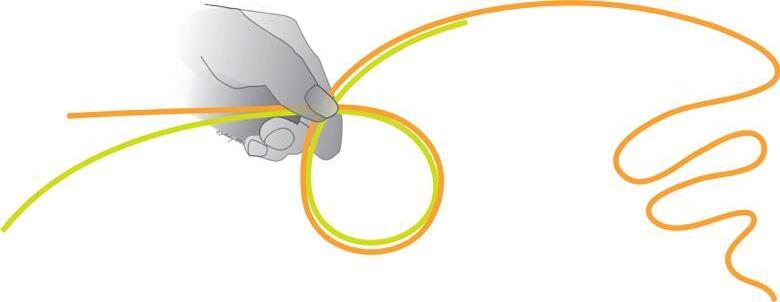
Form a simple loop. Pass both the tag end and the entire leader through the loop
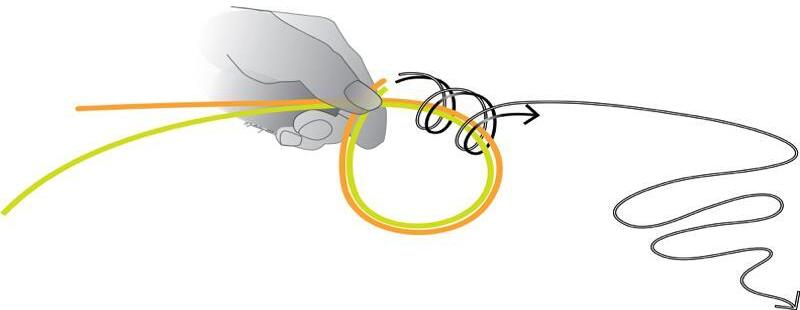
Pass both the tag end and the entire leader through the loop a second time
• (Optional) pass both tag end and leader through the loop an additional time to tie the Triple Surgeon's Knot
Moisten knot and pull all four (4) ends tight
Cut both tag ends
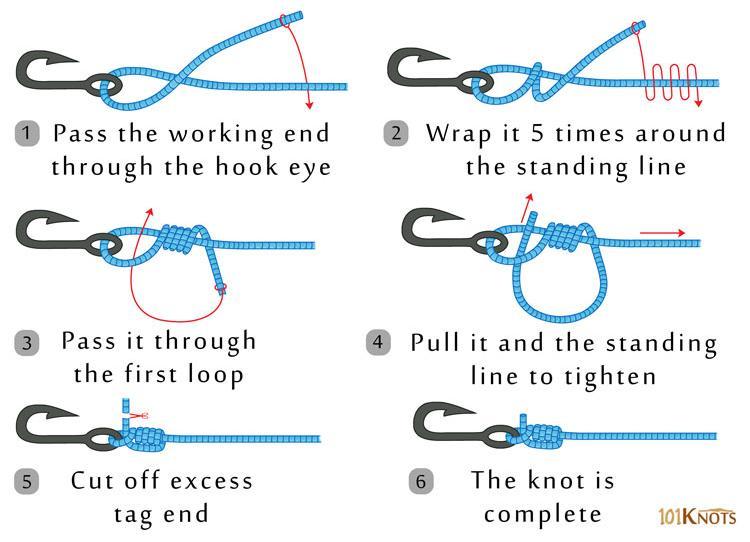
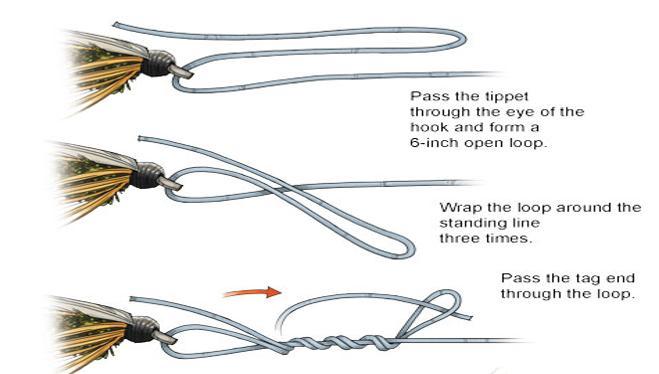
Pass tag end of line through eye of hook. Place tag end parallel to standing line, then wrap tag end 5 or more turns around standing line
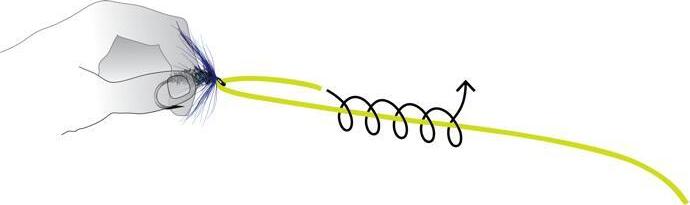
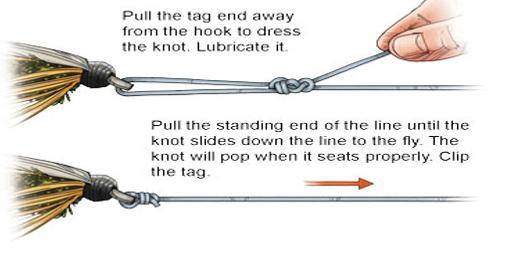
Bring tag end back through the first loop formed behind the eye. If you pull the tag end tight (close the knot) at this point, you have tied the Clinch Knot . If you do not close the knot, but pass the tag through the big loop as below, wet the knot, then pull the tag end tight and close the knot, you tied the Improved Clinch Knot . Seat the knot by pulling on the standing line and the tag end.
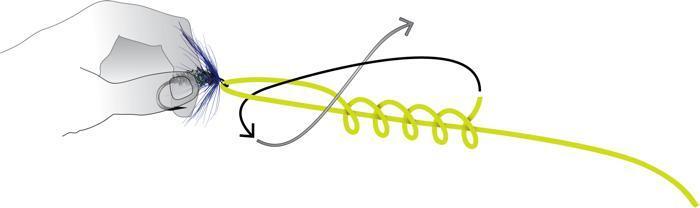
Pull standing line to close knot and cut the tag end close
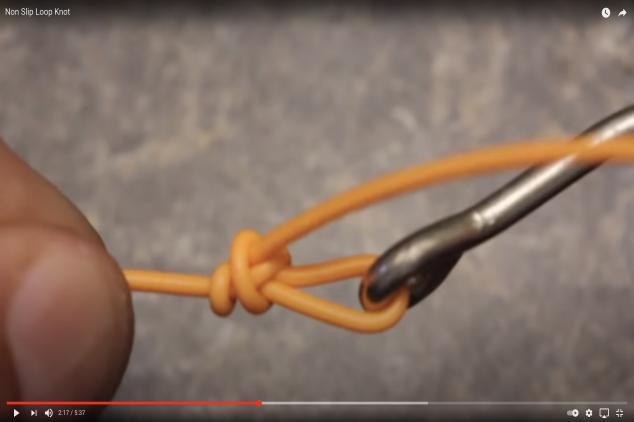
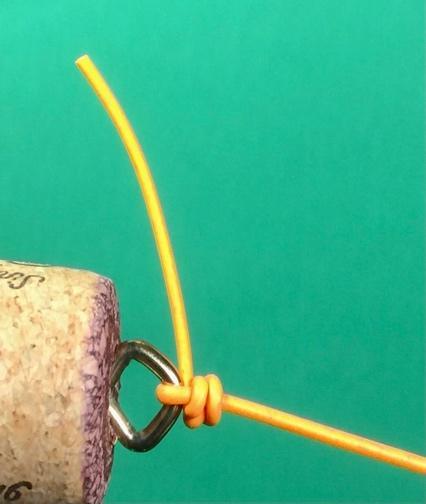
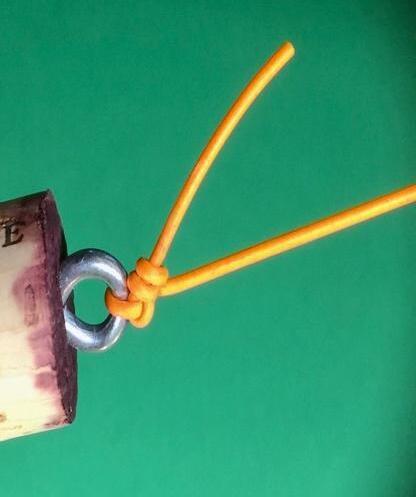
• A Terminal Knot – tippet to fly or tippet ring
- Clinch Knot
- Fisherman’s Knot
• Tippet to leader
- Surgeon Knot
• Loop to loop or tippet to fly
- Perfection Loop
• Close the knot: tighten the knot with a slow, steady continuous pull of the standing parts in opposite directions.
• Set the knot: once the knot is tight, hold both standing parts of the lines close to the knot and make one, and only one, sharp pull to set the knot.
• “No knot failed before it slipped”