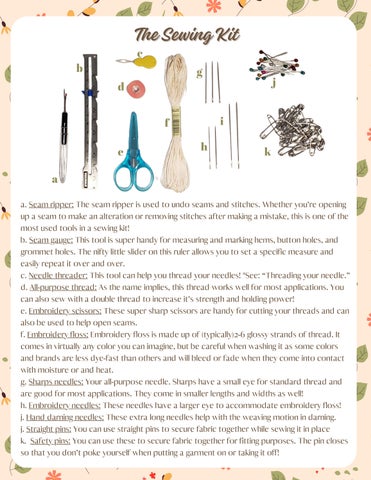
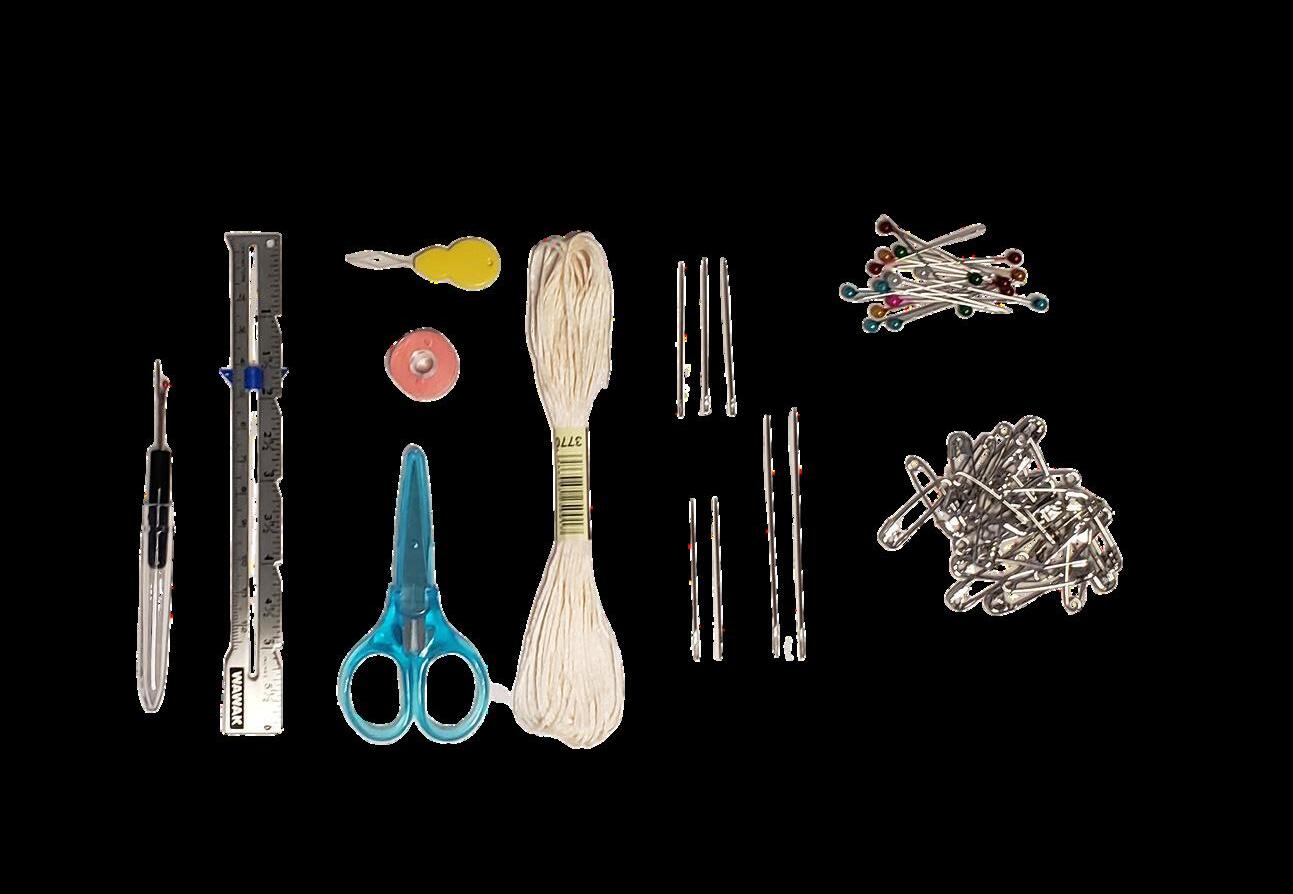
b. Seam gauge: This tool is super handy for measuring and marking hems, button holes, and grommet holes. The nifty little slider on this ruler allows you to set a specific measure and easily repeat it over and over.
c. Needle threader: This tool can help you thread your needles! *See: “Threading your needle.”
d. All-purpose thread: As the name implies, this thread works well for most applications. You can also sew with a double thread to increase it’s strength and holding power!
e. Embroidery scissors: These super sharp scissors are handy for cutting your threads and can also be used to help open seams.
f. Embroidery floss: Embroidery floss is made up of (typically)2-6 glossy strands of thread. It comes in virtually any color you can imagine, but be careful when washing it as some colors and brands are less dye-fast than others and will bleed or fade when they come into contact with moisture or and heat.
g. Sharps needles: Your all-purpose needle. Sharps have a small eye for standard thread and are good for most applications. They come in smaller lengths and widths as well!
h. Embroidery needles: These needles have a larger eye to accommodate embroidery floss!
j. Hand darning needles: These extra long needles help with the weaving motion in darning.
j. Straight pins: You can use straight pins to secure fabric together while sewing it in place
k. Safety pins: You can use these to secure fabric together for fitting purposes. The pin closes so that you don’t poke yourself when putting a garment on or taking it off!
a u m
g
a b e d c f g h i j k
1
2
3
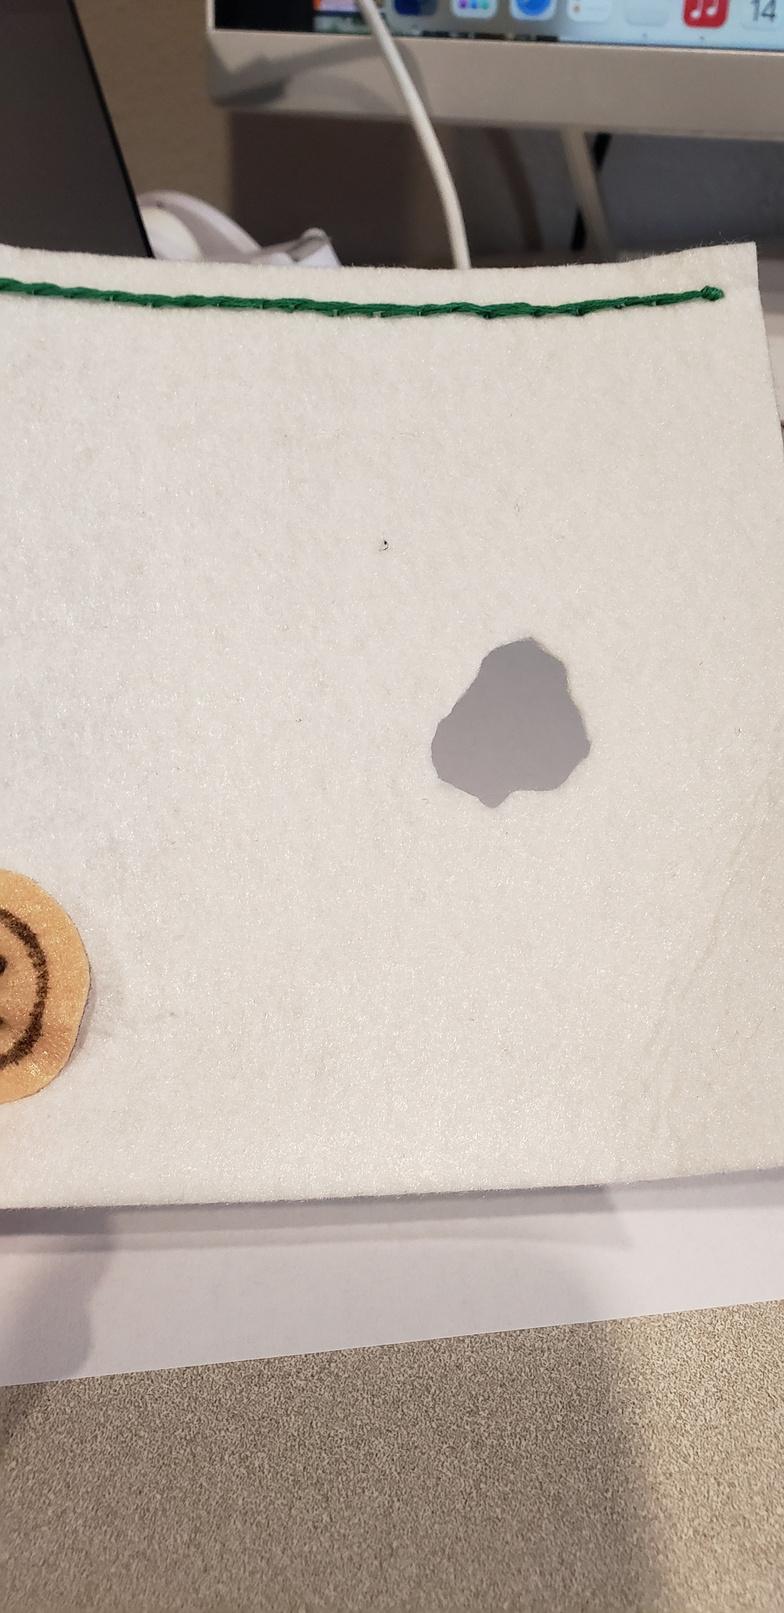
Investigate the hole: inspect the hole from the inside and outside of the garment. Touch the surrounding fabric and notice where the fabric has thinned and where it is strong
a. Cut a piece of cardboard that is about 2 “ larger than your hole in each direction Insert the cardboard into the inside of the garment position it below the hole Pin fabric to the cardboard around the perimeter
If the hole is quite large or the surrounding fabric is very weak, consider adding a patch on the inside to stabilize repair
(alternatively, use an embroidery hoop)
4
Double or quadruple thread your needle (or use embroidery floss if you wish)
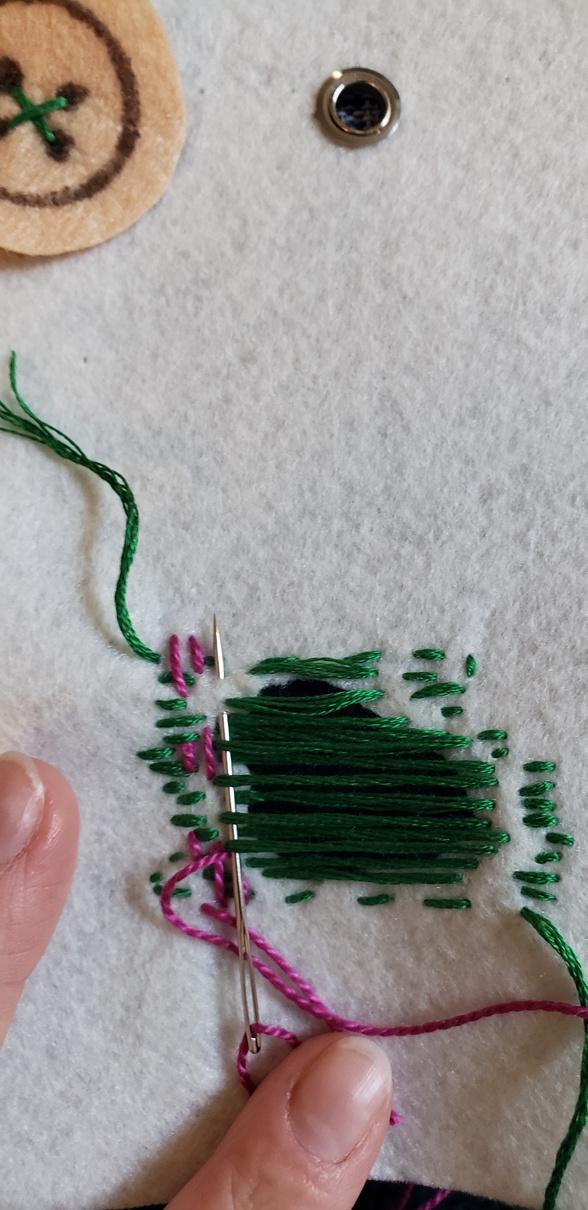
Darning is a method of fabric repair that uses a needle and thread to weave and fill in holes. It is frequently employed to repair socks. but it can be used to subtly repair many types of fabric and garments Step 1 Step
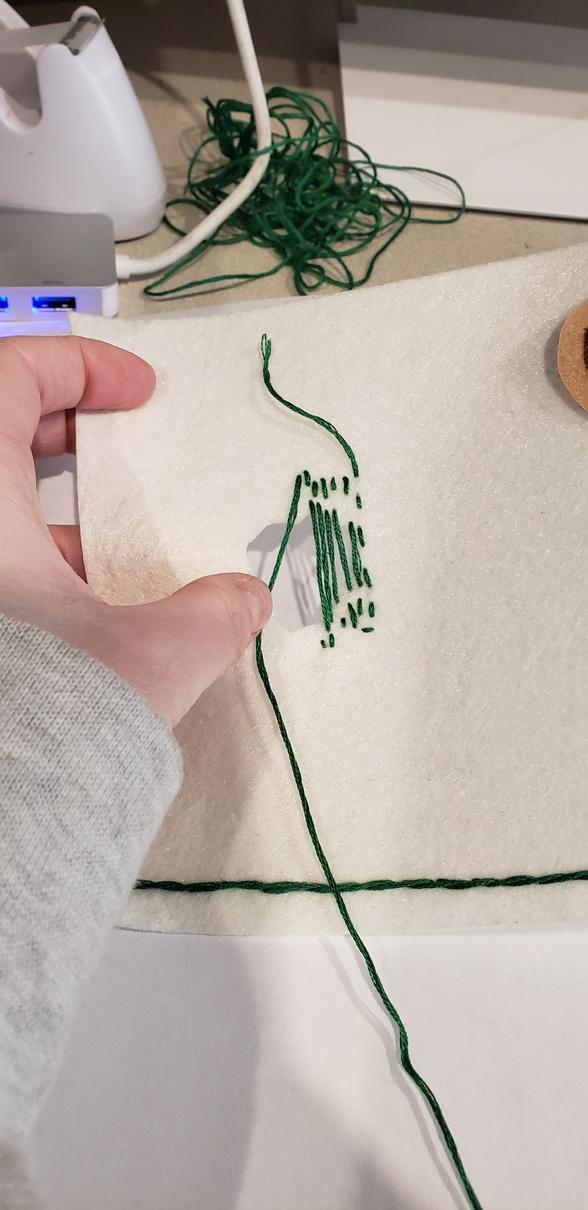
Using a running stitch, begin sewing vertical rows across the hole
a.
b
d.
Start about 1/2" away from the edge of the hole on one side
When you reach the hole, pass over it and begin sewing again when you reach the edge of the hole on the other side
c. Move your needle about 1/16"-1/8" over in the horizontal direction and then sew a running stitch row that runs parallel to the first
e
Continue the running stitch until you have traveled about 1/2" away from the edge of the hole
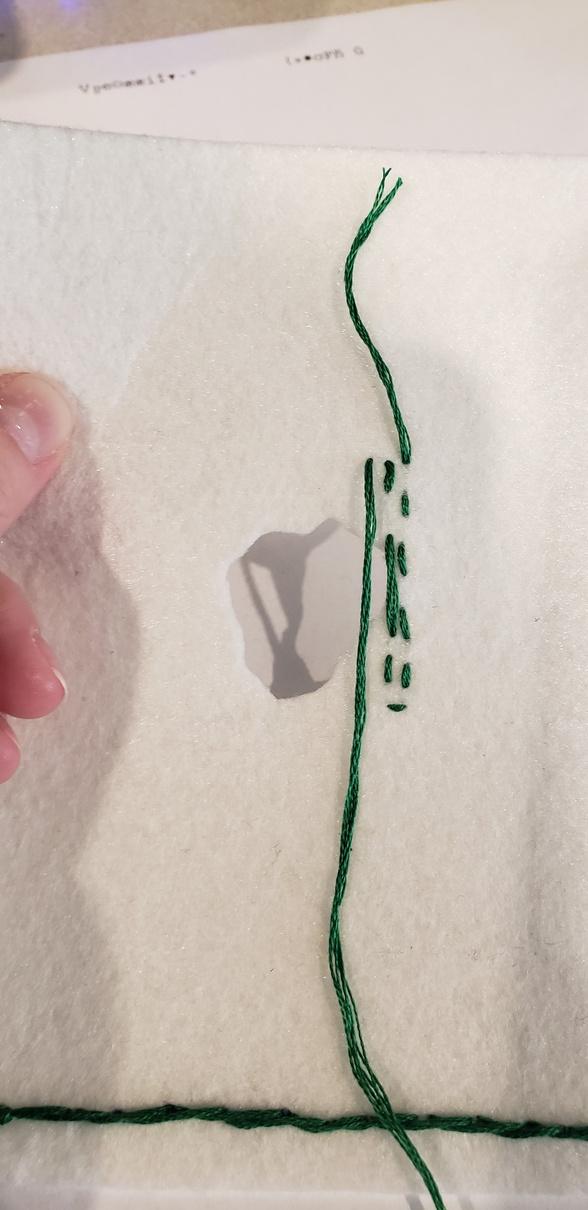
Continue until you reach the opposite edge of the hole
Hand Darning Hand Darning - Part 1 - Part 1
4 Step 4b Step 4e
Step 2 Step 2 b
2
1
If you begin to run out of thread at any point along the way, come to end of the last row that you can finish, while leaving about 4" of thread remaining, and unthread the needle Leave the tail loose
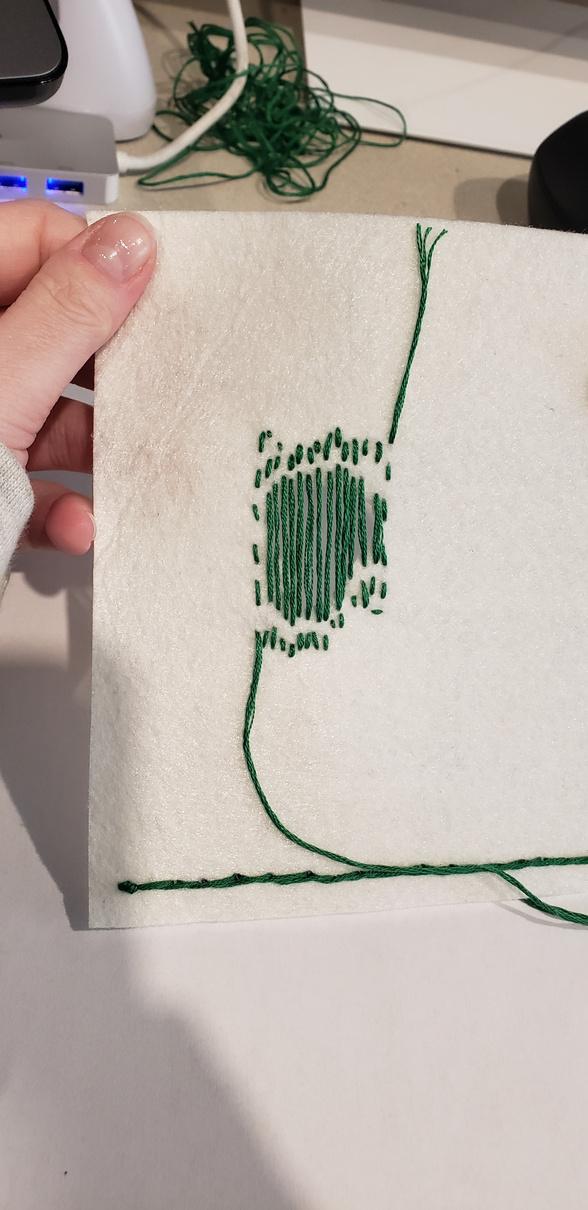
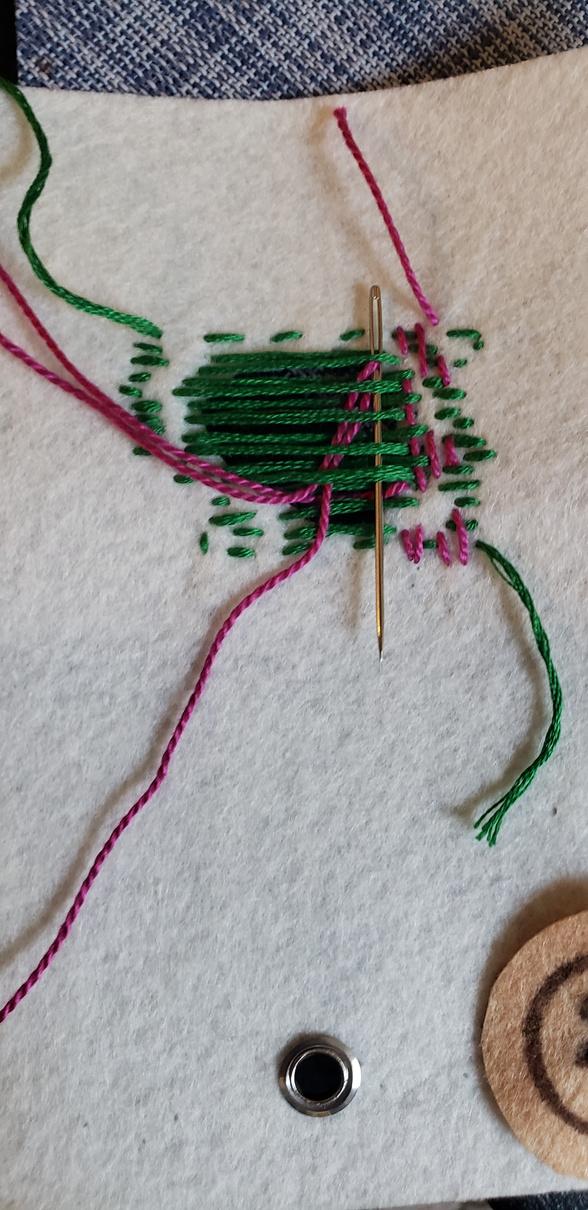
When you have finished your vertical rows, use a running stitch to sew horizontal rows across the hole
a
Start about 1/2" away from the edge of the hole
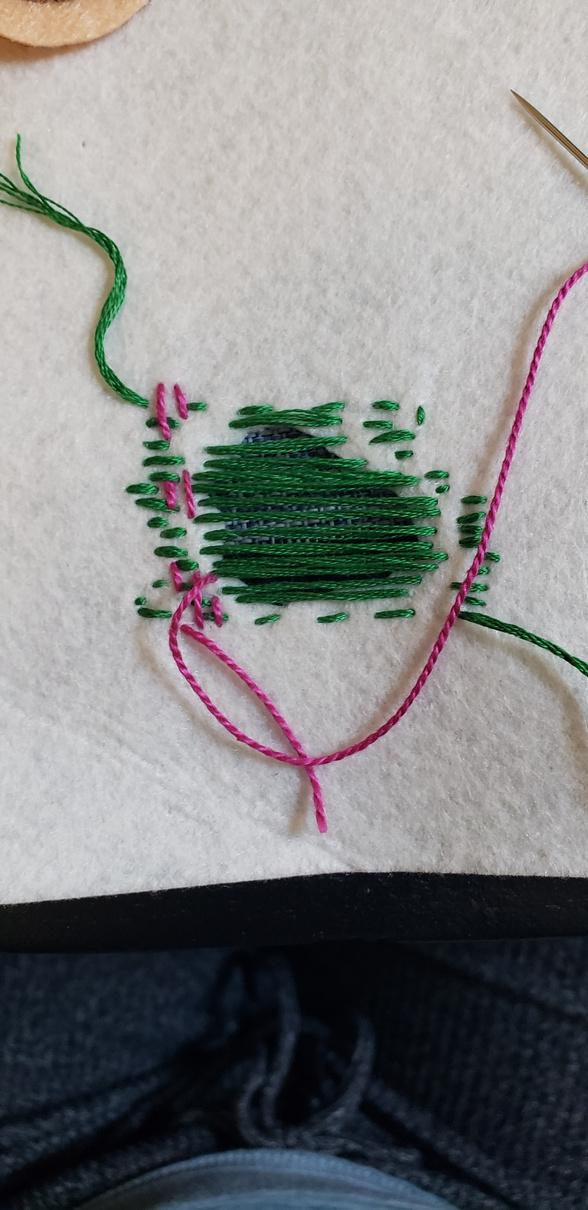
When you reach the vertical threads, weave your needle under and over until you get to the other side of the hole (this may be easier to do with the eye side of the needle) b
Continue the running stitch until you have traveled about 1/2" away from the edge of the hole
e.
c Move your needle about 1/16"-1/8" over in the vertical direction and then sew another running stitch row parallel to the first d. Continue until you reach the opposite edge of the hole
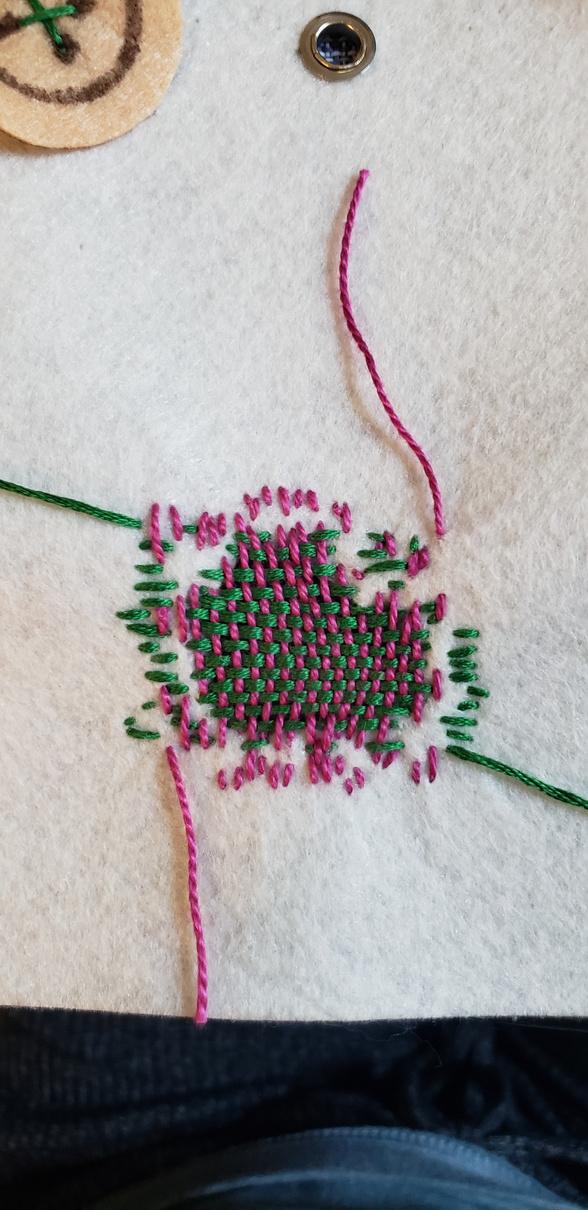
When the hole is completely covered, thread each tail through your needle and then sew down to bring it to the inside of the garment f Turn your garment inside-out g.
h
Separate the individual threads of each tail so that you have half in each hand and triple knot them
Trim away the excess, and you ’ re done! i
Tip: if you don’t have an exact match for thread, try to match the value (light/dark) of the fabric in a neutral, analogous color Eg : grays work well for blues and greens
and Darning Hand Darning - Part 2 - Part 2
H
Weaving with eye first Step 2e

decorative grommets

functional grommets
Adding grommets to your clothes is surprisingly easy! It’s a great way to add some flare to an item you already own You can also use grommet lacing to make fit adjustments!
Decide where you want to put in grommets for lacing and what their purpose will be 1.
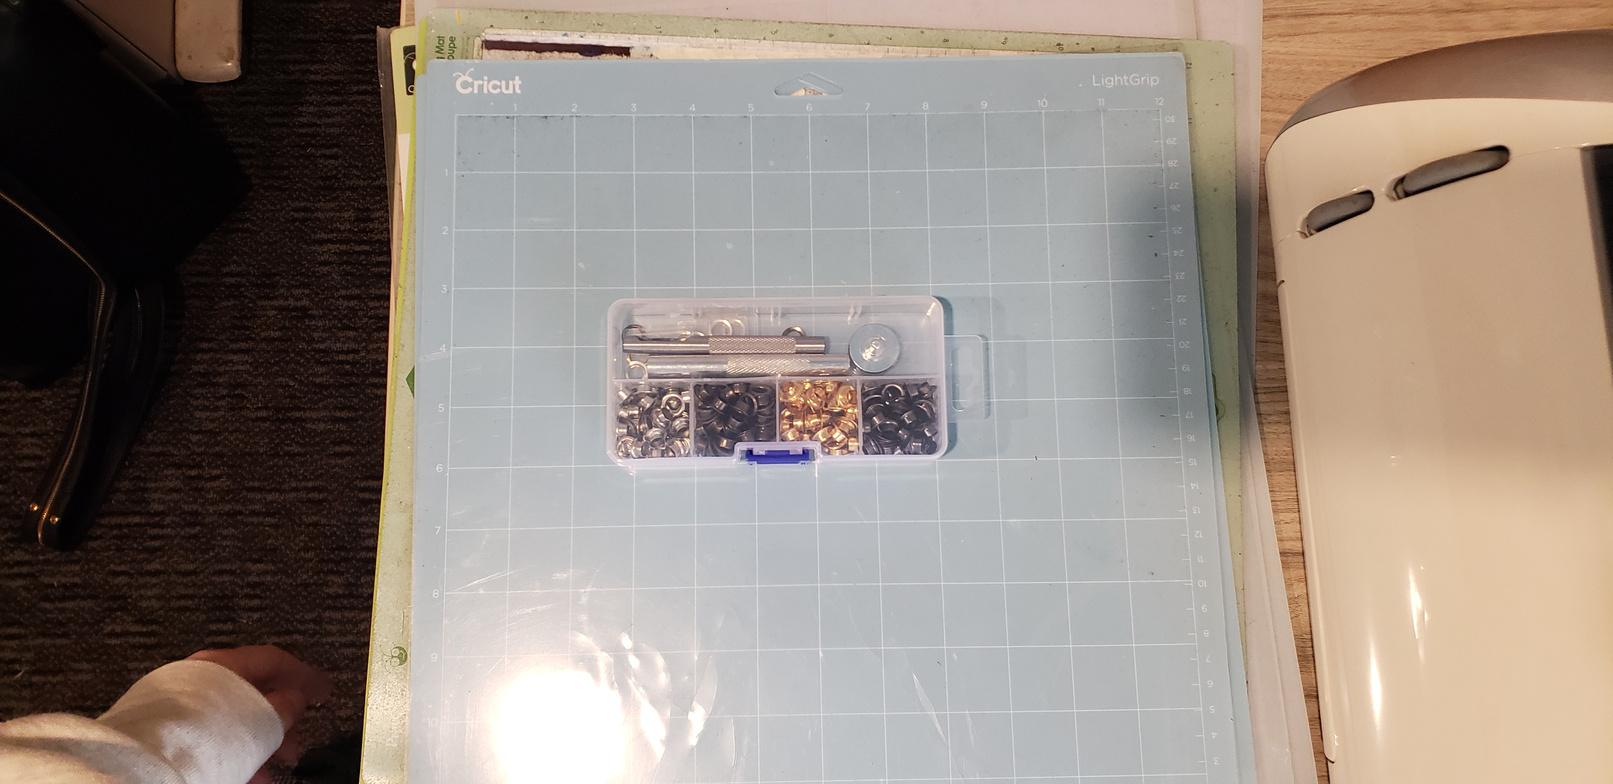
grommet kit
marking grommet position
a If the grommets will be functional, the spacing of your grommets should be 1 1/2" or less, and they should be positioned about 1/2"-1/4" away from the edge of the fabric where the garment will close
If the grommets will be decorative, you may place grommets anywhere, with any spacing that suits your aesthetic goal
b ing to cinch in the he grommets 1/2"-1" apart
c is strong enough to g. Non-stretch denim, faux as are typically good weight and stretchy fabrics didates for cinching)
will be used to close a e placed directly across , just like shoe lace holes mmets may rub against a layer underneath is
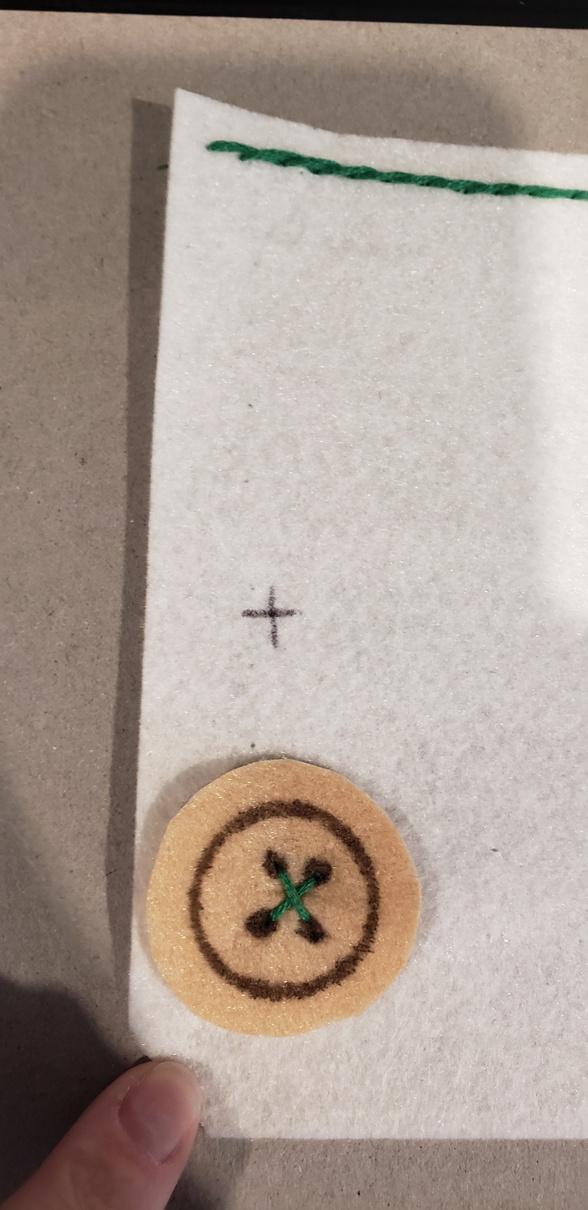
Using a ruler or seam gauge and a washable marking tool to mark the position of your grommets
2 *Graphite will readily wash out of many fabrics If you are marking on very light fabric, try to make your markings small and precise
a Alternatives include chalk and tailor’s wax b.
Grommets - Part Grommets - Part 11
1
Adding Grommets Adding Grommets
2
With your grommets marked out, begin by using the cutting die to punch your holes
Lie firm scrap cardboard (the backs of notebooks work well), scrap wood, or a cutting mat down on a sturdy table or the ground a.
b
Lay your garment or fabric down on the surface and ensure you are only cutting through one layer If you cannot achieve this, you may insert your scrap wood or cutting mat in between the layers
c
Line the cutting die up over your first marking
d
Strike the top of the cutting die firmly with a rubber mallet Aim for 1-2 strikes
e.
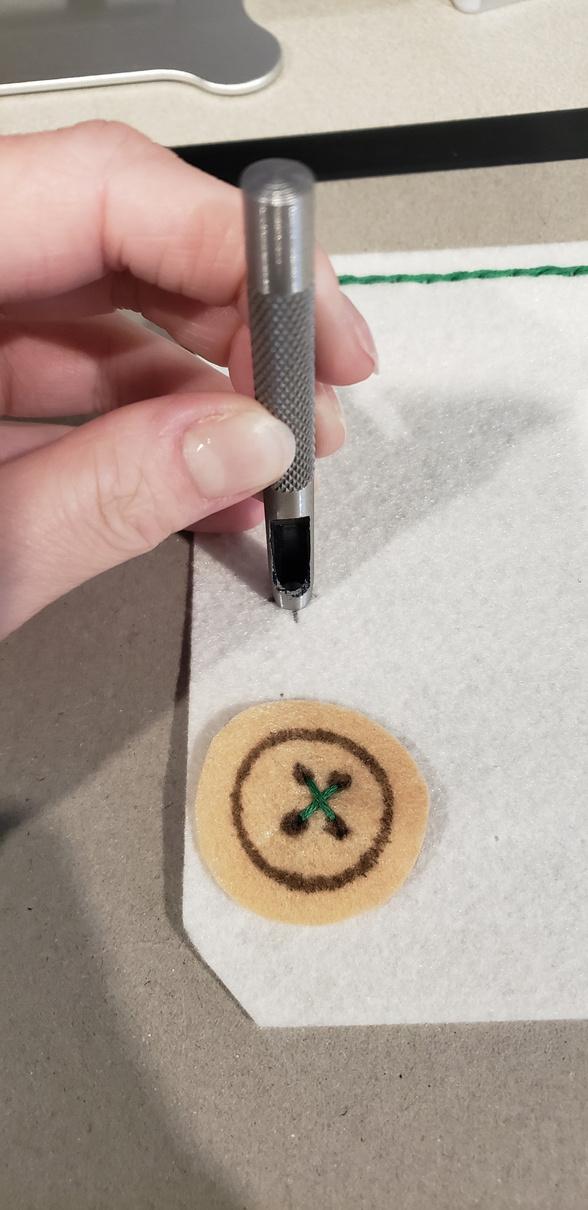
Repeat until all your holes are punched
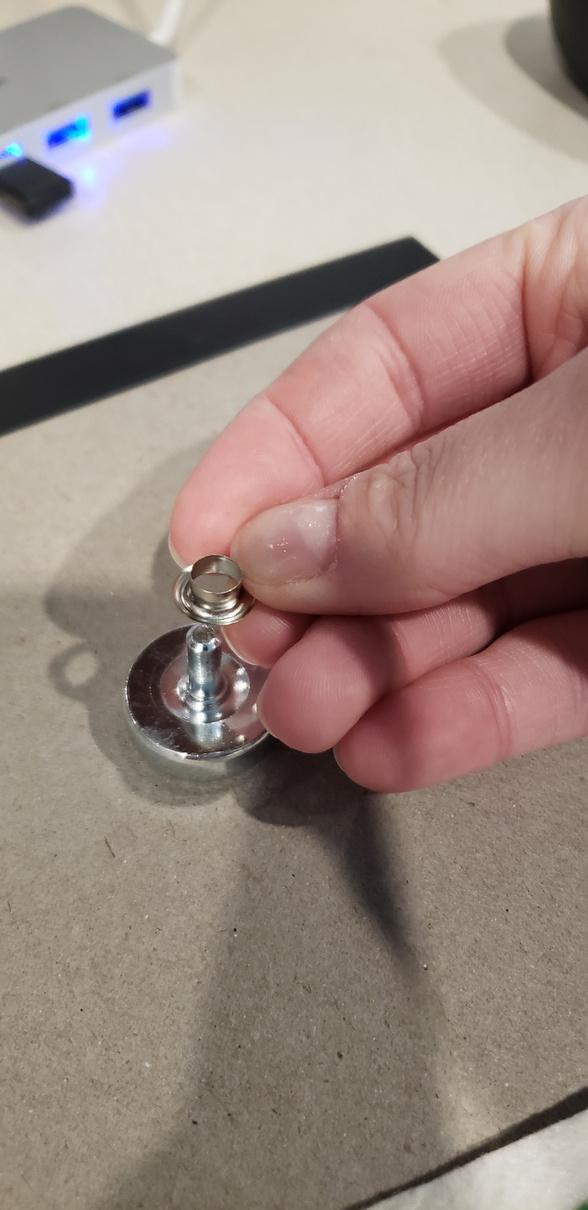
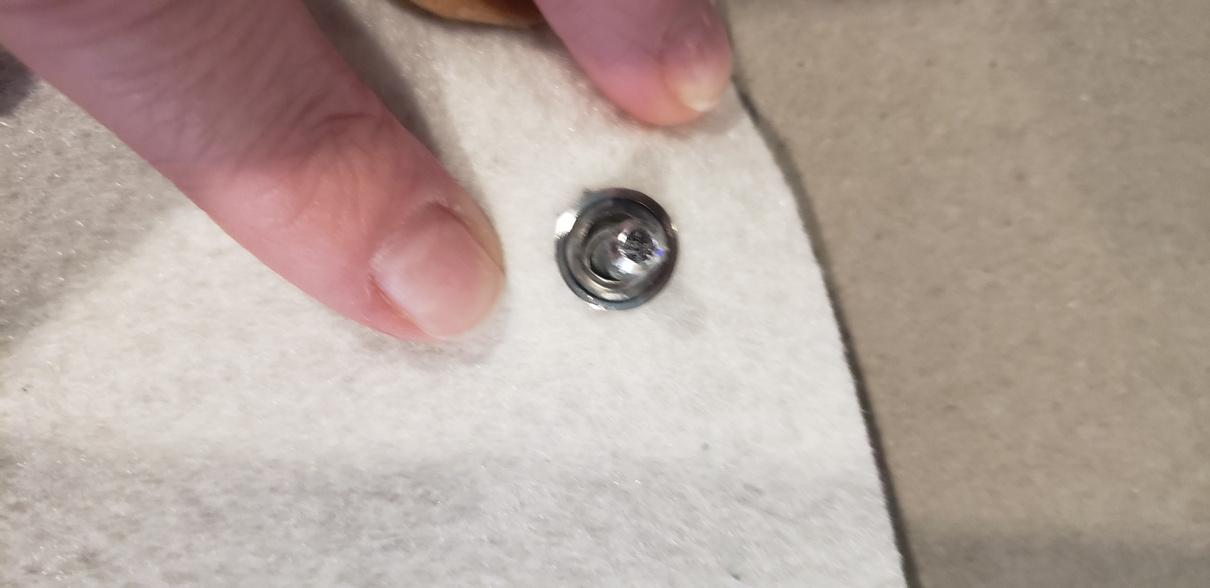
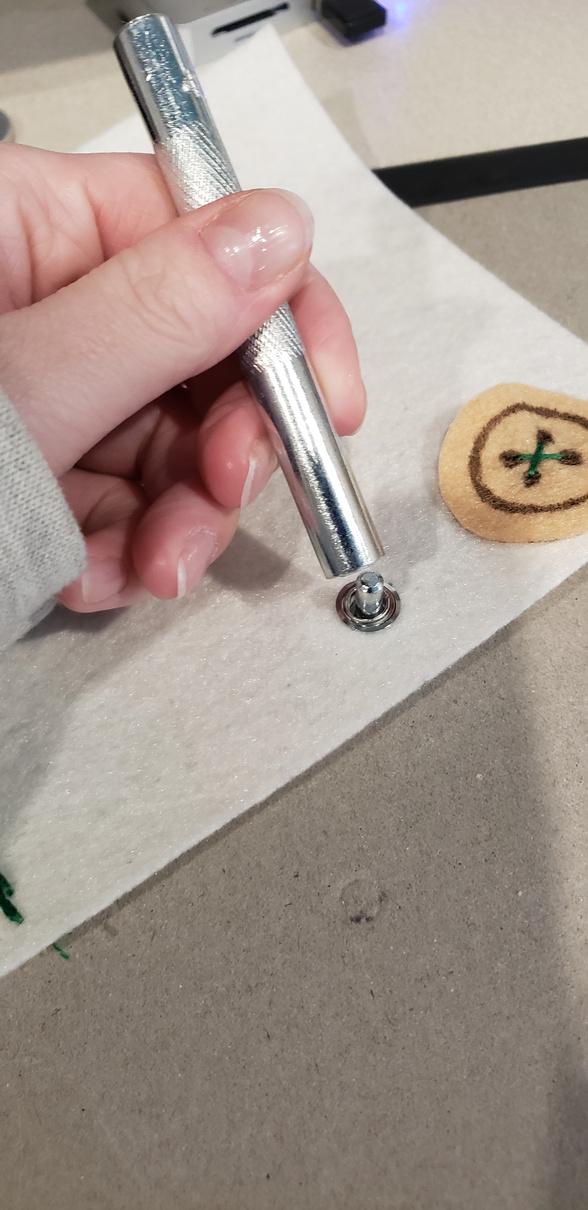
Retrieve your grommets, setting anvil, and setting tool and install your grommets:
Place the shank with the shank side up on the setting anvil a.
b
c.
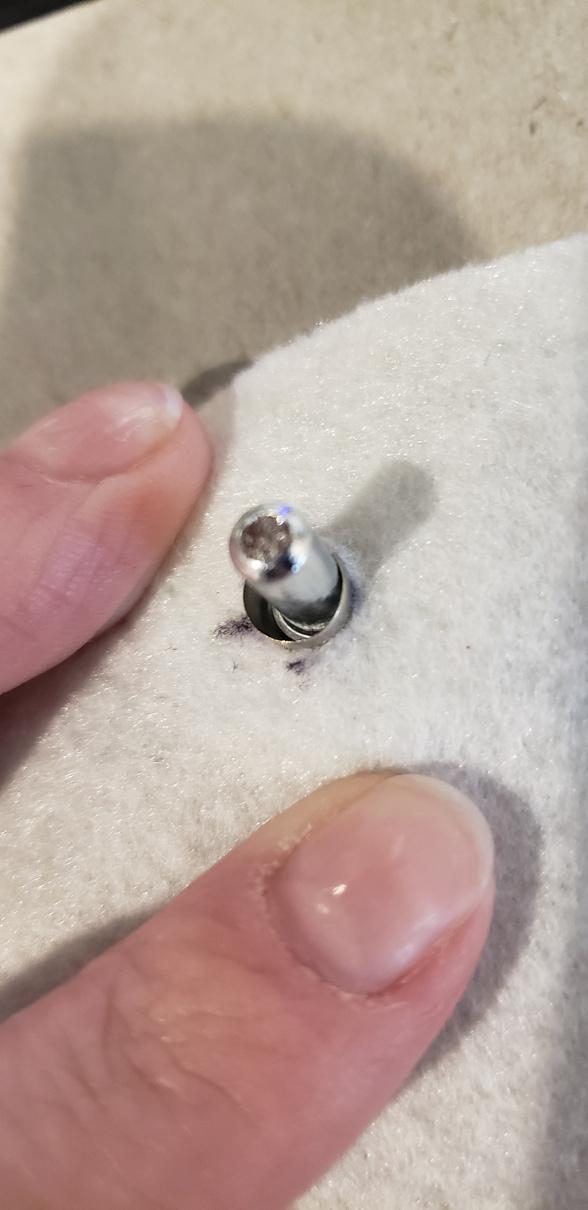
Place your fabric with the right facing down on top and wiggle over the shank
Place the washer on top of the with the convex side facing up
Line up the setting tool on top and firmly with a rubber mallet. Aim for 3
Continue until all grommets are ins 4
Thread your laces through and enjoy your lacing detail! 5
3
Step 2b Step

Lighter-weight and more flexible fabrics can be taken in with
Try on your pants and pinch in as much fabric as you would like to take in. If you have someone helping you, they will usually pinch the fabric in somewhere at the back. If you don’t have a helper, you can pinch in the amount from the front. Don’t worry about symmetry for now!
2
3
Use safety pins to secure the fabric you have pinched in
4
5
Take off the pants and use your seam gauge to measure how much fabric you pinched in - be sure you double this measurement to account for the fabric folding over itself
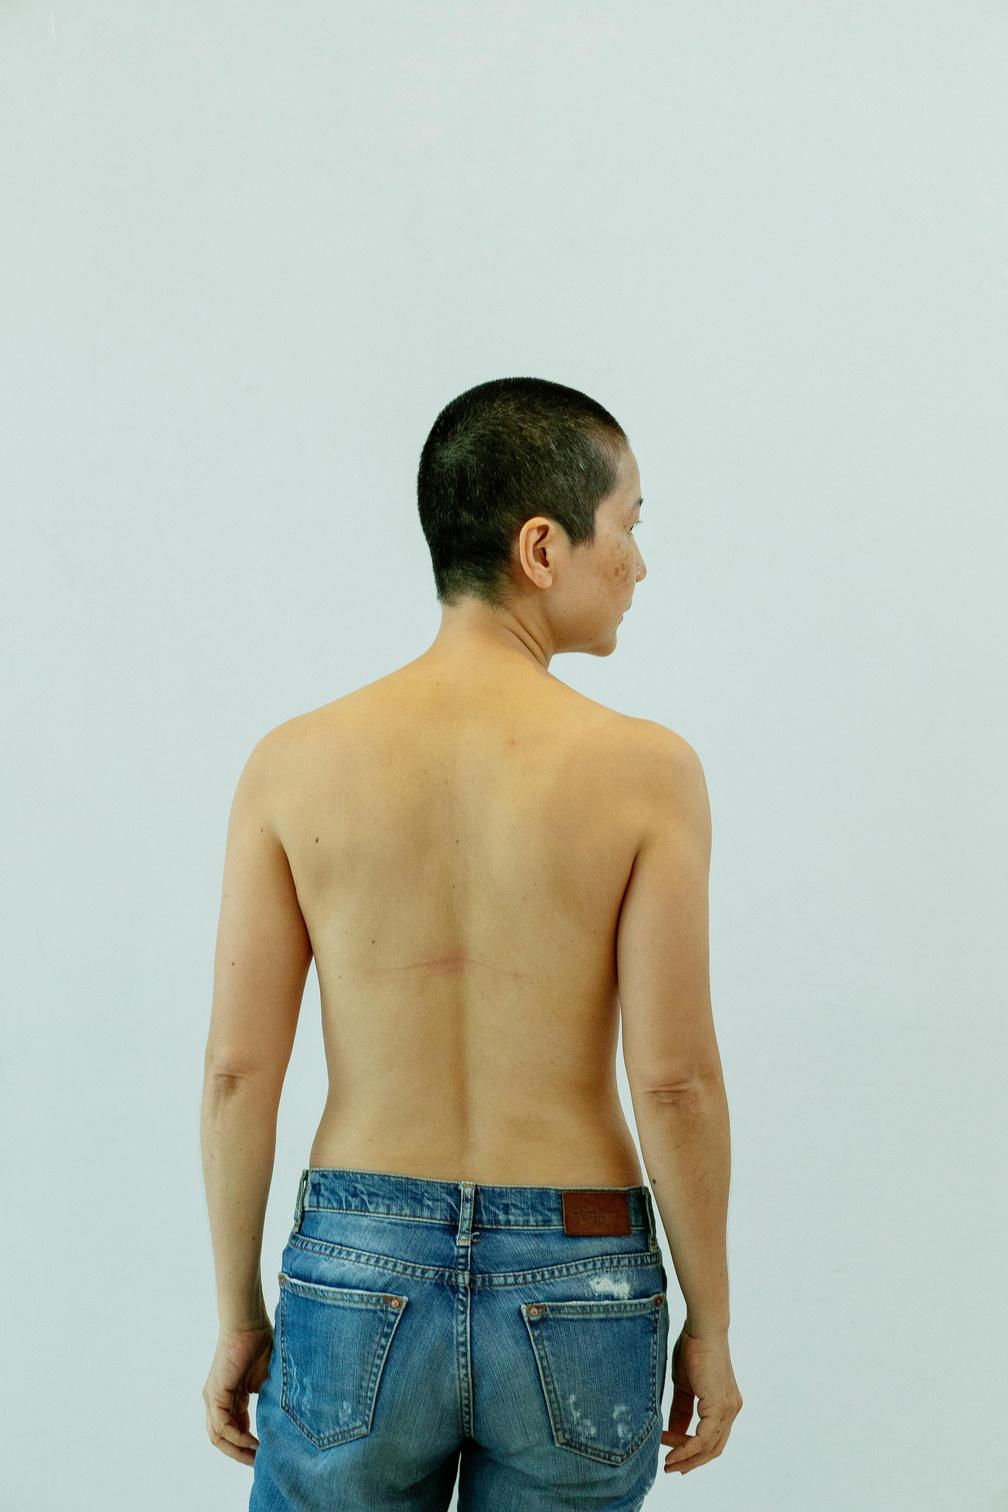
Observe your garment. Note the locations of zippers, buttons, seams, pockets, and belt loops. Does the garment already have darts or pleats? If so, where? These will affect where you decide to take the garment in and how you do so
a
b

Decide where you would like to place your darts or pleats
c
If you have a small amount of fabric to take in (1"-2"), you can take in the full amount from the center back (yellow dot on photo b) or split the amount evenly between two points - one at each side-seam (green dots on photos a and b) or one on each side of the front (cream dots on photo a) or back (red dots on photo b). Choose whichever suits your taste and comfort best!
i
If you have pockets or a zipper at the sides, you can take in the amount just behind a sideseam to avoid interfering with the zipper or pockets
If you have a medium amount to take in (2 1/2"-4"), splitting the amount into either two or three points is common
For example, you might take in 2" at the center back and 3/4" on each side-seam for a total of 31/2" i
If you have a large amount to take in (41/2" or more), you may consider making multiple pleats or darts with the excess fabric
You may have difficulty taking in a large amount if your garment has many elements (such as pockets and belt loops) near the waist i
If your fabric is pleated into the waistband, you might choose to take in a large pleat at either side, which will blend in with the existing pleats and create a fuller hemline
The dots on the photos indicate places where garments are usually taken in to preserve the existing look of the garment, but you may alter your clothes to fit your own taste. Try using safety pins to test out different options and see how you like the results!
ii
d
a b
Now that you’ve decided where you would like to
Darts are used to achieve a fitted shape in a garment where the body is narrower at one point and wider at another
How to sew a dart:
1 - Divide the total amount of fabric to be taken in by the number of darts you will make
If you want to take in 4" between 2 darts, each dart will have a depth of 2"
2 - Divide the depth for each dart by 2 (because your fabric will fold over itself)
If each dart will get 2" of fabric, then you want a fold that measures 1"
3 - Measure and mark your darts
Turn your garment inside out a
b

With a temporary marking tool, mark the fold line for each of your darts, beginning at the waistband and drawing downward toward the hemline. (Some darts follow a vertical line, extending straight up and down the body, while others lay at an angle. Desired fit and aesthetic determine the angle of the dart
c
Measure out from the fold line, 1/2 of the depth of the dart, and mark the top of each dart leg on either side of the fold line (see green dots)
a. fold line - this marks the center of where the dart folds together
d
Mark the apex of the dart somewhere along the fold line (see red dot). Try somewhere between 3" and 4" to start
e
Line up a straight edge between the apex and top of each dart leg and draw in the dart legs
b. legs - these lines mark the outer edges of the fold and indicate where to sew
c. apex - this is where the dart ends
a b c
Taking in a Waistba Taking in a Waistba


4- Pin your darts
b
Fold your dart together so that the fold line is in the center of the fold and the two dart legs lay exactly over one another
a If the darts are too long, the fabric will pull taught and create stretch lines near the apex. You can use a marking tool or safety pin to mark just above where the stretch lines begin b c a b
a Use safety pins to pin your dart together along the dart leg line
5- Keeping the garment turned inside out, try it on
If the darts are too short, the fabric will bubble out near the apex. You can use a marking tool or safety pin to mark just below where the bubbling stops
6 - Take the garment off and adjust the length of your dart, if necessary
Mark the location of the new apex and draw adjusted legs a
7 - Remove the safety pins and cross-pin the dart together using straight pins. The number of pins you use is according to your preference, but make sure you pin at each end of the dart
8 - Thread your needle and tie a knot at the end
9 - Begin sewing at the top of the dart leg (green dot) and work your way to the apex, using a small running stitch or back stitch
10 - When you reach the apex, poke the needle exactly through the apex marking
11a - If you are sewing with a single thread, turn your garment around and sew back down along the dart leg for a few stitches
11b - If you are sewing with a double thread, cut your needle loose
11a 11b
12b - Separate the two threads and tie a triple knot in them to secure the end of your dart knot knot
12a - Pass your needle underneath one of the stitches and tie a triple knot
c b
a Taking in a Waistband - Darts Taking in a Waistband - Darts
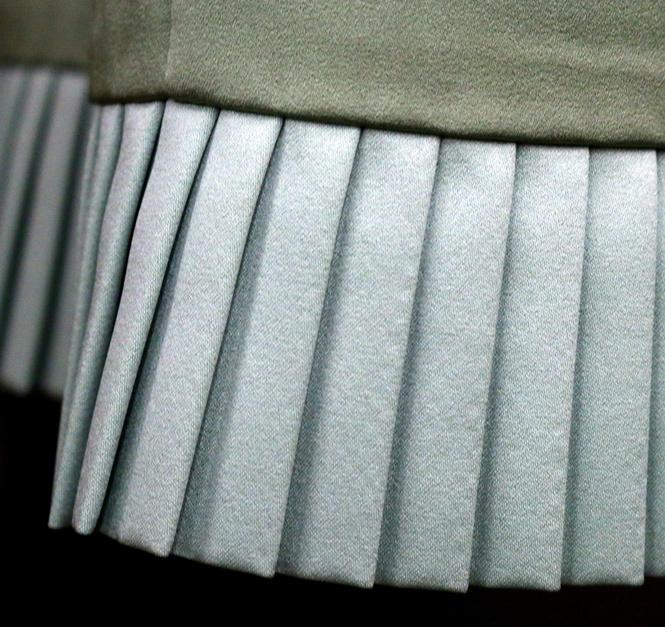
How to sew knife pleats:
Knife pleats are formed by folding the fabric over itself one or more times, with the folds facing the same direction (photo a) Pleats can also mirror each-other across the body (photo b) a b
1 - Divide the total amount of fabric to be taken in by the number of pleats you will make For example, if you want 4 pleats and need to take in 8", each pleat will get 2" a
2 - Divide that measurement in half, because the fabric will fold over itself
3 - Measure and mark your pleats on the front side of your garment
b
With a temporary marking tool, mark the fold line (solid line on figure c) for your first pleat, beginning at the waistband and drawing downward toward the hemline a

4 - From the fold line, measure out across the waistband in the direction you want the pleat to fold and mark a fold to (dotted line on figure c) line
4 - Repeat step 3 until you have as many pleats marked as you need
5 - Form the pleats by folding the fold lines over to match up with the fold to lines
6 - Secure the pleats in place with safety pins
7 - Try on the garment to make it fits and that you like how the pleats look
8 - Using a small running stitch or a back stitch, sew your pleats in place (figure d or e)
9 - Tie off your thread at the end, and you’re done!
Desired fit and aesthetic determine how far down the pleat you sew
If you only secure the pleats at the top (figure d), they will have greater movement and volume at the waist
If you sew down the pleat a bit (figure c), they will lay more smoothly across that section of the body and kick out where the stitching stops
d e c Ta e Pleats Ta e Pleats
Jeans and other thick and sturdy fabrics are easiest to take in with elastic. Use a seam ripper to open about a 1"-2" gap at the top of the waistband, one on the back left and one on the back right - (if you need to take in a large amount, consider starting closer to the side seams)
2
3
1 Thread a length of elastic through the waistband from one side to the other, but do not cut it yet
Secure the elastic on one side of the jeans by safety pinning through the jeans and elastic
4 Have a friend help you pin the other end of the elastic in place with a safety pin
Try the jeans on and pull the other end of the elastic until the jeans fit comfortably
6.
5 Using a back stitch, sew through the waistband and elastic to secure the elastic on both sides
7
Use a small running stitch or whip stitch to close the gaps at the top of the waist band. Make sure you start stitching about an inch before and keep sewing about an inch after each gap!
See the curated list of videos below for more techniques and tips to alter your clothes!
Basic:
Basic Hand Sewing - Tying a Starting Knot
Basic Hand Sewing - Running Stitch
Basic Hand Sewing - Back Stitch
Basic Hand Sewing - Tying a Finishing Knot
Hand sewing 2 Sewing on a button
Beginner:
How to Take in Pants the Easy Way
How to Hem Pants- No Sewing Machine
Easiest Way to Alter Your Jeans
How to Resize Jeans Waist (Elastic Method)
How to Alter Oversized Garment
Intermediate:
Couture Hand Sewing Stitches
How to Resize a Dress
How to Tailor the Back of a Dress Shirt
Advanced:
Taking in the Waistband 10 Inches and Adding Pleats to Trousers!
How to Shorten Sleeves on the Jacket
CHECK IT OUT: Slugworks Creatorspace at Baskin Engineering has sewing machines!
T
- Jeans T
W
- Jeans
aking in a Waistband
aking in a
aistband