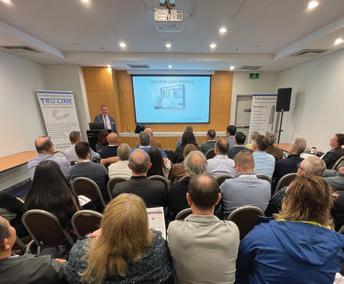
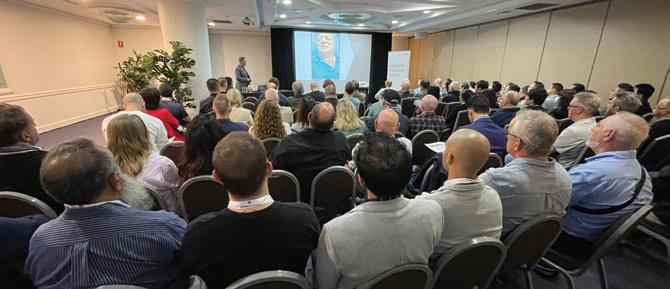
TWO DAYS OF LECTURES AND WORKSHOPS ON DIGITAL DENTISTRY FOR DENTISTS, SPECIALISTS, DENTAL TECHNICIANS AND DENTAL PROSTHETISTS
SPONSORSHIP
ONLY $880 FOR 2 DAYS OF EDUCATION
ONLY $220 FOR 2 DAYS OF EDUCATION (12 HOURS OF CPD) IF YOU REGISTER BEFORE 29 NOVEMBER 202
Join us again or for the first time at Digital Dentistry & Dental Technology No 6 for a fun, exciting and fully immersive learning experience with the best of the best in the new age of dentistry. This year’s program will again cover Artificial Intelligence • Digital Smile Design • Digital orthodontics • Intraoral scanning • 3D Facial Scanning • Digital implantology • Digital full arch restorations and full mouth rehabilitations • Digital Dentures • 3D Printing • Milling • CBCT • Materials and applications • Software and more with MORE Hands-on Sessions • MORE Advanced Sessions • MORE New Products • NEW Masterclasses... and more!
Join us again or for the first time at Digital Dentistry & Dental Technology No 7 for a fun, exciting and fully immersive learning experience with the best of the best in the new age of dentistry. This year’s program will again cover Digital Smile Design • Digital orthodontics • Intraoral scanning • AI • 3D Facial Scanning • Digital implantology • Digital full arch restorations and full mouth rehabilitations • Digital Dentures • 3D Printing • Milling • CBCT • Materials and applications • Software and more with MORE Hands-on Sessions • MORE Advanced Sessions • MORE New Products • NEW Masterclasses... and more!
REGISTRATION FEES
REGISTRATION FEES
INCLUSIONS
INCLUSIONS
PROGRAMME DETAILS
PROGRAMME DETAILS
$880 inc gst
$880 inc gst
ALL INCLUSIVE
EARLY BIRD PRICING
$220 before 29 nov 2025
Early bird discounts may apply
price increases $110 on the 2nd of every month
VENUE DETAILS
VENUE DETAILS
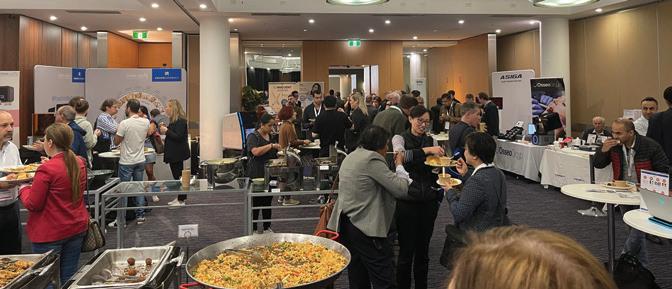
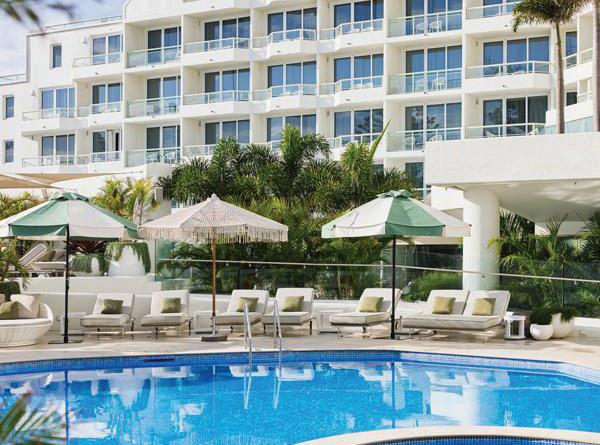
Registration fee includes participation in TWO full days of education (12 CPD hours), all catering and Friday drinks. Multiple lectures and workshops are being run concurrently to allow you to build your own program to suit your specific interests. Price is all inclusive.
Registration fee includes participation in TWO full days of education (12 CPD hours), all catering and Friday drinks. Multiple lectures and workshops are being run concurrently to allow you to build your own program to suit your specific interests. Price is all inclusive.
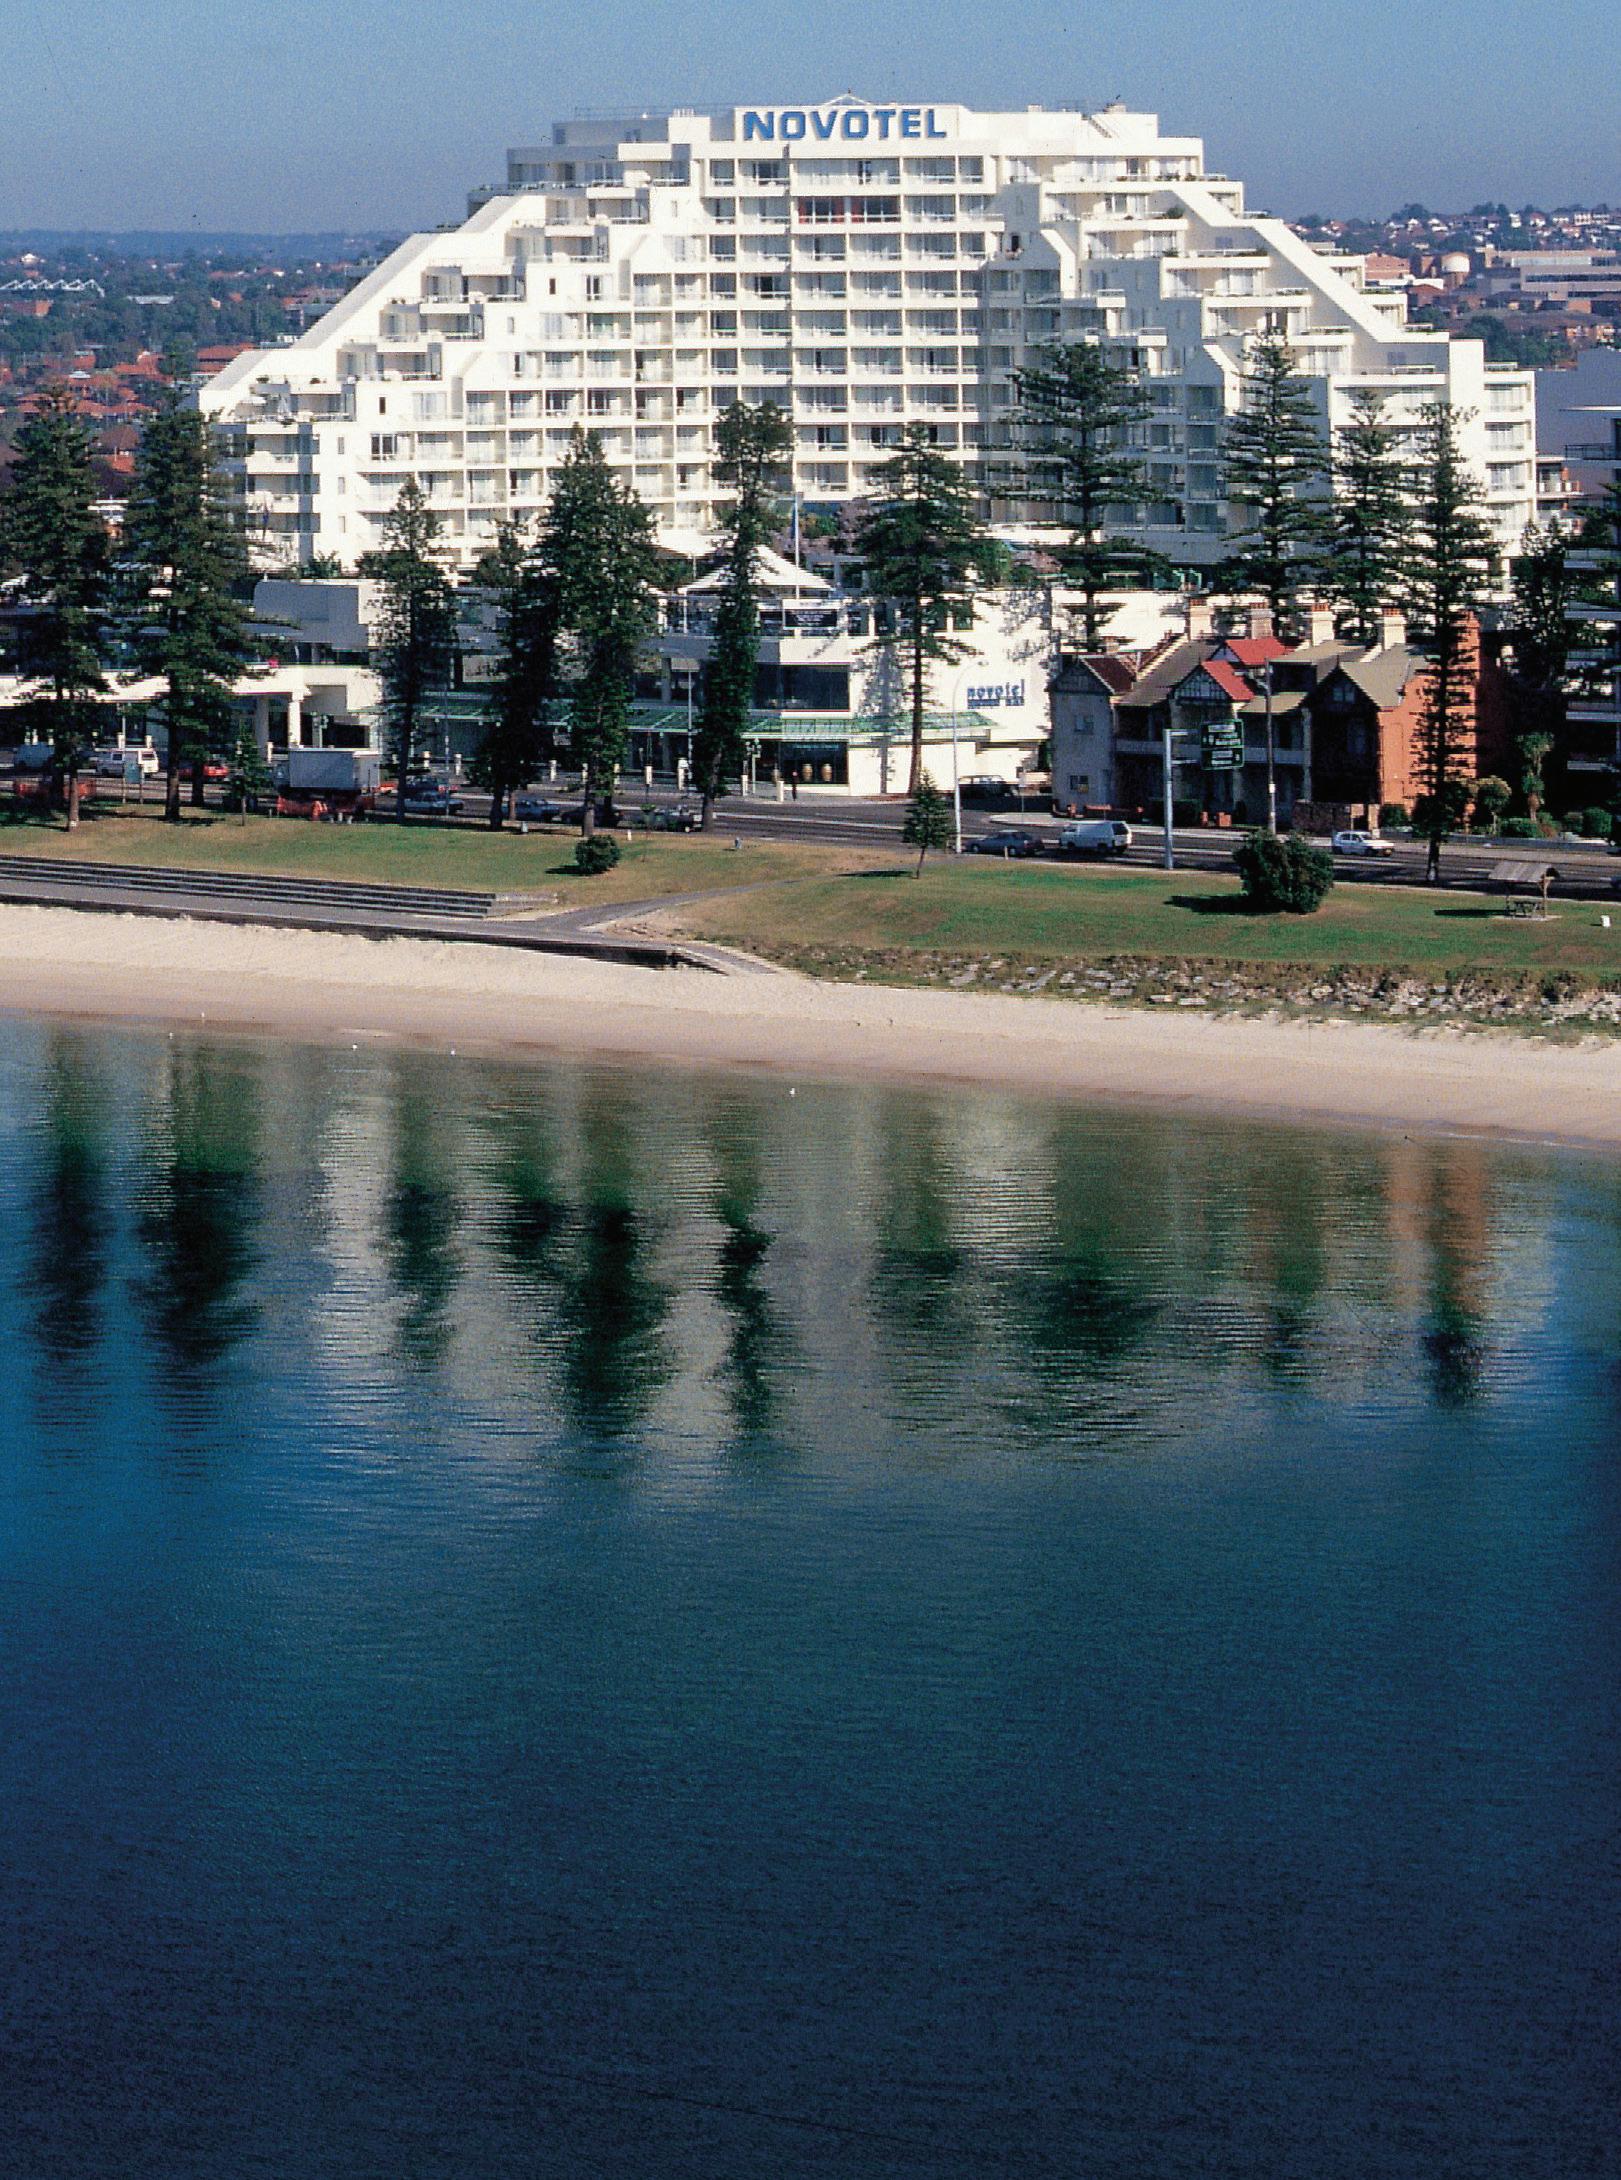
Novotel Sydney Brighton Beach - The Grand Parade, Brighton-Le-Sands NSW 2216 - Close to Sydney Domestic and International Airports
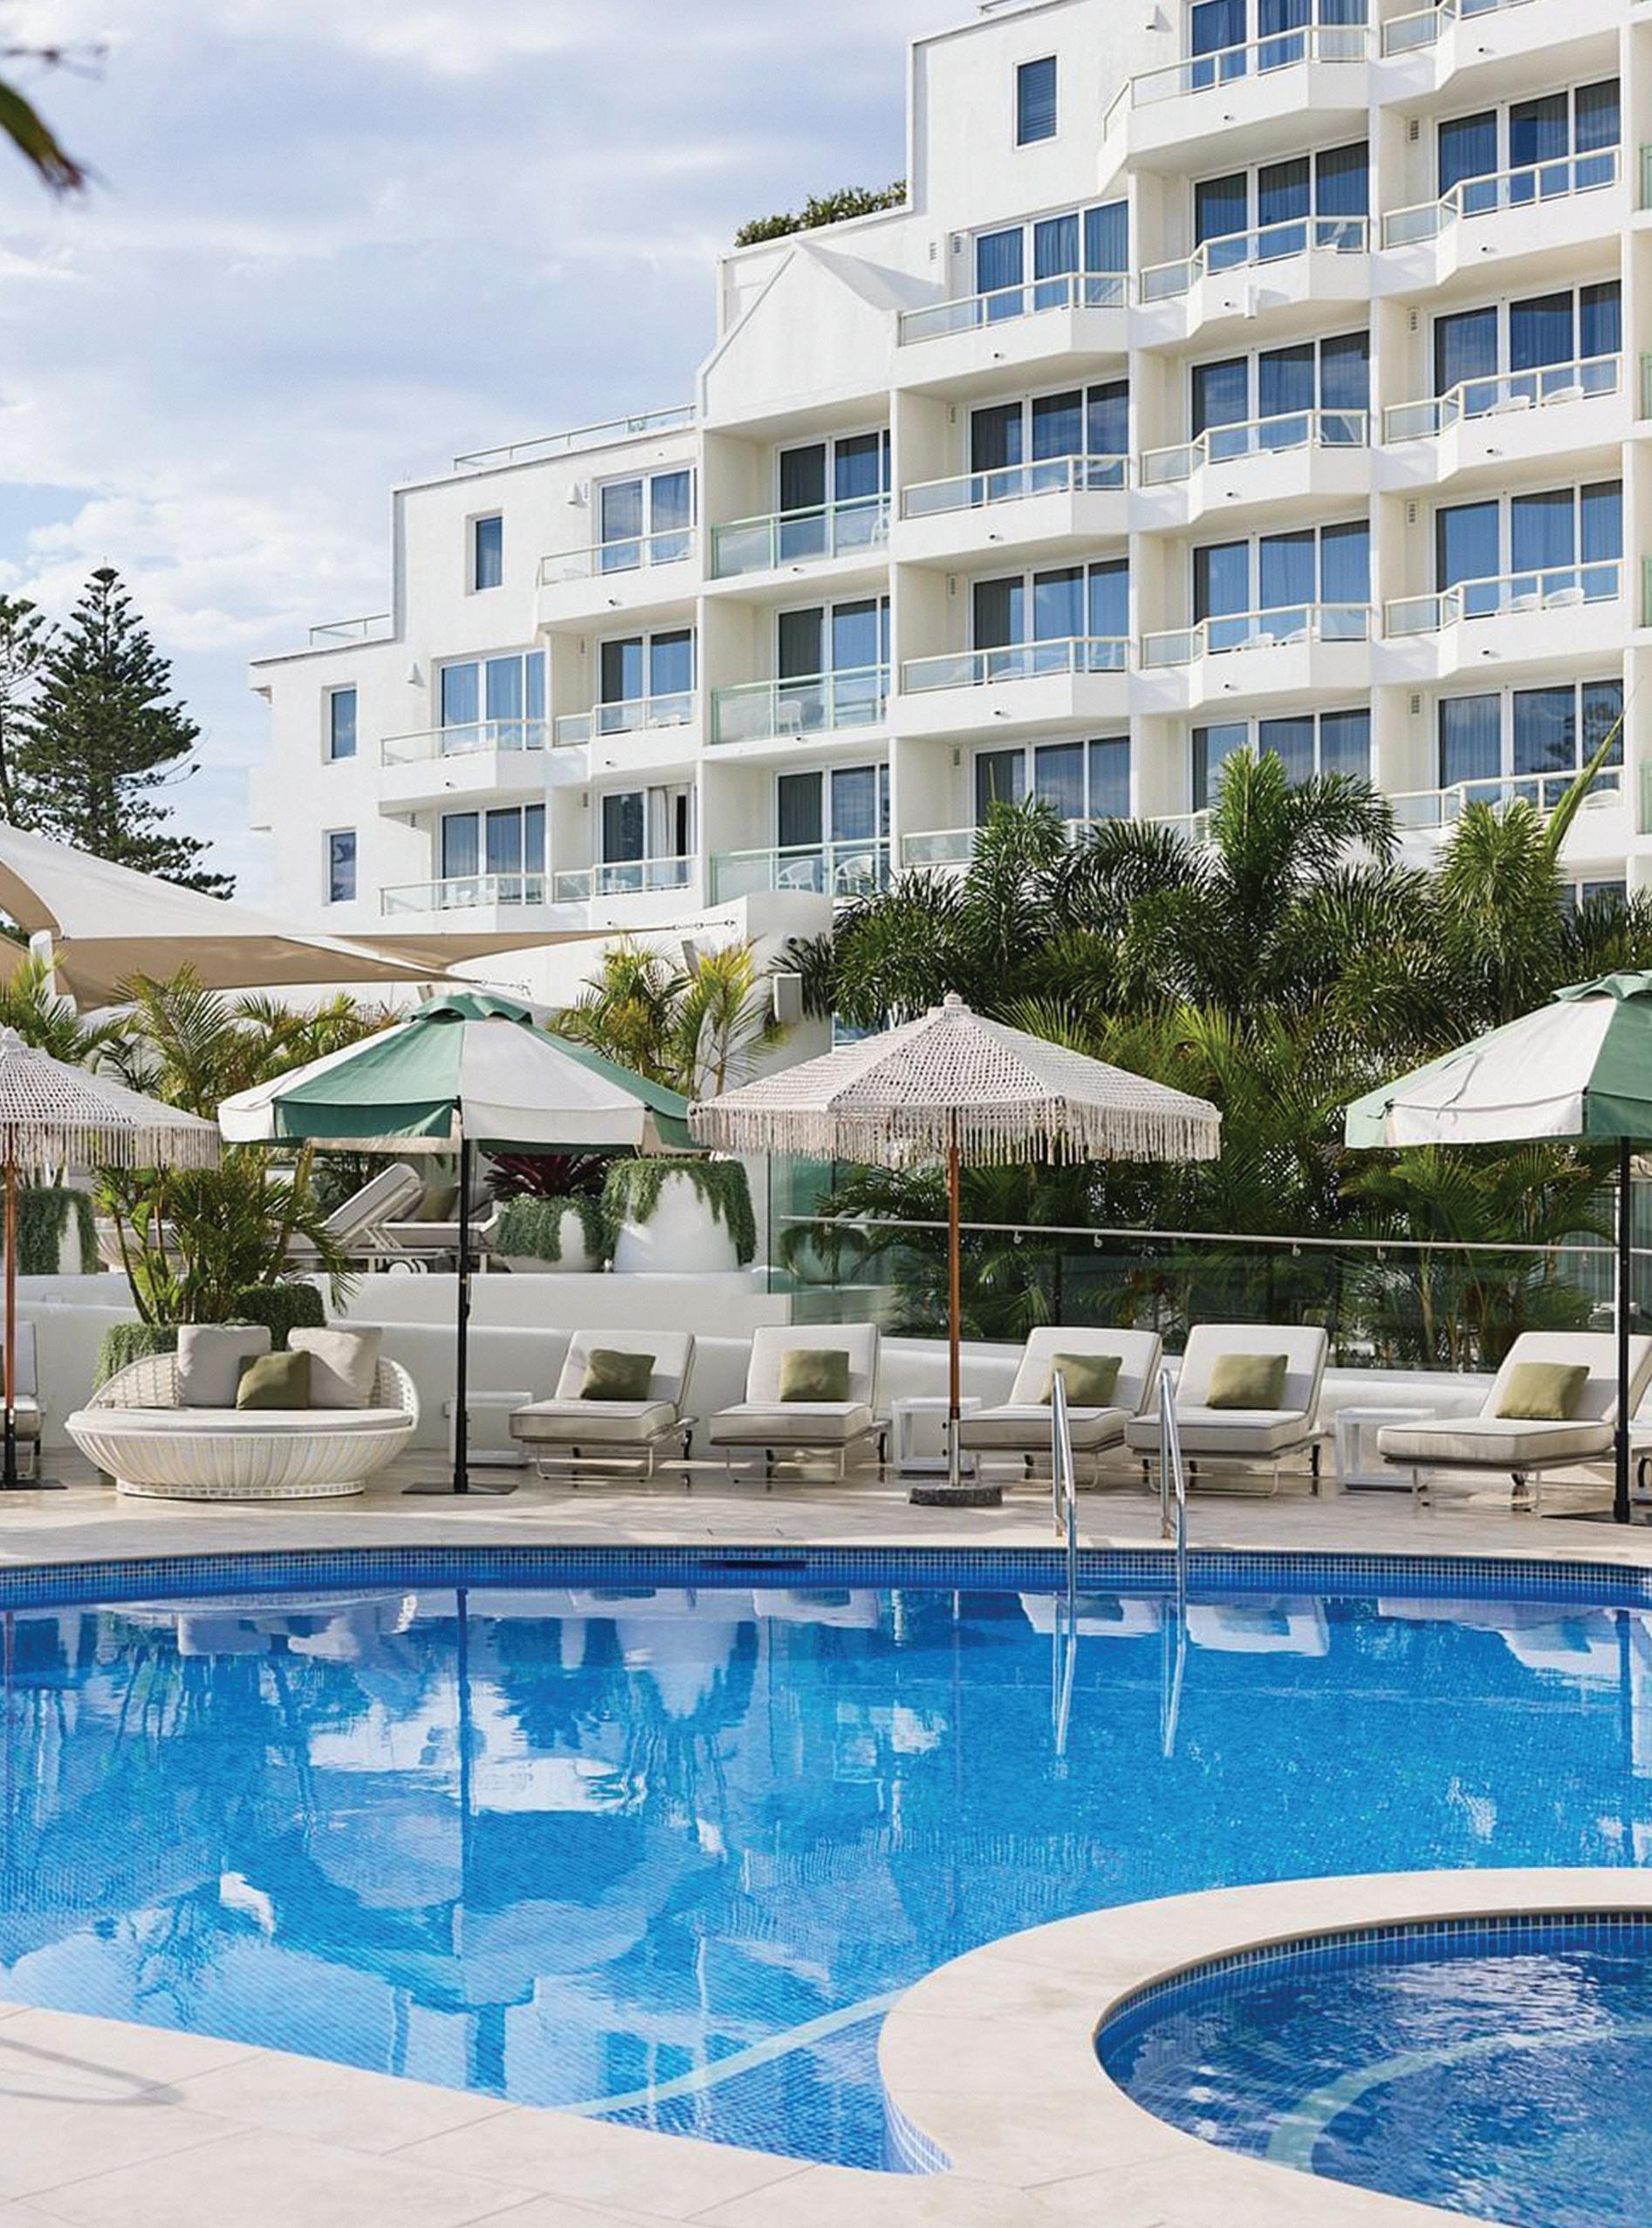
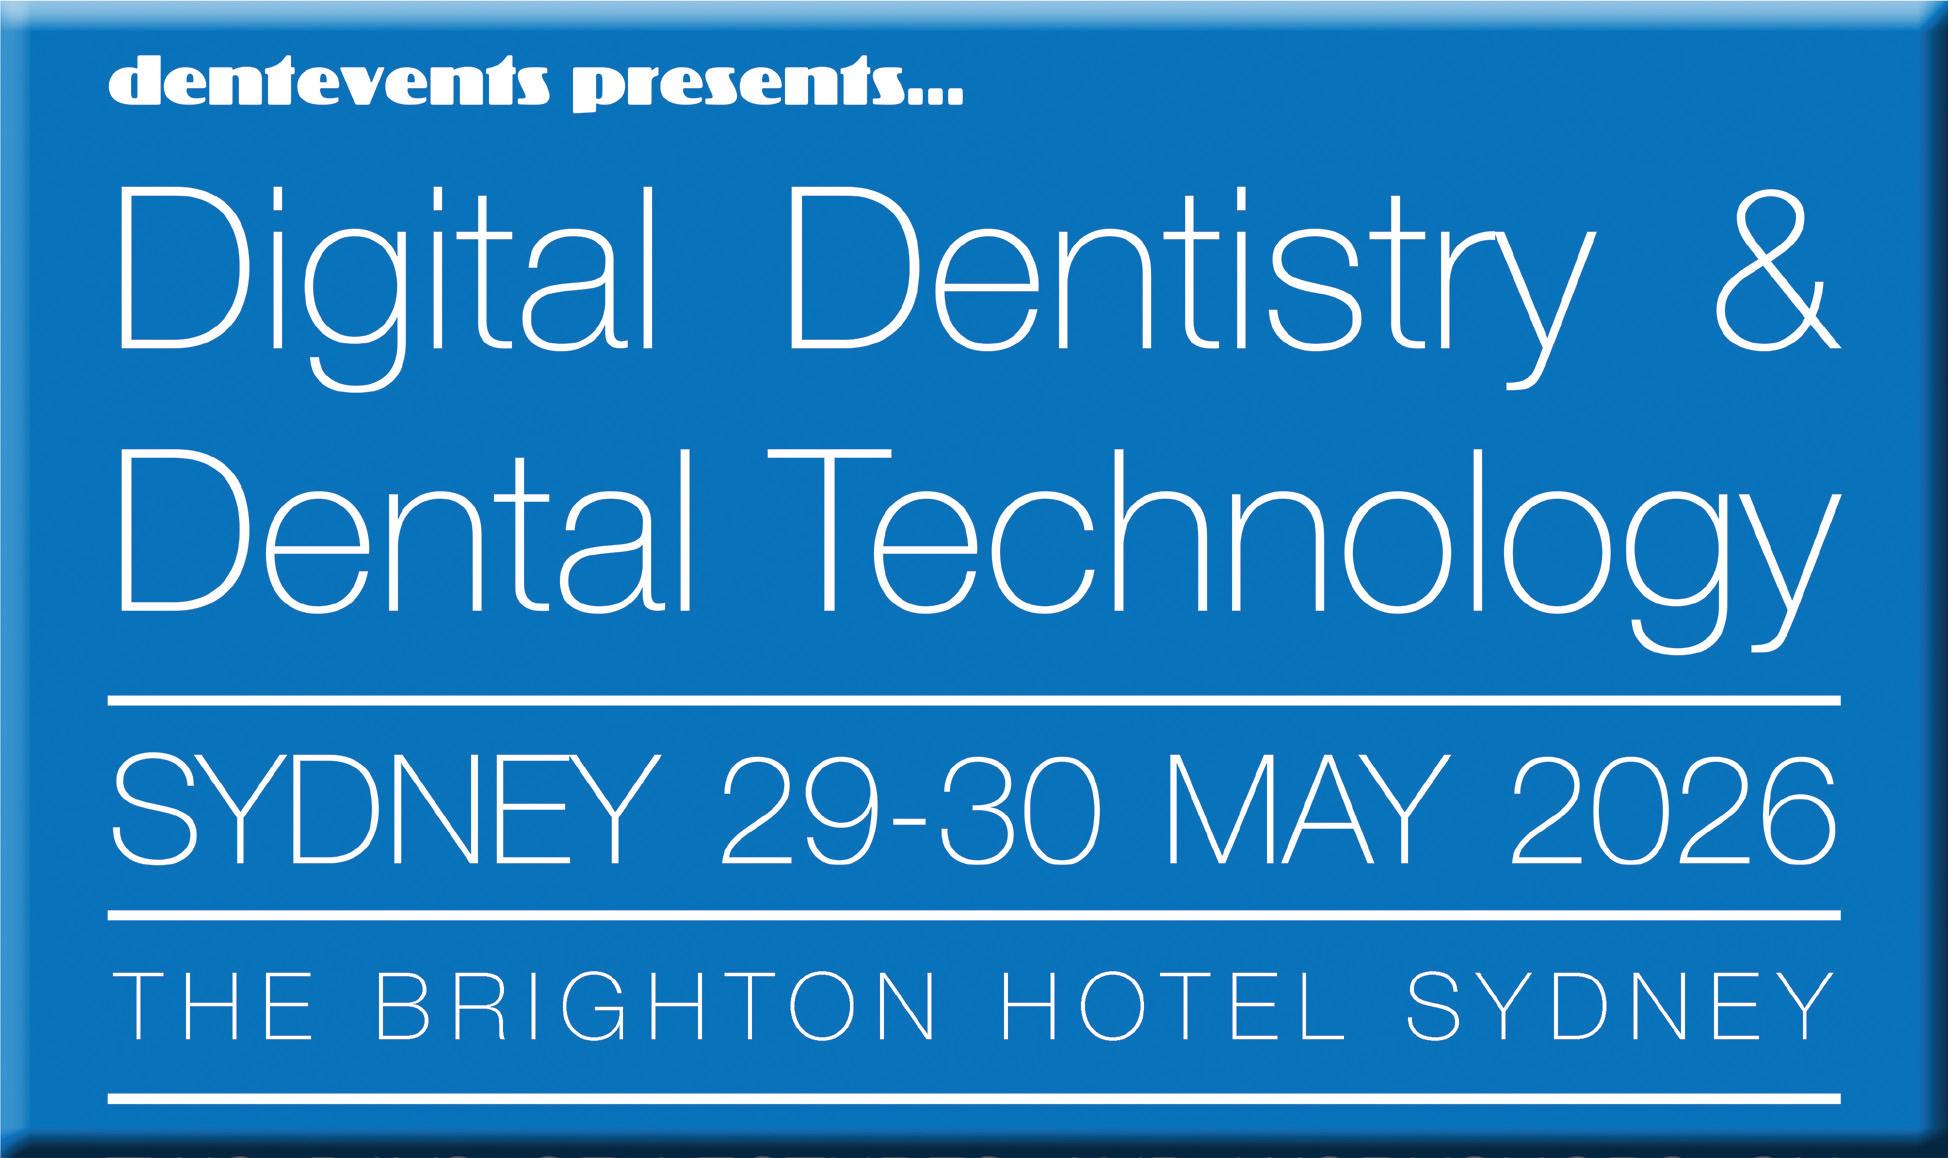
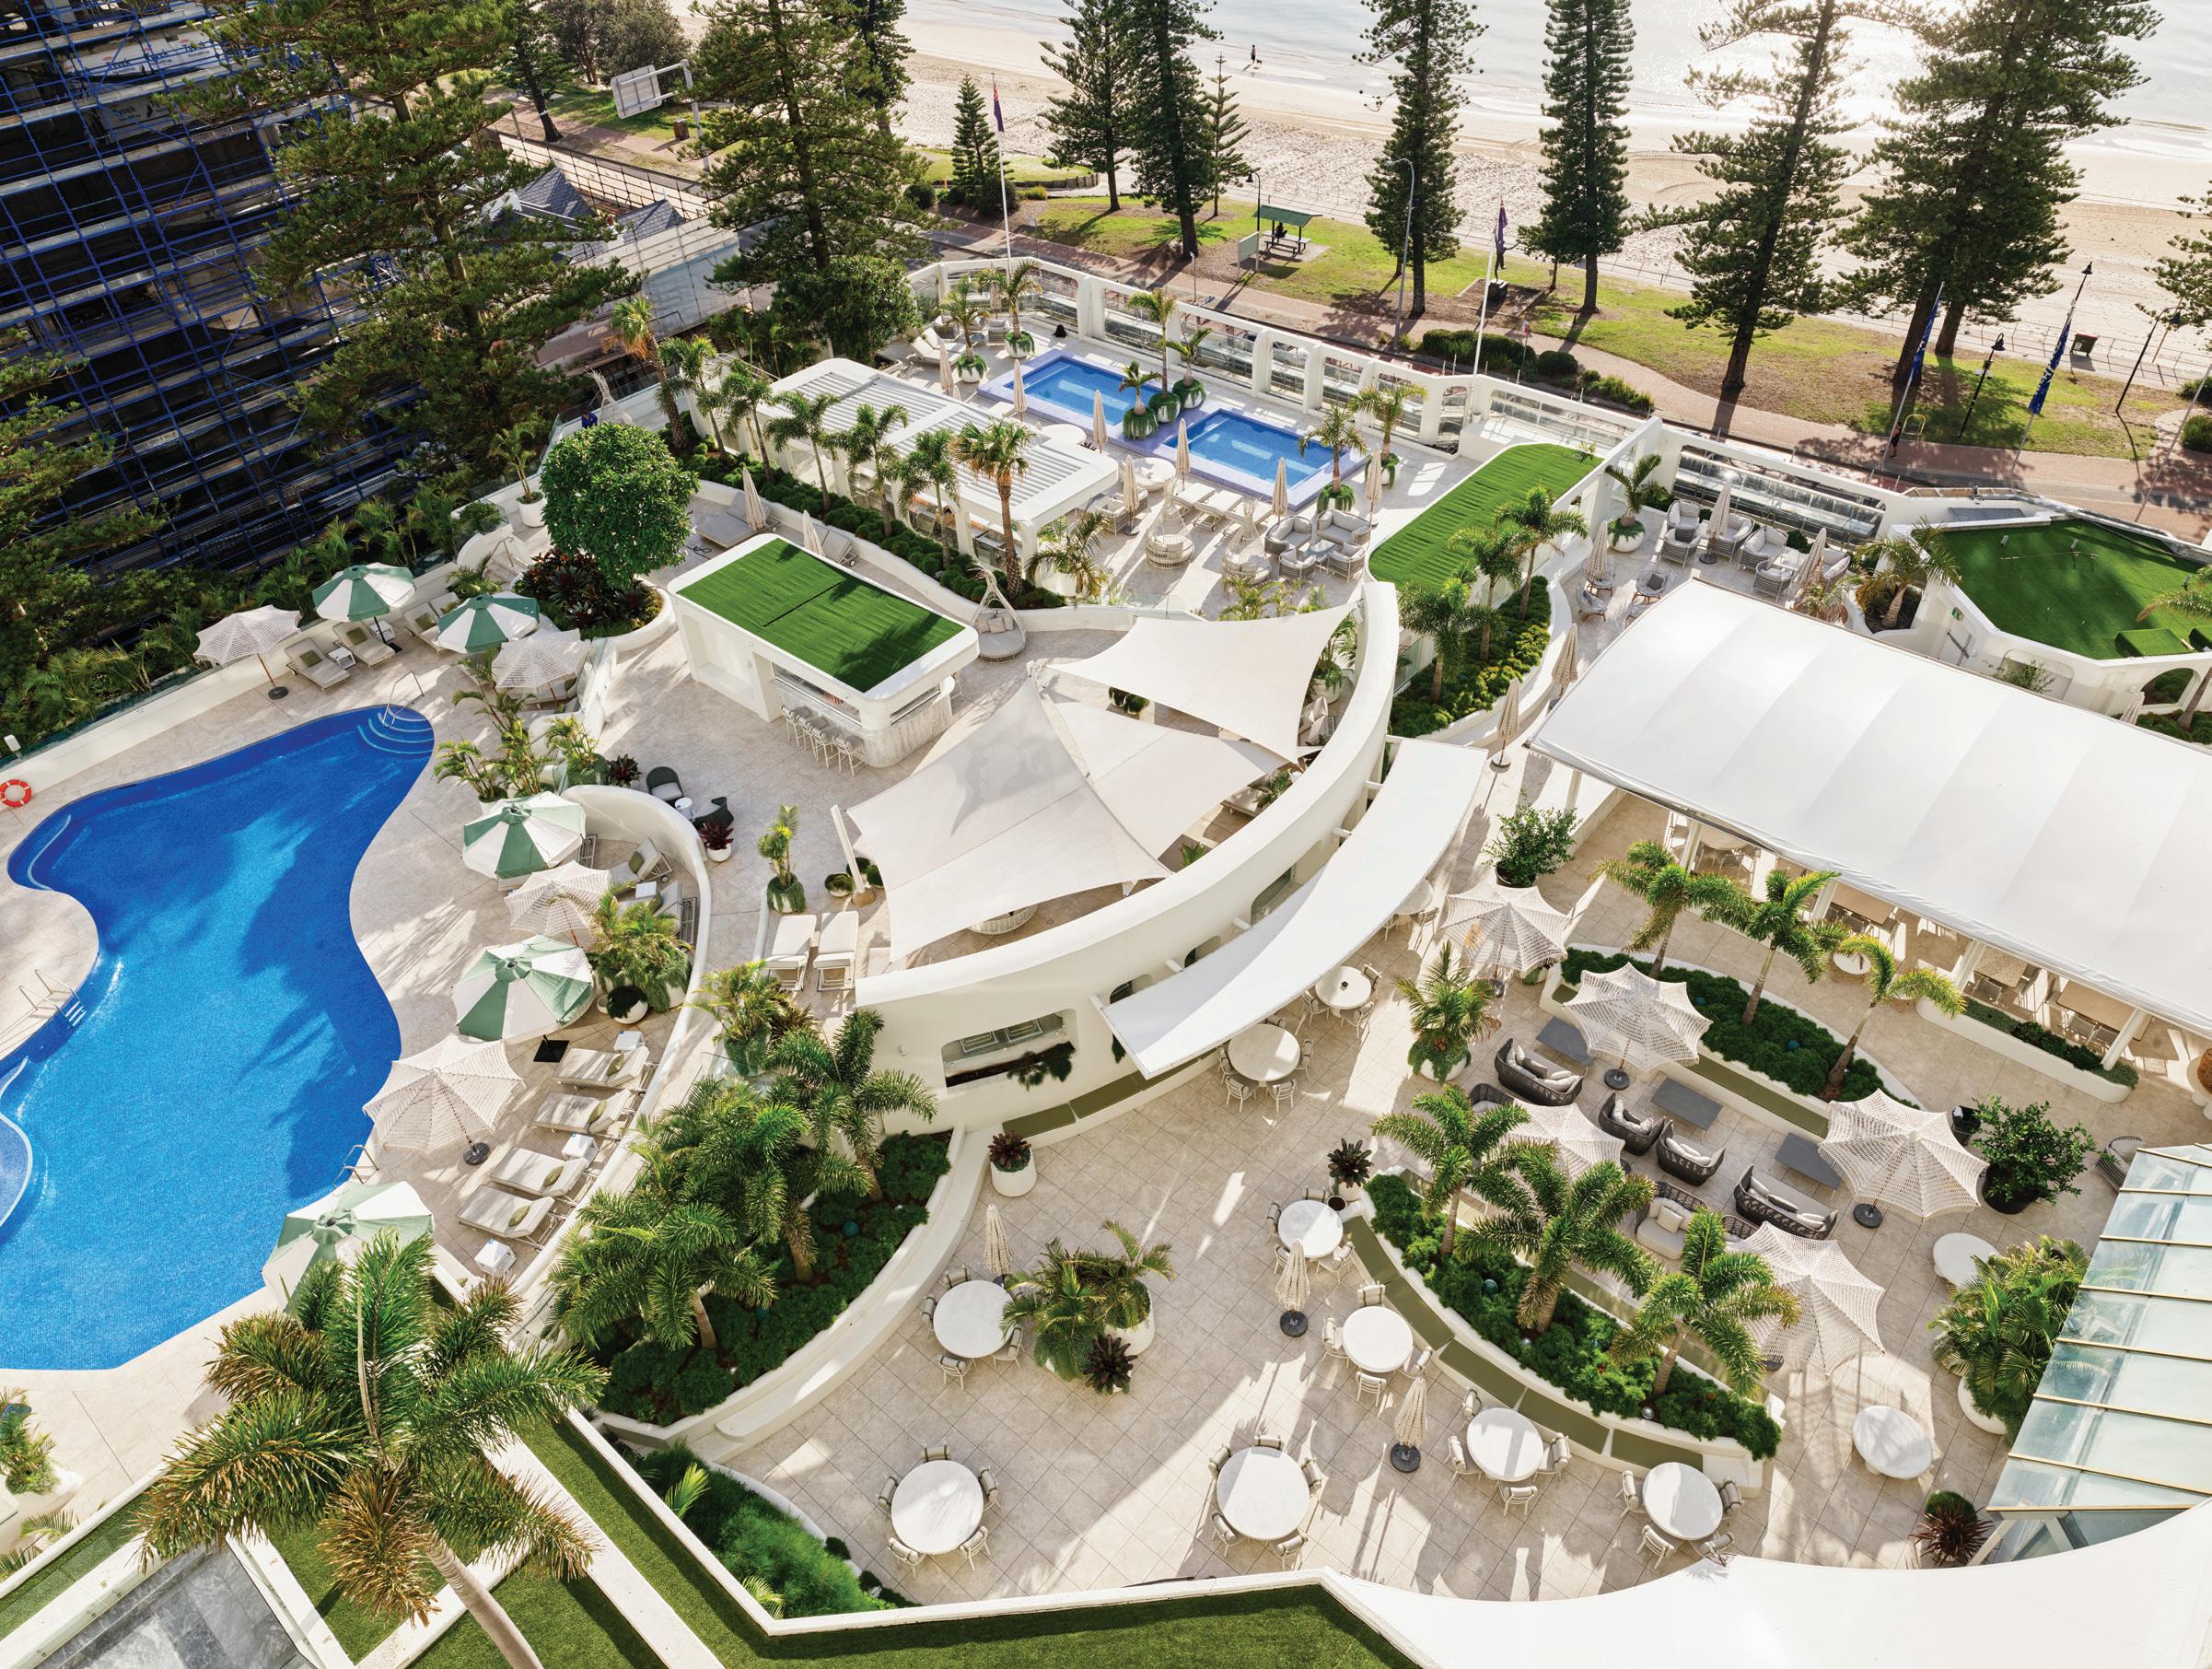
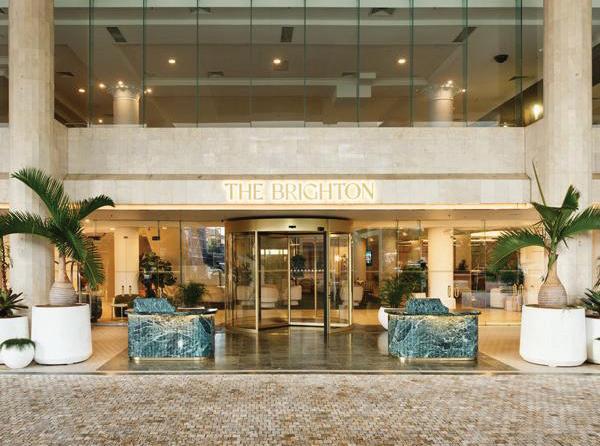
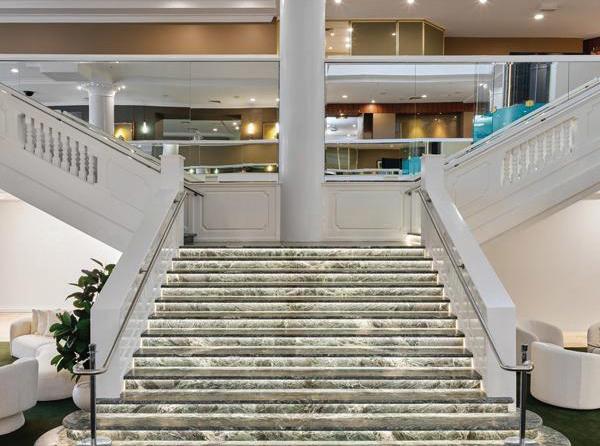
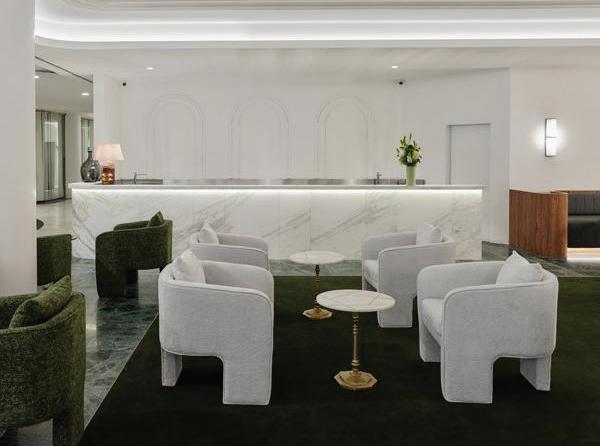
The Brighton Hotel Sydney - The Grand Parade, Brighton-Le-Sands NSW 2216 - Close to Sydney Domestic and International Airports
Use code 2605DDDTEC for discounted accommodation rates for the conference • Ample parking available at the hotel
Check the website for details of discounted accommodation rates for the conference • Ample parking available at the hotel
Organised by Dentevents™ a division of Main Street Publishing Pty Ltd ABN 74 065 490 655 www.dentevents.com • info@dentist.com.au • Tel: (02) 8001-6502
Organised by Dentevents™ a division of Main Street Publishing Pty Ltd ABN 74 065 490 655 www.dentevents.com • info@dentist.com.au • Tel: (02) 8001-6502
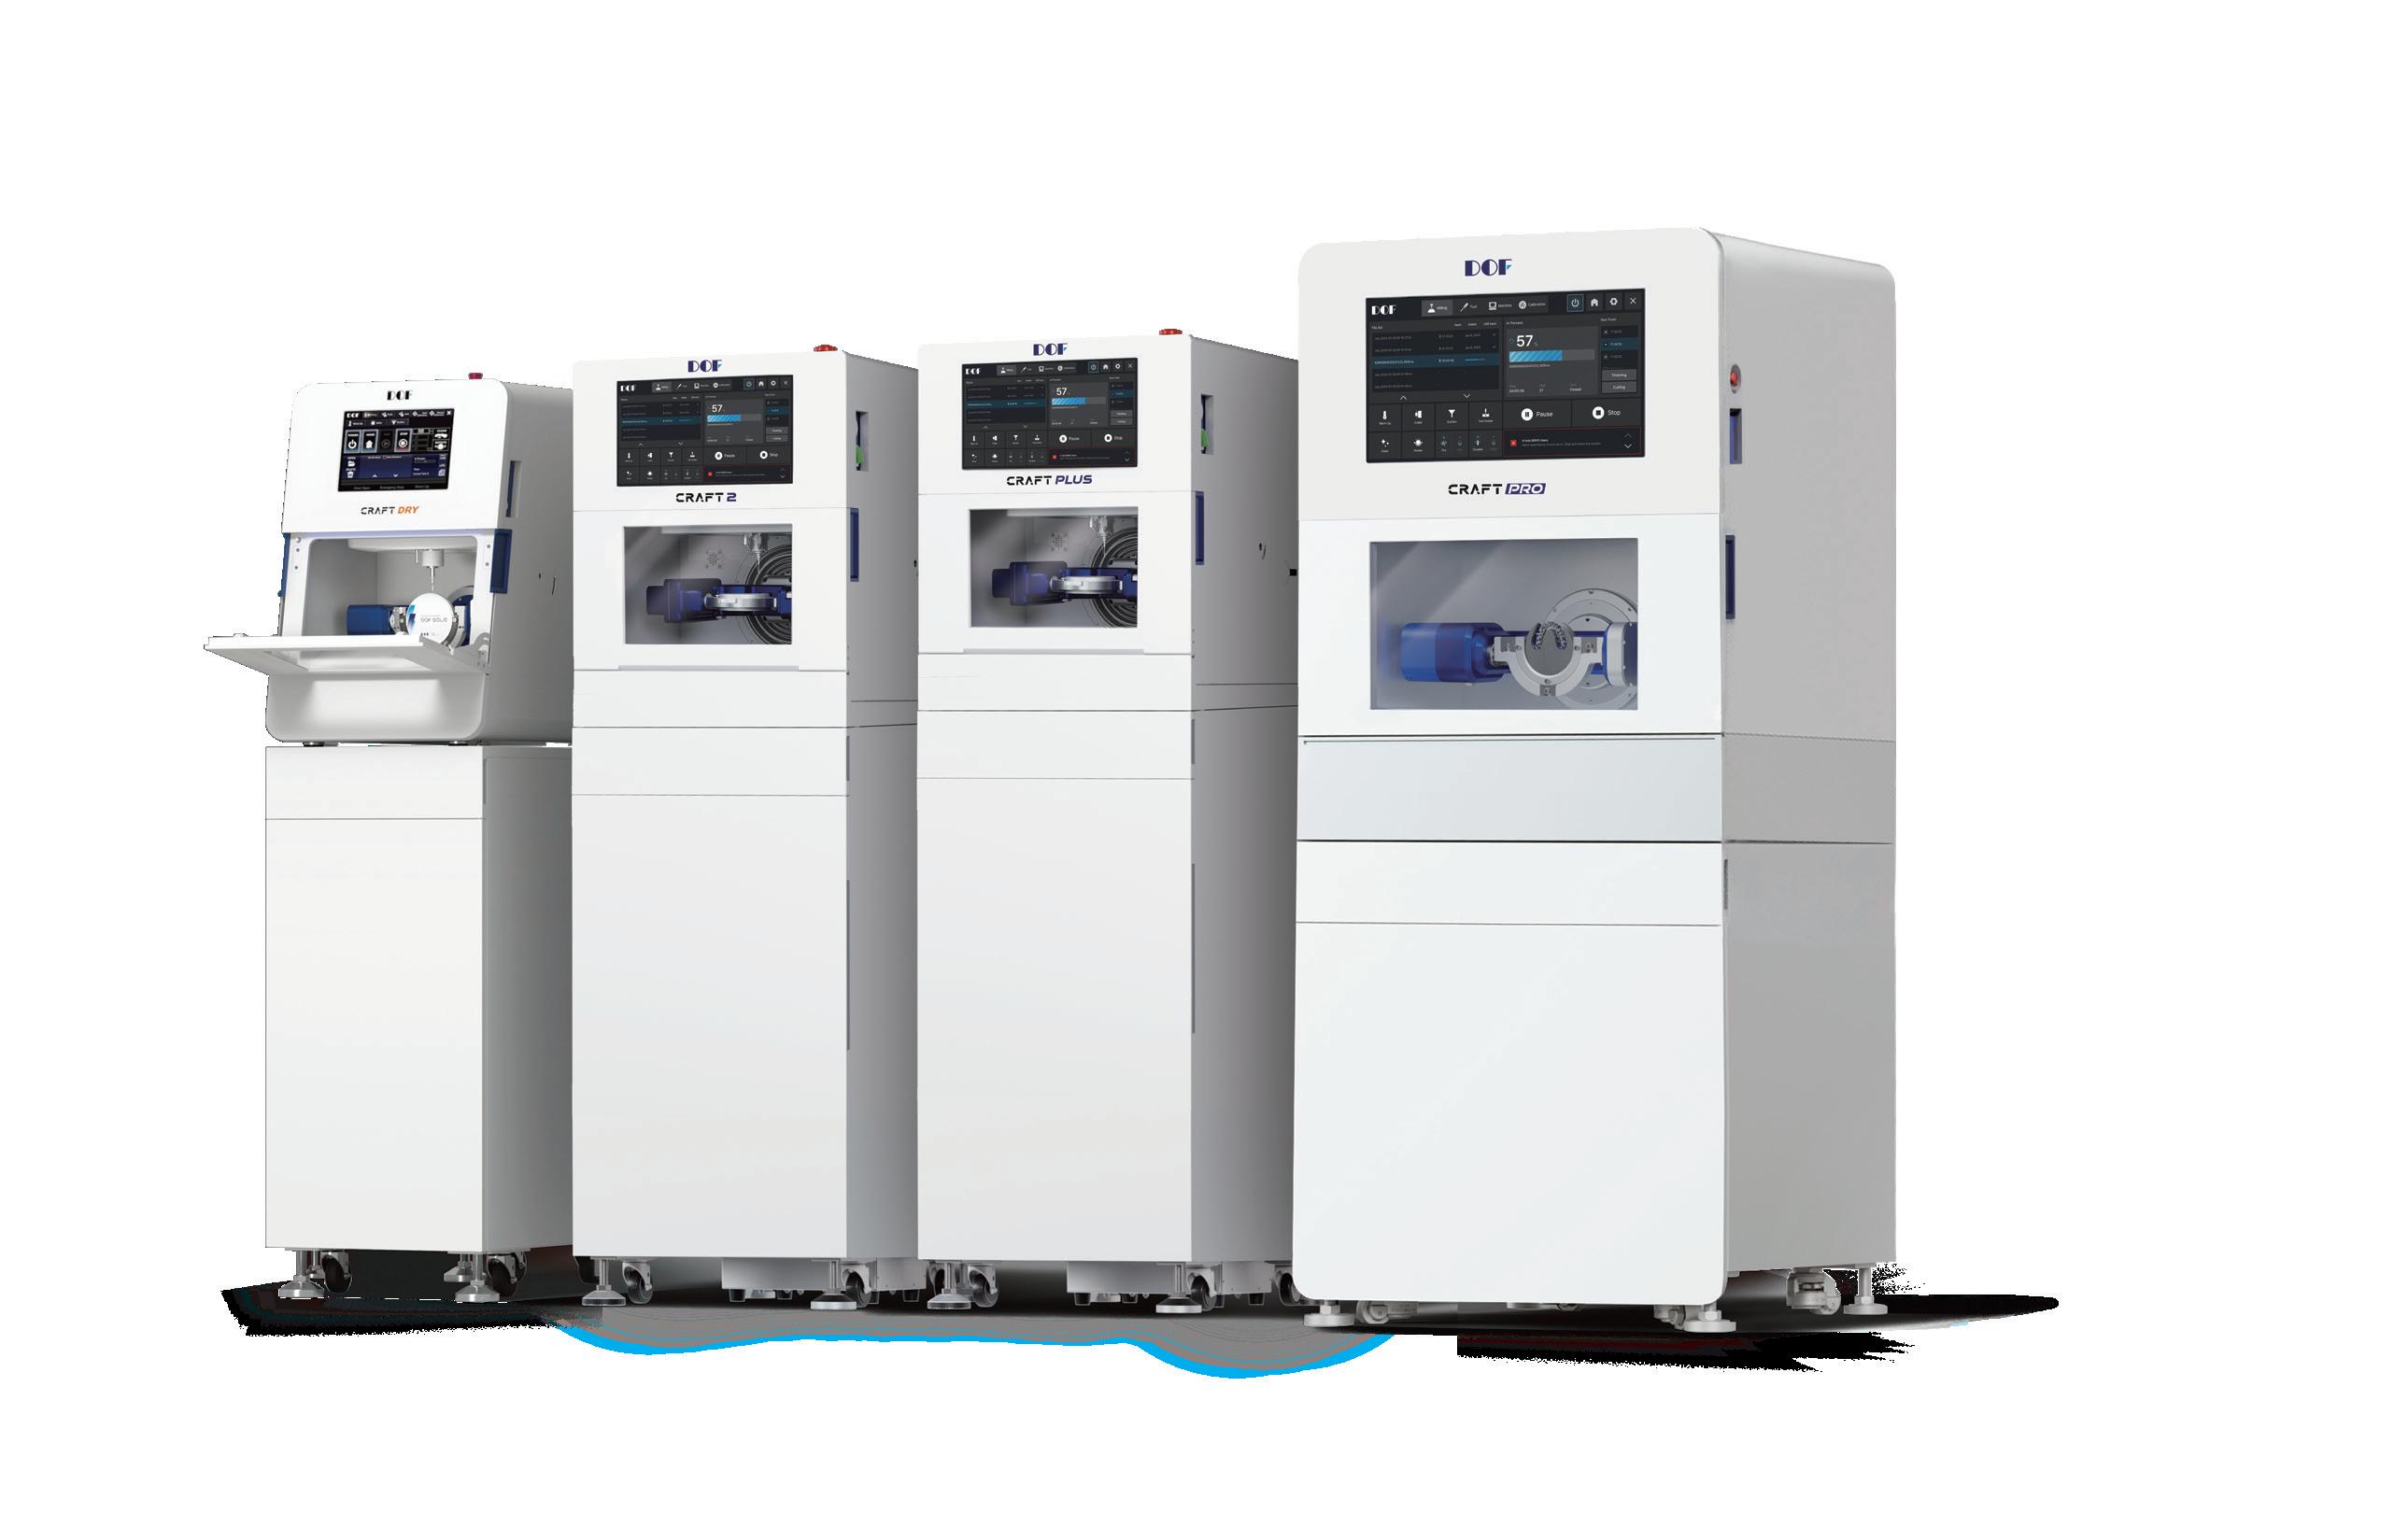
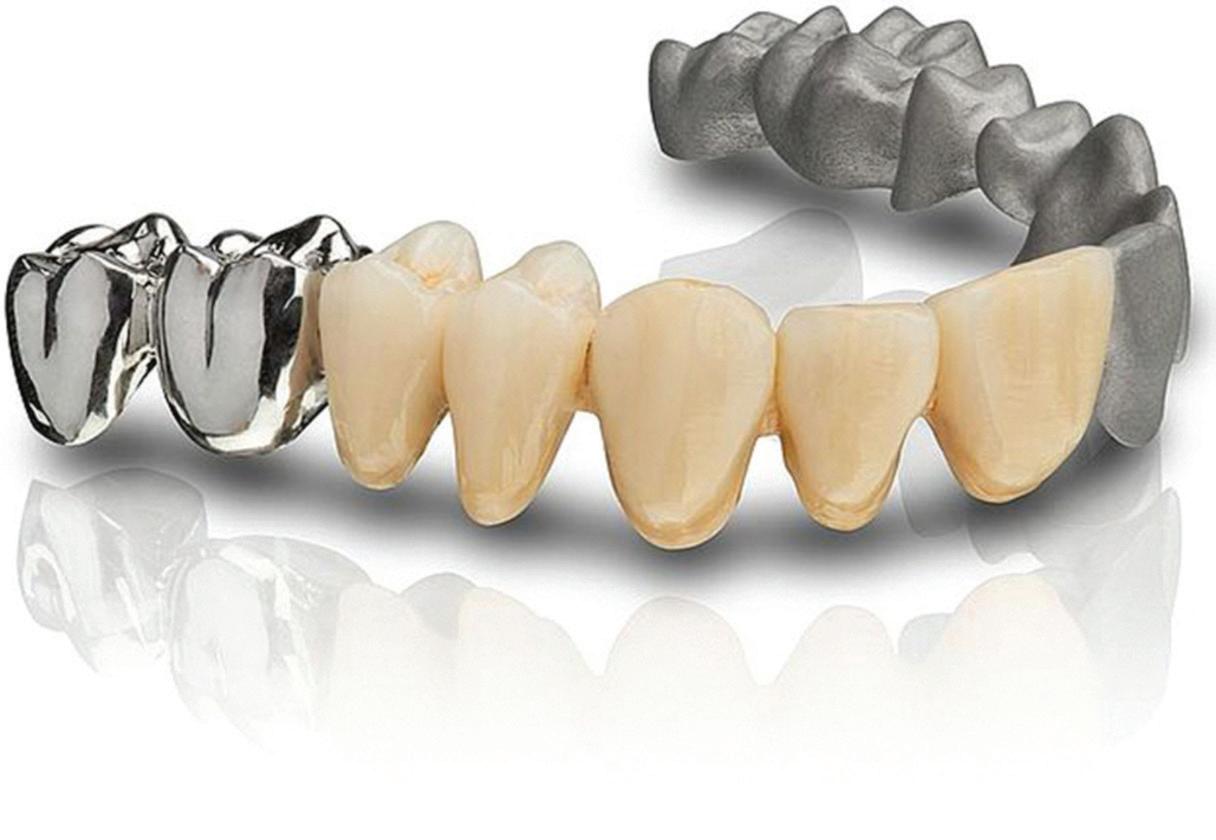
Zir, Hybrid Ceramic
PMMA, Wax
Glass Ceramic, Custom Abutment
Titanium Disk
Co-Cr Disc
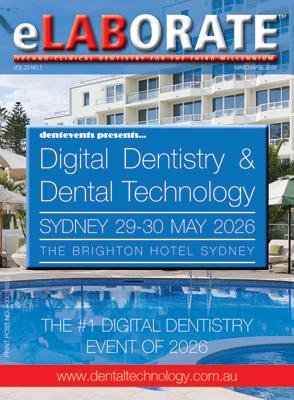
VOLUME 23 | NUMBER 1
MARCH/APRIL 2026
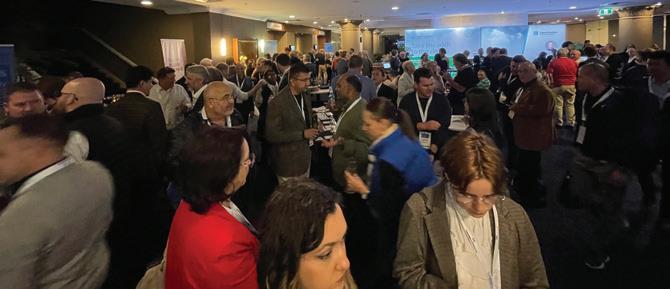
On the cover... Digital Dentistry & Dental Technology 2026 is on again on May 29-30 at The Brighton Hotel Sydney. Join us for 2 days of the latest and greatest digital dentistry has to offer. Register Now!
BRIEFS
SPECTRUM
CPD CENTRE
NEW ASIGA CURE: THE POST-PROCESSING REVOLUTION
EXMOD-PRO - AUTOMATIC SEPARATION OF THERMOFORMED ALIGNER FOILS FROM MODELS
Editor and Publisher: Joseph Allbeury Technical Editor: Terence Whitty, Dip. DT (Syd)
There is a recurring theme in digital dentistry that tends to reveal itself every time we bring clinicians and technicians together in a learning environment… what appears simple on the surface is rarely simple in execution. Whether it’s designing a full denture in CAD, calibrating a 3D printer or integrating a complete digital workflow into a busy clinic, the gap between watching and doing remains significant.
We are now well past the “early adopter” phase. Digital workflows are no longer optional extras or marketing tools... they are becoming the operational backbone of modern practices and labs. Yet with that shift comes a new challenge – competence. Not just familiarity, but true, repeatable competence across multiple systems, materials and software.
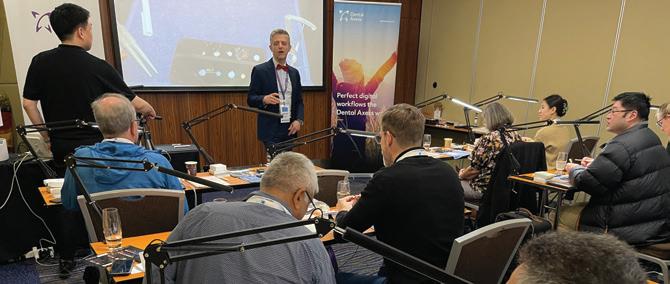
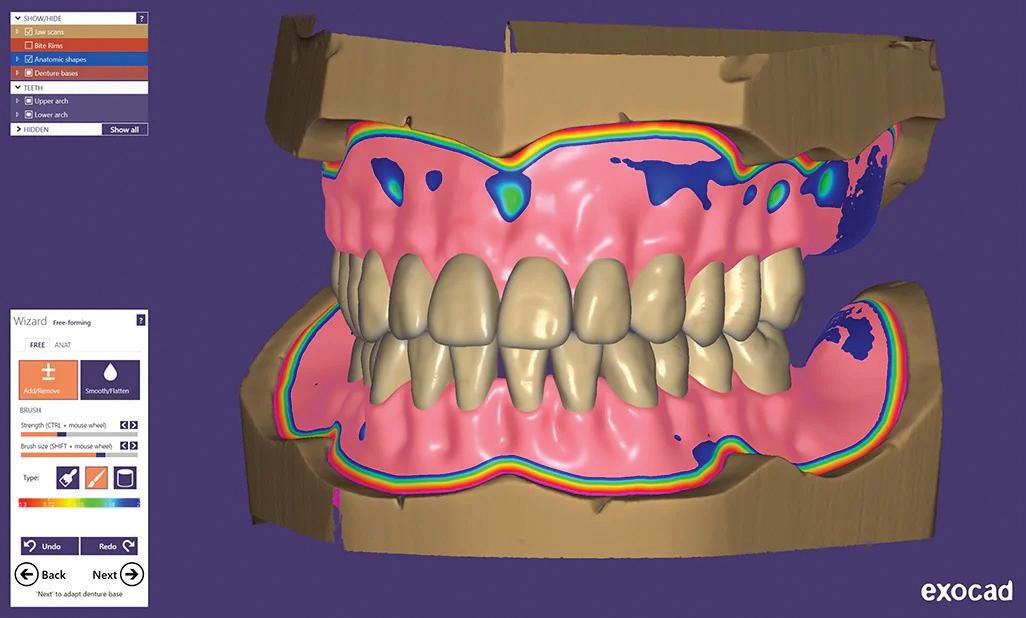
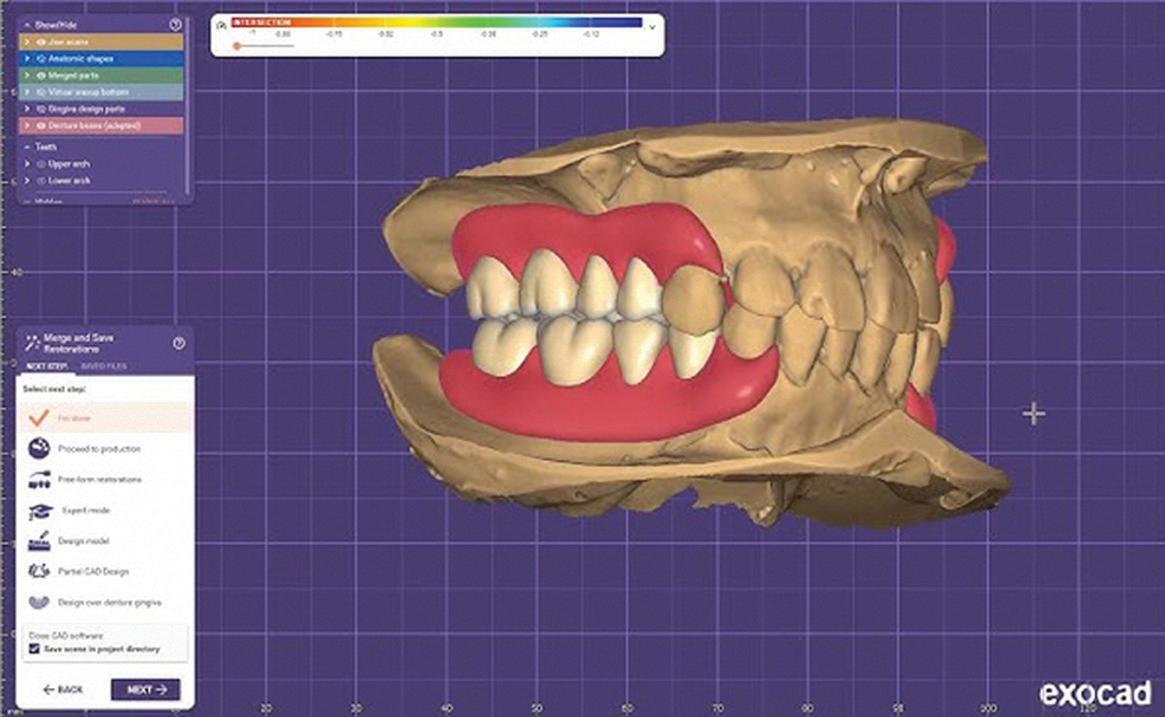
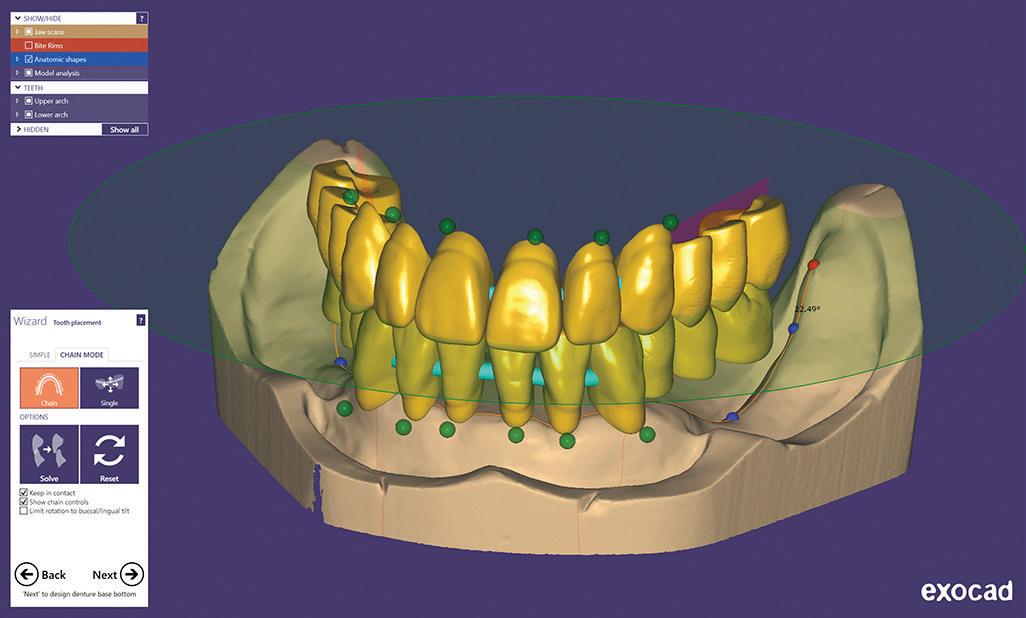
This is where structured, high-level education is critical. Take exocad denture design as an example. On paper, it is a streamlined, logical workflow. In reality, achieving predictable, aesthetic and functional outcomes requires a deep understanding of both the software and the clinical principles that underpin denture construction. The Exocad Intensive –Denture Design (www.exocademy.com.au) program has been specifically developed to bridge that gap, moving beyond theory into real-world applications, giving attendees the confidence to design with purpose rather than guesswork.
The same applies to 3D printing. As we’ve said before… it is complex. The variables are numerous and often unforgiving. The 3D Printing School 2026 (www.3dpd.com.au) builds on this reality with a hands-on, start-to-finish approach that demystifies the process while reinforcing the discipline required to get consistent results. It’s not about pushing buttons… it’s about understanding why each step matters.
And then there is the broader picture.
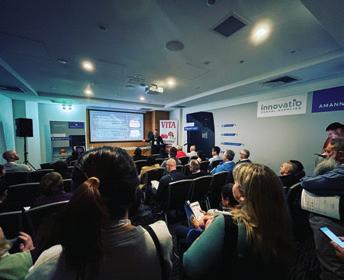
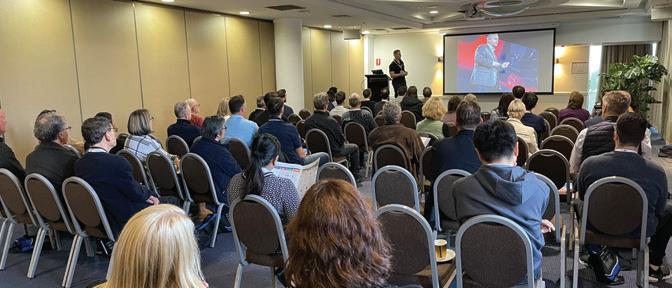
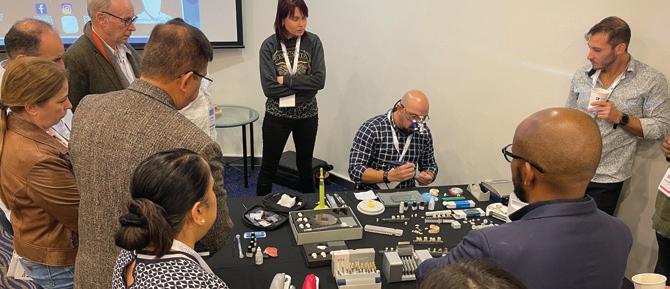
Digital Dentistry & Dental Technology 2026 is where it all comes together (www.dentaltechnology.com.au). It’s not just an event… it’s a reflection of where the industry is heading. Materials, software, hardware, workflows and business strategy all intersect in one place, giving attendees a clear view of both the opportunities and the challenges ahead. If you want to understand not just what is happening now, but what comes next, this is where those conversations take place. What continues to stand out across all three events is the emphasis on practical, experience-based learning. These are not passive lectures. They are immersive environments led by educators who work in the real world, dealing with the same pressures, limitations and expectations as everyone else in the room Because ultimately, digital dentistry is not about technology. It’s about outcomes.
So if you are serious about integrating or refining your digital workflow, the pathway is clear. Invest the time, learn from those who have already navigated the challenges and position yourself ahead of the curve. Explore the programs, secure your place and be part of what comes next.
Joseph Allbeury, Editor and Publisher
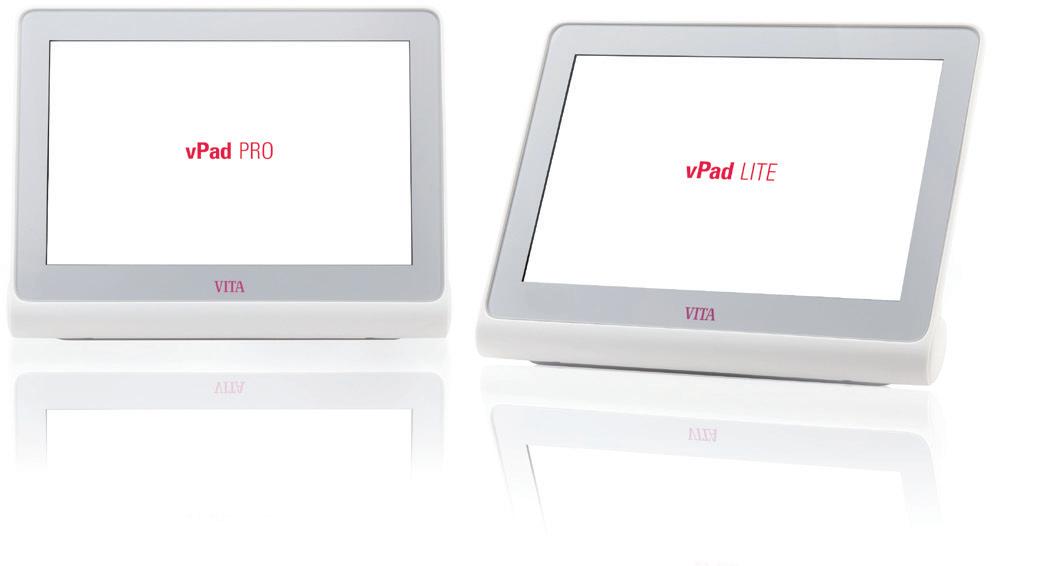
New VITA vPad LITE and PRO
With the new VITA vPad LITE and VITA vPad PRO models, VITA Zahnfabrik is introducing two new control units for VITA firing and sintering furnaces that make everyday work in dental laboratories and dental practices even easier. The devices replace the previous models VITA vPad comfort and VITA vPad excellence and feature a clear, user-friendly interface and new, well-designed functions. VITA vPad LITE is designed for users who need a reliable device for standard applications. It offers impressive intuitive navigation, clear menu navigation and a solid technical foundation – ideal for everyday use. The VITA vPad PRO also offers advanced features such as a programmable start time and versatile connection options. This makes the VITA vPad PRO particularly suitable for more complex processes that require efficiency and control – without compromising on user friendliness. Both models were specially developed for the requirements of the firing and sintering process. They help streamline workflows, reduce operating times and focus on what matters most – a seamless process flow in the laboratory and practice. Whether it’s a standard application or more advanced control, the VITA vPad LITE and VITA vPad PRO provide dental practices and dental laboratories with the perfect solution to fit their needs.
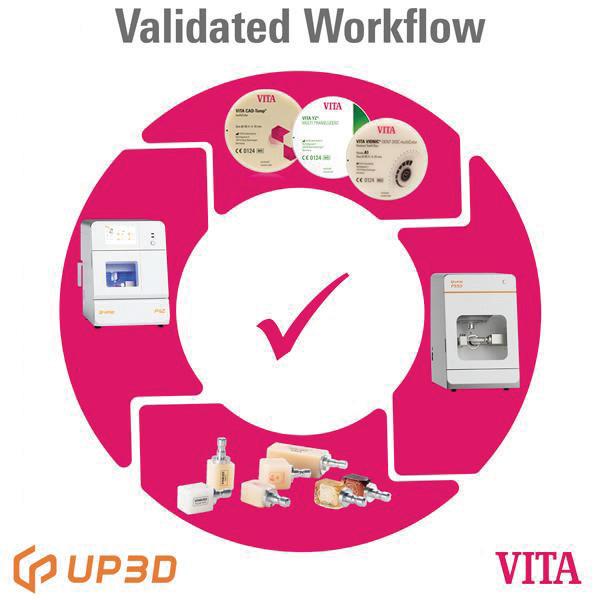
VITA and UP3D launch validated workflow
VITA Zahnfabrik and UP3D now offer a fully validated workflow for dental milling applications. At the heart of this new partnership lies the successful validation of VITA’s complete CAD/CAM material portfolio on the UP3D milling machine series – including the models P42, P53 and P55D. This allows dental laboratories and clinics to work with a fully harmonised system – from material selection to final restorations. The validation covers the full range of VITA CAD/ CAM materials – from the million-times proven feldspar VITABLOCS, the high-performance VITA YZ zirconia, and the unique VITA ENAMIC hybrid ceramic to the VITA VIONIC materials for digital denture production. This ensures not only reliable results, but also restorations that meet the highest standards of esthetics and functionality. UP3D is known for delivering powerful yet attractively priced CAD/CAM systems with a strong and growing global customer base. In combination with VITA’s proven materials, this creates a forward-looking solution that is simple, efficient and validated.
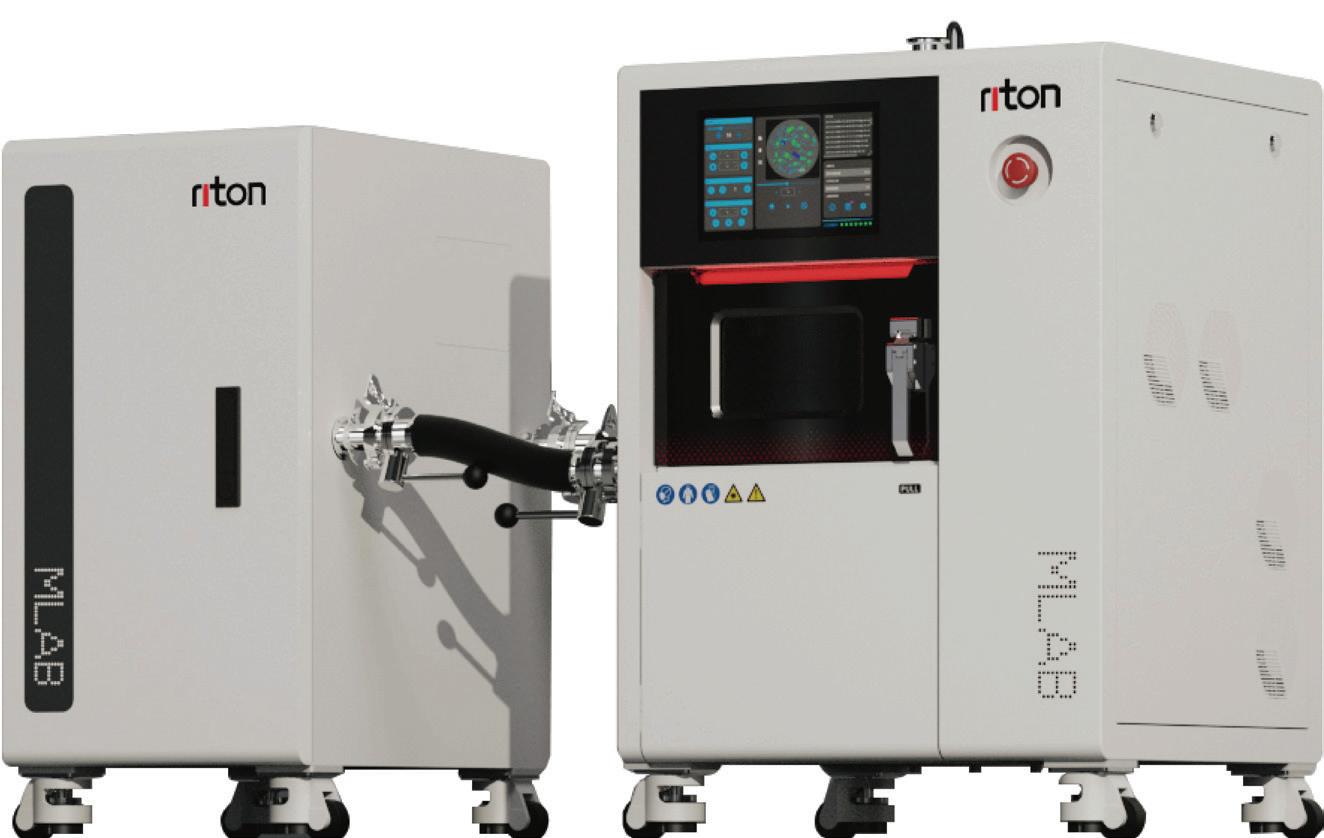
Digital metal on your desktop
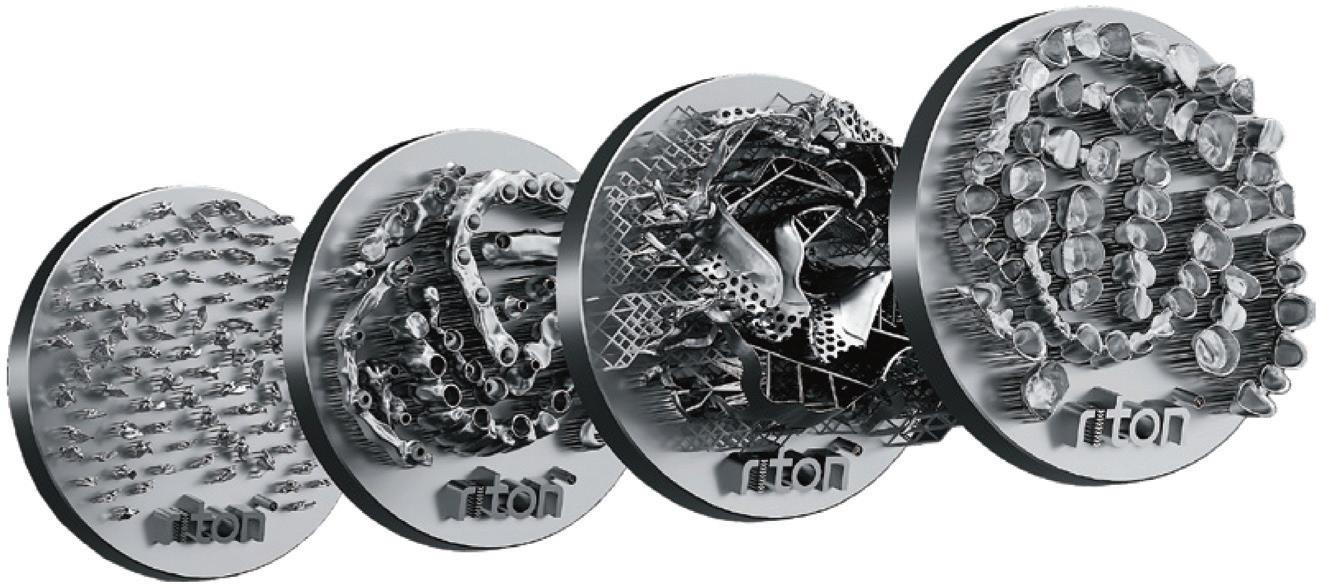
There are moments in dentistry when something shifts quietly in the background and then there are moments when a technology arrives that changes the direction of the entire workflow. The new RITON dental SLM printer sits firmly in the second category. This is not another incremental improvement. This is a truly viable desktop metal printing system designed specifically for dental production, set to redefine how we approach partial denture frameworks, fixed orthodontic appliances and nonprecious crown and bridge frameworks.
For decades, we have accepted casting as the standard. It works, but it comes with inherent limitations—distortion, technique sensitivity and a workflow that is as much art as it is science. What RITON has done is remove that variability and replace it with controlled, repeatable, digital manufacturing. You are building metal layer by layer with precision.
A laser selectively fuses metal powder, one thin layer at a time, guided by a digital design. Supports anchor the structure during the build, ensuring accuracy and stability. Once complete, the framework is removed, cleaned, heat treated and finished. It is a controlled process from start to finish.
The impact becomes clear with partial denture frameworks. These are among the most technique-sensitive prostheses we produce, where small casting errors lead to poor fit and remakes. With the RITON system, the framework is produced exactly as designed. Fit is no longer dependent on variables like investment expansion or burnout cycles, but on the digital file.
The same applies to fixed orthodontic appliances. Wire bending and soldering have served us well, but they are manual processes. With SLM, appliances can be designed digitally and manufactured with consistent geometry and strength. What was once handcrafted becomes engineered.
Then there is crown and bridge. Non-precious metal frameworks have always had a place, but the workflow has been slow and labour-intensive. Digital design now flows directly into manufacturing, removing manual steps and delivering consistent, accurate frameworks ready for finishing.
None of this works without a controlled ecosystem. Materials matter, and consistency in metal powder is critical. The involvement of companies supplying verified, TGA-registered powders brings traceability and regulatory confidence.
Equally important is design validation. A machine will produce exactly what you design, so accuracy at the design stage is essential. This combination of validated materials and design turns equipment into a reliable production system.
Finishing has always been a weak point in metal workflows. Grinding and polishing are time-consuming and inconsistent. The inclusion of plasma polishing changes that. It produces a surface that is smooth, clean and consistent at a level difficult to achieve manually.
What makes this significant is that all of this sits in a desktop format. This is a compact unit that can be integrated into a
dental laboratory environment, bringing metal manufacturing into the same space as digital design and improving workflow efficiency and turnaround times.
For the first time, casting becomes optional rather than essential. Frameworks can be designed, manufactured and finished within a controlled digital ecosystem where accuracy is engineered, not approximated.
If you want to see where this is going, it will be on display at Digital Dentistry and Dental Technology 2026 this May in Brighton-Le-Sands, Sydney. This is not a concept—it is available now.
We have talked about digital dentistry for years. What we are seeing now is the extension of that philosophy into metal as a production reality.
For more information, contact Fabdent on 1300-878-336.
Riton M Lab SLM printer.
Welcome to Zirkonzahn Australia
A fully equipped centre designed to support clinics and laboratories across the country
Located in the Sydney suburb of St Leonards, just minutes from the city centre, Zirkonzahn Australia becomes the company’s 13th location worldwide.
In this new facility, dentists and dental technicians can take part in on-site training courses and live demonstrations dedicated to Zirkonzahn products, equipment and digital workflows.
In addition, the educational offering also includes a wide range of webinars, accessible remotely, as part of the Zirkonzahn School – a structured and comprehensive programme designed to teach the effective use of Zirkonzahn equipment and materials without knowledge gaps.
Zirkonzahn Australia also includes a local logistics department, ensuring fast and reliable delivery of materials without waiting times. In addition, Rian Barnard, Zirkonzahn’s on-site Dental Technician and CAD/CAM expert, is also available to support customers and prospective clients in developing their workflows, showcasing the system’s various components, assisting with on-site installation and answering all related technical questions.
With the recent opening of this new dedicated service, supply and support facility, users in Australia can now explore Zirkonzahn’s innovations first-hand without having to travel to the headquarters in Italy – which, of course, always remains worth a visit. Zirkonzahn’s doors are always open to professionals interested in discovering where all products are created and in experiencing the South Tyrolean culture that has shaped the company since its foundation.
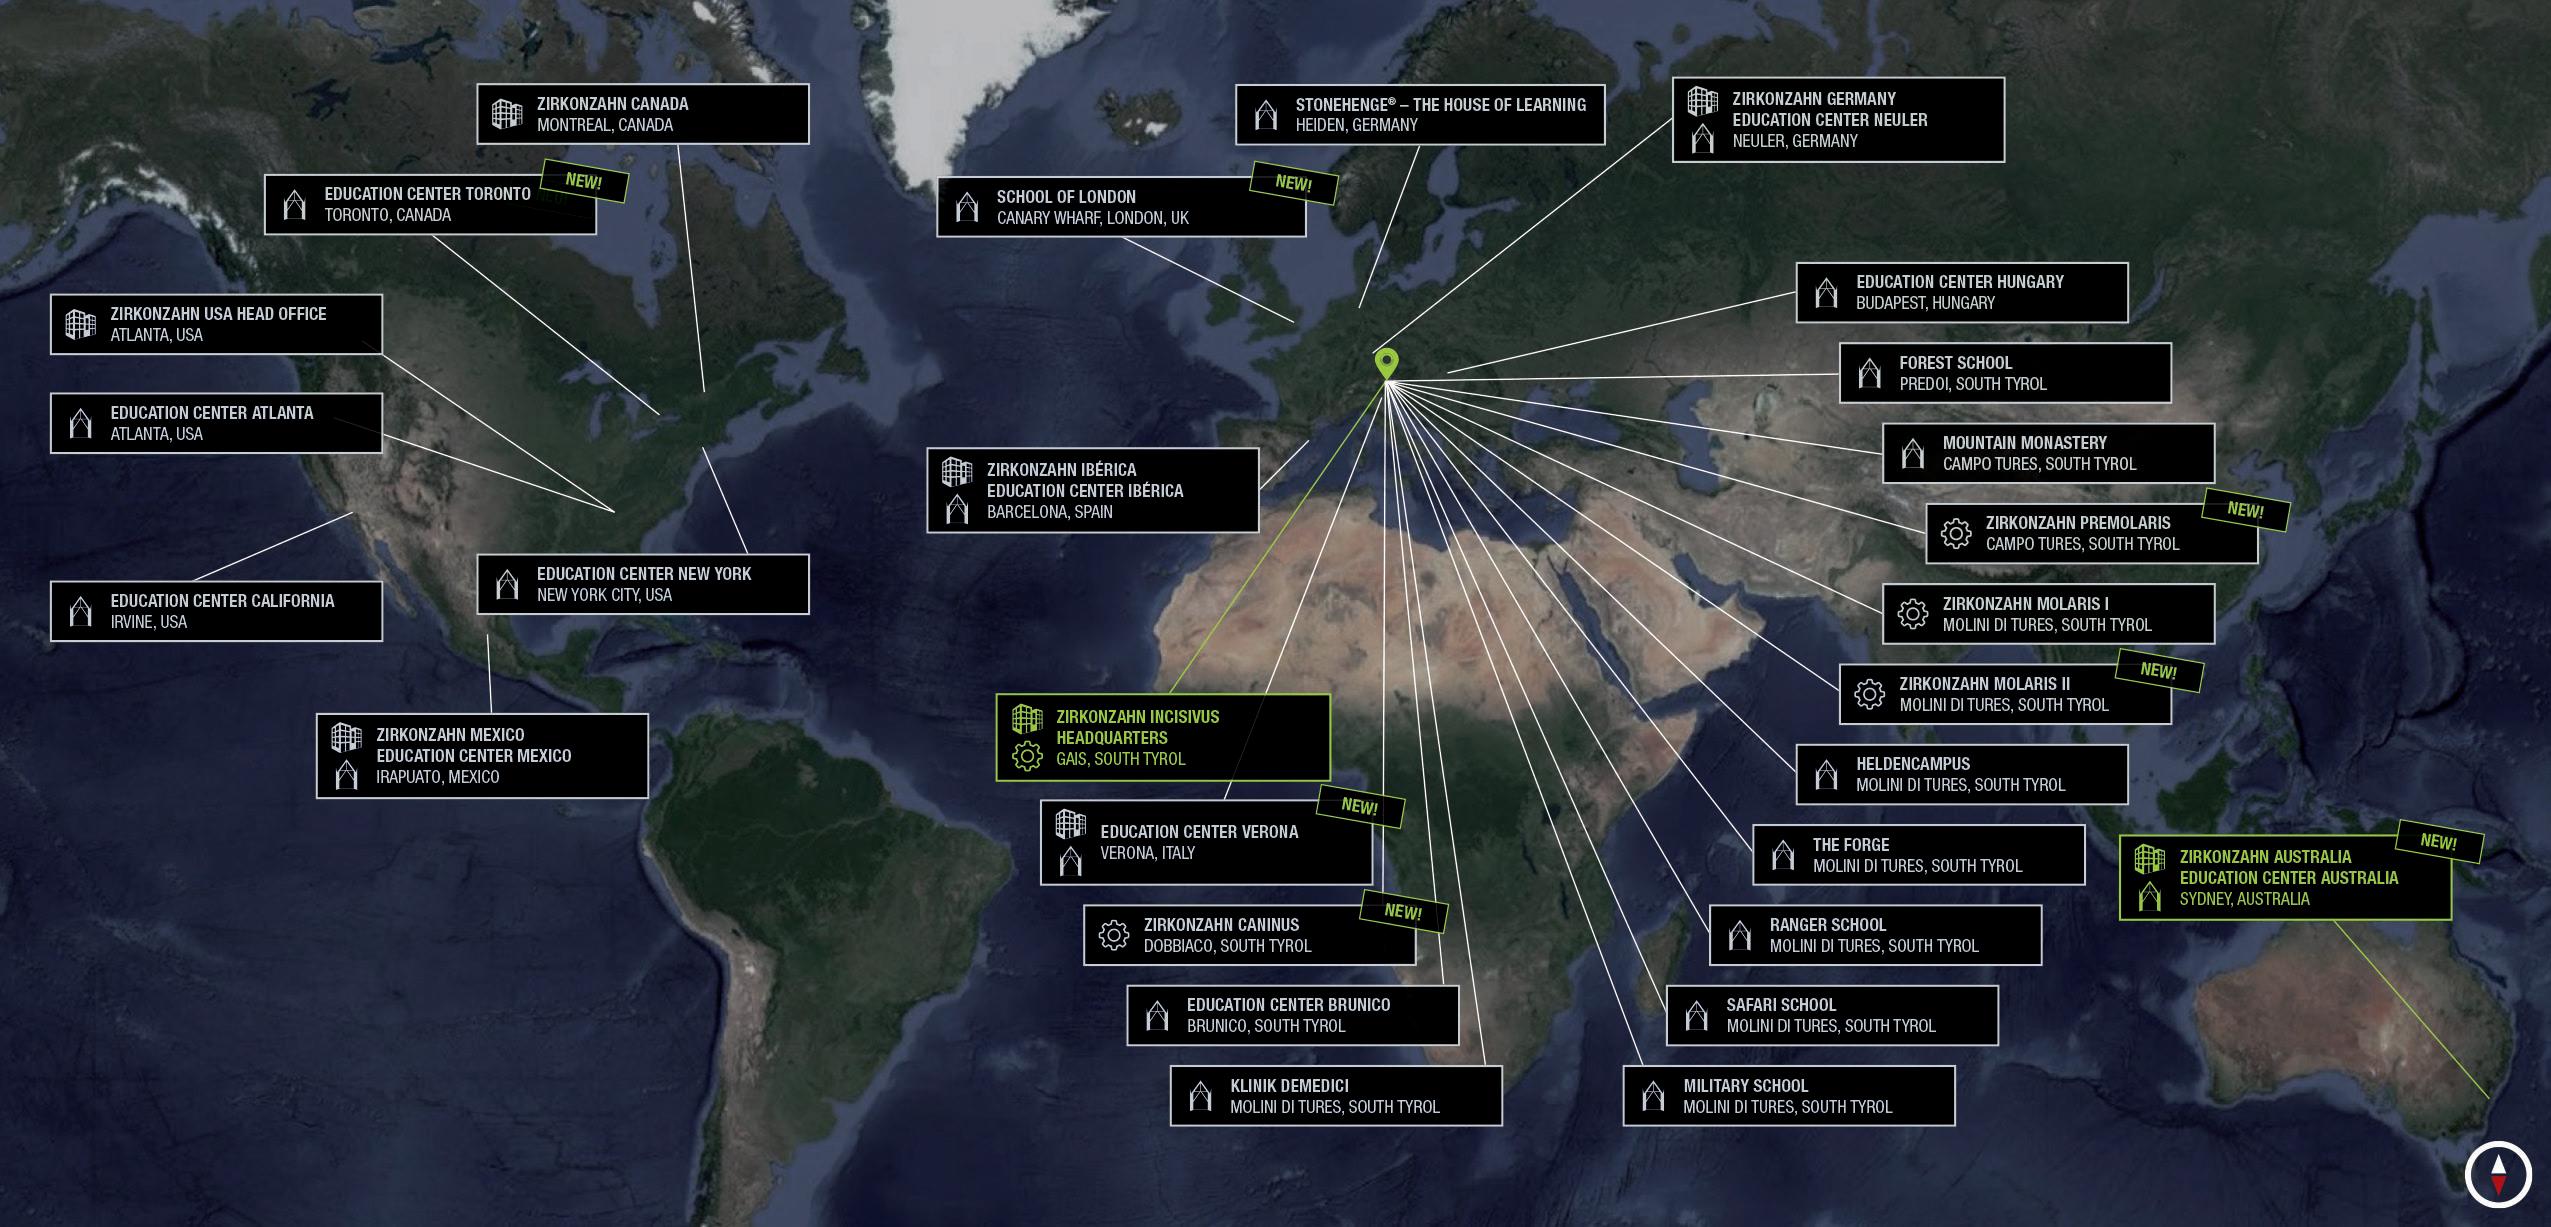
Figure 1. From a one-person business to a global company: Today Zirkonzahn counts over 350 employees, with its headquarters, main education centres and production sites in South Tyrol, plus additional facilities in seven countries worldwide.
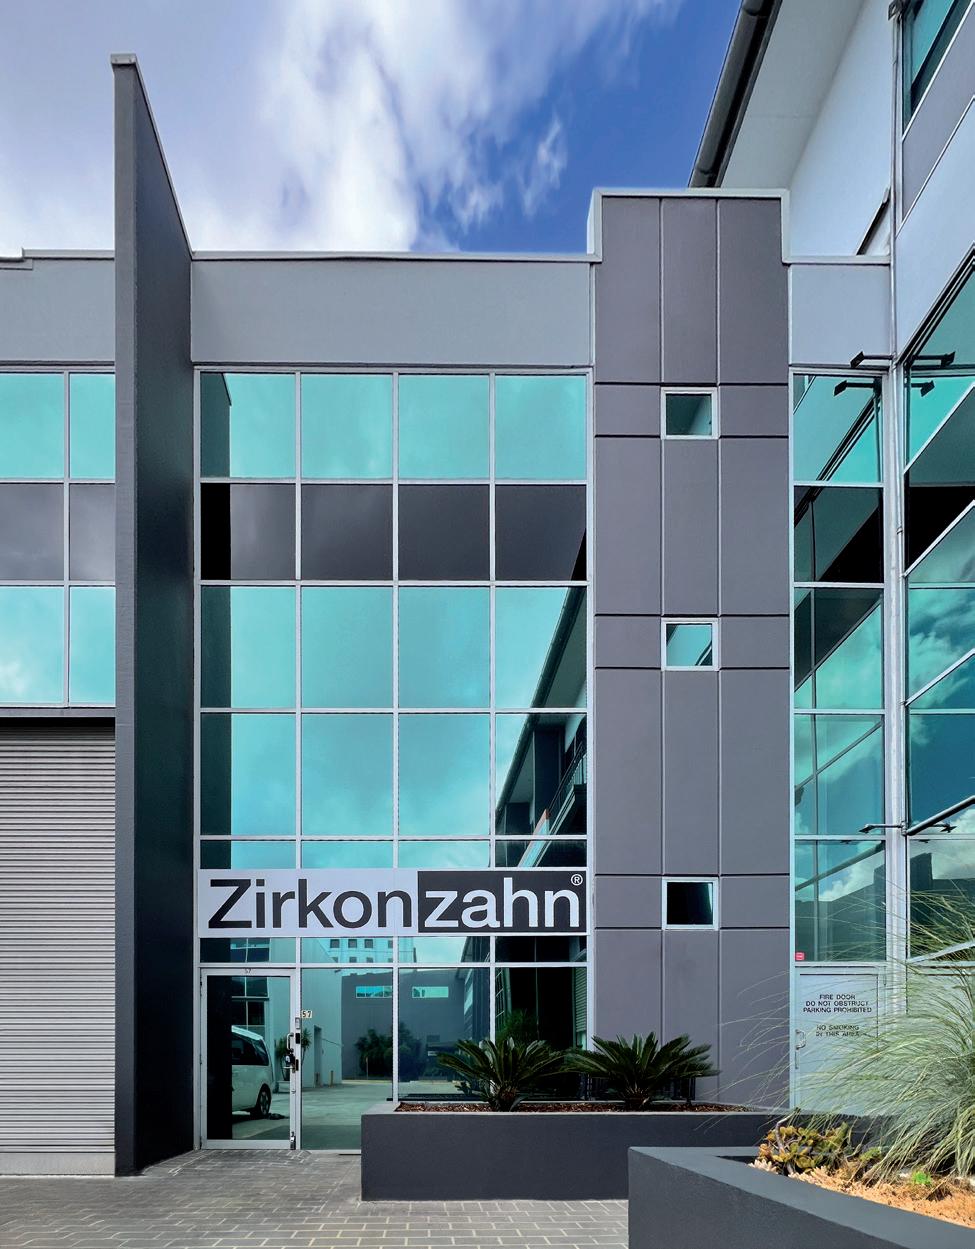
Figure 2. From the Alps to Sydney: Zirkonzahn lands in Australia with a modern, fully equipped facility.
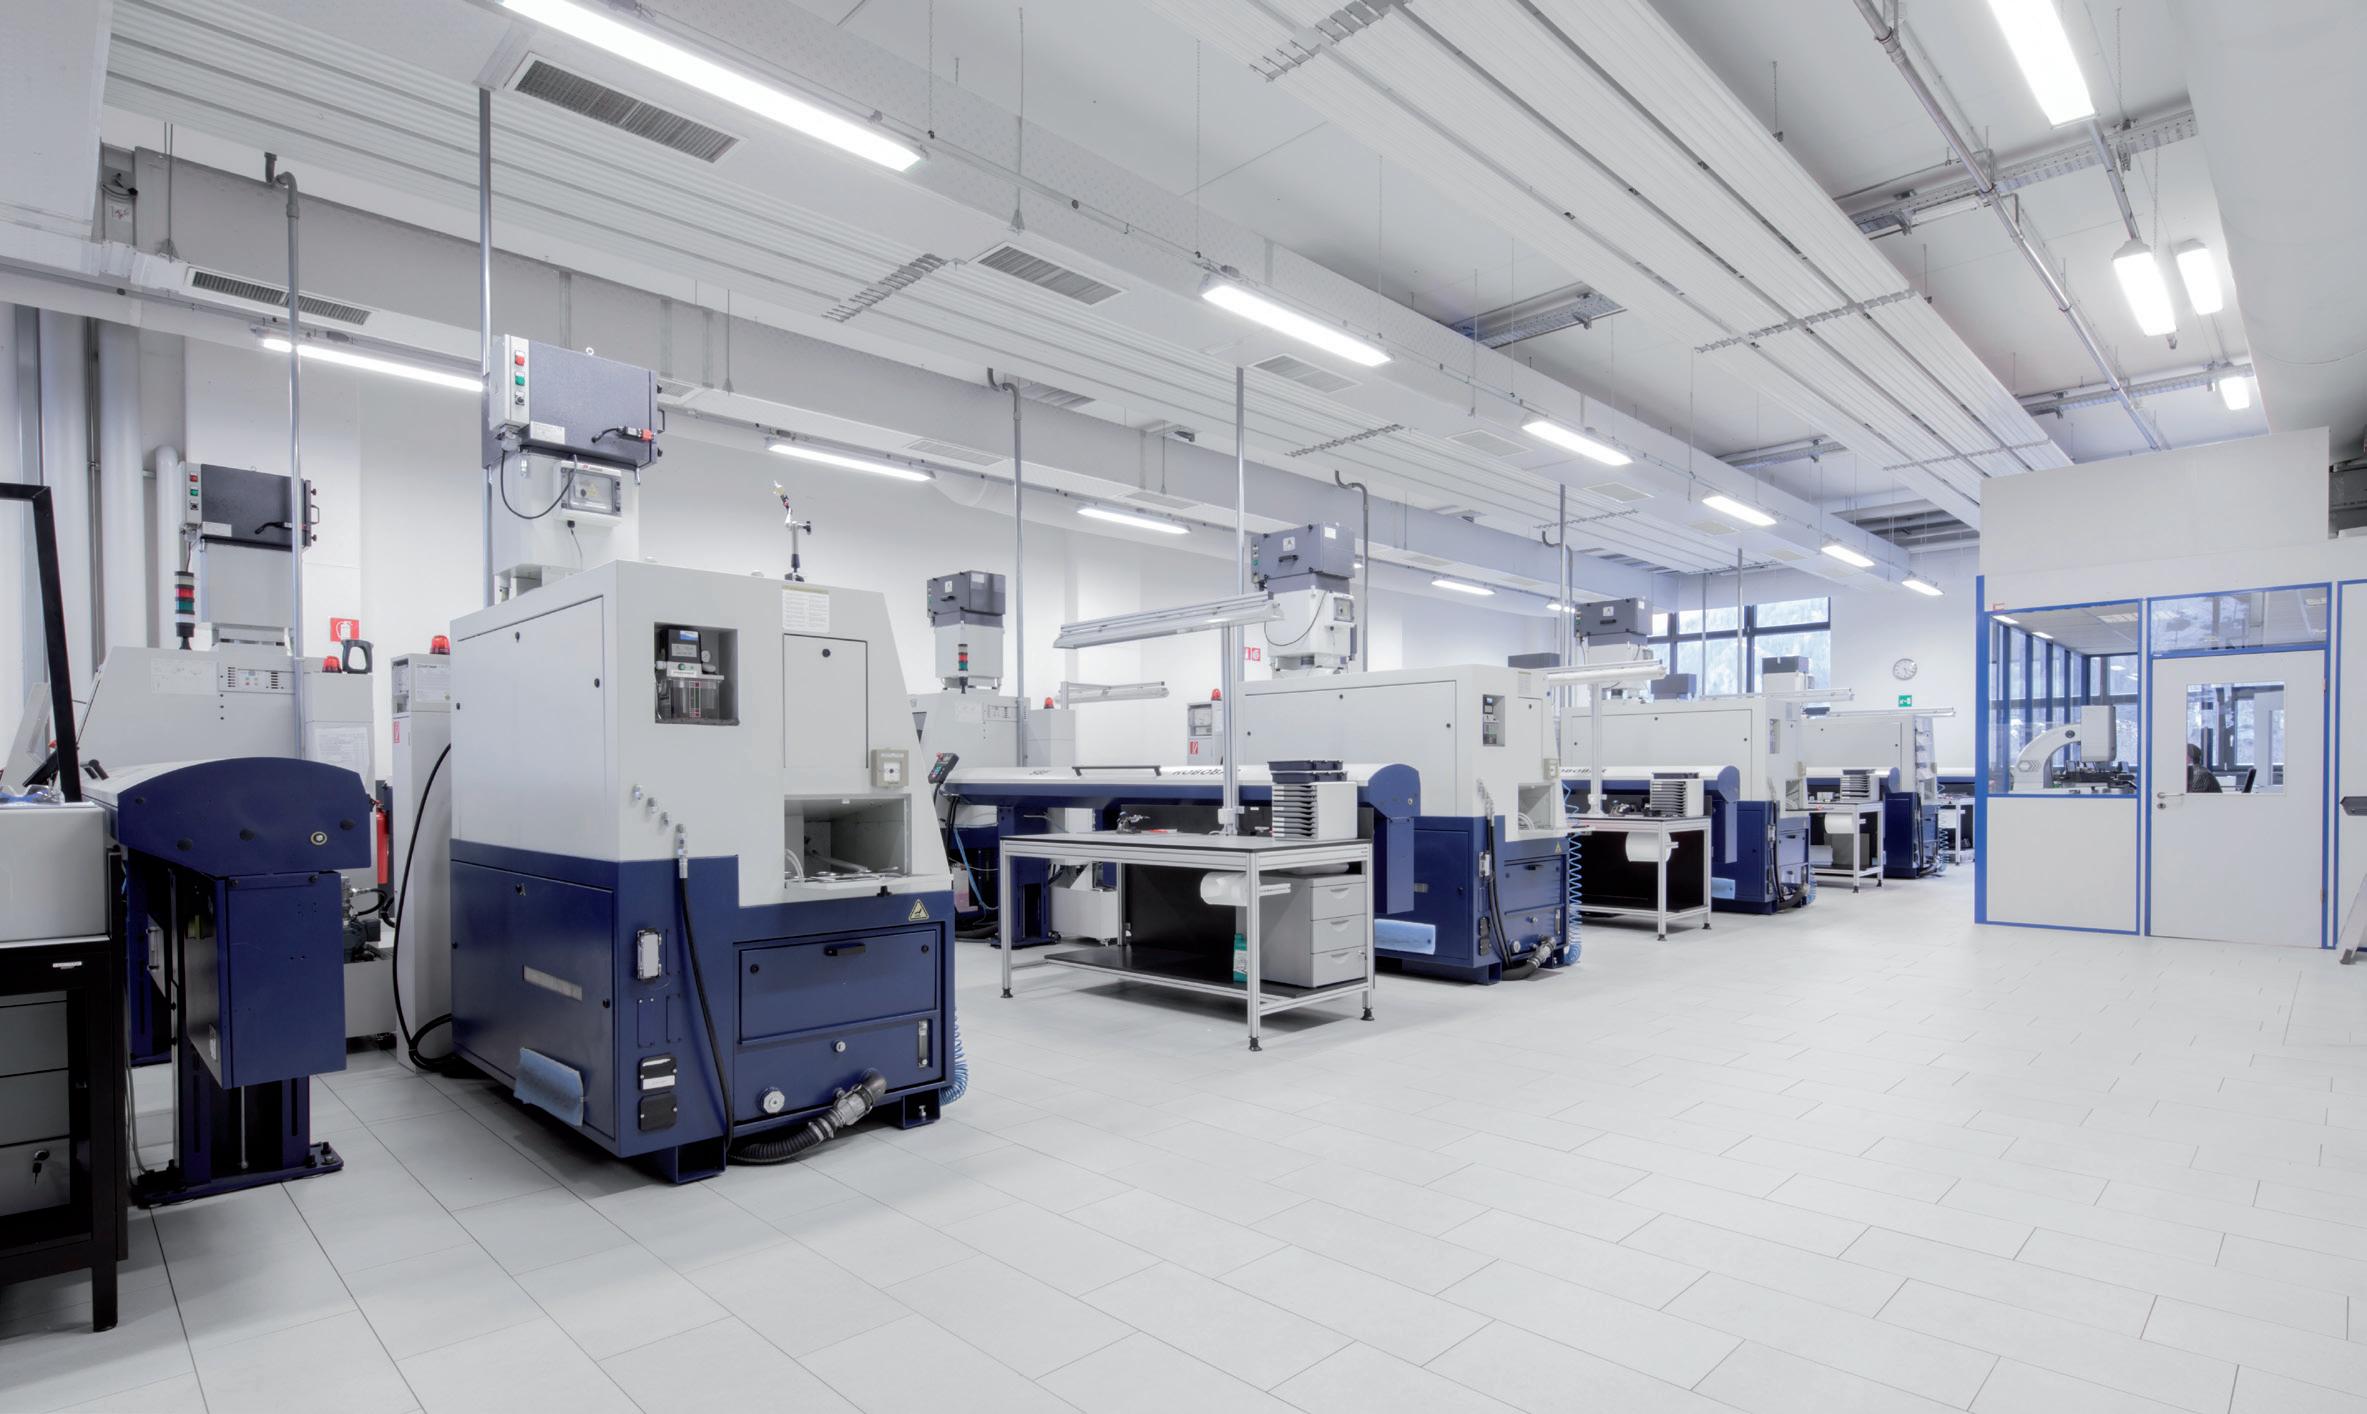
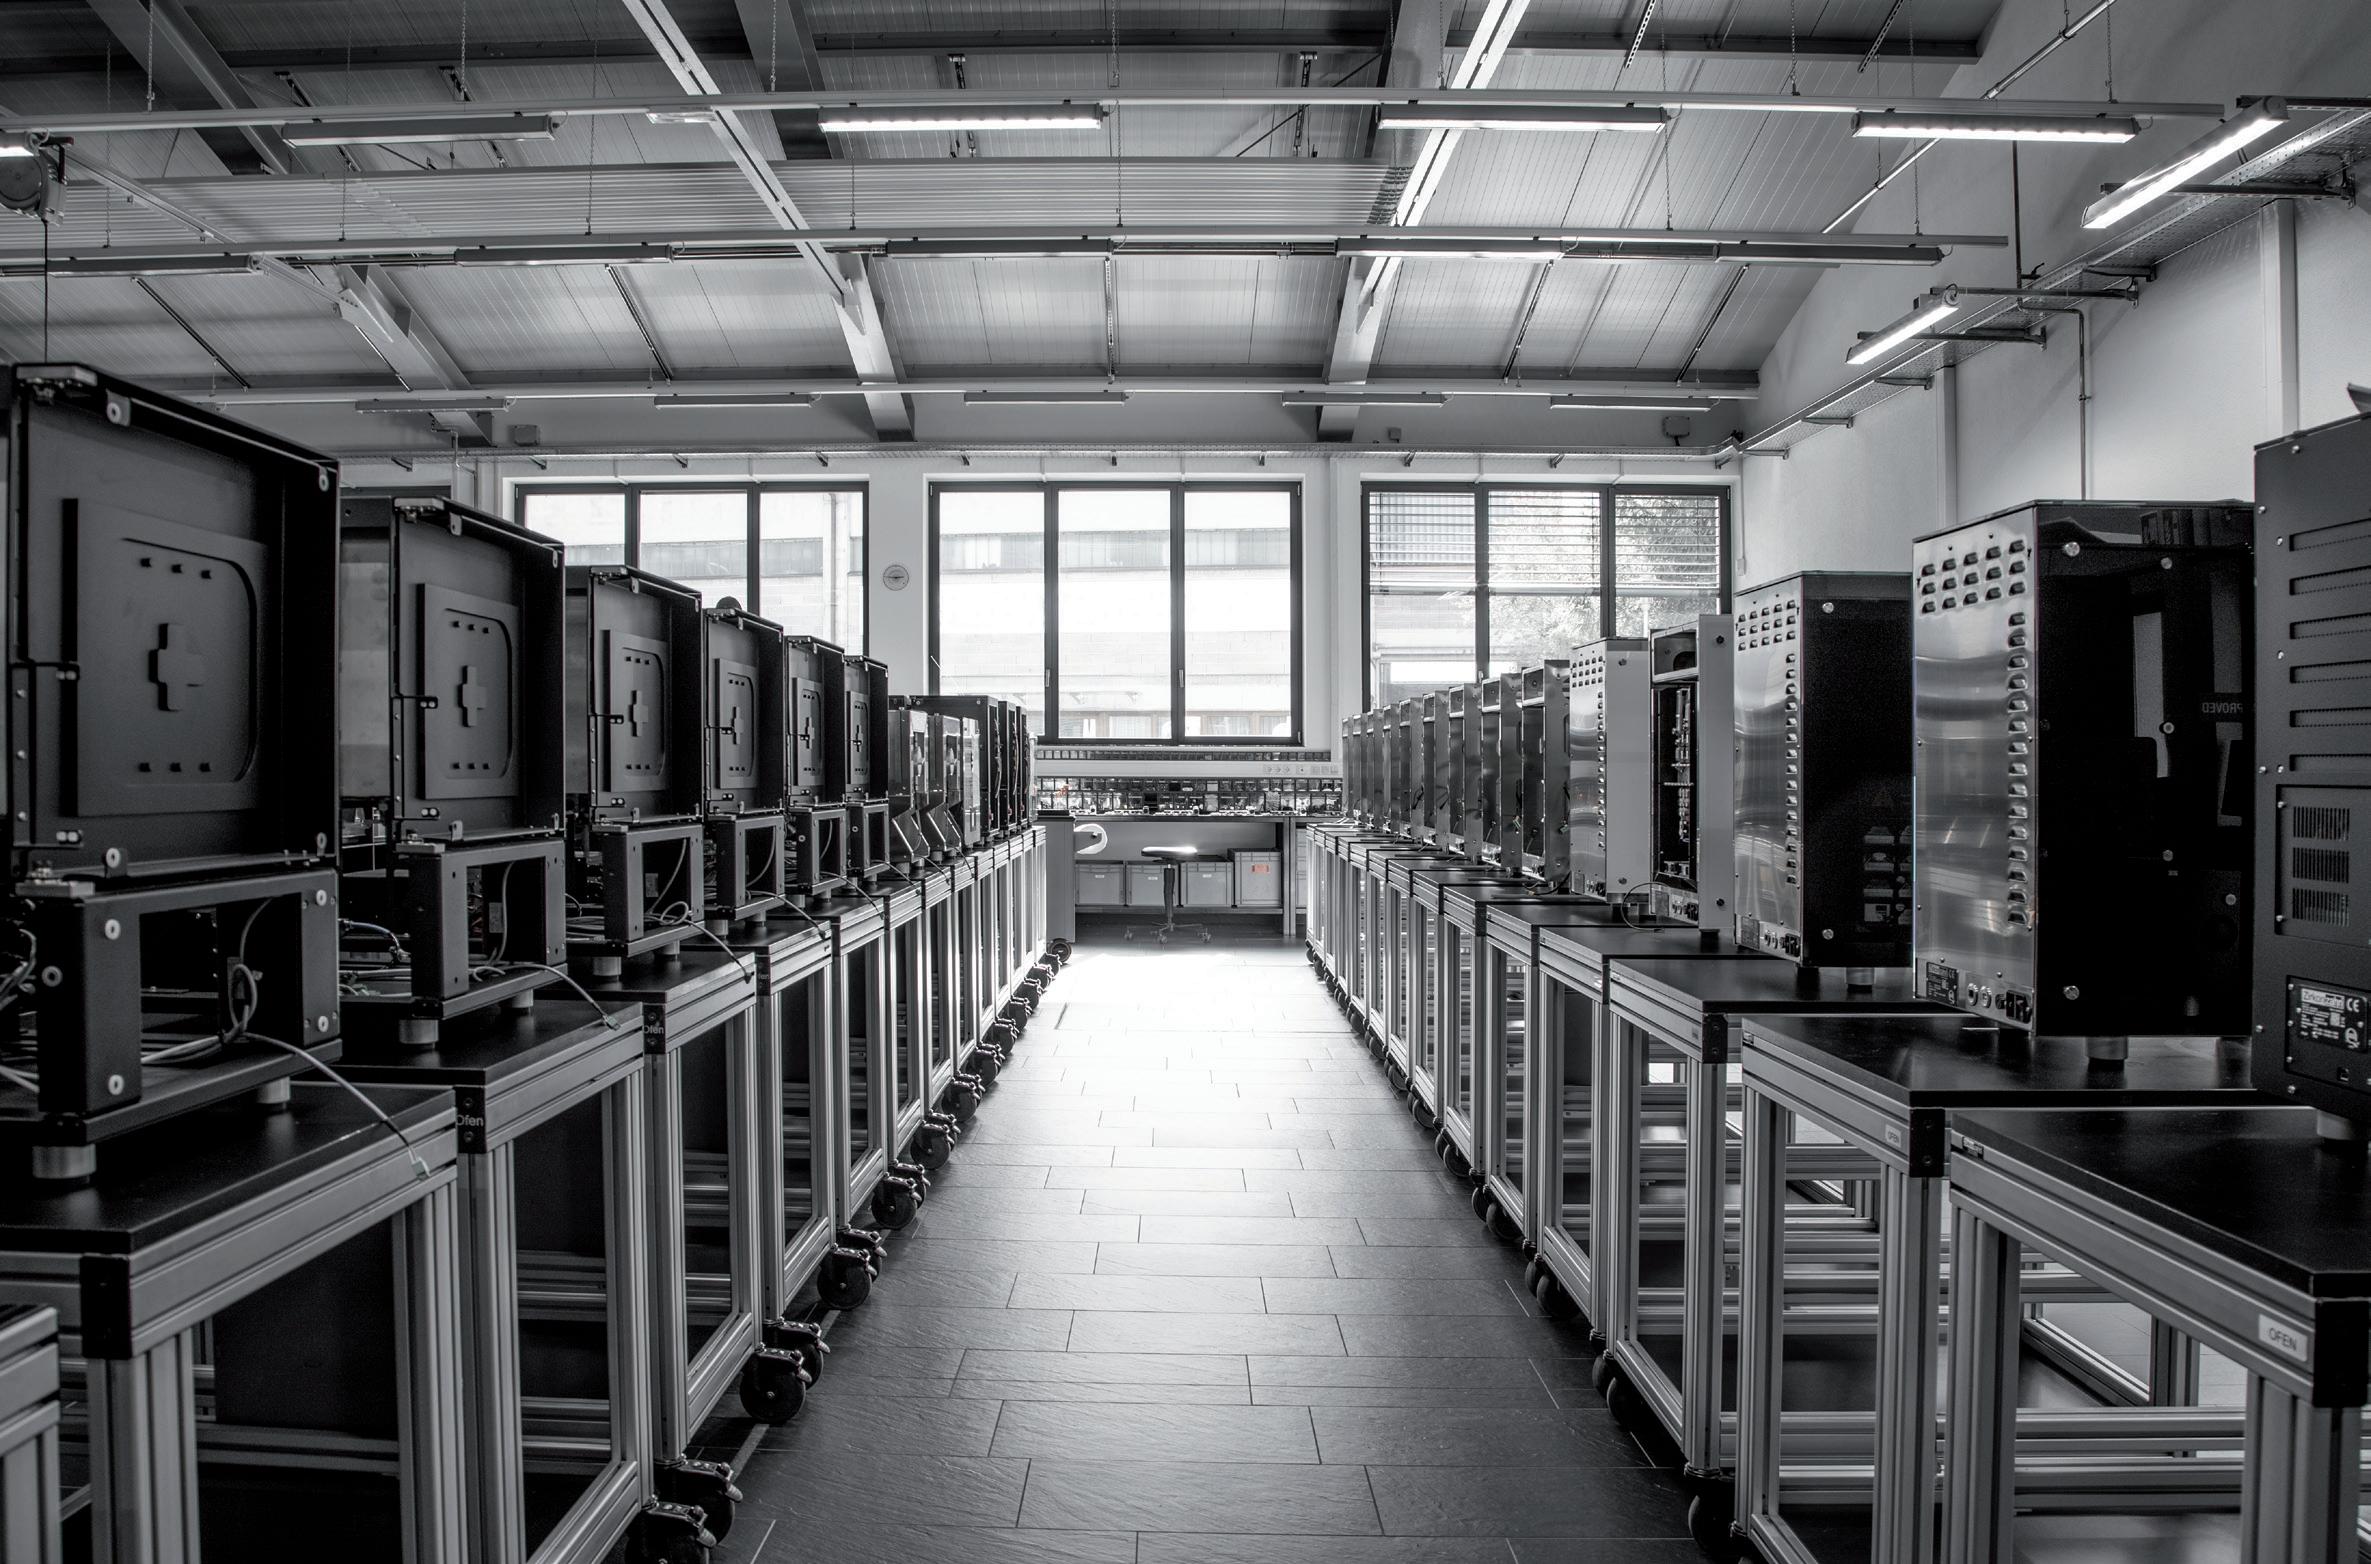
3 (above). One of the company’s three production halls dedicated to implant prosthetic components.
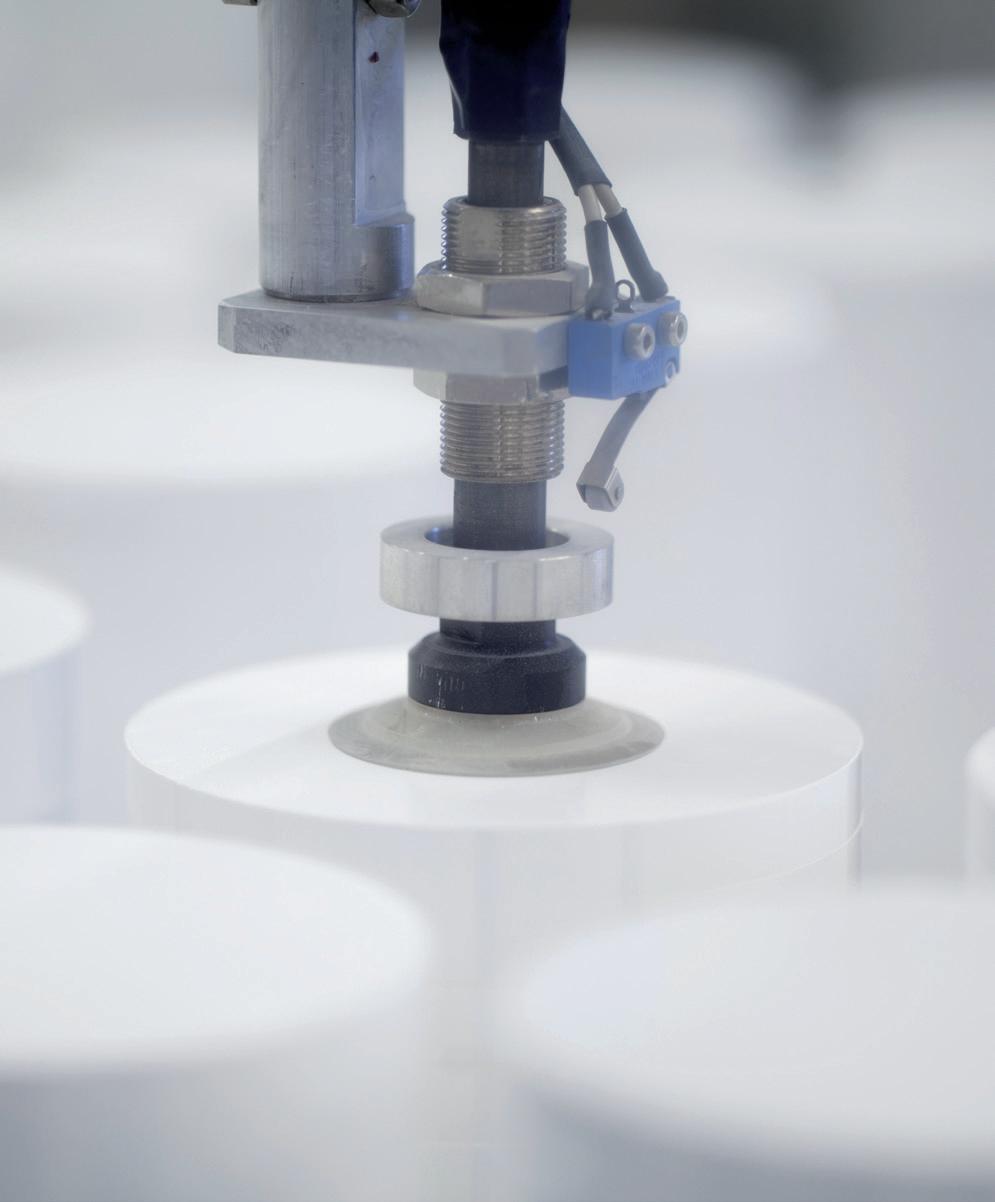
Figure 4 (right). Zirconia production. Each blank is accurately checked after every step, via specific tests and measurements to control hardness, dimensions, density, colour, translucency and materials’ shrinkage.
LSetting new standards in digital dentistry
ocated in the heart of the Italian Alps and guided by the core values of discipline, innovation, trust and responsibility, Zirkonzahn has been offering solutions and approaches for the dental sector since its founding in 2003. The expertise developed over the years is passed down from father to son – both Master Dental Technicians – ensuring continuity and creating longlasting relationships based on mutual trust.
From patient diagnostics to the final restoration, Zirkonzahn’s goal is to optimise collaboration and communication between dentists and dental technicians by providing a complete workflow with perfectly coordinated tools. Under the motto “Everything from a single source”, all milling units, dental materials, equipment, software, tools and TGA-approved implant prosthetic components are conceived and developed in-house. This guarantees full control over production and compliance with the highest quality standards, ensuring seamless compatibility among all products.
With Zirkonzahn, customers do not simply purchase a product: they access an entire working philosophy that combines a wellcoordinated dental workflow (digital and/or analogue), a complete service package and reliable support.
Thanks to the multilingual helpdesk, users benefit from fast and comprehensive assistance for both technical and dental-technical issues at any stage of their workflow.
Zirkonzahn is open
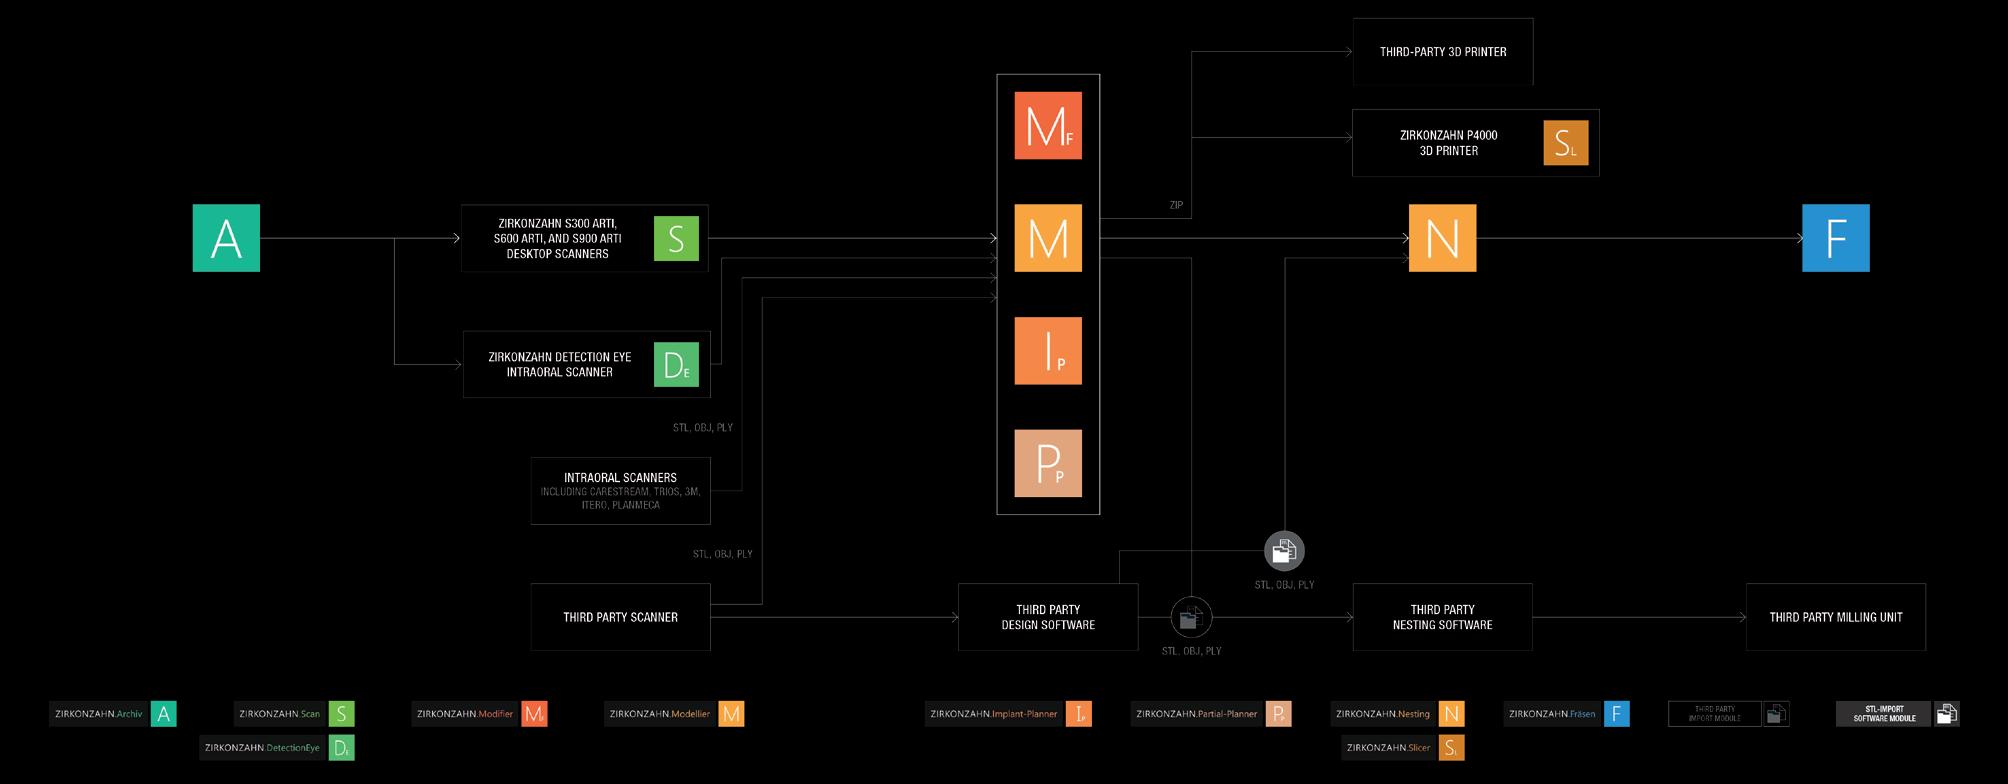
Driven by continuous innovation and a search for smart, unconventional solutions, all Zirkonzahn hardware components and software modules generate open data formats (e.g., STL, OBJ). These are compatible with all open CAD systems, milling units and 3D printers. Likewise, open data from other manufacturers can be processed with Zirkonzahn’s wide range of products.
This openness allows customers to build a personalised and upgradable system, adaptable to their needs through numerous combinations. Even the design of the CAD/CAM system itself can be customised on request, in various colours and styles, to express each user’s identity.
Figure
Always at your side to face the future
In the dental market – and in the broader world of work – staying informed about the latest advancements is a sign of professionalism, competence and versatility. Professionals particularly value partners who, beyond delivering excellent results, provide valuable insight into modern and effective techniques to meet every requirement. From new materials to advanced CAD/CAM technologies, every Zirkonzahn innovation aims to enhance communication between clinic and laboratory, ensuring
the perfect balance of function, aesthetics and streamlined technical processes.
As always, Zirkonzahn stands alongside its customers—ready to walk with them through the daily challenges of work.
Discover the Zirkonzahn world! Scan the QR code or contact Valentina Sacco - valentina.sacco@zirkonzahn. com - Tel: +39-0474-066663 - or Zirkonzahn Australia – Sydney Team - Hanna Kukula – Mob: 0422-770-640 – hanna. kukula@zirkonzahn.com
Assembly of milling units, scanners and furnaces – all in-house.
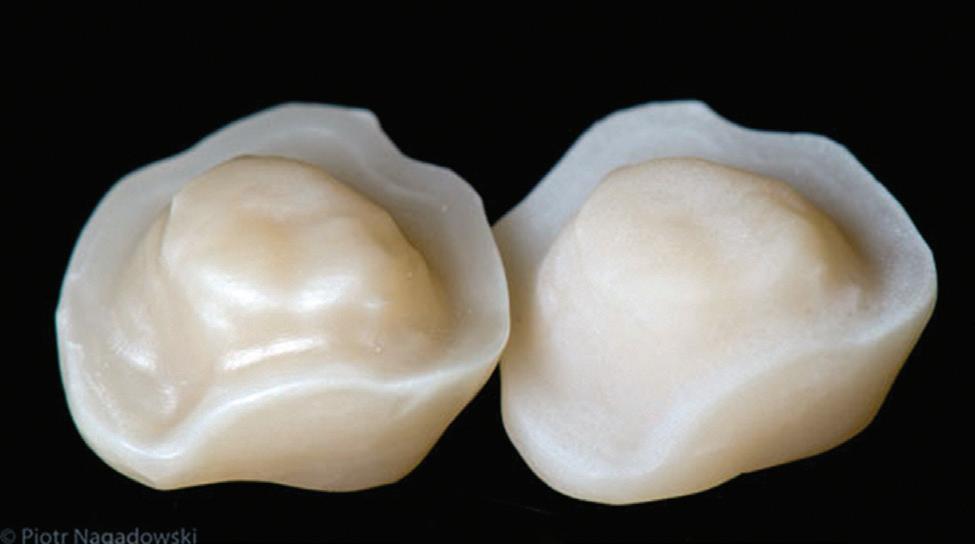
ICE PLUS
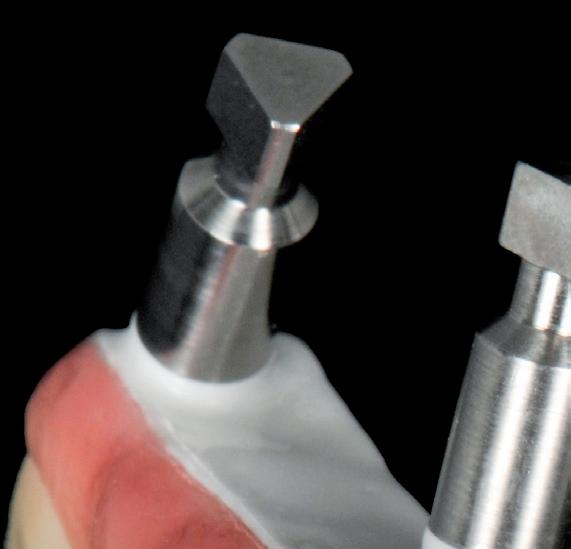
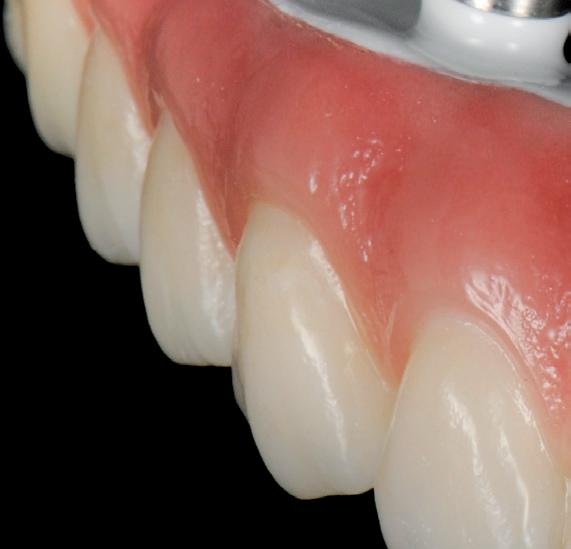
ZIRCONIA UPPER AND LOWER RESTORATION ON FOUR IMPLANTS EACH
- Acquisition of implant positions using photogrammetry technology, and of soft tissue data using an intraoral scanner; smile design defi nition
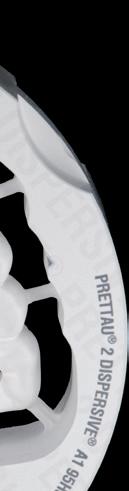
- Printing of super- and substructures for a first try-in in the patient’s mouth; digital design of the upper and lower full arches in Prettau® 2 Dispersive® zirconia as well as of the substructures in ICE Plus zirconia
- After milling and sintering, bonding of the superstructures to the substructures
- Minimal layering with ICE Ceramics and characterisation with ICE Stains 3D by Enrico Steger
- High-gloss polishing of the restoration and insertion in the patient’s mouth
Dr. Anne-Maree Cole – The Littleton Cole Dental Centre, Brisbane, Australia
DT Werner Sauer – Werner Sauer Smile Design, Brisbane, Australia
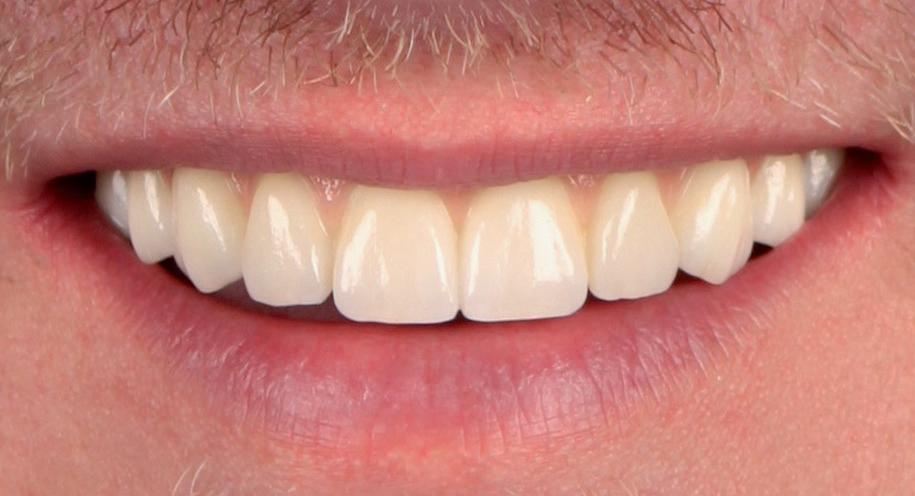
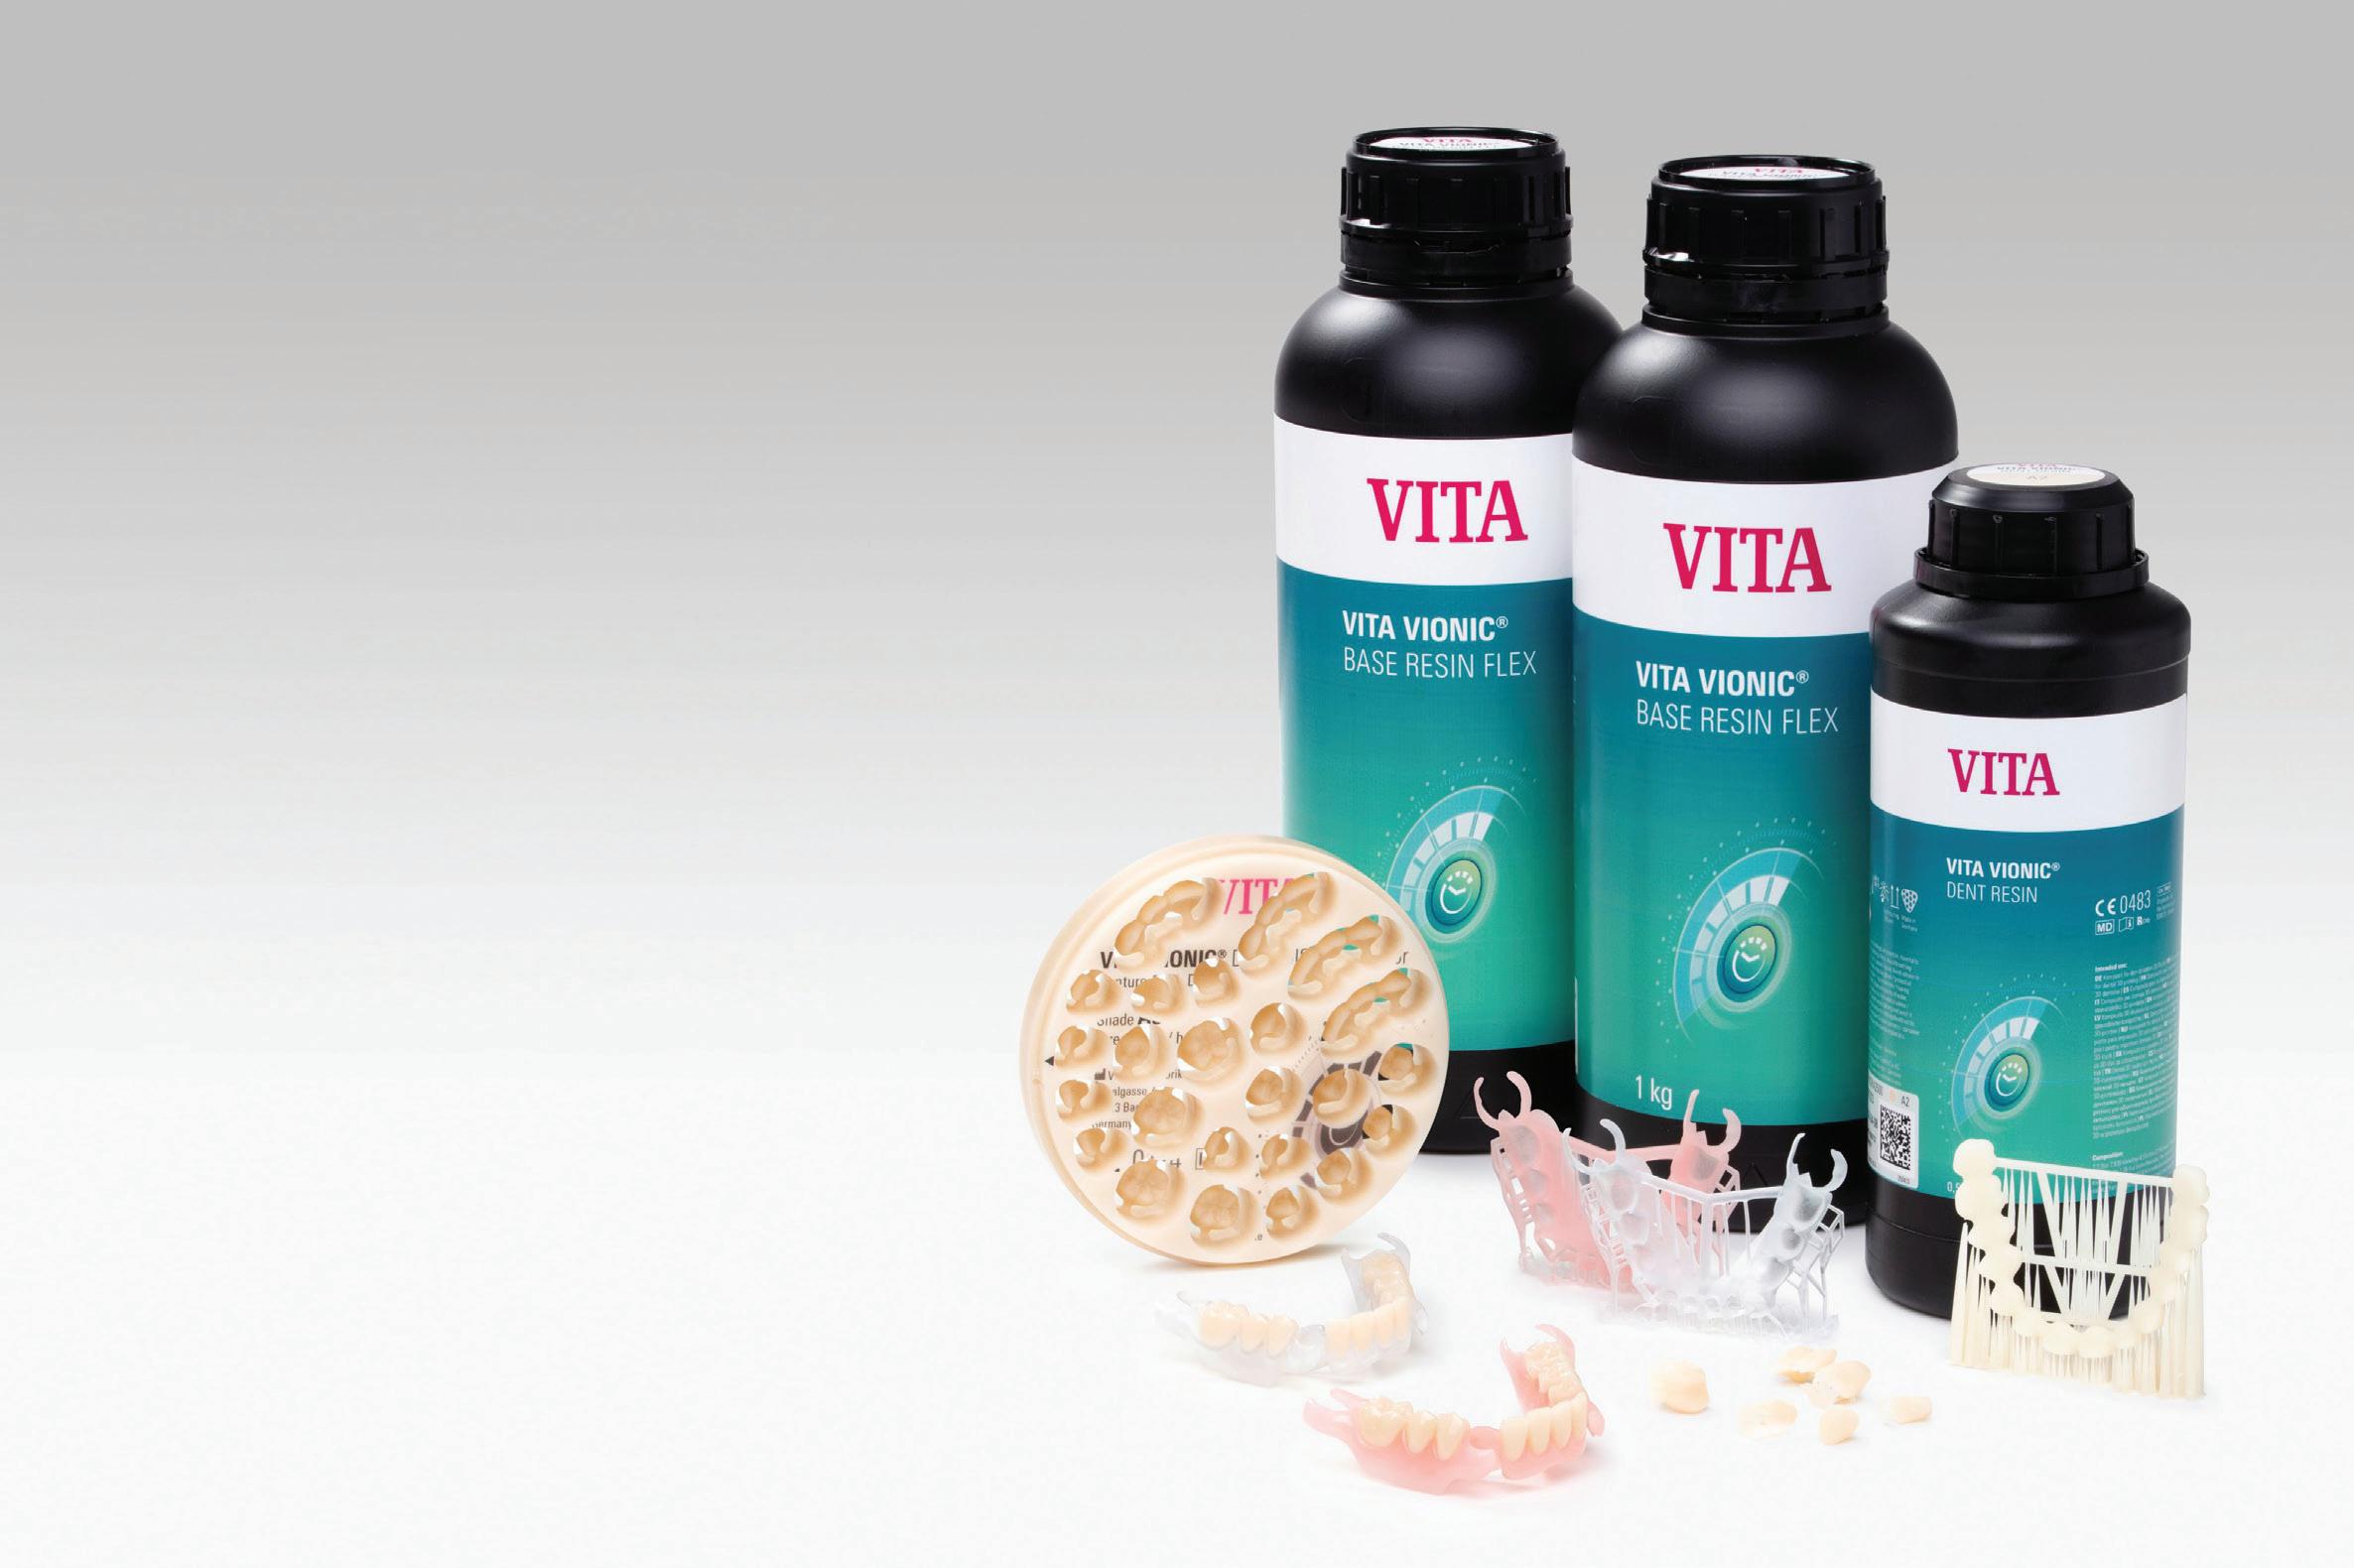
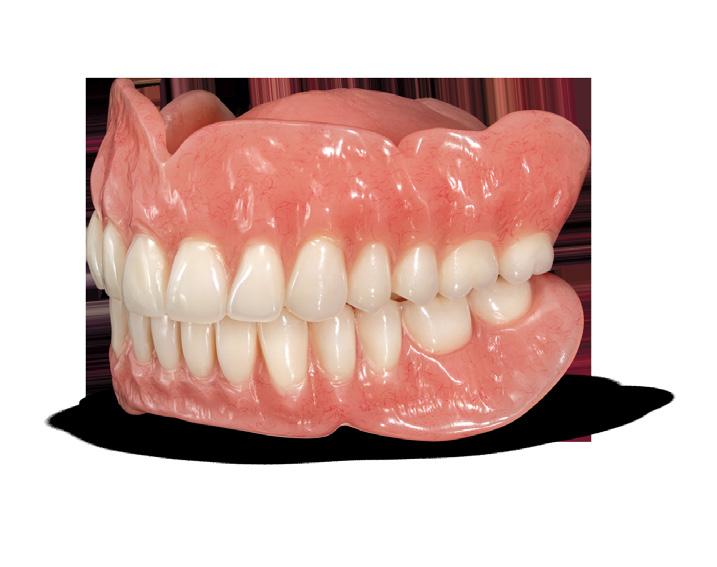
New VITA Vionic Base Resin Flex for digital fabrication of flexible partials dentures
With VITA Vionic Base Resin Flex, VITA Zahnfabrik presents an innovative 3D printing material for the economical and efficient fabrication of flexible partial dentures in everyday digital laboratory practice. This new material solution offers stability in clinical situations with a lifespan of up to one and a half years, providing metal-free, adaptable comfort for patients and supporting optimal healing and recovery.
Efficient. Precise. Reproducible.
Flexible and removable long-term temporary restorations have proven to be a valuable prosthetic solution in the past. They help make the time until the final restoration as comfortable and aesthetic as possible and free from complications by absorbing masticatory forces in clinically uncertain situations, particularly after surgical or periodontal treatments. However, to date, their production has been labour intensive and the results have often been inconsistent and not reproducible. The digital workflow now makes it possible to cost-effectively produce this type of flexible base with integrated retaining elements, using 3D printing with VITA Vionic Base Resin Flex.
The digital production chain enables efficient, reproducible fabrication of multiple partial dentures in a single printing process, delivering significant time and cost savings in the laboratory. The flexible material is available in clear and pink translucent colours, offering patient-specific aesthetics as the natural gingival shade can show through from underneath. The recommended duration of wear for the material is stated as up to 18 months.
PMaximum flexibility in fabrication and application
artial dentures made with VITA Vionic Base Resin Flex can be repaired and extended. In addition, the material is significantly easier to process and polish than traditional injection molding processes or filament printers. VITA Vionic Base Resin Flex can also be used as a bonding material to create chemical adhesion to the precisely fitting alveoli of the base, for both printed and milled teeth.
“The digital workflow now makes it possible to cost-effectively produce flexible and removable long-term temporary restorations with integrated retaining elements using 3D printing with VITA Vionic Base Resin Flex...”
The new 3D printing material is the solution for offering customised and comfortable partial dentures with a flexible base in a cost-effective, efficient and state-of-the-art manner. Patients enjoy the benefits of a comfortable fit, metal-free aesthetics and flexible adaptability to the clinical situation.
Visit http://hs.vita-zahnfabrik.com/de/vita-vionic-base-resin-flex for more information VITA Vionic Base Resin Flex.
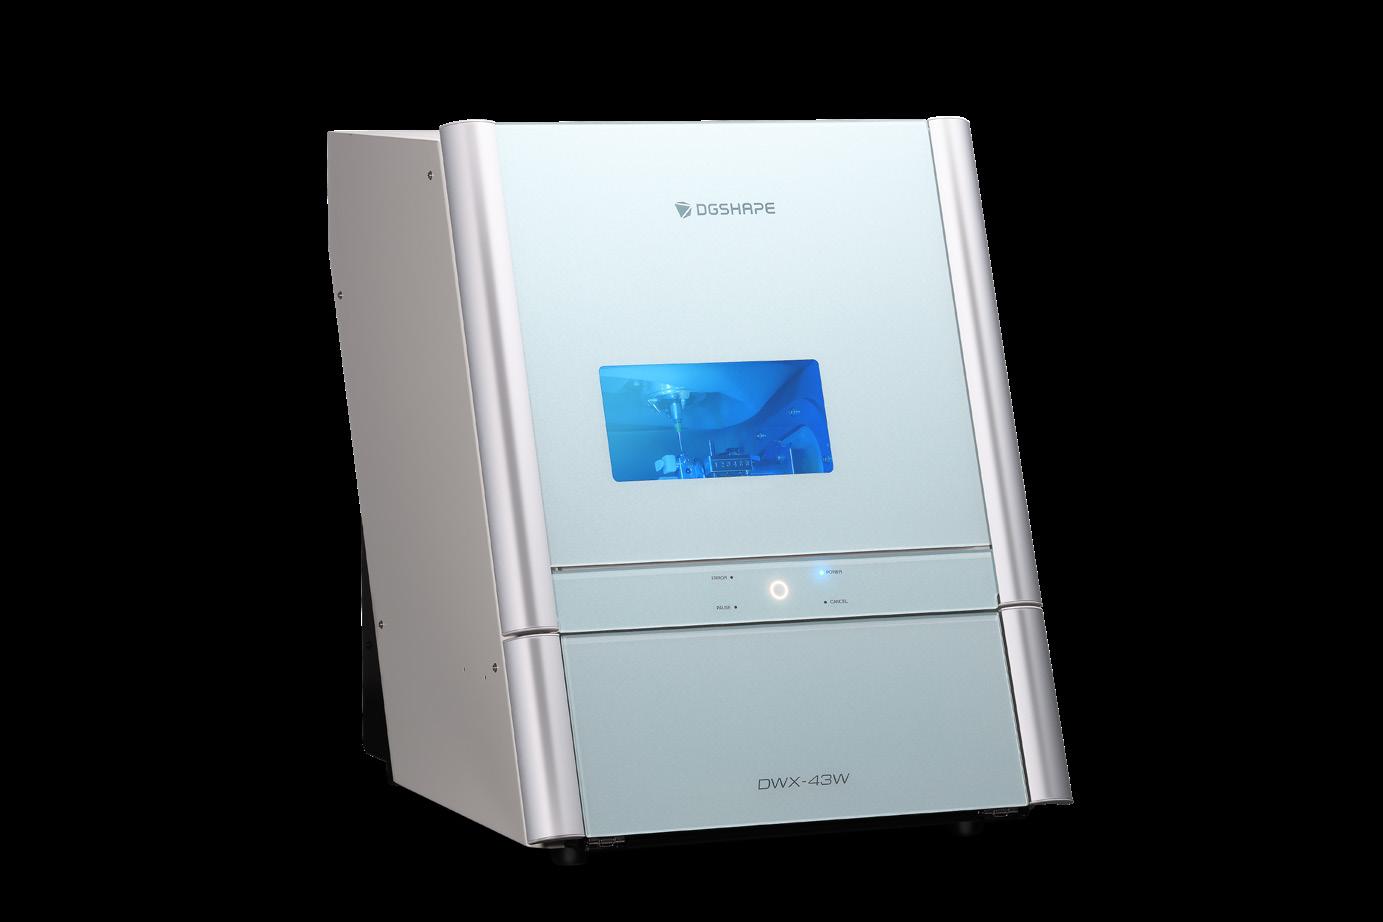
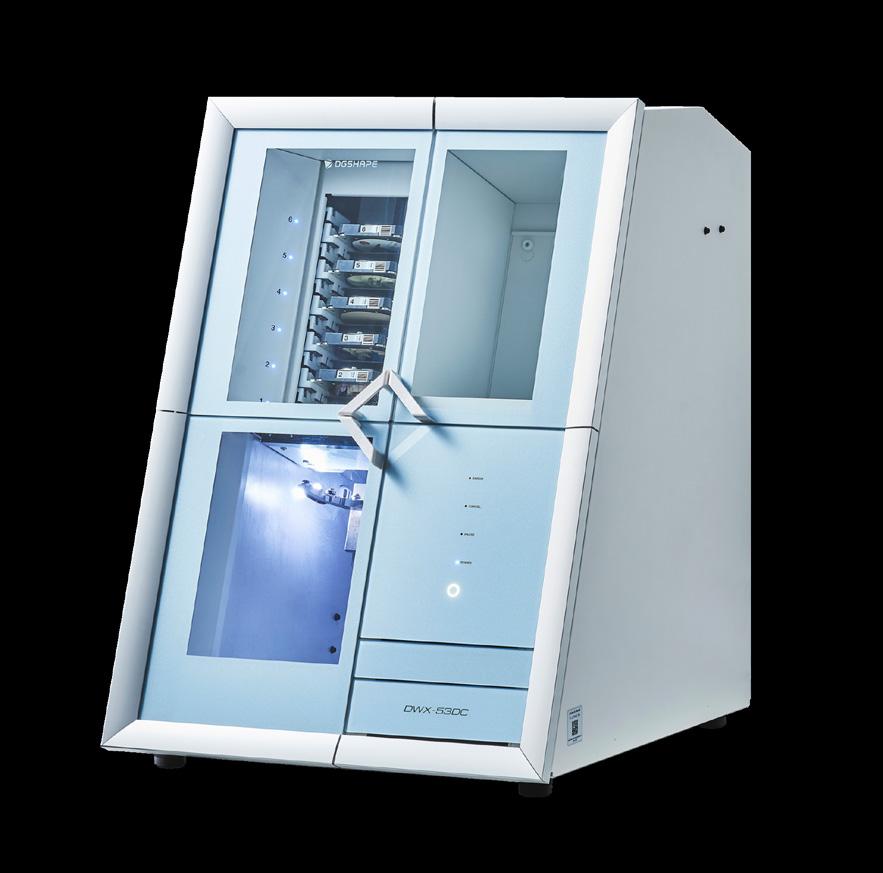
Experience effortless performance and higher ROI with the DWX-43W wet milling solution
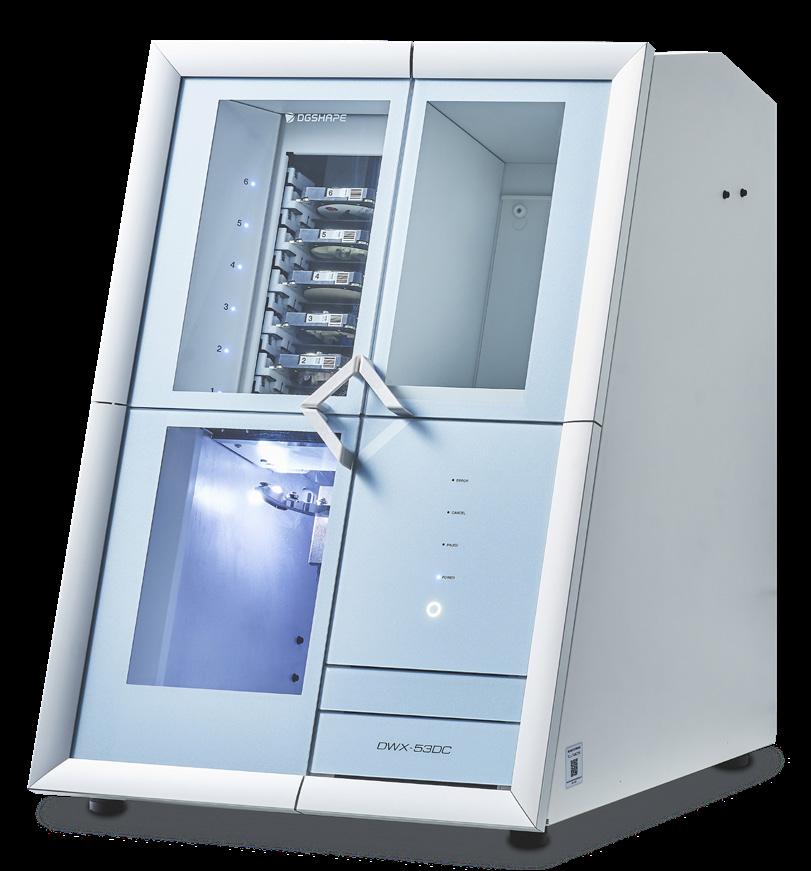
Achieve faster production and flawless accuracy with the DWX-53DC dry milling solution Two
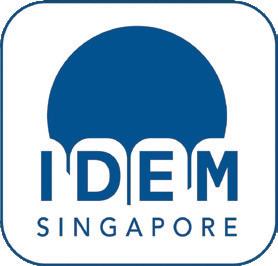
IDEM 2026 ushers in the next era of smart, sustainable, digital dentistry
IDEM 2026, the International Dental Exhibition & Meeting, the Asia-Pacific’s leading dental exhibition and conference, returns to Marina Bay Sands, Singapore, from 17 to 19 April 2026, focusing on “Innovating Smart Dentistry for a Sustainable Digital Future”.
Organised by Koelnmesse in partnership with the Singapore Dental Association (SDA), IDEM 2026 will feature three days of innovation, education and international business exchange that addresses the evolving needs of modern dentistry, ranging from digital workflows and advanced clinical techniques to sustainable, patient-centric practice models.
“IDEM remains the key meeting place for the dental industry in the region,” said Mr Mathias Kuepper, Managing Director and Regional President AsiaPacific, Koelnmesse Pte Ltd. “With over 33 countries and regions represented on the exhibition floor, the event brings the global dental community together in Singapore, connecting Asia’s dental traders with international manufacturers. As organisers, we are further supporting this with programmes such as the IDEM360+ App, where visitors and exhibitors can set up meetings before the event and the IDEMclub, a buyer programme aimed at supporting key buyers to meet their future business partners.”
A dynamic exhibition with international representation
I DEM 2026 will span 17,000 square metres and host over 400 exhibitors from around the world. The exhibition will feature products and solutions in orthodontics, endodontics, prosthodontics and paediatric dentistry, presented by established industry leaders and emerging innovators.
The exhibition will showcase the global diversity of the dental industry with 12 national and regional pavilions: Brazil, China, France, Germany, Italy, Singapore, South Korea, Spain, Switzerland, Taiwan, the United Kingdom and the United
States. The United Kingdom returns as the newest pavilion, accompanied by a strong line-up of new exhibitors. More than 40 first-time exhibitors will participate this year, reinforcing IDEM’s role as a launchpad into the regional market.
Sustainable digital practices
The IDEM 2026 scientific conference will feature three parallel tracks spanning three days, comprising 42 sessions led by 36 speakers and covering a variety of topics, including Digital Dentistry, Periodontal Regenerative Therapies, CBCT for Endodontic Treatment, Pain Management, Aesthetic Dentistry and many more. Renowned speakers, including Anthony Mak, Chris Ho, Andrew Ip, Henry Kwek, Jeyavel Rajan, Leon Chen, and Taisuke Tsukiboshi, will share clinical insights and practical approaches for digital and patient-centric dentistry.
At its core, the IDEM 2026 Scientific Conference is about empowering dental professionals to run smarter, more efficient and future-ready practices,” said Dr Kelvin Chye, Chairperson of IDEM 2026 and Vice President of the Singapore Dental Association. “This year’s conference dives deep into key topics, including digital workflows and emerging innovations in clinical care, while bringing together
clinicians from key dental markets. We are proud to welcome representatives from 12 national dental associations, alongside strong participation from leading markets such as Indonesia, Australia, the Philippines and Malaysia. Together, this vibrant regional exchange will foster collaboration, strengthen professional networks and help shape the future of dentistry in Asia-Pacific.”
SDA Masterclasses and hands-on learning
IDEM 2026 will feature an immersive SDA Masterclass programme, offering delegates a chance to explore the latest innovations in digital dentistry, prosthodontics, and restorative techniques. Participants can gain hands-on experience by learning to integrate advanced digital tools into everyday practice—from veneers and crowns to implant rehabilitation, dental photography, videography, and AI-assisted smile design.
Registration for delegates is open until 19 April 2026. Dental professionals are encouraged to register early to secure their place at IDEM 2026. Visitors to the exhibition can register for free until 3 April 2026. For more information, visit www.idem-singapore.com
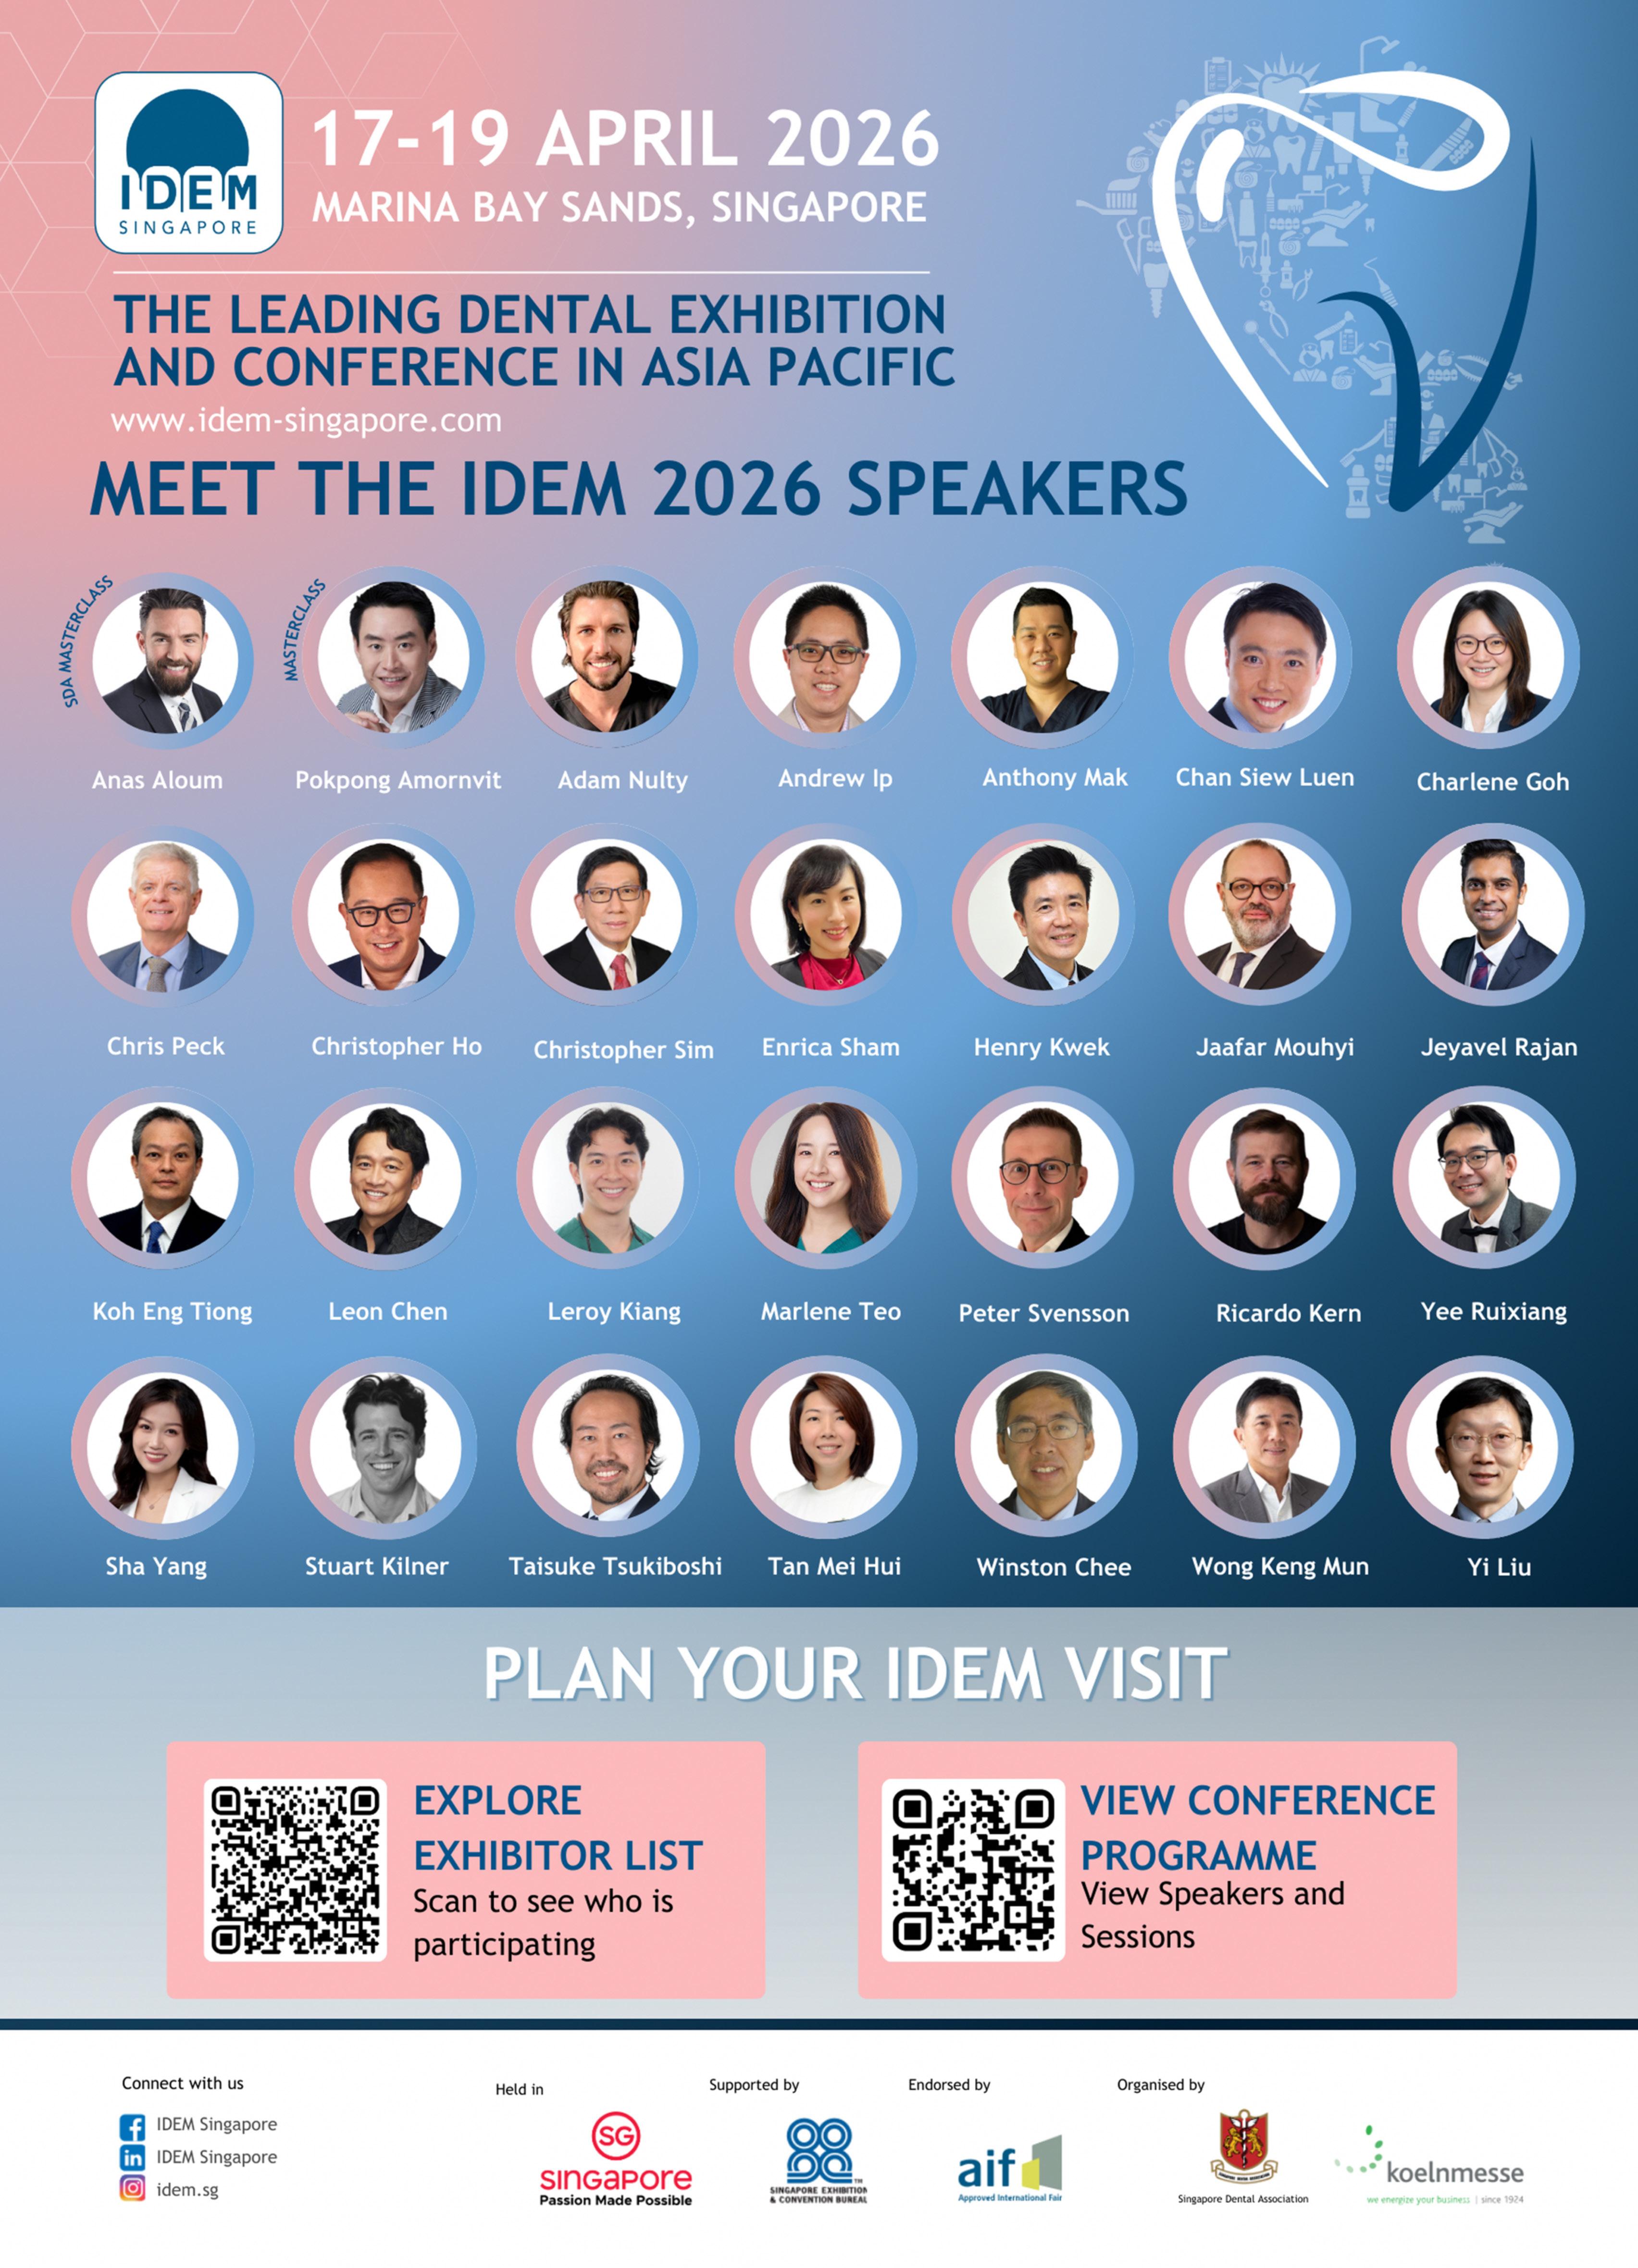
New IPS e.max Ceram Art
Ivoclar has introduced IPS e.max Ceram Art, its new product line for the customisation of ceramic restorations. The ready-to-use stain, glaze and structure pastes open up new creative possibilities and integrate seamlessly into a variety of fabrication techniques, from press and CAD/CAM technology to monolithic and layered restorations. As the latest addition to the globally successful IPS e.max all-ceramic portfolio, IPS e.max Ceram Art sets a new standard in the finalisation of ceramic restorations.
In addition to conventional staining materials, the new line includes innovative glaze materials that feature a unique Magic Glaze effect with optimal viscosity for easy application without beading or running, delivering a brilliant natural shine. The pastes are also ideal for the one-shot technique, in which staining and glazing are combined in a single firing cycle.
Another highlight of the range is the inclusion of firing-stable, cadmium-free gingiva shades, designed to enable natural-looking gingival characterisation across diverse phenotypical variations. With its optimised consistency, IPS e.max Ceram Art is ideally suited for wet-on-wet staining (one-shot technique). Staining and glazing can be performed in a single firing cycle, saving time and simplifying workflows – a real advantage for modern, efficiencyfocused laboratories. A standout feature of the ready-to-use IPS e.max Ceram Art pastes is the self-glaze effect, which eliminates the need for an additional glaze firing.
In lifelike reconstructions, the design of the gingival area is becoming increasingly important. Colour, translucency and structure vary greatly among individuals and significantly influence the overall appearance of the restoration.
The new IPS e.max Ceram Art gingiva materials – cadmiumfree for the first time – are available in a wide range of shades to reproduce virtually all phenotypical variations. Reconstructed gingival areas blend seamlessly into their surroundings, delivering results that look very natural.
The new product line also delivers outstanding results in surface design. The form-stable structure pastes provide targeted 3D effects, such as natural tooth or gingiva textures – without the need for an additional layering step. Together, these advantages make IPS e.max Ceram Art a material that offers creative freedom in design and process reliability in application. The materials are perfectly matched to Ivoclar’s all-ceramic framework materials such as IPS e.max Press, IPS e.max CAD (lithium disilicate) and IPS e.max ZirCAD (zirconium oxide). They can also be used for the characterisation of Ivoclar’s metal-ceramics, as well as other framework materials with a compatible CTE.
A limited first edition of 750 exclusive kits of IPS e.max Ceram Art is now available, allowing dental technicians to purchase the new product range ahead of its official launch. The First Edition includes the complete range of pastes and is the ideal introduction to working with IPS e.max Ceram Art. Each kit comes with training materials and application tips, so users can make the most of the product from day one.
More info about the First Edition, the product selection and its scope of applications, see www.ivoclar.com/ips-e.max-ceram-art or call 1300-486-252 orders.au@ivoclar.com in Australia or in New Zealand, call 0508-486-252 orders.nz@ivoclar.com
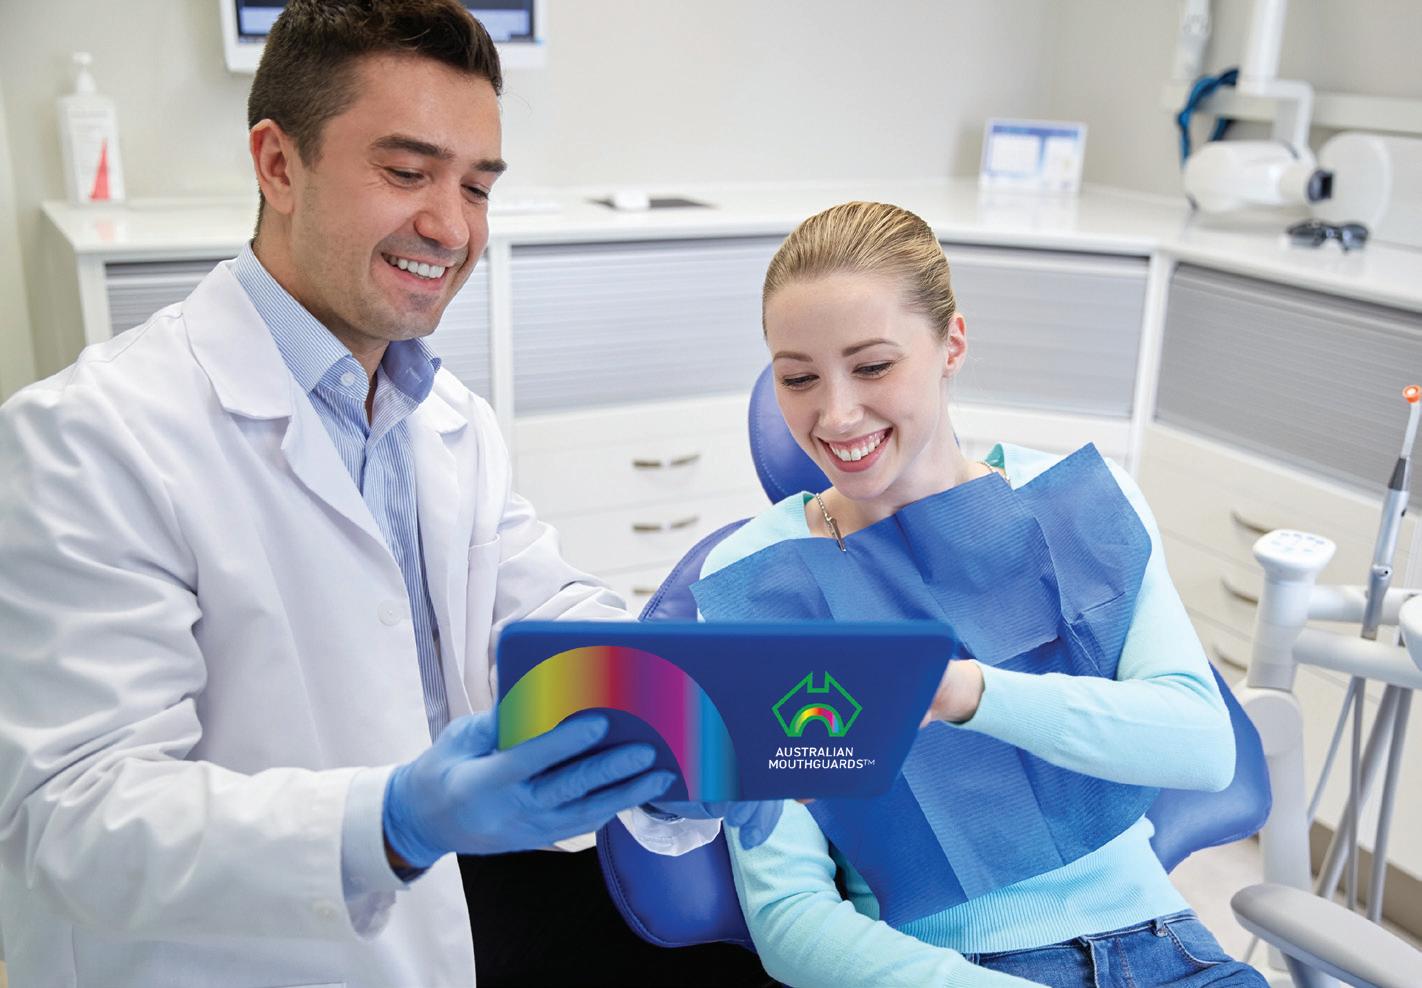
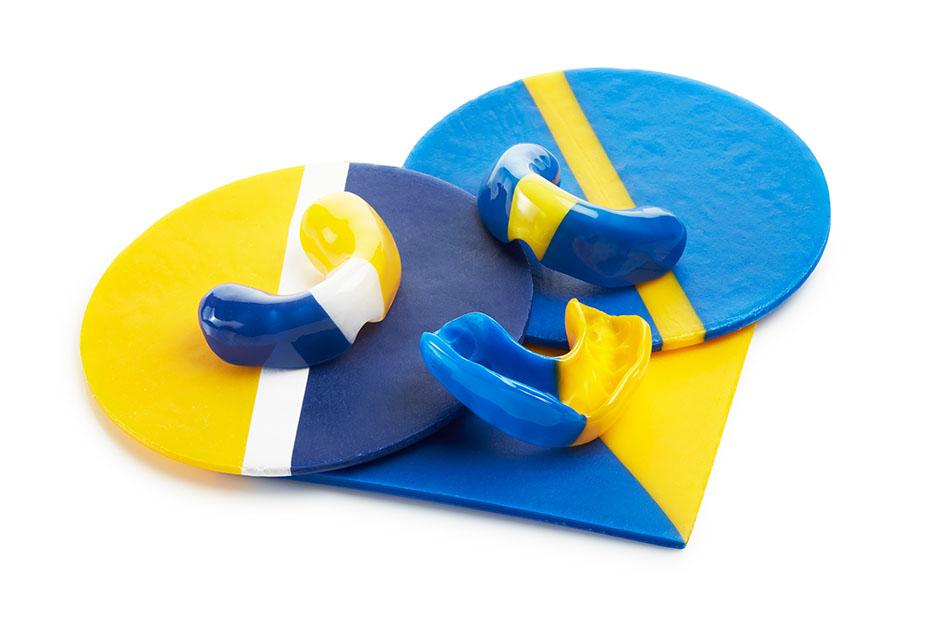
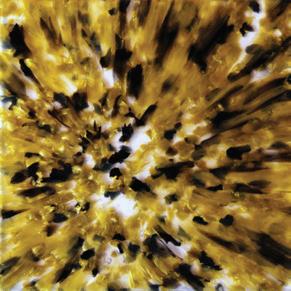
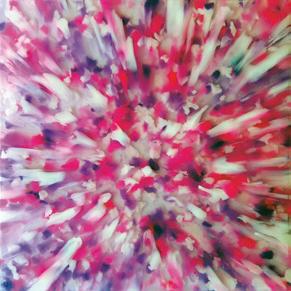
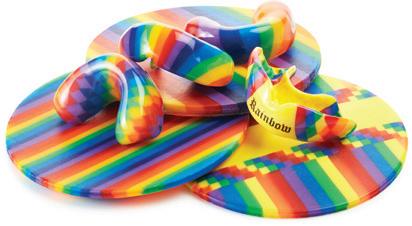
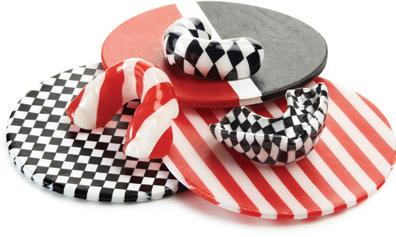
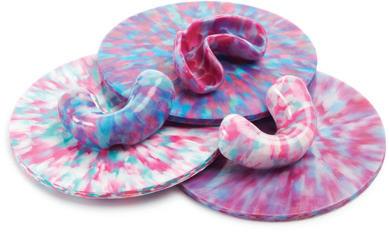
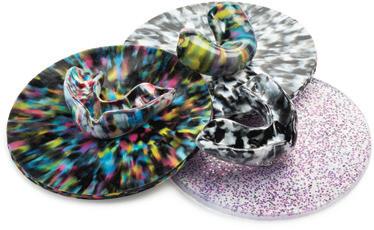
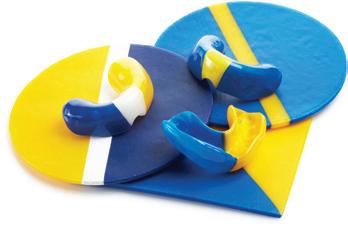
AUSTRALIAN MOUTHGUARDS
AustralianMouthguards-160901-19
AustralianMouthguards-160901-20
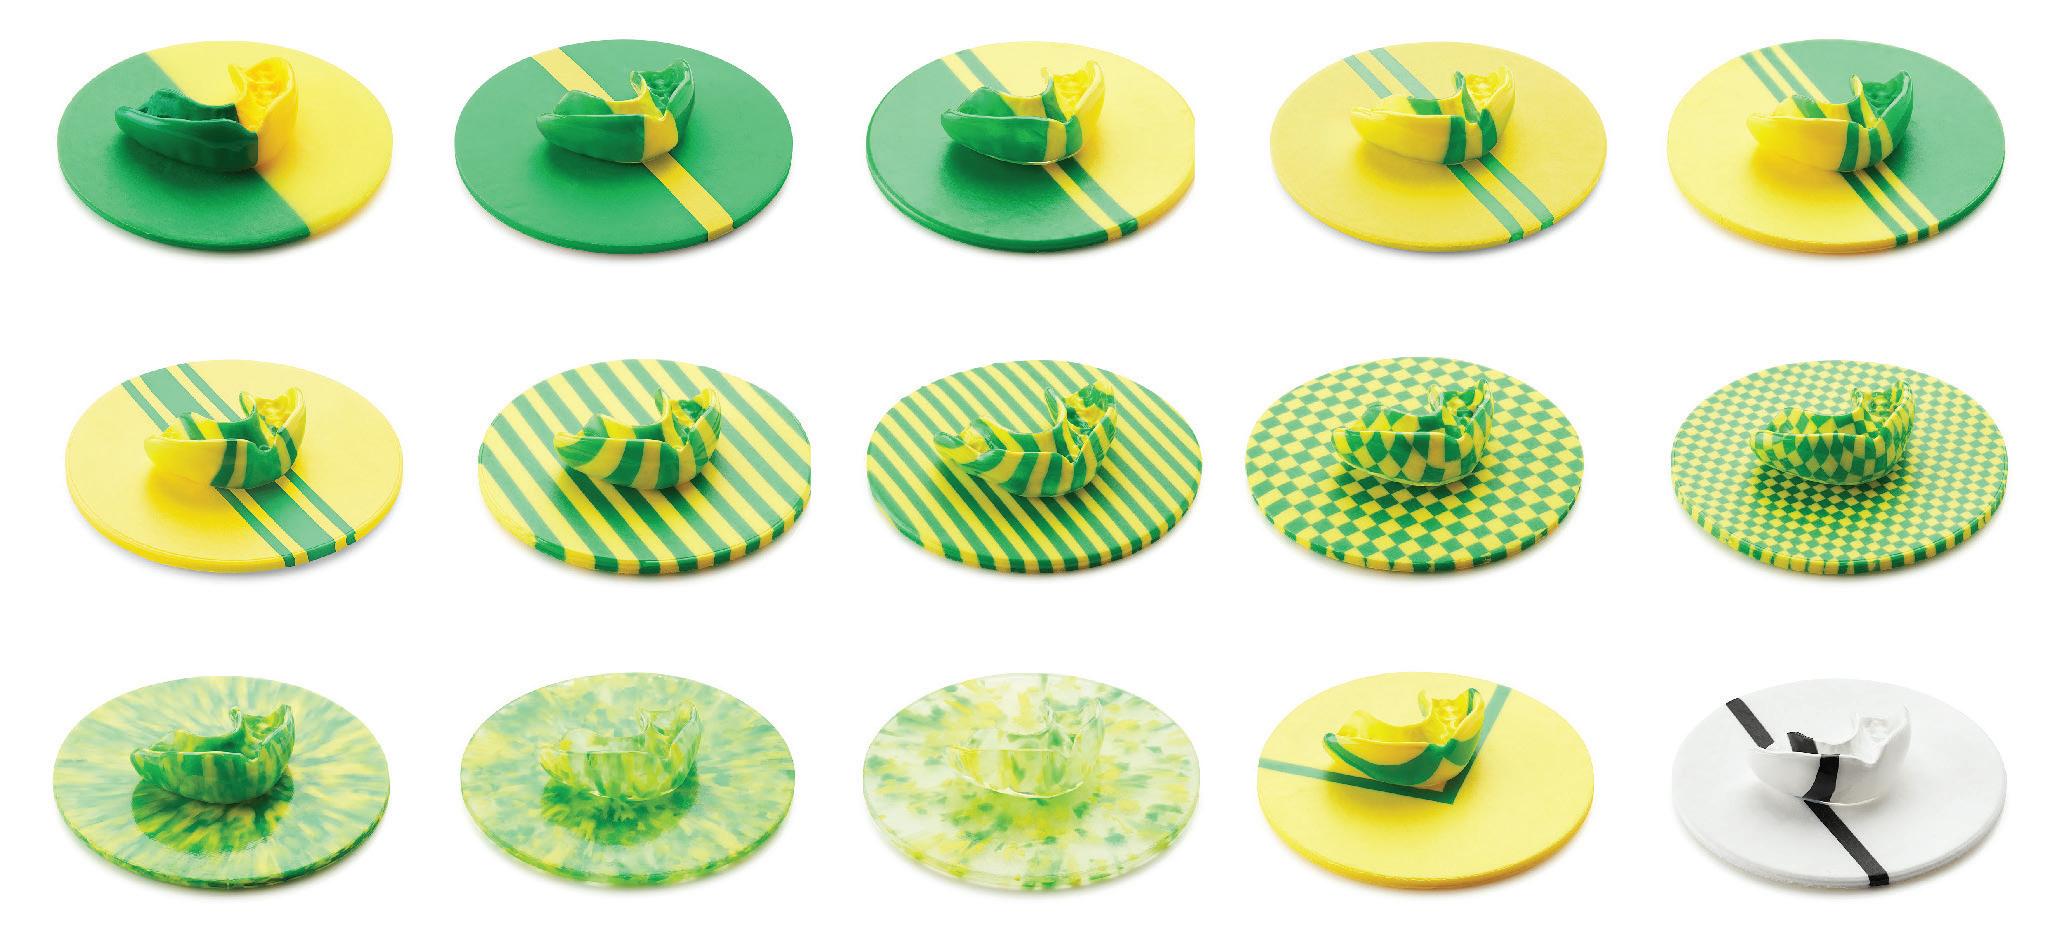
Choose from 15 styles
34 Billion + Colour Combinations
YOUR WINNING TEAM
Dual Lamination
35 base colour blanks 1-5mm
Choose from 15 styles
Choose from 15+ styles
Choose from 15 styles
34 Billion + Colour Combinations
34 Billion+ Colour Combinations
34 Billion + Colour Combinations
Dual Lamination
Dual lamination to your desired thickness and on any colour or design
Dual Lamination
35 base colour blanks 1-5mm
Choose from 15 styles
35 base colour blanks 1-5mm
Clear blanks in 1-1.5mm and 2-5mm
34 Billion + Colour Combinations
36 base colour blanks in 1, 2, 3, 4 & 5mm
Clear blanks in 1mm, 1.5mm and 2-5mm
Hard & Semi Hard Material
Dual Lamination
Clear, bleaching and laminating material in 1, 1.5, 2, 3, 4 & 5mm
AustralianMouthguards-160901-22
Hard & Semi Hard Material
Mouthguard Boxes
Mouthguard Boxes
35 base colour blanks 1-5mm
120 & 125mm Round & 125mm Square
Mouthguard Boxes- 25 & 40mm deep
120 & 125mm Round & 125mm Square
Clear blanks in 1mm, 1.5mm and 2-5mm
Round available in 120 & 125mm
Hard & Semi Hard Material
GUARANTEED
GUARAN TEE D
Mouthguard Boxes
Square available in 125mm with diagonal available on request in 2 and 3 stripes
AUSTRALIAN QUALITY
AUSTR ALIA N QUALIT Y
120 & 125mm Round & 125mm Square
Customisation of 3 stripe width on request
Glitter available on all 36 colours and designs
GUARAN
TEE D
AUSTR ALIA N QUALIT Y
All colour combination foils are made here in Australia. Our products are manufactured using high impact, FDA approved pure materials under ISO 9002 conditions and with a Shore Hardness of 75. We offer high quality products without the designer price.
All colour combination foils are made here in Australia. Our products are manufactured using high impact, FDA approved pure materials under ISO 9002 conditions and with a Shore Hardness of 75. We offer high quality products without the designer price.
AustralianMouthguards-160901-25
WHAT Y CLIE
WHAT YOUR CLIENTS REALLY WANT
All colour combination foils are made here in Australia. Our products are manufactured using high impact, FDA approved pure materials under ISO 9002 conditions and with a Shore Hardness of 75. We offer high quality products without the designer price.
R EAL LY WANT
Clear blanks in 1mm, 1.5mm and 2-5mm
Hard & Semi Hard Material
Mouthguard Boxes
120 & 125mm Round & 125mm Square
GUARAN TEE D
AustralianMouthguards-160901-23
AUSTR ALIA N QUALIT Y
HOW TO ORDER
All colour combination foils are made here in Australia. Our products are manufactured using high impact, FDA approved pure materials under ISO 9002 conditions and with a Shore Hardness of 75. We offer high quality products without designer price.
AUSTRALIA/NEWZEALAND
HOW TO OR DER
Phone (08) 9535 8664
All colour combination foils are made here in Australia from ethylene vinyl acetate (EVA), a medical grade, high impact material made with virgin, non-recycled material that has a minimum Shore hardness of 75. We offer high quality products without the designer price.
AUSTRALIA/NEW ZEALAND
Fax (08) 9535 2866
Phone (08) 9535 8664
WHAT YOU R CLIE NTS R EAL LY WANT
Email aussieguard@bigpond.com.au
ALPHABOND
HOW TO OR DER
Email aussieguard@bigpond.com.au
Phone (02) 9417 6660
ALPHABOND
AUSTRALIA/NEW ZEALAND
Phone (02) 9417 6660
AustralianMouthguards-160901-26
STRADENT AUSTRALIA
Phone (08) 9535 8664
Join an award winning company with a long list of very satisfied customers - offer your clients unbeatable great products and let them choose the mouthguard they REALLY want.
Phone (08) 8251 1566
STRADENT AUSTRALIA
Email aussieguard@bigpond.com.au
Phone (08) 8251 1566
ALPHABOND
Join an award winning company with a long list of very satisfied customers - offer your clients unbeatable great products and let them choose the mouthguard the REALLY want.
WHAT Y CLIE NTS EAL LY WANT
Join an award winning company with a long list of very satisfied customers - offer your clients unbeatable great products and let them choose the mouthguard they REALLY want.
Join an award winning company with a long list of very satisfied customers - offer your clients unbeatable great products and let them choose the mouthguard they REALLY want.
Phone (02) 9417 6660
STRADENT AUSTRALIA
Phone (08) 8251 1566
ONLINE CPD CENTRE
Answer the questions online at www.dentalcommunity.com.au To retrieve your FREE Dental Community Login, Call (02) 8001-6502 or email joseph@dentist.com.au
Question 1. Why is zirconia resistant to conventional etching methods?
a. It is a non-silica ceramic and not etchable.
b. It contains excessive silica.
c. It is a metal alloy.
d. It reacts too quickly with acids.
Question 2. What combination was found to improve the bond strength between zirconia and resin cement?
a. Sandblasting alone.
b. Hydrofluoric acid alone.
c. HF/HNO3 acid with ultrasonic treatment.
d. Air abrasion with water spray.
Question 3. What role does ultrasonic treatment play in the etching process?
a. It cools the zirconia surface.
b. It enhances proton activity and increases acidity.
c. It reduces surface roughness.
d. It removes the need for acid.
Question 4. Which resin cement was used in the study?
a. Panavia V5
b. RelyX Unicem U200
c. Fuji I
d. Ketac Cem
Question 5. What was a key finding regarding the hot etching method on zirconia?
a. It weakened zirconia’s mechanical properties.
b. It had no effect on bond strength.
c. It increased bond strength without affecting mechanical properties.
d. It caused significant surface cracking.
Question 6. What does “conversion” refer to in 3D printed materials?
a. The cooling of the printed object.
b. The amount of polymerisation that has occurred.
c. The removal of excess resin.
d. The final polishing stage.
Question 7. What is a key consequence of low conversion in a printed dental appliance?
a. Increased translucency.
b. Faster production time.
c. Higher residual monomer and weaker structure.
d. Improved wear resistance.
Question 8. What is the main effect of oxygen on the curing process?
a. It inhibits polymerisation at the surface.
b. It accelerates polymerisation.
c. It strengthens the surface layer.
d. It increases heat generation.
Question 9. According to the article, what is the advantage of curing under vacuum?
a. It reduces curing time only.
b. It removes oxygen, allowing full surface polymerisation.
c. It eliminates the need for light exposure.
d. It cools the material during curing.
Question 10. Which combination of factors is emphasised as critical for optimal curing?
a. Speed, colour and polishing.
b. Light intensity only.
c. Dose, environment, temperature, and validation.
d. Printer resolution and build angle.
INSTRUCTIONS:
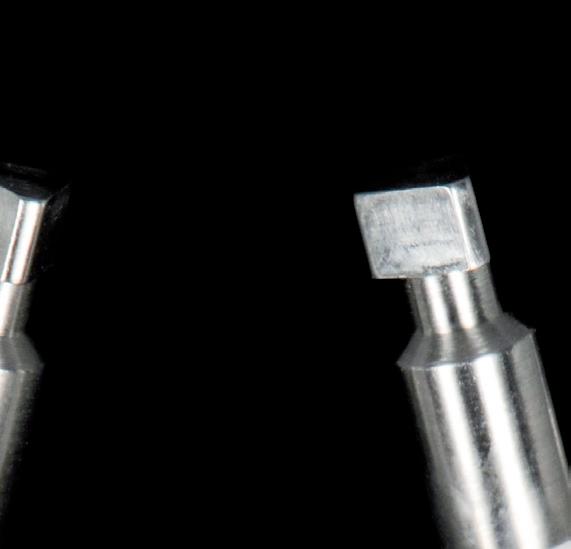
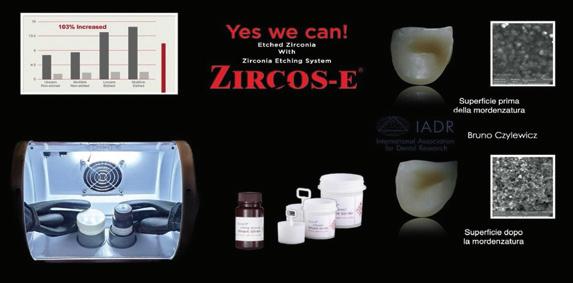
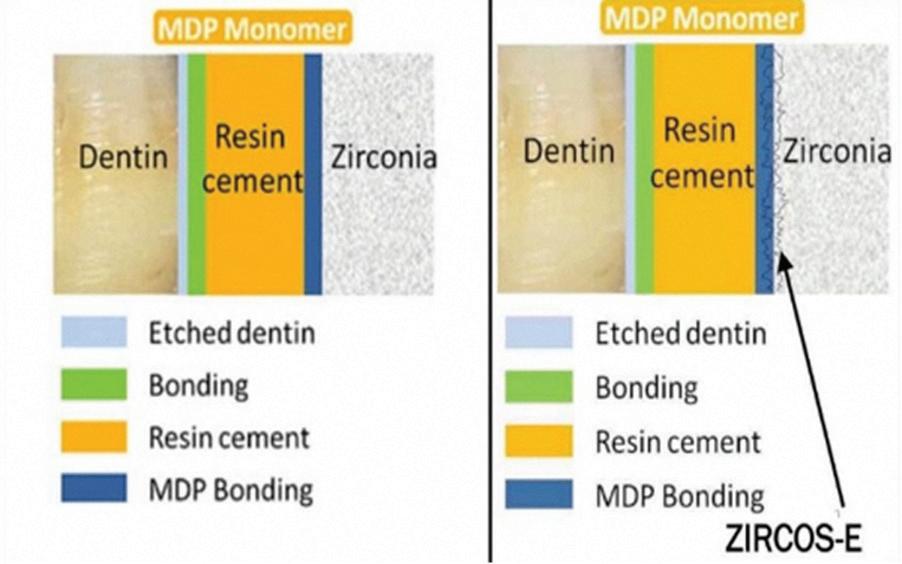
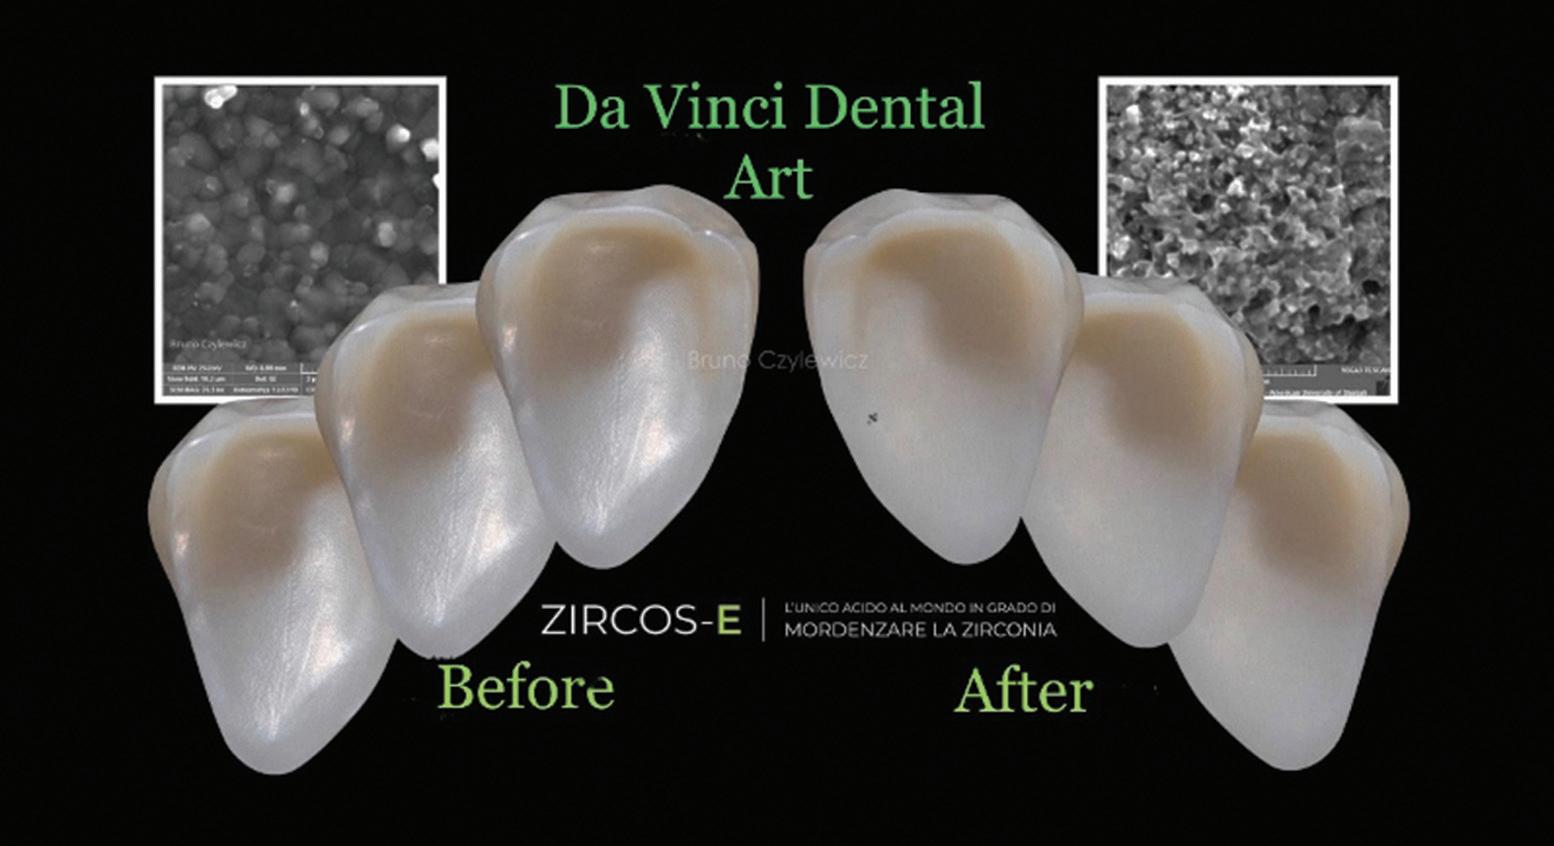
Etching solution on Zirconia crowns
Effects of acid treatment in conjunction with ultrasonic on resin-zirconia bond strength
By MDT Angelo Di franco and Bruno Czylewicz
Until recently many surface roughening methods were developed for zirconia restorations, but due to its resistance to conventional etching, these were not effective. The following technique was developed in Seoul, Korea by S-D Dental Clinic, Yonsei University, Kyung Hee University and Eberhard-Karls University Tubingen, Germany. This alternative etching technique can also be used to increase bond strength of resin cement.
Dr Casucci found that this hot etching method increased the bond strength between Zr and resin and the mechanical properties of Zr were not affected.
Ultrasonic treatment plays an important role in molecular motion, enhancing proton activity and increasing acidity. Therefore**,** Zr can be more readily affected by acids when combined with ultrasonic treatment. This is best performed by the laboratory prior to sending the case back to the dentist.
ZMaterials and methods
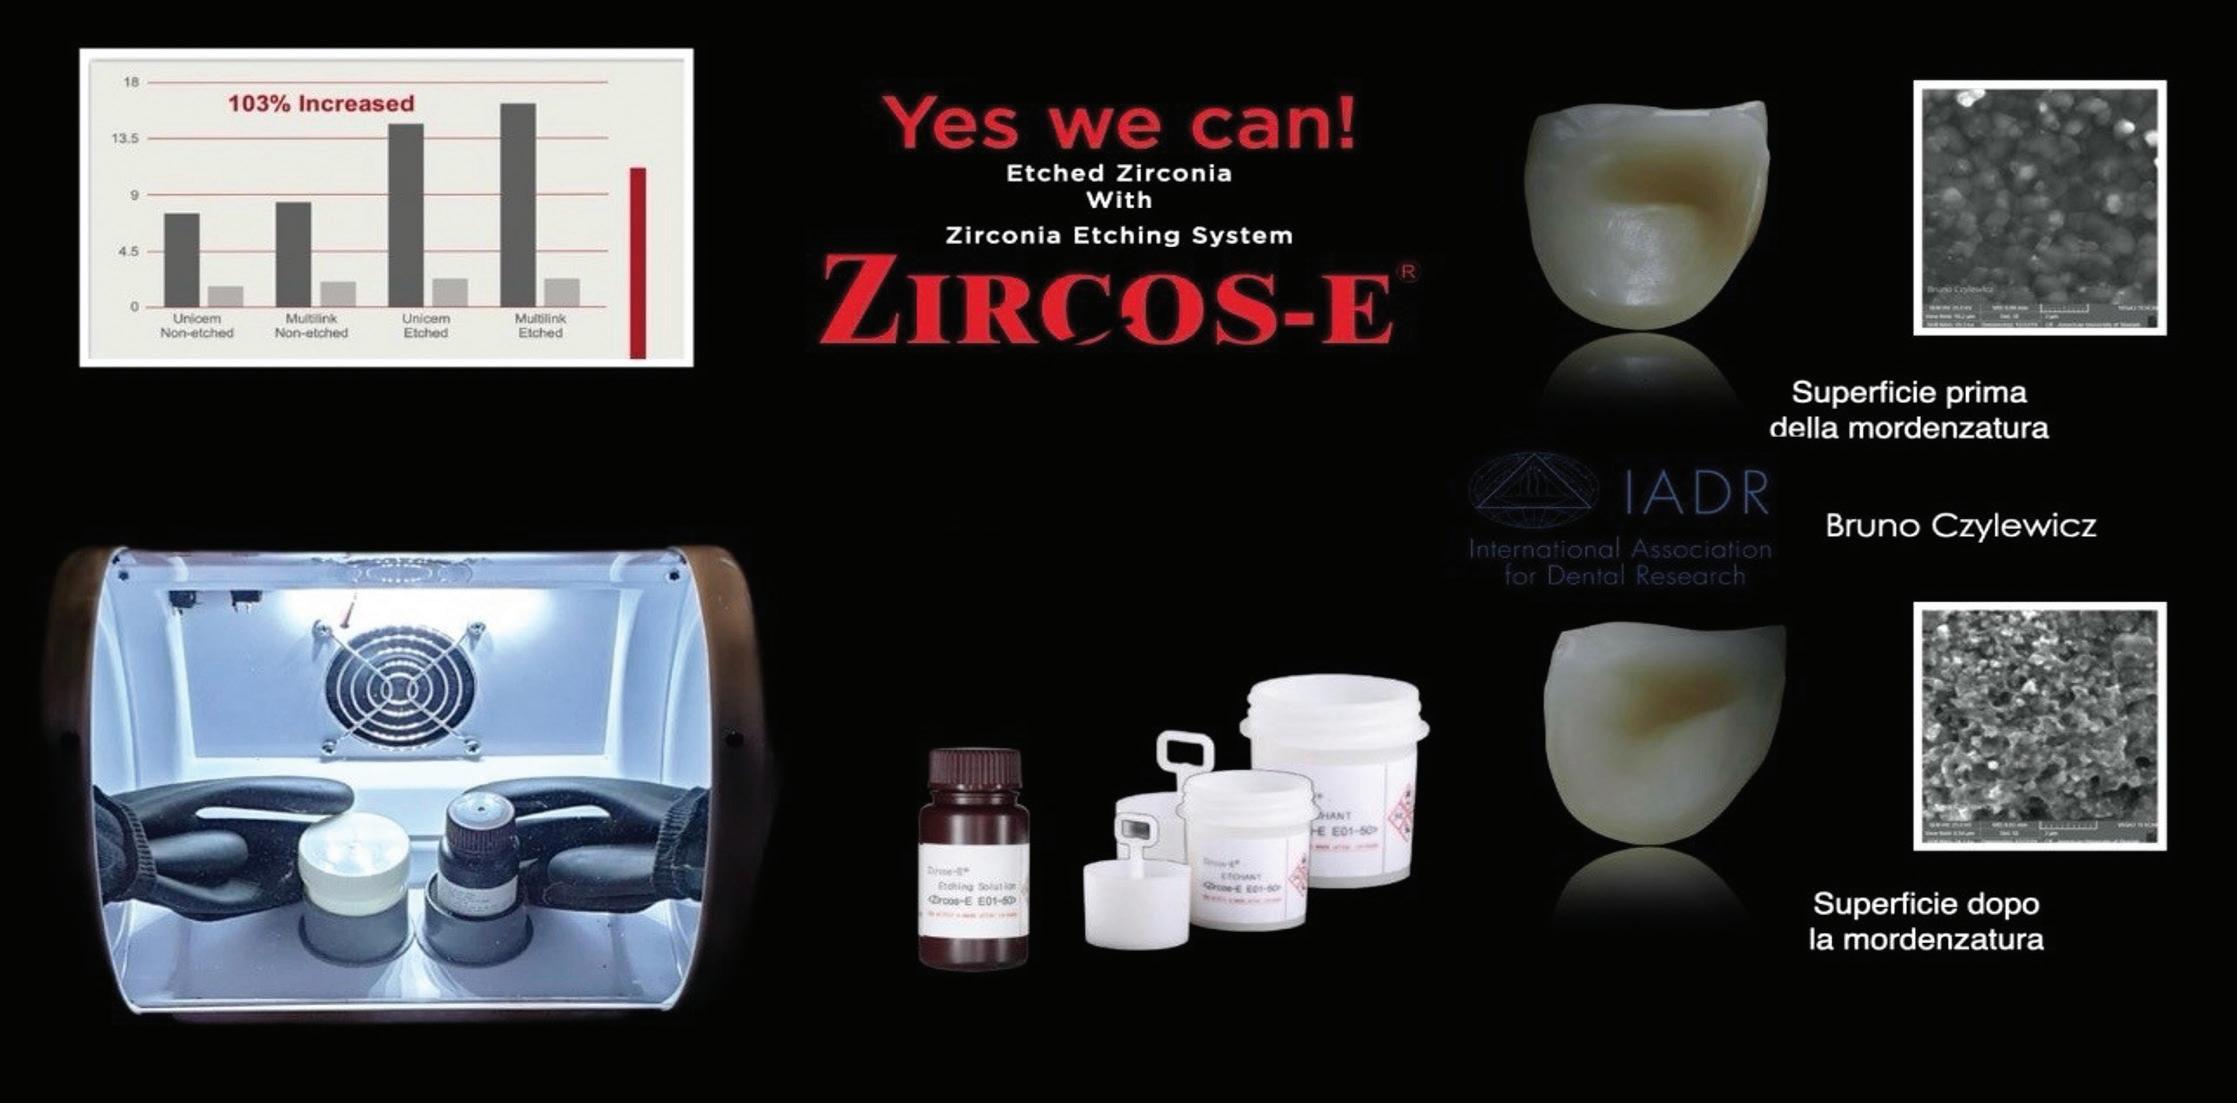
irconia core material (Acucera Inc., Korea) and two resin cements were selected. Rely X Unicem U200 (Solventum) and Multilink N (Ivoclar) were used. Forty-eight Y-TZP (yttria-tetragonal zirconia polycrystals) discs (Diameter 15mm, Height 4mm) were produced and polished with a mirror-like finish. Y-TZP discs were randomly assigned to four groups (n=12 per group) according to the surface treatment with resin cement used.
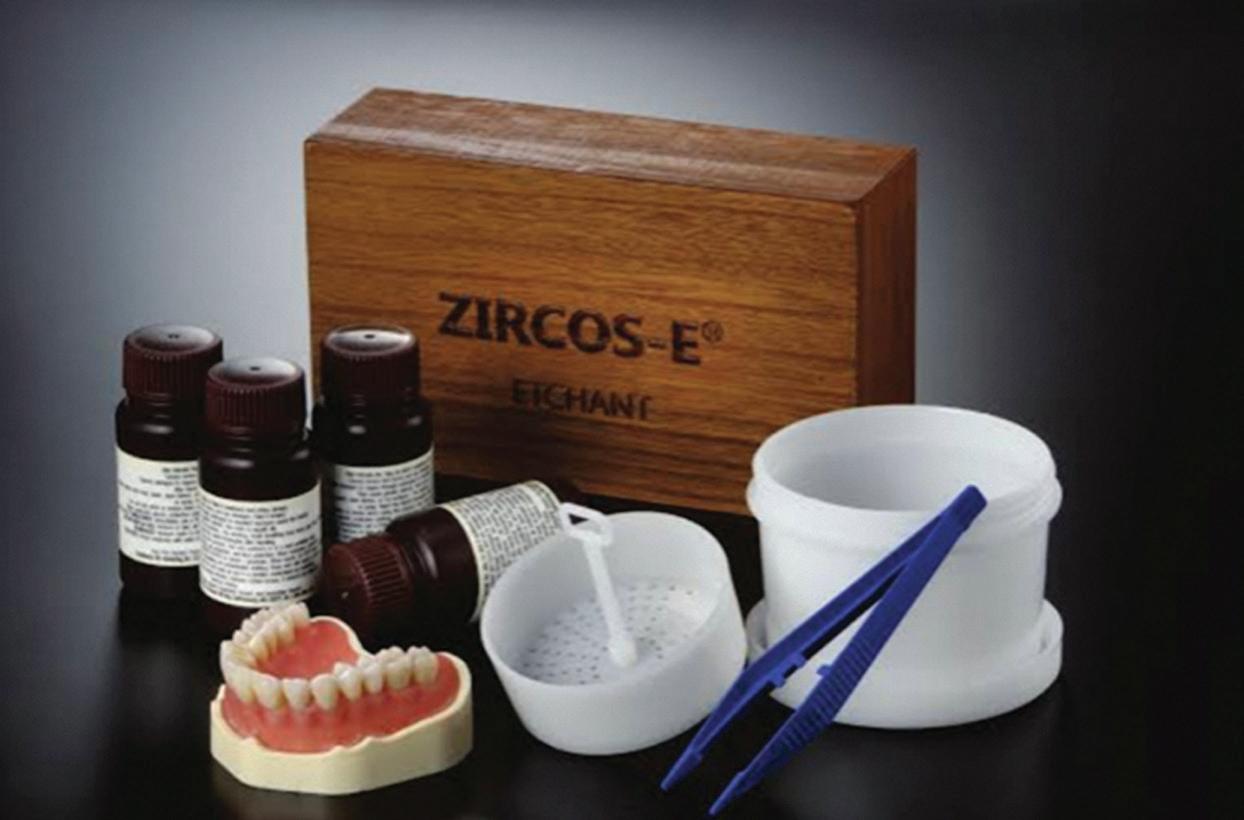
Four experimental groups were shown as follows: Multilink on acid-etched surface (M/E), Unicem on acid-etched surface (U/E), Multilink on polished surface (M/P) and Unicem on polished surface (U/P). Half of the specimens were dipped in HF/ HNO3 solution (ZIRCOS-E, Bioden co., Korea) (Figures 1-2) for 30 minutes in an ultrasonic. After rinsing with distilled water and steam cleaning, annealing was conducted at 1150ºC.
Figure 1.
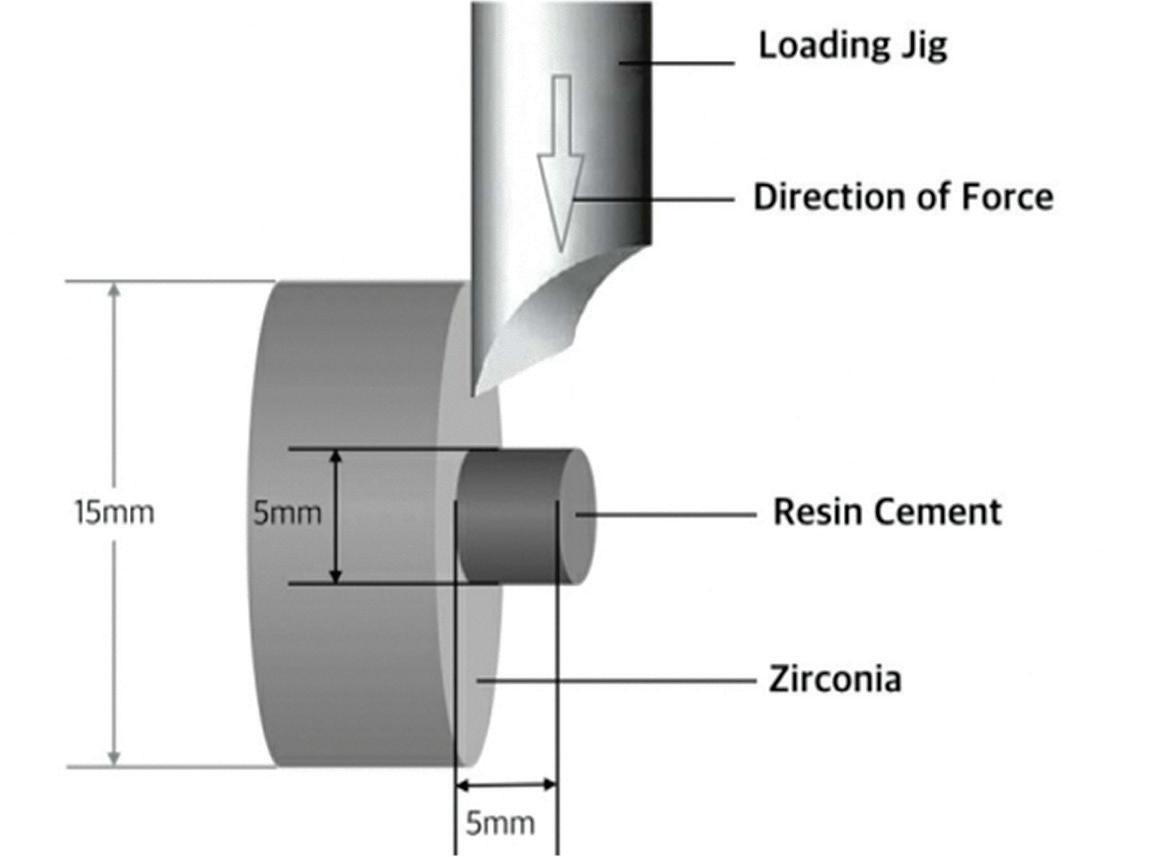
For the shear bond strength test, resin cements (Diameter 6mm, Height 5mm) were bonded on the Y-TZP surface using a putty index according to manufacturers’ recommendation.
Surface roughness of 3 specimens of each group was evaluated using a 3D optical analyzer (Burker, Germany) and microscopic analysis was performed. Bonded specimens were subjected to a shear bond strength (SBS) test at a crosshead speed of 1mm/min using a universal testing machine (Instron Model 3366, USA).
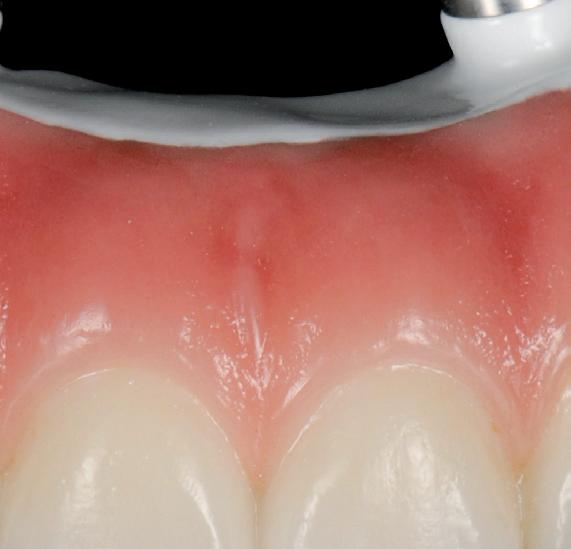
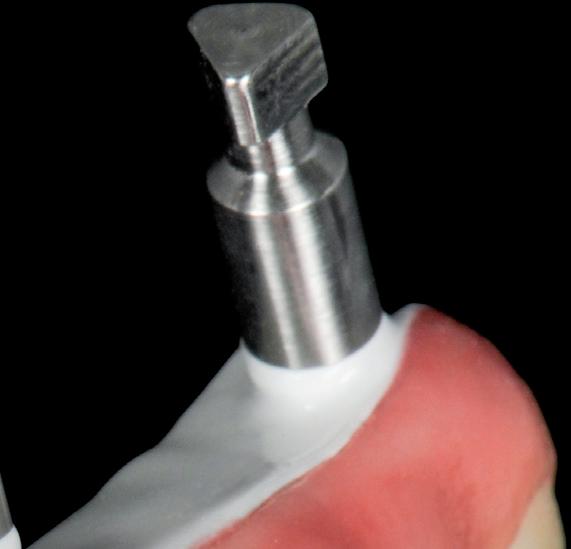
After the shear bond strength test (Figures 3-4), all fractured surfaces of specimens were examined to determine the failure pattern by a digital microscope using X10 magnification. Fracture modes were classified as adhesive failure (fracture occurring at the resin cement–zirconia interface), cohesive failure (fracture occurring within the resin cement), or mixed failurelevenme (occurrence of both adhesive failure and cohesive failure). Statistical analyses were performed using the statistical software IBM SPSS Statistics 22. Levene’s test was applied to ensure the normal distribution of data before the ANOVA (p.05). The one-way ANOVA was performed for each ZIRCOS-E group to determine the difference of shear bond strength values (p=0.05).
General observations from Angelo Di franco
The advent of zirconia in the global dental sector will turn out to be one of the historical events that have most transformed the way of working of operators in the sector. In the current state of things, some issues remain open, where there is a need for clarity and improvements: among these are the precision and stability of the artifact, the stability of the interface and the ageing of the restoration, including its compatibility in the moist environment of the oral cavity. These topics require further serious neutral scientific investigation.
New and innovative methods of constructing dental prosthetics using CAD/CAM have led to an ever-expanding search for new and more innovative materials to mill. One area receiving particular attention is the search for materials with ideal properties for constructing long-span frameworks. Early on, metal was the only choice, but metal is both rigid and requires high-endexpensive - milling systems to manufacture. Recent technological advancements have led to zirconia becoming the most requested material for fixed restorations. This article addresses the bonding of zirconia restorations offering a handful of useful tips.
Figure 3.
Figure 2.
Figure 4.
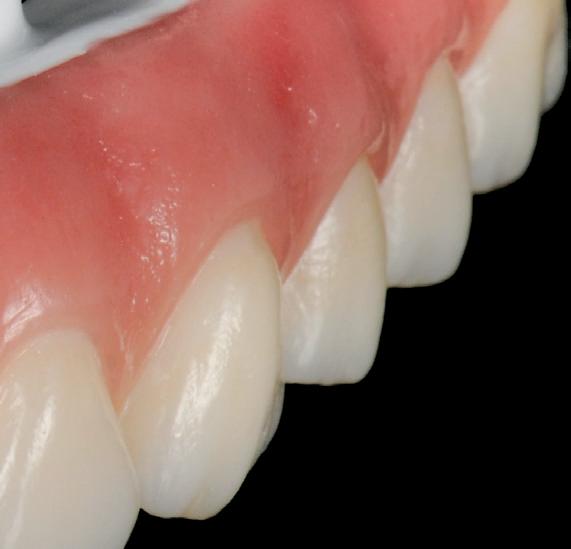
Figure 5.
ceramic | techniques
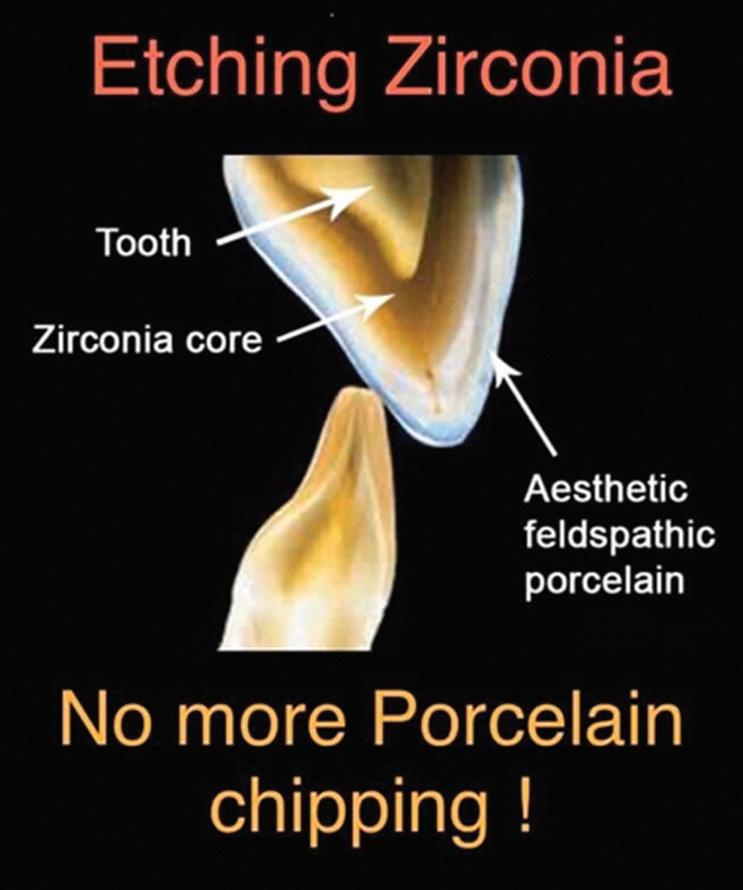
Zirconia is an incredibly strong material with a flexural strength five times greater than other ceramics. It can now be applied to a variety of clinical indications including single crowns, implants, endodontic posts and both anterior and posterior dental restorations. The evolution of translucent or aesthetic zirconia materials encourages its use without visual limitations.
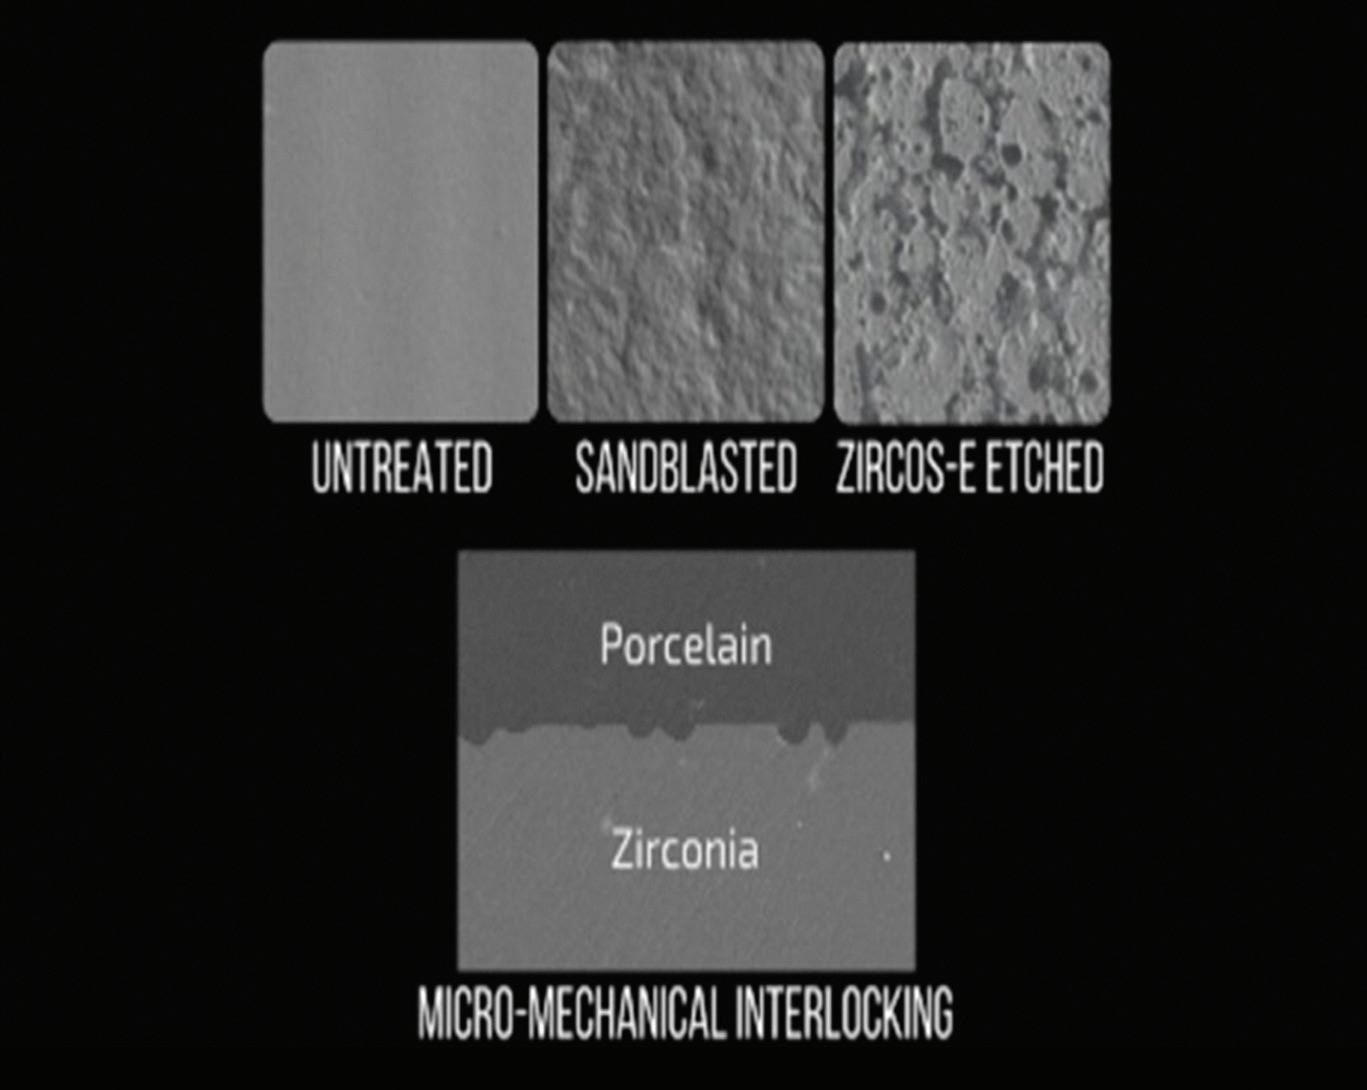
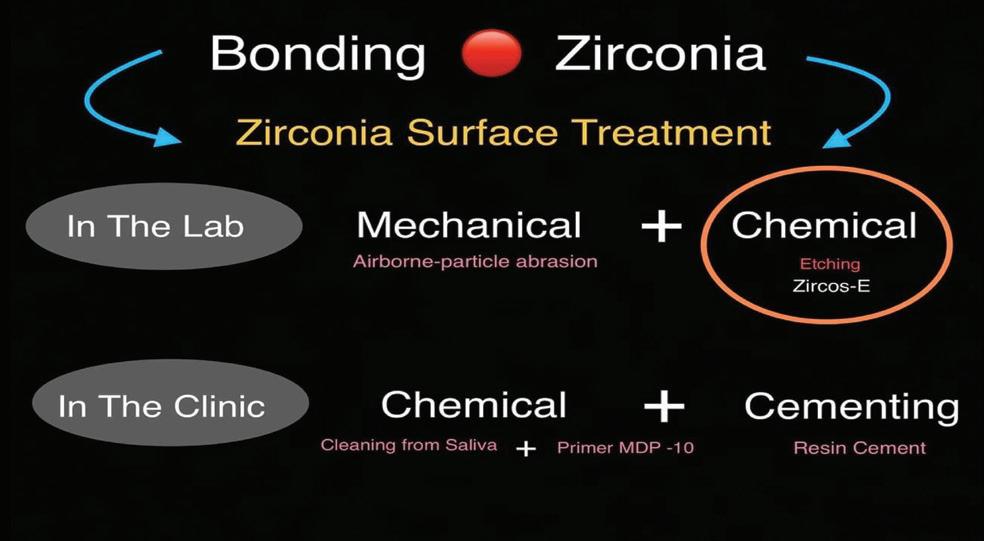
Zirconia is a ceramic, but it is not an etchable ceramic, nor does it contain silica. Zirconia cannot be etched or silinated, so the bonding procedure differs from that used for felspathic porcelain or lithium disilicate until 4 years ago. One of the common errors clinicians make is treating zirconia like it is lithium disilicate when bonding zirconia.
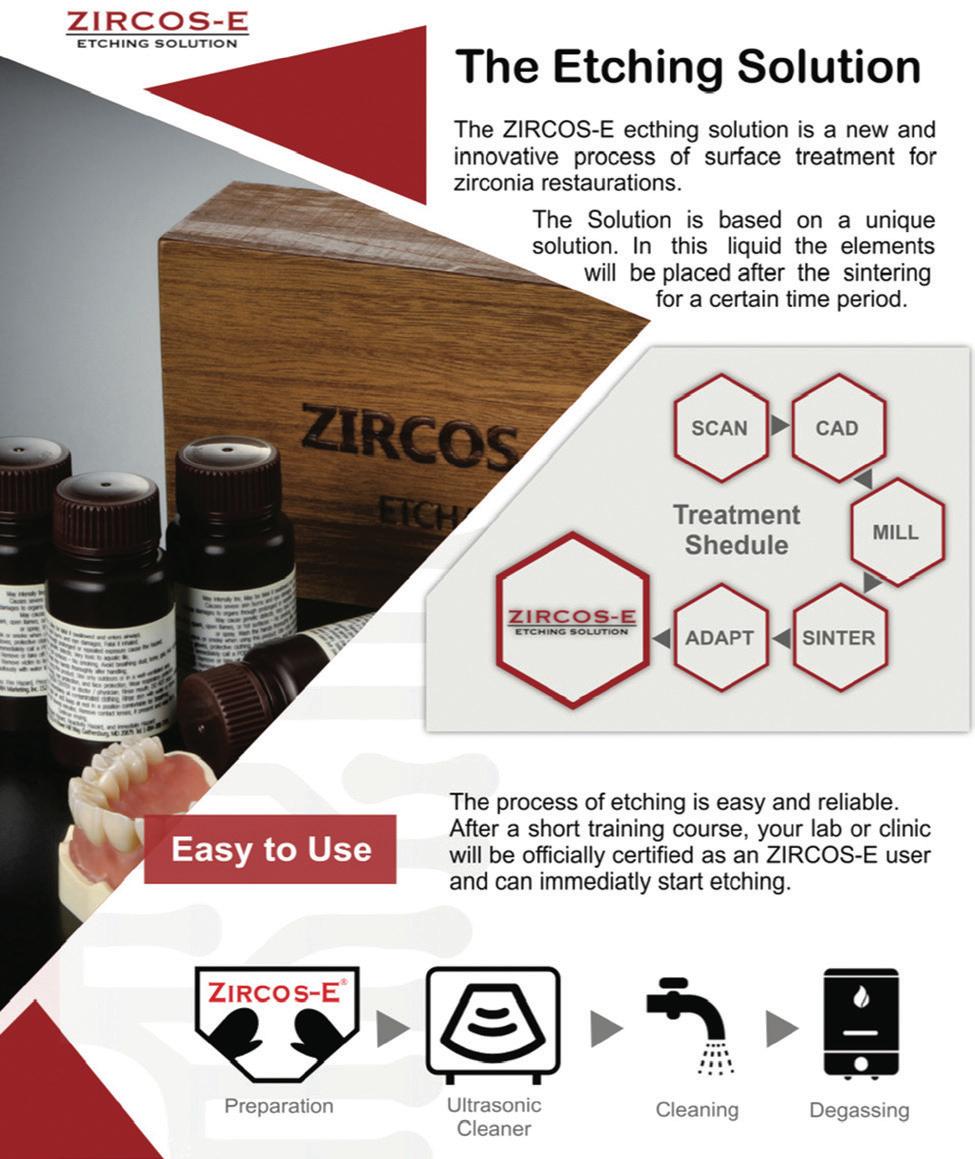
This article presents a new surface treatment process for zirconia. The etching process is easy and reliable. The solution is based on a proprietary mixture. After sintering, the restorations are placed in this liquid for a certain period of time.
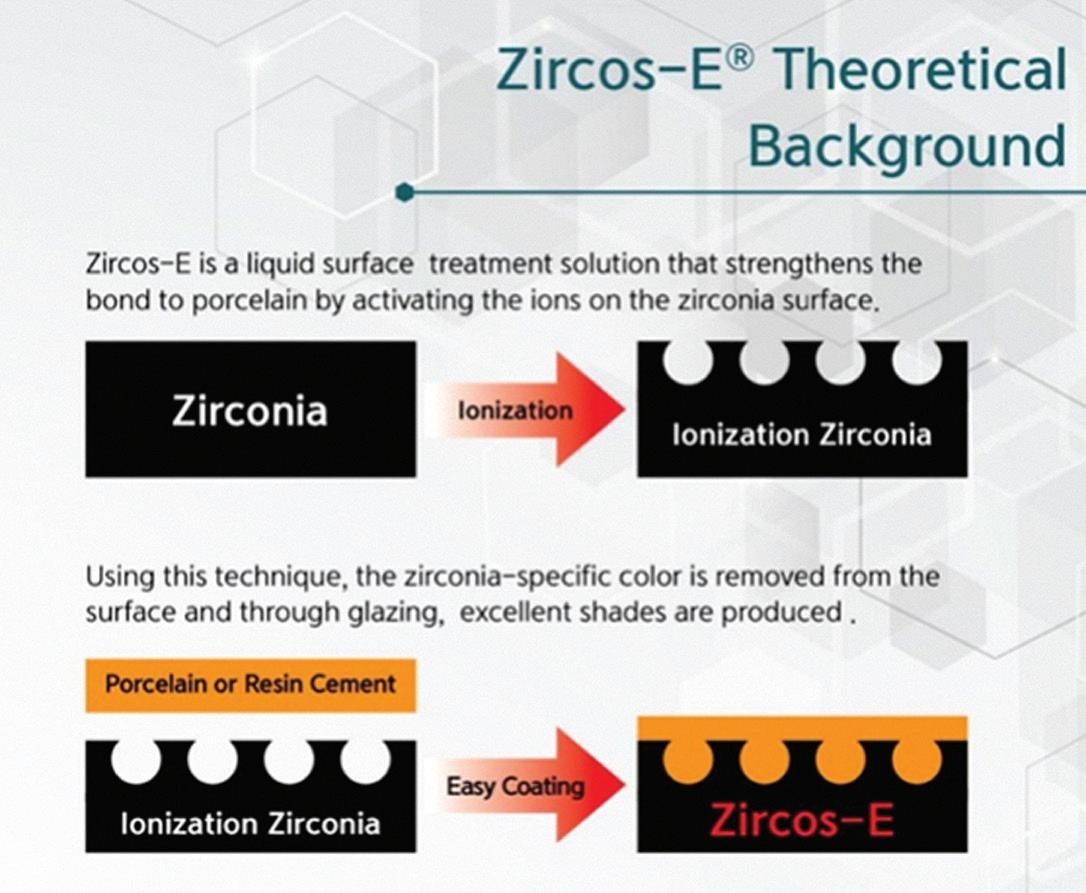
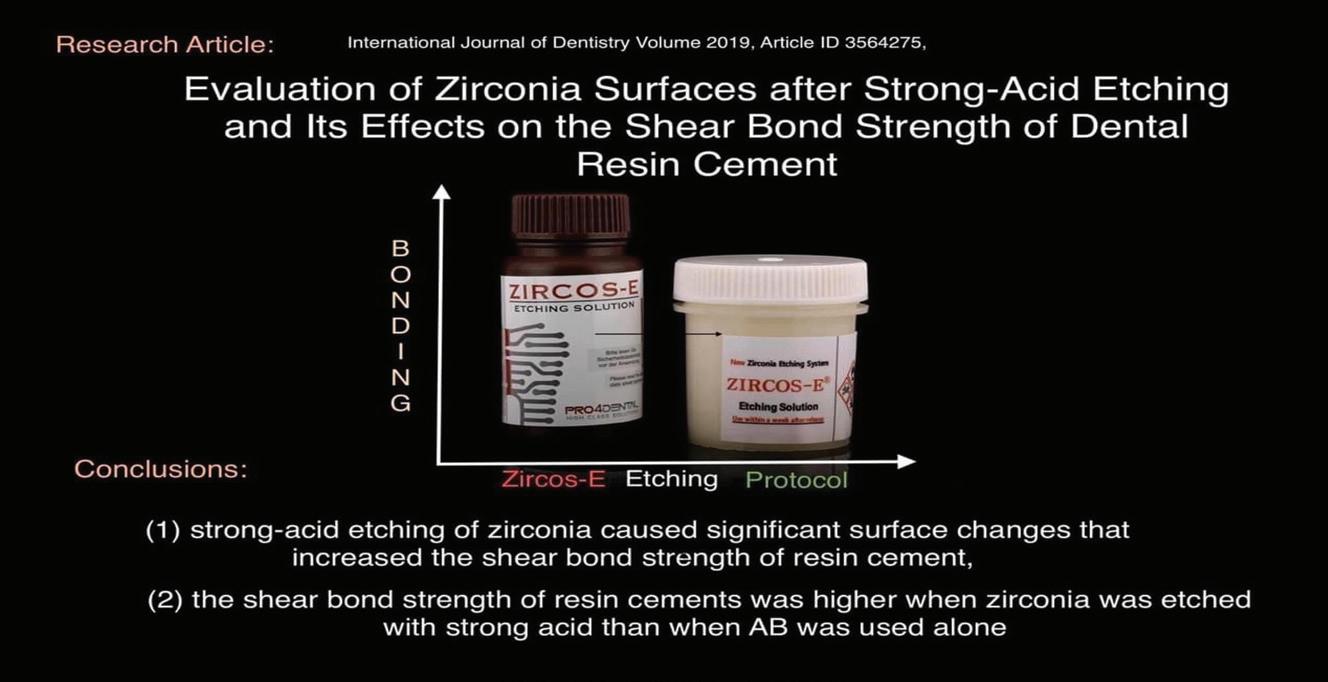
Zircos-E is the world’s first complete system, developed in collaboration with (Korea Institute of Ceramic Engineering and Technology) (Figure 6). Zircos-E is a liquid solution for surface treatment, which strengthens the bond with porcelain by activating ions on the surface of zirconia. With this technique, the specific surface layer of zirconia is removed even if glazed, allowing it to obtain excellent chromatic results.
The adhesion strength of the cement is increased through treatment of the inner surface of the inner surface of the crown. The sandblasting method generates a physical shock to zirconium oxide and alumina that leads to microcracks and degradation at low temperature.
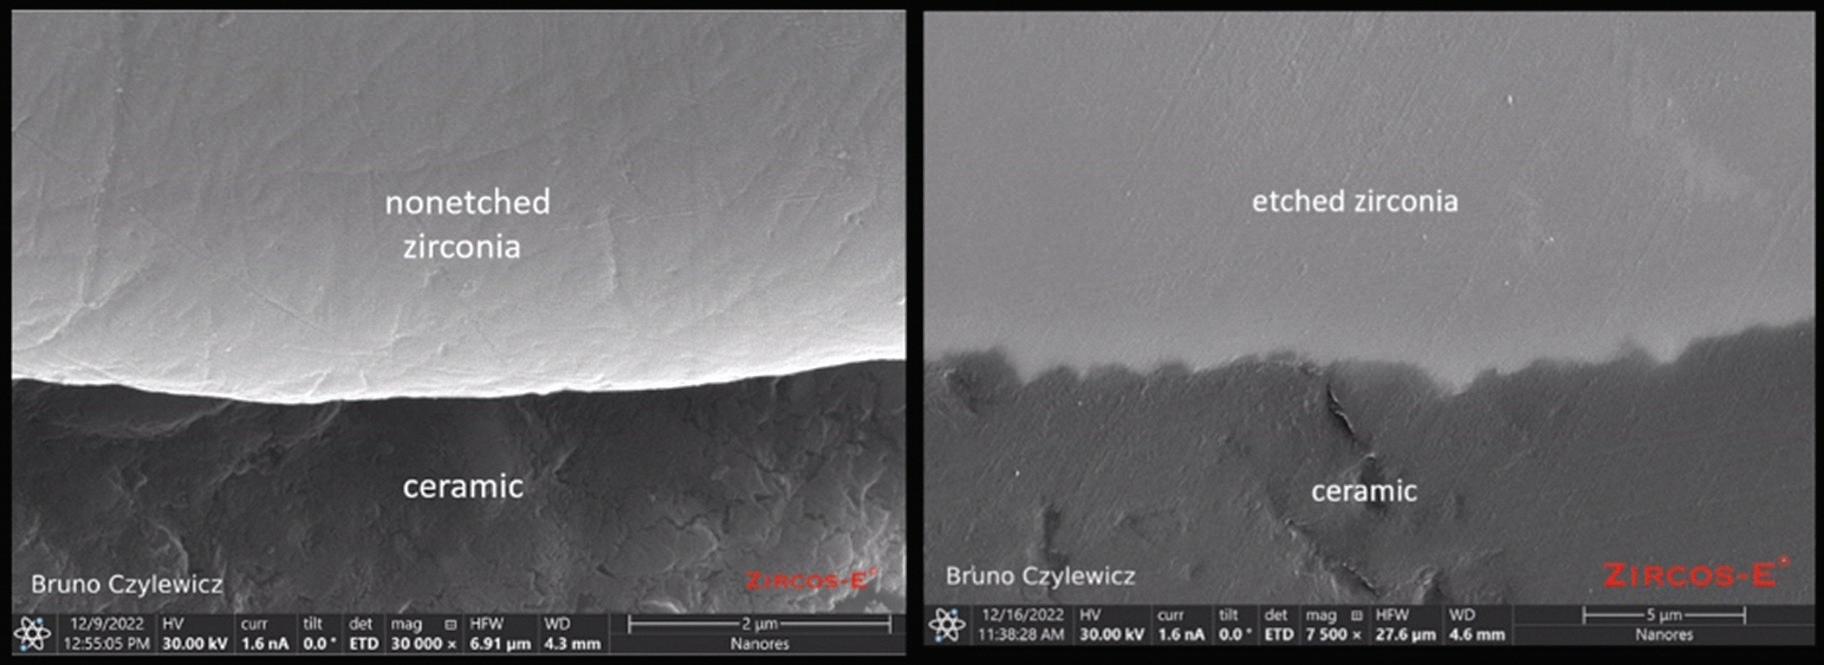
Zircos-E Etching Solution is a patented surface treatment technology that uses ionization to create a microporous surface and improve the bonding strength of zirconia crowns to porcelain (Figures 7-8). Because the etching solution treats the total surface area simultaneously, it also increases the bond strength of zirconia implant crowns to cement. The easy-to-follow treatment process can be completed in 30 minutes. Zircos-E etching solution activates the surface ions of zirconia to greatly strengthen adhesion to porcelain thereby increasing the porous surface area of zirconia.
Zirconia cannot be dissolved by hydrofluoric acid (HF) treatment, commonly used on silica-based ceramics. Alternative surface etching technique of zirconia copings is introduced to increase the surface roughness (Figure 9). A combination of acid etching with HF/HNO3 and ultrasonic seemed to be more promising to improve bonding performance of resin-based cements. Within the limitations of this study, compared to non-etching, acid etching with ultrasonic improved the shear bond strength between zirconia and resin cements.
The first step is to soak the restoration in Zircos-E acid in the container provided. After 30 minutes under ultrasound, rinse under running water and clean the etched crown with a steamer. Then fire at 600°C for 5 minutes in a porcelain furnace to degas Using this technique, the zirconia-specific colour is removed from the surface and through glazing, excellent shades are produced. This etching technique also increases the bonding strength. It is very important to respect the safety protocol. Wear gloves and do not open the bottle or container outside the working box. Now, we are ready to glaze build up the ceramic.
Figure 7.
Figure 9.
Figure 8.
Figure 6.
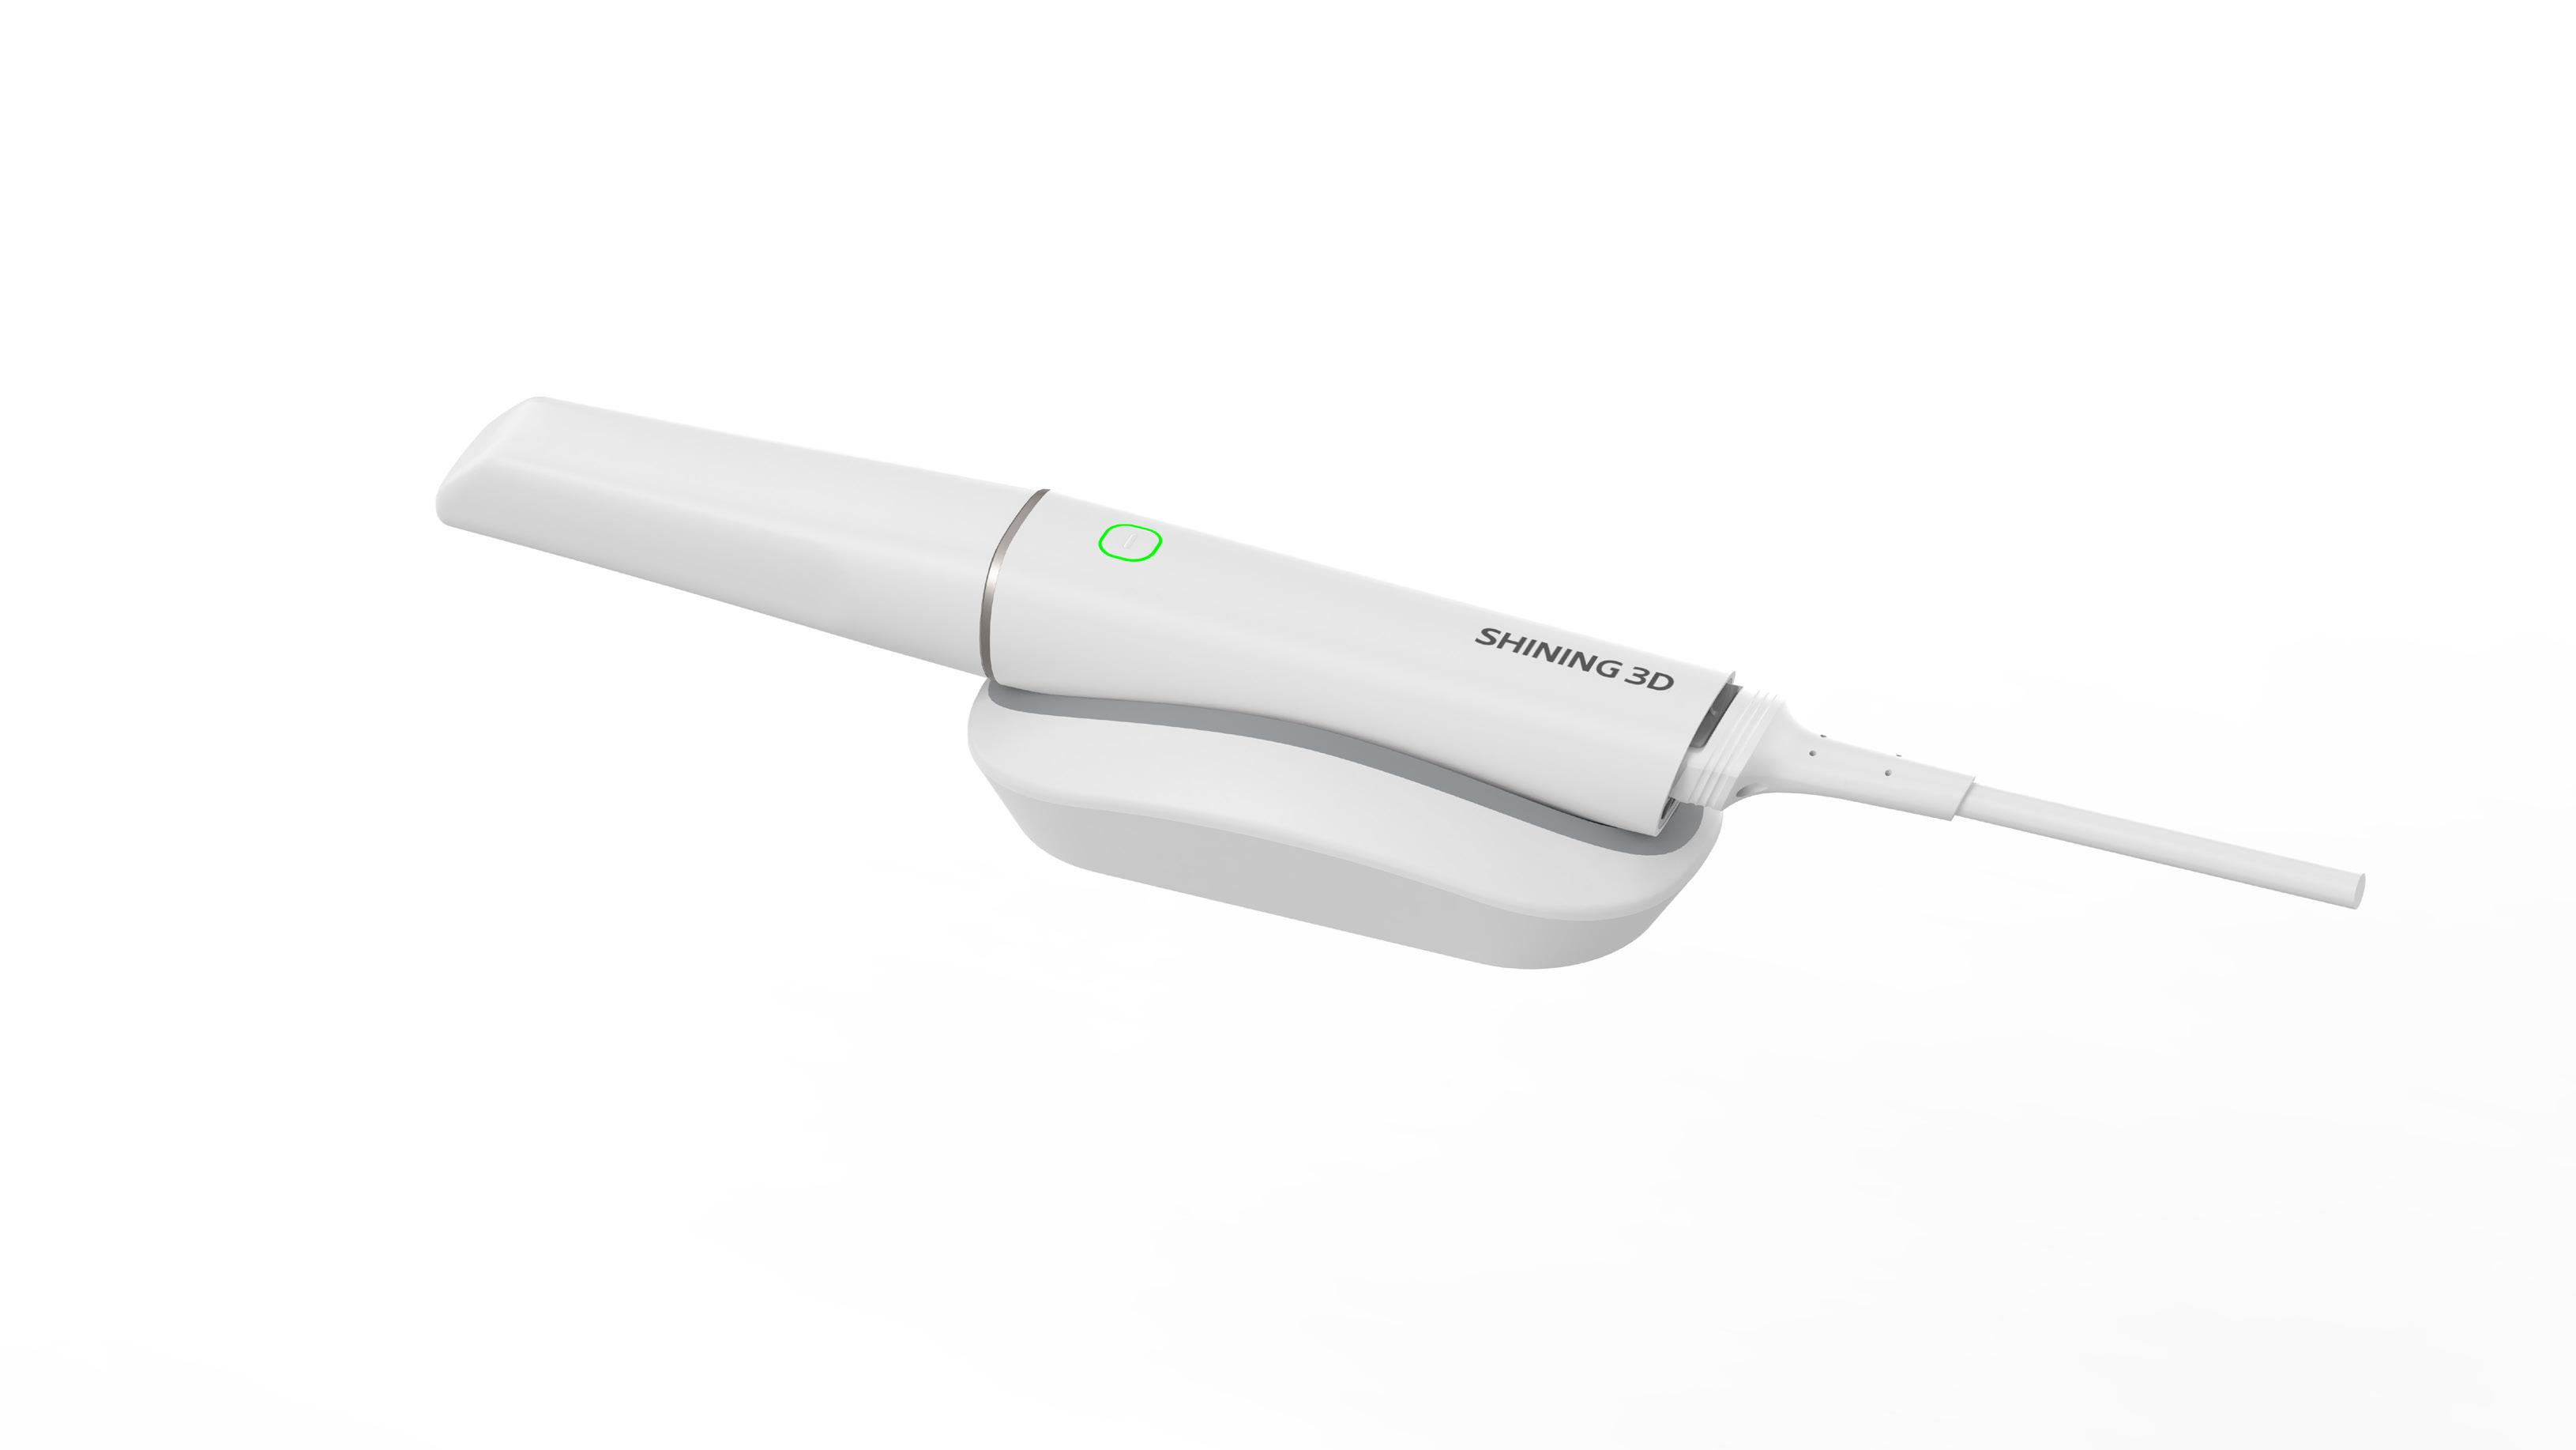
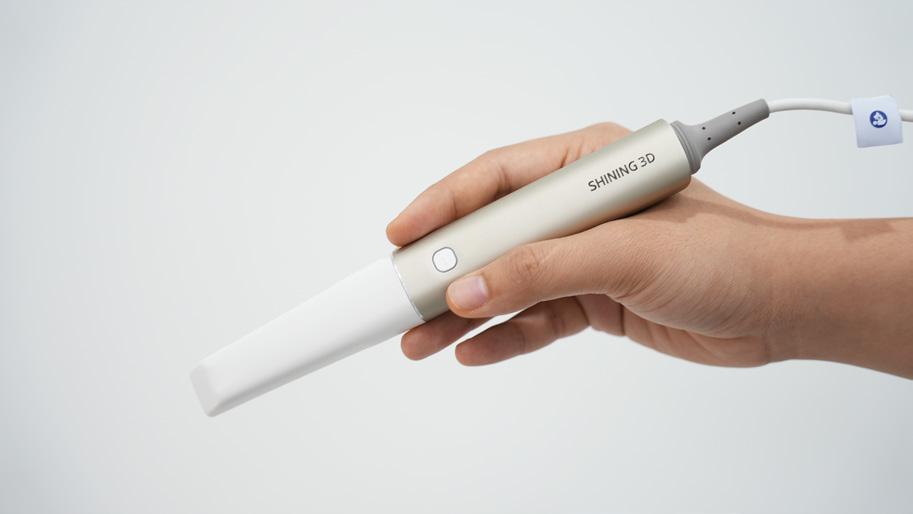
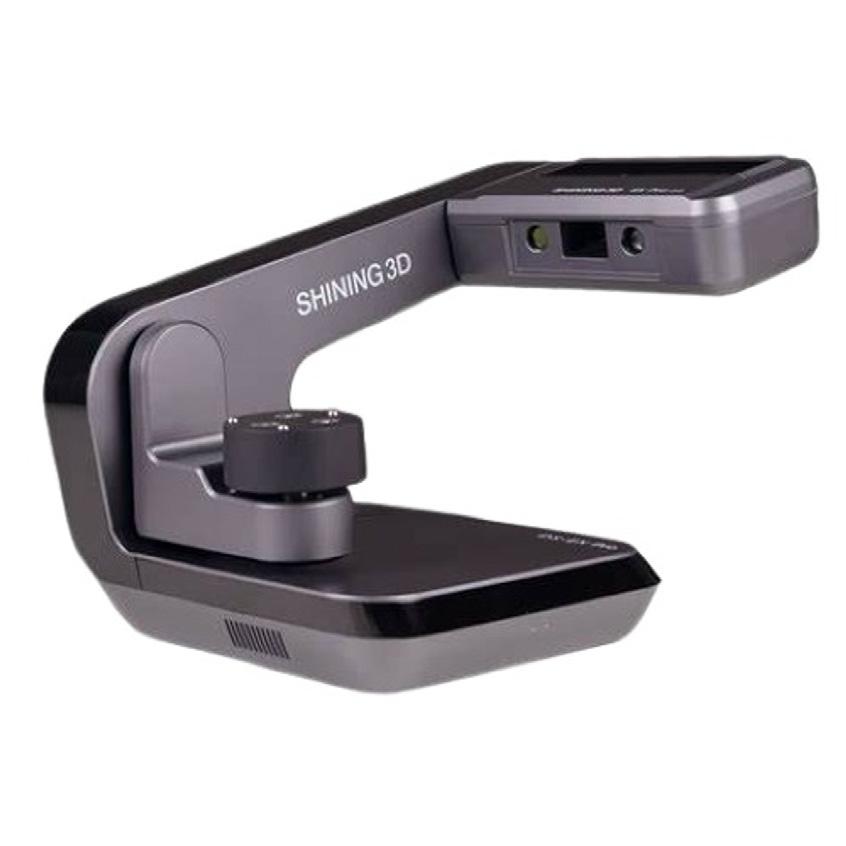
MAKE YOUR LIFE EASY REPLACE DENTURE
IMPRESSIONS WITH SCANS
The New ELF Intra Oral Scanner from Shining 3D uses patented technology to be the lightest, most accurate, easiest and affordable scanner available.
• Edentulous Scanning for Dentures !
• Partial Denture Scanning
• Impression Scanning
• Duplicate Denture Scanning
• Suitable for all Intra Oral Scanning
• Compatible with all 3D printers and Mills
ceramic | techniques
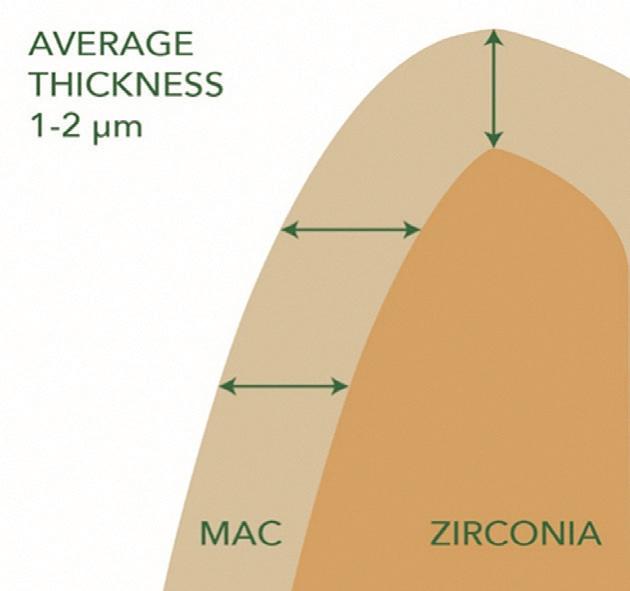
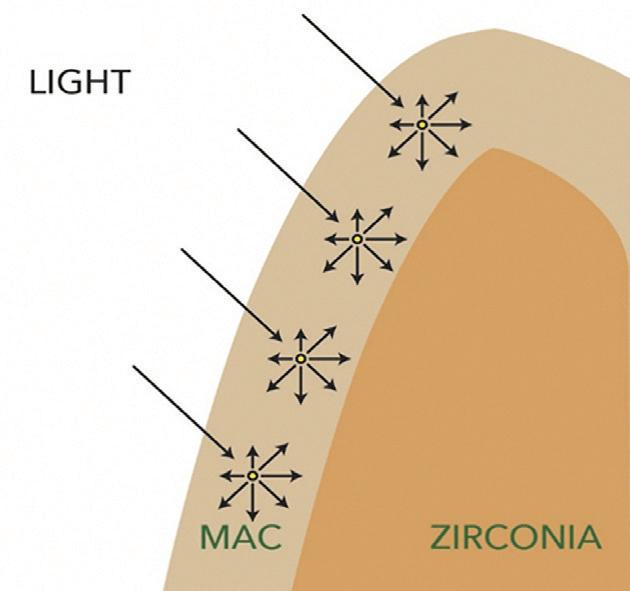
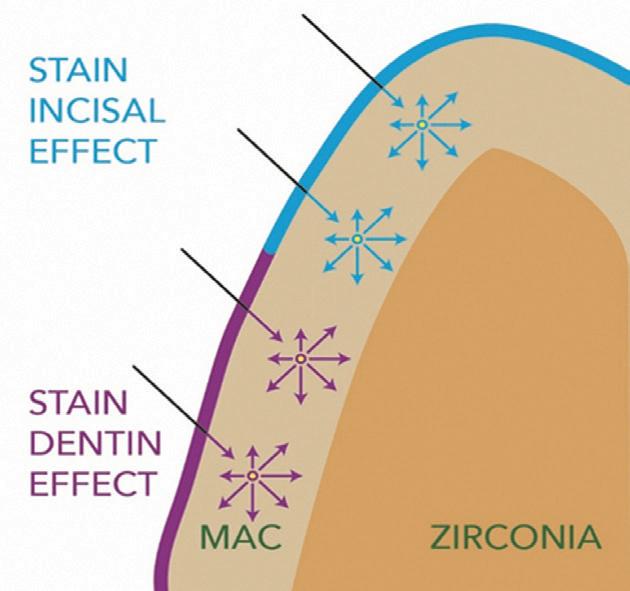
In my laboratory in the last 3 years, I created my own protocol; a fluid ceramic paste is used to glaze a full-contour crown, followed by a glaze available in paste or spray form (highly fluorescent and provide a shiny and brilliant appearance to restorations). For zirconia copings and cut-backs, I use the fluid ceramic instead of a liner ceramic, with average thickness 1-2µm. I use a fluid ceramic mass that improves the aesthetic outcome of monolithic zirconia and lithium silicate.
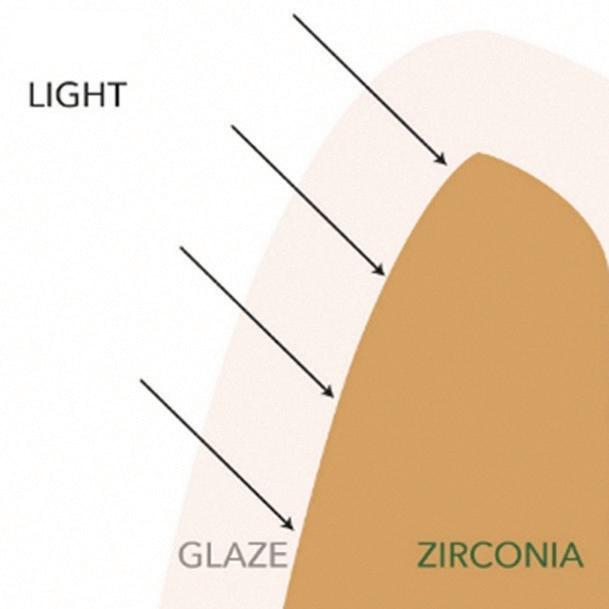
The ceramic paste creates a ceramic interface between the zirconia and the surface-applied colours, creating greater depth and three-dimensionality.
This ceramic paste is not a simple glass, but it contains all the characteristic elements of a true traditional layering ceramic mass. This composition allows achieving a three-dimensional and natural effect through the diffusion and refraction of light in the thin layered ceramic making the whole crown highly fluorescent.
Since I started using this technique of etching on zirconia and fluid porcelain (paste), I have not encountered any problem with porcelain chipping.
It is also possible to etch the crowns after glazing — just cover the outer contour with wax and add some drops inside, then wait 30 minutes before rinsing with water and steaming.
Conclusion
Zirconia cannot be effectively dissolved by hydrofluoric acid alone. So a combination of acid etching with HF/HNO3 and ultrasonic creates a more advanced bond with resin based cements. This method also vastly enhances bond strength on non-ideal preparations, i.e. short or non-parallel preparations. Searching for new methods of construction crown and bridge prosthesis in zirconia has driven the search for alternative materials, with higher aesthetic features, bio-compatibility and mechanical performance. What seemed impossible to achieve a few years ago, nowadays, is part of the everyday work routine in digital dental laboratories. This technique was first developed and implemented by our team; however, many practitioners have since adopted it successfully. Our experience demonstrated
that the combined characteristics of Zircos-E and fluid ceramic sits at the forefront of constructing perfect prosthetics! Through this technique we are now able to improve aesthetics and colour while avoiding chipping through improved bond strength. Most of all this will improve cementation is certainly the future of bonding zirconia restorations. Zircos-E is an acid etching liquid recommended
for this technique. Dr Goran Prokic of the Gold Coast and I have incorporated this protocol for the last 2 years and we find it to be highly successful.
Thanks to D.T Renata Loren for assistance / with the clinical case.
Zircos-E is available at 3Deltadental Supplies. See www.3deltadental.com.au or Whatsapp message +61-478-731-344.
Figure 12.
Figure 10.
Figure 11.
ceramic | techniques
About the authors
MDT Angelo Di Franco was born in Italy and qualified as a Dental Technician in 1988 and retrained in Australia in 1998. During this time he has worked for many leading companies in the Italian dental profession demonstrating new products and techniques and at times traveling the world to share his knowledge. Angelo has also had many articles published in international dental magazines. In 2017 he decided to move to Australia where he had already worked 20 years prior as a Dental Technician in a well-known Dental Laboratory. He is currently owner of Da Vinci dental art on the Gold Coast. Here, Angelo studies aesthetic and innovative materials for immediate loading, training and manufacturing high end dental appliances. Angelo is also a demonstrator for 3 Delta dental supplies in Australia for new generation dental products, which are available to purchase from his website www.3deltadental.com.
CDT Bruno Czylewicz graduated from Dental Technician School in Lodz, Poland in 1986. From 1991, he worked in several well-known laboratories in Toronto, Canada. From 1997 to 2004, he worked together with Prof. Nils Nobreus in Riyadj, Saudi Arabia as part of the Implant Team at Ajaji Dental Center. He currently works for Drs Nicolas and Asp Dental Center in Dubai, managing the dental laboratory. Bruno has garnered 30 years of experience in Dental Technology including 22 years working with implants. He was the 2nd place winner in Implantology at the Aesthetic Dentistry MENA Award 2009 in Dubai and has represented ZIMO and South Korea’s Dental Solution Inc globally. Since 2018 he has represented Zircos-E, Bioden, World. Bruno has participated in conferences in Canada, USA, England, Germany, Poland, Austria, Armenia, Belgium, Liechtenstein, Portugal, Saudi Arabia, UAE and South Korea.
References
[1] Casucci A, Osorio E, Osorio R, Monticelli F, Toledano M, Mazzitelli C, Ferrari M. Influence of different surface treatments on surface zirconia frameworks. J Dent 2009; 37; 891-897. [2] Casucci A, Monticelli F, Goracci C, Mazzitelli C, Cantoro A, Papacchini F, Ferrari M. Effect of surface pre-treatments on the zirconia ceramic-resin cement microtensile bond strength. Dent mater 2011; 27; 1024-1030. [3] Xie H, Chen C, Dai W, Chen G, Zhang F. In vitro short-term bonding performance of zirconia treated with hot acid etching and primer conditioning. Dent Mater J 2013; 32; 928-93
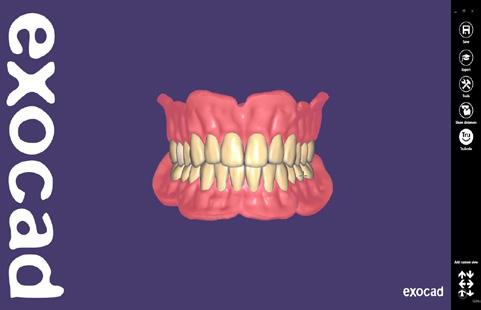
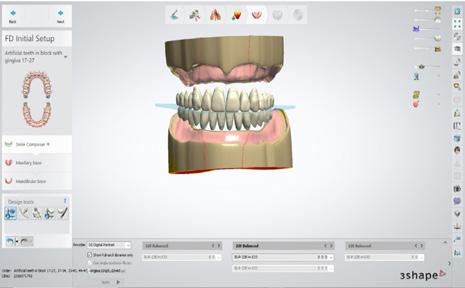
This is a structured hands-on workflow course designed to take you from setup to production-ready denture designs in just two days.
12 HOURS CPD
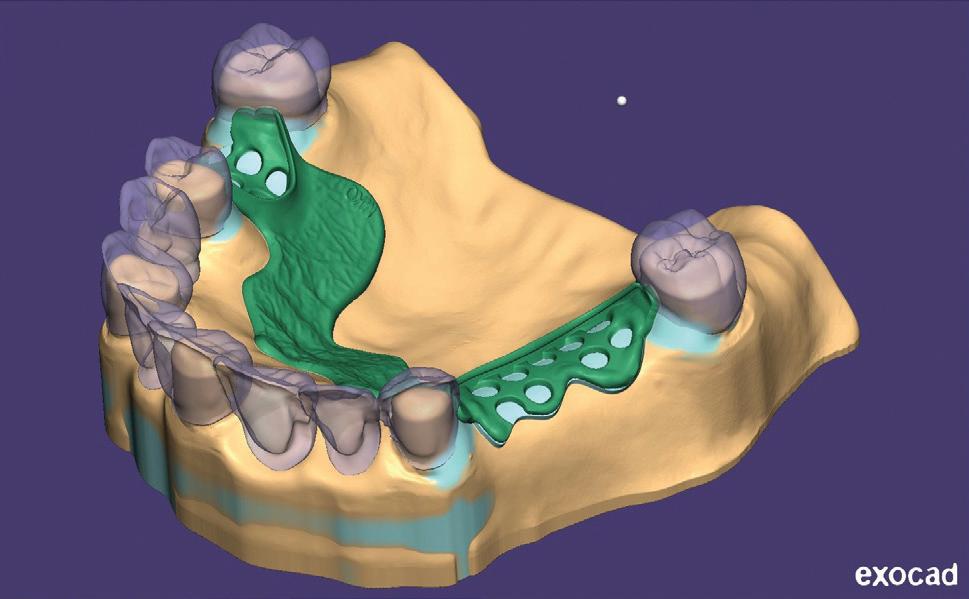
You will work through real cases, learn real workflows and deliver real outcomes — using the exocad Full Denture and Partial Denture modules.
What You Will Learn
n How to correctly set up, maintain and optimise your computer for exocad performance
n How to create clean, repeatable digital denture workflows
n Full single arch denture design from start to finish
n Complete upper and lower denture workflows
n Partial denture design, including surveying and frameworks
n Flexible denture design workflows
n How to produce accurate, production-ready files
n How to avoid the common mistakes that cause remakes and poor fit
Day 1 – Full Dentures & Foundations
You will build your understanding from the ground up:
n Computer setup and optimisation for exocad
n Case setup and scan preparation including intraoral scan acquisition and optimisation
n Single arch denture workflow (step-by-step)
n Full upper and lower denture design
n Occlusion, function and base design
n Preparing designs for digital manufacturing
You will complete both a single arch denture and a full upper & lower denture case
Day 2 – Partial Dentures & Flexible Design
Expand into more advanced workflows:
n Digital surveying and path of insertion
n Framework design (connectors, clasps, structure)
n Tooth setup for partial dentures
n Flexible denture design workflows
n Troubleshooting and design correction
n Preparing files for production
You will complete a partial or flexible denture design ready for manufacturing
Prerequisites - email terry@fabdent.com.au if you do not have the following:
n Laptop with DentalCAD 3.3 Chemnitz installed and running, fully updated (Windows updates and graphic card updates done)
n Full Denture Module and Partial Denture Module activated
n Sound knowledge of traditional denture techniques
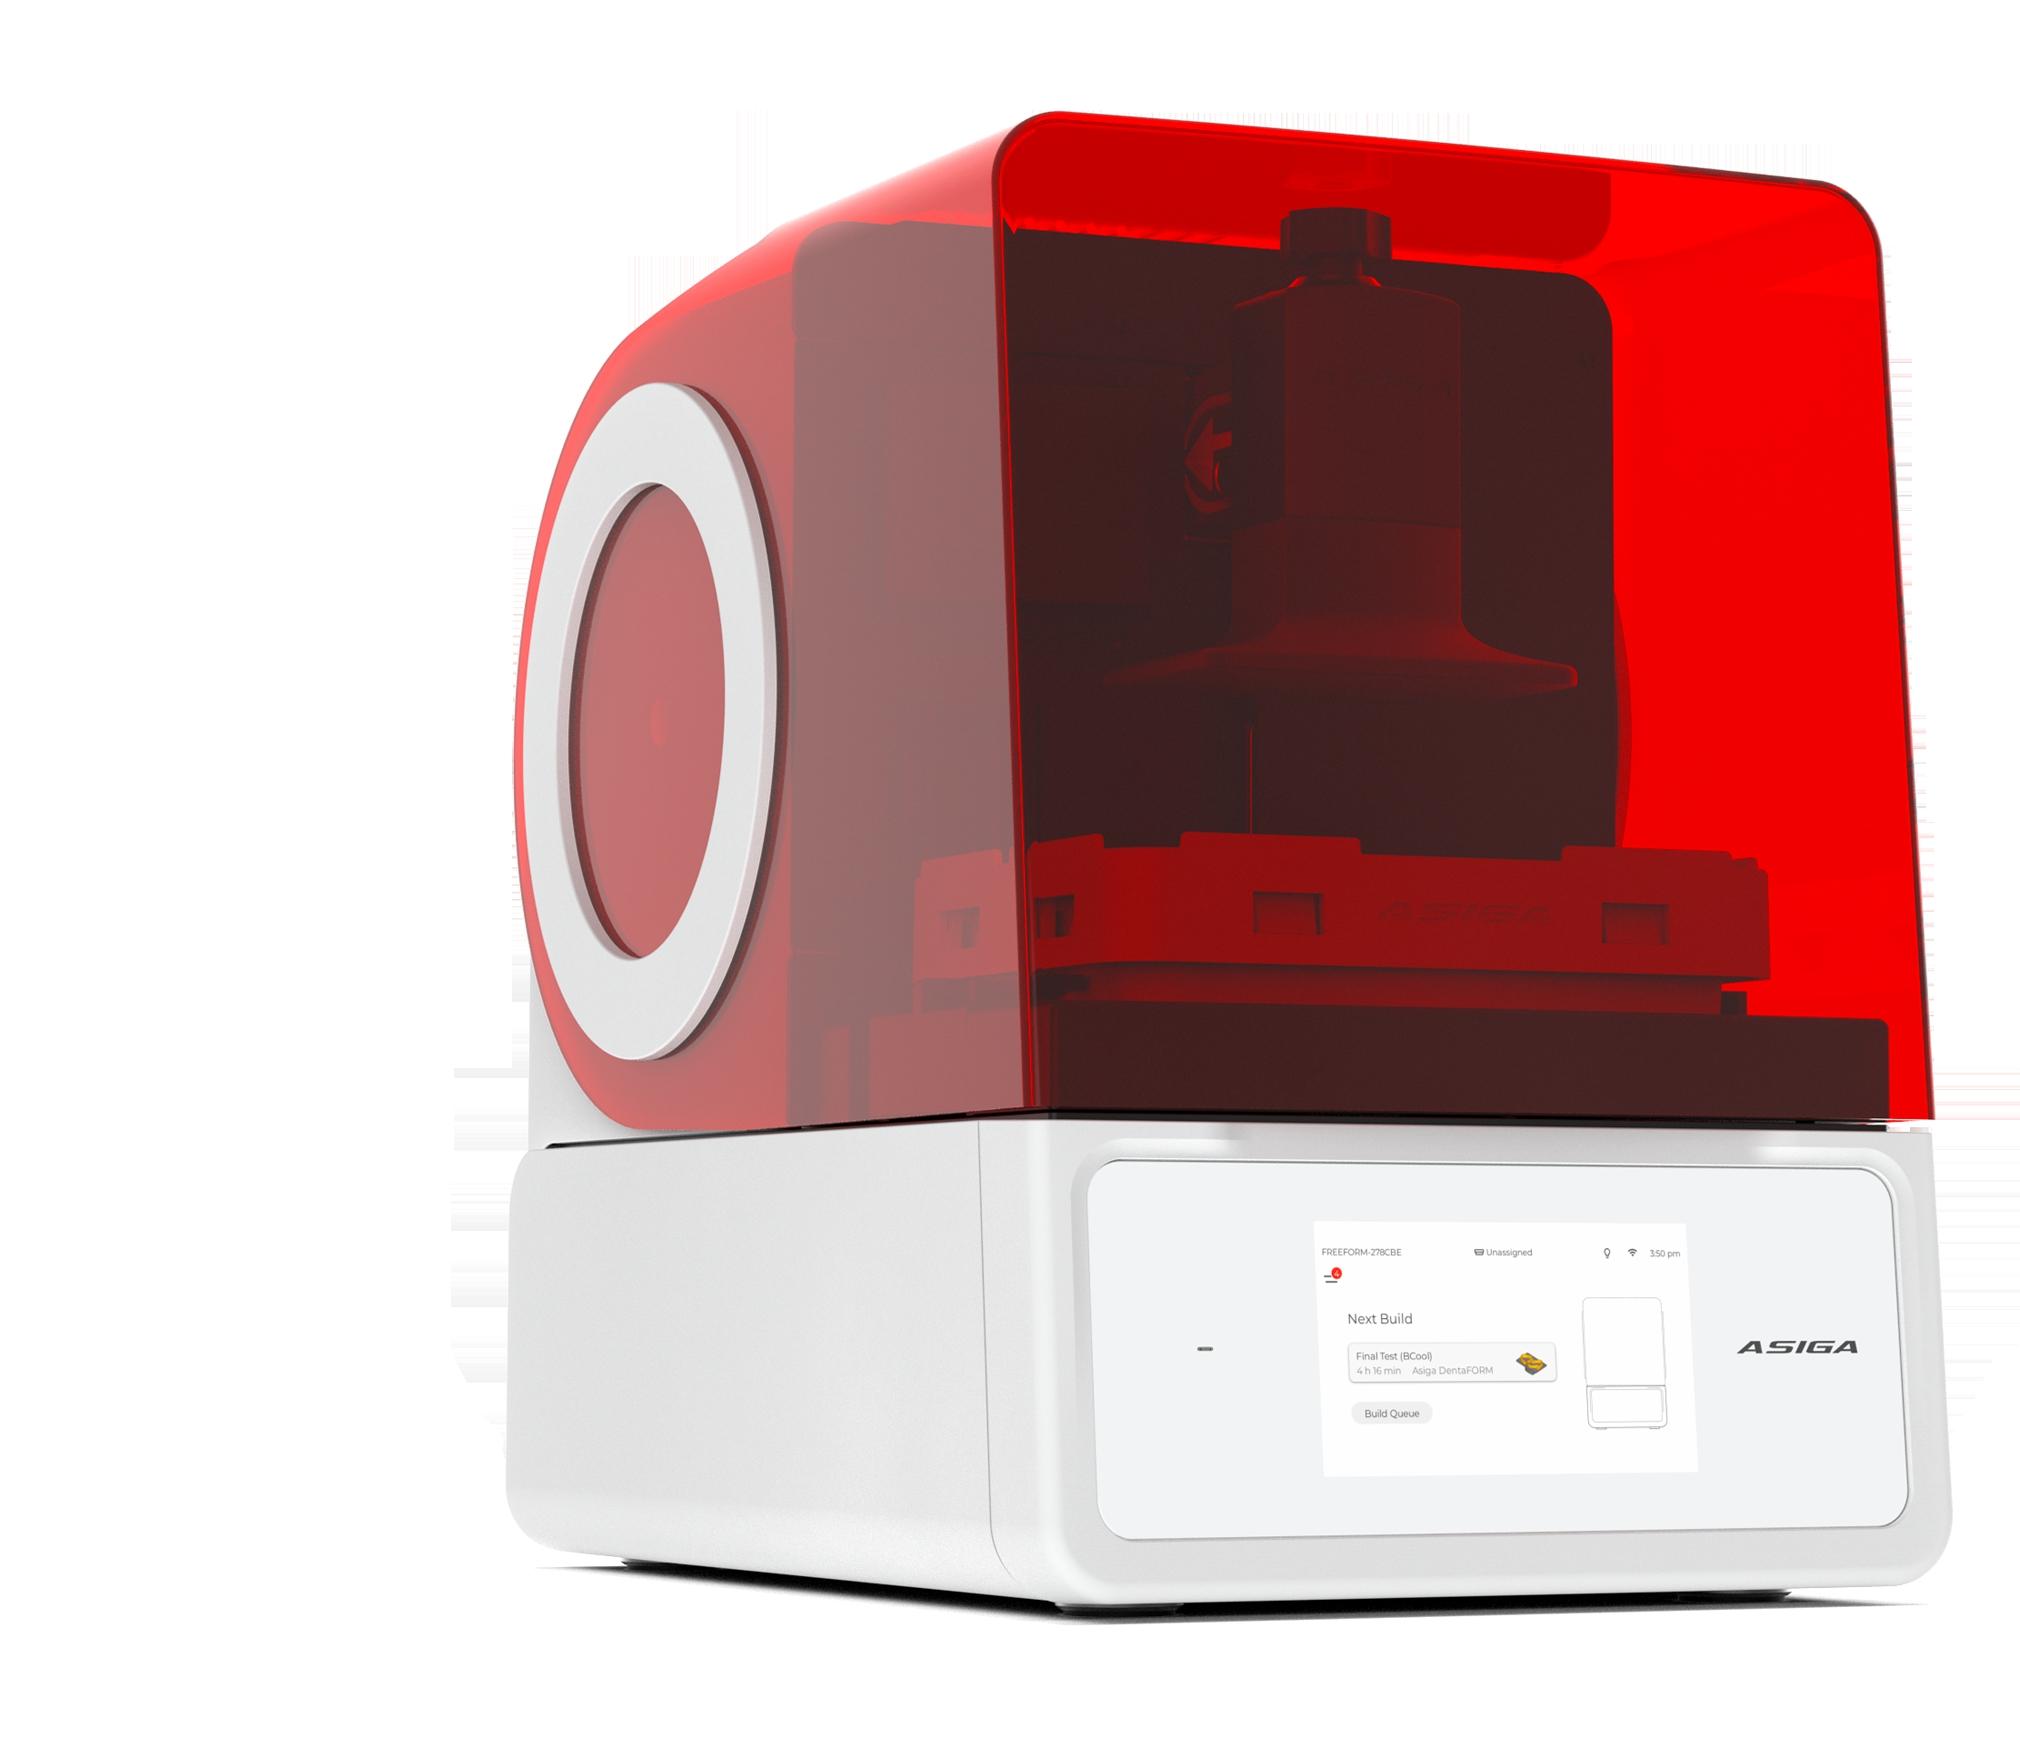
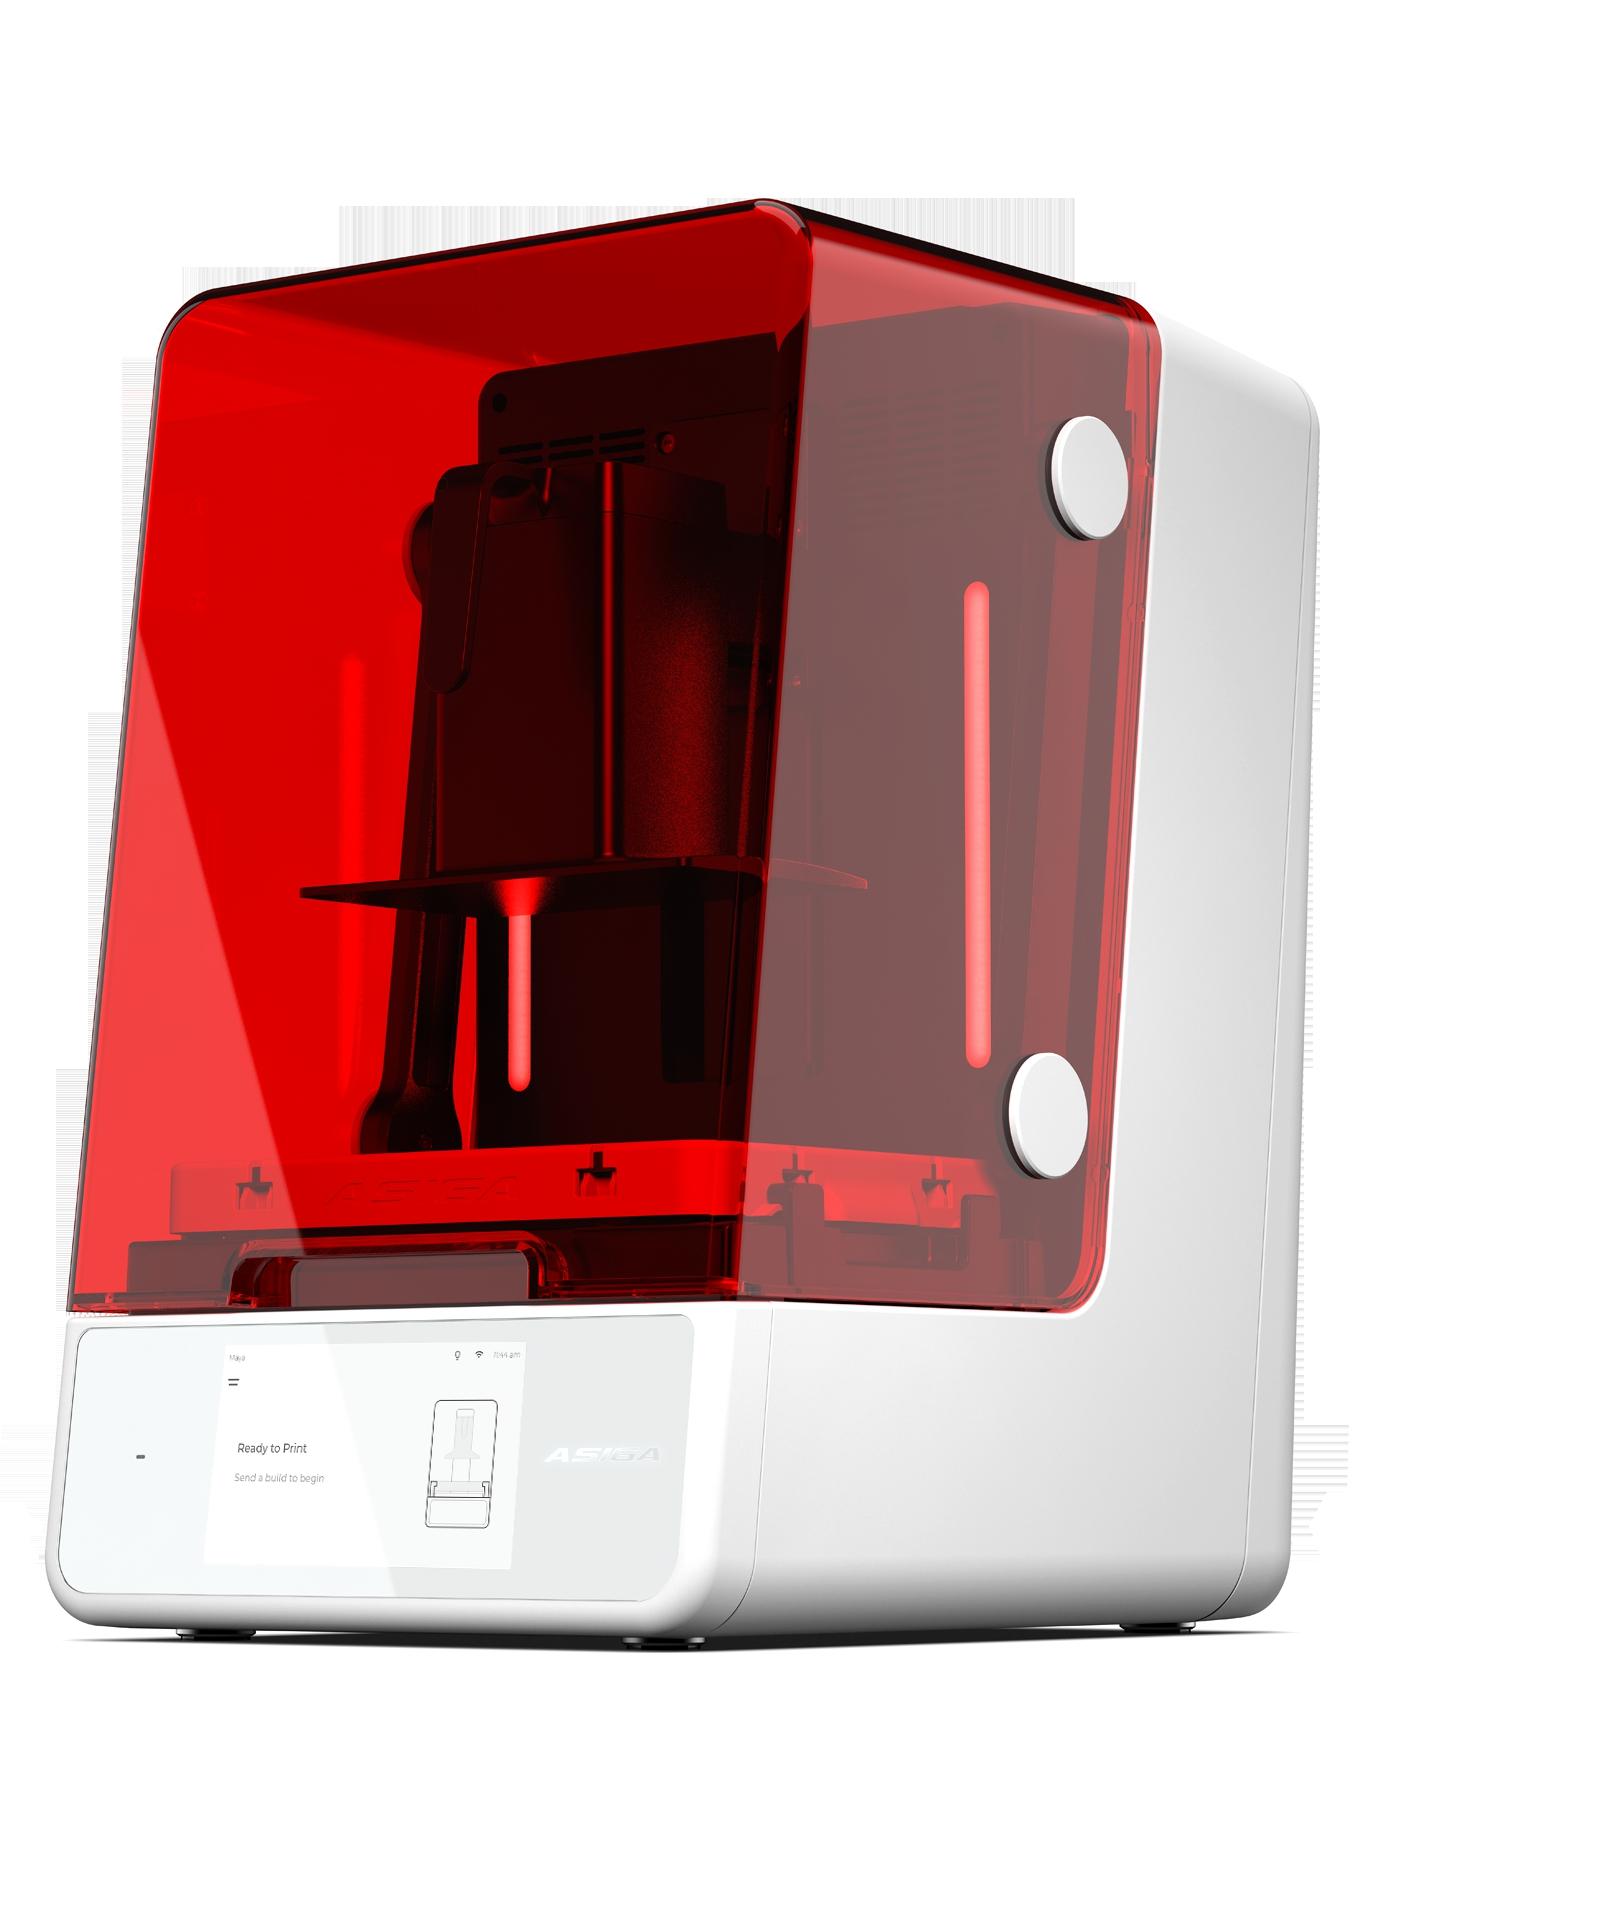
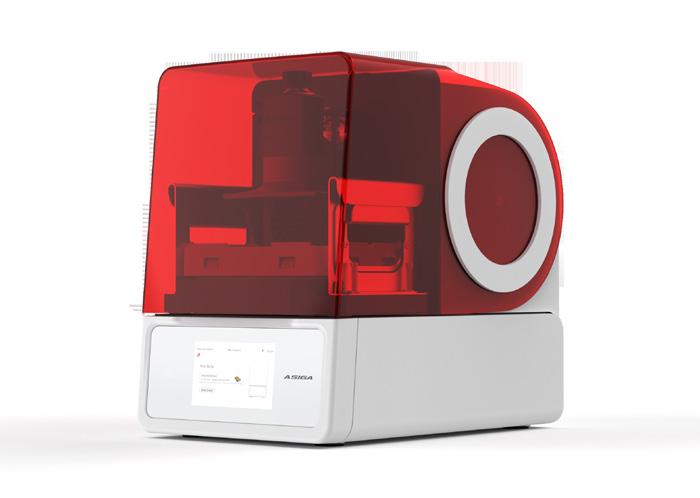
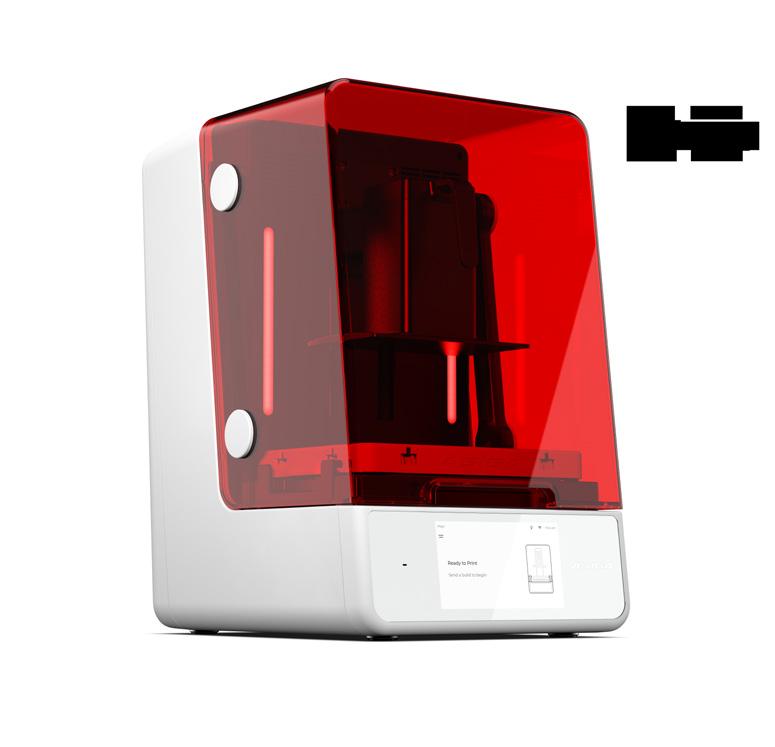
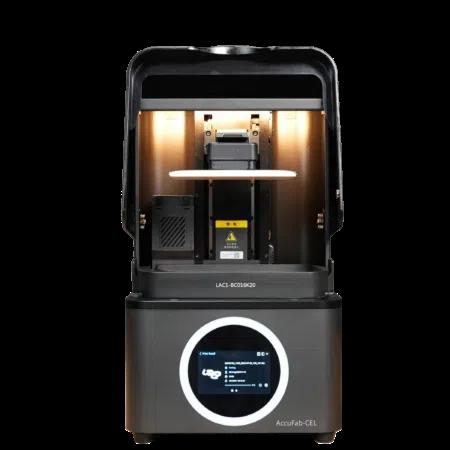
New Asiga Cure: The post-processing revolution
By Terry Whitty
Most people think a 3D printed dental appliance is finished when it comes off the printer. It isn’t.
What you’re holding at that point is a partially reacted material—a structure that looks complete, feels solid, but chemically is still very much a work in progress. The polymer chains have started forming, but there are still plenty of unreacted double bonds sitting there waiting to link up.
This is where a term gets thrown around a lot—conversion. Put simply, conversion is how much of that chemical reaction has actually happened.
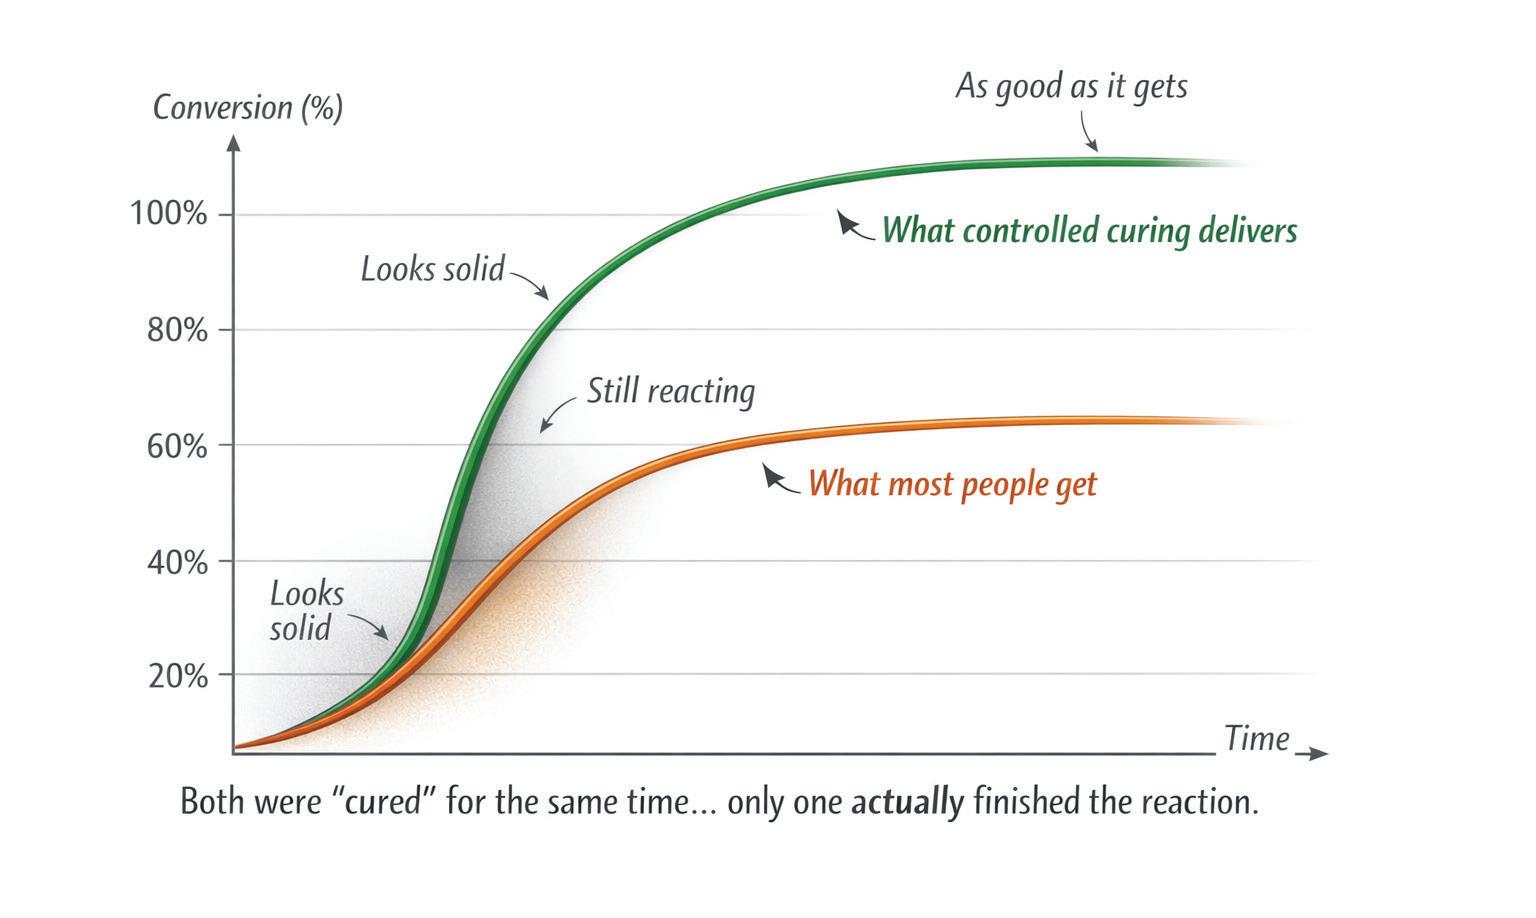
If everything that could react has reacted, you’ve got full conversion. In reality, you never quite get there—but the closer you get, the better the material behaves (Figure 2).
Low conversion means more unreacted monomer, a weaker structure and a material that is less stable over time.
High conversion means improved strength, better wear resistance, more stable colour and—most importantly—a material that is far more suitable to sit in the tissues of the mouth.
So when we talk about curing, what we’re really talking about is driving that conversion as far as possible.
Post-curing is not drying it off under a light. It’s the continuation of the chemical reaction that actually finishes the material and that’s where most people have been getting it wrong.
The industry has spent years obsessing over printers—resolution, layer thickness, build angles—while treating curing like it’s a toaster. Put it in, wait a bit, pull it out... job done. But it’s not job done.
If the chemistry isn’t finished, the material isn’t completely stable. Simple as that.
If that sounds obvious, it’s only obvious once you understand it. For a long time, people simply didn’t think about curing in chemical terms. It was seen as a finishing step, not a defining step.
This becomes a real issue once you move into biocompatible resins. These materials are more demanding. They are less forgiving. And they rely heavily on proper curing to achieve the properties they claim to have. Get that wrong, and you’re left with residual monomer, incomplete conversion and a surface that might look fine but behaves very differently over time.
The big issue is — you often don’t see it straight away. It shows up later as irritation, surface breakdown or discolouration. By then, the printer, the design or the material has already been blamed... when in reality the issue was sitting in the curing unit all along.
There’s also a psychological trap here. If something looks good, we assume it is good. Smooth surface, nice colour, no obvious defects—must be fine. It’s not.
Polymer chemistry doesn’t care how something looks. It only cares how complete the reaction is (Figure 2).
Now we get to the part no one explains properly—the oxygen inhibition layer.
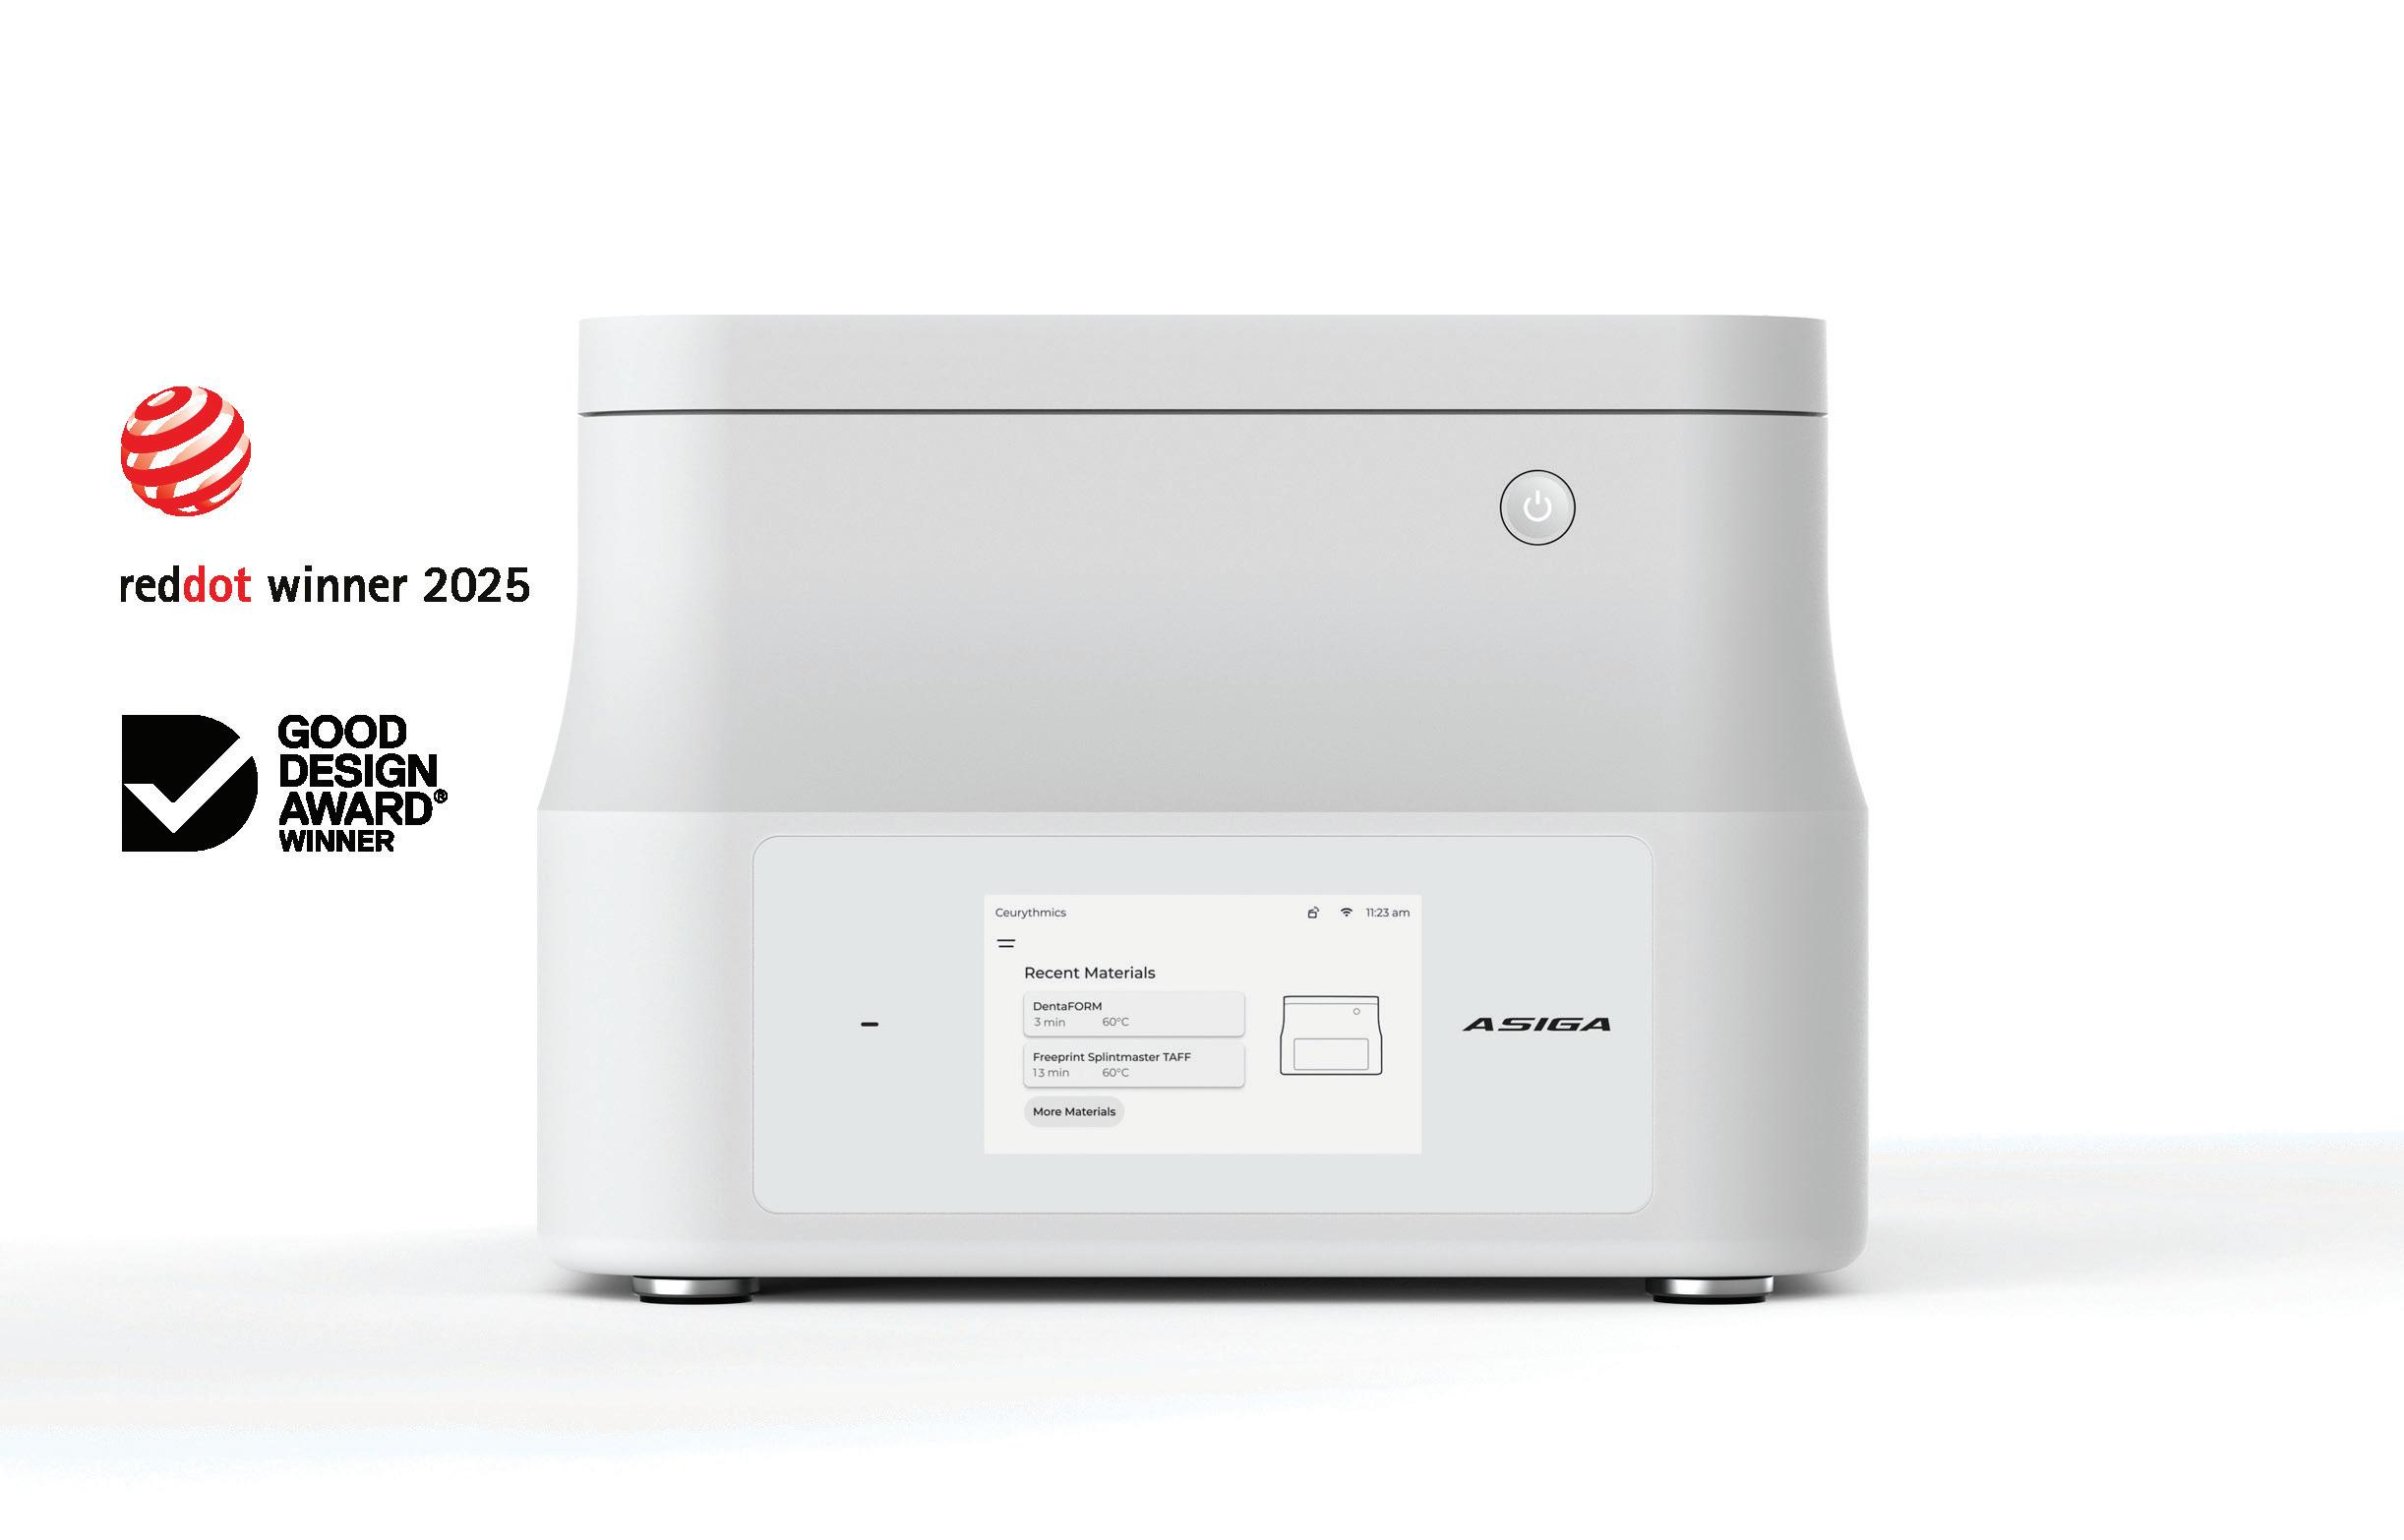
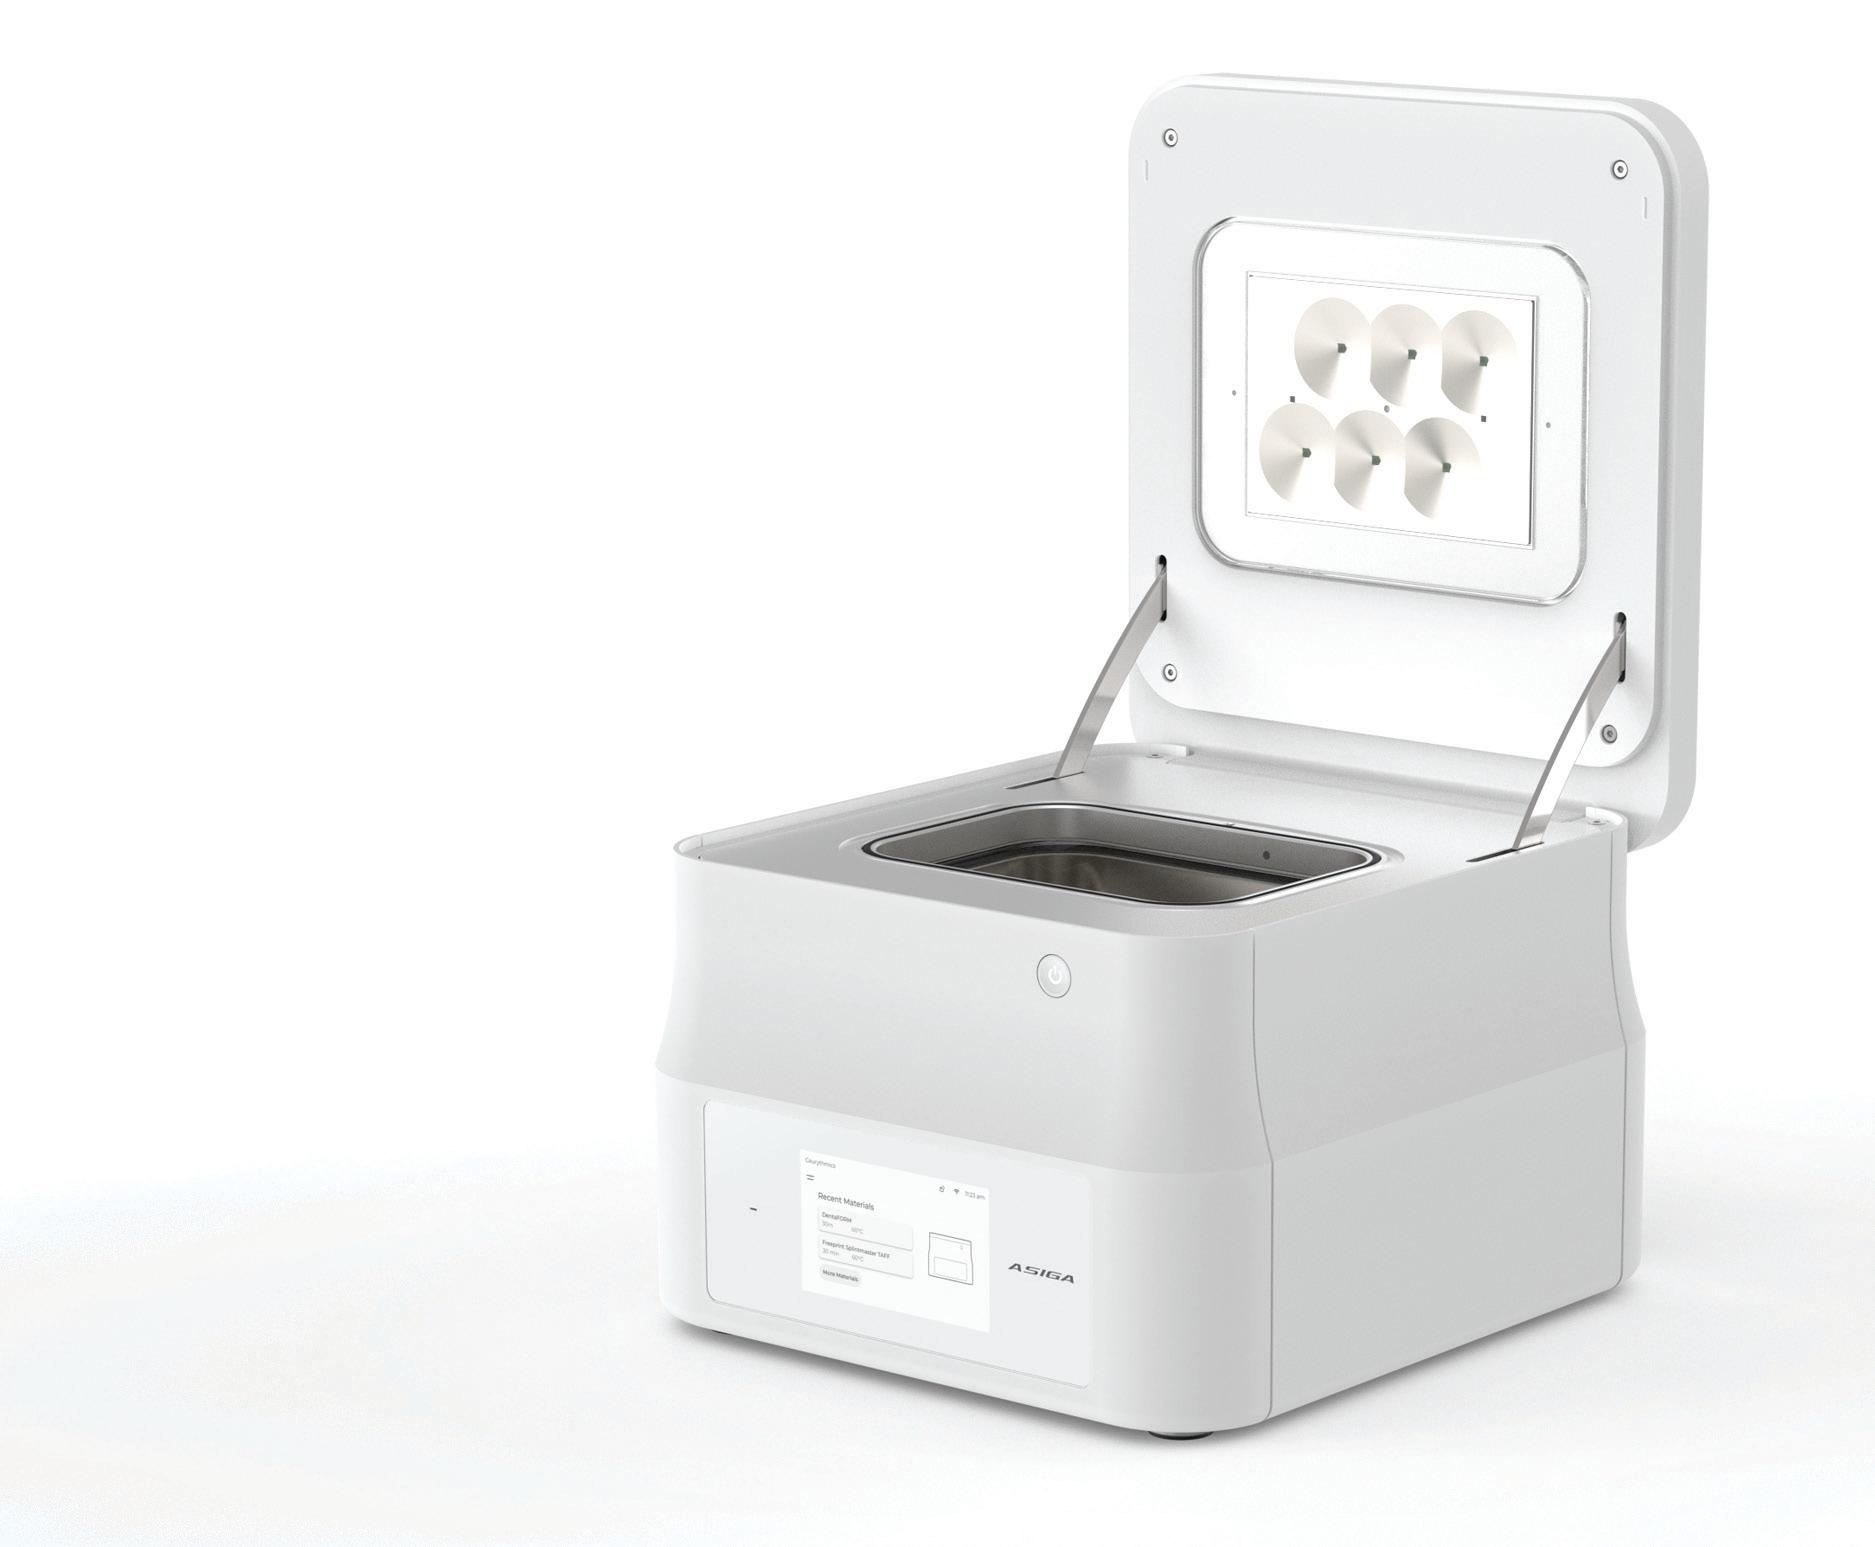
Figure 1. The new Asiga Cure.
Oxygen inhibition layer
Oxygen interferes with polymerisation. It reacts with the free radicals that are trying to drive the reaction and effectively shuts it down at the surface.
The result is a thin outer layer that is under-cured compared to the rest of the object. So you end up with something that is reasonably cured internally, but compromised exactly where it matters most—on the surface.
That’s where you get the sticky feel, poorer polish, increased wear and higher levels of residual monomer sitting right where the material contacts human tissue.
Most curing units just blast light at prints in open air and hope for the best. That’s like painting a car in a dust storm and wondering why the finish isn’t great.
There are only two real ways to deal with oxygen—push it out with nitrogen or remove it altogether with vacuum.
Nitrogen works. It displaces oxygen and improves the surface cure. But it relies on a consistent gas supply and a system that’s set up properly. In the real world, that consistency can be hit and miss. Bottles run low, flow rates vary, seals aren’t perfect— little things that all add up. And there is a cost for the gas itself.
Vacuum takes a more direct approach. It removes oxygen from the environment entirely. No oxygen, no inhibition. The reaction is free to proceed properly, right through to the surface.
Once you understand all of that, you start to look at curing units very differently.
They’re not light boxes.
They’re reaction chambers!
New Asiga Cure
This is where the new Asiga Cure unit starts to separate itself.
It’s designed to control the variables that actually drive conversion, not just shine light and hope for the best.
Take dose, for example. Most people think in terms of time—leave it in for 10 minutes and she’ll be right. But polymerisation doesn’t run on a stopwatch. It runs on energy delivered over time.
The Asiga Cure introduces controlled dosing. In simple terms, it’s not just how long you cure—it’s how much energy the material actually receives. That’s a completely different level of control and it brings curing much closer to something measurable and repeatable.
No more guessing whether enough energy has been delivered. You know.
Timing is still there, but now it actually means something. Not just longer equals better; over-curing has its own issues— brittleness, distortion, internal stress. So now we’re not just curing... we’re curing appropriately for the material.
Then there’s vacuum.
Curing under vacuum
Once you remove oxygen from the equation, surface conversion improves dramatically. The material cures properly throughout, including the outer layer.
You get a harder, more stable surface that polishes better, wears better and behaves more predictably over time.
More importantly, you get consistency. The same result today, tomorrow and next week. Not “it seemed better this time,” but actually better everytime.
Nitrogen is also part of the system and it has its place. It’s another way of managing oxygen, and in certain workflows, it’s effective. What matters is that the environment is controlled, not left to chance. That’s really the underlying theme here—control.
The effect of heat
Heat is still one of the most misunderstood parts of the process. Heat increases molecular mobility, allowing remaining reactive sites to find each other and link up. In other words, it helps drive conversion further. Without heat, you’re relying heavily on light alone. With it, you’re finishing the reaction properly. Again, with Asiga Cure, it’s controlled— not just added in as an afterthought, not just whatever heat happens to build up, but a deliberate, consistent part of the process.
You start to see a pattern here.
Nothing is left to chance.
Figure 2. Same time. Different conversion. Only one actually finishes the reaction.
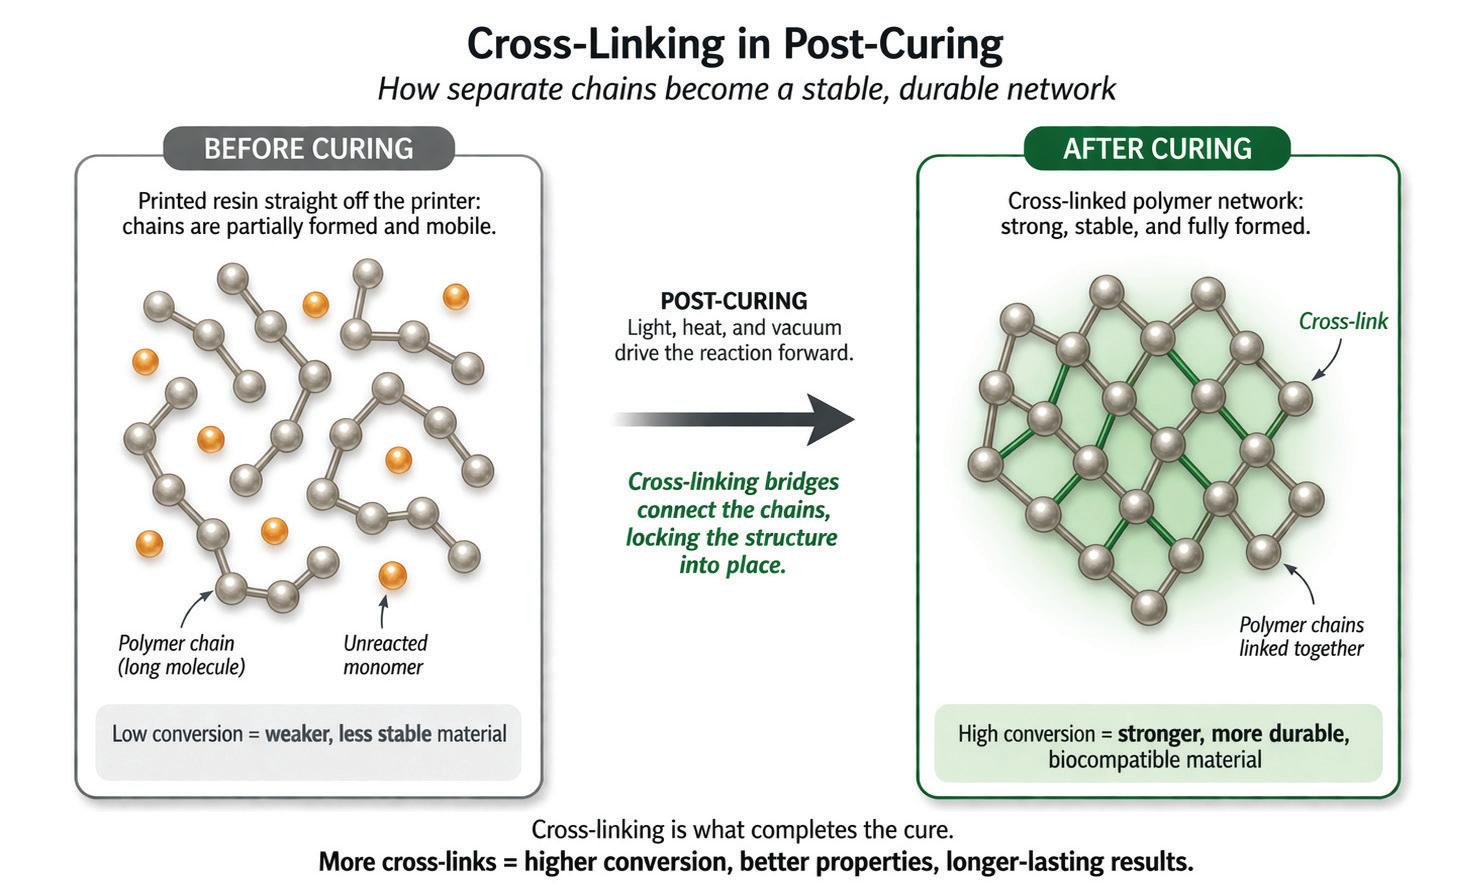
Figure 3. Cross-linking is what actually finishes the material—more links, better properties.
Validation
One of the more important aspects in the curing process is validation.
Anyone can build a box with lights, a heater and a pump. That’s not the hard part. The hard part is knowing that when you run a cycle, the material actually reaches the level of conversion it’s supposed to. That it performs as expected. That it meets its intended use.
That’s where validated curing profiles come in.
Not guesses. Not “this seems to work”. Actual, tested workflows tied to specific individual materials.
So when you run a cycle, you’re not experimenting—you’re following a known pathway to a known outcome.
It’s exactly where this is all heading.
Because once you’re dealing with medical devices—and that’s exactly what these are—you can’t rely on opinion. You need consistency. You need repeatability. You need a process you can stand behind.
Regulation is driving it. Manufacturers will demand it. Clinicians and patients will start expecting it.
Then quietly, the market will shift.
The Asiga Cure isn’t just a better curing unit—it represents a more complete way of thinking about curing.
Control the dose.
Control the environment.
Control the temperature.
Validate the outcome.
Once you work like that for a while, it becomes very hard to go back to throwing parts into a generic light box and hoping for the best.
Because you start to realise something slightly uncomfortable... A lot of the problems people blame on printers, materials or design... ...were never coming from there in the first place. They were being introduced at the very last step. This is exacly the part no one wanted to look at.
What’s interesting is that once you see it, you can’t unsee it. You start questioning everything—why does this material behave differently, why does that one polish better, why does one discolour and another doesn’t. And more often than not, the answer comes back to the same place...
How well was it actually cured?
That question is going to become more important, not less.
Because as materials improve, tolerances tighten and expectations increase, the margin for error gets smaller. You can’t afford to be approximate anymore. You either finish the chemistry... or you don’t.
Conclusion
Finally, a company has actually stopped and thought this through—not just how to build a curing unit, but how curing really works. Not a light box, not a guess, but a properly controlled system that gives you control over everything that matters and removes the guesswork that’s been floating around this space for years.
It delivers everything you could want in a curing unit and more importantly, it aligns with where the industry is going.
This isn’t just a better way to cure—it’s a more responsible way to work.
As materials become more advanced and expectations around performance and biocompatibility continue to rise, systems like this won’t be seen as premium— they’ll be seen as necessary.
And that’s the shift.
The Asiga Cure doesn’t just fit into the current workflow—it points to what the workflow is becoming.
Controlled. Measured. Validated. Like it or not, that’s where this is all heading.
Units like the Asiga Cure won’t just be part of that future... They’ll define it.
About the author
Terence Whitty is a well-known dental technology key opinion leader and lectures nationally and internationally on a variety of dental technology and material science subjects. He is the founder and owner of Fabdent, a busy dental laboratory in Sydney specialising in high tech manufacturing. Using the latest advances in intra- and extra-oral scanning, CAD/CAM, milling, grinding and 3D printing, most specialties are covered including ortho, fixed and removable prosthetics, computerised implant planning and guidance, TMD, sleep appliances and paediatrics.
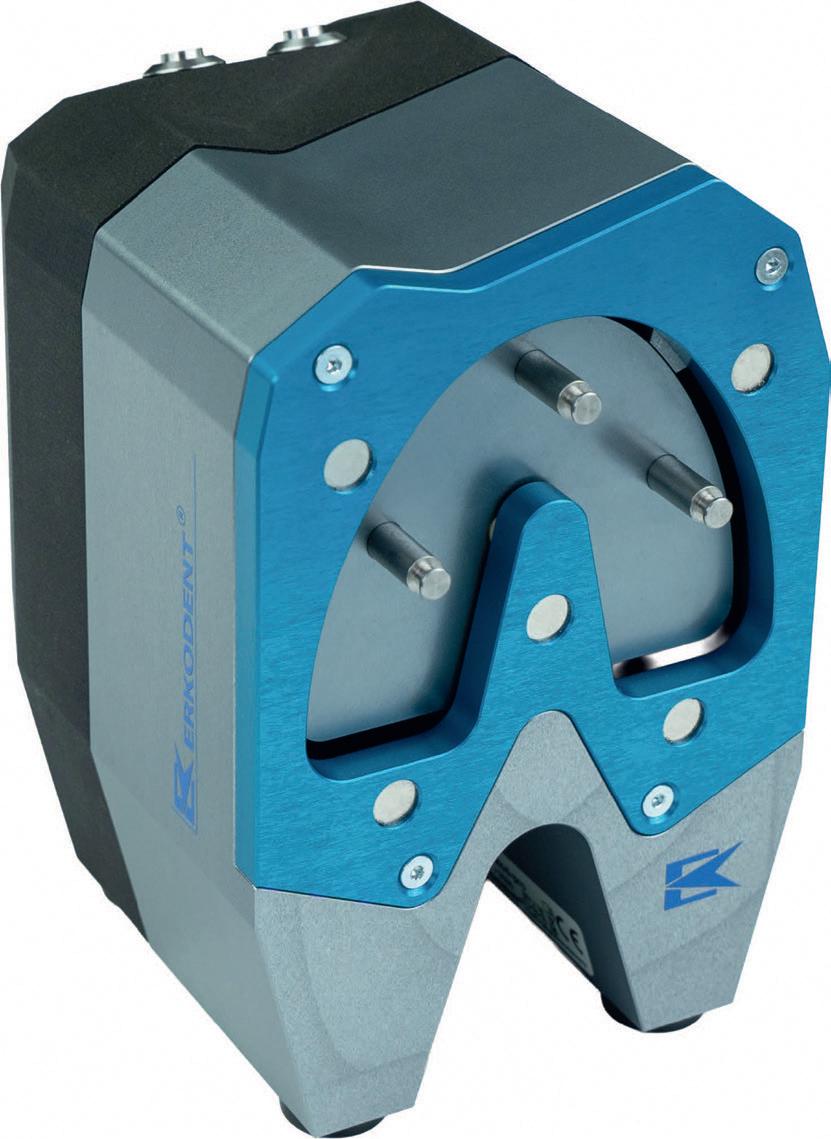
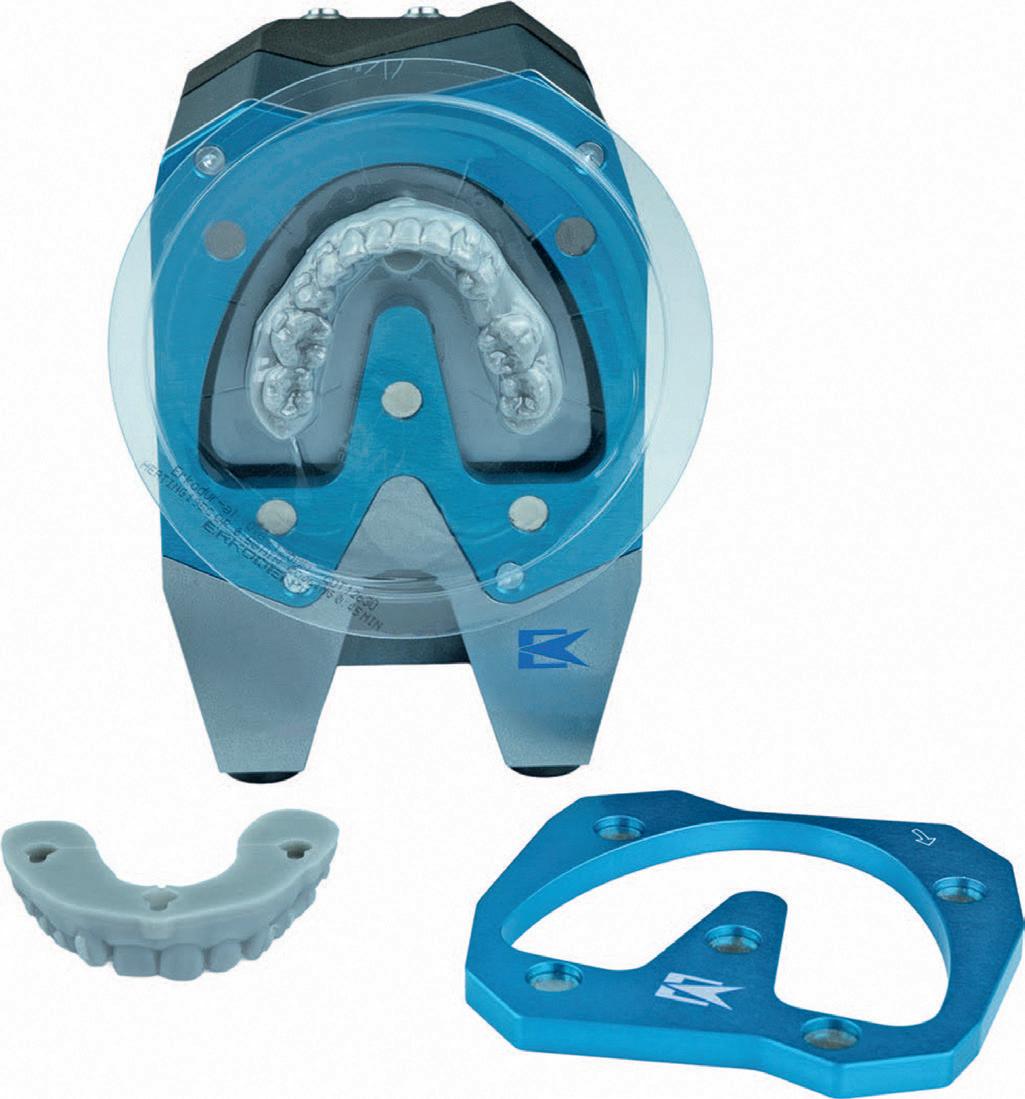
exMod-pro - automatic separation of thermoformed aligner foils from models
By Peter Herring, Adv Dip Dent Tech, ACCDP
Removing aligner foils from printed models can be a time-consuming and frustrating task. Because printed models are typically produced with minimal height and limited undercuts, there is often very little space to grip the foil securely. As a result, levering and pulling the material away from the model can be difficult and may even risk damaging the model or the aligner itself.
The exMod-pro provides a simple, efficient, and user-friendly solution to this problem. It is specifically designed to facilitate the safe and controlled removal of aligner foils, reducing effort and saving valuable working time. By improving the foil handling and minimizing the risk of damage, the exMod-pro helps streamline the workflow in dental laboratories and orthodontic practices.
exMod-pro with mounted print model and thermoformed foil, ready for separation. Suitable for all aligner/retainer foils. Print model with hook-on pockets included in the print.
Magnetic clamping template. Use for foil thicknesses ≤ 0.6 mm and for particularly soft foils.
About the author
Peter Herring is a dental technician, prosthetist and a regular contributor to eLABORATE. He is the Australasian and Indonesian distributor for Erkodent products and spends his time between offices in Perth and Bali. He also operates a busy Australian lab dedicated to thermoformed appliances. He can be contacted at pjh@erkodent.com.au or for general enquires, call Freecall 1800-242-634.
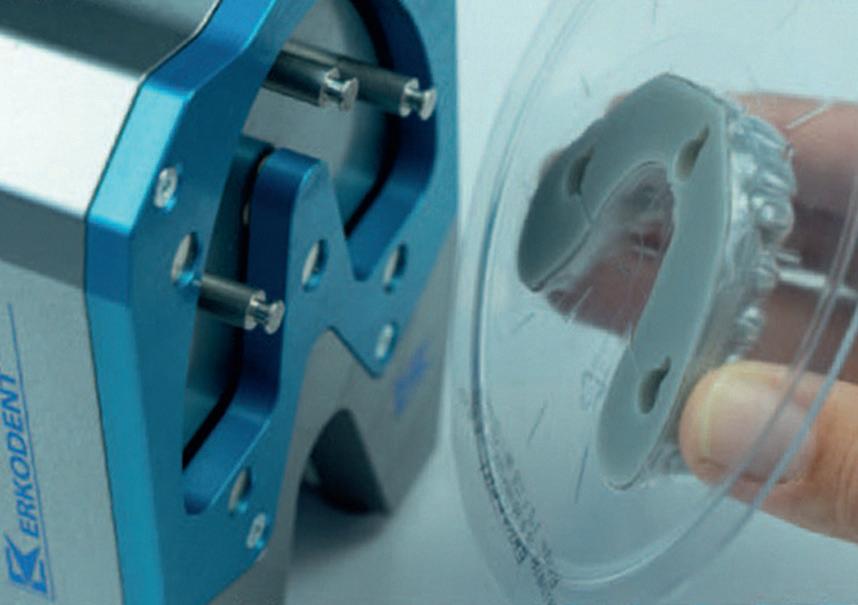
Place the thermoformed foil and print model with the hook-on pockets onto the hook-on pins and press down gently.
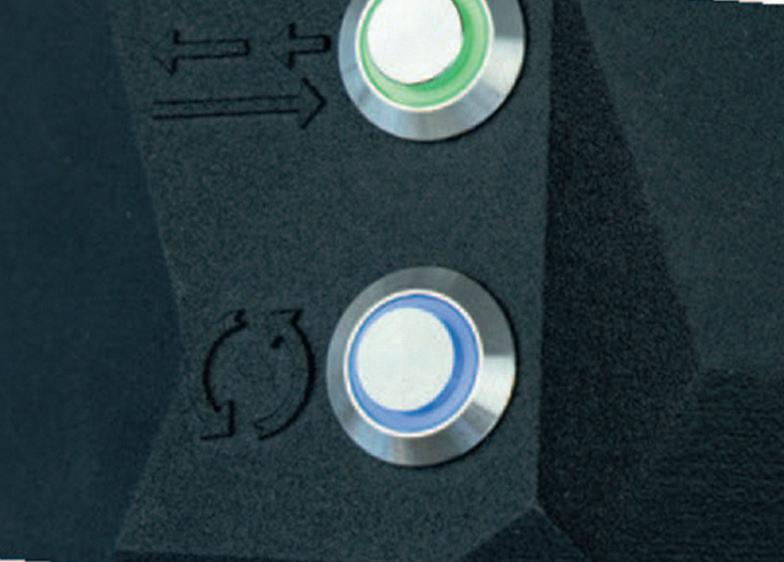
Press the blue illuminated switch to initiate the separation process. This process runs automatically.
Points to consider
1. Software compatibility
Before using the exMod-pro, you should first verify whether it is possible to integrate the STL data into your model construction workflow using your CAD/CAM software. The software must support both additive and subtractive functions, allowing you to add or remove geometry as required. The required files can be downloaded in advance for testing.
2. Model design requirements
The 3D model must be designed in a horseshoe shape and the model base must not be excessively high, as this could interfere with the proper operation of the unit.
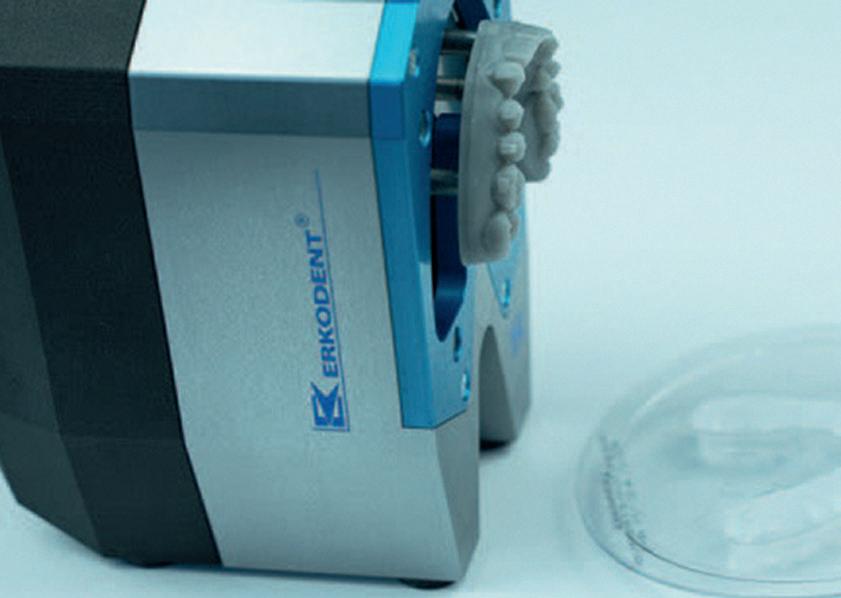
The foil is separated from the model.
Scan QR code to watch the exMod-pro video, see more information and download the STL data
Precise Thermoforming - Proven Workflows
Australia & New Zealand’s trusted partner for Erkodent products with reliable thermoforming solutions, technical expertise and education-led workflows across analogue, digital and hybrid fabrication.
• 24-hour online ordering – Fast, simple and secure
• Full technical support – Expert service, training and application guidance
Information contained in this section is provided by the manufacturers or distributors. eLABORATE does not assume responsibility for the accuracy of the data.
Mediloy® S-Co by Bego for SLM Flexacryl plastic discs
This Type 5 cobalt-based alloy contains cobalt, chrome, wolfram and molybdenum and has been specifically developed for Selective Laser Melting (SLM) production processes. Its homogeneous particle shape ensures excellent flow and consistent build quality, resulting in smooth, pore-free frameworks. Suitable for crowns and bridges, partial denture frameworks, implant prostheses and
orthodontic applications, it is compatible with major SLM systems including Renishaw, Trumpf, EOS and Concept Laser. Manufactured in Germany using advanced BEGO technology, it is supplied in a 5kg bottle.
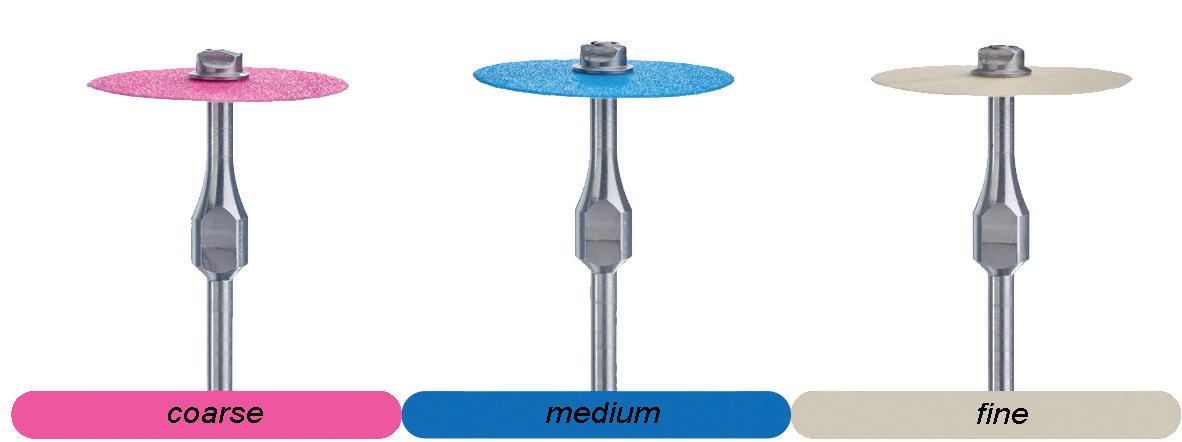
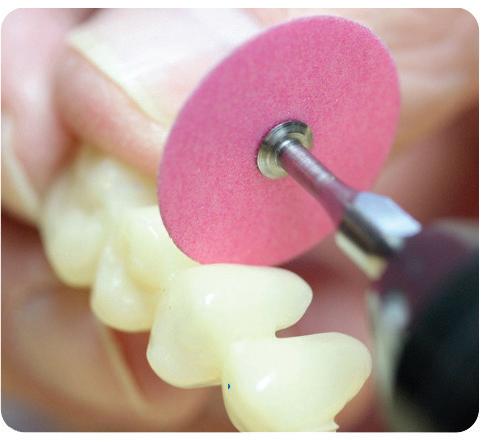
Flexacryl are flexible plastic single-sided coated discs with an abrasive grain for contouring and smoothing of acrylics and composites like the widely known “Moores ®” abrasive disc brand. These 22 mm diameter discs come with their own customised mandrel, available in coarse, medium and fine. Also available in a starter kit of 15 pieces, containing five discs of each grit and three mandrels. Refills available in packets of 50 with one mandrel included
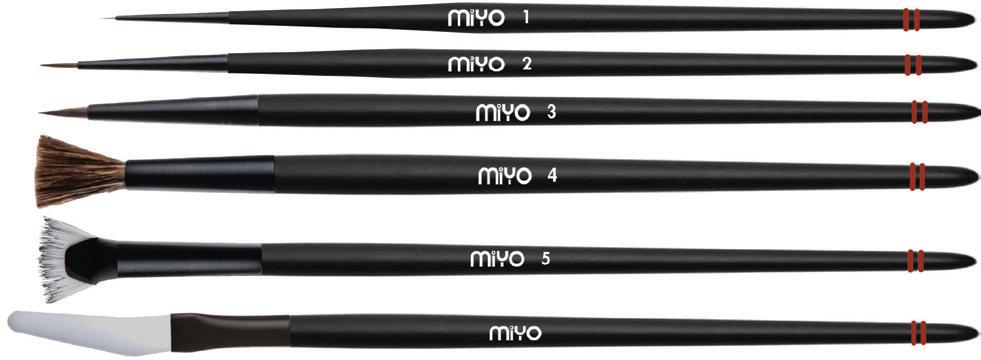
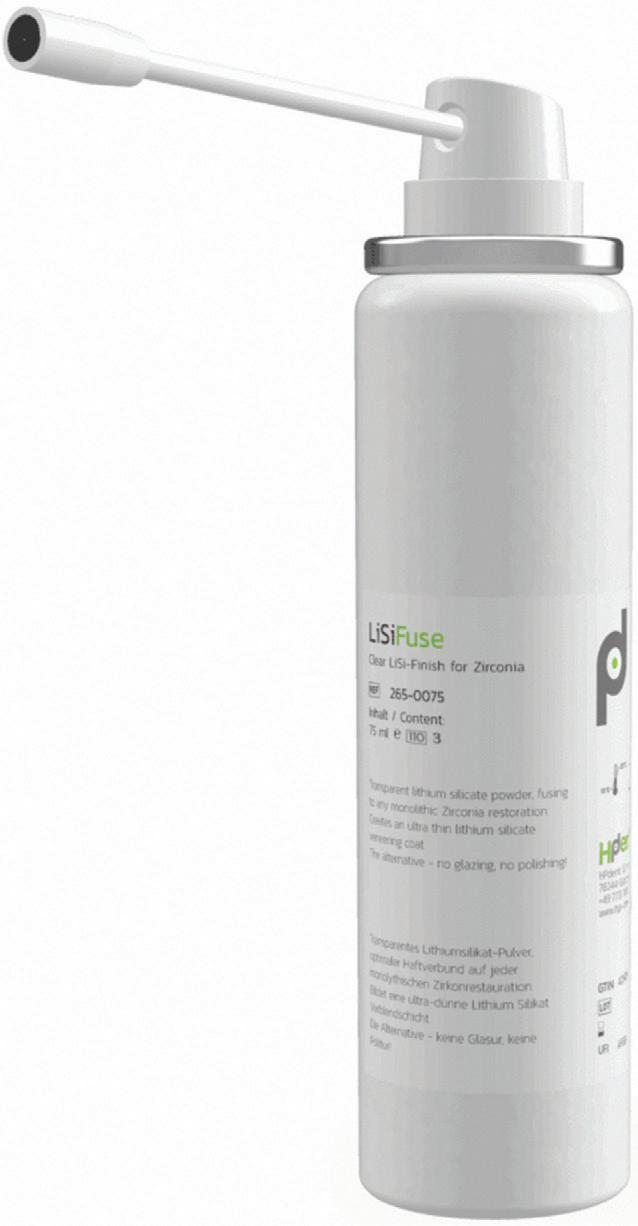
MiYO Liquid Staining Brushes by Jensen LisiFuse Connect by HPDent
The MiYO Liquid Staining Brush Set represents the latest innovation from Jensen Dental, designed to elevate both efficiency and aesthetic outcomes in dental laboratories. Far from being ordinary tools, each component in this six-piece set has been purpose-built to work seamlessly with MiYO Colour and Structure materials. From ultra-fine detailing to smooth colour application and natural gingival stippling, every brush serves a precise function. The set includes specialised Kolinsky brushes, a hybrid structure brush and a fan brush
for surface texturing, allowing technicians to achieve highly natural results with minimal effort. Completing the system is a dedicated mixing spatula, ensuring consistent material preparation. Together, this thoughtfully engineered set helps technicians work faster while delivering superior, more predictable restorations.
Available: Alphabond Dental
Tel: (02) 9417 6660
info@alphabond.com.au
www.alphabond.com.au
LiSiFuse Connect is a ready-to-use lithium silicate solution designed to enhance the surface of monolithic zirconia restorations. By creating a lithium disilicate coating on zirconia (ZrO₂), it significantly improves bonding performance while reducing the risk of cracking and chipping to below 0.1. Unlike traditional methods, this thermochemical diffusion process eliminates the need for hydrofluoric acid etching, making it a safer and more reliable option. The treated surface offers strong, stable adhesion comparable to glass ceramics, without compromising clinical placement. LiSiFuse Connect is ideal for a wide range of applications, including veneers, inlays and Maryland bridges. Compatible with all zirconia materials, it enables predictable bonding, excellent stain and glaze preparation, and long-term durability in modern restorative dentistry.