


PUBLISHER: DARC MAG LLC STEPHEN PLATT
DESIGNER: OMG - BRIAN O’NEILL
EDITOR: LIZ SHAW
CONTRIBUTORS: COVER PHOTO: JEREMY MEYER - DRIFTWELL
DREW BARRON, MATT BARTELL, JONATHAN CASTILLO, CLAY CAUFIELD, JOE FERGUSON, JOSH GEEG, LEE HODGESS, CHRIS JEDD, KENNETH KENNEDY, ADAM MAH, JEREMY MEYER, LOGAN MINEER, STEPHEN PLATT, RWD MARCUS, ANGEL SAYA, SCALE MAGIC, KONSTANTIN STANCHEV, DAVE STEVENS, BRIAN STONEMAN, TROY (ROADSIDE RC), FRANK TUCKER

DARC MAG is FREE to view online download from DARCMAG.COM
Pick up your copy also at these locations:
AMAIN 2860 Fair St. Chico, CA
Casa Drift 4629 S 108th St, Greenfield, WI
Coastal RC Drift 2561 El Camino Real, Carlsbad, CA
DARC 10420 Plano Rd #105, Dallas, TX
Drift In' 3515 Franklin St suite c, Michigan City, Indiana
Drift Manji RC 5 Valley Road, Liversedge, UK
Drift Ninjas RC 6625 Robinson Ave, Allen Park, MI
Drift Scene 315 Fingerlakes Mall, 1579 Clark Street Road, Auburn, NY
Feint! RC 2700 Commerce Pkwy Bldg, A Unit #2, Lancaster, NY
High Voltage Garage 1199 E Central Ave, Wichita, KS 67214
HobbyTown RVA RC Drift Garage 9900 West Broad Street, Glen Allen, VA
HobbyTown Rockford, IL 3782 North Alpine Road, Rockford, IL
Garage RC Hobbies 4001 East 29th Street. Ste 82, Bryan, TX
Iron City RC Hobbies 2980 Lebanon Church Rd, West Mifflin, PA 15122
Pop's Dirty South 1717 Rabbit Ln, Lake Charles, LA 70605
Prodigy RC 3231 N Decatur Blvd. Suite 134, Las Vegas, NV
RC Car World 2305 Garry Road, Cinnaminson, NJ
RC Drift Scene 315 Fingerlakes Mall, Clark Street Road, Auburn, NY
RC Driftway 3065 Cranberry Highway, East Wareham, MA
ROC Drift 1250 State Route 104, Ontario, NY
Scale Science 2255 S Wadsworth Blvd Suite G3, Lakewood, CO
Scaletopia 5007 Victory Blvd, Yorktown, VA
Shaka Hobbies 1204b State Hwy 110, Whitehouse, TX
Super G 1376 Maine Ave, Baldwin Park, CA
TCRC Drift 2465 North Main Street, Suite 3C, Sunset, UT
THS - The Hobby Shop 900 Lacy Dr, Leander, TX 78641
Tandem RC - Mesa, Arizona 909 S Dobson Rd #19, Mesa, AZ
Triple Crown RC Hobbies 2825 Epperly Drive, Del City, OK
Vertex RC 5595 Magnatron Blvd t, San Diego, CA
Zero Traction 500 Polk St suite 9, Greenwood, IN
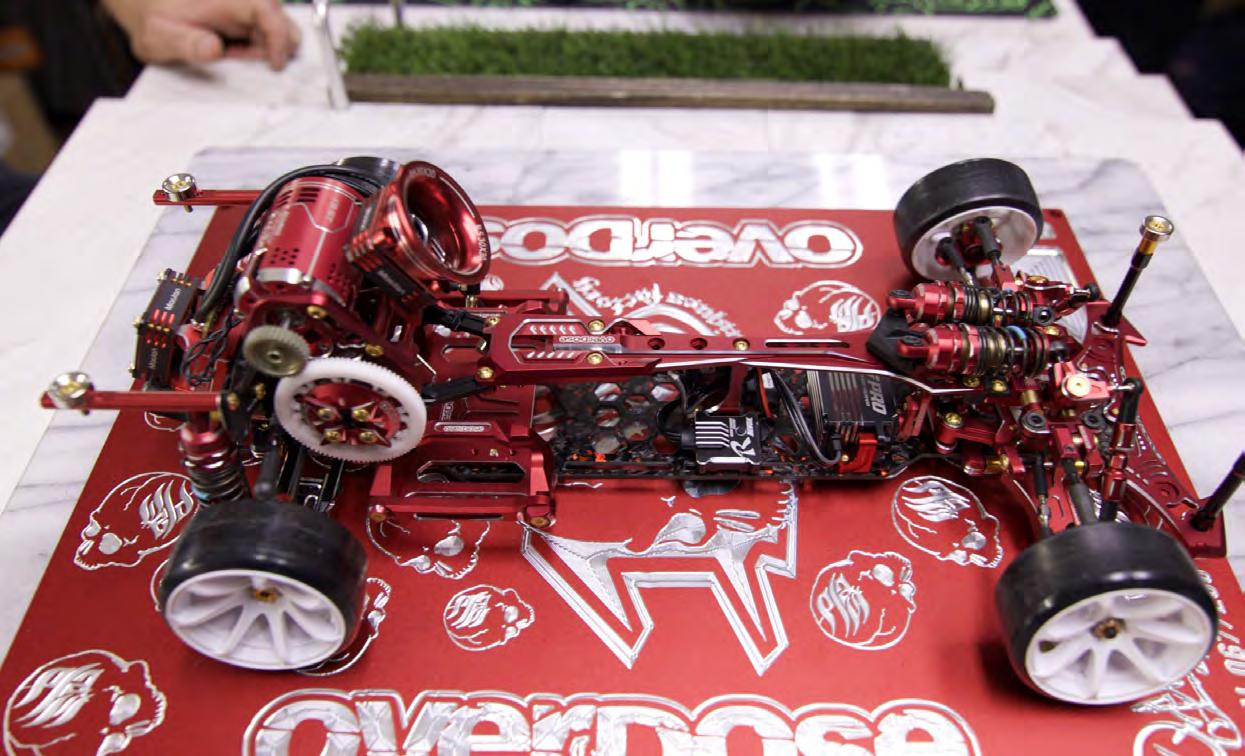
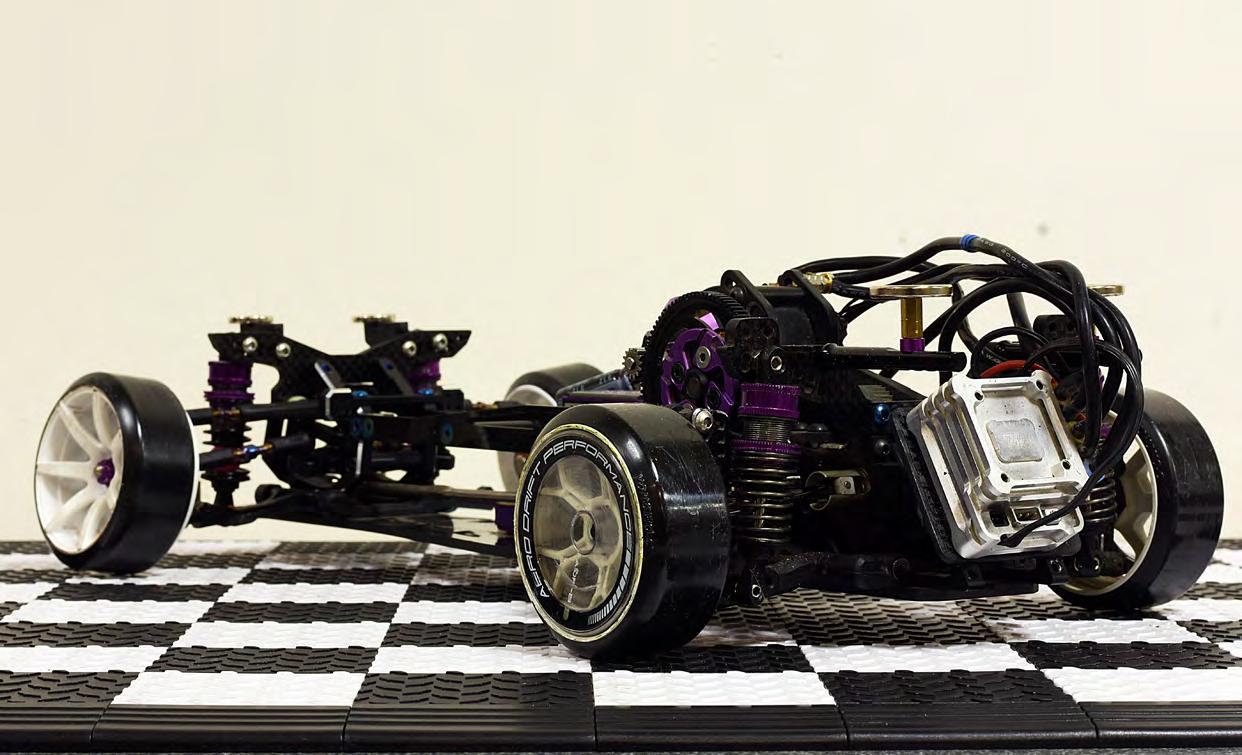
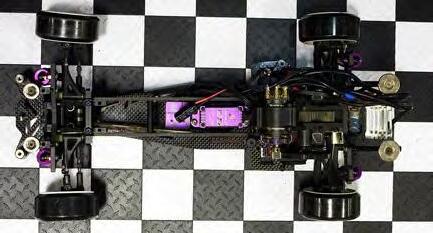
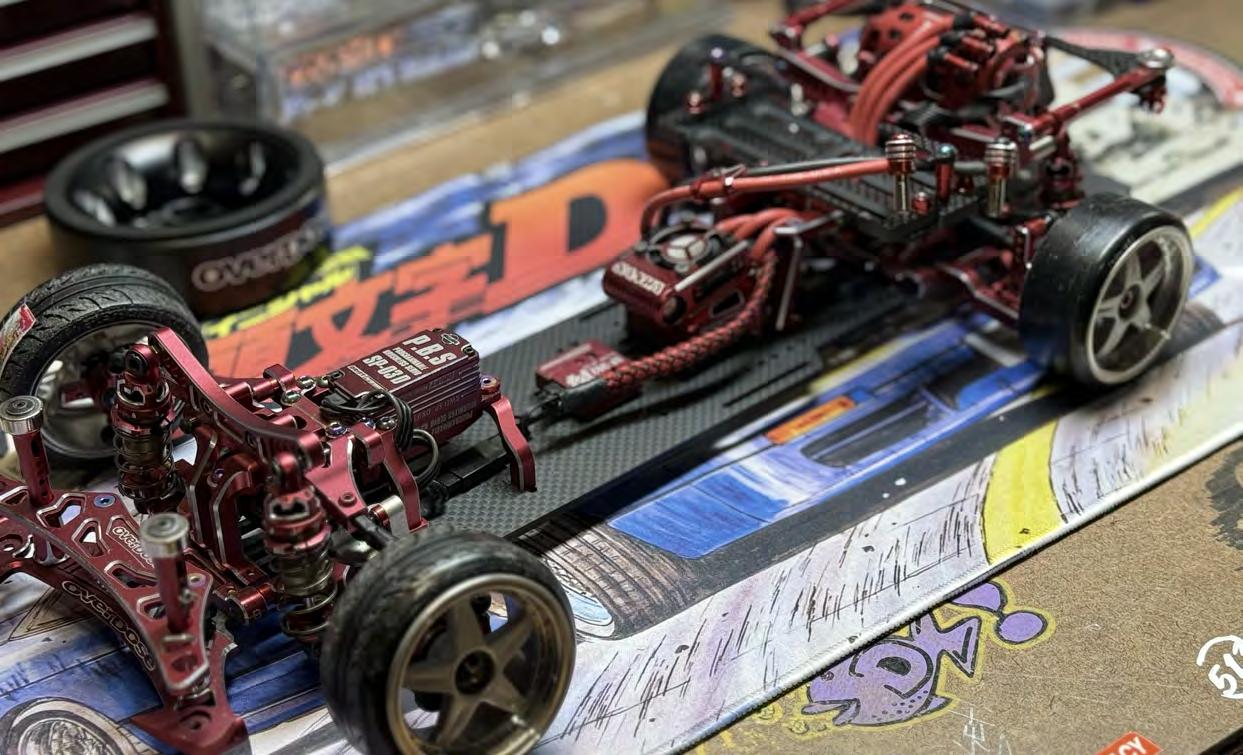
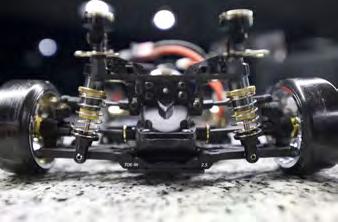
I started my Overdose GALM build earlier this year, and I’m still pretty new to the whole Overdose world. I picked up this chassis a couple of months ago and have been working on it since. There’s no big conversion on it, just a lot of aluminum parts. Some of them are still mix-matched colors because I’ve been trying to find red parts for the car, but they’re not easy to come by. One thing I did swap out was the GALM deck for a Bingo TR deck, just to make it a little more unique.

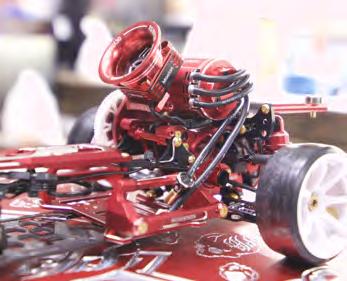
For electronics, I have a full Acuvance setup. It makes things simple, and my whole team stands behind that brand, so it’s easier for us to share tunes and stay on the same platform. I’m running an Acuvance RAD ESC, an Onisiki capacitor, and an Acuvance 13.5T Agile motor with a Level 42 rotor. I also use an Acuvance Trace Bector capacitor for some extra reserve when the turbo kicks in. For the servo and gyro, I’ve got a Reve D RS-ST Pro servo and a Reve D Revox gyro. My radio is a Noble NB4 Plus.
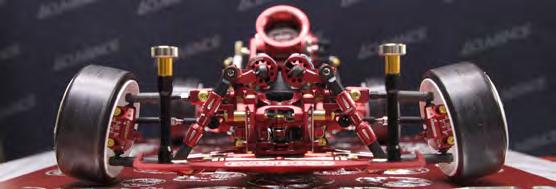
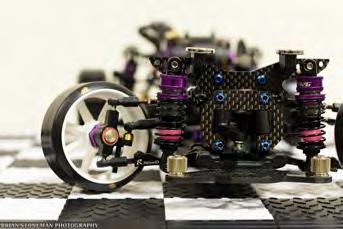
I’m going for that all-red-andgold look on the chassis, with gold hardware. It’s a work in progress, but

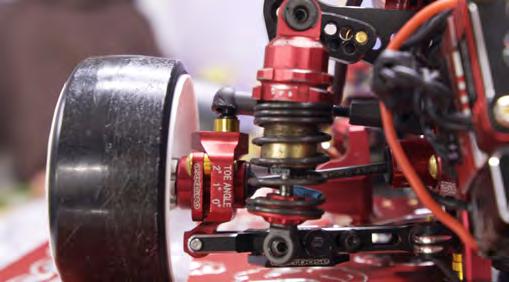
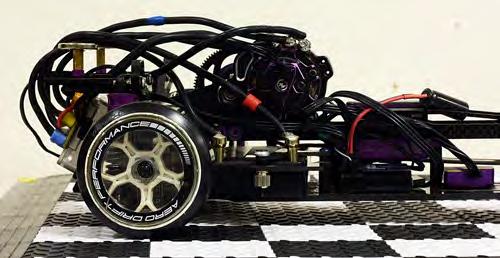
I’m getting there. For the damper setup, I use 10 and 15 weight Overdose shock oil - soft up front and even softer in the rear, so the car squats a bit. Up front, I run -12° camber and 1° toe out, with the Ackermann just slightly off-set parallel. For the rear, I’ve got -2.5° camber and 1° toe in. I stick with the Overdose ball diff.
If you’re wondering about the price, these things can go for almost $3,000 fully optioned with electronics. Mine’s just a couple pieces shy of that. As for how it drives, it’s smooth and handles well. It can get right on people’s doors and puts the grip down when you need it. All round, it’s a fun car to drive, perfect for throwing down at a Matsuri or a comp. I’m still learning and adding to it, but that’s half the fun.
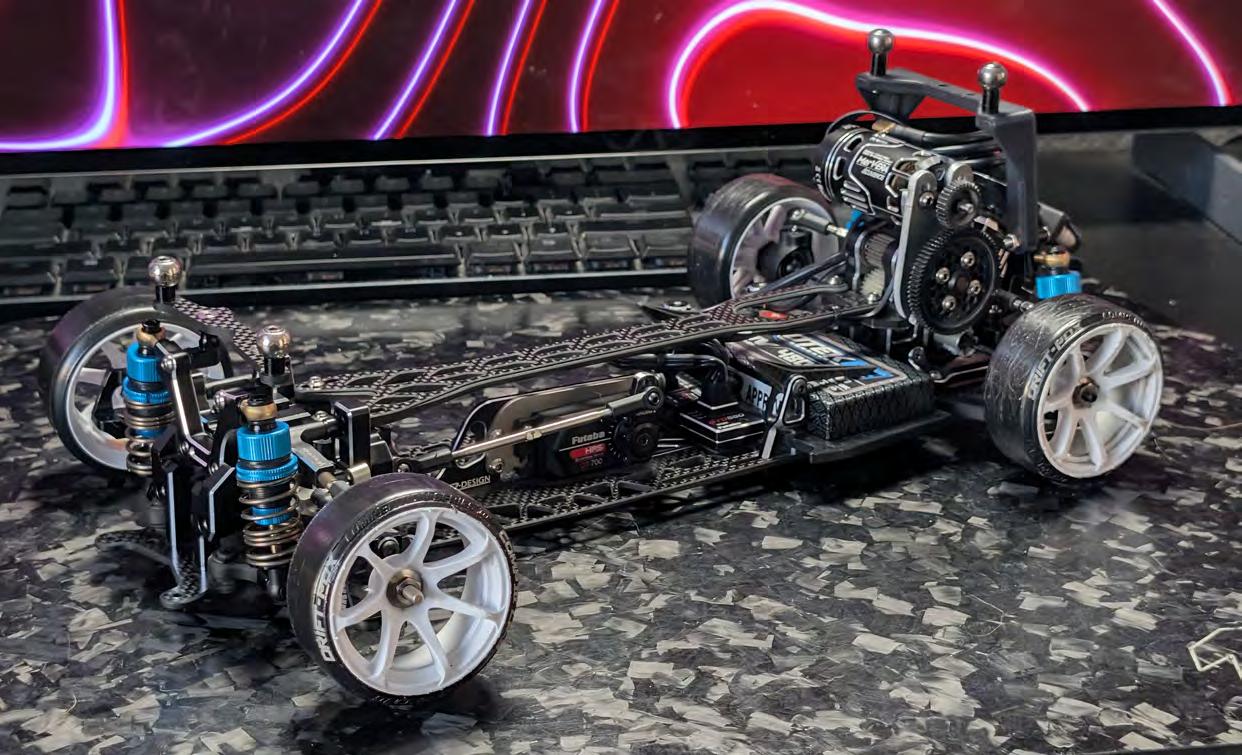
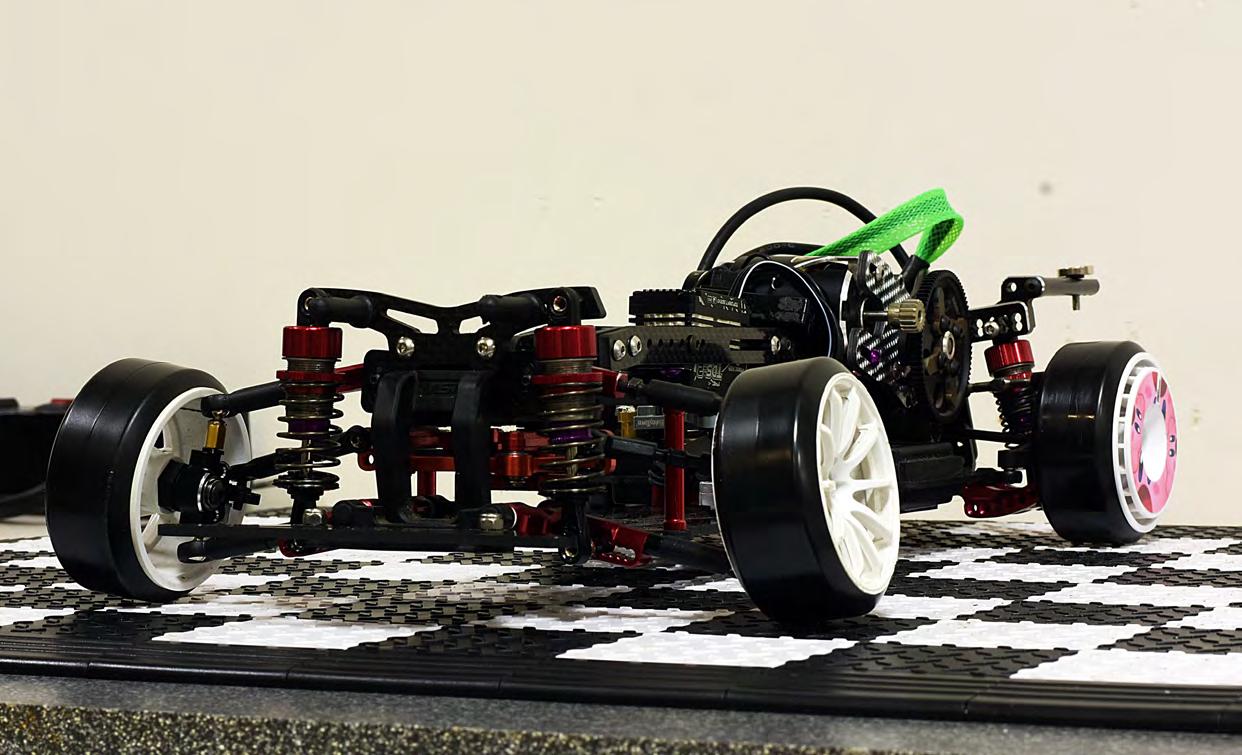
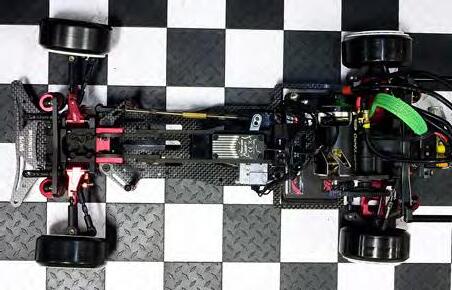
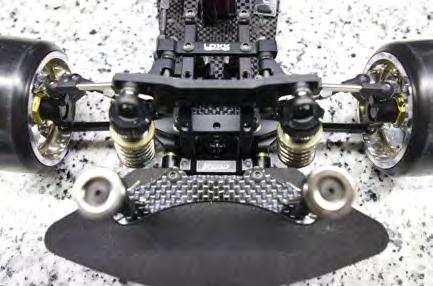
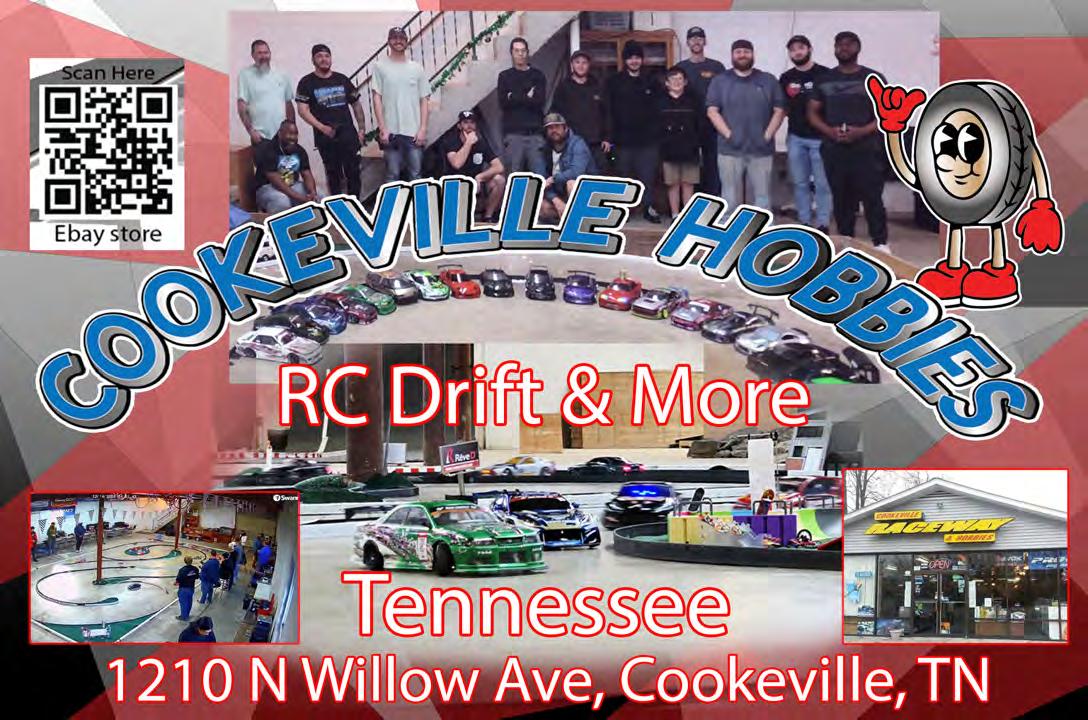
The foundation of this build is the Yokomo MD 2.0 chassis which I purchased in February 2024, paired with the R-Design FA 1.0 Isogrid conversion. This particular setup is a prototype, making it pretty rare - only a limited number were produced and sold.
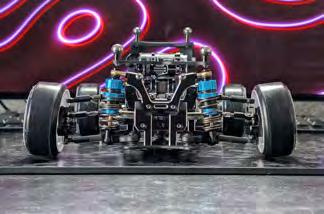
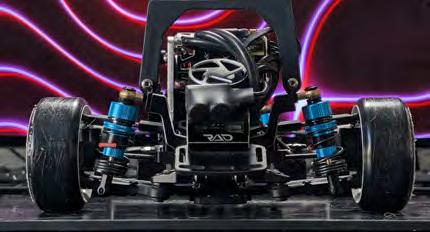
The fundamentals of my setup are low centerof-gravity, low moment of inertia, and as much rear weight as allowed by the rulebook. Steering is handled by HikoTech V.I.A. knuckles and I fully adopt the HikoTech strategy on the front, 0° caster. This allows for 0° camber change throughout the steering arc. I haven’t come across anyone else that fully runs 0° caster with an included angle setup like the HikoTech knuckles. I know of others that use them, but I haven’t seen any others that run 0° caster.
The chassis is dressed head to toe in 1up Racing hardware, including screws, bearings, lockdown plugs, turnbuckles and more. The suspension system uses TRF dampers combined with the RC Art UC conversion and stock pistons filled with 35wt oil in the front and 30wt in the rear. The front springs are relatively stiff, though I’m not too sure of the exact specification. I use ReveD red springs in the rear.
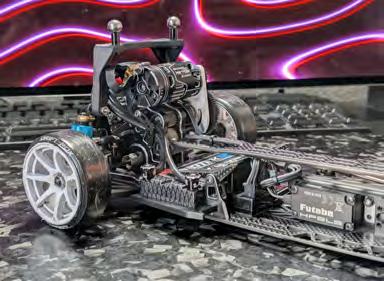
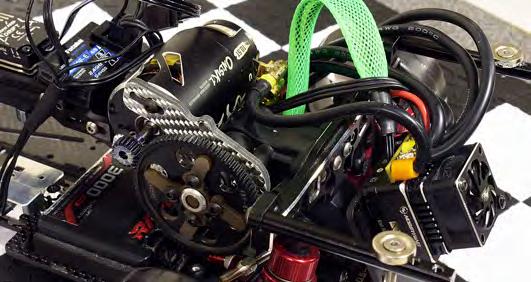
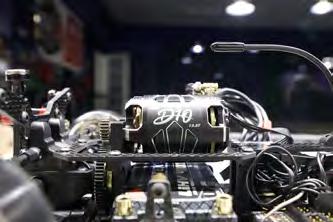
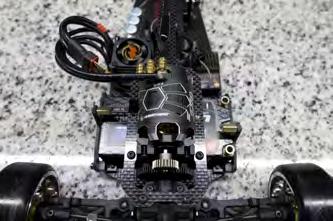
The differential is a CLSD (Closed Limited Slip Differential) setup, with a bit of grease, four gears, and hard springs. The electronics set up are Futaba and Acuvance, I just love the convenience of remote tuning. I use the Acuvance Rad ESC and Merv Era 13.5 or 10.5 motor, depending on the situation. Paired with the Futaba 550 gyro and CD700 servo, I get the exact feel out of the car that I want.
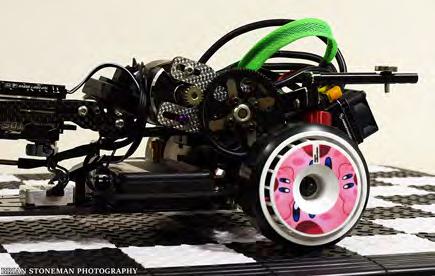
The front features a slight toe out, approximately 1°, and around 1.5° Ackermann. The rear has about 2° of toe in with the camber set at -4°, though my current tire wear brings this effectively to zero.
It’s hard to estimate the base retail price for this chassis, I wouldn’t be surprised if it was approaching $2,000. With the electronics, it’s priceless. I love it too much and wouldn’t sell it, as in its current form it’s irreplaceable.
On the track, this car is a joy to drive, delivering high stability and control. It is capable of holding deep drift angles without significant speed loss, offering a consistent and fun driving experience.
This build is a Hikotech Bianca 2.1, assembled using an RDX donor chassis. In practice, that means the toe blocks, arms, and knuckles are sourced from the donor, while about 90% of the components are RDX parts I already had on hand. The chassis was produced in 2022, and I picked mine up in 2023. Although this setup isn’t exactly rare, it’s not something you see very often in the RC drift scene.
The front end is equipped with Reve D ASL lower arms and SD knuckles, which provide precise and responsive steering. The rear remains as stock RDX components, but I’ve upgraded to Reve D aluminum hubs for added durability. All the hardware is finished off with Klinik RC titanium turnbuckles and screws, keeping things lightweight and strong.
I’m running MST TR56 dampers with WUN soft weight shift springs in the back to help maintain stability during aggressive transitions. The differential is a CLSD set to ‘8-soft’, which makes the car smooth and consistent through flicks and transitions.
Power comes from a HobbyWing D10 motor with a Level 2 rotor, paired with a colorstripped XD10 ESC. I rely on a Yokomo DP-302 V4 gyro in all my chassis, and in this Bianca, it’s paired with the rare Reve D RSST Anniversary Edition servo.
For alignment, I usually run about -5° camber up front with as little toe out as possible, aiming for maximum grip and angle. In the rear, I set 0.5° camber to accommodate the heavy roll center, allowing the chassis to roll flat during transitions. I also run bump stops in the front shocks to keep the setup under control.
With plastic arms, the total cost for this build is around $1,100. Out of all the chassis I’ve owned and driven, this one stands out for its consistency and its ability to handle big flicks - it truly performs best when pushed hard.
This RC drift chassis features an MST RMX 2.5 base with a rare Drift Hard Parts Zeus conversion - one of only three known builds. The main reason behind the Zeus chassis conversion is the ability to swap for the YD-2 transmission. In fact, it can be swapped to an RD-2, SD-2, or Team AD gearbox.
It includes a mounting plate to adapt the transmission case to the vertical upper deck. It’s equipped with MST TR56 shocks (10wt all around) and a CLSD 8 soft diff. The electronics package includes the Hobbywing XR10 Pro ESC and an Onusiki Kikoku 10.5 motor for standout performance and sound. I stick with Hobbywing because I’m used
to tuning it and the Kikoku because it’s by far the loudest motor I’ve found. I also run the Yokomo DP-302 gyro and the Power HD TDS2 servo. My radio of choice is the Futaba 7PX.
The front runs -6° camber and slight toe-out; the rear has -1° camber and 1° toe, with active toe adjustment. I’ve always been a huge fan of the RMX front end. The Zeus is the best of both worlds and gives a chassis that’s been slept on a chance to thrive. I honestly have no idea what it’s worth. I’ve seen some fully built RMXs go for $300. With all the time I have put into this chassis design to fit the Yokomo transmission, I wouldn’t part with it.
It drives like nothing else. The RMX 2.5 is one of my favorite front ends, so pairing that with the old dependable Yokomo transmission was everything I personally could have asked for in a chassis.
This RC drift chassis is based on a YD-2 EX2, originally released around 2019. The build started as a half-completed E model with the slide rack steering system. It now features a Topline 3.0mm smart chassis lower deck and a red Addiction transmission, which converts it from the E to the R variant. The Addiction transmission was sourced after more than three years of searching, finally acquired from a Japanese market site.
Key modifications include GRK5 rear and front hubs, Overdose front bumpers, an Overdose spur gear cover, and a WrapUpNext high mount battery tray. The damper setup consists of Overdose HG 4 dampers with 10wt oil and stock piston holes, combined with Yokomo soft springs all around. The differential is a Rhino Racing CLSD.
The electronics package includes a Yokomo SP-03D servo, Yokomo DP-304 V4 gyro, and a Sanwa Super Vortex type D ESC. The motor is a Yokomo Type R, selected for its smooth power delivery. The radio system is a Sanwa M12 gold edition.
For alignment, the chassis runs at least 10° of camber in the front to achieve realistic fitment and appearance, with 1° of camber at the rear. The rear also features an active camber setup using a short upper arm, which increases camber under squat and enhances roll center. Toe is set to 1° in at the rear and as close to zero as possible in the front. The Ackermann is kept mild, allowing the lead wheel to approach 90° of steering angle while the trailing wheel remains slightly behind.

The build also includes D-Like hopping bone rear axles with spring-loaded telescoping length and full titanium screws. The total estimated cost, including electronics, is approximately $2,000.
This chassis incorporates components from all my favorite companies: Sanwa, Topline, Overdose, Yokomo, RC Art, and WrapUpNext. After building three other YD-2s, this example stands out for its planted, predictable, and agile handling characteristics, especially for a rear motor setup.

Article and Photography by Lee Hodgess
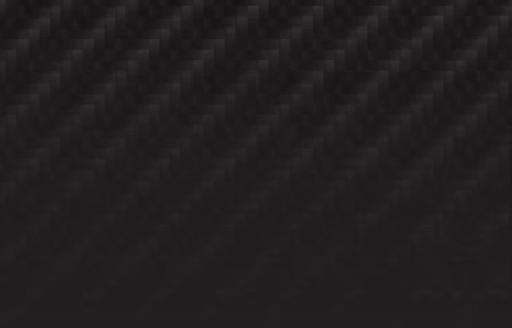
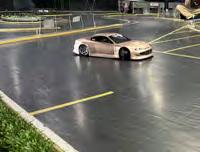
I was fortunate enough to be invited to handle the photography and media for RCDrift.io at The Main Event competition, which took place in November 2025 in Birmingham, UK. What an incredible culmination to the RCDrift.io 2025 season it proved to be!
RCDrift.io’s vision is to elevate the sport by standardizing rules, structure, and qualifying procedures across the UK, Europe, and beyond. Their system uses results from regional ‘feeder’ rounds to calculate driver ratings, which determine eligibility for major competitions. This approach is designed to unite RC drifting worldwide, allowing competitors from all countries to enter based on their qualifying standing.
This year’s competition was massive, spanning numerous tournaments and attracting significant participation. Across the campaign, 102 drivers battled it out in 695 matches over 14 feeder rounds, all leading up to this final showpiece. The atmosphere at The Main Event was electric, welcoming the UK’s top drivers alongside eight international competitors from Europe. Held over two action-packed days, everyone witnessed some of the best RC drifting the sport has to offer.
ONE: International Qualifying & Practice was a whirlwind of activity, featuring the International Qualifying Session, group practice, and secondary track time. The schedule was jam-packed: 9:00am inspection, 9:30am drivers’ briefing, 9:45am practice, 12:00pm International Qualifying, and final practice wrapping up at 10:30pm.
The International Qualifying Session was reserved for the eight international drivers, whose results were calculated into the existing Driver Ratings and used to set the battle bracket standings. The qualifying was spectacularSebastian Thorley stole the show with the highest position among the international drivers with an absolutely pristine, wall-to-wall, box-to-box run, followed closely by Dennis Bjorn and Vincent Jacquelin. The international contingent set a high bar, pushing the UK drivers to new heights. Throughout the day, UK talents Ryan Addis, Dan R RC, Rory Edwards, and Henry Ford delivered standout performances.
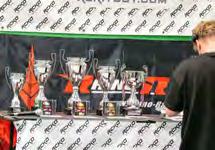
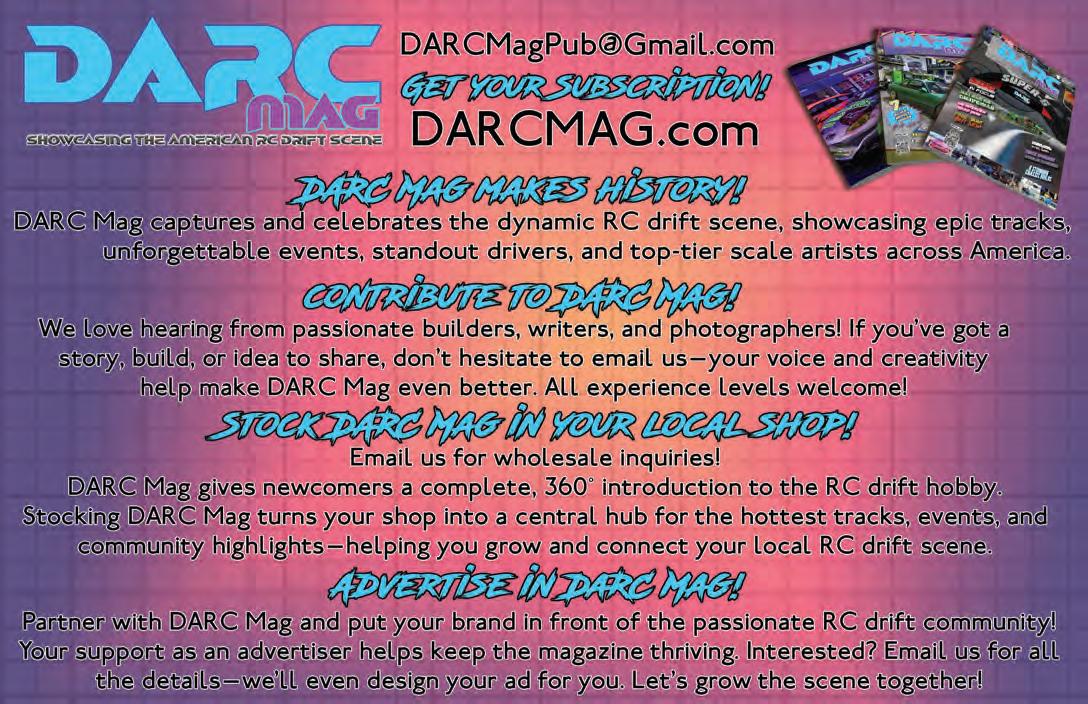
Clubs from across the UK inspired everyone, joining together, helping in the pits, and having friendly battles in practice to gain an edge. The stakes were high, with a prize purse of £1,200 for first place, £800 for second, and £460 for third, alongside generous gifts from sponsors. Huge thanks go to RCKO (RCKITOUT.COM), Meguiar’s, Zerofeel, MST (Max Speed Technology), Team Yokomo, MB Models, Power HD, DS Racing, TEAM AD, and Rhino Racing for their support.
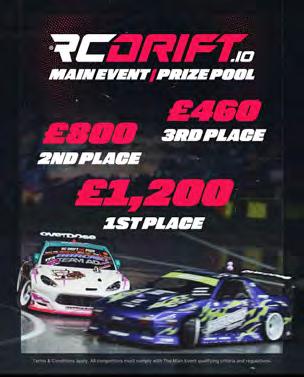
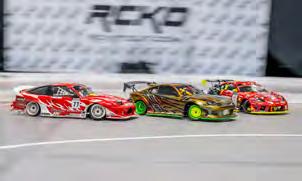
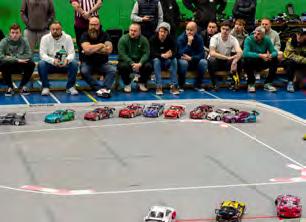
DAY TWO: The Main Event Battles Day two brought a different energy; the hall was filled with excitement and competition nerves. The seats were set, the livestreams were rolling, and it was time for the double-elimination knockout tournament. The competition level was outstanding. The car bodies looked amazing, and the drivers displayed exceptional skill, making
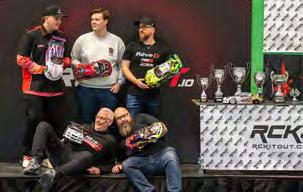
very few mistakes all weekend. Still, critical errors affected the season’s final standings. The crowd of supporters, families, and friends created a vibrant, supportive atmosphere. Judges had their work cut out, with multiple reruns due to the tightness of the battles. A year of hard work by drivers and organizers was drawing to a close, marking a step forward for professional and competitive RC drifting. The Main Event featured 128 battles, culminating in a thrilling final showdown. Many expected the international drivers to sweep the podium, but by day’s end, two UK drivers took first and second, with an international competitor securing third.
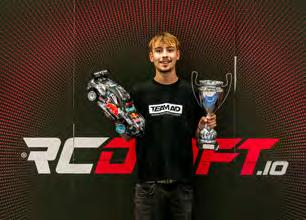
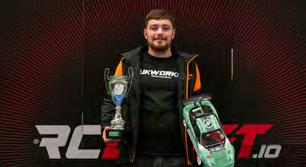
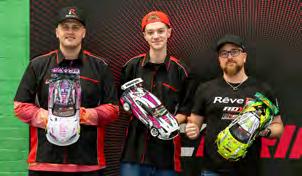
With several UK favorites and top European names exiting earlier than expected, the podium was wide open for Henry Ford, Dan R RC, Dennis Bjorn, and Simen Gulbrandsen. The finish couldn’t have been more thrilling. Henry Ford took the win with smooth, fast, and consistent closequarters drifting all day. The crowd cheered him on as the judges awarded him the top spot - a well-deserved victory. Henry was reunited with his father, John, who he had faced earlier in the competition - a true highlight capturing the fun, excitement, and family spirit that defines RC drifting. Dan R RC earned a hard-fought second place, driving exceptionally all day, but Henry’s pace, proximity, and speed secured the final battle. Dan’s dedication throughout the season was commendable. Dennis Bjorn took third, representing the international field with exceptional skill, while Simen Gulbrandsen finished fourth. Special mention goes to Rory Edwards, who finished ‘Top of the Season Points Tally’, an incredible achievement, even without a podium finish at The Main Event.
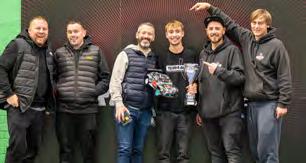

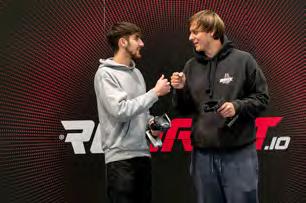
The final battles were razor-close, with Sebastian Thorley and Vincent Jacquelin facing each other twice in memorable matchups. After his win, Henry Ford shared, “I can’t thank everyone enough for all the help and support I have received this season and today. First, a massive thank you to my sponsors, Team AD and SL1D3. Second, a massive thank you to my family and supporters for all the cheering and pit support I have received. It was such a great honour to win this event, especially given the current UK drivers and the best in Europe - it makes me very proud. Finally, thank you to RCDrift. io for setting up this incredible season and final event. Here’s to another fantastic year of drifting next year.”
The event ended in a mix of celebration and bittersweet farewells, especially as the international drivers departed after a season of hard work. RCDrift. io is redefining how drifting is experienced, presented, and competed on a global scale. Their dream is to make RC drifting more professional, with more sponsors, livestreams, and accessible events for everyone interested in joining this community.
Join us on this journey and help make worldwide RC drifting more visible and accessible for future champions like Henry, a young driver from Bristol, sponsored by Team AD, now standing atop the podium. His win proves that age and experience matter less than having fun, enjoying the competition, and giving your best. I hope to see even more drivers and sponsors from the UK, Europe, and the rest of the world come together to support this amazing community.

Follow Lee on Facebook RC Goats
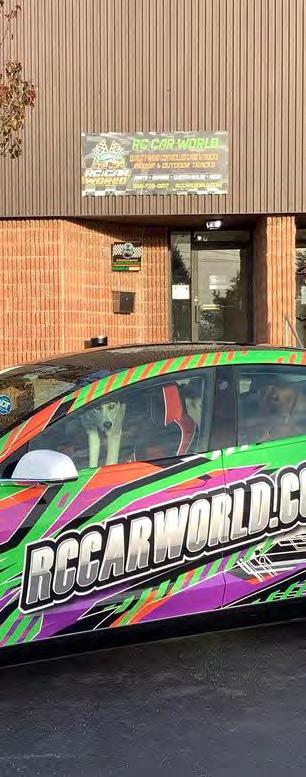
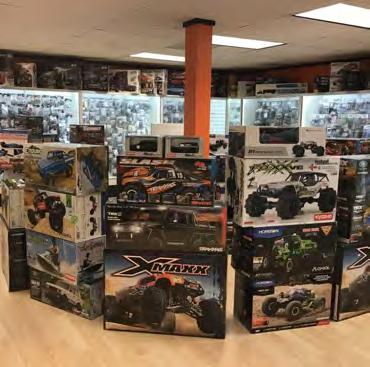
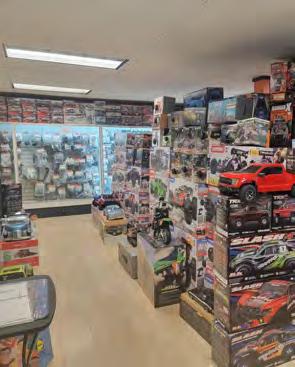
RC Car World (RCCW) isn’t just a retail shop; it’s been a pivotal force in the global RC drift community for over a decade. Since 2013, owners Mike and Gia Sienczenko have cultivated a thriving hub, evolving from a humble carpet track to epoxy, and now state-of-the-art P-tile, continuously pushing the boundaries of the sport. What began as a small local spot has blossomed into one of North America’s premier RC drift tracks, even hosting legends like Tetsujin’s Atsushi Mizunaga in its early days.
A pivotal moment arrived in 2019 when five drivers who weren’t well-known—including Berto Cosse, Rob Fischetti, and Alex Jordan—representing RCCW and Team Endless, descended upon the US RC Drift Championships in Houston. Against a field of top talent from across the nation, Berto Cosse emerged victorious, claiming the coveted title of US RC Drift Champion. This monumental win wasn’t just a personal triumph; it firmly cemented RCCW’s reputation on the map, drawing drivers from coast to coast eager to experience our signature aggressive drifting style and the vibrant personalities that define our community.
The momentum continued as Alex Jordan took the helm as track curator and coach, a role in which he continues to elevate drivers and sculpt the Northeast drift scene. RCCW has served as a crucial proving ground for many prominent and sponsored drivers, who honed their skills here before making their mark nationwide. This commitment to progression led to the founding of the Scale Drift Series (SDS) at RCCW, a competition designed to mirror the authenticity and intensity of 1:1 drifting more closely than any other major event worldwide.
Today, RCCW is a magnet for top talent, regularly drawing drivers from across twelve states—NJ, NY, CT, NH, DE, MA, PA, RI, MD, ME, VA, WV—and even Quebec during intense SDS rounds. Our track becomes the ultimate monthly proving ground where the Northeast’s best vie for supremacy. Our drivers, like SDS and North American Championship (US/CA) winner Anthony Torres, are not only dominant on our home turf but also seasoned competitors on the broader international stage, frequently traveling to compete at other prestigious events, including the annual North American Championship in Quebec.
Beyond the fierce competition, RCCW offers a truly unique experience. Saturdays and major events pulsate with an energy akin to a Grid Life festival, creating an unforgettable atmosphere. Expect genuine Jersey hospitality: no drama, just a welcoming vibe filled with lighthearted banter and friendly trash talk. Spontaneous challenges and call-outs are a regular occurrence. Do you believe you have what it takes to be the best? Come test your skills, soak in the unparalleled vibes, and become part of the RCCW legacy!

Ready to prove you're the Midwest's best on the RC drifting circuit? The Midwest Drift League (MDL) is the premier regional RC drifting competition, uniting five dedicated tracks across five states: Indiana, Illinois, Michigan, Minnesota, and Wisconsin. This non-traveling, points-based series allows you to battle top drivers at your home track, earning crucial points throughout the season.
All roads lead to the ultimate showdown: a centralized Championship Final where the MDL's top contenders will collide to claim the title and regional bragging rights. Don't just drivecompete! Find a participating track near you and join the league that's raising the standard for RC drift competition.


DARC MAG PRODUCT REVIEW
BY KEN KENNEDY - PHOTOS BY DREW BARRON
Our initial thoughts when taking the Louise LDXX out of the box were…. everything fit together well and we were impressed with the overall quality. We are familiar with the Hobbywing XD10/D10 Drift Combo and know it to be smooth, responsive, and reliable, allowing us to fairly assess the throttle response of the WFly X9S Radio. We opted for the tried-and-tested Yokomo SP-02D servo and DP-302 V4 gyro to ensure reliable gyro lock and smooth servo response, giving the chassis a fair chance to perform.
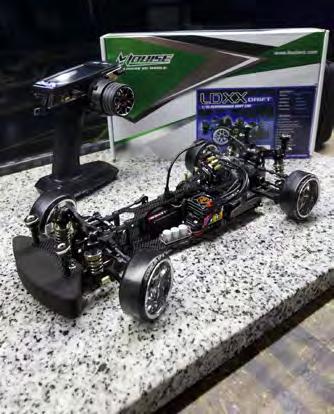
The Louise LDXX went together beautifully. The screws are high quality and there is a metric ruler on each page of the manual, which makes identifying screw sizes straightforward. We’ve stripped screws on other kits, but not on this one. Having the bags numbered for each instruction step would have been helpful, as the current packaging isn’t sequential. The manual has instructions to assemble a gear differential, ball differential, and dampers, but this kit came with a prebuilt ball diff and dampers. We couldn’t find an optional ball diff with steel outdrives available for this chassis, but the LNBA308 metal gear diff appears to have them. The rear differential outdrives are plastic with a steel ring for reinforcement. We still rebuilt both, the dampers needed oil anyway. The front and rear dampers are different lengths, so the springs are specific sizes for front and rear. Several parts that initially looked like plastic were actually aluminum, which was an unexpected surprise. The kit includes an aluminum front bulkhead, and a delrin plastic gearbox. The upper and lower deck, front and rear shock towers, and body mounting bracket are all carbon fiber. The bell crank wiper set is all aluminum, along with the front upper and lower arms. Several shims are provided for the arms, giving the option to tune a more precise steering setup with minimal ‘slop’.
The front knuckles and rear arms use delrin plastic. While aluminum is preferable for durability, the plastic parts perform well for now. Covered in RWD Marcus’ ‘Basic to Advanced Tuning Front-End Geometry’ article in this issue, these knuckles are fixed and have a little bit of a fixed KPI offset in the front. Caster is easily adjustable, using the upper arm grub screws for fine-tuning. KPI is not adjustable with these knuckles, as with most kits. These knuckles are, however, small and give great clearance, which is how it achieves 85° of steering angle. They can be changed to any brand and you could always tinker and try some others with more tuning options. The caster was set well as per the manual. The adjustability isn’t overwhelming, making it beginner-friendly. We started with the suggested tuning settings, but may decide to retune after more

track time. On our P-tile track, the recommended settings worked well.
The aluminum hex mounts and 25T servo horn are both nice touches. Compared to other kits, this one offers more aluminum parts out of the box. The motor mount position is high-mid inline and does not have the increasingly common option to change position. There are still other options to change the center-of-gravity or weight balance through battery and electronics placement. There’s a space for the LOUNHA434 anti-sway bar on the rear gearbox, and the droop and damper travel are impressive. We adjusted the rear lower arm spacers for wheelbase fit, which worked well with the HPI body. We used longer screws and spacers to extend the body mounts, opting for Racers Edge Magnetic Body mounts for flexibility. Everything fit well and required no modification. We didn’t strip any screws, and the aluminum/carbon fiber build was impressive.
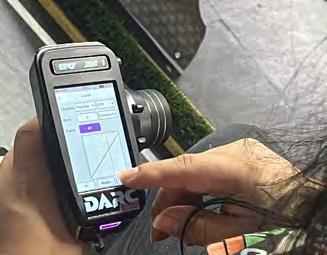
We’ve used the Hobbywing XERun XD10/D10 drift setup extensively. We set the boost and turbo to 15 (our standard starting point) and left most of the recommended stock settings, which we feel are good for newer drivers. Once the chassis (and driver) is under control, we like to bump up the boost and turbo to 20. The XERun XD10 ESC offers advanced timing options for turbo, boost, and boost start RPM that are not offered on standard non-drift ESCs. These options are all based on personal driving style. The D10 combo is a great upgrade from entry-level ESCs like the 10BL120. It looks sleek in black, matches the chassis, and delivers smooth, responsive power. The combo worked seamlessly with the WFly X9S radio, giving us excellent low-level throttle response as well as immediate turbo response.

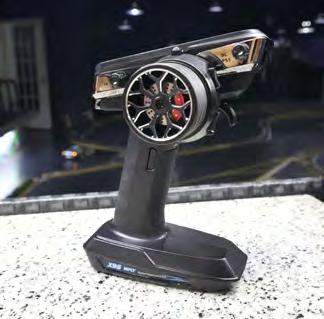
The WFly X9S radio impressed us. We’re familiar with Sanwa and Futaba, but the WFly was easy to learn and feels great in hand. For its price, it delivers everything needed for drifting, including adjustable steering speed and throttle curves. It’s a fantastic value for both beginners and experienced drivers.
The initial drive with the stock tune revealed that the front knuckle changes Ackermann mid-throw, tuning out the desirable side-toside snap-back, common in comp chassis. The box settings favor stability, making it user-friendly for newcomers. Personally, I would reduce the negative Ackermann and switch the front camber to 10-11° for a flat contact patch at standard drift angle of 45°. Mounting the ESC higher or on a rear mount could help with balance. The car felt stable in corners and could benefit from faster corner speeds with more tuning. It’s possible to tune more camber progression to the rear uprights as transitions felt a little slow.
Overall, the Louise LDXX chassis kit, paired with the Hobbywing D10 combo and WFly X95, offers a premium, user-friendly experience. Out of the box, it’s well-equipped, easy to assemble, and delivers ontrack performance that rivals more expensive kits. With thoughtful tuning, it’s suitable for both beginners and seasoned RC drifters.
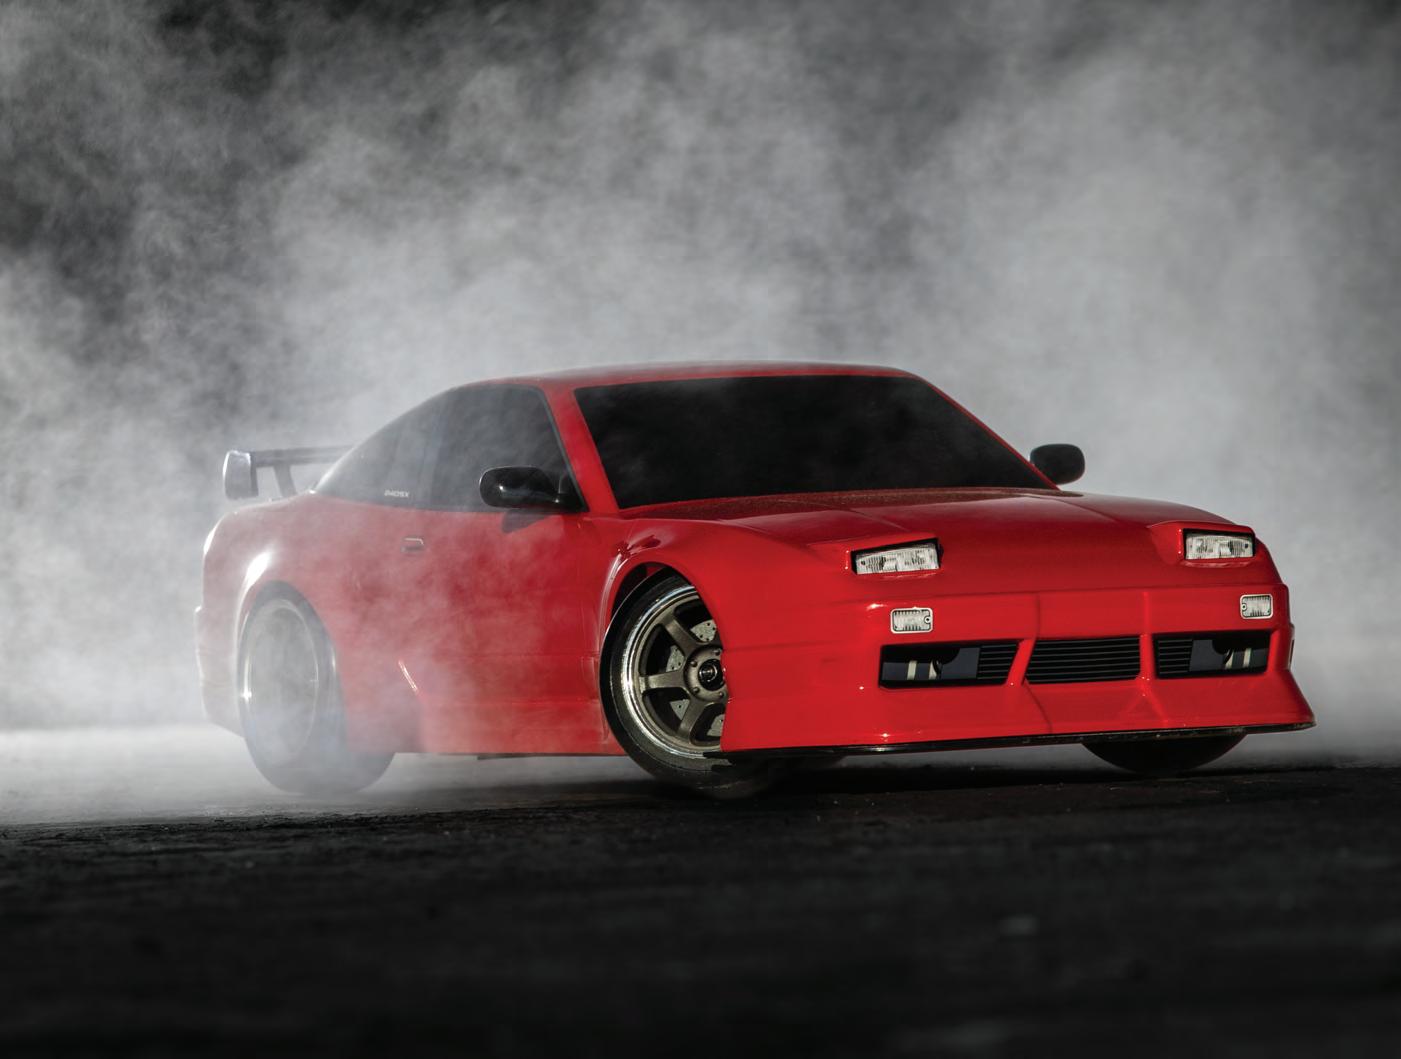
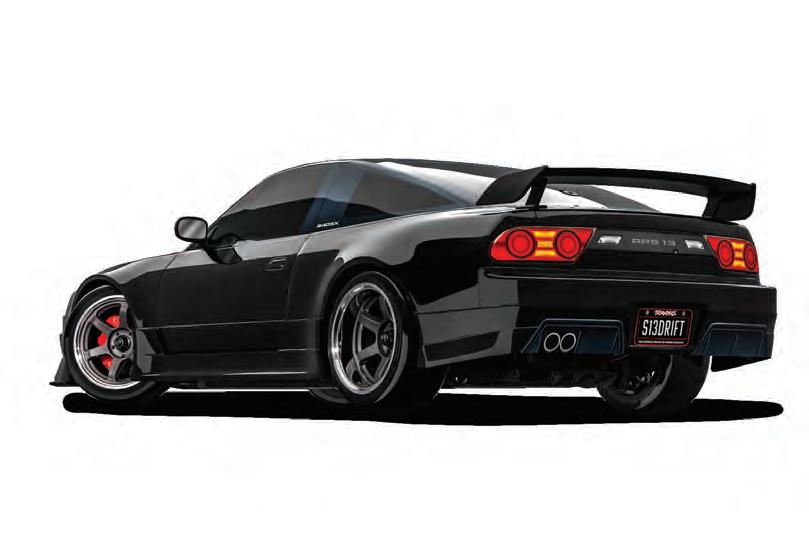
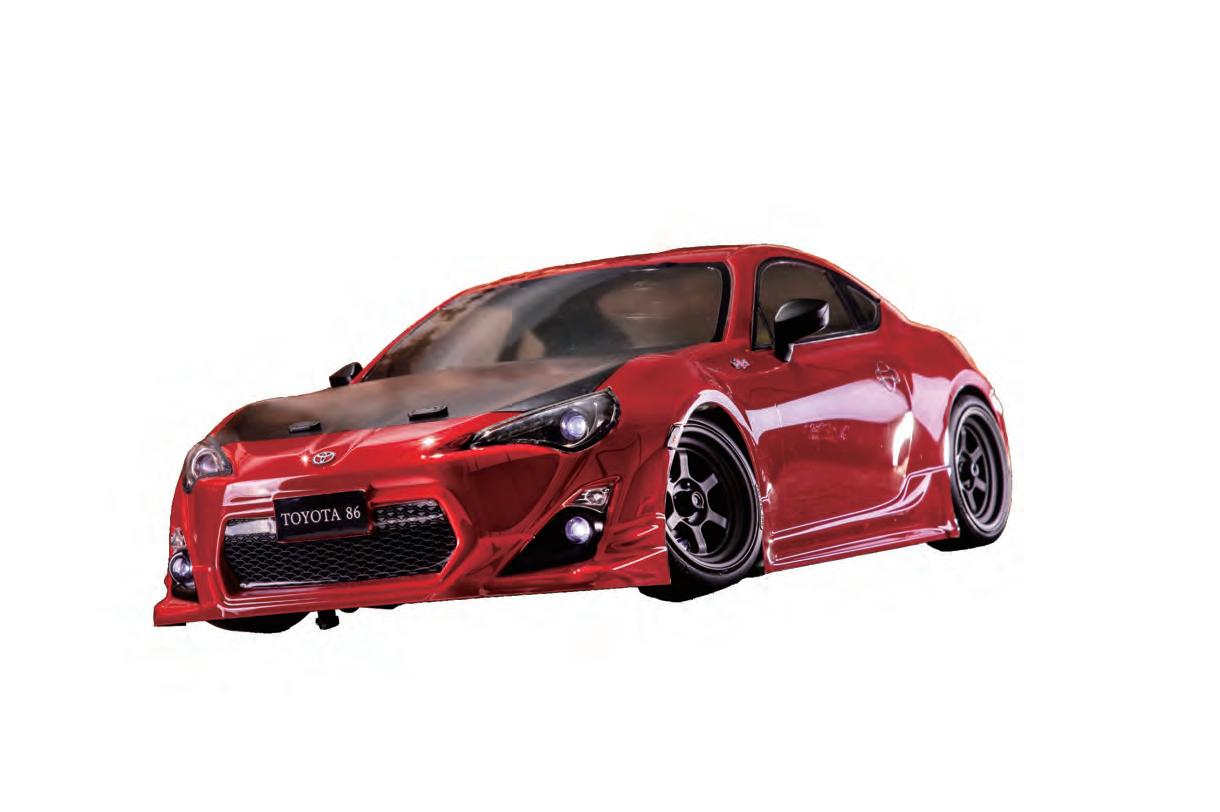
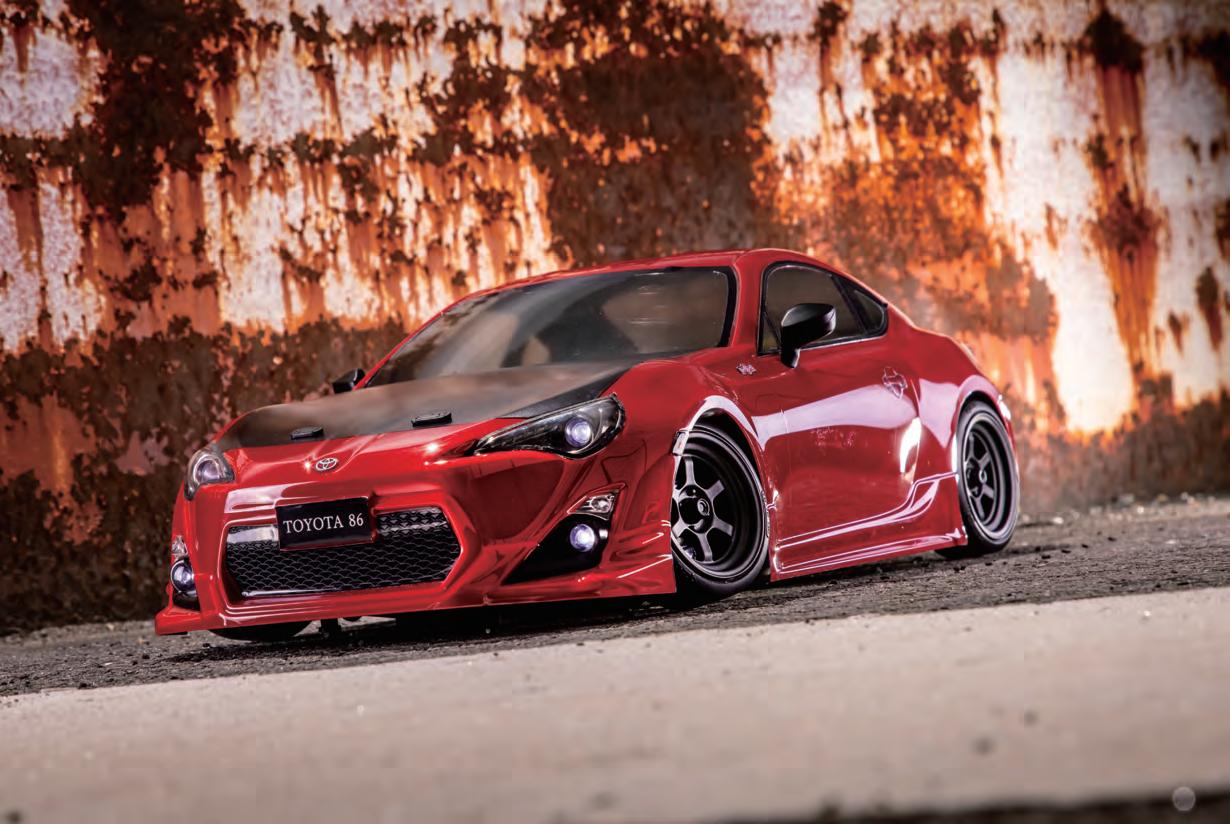
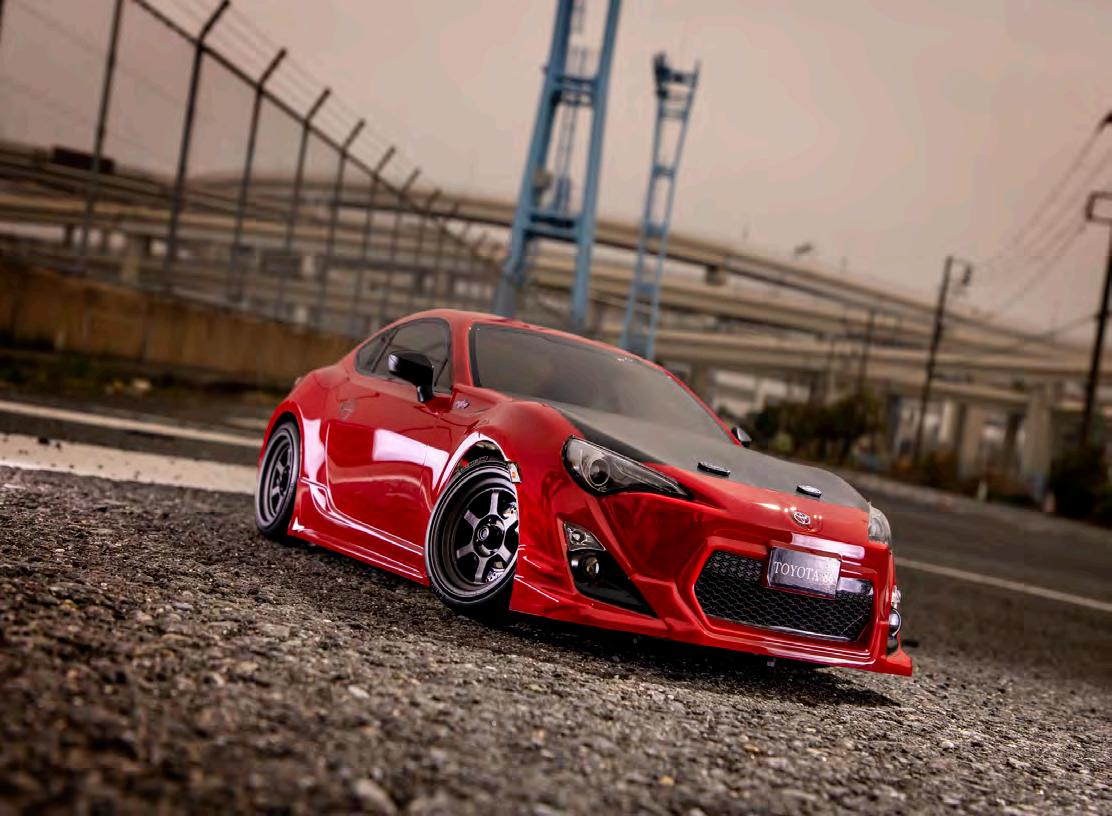
A favorite at drift competitions, the S13 Nissan® 240SX combines light weight, rear-wheel drive, and almost perfect 50/50 weight distribution. Traxxas creates the ultimate RC drift car by adding an incredible replica Nissan 240SX body to the proven 4-Tec® Drift chassis. Outfitted with advanced TSM® Drift technology, 4-Tec Drift is easy to master and endless fun to drive with its smooth, predictable slides and high-tech chassis.


Marcus has been helping American RC drifters with tuning explanations and tutorials since the early days. When we got back in touch with him, we knew we had to publish some of his tuning advice. This is a basicto-advanced front end geometry excerpt from his blog. He has given DARC Mag permission to publish it as we believe it is extremely helpful in understanding the complex world of RWD tuning. We look forward to including more of his tuning expertise in coming issues.
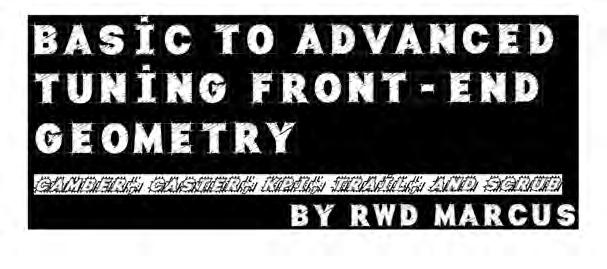
How does your tire look when counter steering? Steering does not have to be at full lock. Your front alignment dictates how your leading and trailing tires contact the surface.
In this setup, with steering at neutral, camber is set at NEGATIVE 10°.
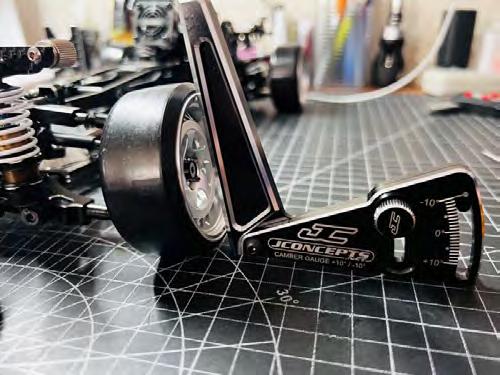
The leading tire at full lock is between 7-8° POSITIVE camber.
The trailing tire at full lock is at 7° NEGATIVE camber.

Camber angle is the vertical alignment of the wheel relative to the driving surface. The top of the tire should be leaning into the body at the neutral steering position, which is negative camber. The key element for front alignment in RWD RC drifting is the front tire contact patch that is primarily dictated by camber. The contact patch is how much of the tire contacts the surface. The contact patch is either along the edge with less contact, or on the larger surface with more contact. This applies to both the leading and trailing tires. As you steer, the camber will change relative to how the other alignment is set in combination with the camber.
Caster is the angle created by the steering pivot point of the top and bottom arms, or the ‘king pin’ in the front to back direction of the chassis. This angle should be leaning towards the back of the chassis. Caster is the same as the steering fork of a bicycle. The more it leans, the more stable it is, but it also makes the steering less responsive. Caster is closely related to camber. As you turn your steering, the camber throughout the steering will change relative to the caster.
Leading tire = Negative camber will be cancelled out by caster. Going zero camber, then positive camber depending on camber/caster setup.
Trailing tire = Camber will increase by caster.
Caster is the steering pivot point or the king pin angle in the front to back direction of the chassis. KPI is king pin angle in the left to right direction of the chassis, leaning into the chassis at the top, but NOT to be confused with camber.
KPI will change the ‘progression’ of the camber in combination with the caster throughout the steering stroke. This is a compound element of camber, caster and KPI.
Leading tire = KPI will add the amount of positive camber gain. Depending on the setting, negative camber at neutral will progress to zero, then to positive camber.
Trailing tire = KPI will cancel out the amount of negative camber gain.
KPI can be utilized to adjust the camber progression throughout the steering stroke, both negative and positive.
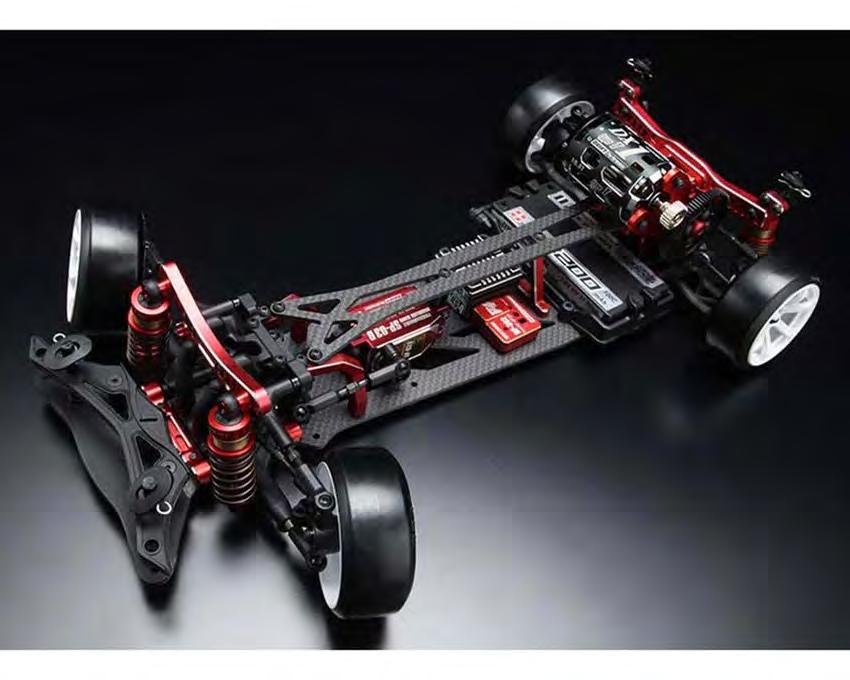
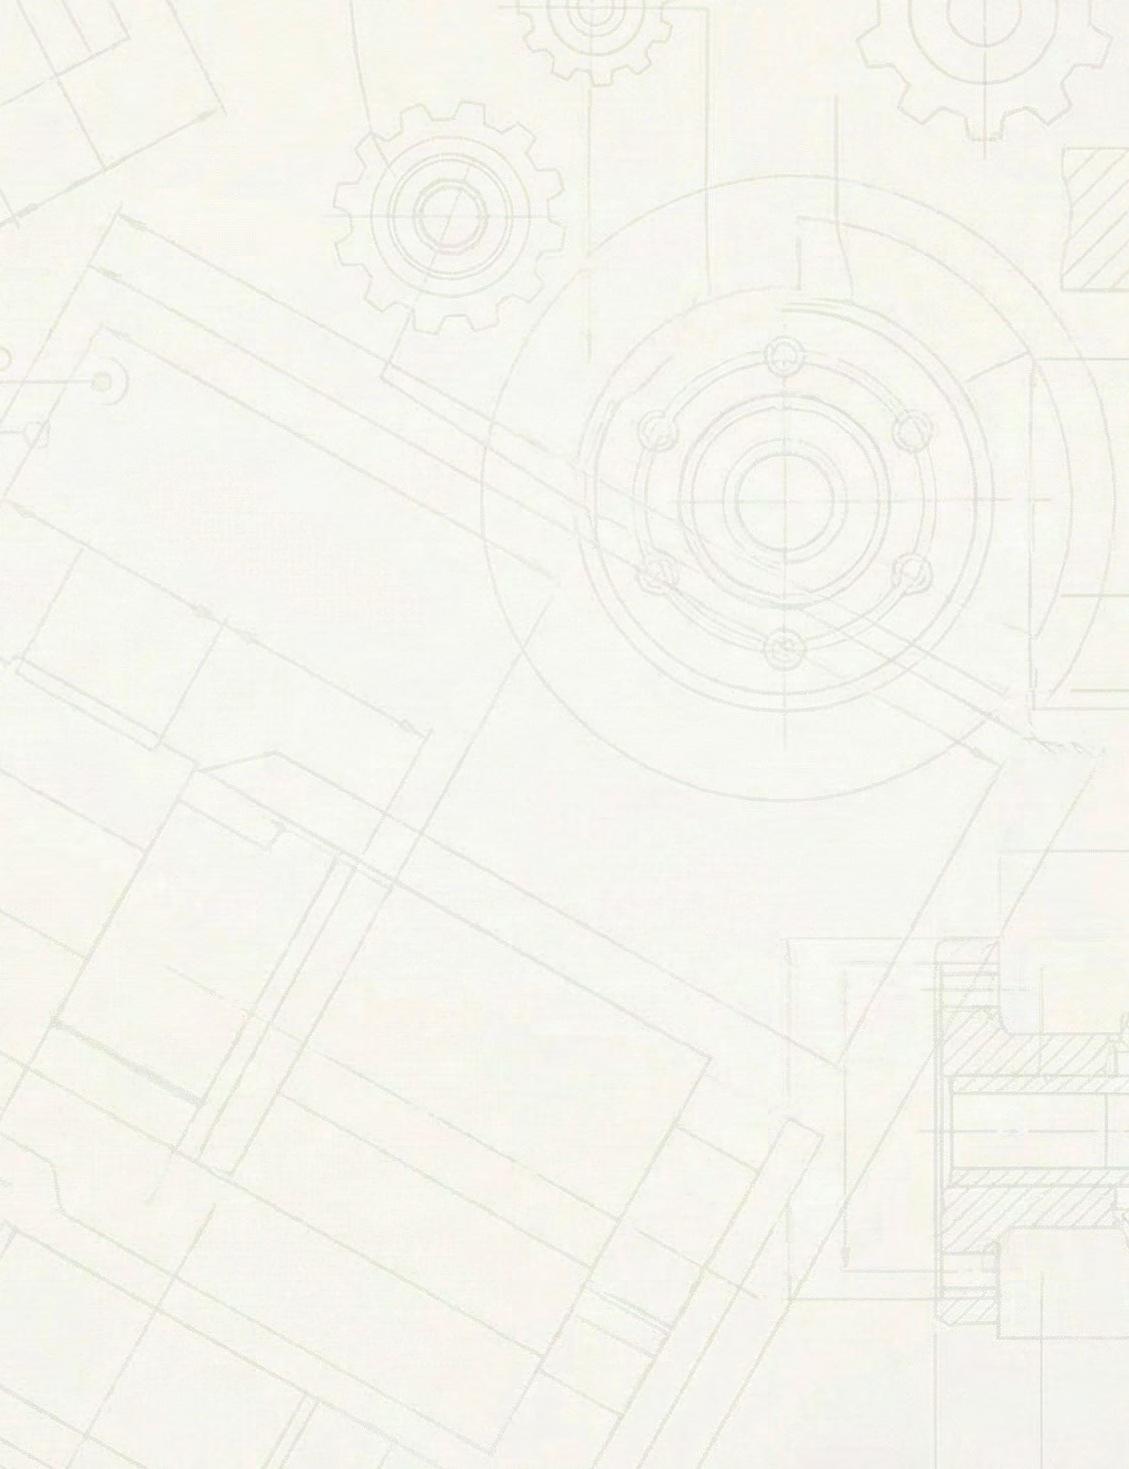
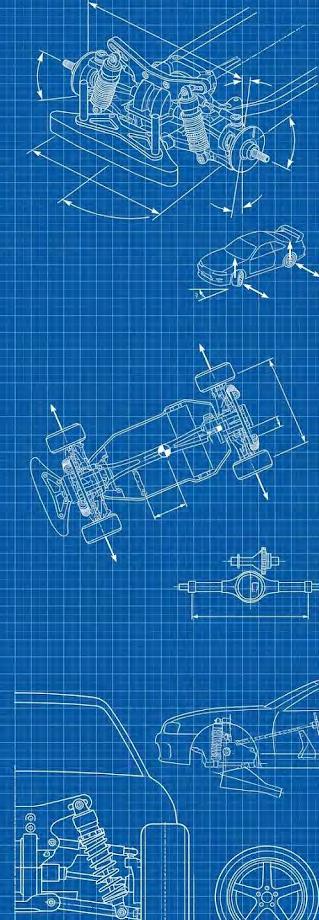
These are simple simulations of how caster will add camber from neutral to full lock on the leading and trailing tires. To simplify the test, camber is set to ZERO.
With camber at ZERO and caster at ZERO, there is no change in camber for the leading and trailing tires. With camber at ZERO and ADDING caster, the amount of caster adds/subtracts to the camber.
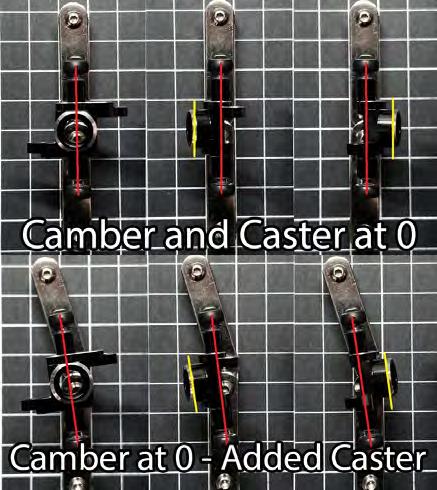
In the next simulation, KPI has been added. Again, camber is set at ZERO.
With camber at ZERO and caster at ZERO, the amount of KPI affects the change in camber for the leading and trailing tires.
With camber at ZERO and ADDING caster, the amount of caster adds/subtracts to the camber.
On the leading tire, you can see the KPI added more positive camber to the caster. On the trailing tire, the KPI cancels out the camber change from the caster.
The total tune between these 3 elements will dictate how the camber progresses, how the tires contact the surface, and also at what point in the steering stroke.
Negative camber at full lock = Tuning the leading tire to stay negative camber throughout the entire steering stroke up to full lock.
Zero camber point = Tuning the point where the leading tire goes to zero camber at a certain angle of the steering stroke.
Positive camber at full lock = Tuning the positive camber at full lock to be opposite of the trailing tire for both leading and trailing to look parallel in camber.
There are few more elements in setting the front alignment, in addition to the camber/caster/KPI to further dial in the steering characteristic.
If you have a front knuckle that has the ability to adjust trail, then it may be worth trying this. Trail is the offset of the axle or tire rotation center relative to the steering pivot point or king pin. The axle behind the king pin is negative trail, the axle being in front of the king pin is positive trail.
Positive trail = Increased stability, steering less responsive.
Negative trail = Reduced stability, steering more responsive.
Trail has a similar effect as adding caster, but adding caster also affects camber, therefore adjusting trail in combination to camber and caster as is another way to tune for stability and responsiveness.
Scrub is the distance or radius of the steering pivot point or king pin to the center of the tire. Scrub dictates how much the front tires move relative to the steering radius. Scrub can affect steering responsiveness and more scrub will drag the tire as you steer.
However, in RWD drifting, more scrub allows for more clearance for steering linkage to achieve more lock, so it will be a balance to tune the scrub with the amount of lock.
More scrub = Less steering responsiveness, more drag, more clearance for steering linkage. Less scrub = More steering responsiveness, less drag, less clearance for steering linkage.
This write up covered the basic tuning aspects of front alignment. Hopefully this is a good reference to understand how these elements come together and help you tune to your liking. There are other elements such as bump steer, upper and lower arm settings, and the most obvious being Ackermann.
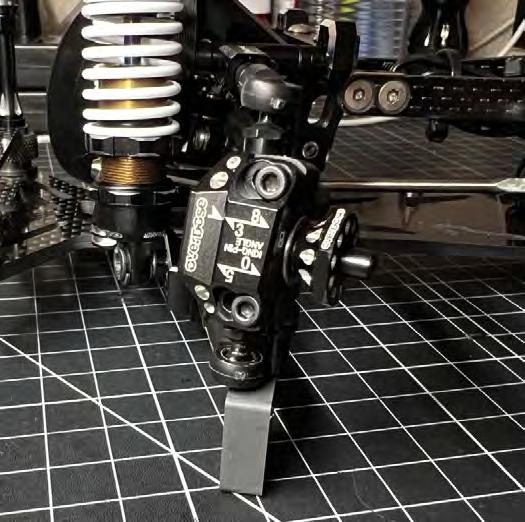
This is the Overdose adjustable knuckle type-2, which is one of the most versatile front knuckles that has been around for a few years. It has adjustments for KPI of 0°, 3°, 5° and 8°, as well as spacer adjustments for trail. The linkage position adjustability is very useful in dialing the desired Ackermann.
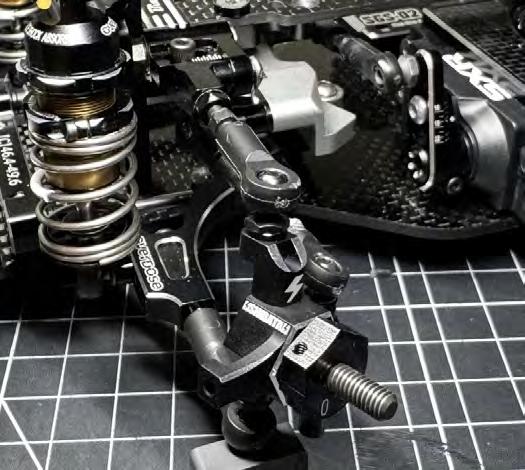
The most recent discovery for me was the Shibata GRK light weight front knuckle version Y, designed by the GRK driver Mr Yoshiba. I have always loved the adjustability of Overdose front knuckles, and this one was an eye opener for the balance of stability and responsiveness, as well as a full parallel Ackermann throughout. The KPI is set around 3°, positive trail of 0.5mm, with slightly higher scrub, even with 5mm hex and 6-7mm offset wheels, and a steering linkage point strategically set to achieve a full parallel Ackermann.

Masanori Morizuka, widely known by his handle “RWD Marcus”, is a pivotal authority in the RWD RC drift community. Through his popular Ameba blog, he acts as a bridge between Japanese engineering and international hobbyists, providing highly technical English-language guides on chassis tuning, alignment, and advanced drift mechanics.
Follow RWD Marcus blog : https://www.ameba.jp/ profile/general/marcus38060/ Instagram RWD Marcus(@rwdmarcus) • Instagram @rwdmarcus
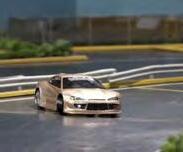
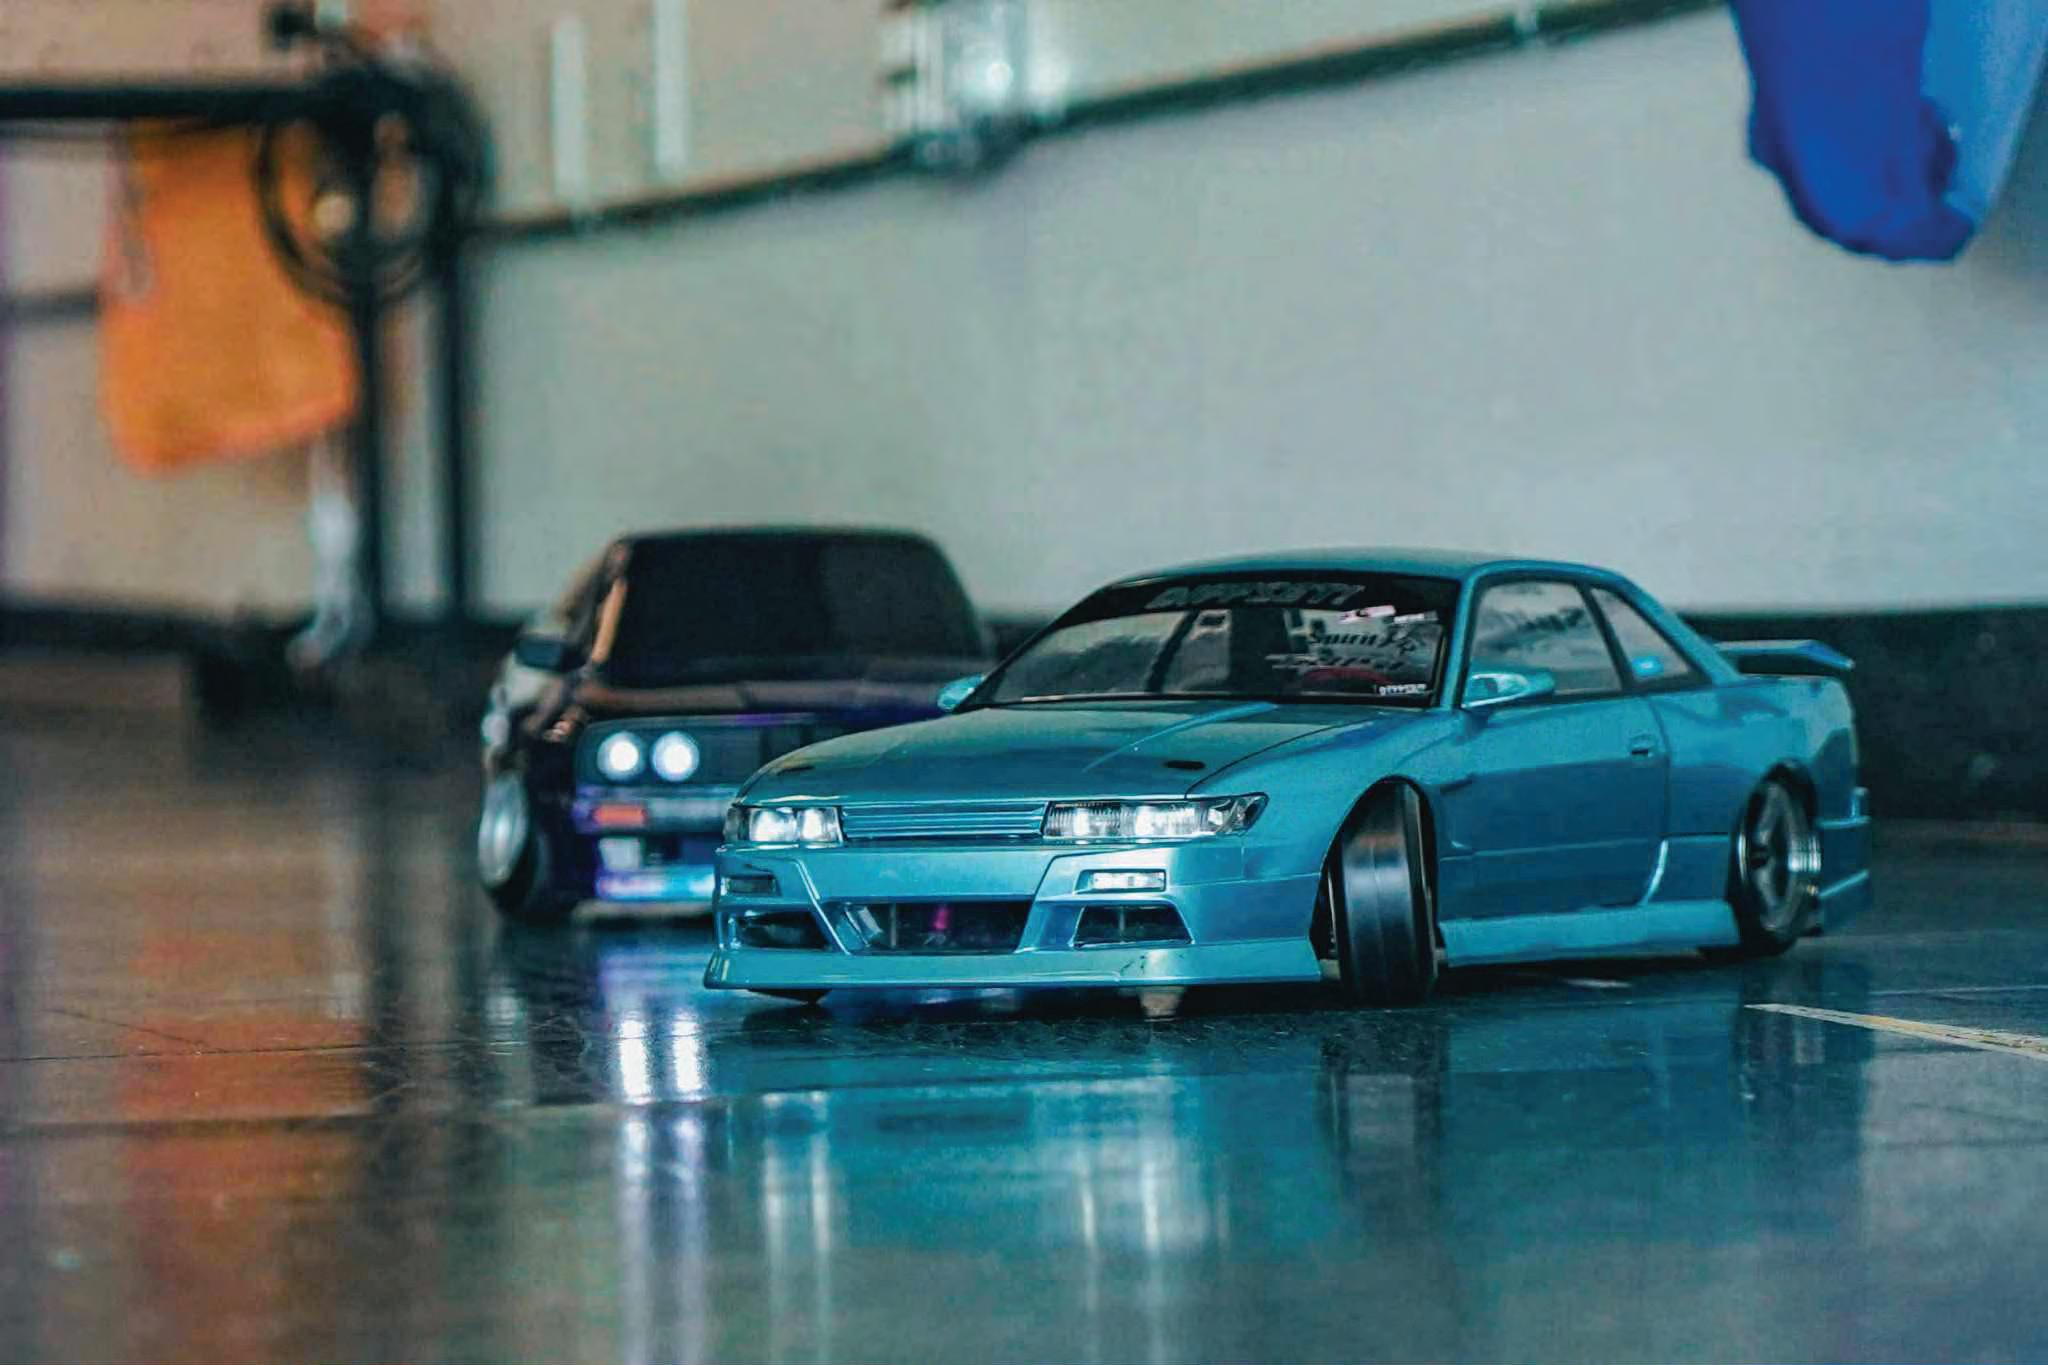
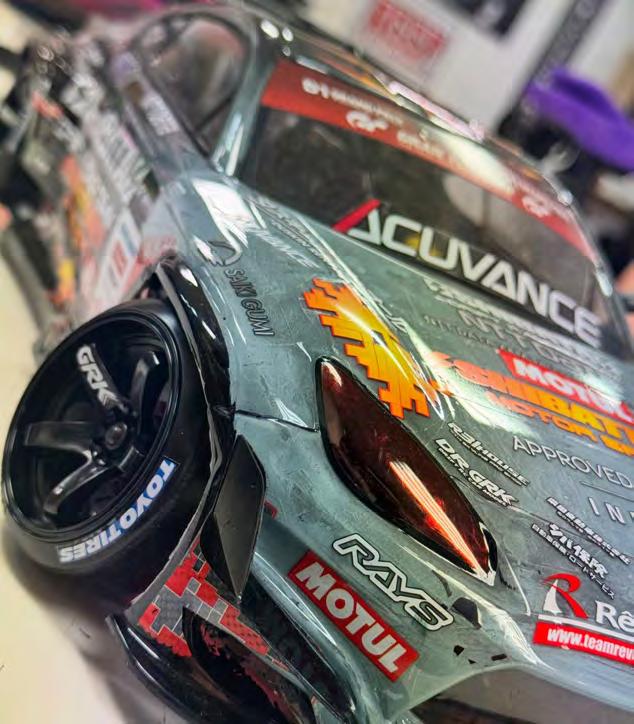
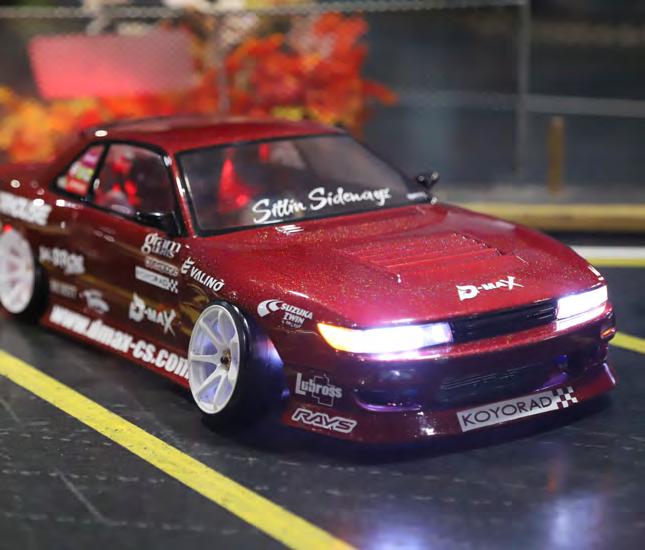
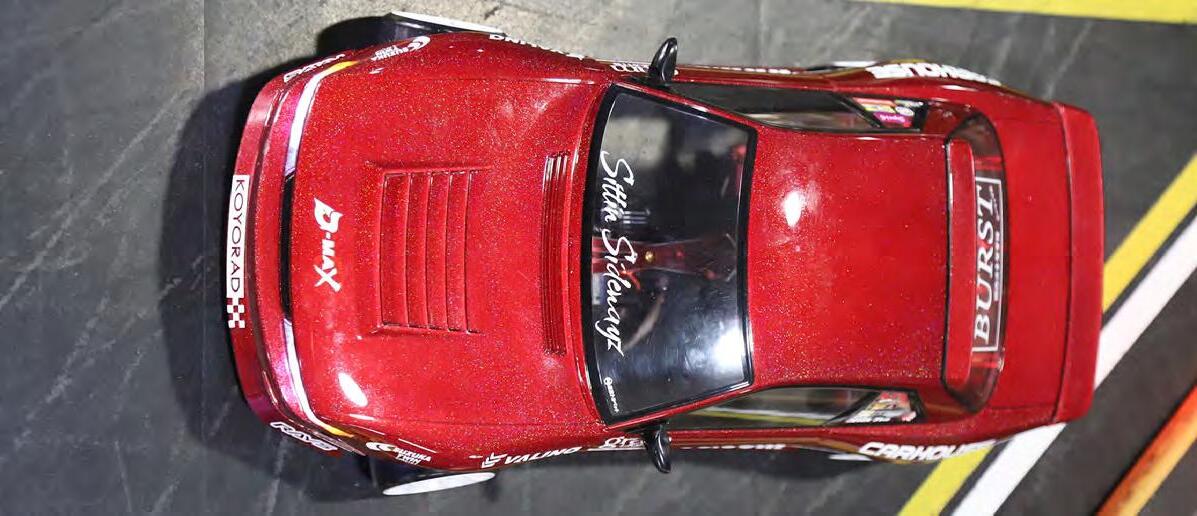
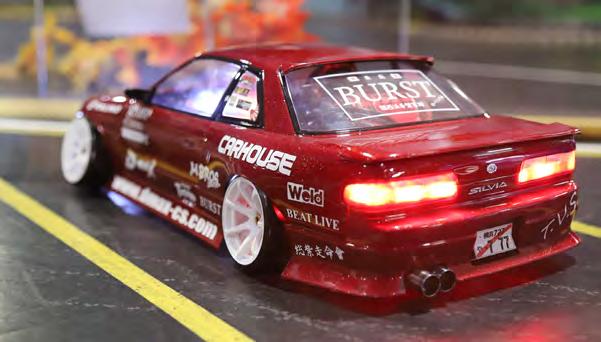
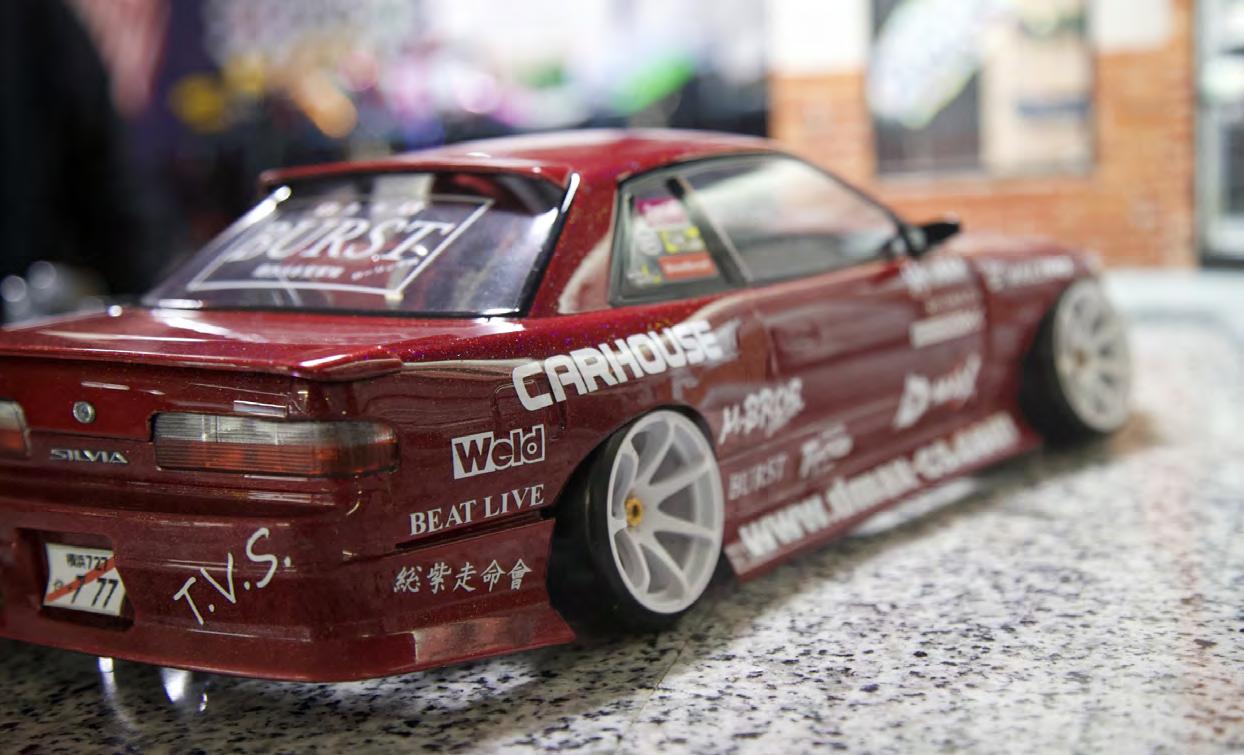
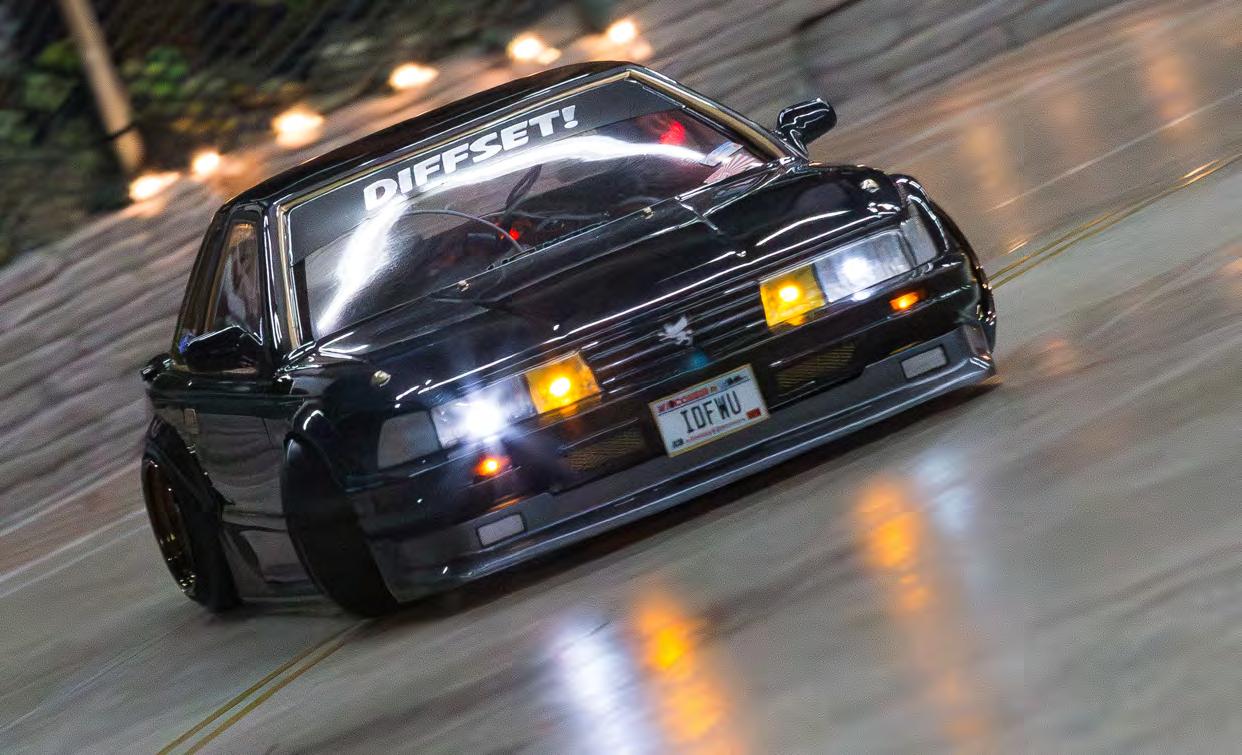
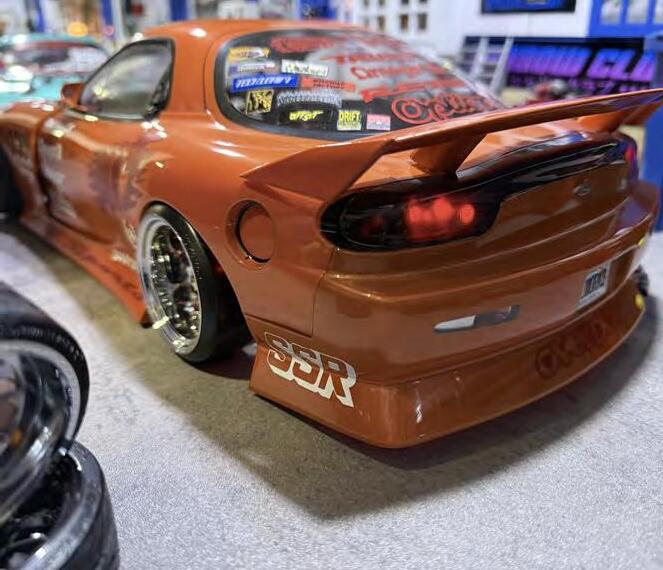
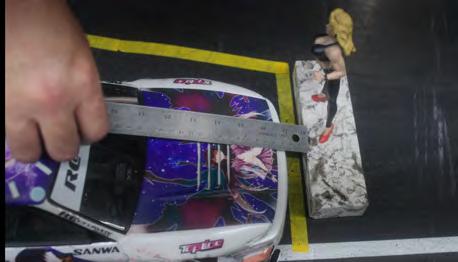
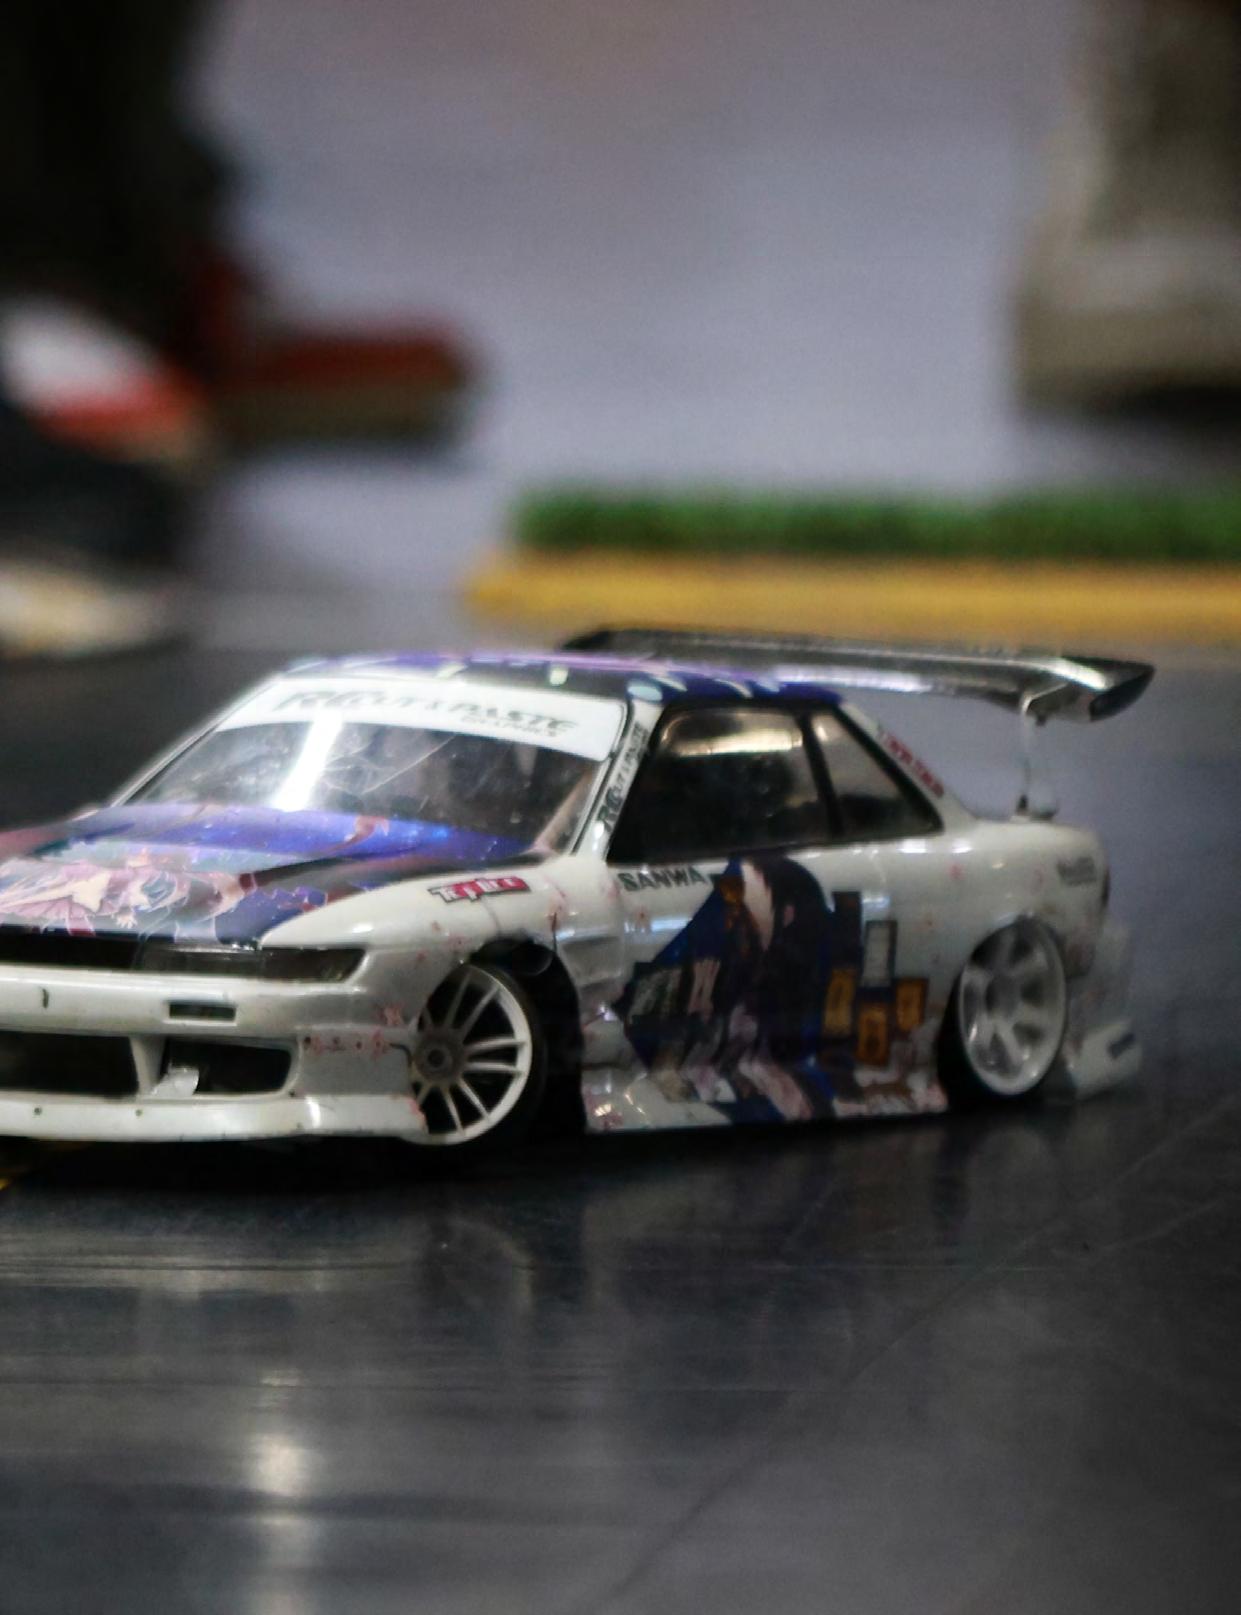
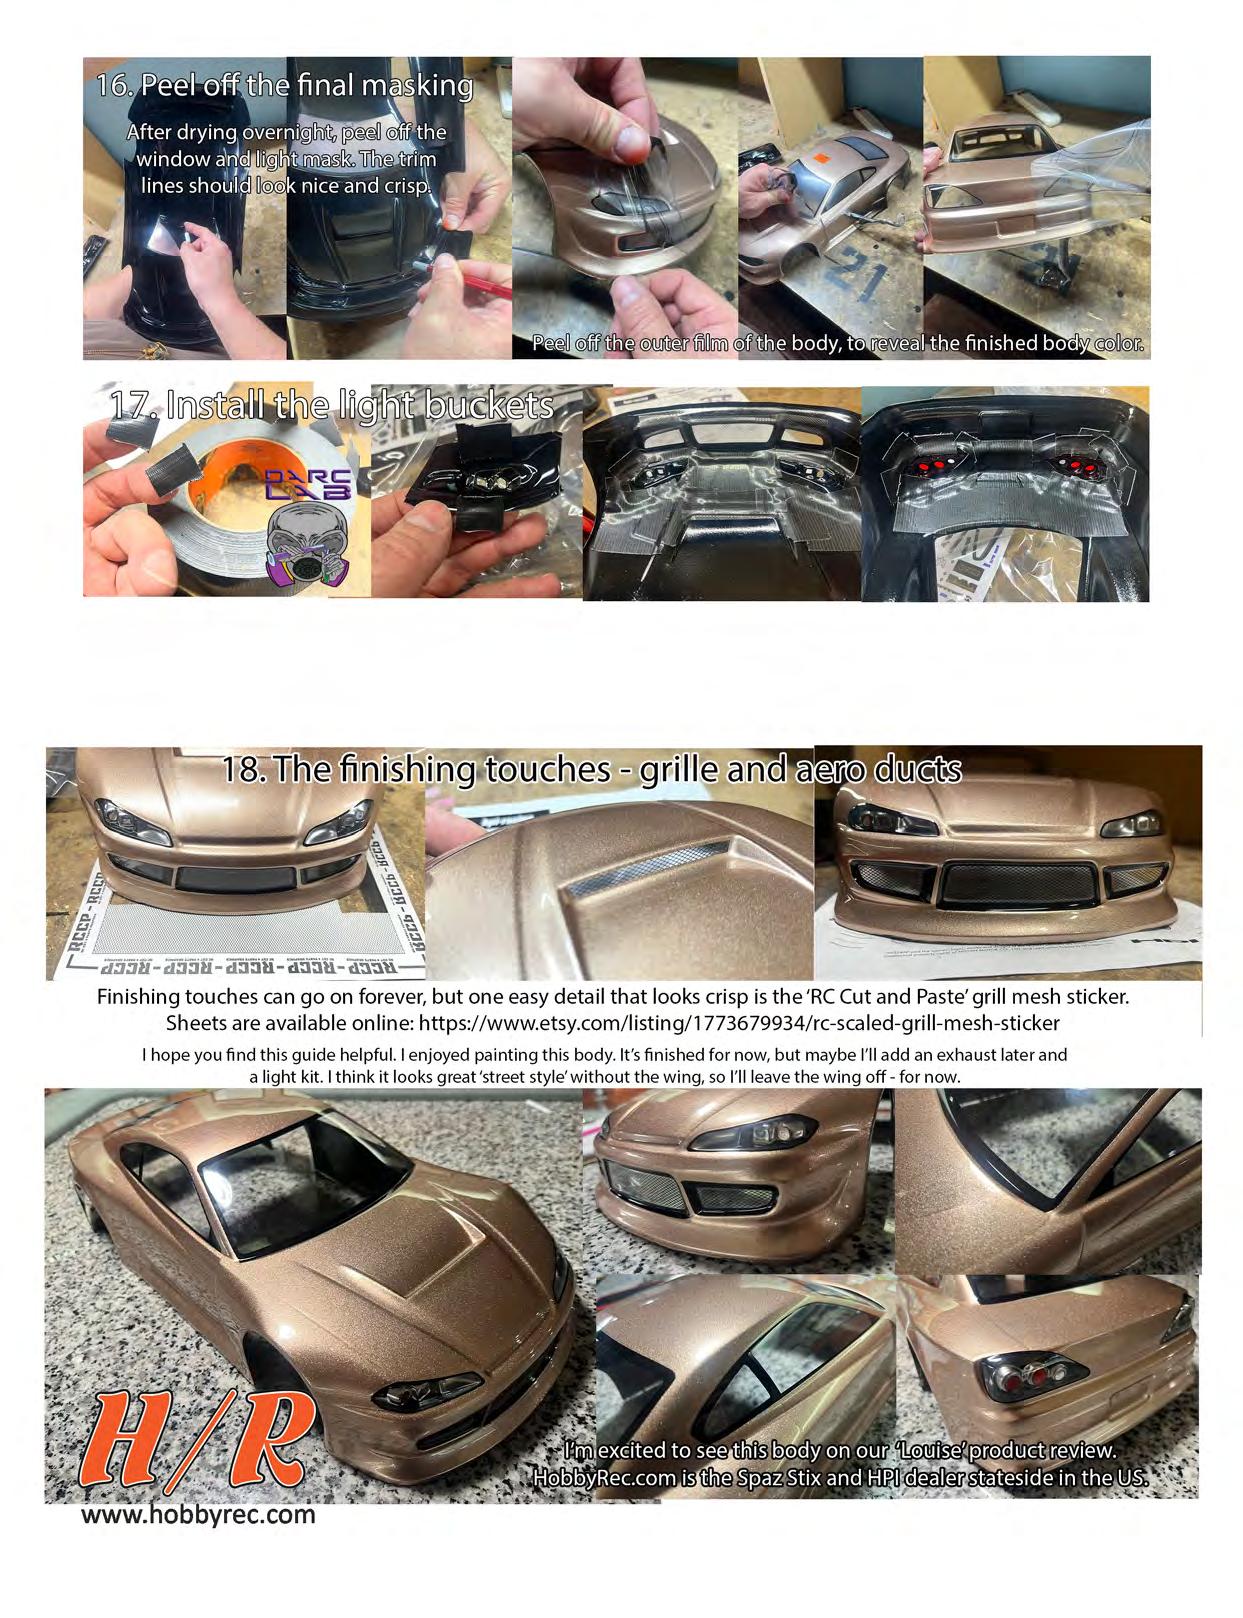
This body is an Addiction S13 DMAX. I wanted to make the car look like a final-bout street car with the sponsor livery and paint that has tones of flake and body that almost touches the floor. I’ve always loved street style S-chassis and Japanese style cars. This is my tribute to all the things I love in real life - down to scale.

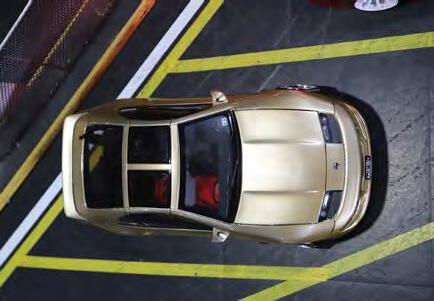
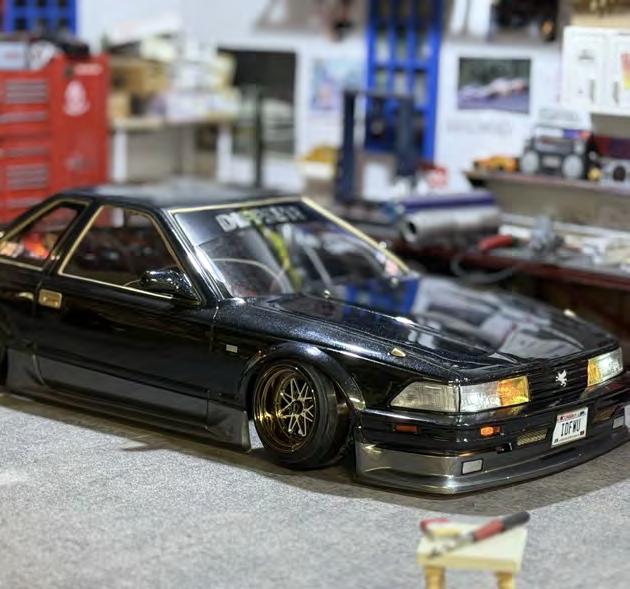
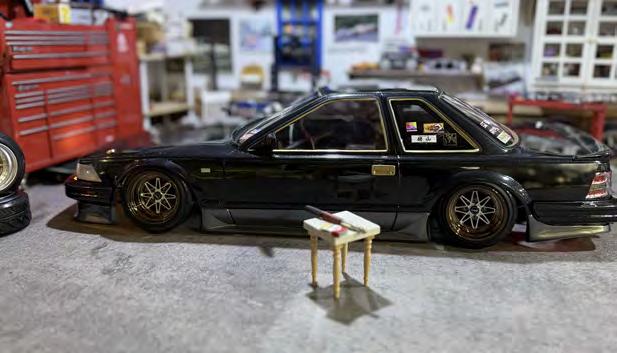
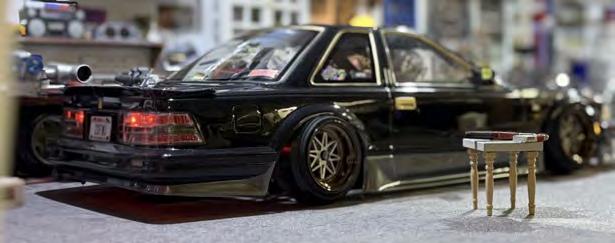
This Pandora Z20 Soarer, custom built for Mark, admin of MKE Drift RC, blends show and comp vibes in one killer package. It features SRP door handles, side mirrors, and squirters, with Pandora buckets and lenses for authentic detail. The real metal gold grille and handpainted gold trims pop against the body, while detachable bumpers and a magnetic spoiler add serious comp flexibility. Sitting on 12mm Work Equip 03 wheels, this Soarer is all about style, precision, and street cred - ready to turn heads at any drift event.


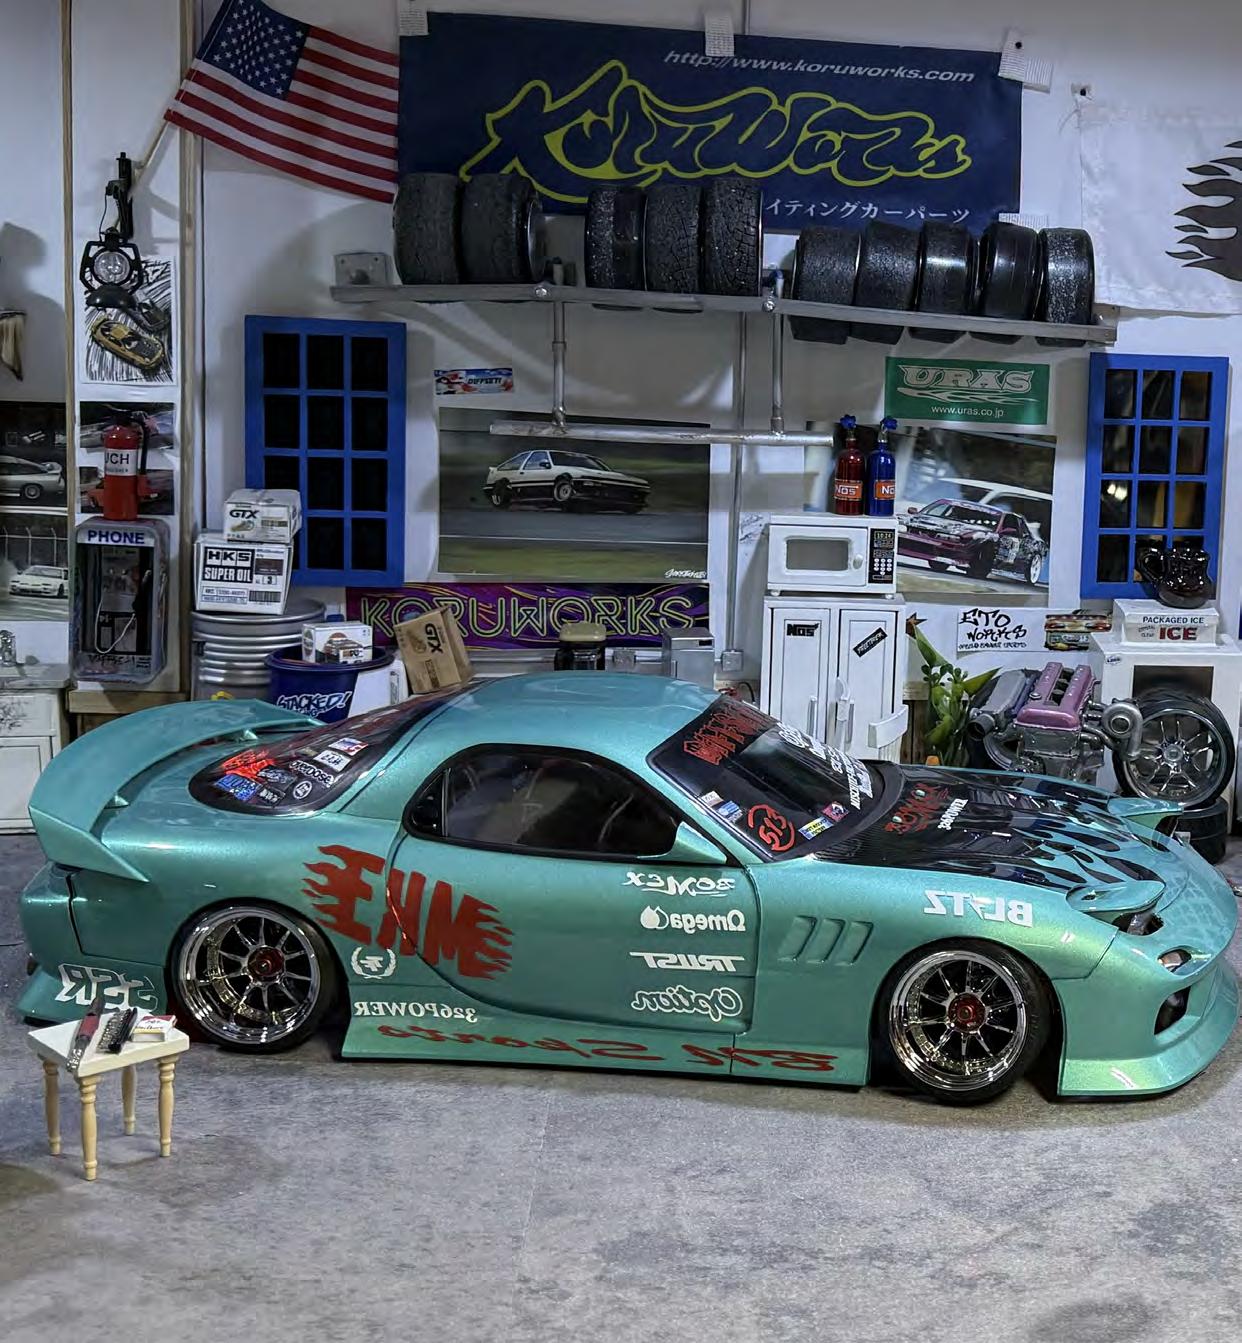
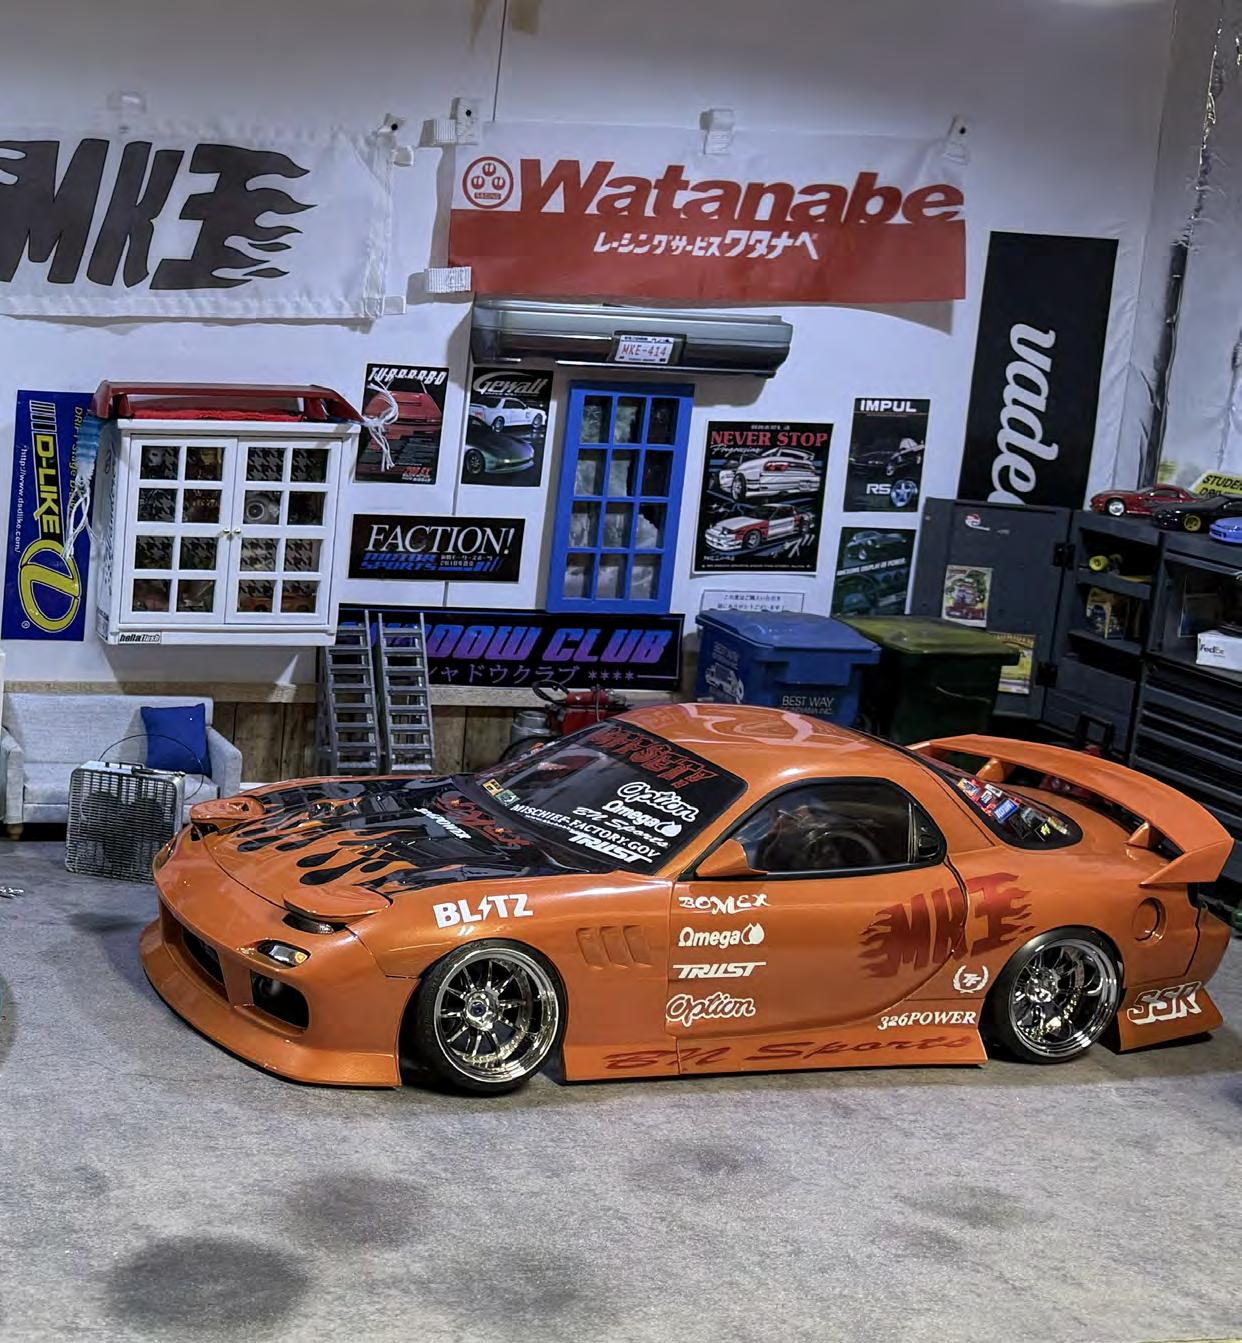
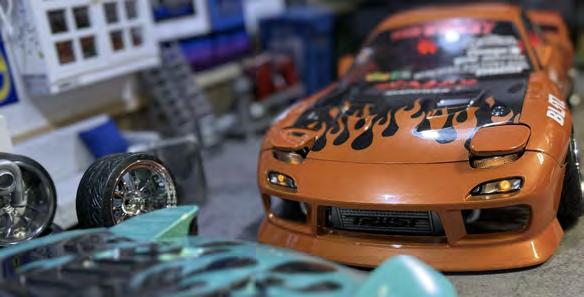
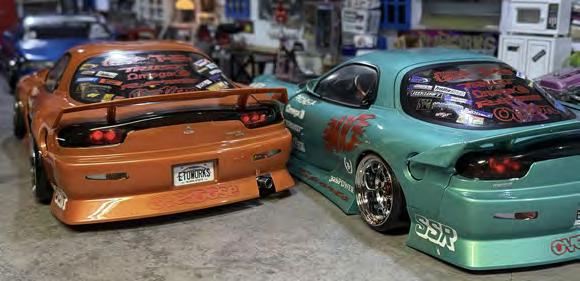
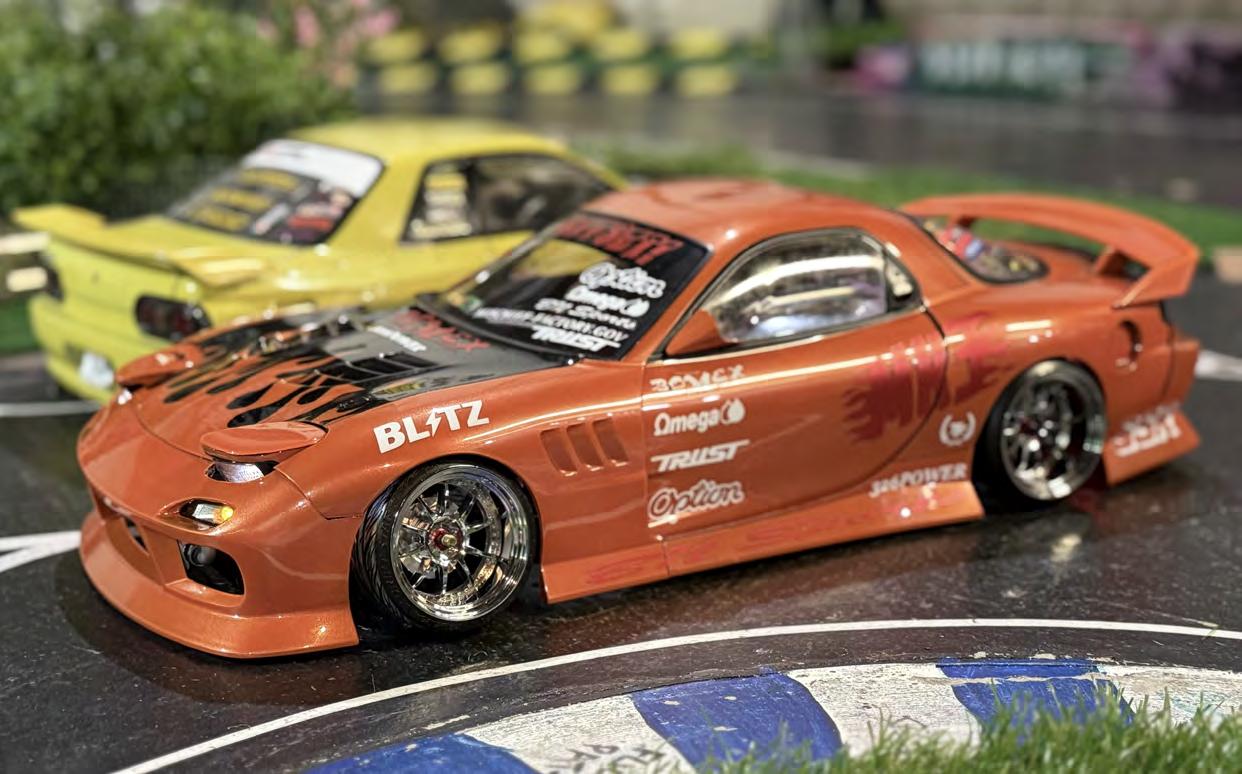
Jake and I started MKE DRIFT RC around 2016. We have had a few ‘team bodies’ over the years, but in my opinion, these easily top them all. We went from Pandora leopard print, candy red 86s, two tone Addiction S13s, to these fully kitted ABC Hobby FD RX7s. Features include: Addiction BN sports blister body kits, SRP door handles,
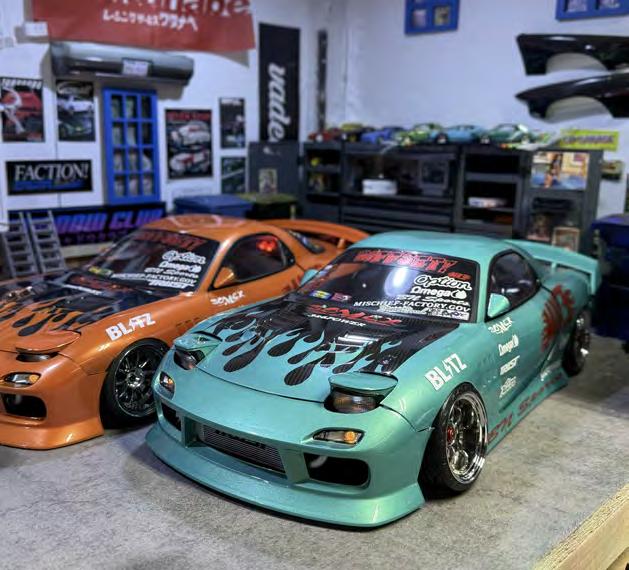
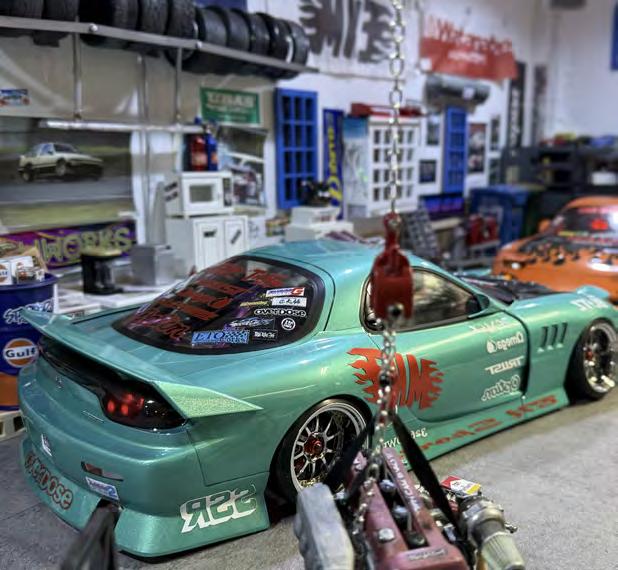
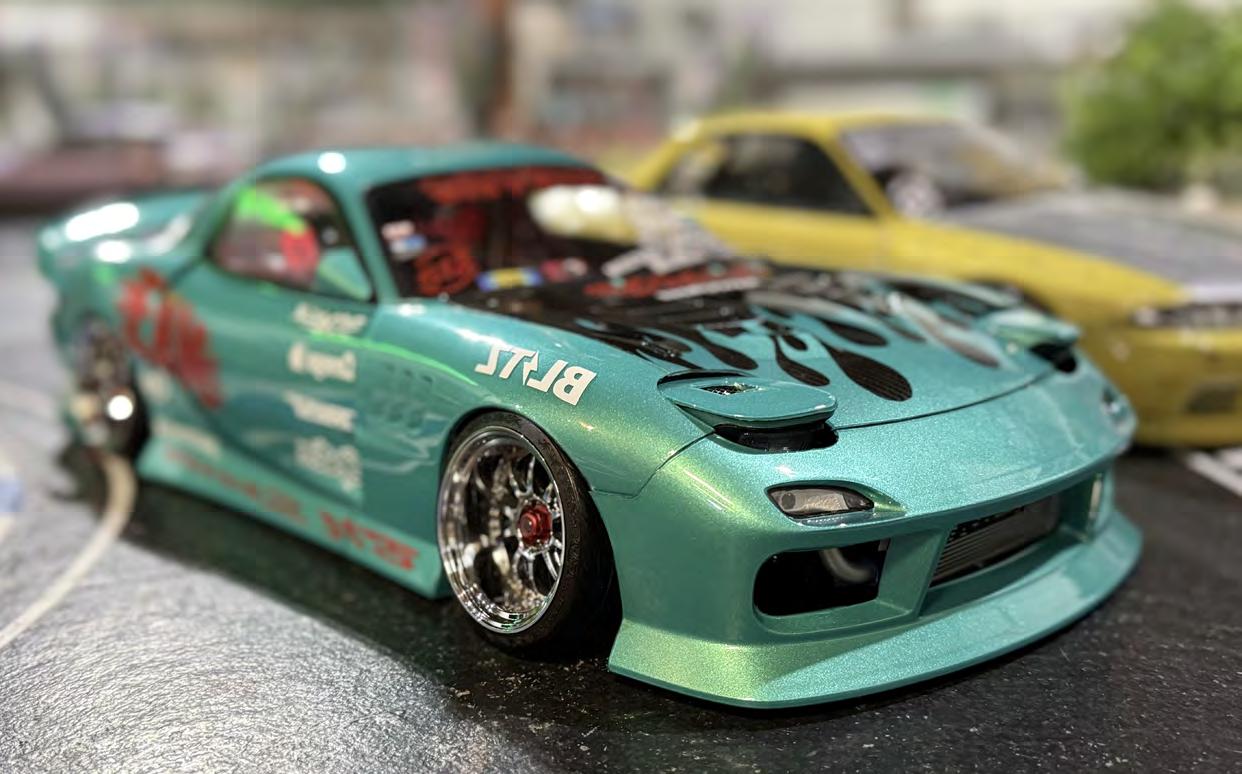
Rouge Nights Bomex mirrors, RC Art 326 style wings, functional micro servo controlled headlamps with a ‘functional’ air duct headlamp cover. Paint matched SRP squirters. Sitting on matching discontinued Overdose SSR SP3 chrome wheels, 11mm rear, and 7mm front. I painted carbon-fiber effect hoods and hand masked flames over it.
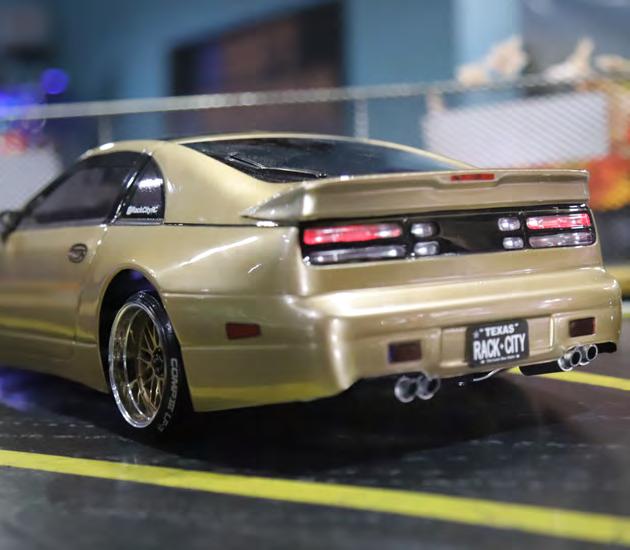
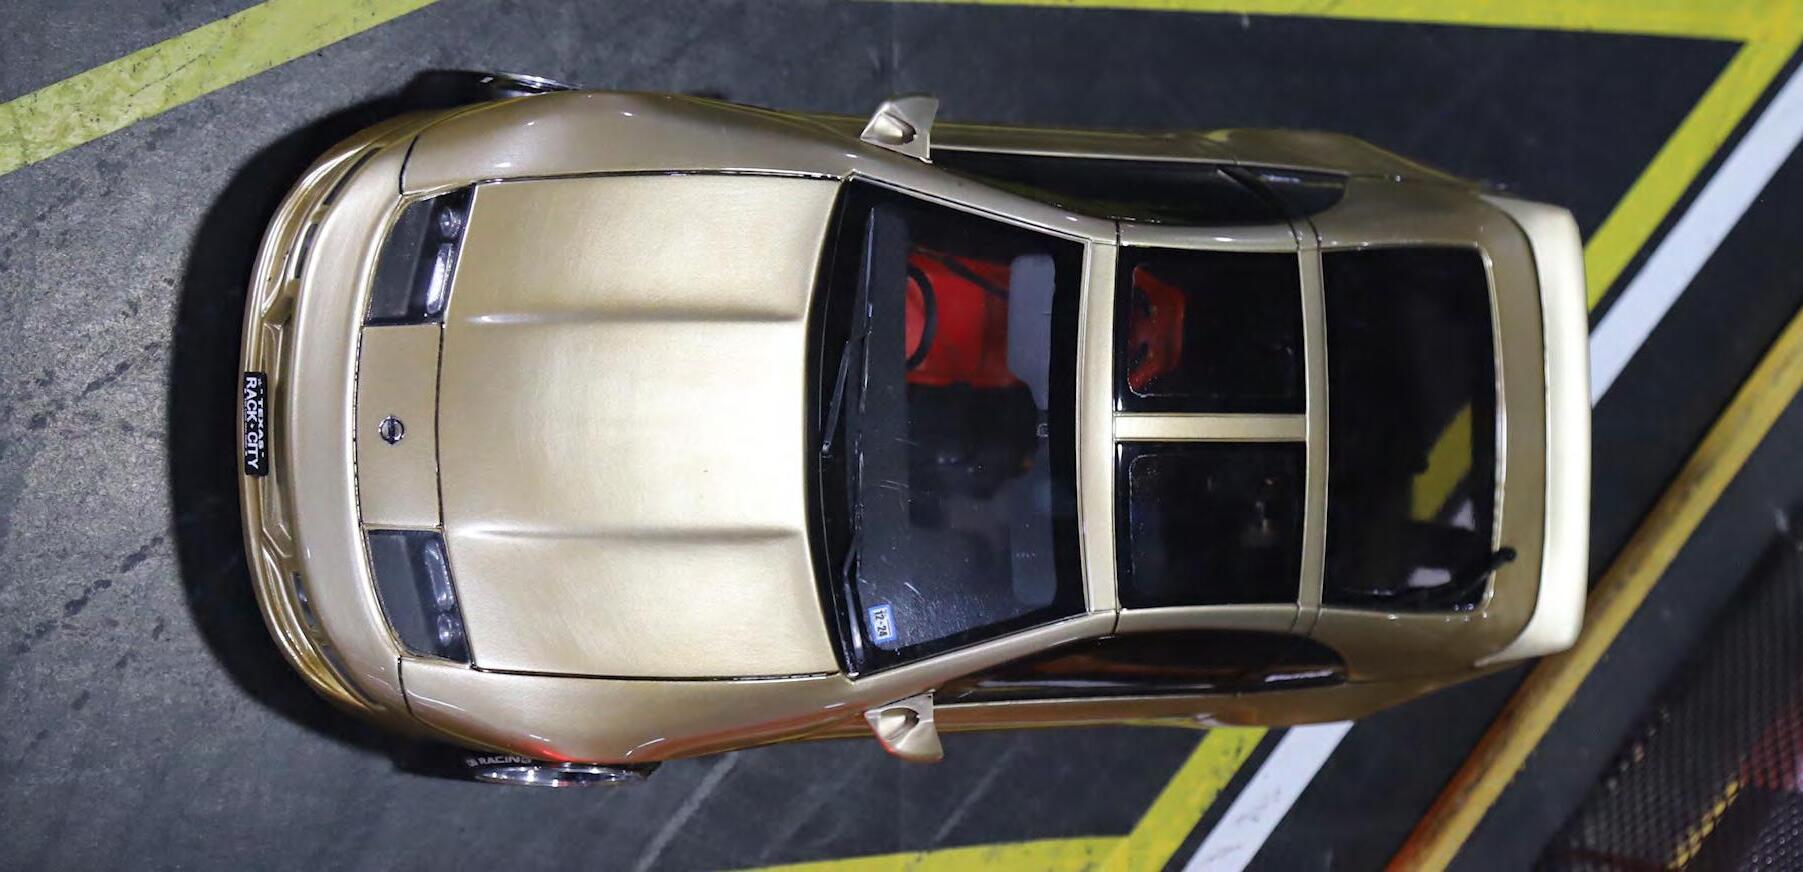
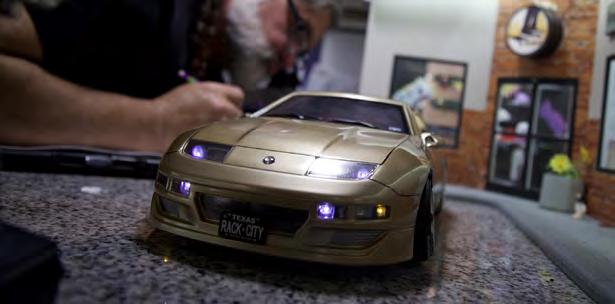
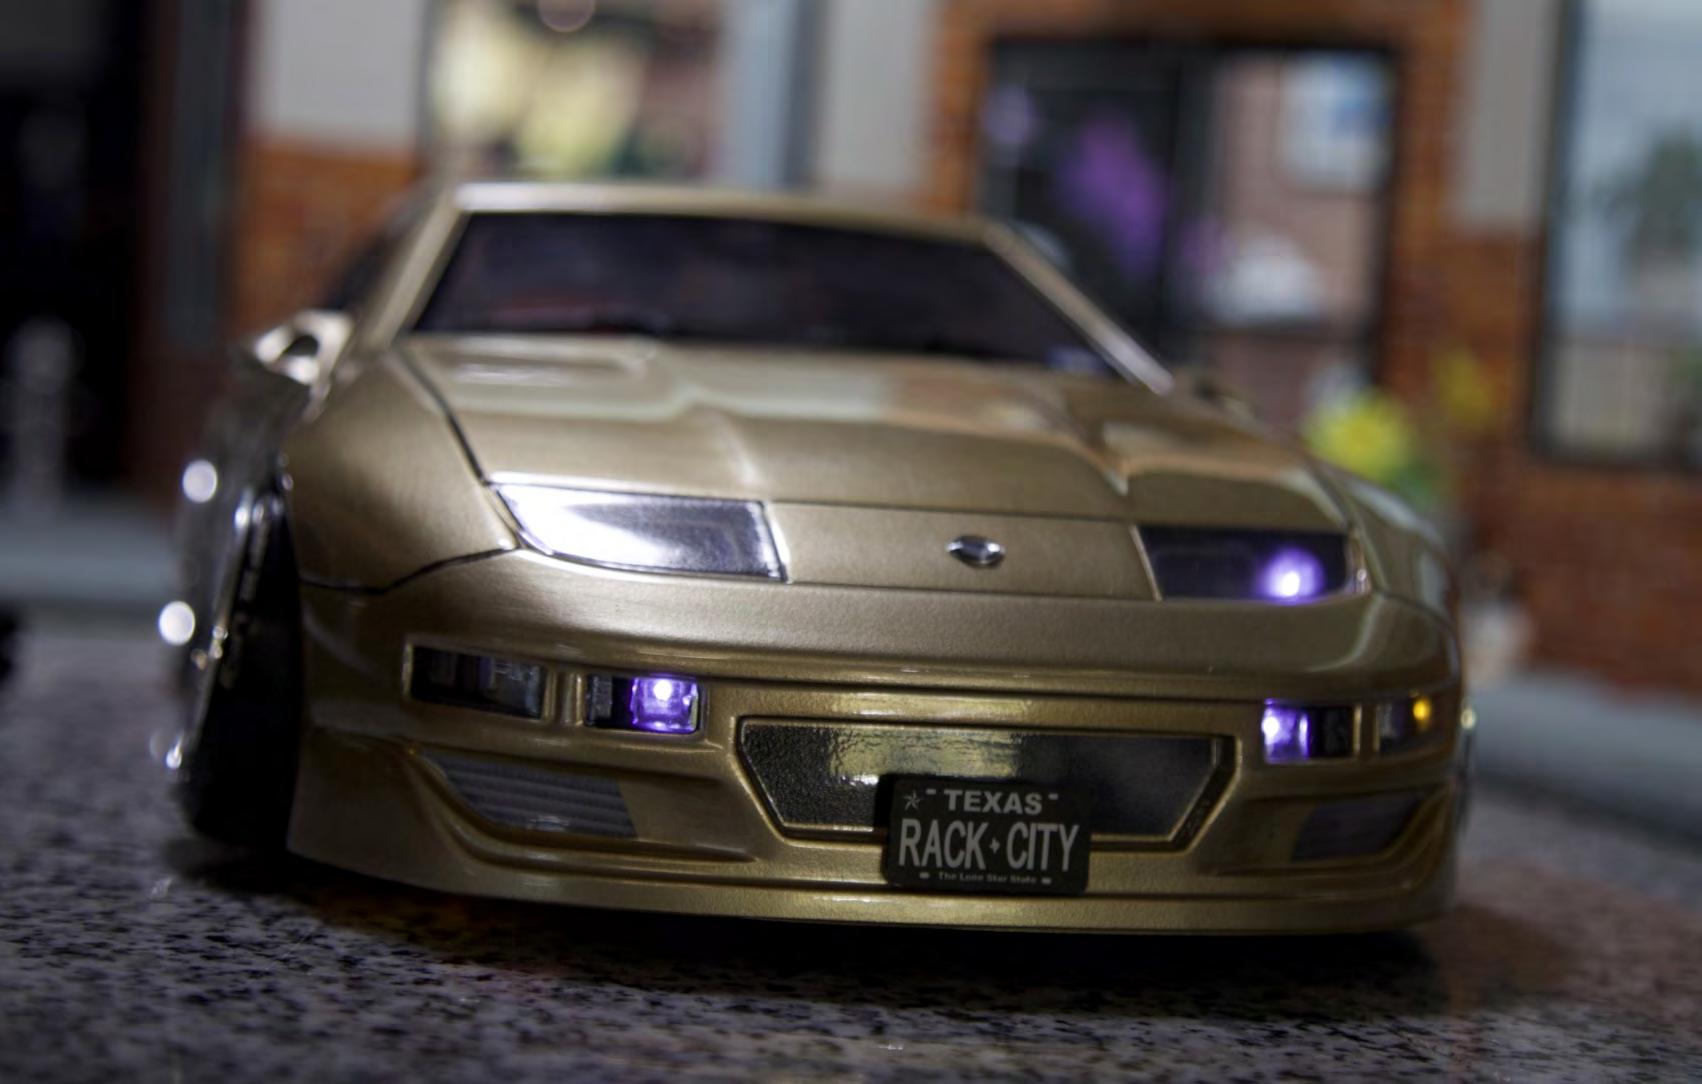
I bought this Exceed RC 300ZX body used on eBay, aiming for a street-style build inspired by a friend’s car from high school. I chose a custom gold paint combo for visibility on the track. Most details are handmade from styrene, including the dashboard, visors, mirror, exhaust, and light buckets. I 3D printed the steering wheel and Bride seat, and only bought the Nissan logo and antenna. The custom light kit uses micro LEDs and a magnetic clip for easy removal. Scale realism drives my builds, and my wife’s attention to detail always pushes me to improve further.
BUILT AND PHOTOGRAPHED BY
DREW BARRON
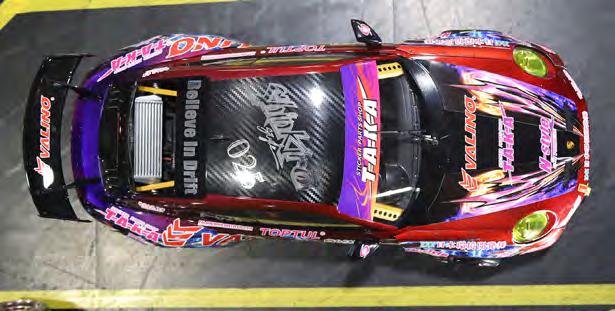
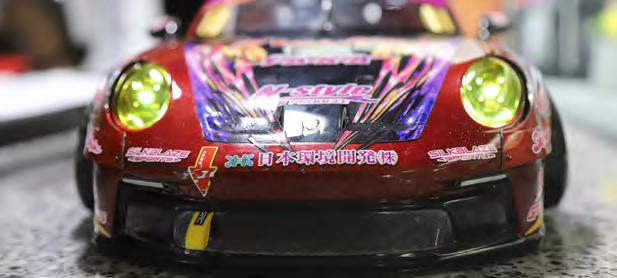
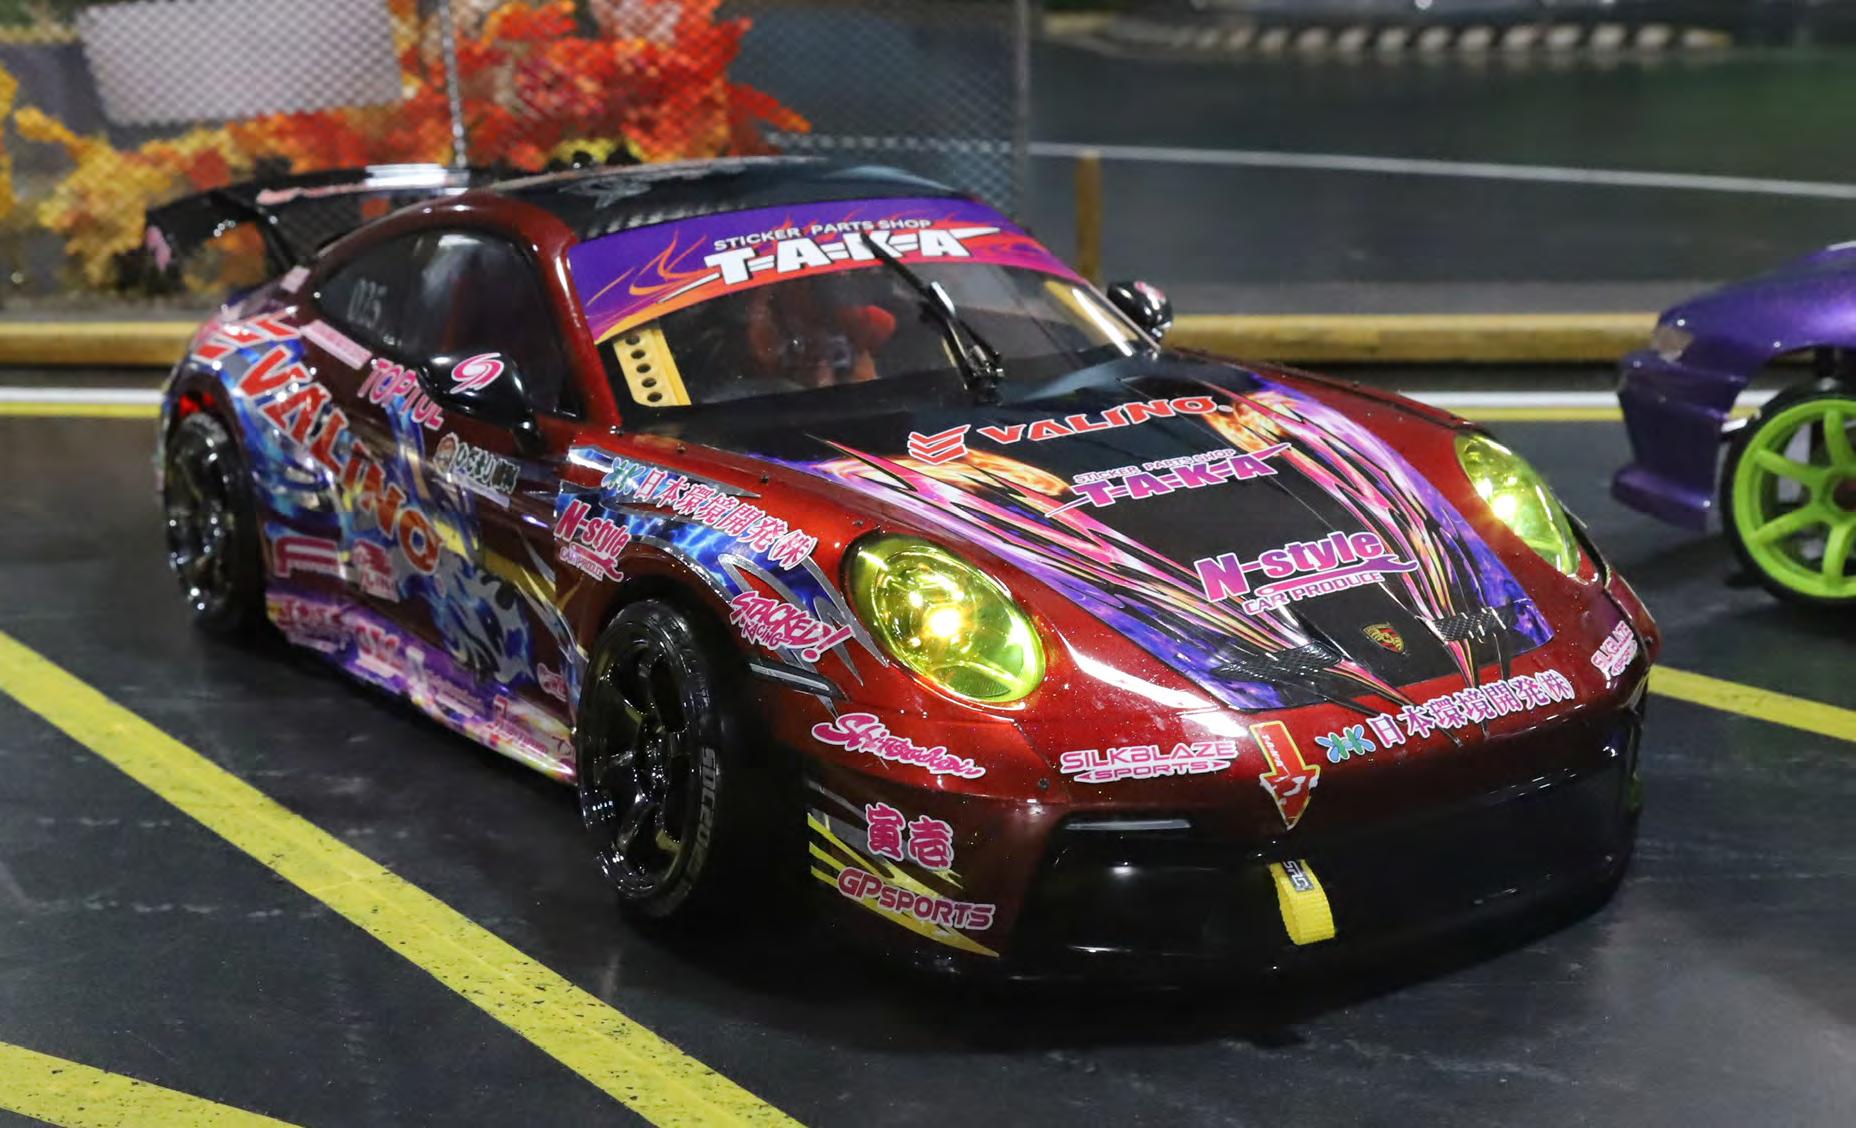
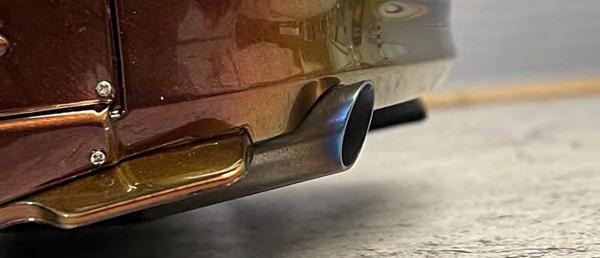
I started with a Tamiya Porsche body and leftover Taka livery, wanting to create something you don’t see all the time. The stock body was too narrow and the wheelbase was off, so I bought a second body for parts. I widened the front by 5.5 mm per side, creating a subtle GT3 RS look, and reshaped the rear into a Liberty Walk-style setup. Moving the rear overfenders back fixed the wheelbase, and spacing the lower sections gave a mild “stock-plus” feel. I relocated the factory wing, sprayed layered candy colors over flake, added lights, a cage, intercooler, and small details, then mounted it up.

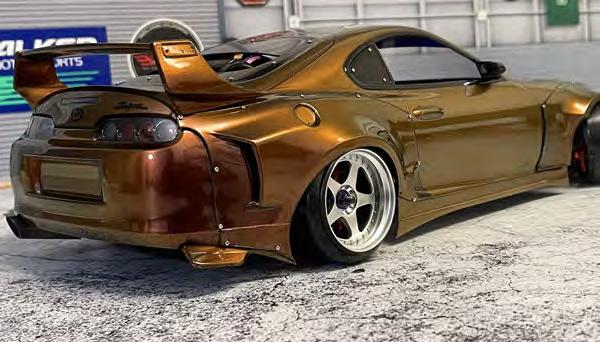
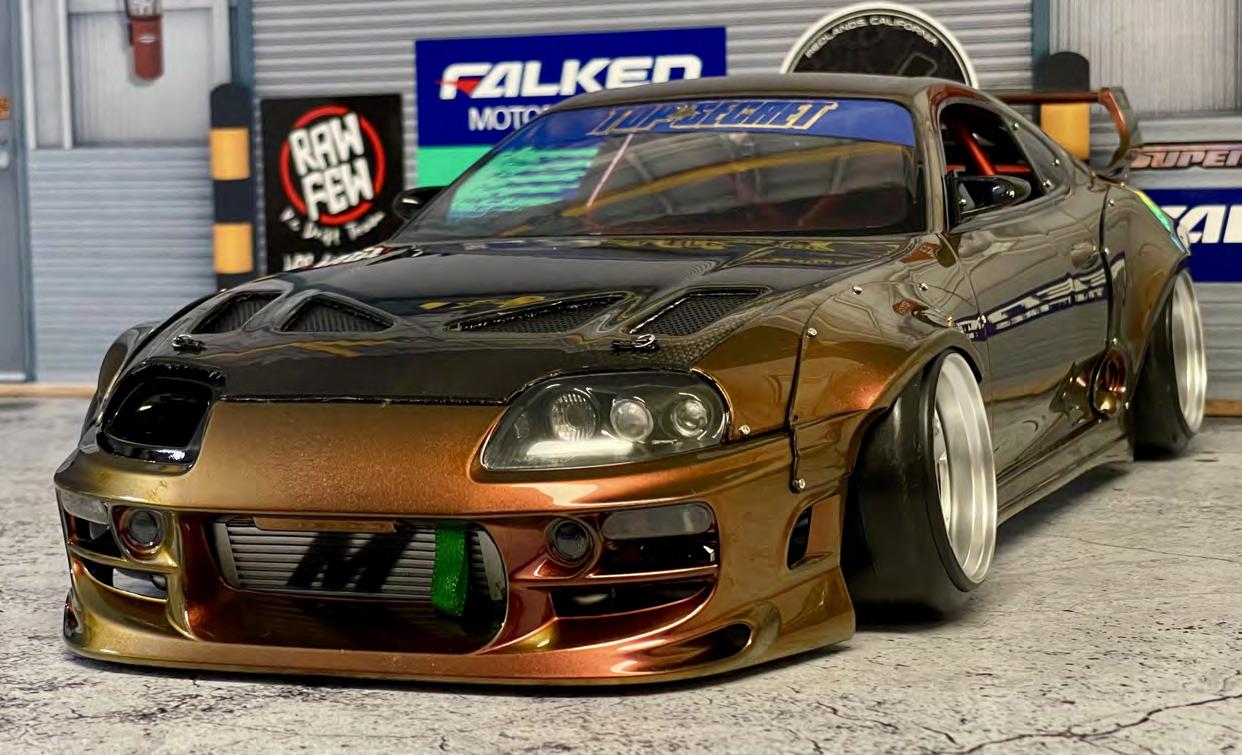
This Addiction A80 Supra has a custom paint job which color shifts from gold, to bronze, to a rosey red. The details speak for themselves - I 3D printed the headlight intake, rear TRD wing and the intercooler. The hood is simulated carbon fiber using aluminum fiber tape under a tint/smoke painted hood. The wheels are Hayashi NZ in silver. The exhaust is made from a titanium boba straw, and the tip was burnt to give it that raw titanium look. The roll cage was hand made using styrene rods and styrene cement.

JOSH GEEG
- By Troy, YouTube channel RoadsideRC
Over the years, I have fielded many questions from beginners looking to get into RC drifting. Never…and I really mean NEVER, has someone asked me how to get started with a budget of $1k or more. The questions hover around much lower budgets, and I’m often asked “I was just wondering if there were any affordable options to get into drifting, ideally around 100 bucks.”
This has driven me to look at ways to help these folks get into this hobby as close to their budget as possible. In this article, I will share the questions I typically ask, and the recommendations I normally give.
First, I start with understanding their background and plans.
• Do you have any experience with other forms of RC?
• Do you have a local track or community to help you with the car? with the car?
• Where do you expect to drive?
If they do NOT have any prior RC experience, don't have a local community, and only expect to ever drive at home or solo, then I frequently point them to an RTR. I know, I know…die-hard drift enthusiasts usually hate it when I say this. However, when a beginner jumps to a kit, they often don’t have the tools or knowledge to complete it correctly. This leads to frustration, disappointment, and their car then listed on Facebook Marketplace.
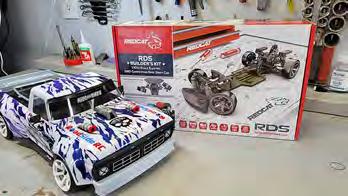
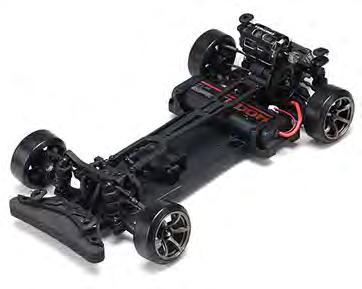
I typically point them to the MST RMX 2.5 RTR or the Redcat RDS RTR. As I write this, the brushed MST RTR is $299 (Amain Hobbies) and the
Redcat RDS is currently on sale for $199 (Redcat website). Neither of these RTRs are perfect, but both can be taken out of the box and drifted with the addition of a battery and charger. They also have supportive online communities to help the beginners when they need it.
If the person DOES have prior RC experience AND they have a local community to help, I’m more comfortable pushing them towards a kit. As many of you know, RC drift gyros and alignments are more difficult to set up than what is needed for general bashing and crawling, so a helpful community is key here.
Starting with the Chassis, I typically suggest folks go with the Redcat RDS Builder Kit (on sale for $99), the Sakura D6 ($127 supergdrift.com), or the Yokomo RD2.0 ($209 amainhobbies. com). These are all budget-focused but offer good performance, clear upgrade paths, and helpful online communities. When in doubt, I suggest they visit their local track and buy whatever everyone else is running. Having the same chassis makes it easier for the community to give tuning advice.
Next is the ESC and Motor. At the beginner level, it is one of the best places to cut their budget. If their budget is really limited, they can start with the Hobbywing 10BL60 G2 ($49 Amain). This ESC is sensored, providing turbo and boost, but has limited tuning and will eventually need to be upgraded. If they go with the Hobbywing XR10 Stock Spec ($149 Amain), it is still $40 cheaper than the very popular XD10 and Furitek setups and they will never need an upgrade.
On the motor side, I suggest the cheapest 13.5T or 10.5T sensored motor they can find. The Ruddog RP540 on Amain sells for $57 and has served me well. However, there are mixed reviews for it online. They can also get motors like the Yokomo ZERO-S and Onisiki for under $100.
Servos can be a key part of an RC drift experience, but there are some budget friendly options. I have personally used the EcoPower WP115T ($43 Amain) and the Injora INJS014 ($24 Amazon) with good results.
Gyros are so important to RC drifting, so I do not suggest folks ‘cheap out’. It is still hard for many folks to spend $160 on the Futaba GYD550, so
they will frequently use the Yokomo DP-302 V4 ($75 Amain). The most budget-friendly option, the PowerHD G2 ($49 Super-G) is currently in one of my cars and surprises me how well it performs for the price.

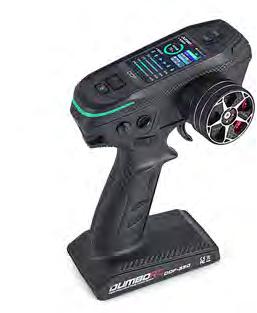
Finally, the Controller, and although a choice like the Flysky Noble or Futaba 4PM would be a good “buy once, cry once” option, their $300+
price tags are frequently out of reach. An alternative would be the Dumbo DDF350. It has a good feel, all of the settings required, and a price tag of $79 from Amazon!
The budget-oriented beginner can get started with an RTR for under $300 or build a car starting with the Redcat RDS, adding the 10BL60, Ruddog 13.5T motor, Injora servo, PowerHD gyro, and the DDF-350, which comes to a total of $360. Adding track-specific tires, a set of wheels, and secondhand body brings the total to just over $400. That would be a solid-performing car for $100 more than the RTR! Interested in knowing more about any of these parts? I have dedicated videos for each of them on my Youtube channel, RoadsideRC.
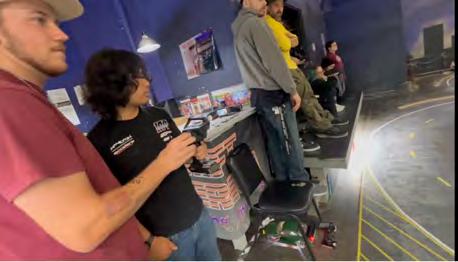
By Stephen Platt Photo credits @keensightz
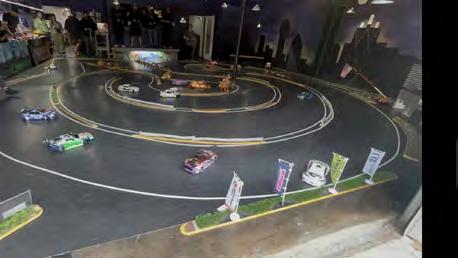
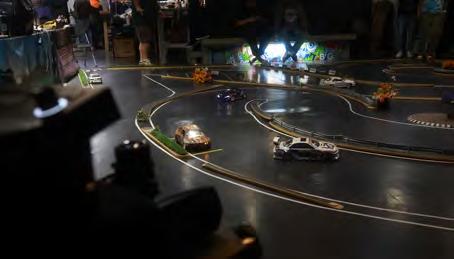
RC drift games are friendly competitions designed for everyone to participate in, regardless of skill level. Winning isn’t about having the highest skill - these games are all about having fun and sharing a few laughs. Over the years, we’ve seen many drift games and competition formats. Here are some of our favorites that are easy to set up and lots of fun.
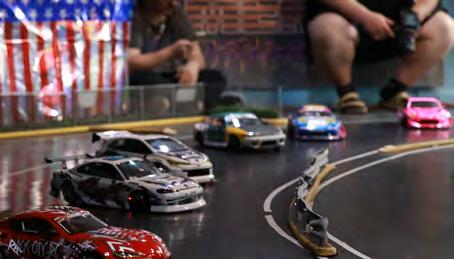
‘Last Man Standing’ is one of the simplest drift games to organize, making it ideal for beginners or tracks with mostly new drivers. The goal is straightforward: circle the track without hitting anything or anyone. Start by spacing drivers evenly around the track to avoid immediate collisions. On “go” everyone starts driving. If a driver hits a curb, spins out, or collides with another car, they exit the track. The game continues until only two drivers remain to battle for the win. When the final two drivers are left, they pressure each other into making a mistake - and it usually works. Typically, a round lasts no more than 20 minutes.
‘Ghost Driver’ is a team challenge where two people control one car, with one managing the throttle, the other the steering. It’s harder than it sounds and leads to some hilarious moments. After everyone’s had a turn, the top teams can try tandem runs for an added challenge.
A variation of ‘Last Man Standing’ for more advanced drivers or tracks is ‘Sticks’. The rules are similar, but when a driver crashes, their car ‘freezes’ on the track as a stationary obstacle. This raises the difficulty for the remaining drivers, who must avoid both the track boundaries and the ‘frozen’ cars. Drivers may need to navigate around obstacles without drifting, though the goal is to drift as much as possible. The focus remains on fun, so the rules are flexible.
‘Musical Parking Spaces’ is a new favorite, inspired by the classic game of musical chairs. Start by counting the number of cars on the track and set up one fewer
parking space - for example, 14 spaces for 15 cars. Mark each space with two 10-inch pieces of yellow electrical tape, 20 inches apart. Spaces can be spread out or grouped, such as in a parking structure with multiple bays. When the music plays, everyone drives; when it stops, drivers race to the nearest parking space. The last driver without a space is out and occupies a space for the next round, reducing the number of available spots. The game continues until only one driver remains. It’s always fun to see the scramble for the final spot.
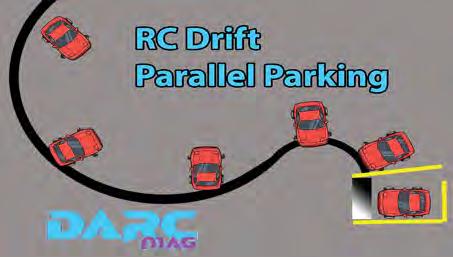
The ‘Drift Parallel Parking’ challenge is based on a full-scale version from Japan. Drivers approach a marked parking space with a sweeping drift, a Manji (a snakelike switch to change direction), then must slide in sideways with no advancing forward allowed.
The parking space is 20 inches long, marked with two 10-inch pieces of yellow tape. You then complete the box with an outside line, to determine that they have completely parked within the
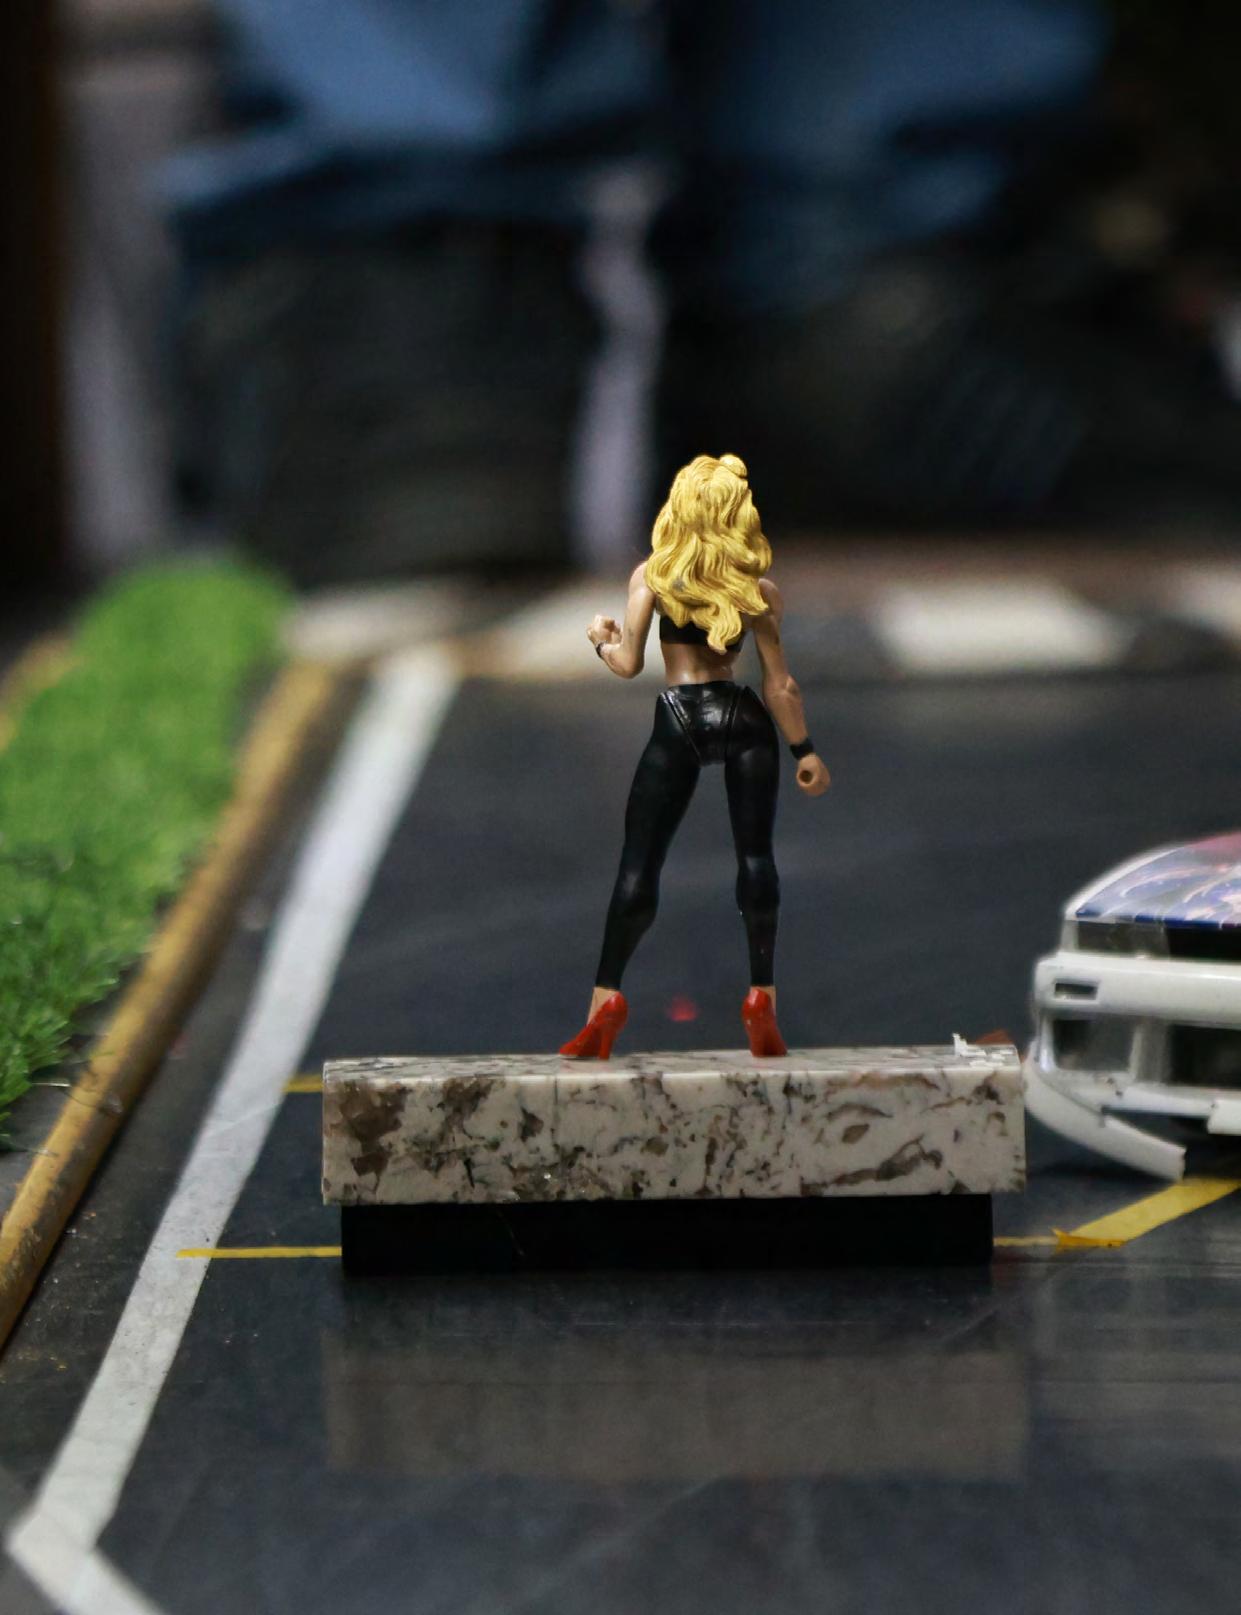
spot. The outside line at the back of the box is hinged slightly open, about 10-15 degrees, to allow a little ‘wiggle’ room. A figurine (we use a 7-inch WWF character named ‘Sable’) is placed on a platform at the front of the space. The score is the distance from the car’s front bumper to the platform - closest wins. If the figurine on the platform is knocked over, it’s a zero. This challenge is a true test of precision and control.
‘Tandem Practice’ isn’t a competition, but a group goal. All cars line up single file at a starting point. On “123 go” everyone tries to maintain formation and even spacing around the track. Drivers who spin out or crash move to the back for the next round. The goal is to complete a clean lap together, rotating the lead driver, to give everyone a chance to set the pace.
NEW DRIFT GAMES ARE ALWAYS EMERGING. IF YOU HAVE A FAVORITE, OR KNOW OF A UNIQUE ONE, WE’D LOVE TO HEAR ABOUT IT.
darcmagpub@gmail.com

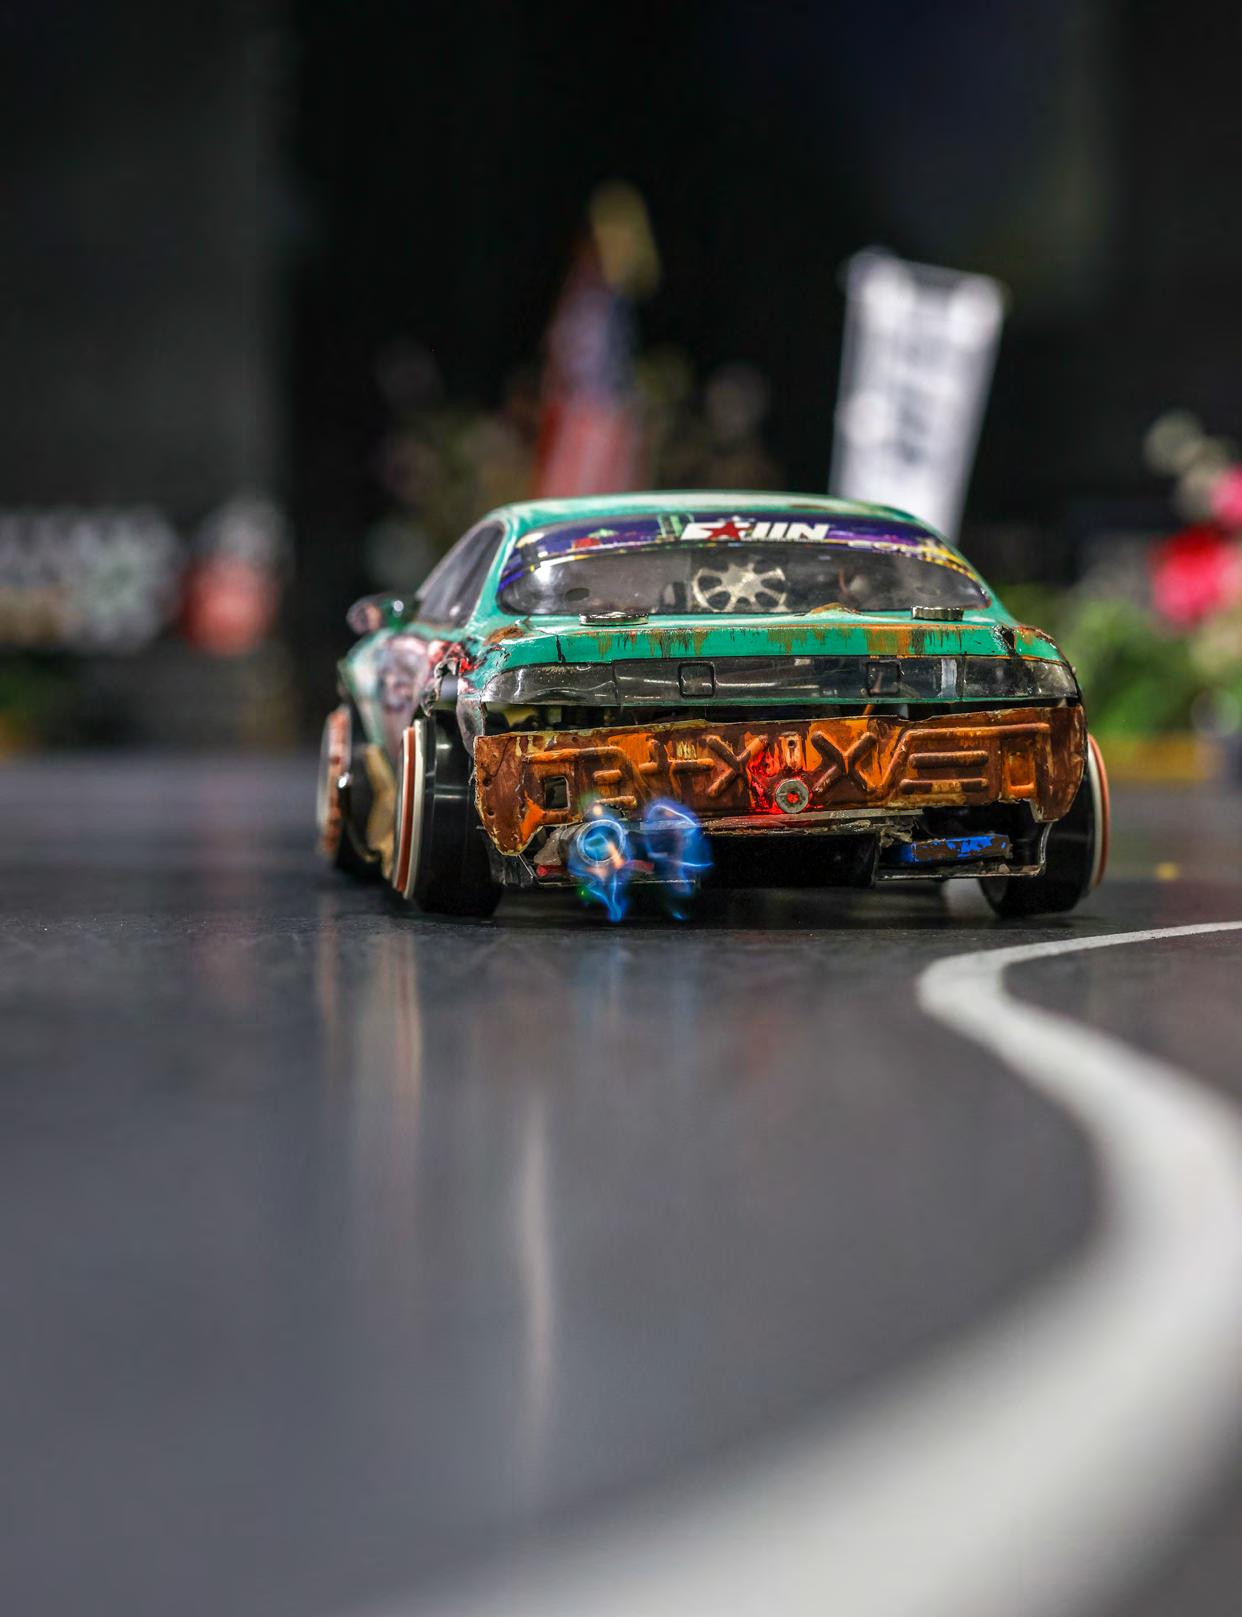
FIRE HAZARD - KEENSIGHTZ PHOTOGRAPHY


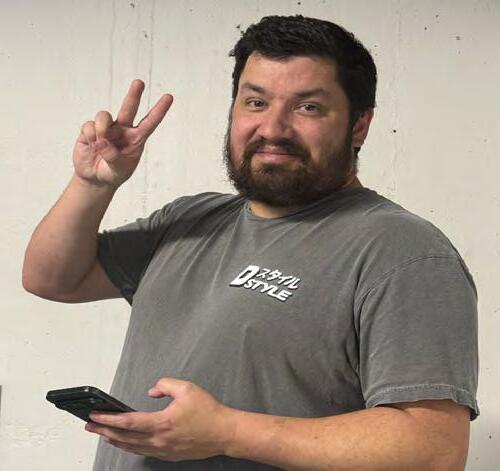
Hey All! I’m gonna keep it local for this interview. He’s a Northwest drifter who’s been in the hobby for the last three years. You’ve seen him co-hosting my live streams, drifting at Drift PDX, and at the national competition venues. Constantly seeking the next battle and looking to hone his skills, meet Logan Mineer!
Adam: Welcome Logan, what first pulled you into the world of RC drifting, and do you remember the moment you realized you were hooked?
Logan: It all started with a love for motorsports and gaming. I got into rally through Gran Turismo 2, and eventually drifted with Need For Speed Underground. After some offroad RC, I was curious about RC drift, but without a local track I knew that my interest wouldn’t last. Then PDX Underground opened their drift track and I finally bought a YD-2Z, built on a budget. I picked it up fast, and found it to be much more captivating than simulations or gaming.
Adam: Was there someone who inspired or mentored you when you were starting out?
Logan: Yeah, Mike Carozza was always at the track, giving consistent leads for me to chase and build up quality seat time quickly. Jake Dotter has been a big supporter of my growth, as well as James Andreassen - these are guys who give you clean laps so you can learn how to be aggressive in chase.
Adam: Looking back, what skill or technique took you the longest to master?
Logan: I wouldn’t say I have mastered anything, but my biggest struggle is feeling the car and translating that into tuning. My perception changes every week. If
by Adam Mah of RC Drift Talk Podcast - YADMAH
I were to swap out my shocks for something completely different, I can’t guarantee I would even notice! But I’m starting to get the hang of it.
Adam: What was the first modification you made that made you feel like you were starting to take drifting more seriously?
Logan: I upgraded from my Futaba 3PV to the 10PX, it was a pretty big financial commitment and I knew I had to stay locked in to make it worthwhile.
Adam: Is there a particular moment, good or bad, that stands out as a turning point in your development?
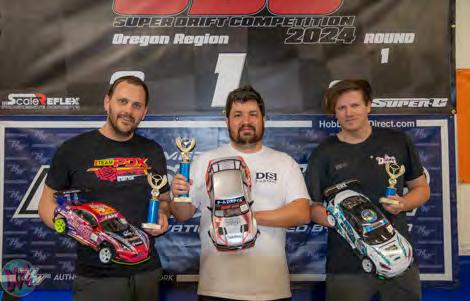
Logan: Yes, Round 1 of SDC Oregon 2024 - my first TQ and first win. Before that, I finished 2nd a couple times in comps and almost had 1st win jitters. I was starting to wonder if I’d ever be able to perform in a final. I went from being unsure to expecting to win, that has helped my mental game a lot.
Adam: Was there a competitor who pushed you to level up your driving?
Logan: My buddy Charlie Hiltzik, who I started with, was doing really well in comps. I only did one comp in 2023, SDC Oregon, but Charlie ended up winning one of the rounds, having only been driving a short time. So he motivated me for sure!
Adam: What’s the one upgrade that offers the biggest return for drifting performance?
Logan: It depends - if you have an RTR chassis, the servo/gyro combo is going to make a big difference. I also think having at least a mid tier transmitter is a big deal. Beyond that, seat time.
Adam: If someone were building their first comp-ready drift chassis, what advice would you give them?
Logan: I would suggest picking something that is a known and common chassis like a YD-2 or RDX. Spend as much time tuning it as you can, but don’t change much in season. Once a season starts you should only be making minor adjustments. Consistency is king.
Adam: How would you describe the local RC drift community in the Northwest?
Logan: It’s great, man. We have a great group and I am happy to see everyone when I show up at the track. Obviously our core group, Team PDX, is very close and we travel often, so that is very fun, and makes me feel proud.
Adam: You’ve been to a few different states for drifting, what states and tracks have you been to? What has been your favorite track you’ve visited, excluding Drift PDX?
Logan: I’ve been to AMain, Rolling Garage, Pittstop, Super-G, GGT, Tandem RC, and soon Eighty8 in Surrey, B.C. All are great spots with great people. I have to say my favorite outside of home is Rolling Garage. It’s just like an extended family down there and we always have a good time with those dudes. Honorable mention to Tandem RC as well. Great spot with fun layouts.
Adam: Who in the community do you look up to at this stage of your journey?
Logan: Jake Dotter and Judson King are absolute pillars for our
community in the Pacific-Northwest. Jake has pushed my skills farther than I could have by myself. Judson, our track owner, has put a lot of weight on his shoulders to make sure we have a spot to drift and hang out. Honorable mentions: Mikko Yang, Hector Moran, Adam Hokoki, and Jordan Meyers, all for various reasons.
Adam: What’s the next milestone you’re aiming for?
Logan: I accomplished many goals this year, my sights are set on continuing to grow our community and making our event ‘Drift to Death’ bigger than ever! Competitively, I would like to improve my results at SDC Worlds and get further into the top 32, if not win! Winning some kind of major tournament, something bigger than a local SDC round, would be great.
Adam: Where do you see yourself in the world of RC drifting two or three years from now?
Logan: Hopefully competing on ESPN Ocho in Formula Drift RC or something like that haha. We can dream!
Adam: And finally—if you could give one message to someone just starting their RC drift journey, what would it be?
Logan: It’s probably not the car :]
Follow Logan on Instagram @hotdogracingus
Follow Adam on YouTube, Facebook, and Instagram: @yadmah
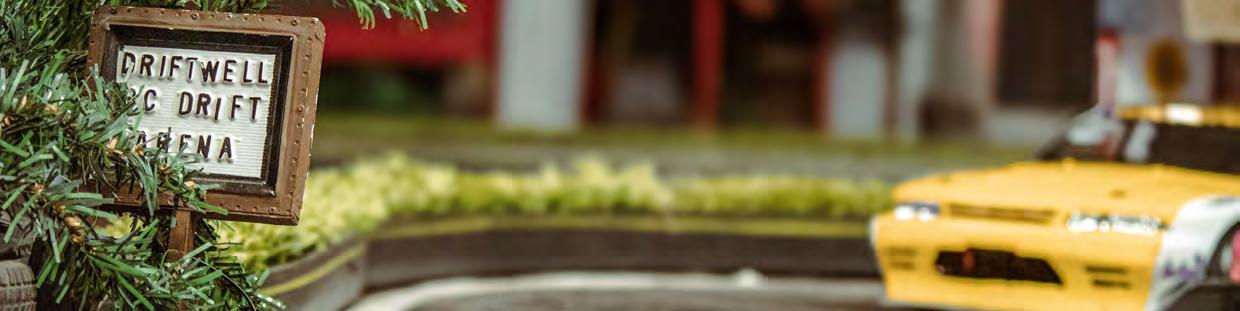


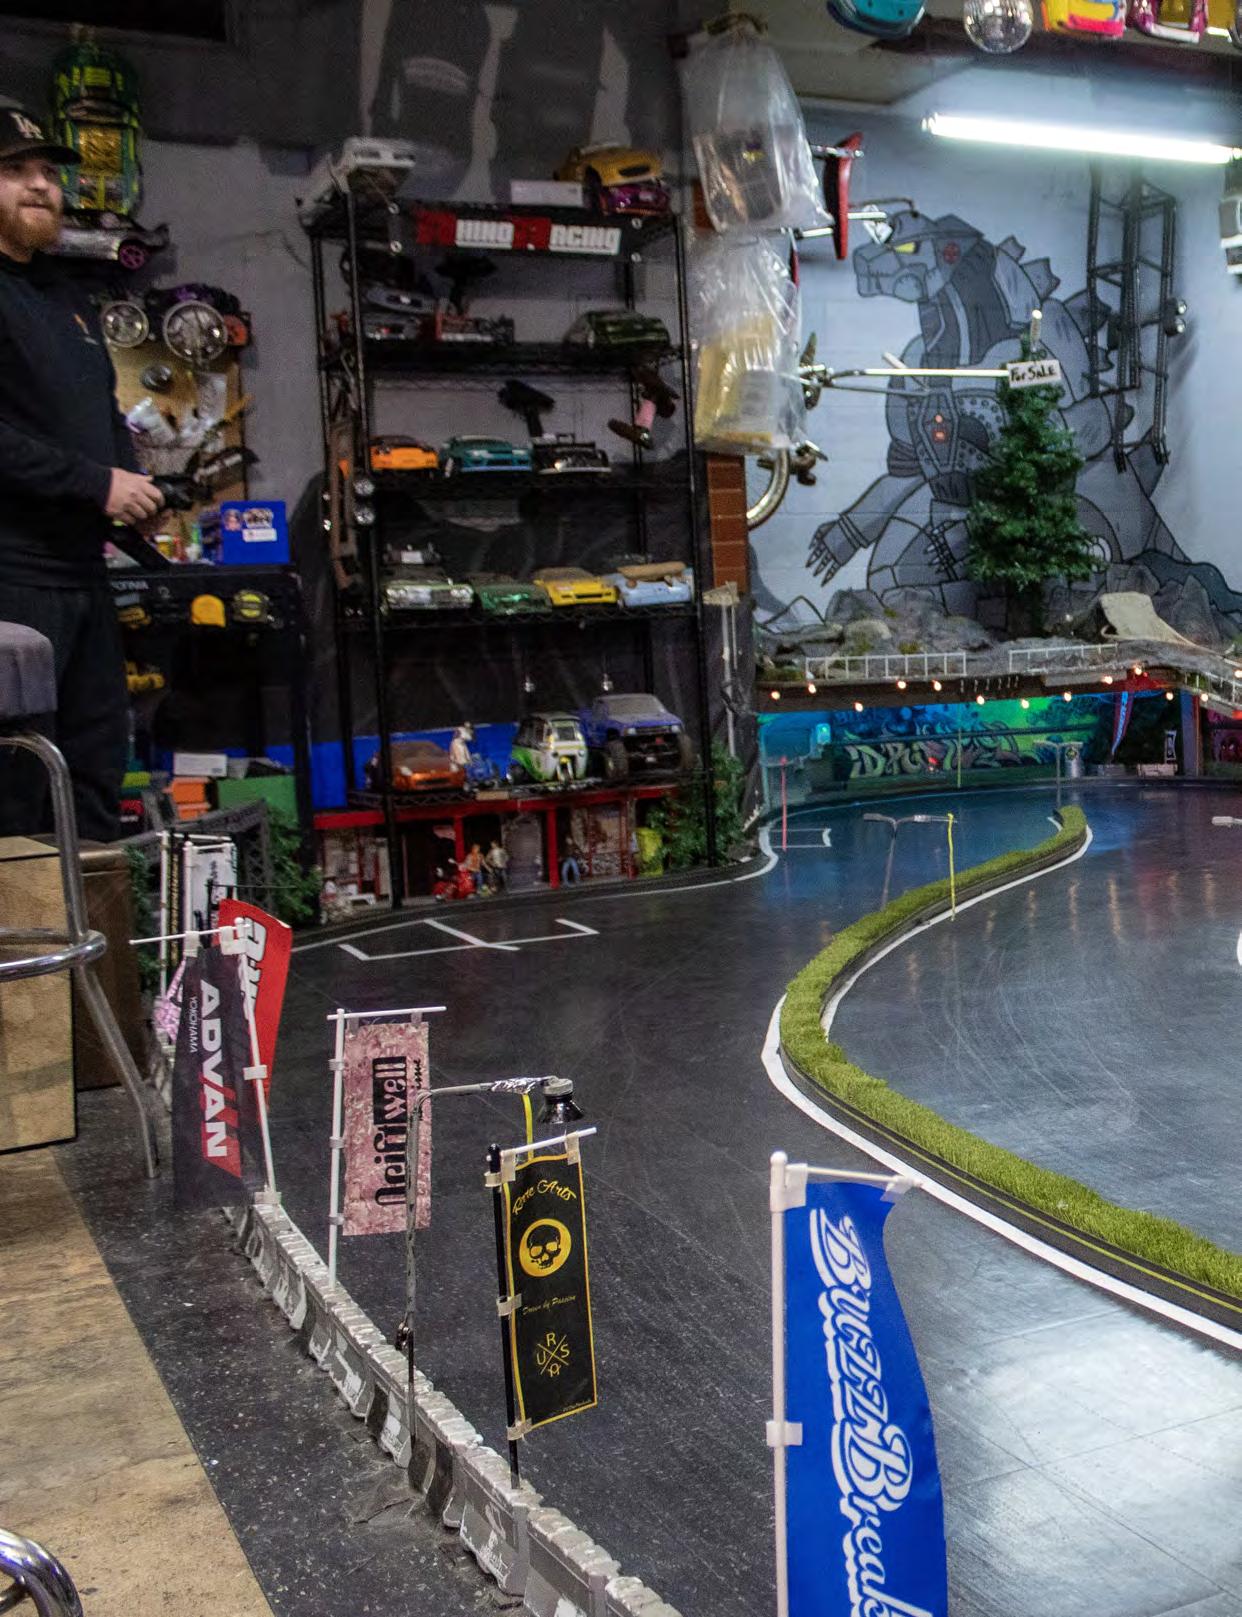
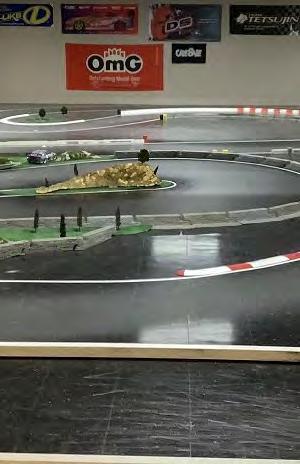
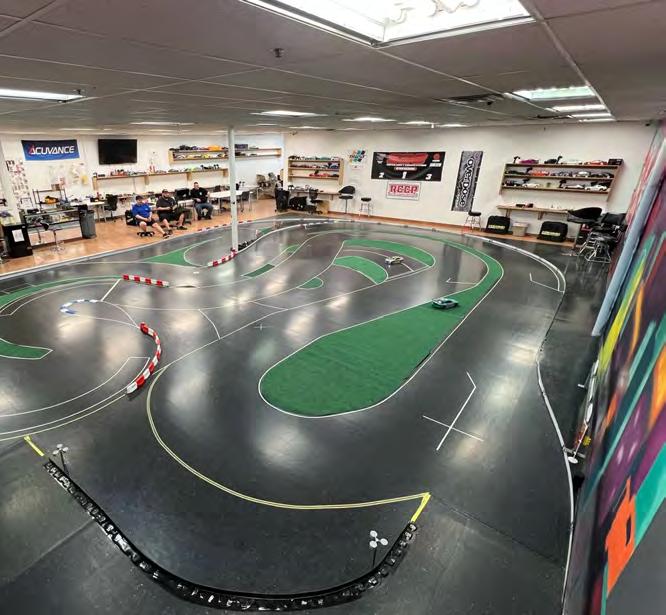
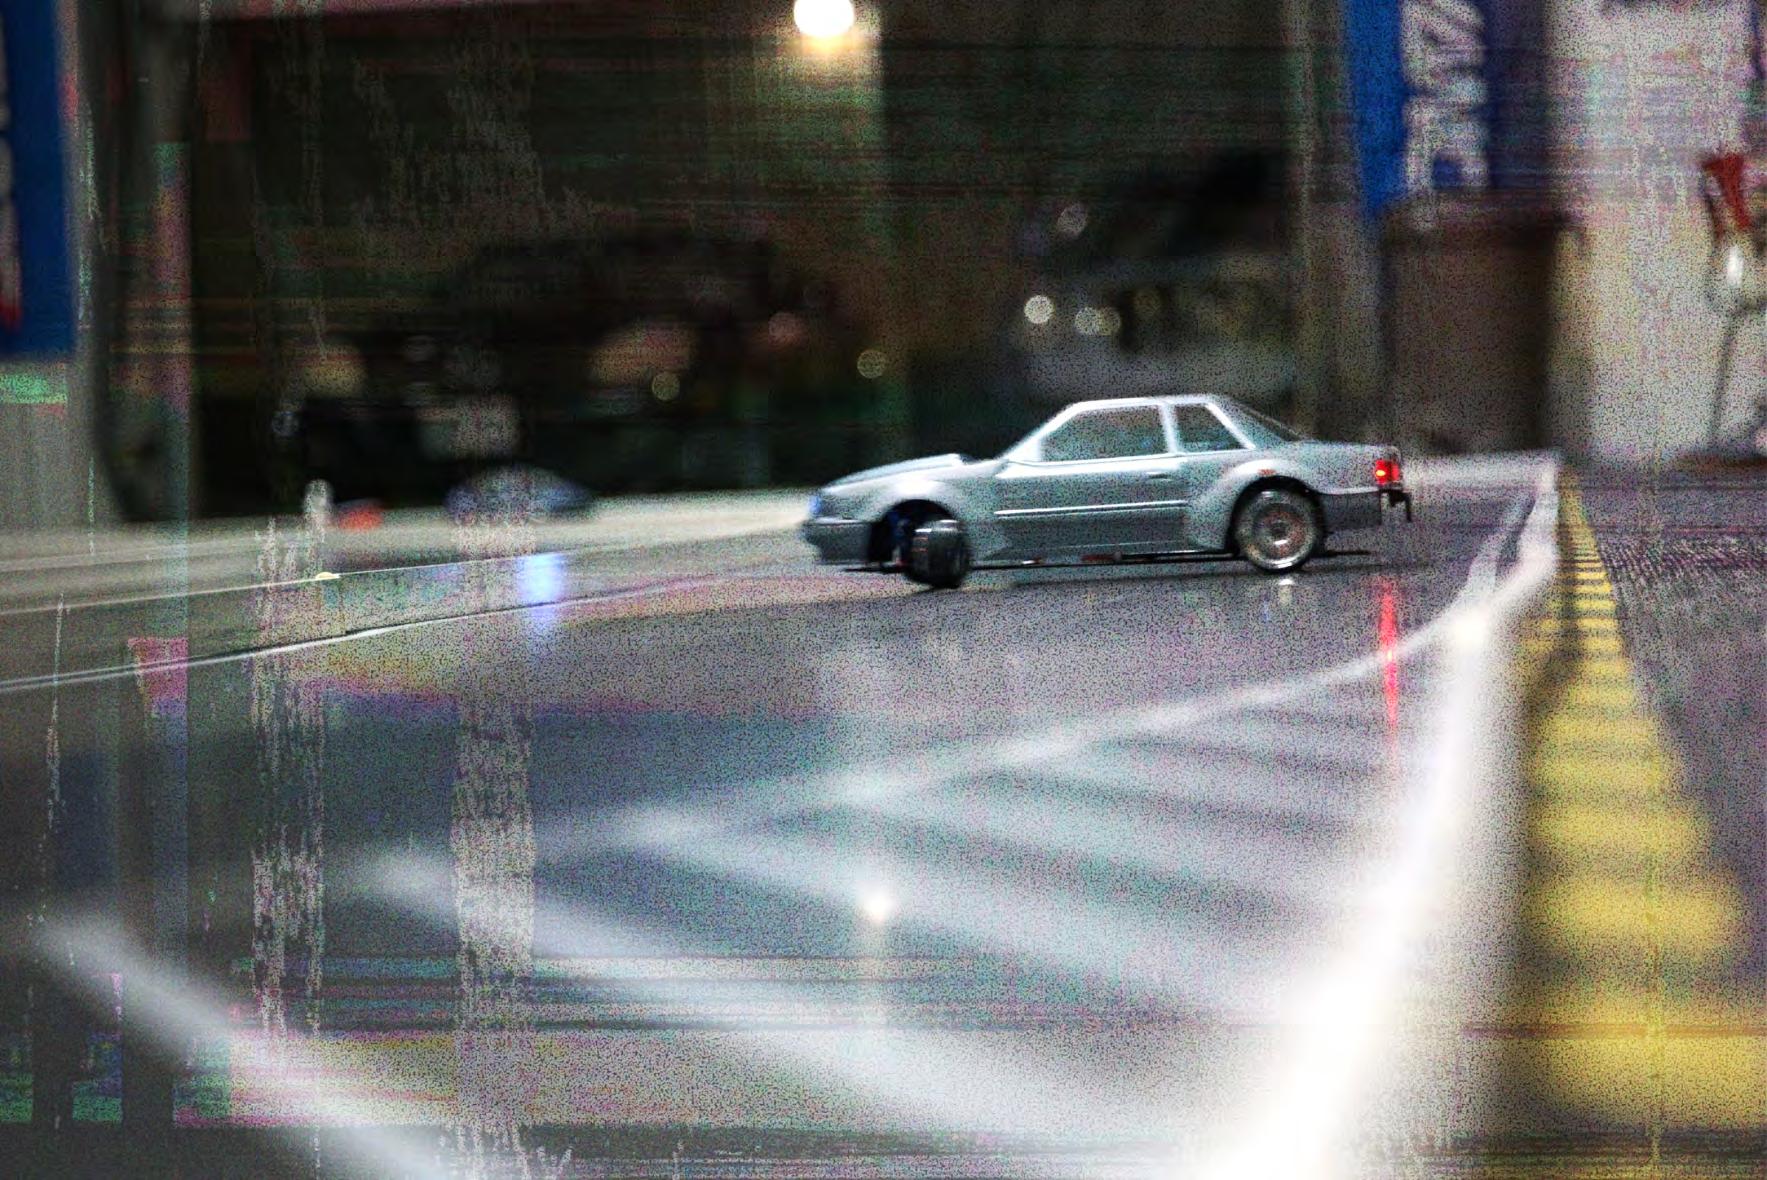
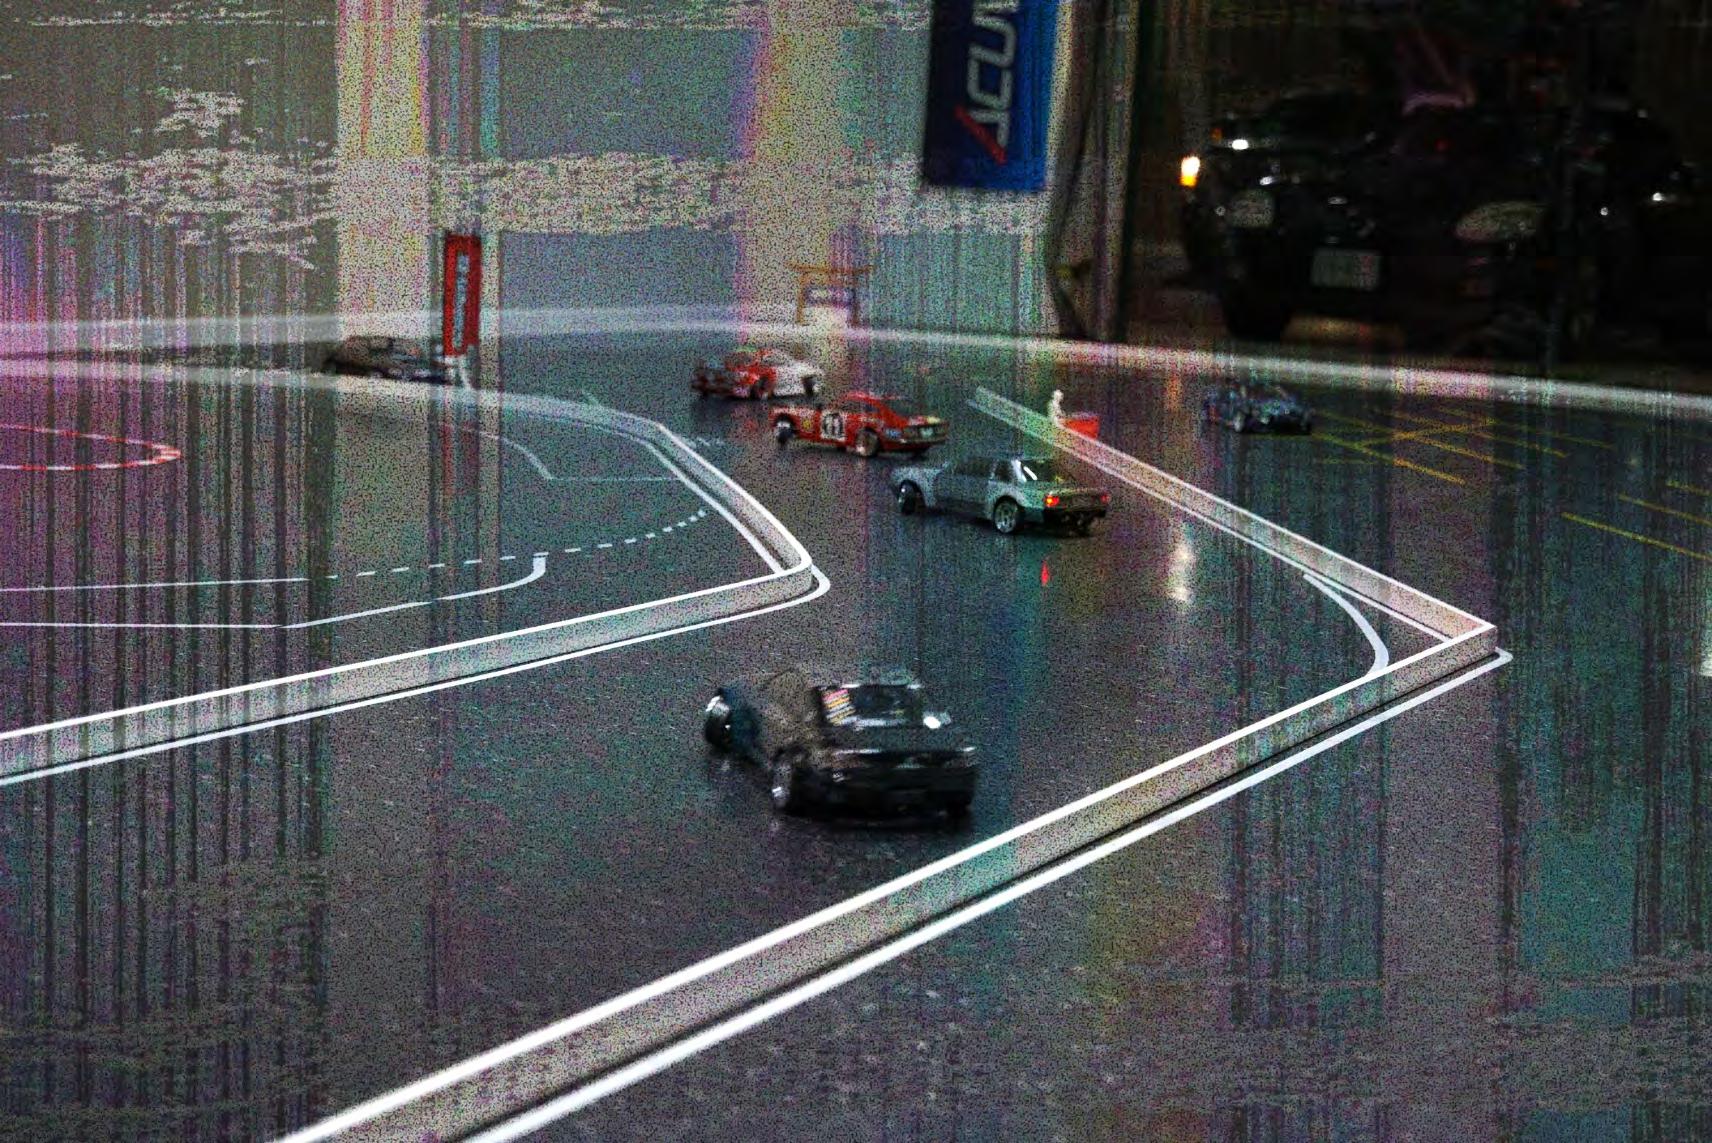
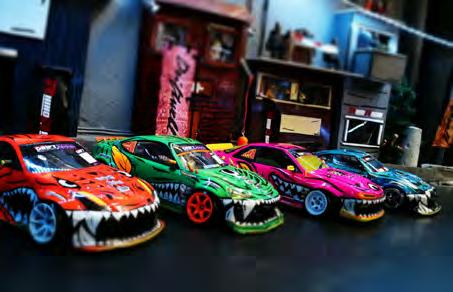
Driftwell isn’t just another RC drift track, it’s a passion-project that’s shaped the Central Valley RC drift scene since 2014. Founded by Jeremy Meyer in Fresno, California, Driftwell was created with a single purpose: to grow the RC drift hobby and help newcomers find their own style on the track. For Jeremy, it’s never been about competition for competition’s sake; it’s always about community, progress, and sharing the thrill of drifting.
In Jeremy’s words, “Our main goal at Driftwell is to help new drivers develop their own style and progress in tandem drifting. We want people to learn track etiquette and set up their chassis based on the style they want to achieve.” They always say, “Only take advice from drivers you’ve actually seen on track or driven with. That’s how you know it works.”
Track rules at Driftwell are straightforward: call out your spins, and everyone runs Yokomo DRC tires for consistency. Driftwell’s motto, fittingly, is “We don’t play.” It’s a playful jab at the seriousness with which the team embraces both fun and learning. Jeremy and the Driftwell crew are known for their open ‘nogatekeeping’ attitude. “No one here hides their setup. We let everyone take measurements and copy tunes. We’d love to see a world where RC drifting is about driver-to-driver connections, not money or secret tunes. Our tunes utilize a lot of traction to shift weight, so we rely on mechanical grip and deceleration instead of drag break. As far as tuning goes, we don’t put a cap on it. Most people who come here want to drive with us and tune off of our setups. We openly give out our tunes, without forcing anything on anyone.”
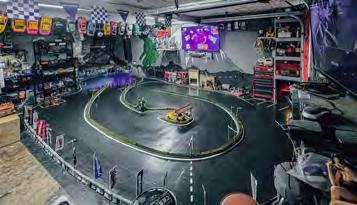
Since opening, Driftwell has operated from the same location, but big changes are coming. Jeremy is excited about moving into a new building soon. The current track is primarily a practice, test, and tune spot. Comps are rare due to space. But Jeremy says that’s about to change, “We’re planning to hold an SDC 2026 Regional series at the new facility. It’ll give us the space to run bigger events and welcome more drivers.”
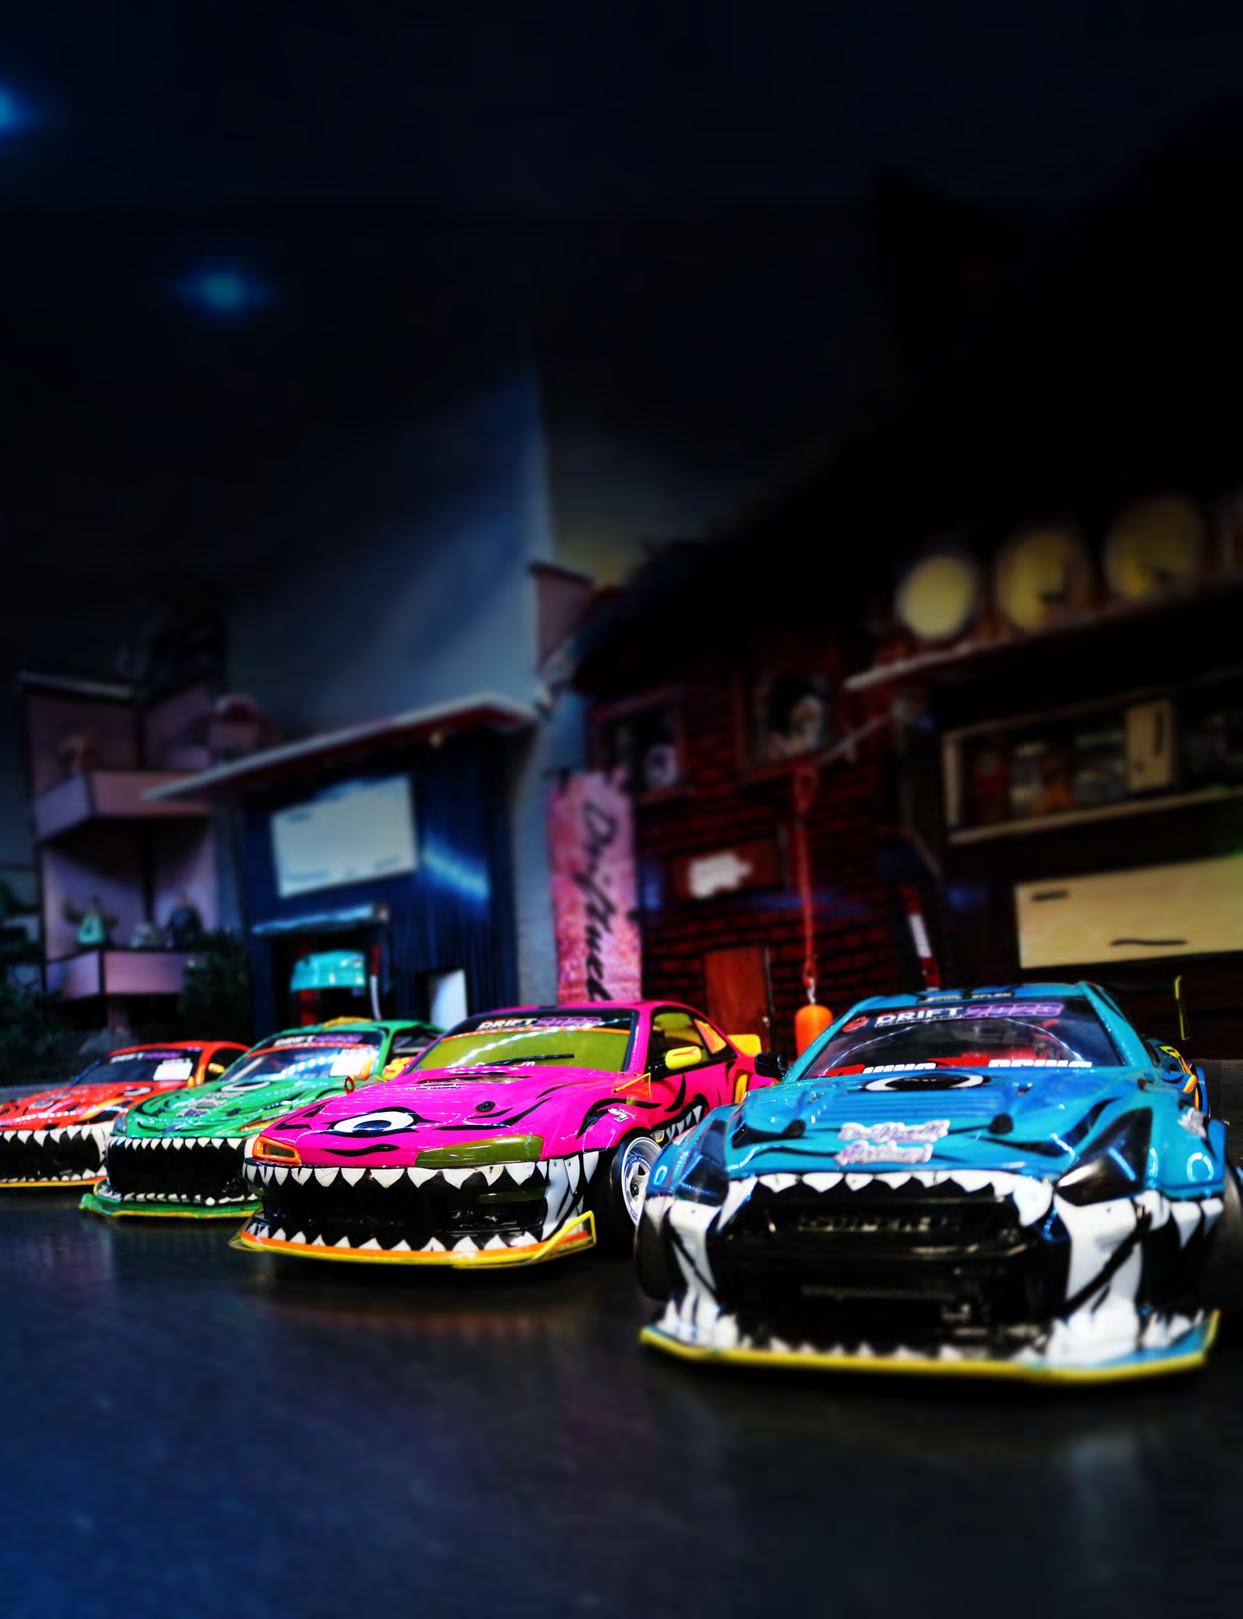
Jeremy’s creative skills are evident at Driftwell by way of murals,
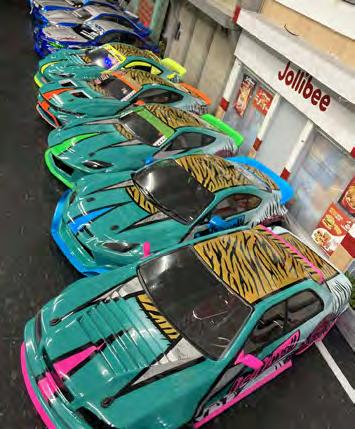
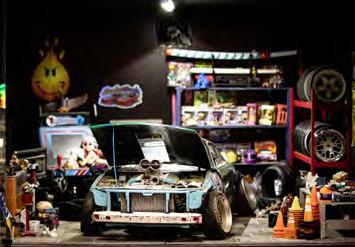
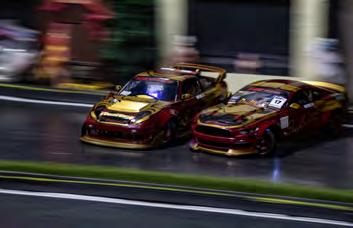


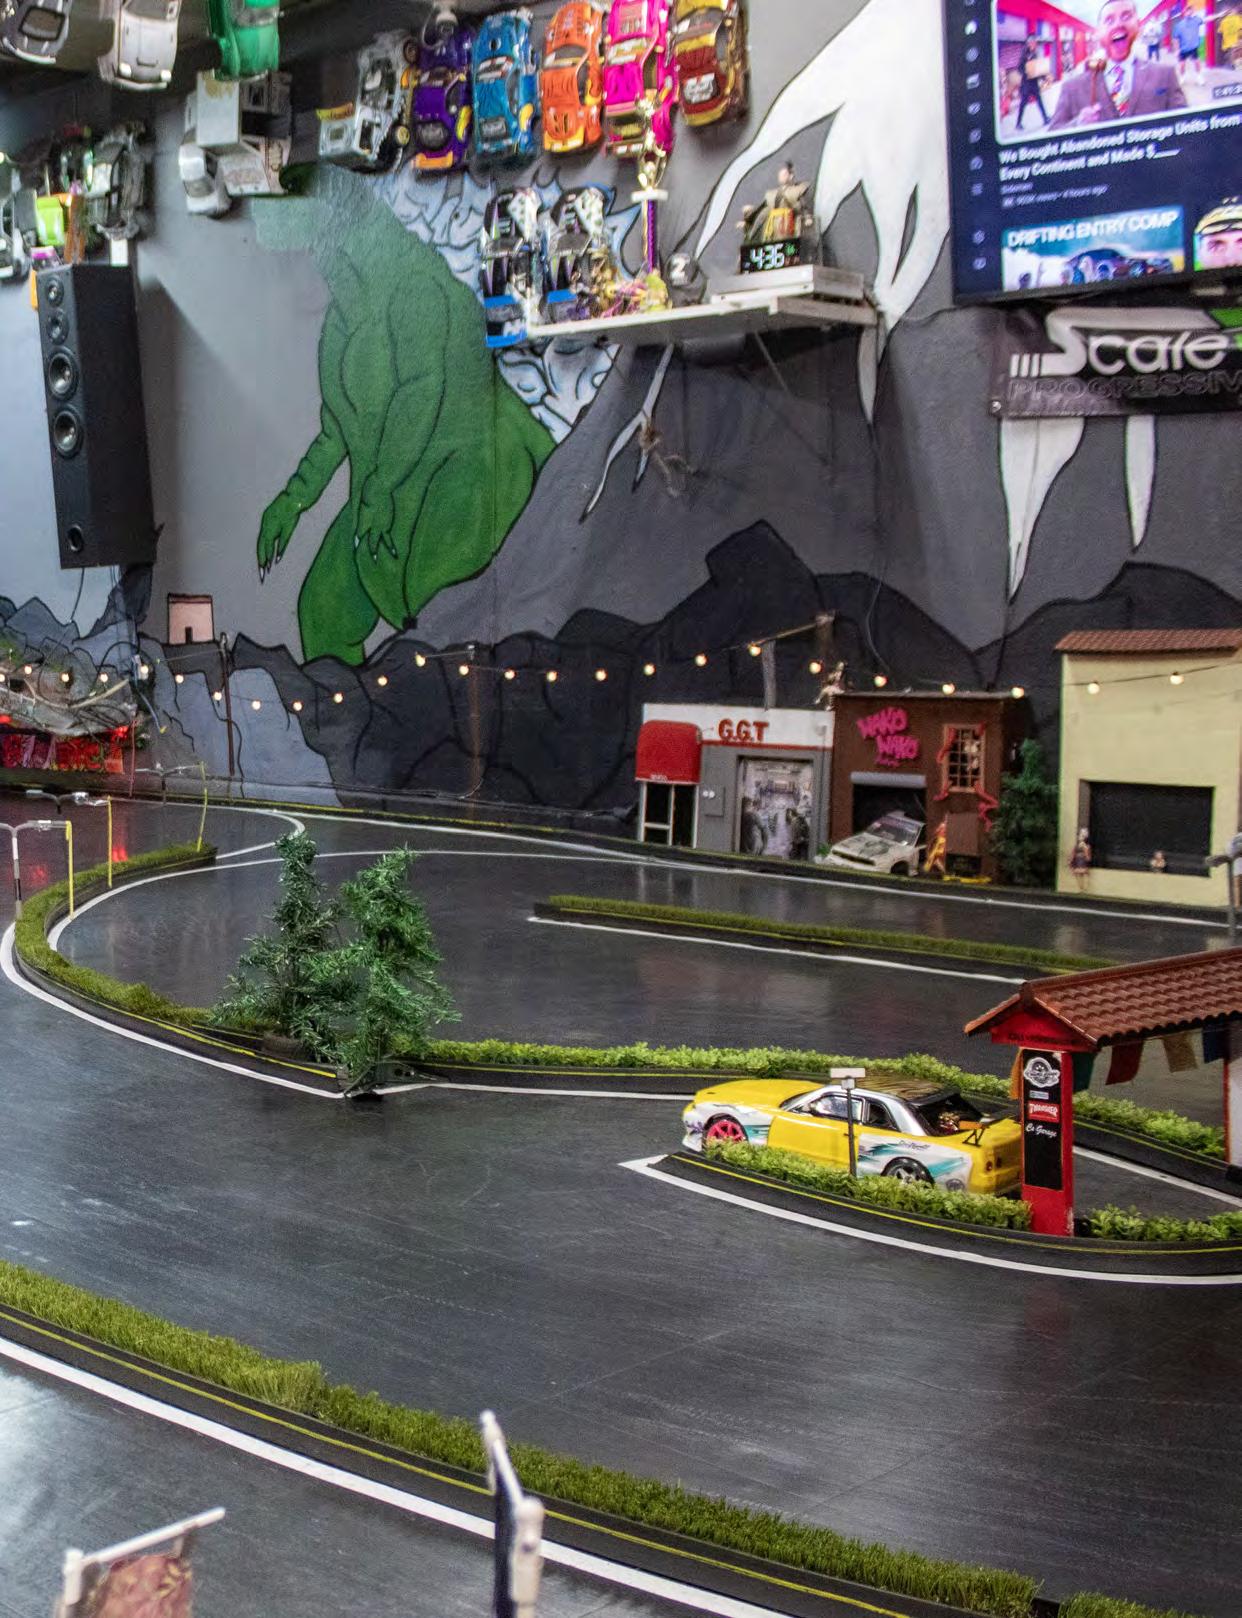
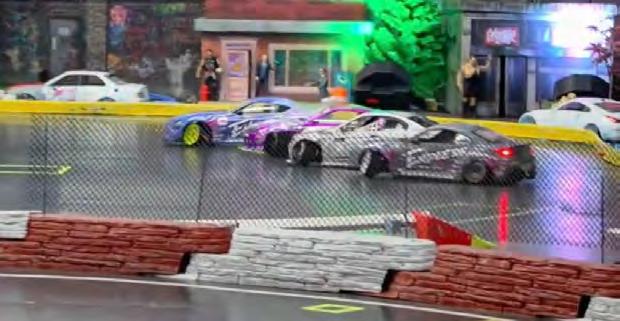
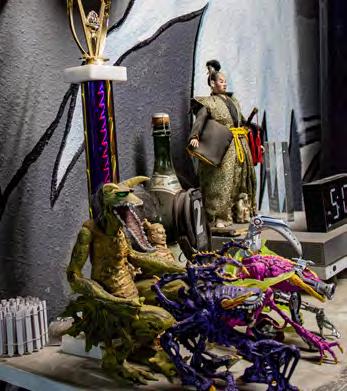
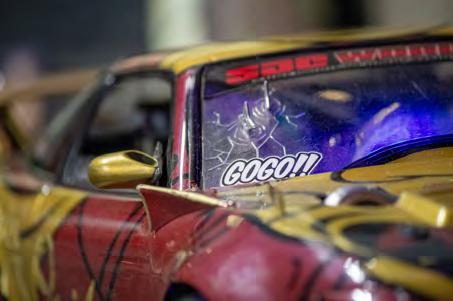
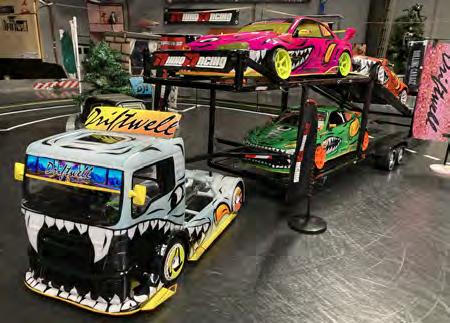
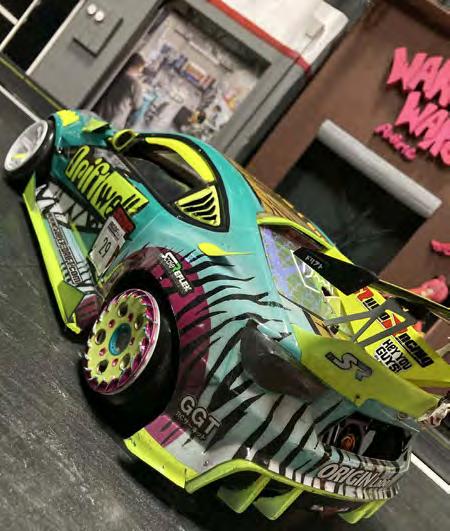
and dioramas, and figurines. The Driftwell Team Bodies stand out visually, too, featuring imaginative, unique, and vibrantly colorful designs. Their cars sport swords and ninja stars sticking out of their windshields - a signature touch. Jeremy’s thinking is, “I paint them myself. My style’s a little strange, but I’ve always liked breaking away from the normal drift look. The swords and ninja stars are like battle scars and marks of our time on track.” He also made some amazing monster-themed team bodies for the 2023 SDC Series, complete with drift rig and trailer. Jeremy explains the theme, “The bodies were just random creatures I came up with. The drift bodies came first, then I painted the spawn toys to match. I just like to be out of the ordinary and stand out in a group”
Jeremy’s commitment runs deep. He’s at the track every day, handling everything from layout changes to scratch-built scale buildings. “I change the track two or three times a year, sometimes more, depending on what we need to train for. Usually, I’ll do it all in a day. This is my only job and my biggest passion. I try to put down at least one battery a day.” While he’s open to help, Jeremy admits, “If I ask, I know I’d get help, but it’s hard to have someone else share the same vision.”
Driftwell’s hours are 4:00pm to 11:00pm or later, with the busiest nights on Tuesdays, Thursdays, and Sundays. The track is quickpaced, reflecting the evolution of the RC community in California. Though big events are rare at the current spot, Driftwell is always open to out-of-town visitors. Jeremy loves showing off the track’s
hidden secrets and unique vibe.
“We don’t have a ton of events right now, but in 2026 we plan to host more multi-day meets. We’re always happy to open up for anyone who rolls through.”
Jeremy’s favorite memories include late-night sessions during Worlds, when out-ofstate drivers drop in and the track stays open until 3:00am. “Those are some of the best times - seeing so many different drivers come together and push each other. We love what we do and we’re proud of our little shop.”
Running Driftwell has been a solo mission for Jeremy for almost a decade, but recently, a teammate, Armando Pimentel, has stepped up as a halftime partner. “He’s been loyal to the spot even when other shops tried to recruit him. I’d like to thank Armando for his support, and also Mischa Zwaan, especially for helping with the P-Tile. Our team drivers are sponsored by Rhino Racing and I’d also like to thank them for their support. Driftwell has Shark infested waters!”
Driftwell is the only dedicated RC drift track within a two or three hour drive.
Jeremy’s focus remains clear: help the hobby grow, create a welcoming space, and make sure every driver leaves better than they arrived. “RC drifting should be about the drivers, not money or exclusive tunes. At Driftwell, everyone’s welcome to learn, share, and progress. That’s what makes this place special.”
Jeremy’s love for the hobby has kept Driftwell up and running for over a decade. The space shines with passion, character, and fun. Congratulations to him and the Driftwell Community for standing the test of time!


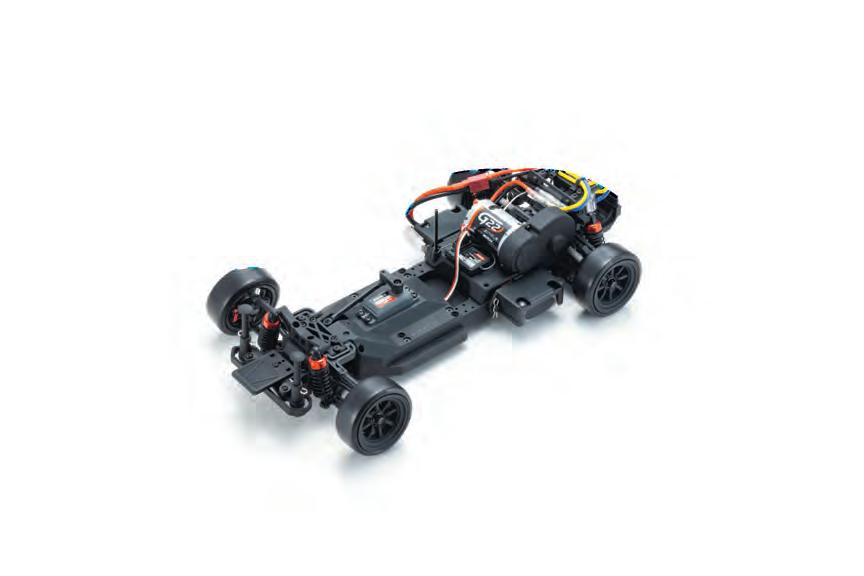
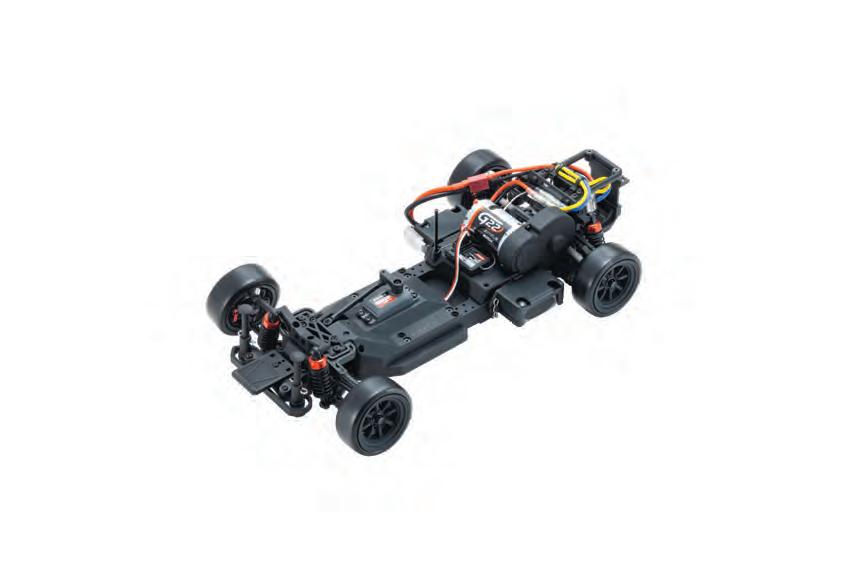

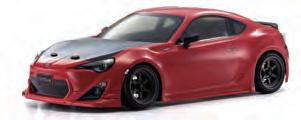
DPR-RZ34BL, DPR-RZ34R 49,800JPY


DRIFT PACKAGE RTR PANDEM NISSAN FairladyZ (RZ34) (Blue) + DRIFT PACKAGE RTR PANDEM NISSAN FairladyZ (RZ34) (Red) assembly

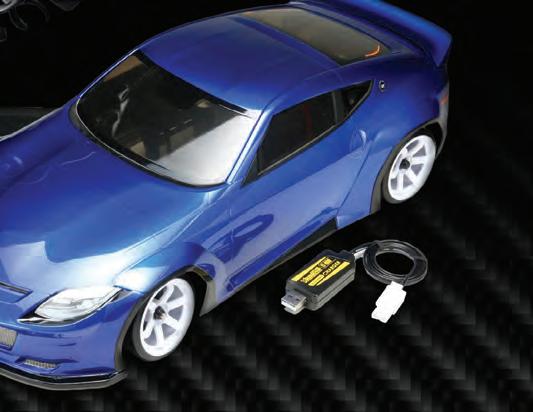


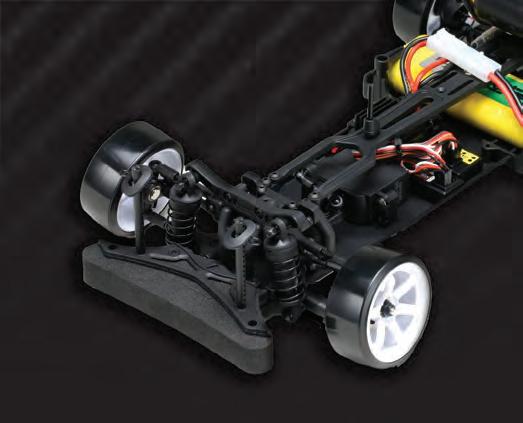
THIS COMPREHENSIVE SET OF RWD DRIFT CARS comes highly recommended for rst-time RC car buyers and those new to drifting. It’s a comprehensive kit that covers all the areas beginners often struggle with, from chassis assembly and RC unit installation to body painting, and it includes a USB charging adapter. All this is available at an a ordable price. Based on the latest RWD drift car, the Rookie Drift RD2.0, it shares over 90% of its parts with this model. This means that you can easily replace damaged or worn parts, and there is also a wide range of optional parts available for upgrading. As your driving skills improve, you can handle everything from maintenance to tuning with ease. The NISSAN Fairlady Z body is pre- tted to the machine and is available in blue or red. Simply charge the running battery, and provide four AA batteries for the transmitter separately, and you’re ready to start driving right away. NISSAN Fairlady Z bodies are also available for individual purchase.


range