PROJECT 1 - TREE CANDLES

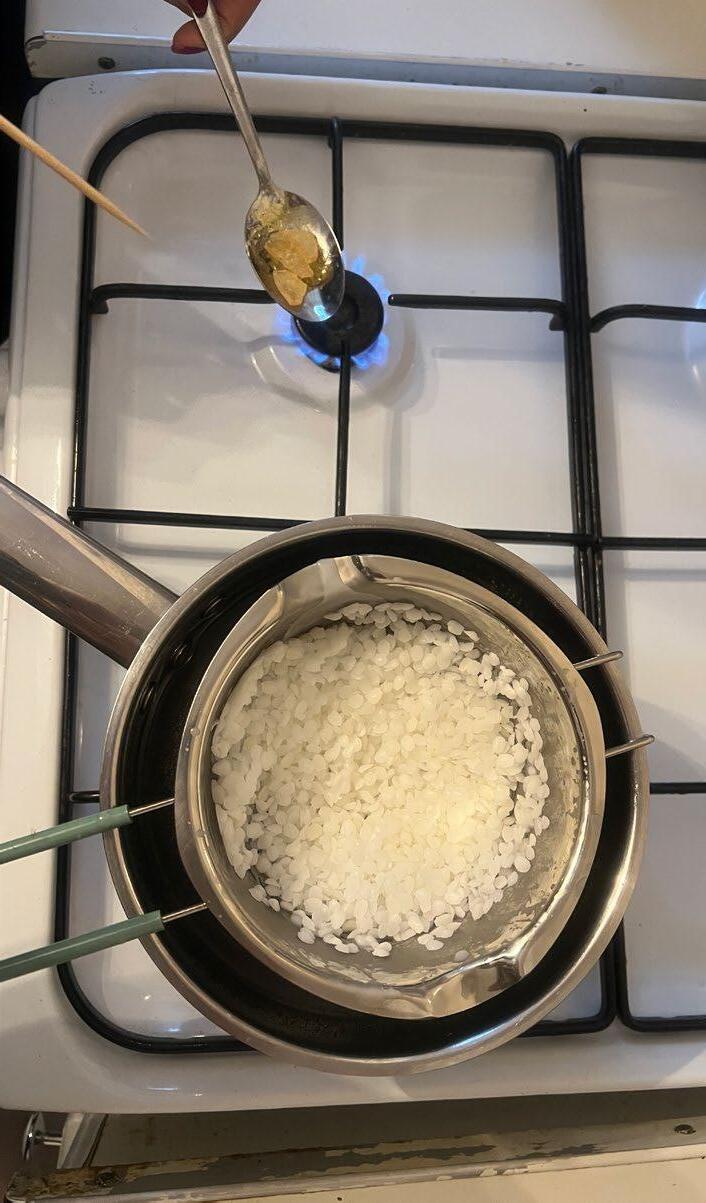
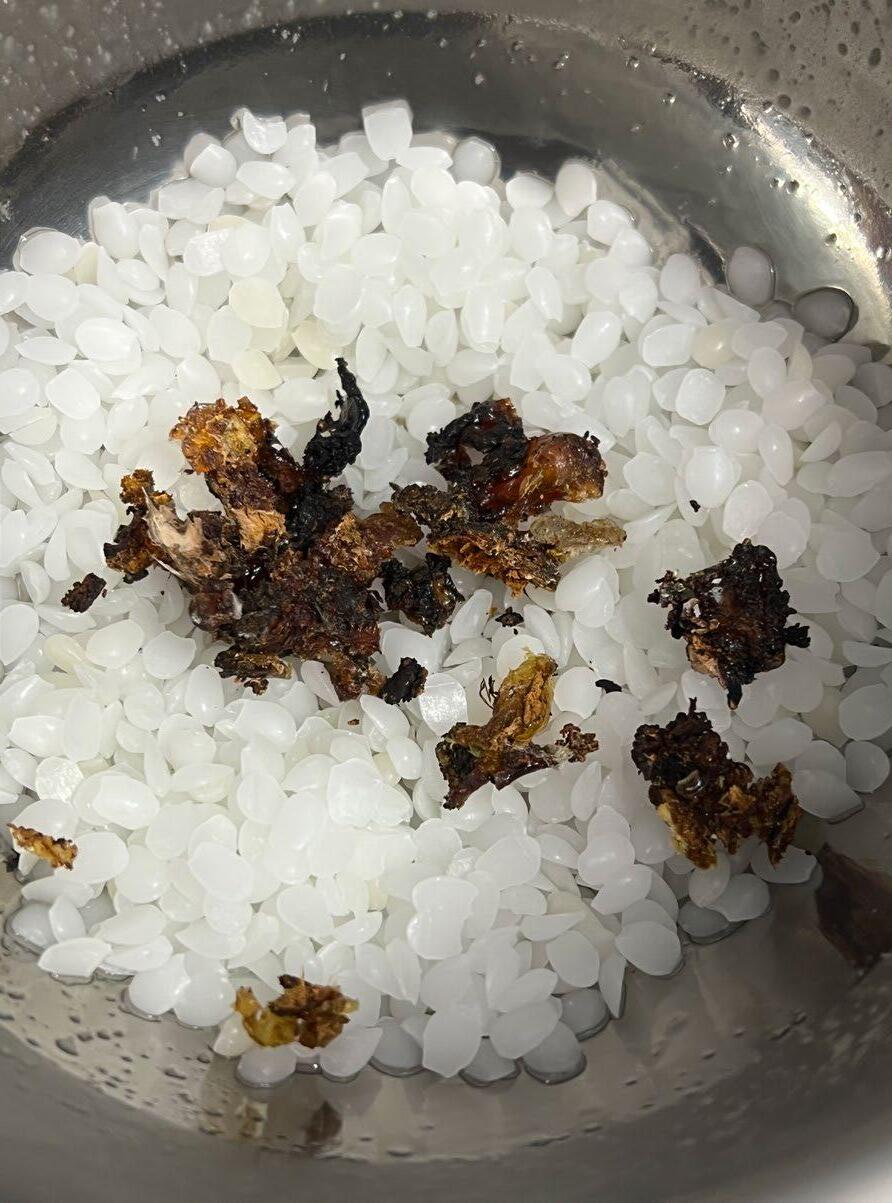
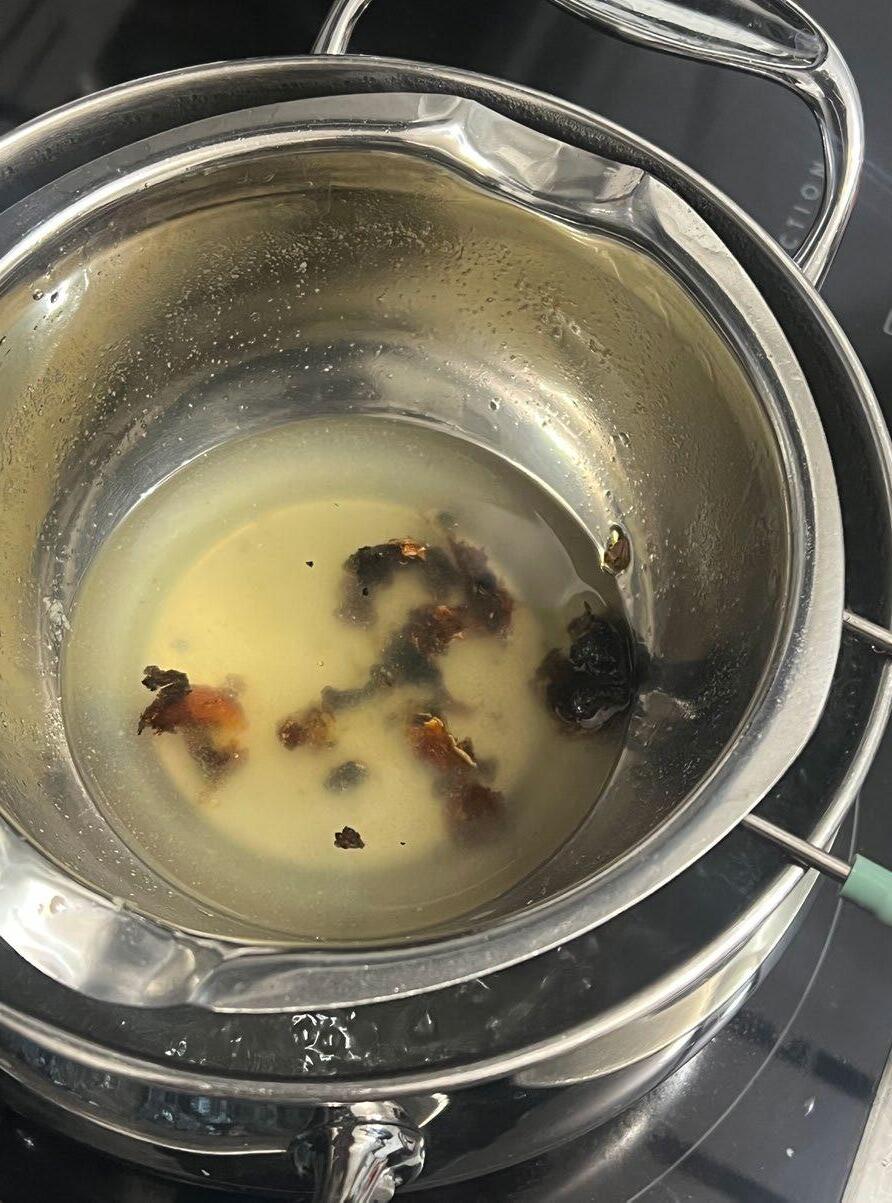

Within my third year at university, we were assinged a group that was in charge of Lighting and Fire at our ‘De-constructing the Tree’ end of term feast brief. As part of this group, I was in charge of creating candles after exploration of forest fires and how to make fire. My focus was looking into making the candle as tree made as possible. As I explored local trees I found cherry tree resin of which boosted my inspiraton into using pine tree resin and mastiha resin in making these candles.
PROJECT 1 - TREE CANDLES
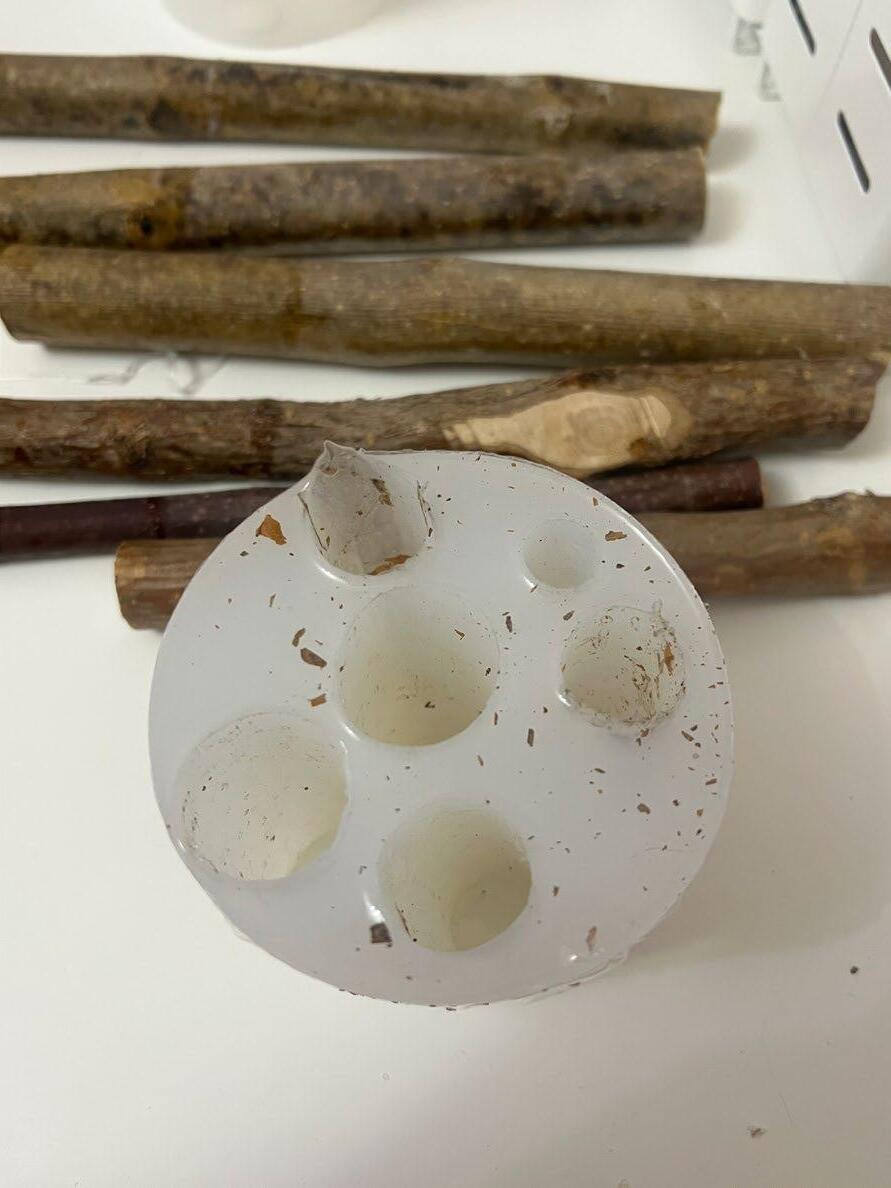
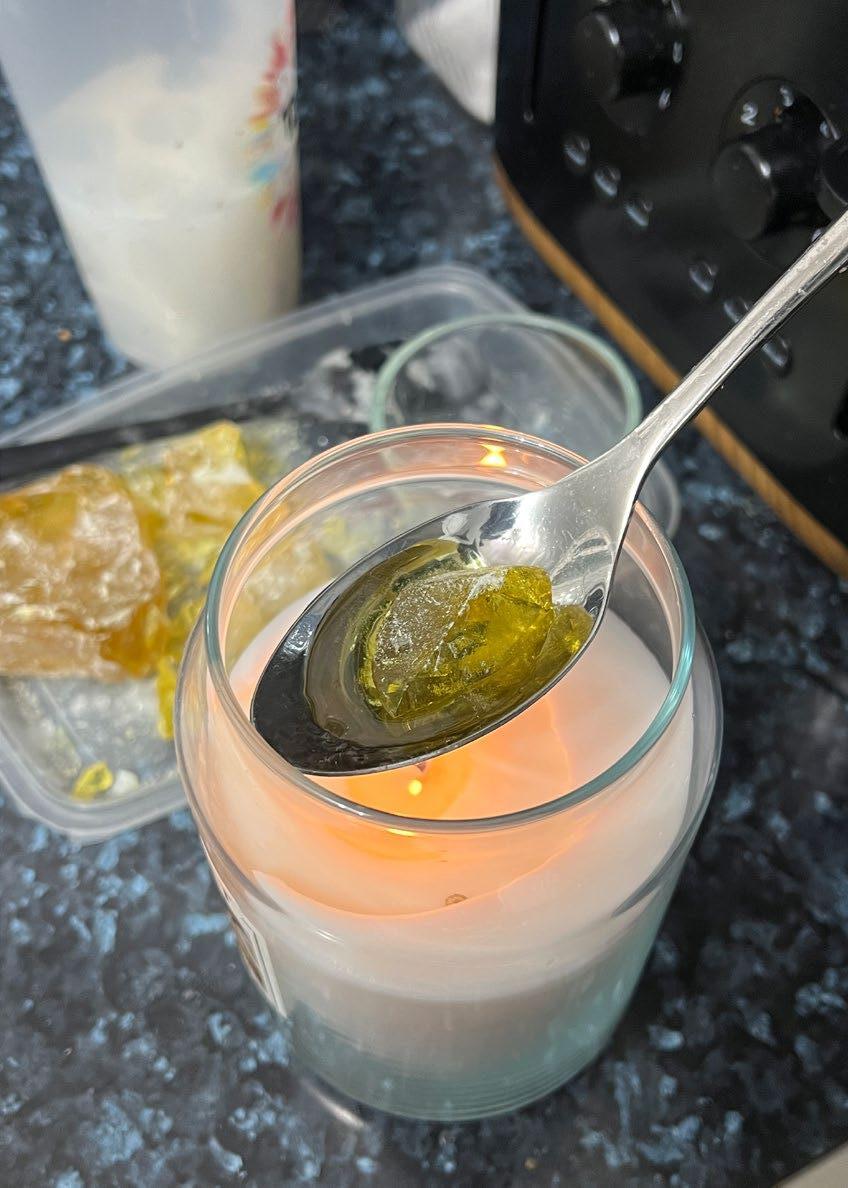
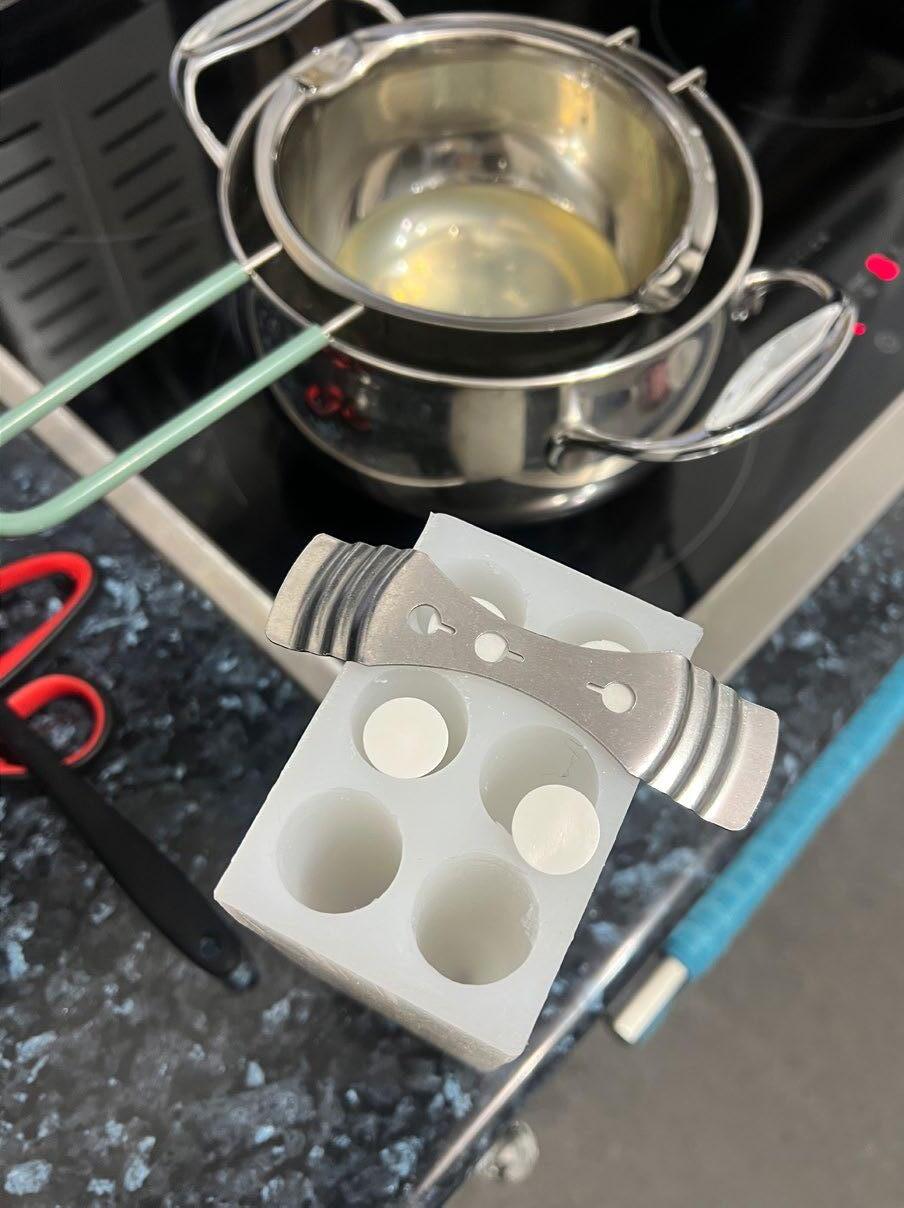
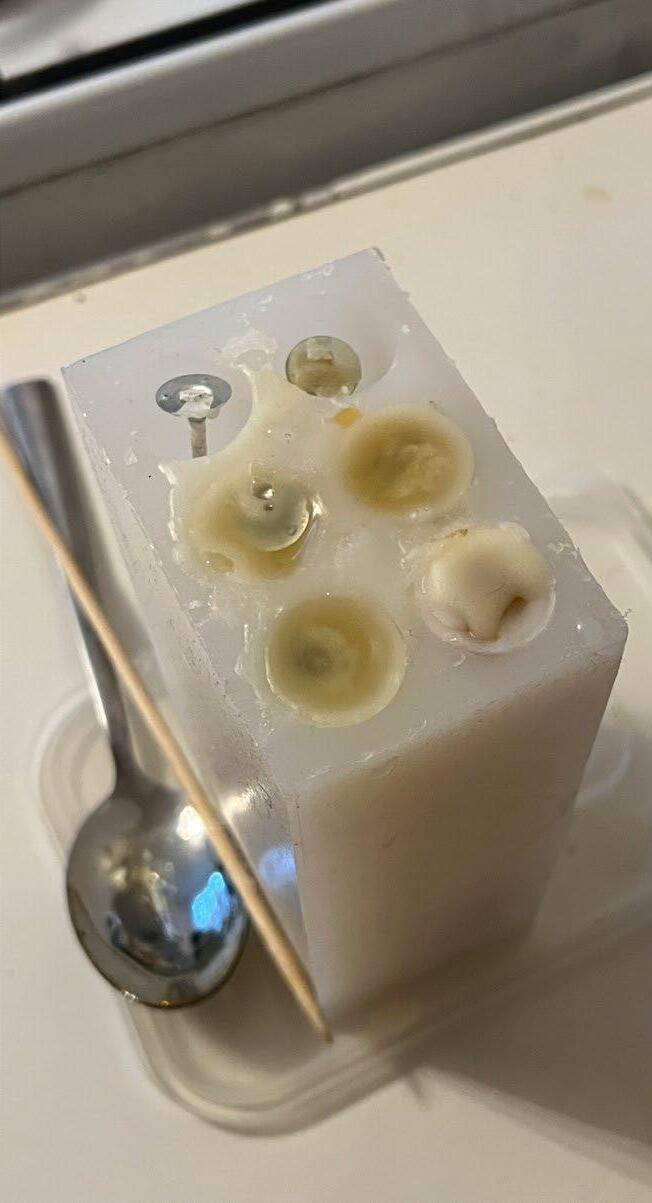
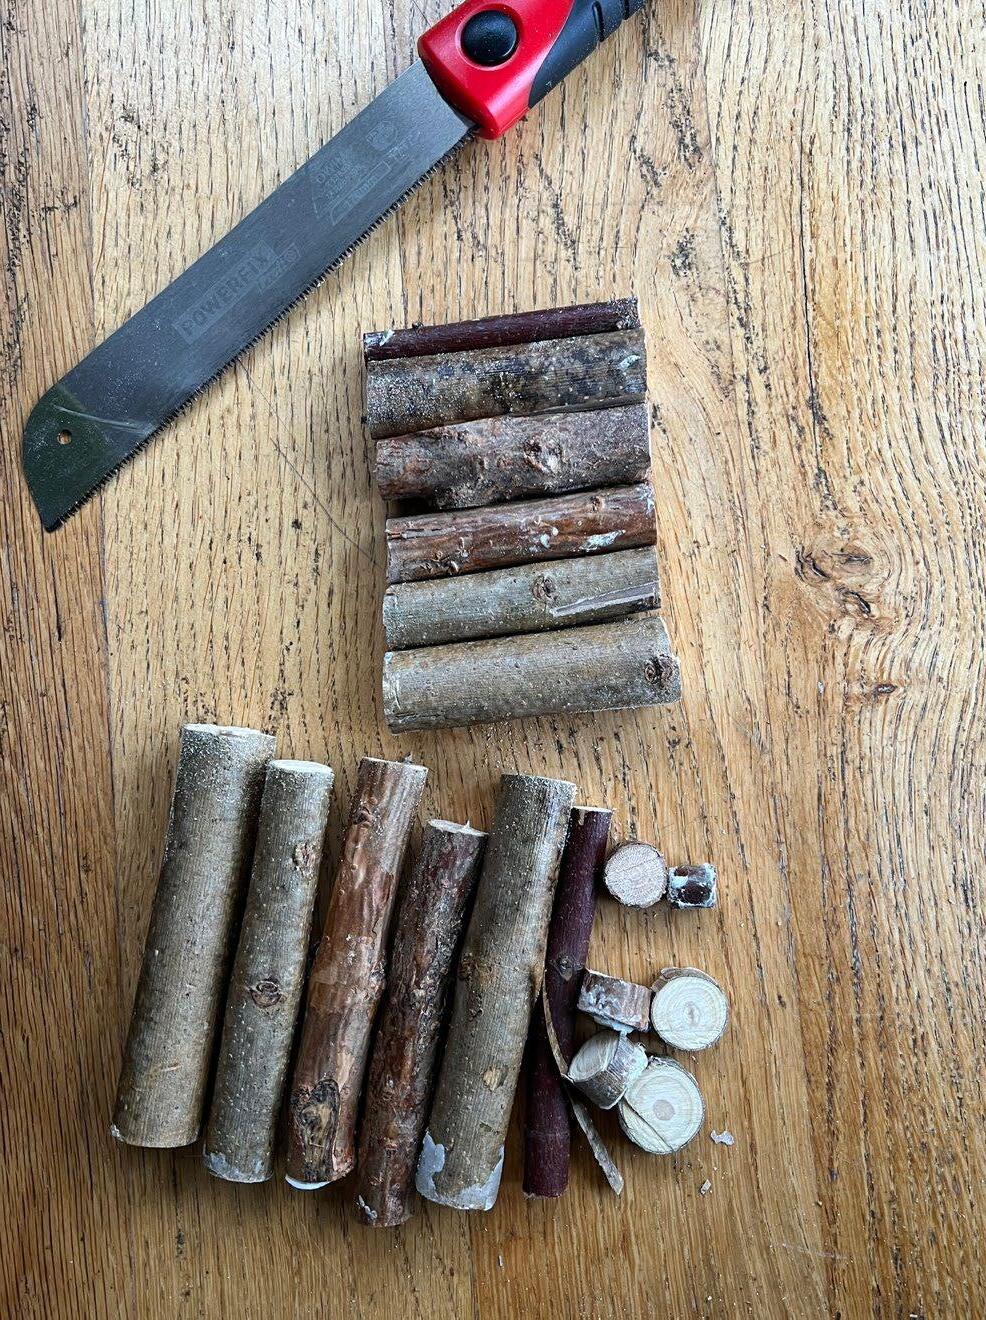
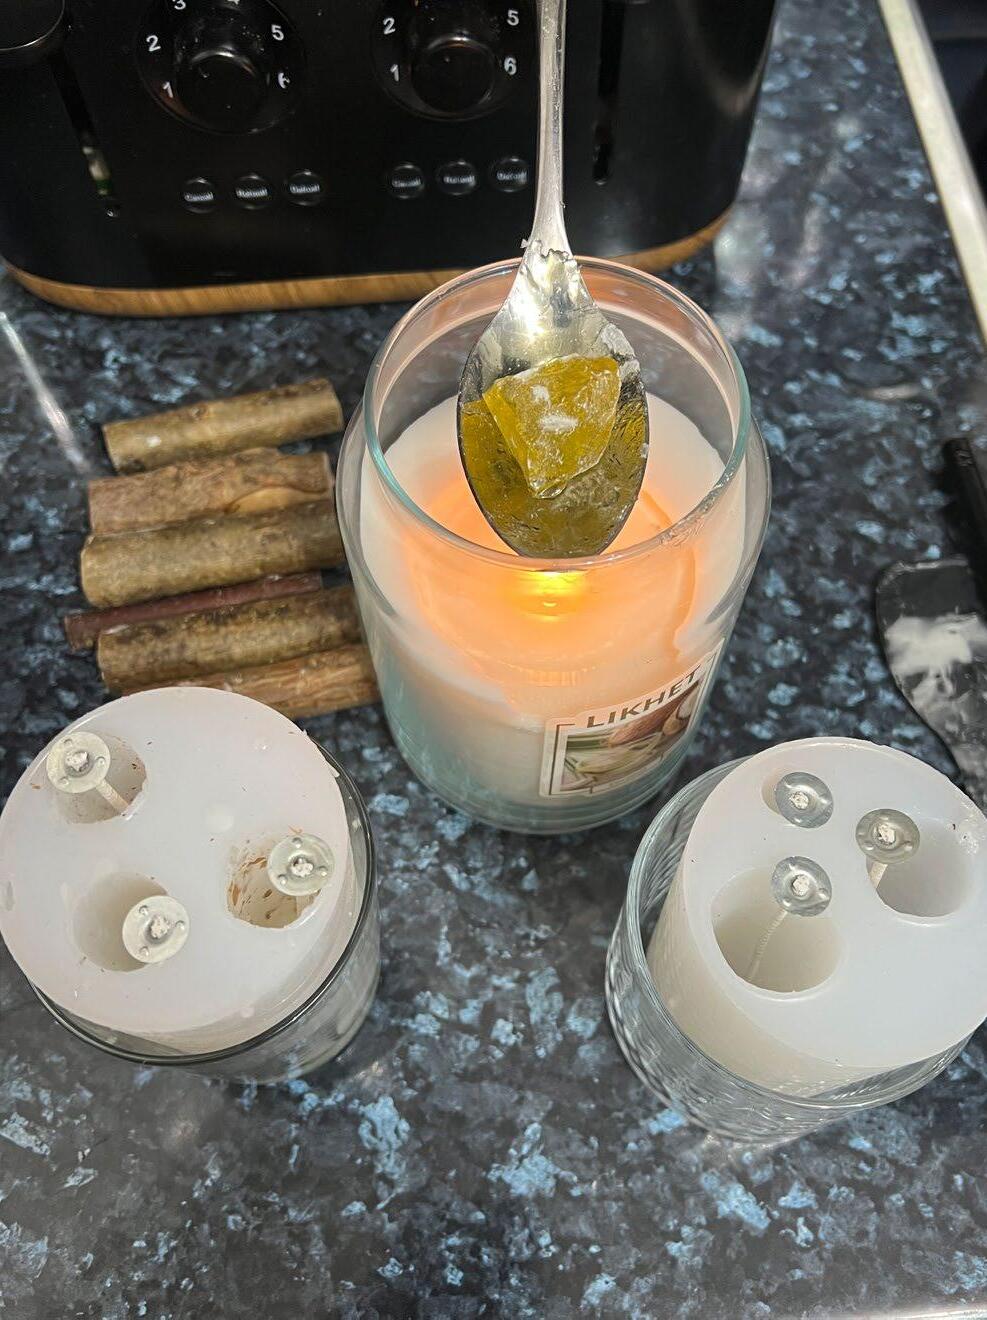
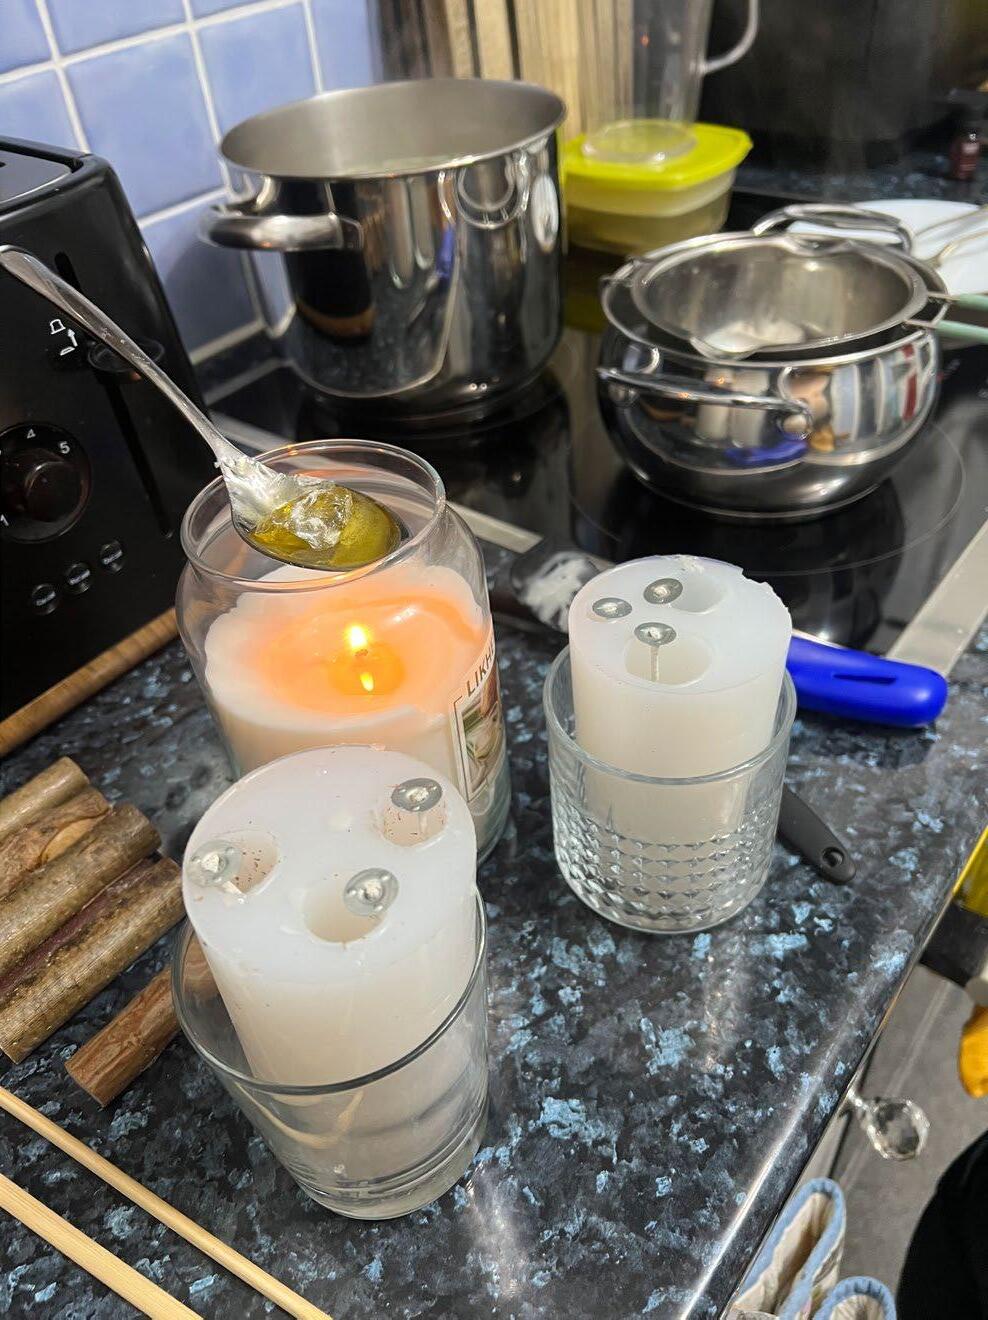
When experimenting with making silicone moulds for the candles, a happy accident occured where I did not have enough silicone to make a full candle mould from the tree sticks, therefore I thought of using the stick as a continuation to the candle itself. This made me realise the resin can also act like a glue for holding the candle to the stick. This project was extremely experimental and hands on, with the aim to just make and improve, therefore my images are procees pictures and developments.
PROJECT 1 - TREE CANDLES
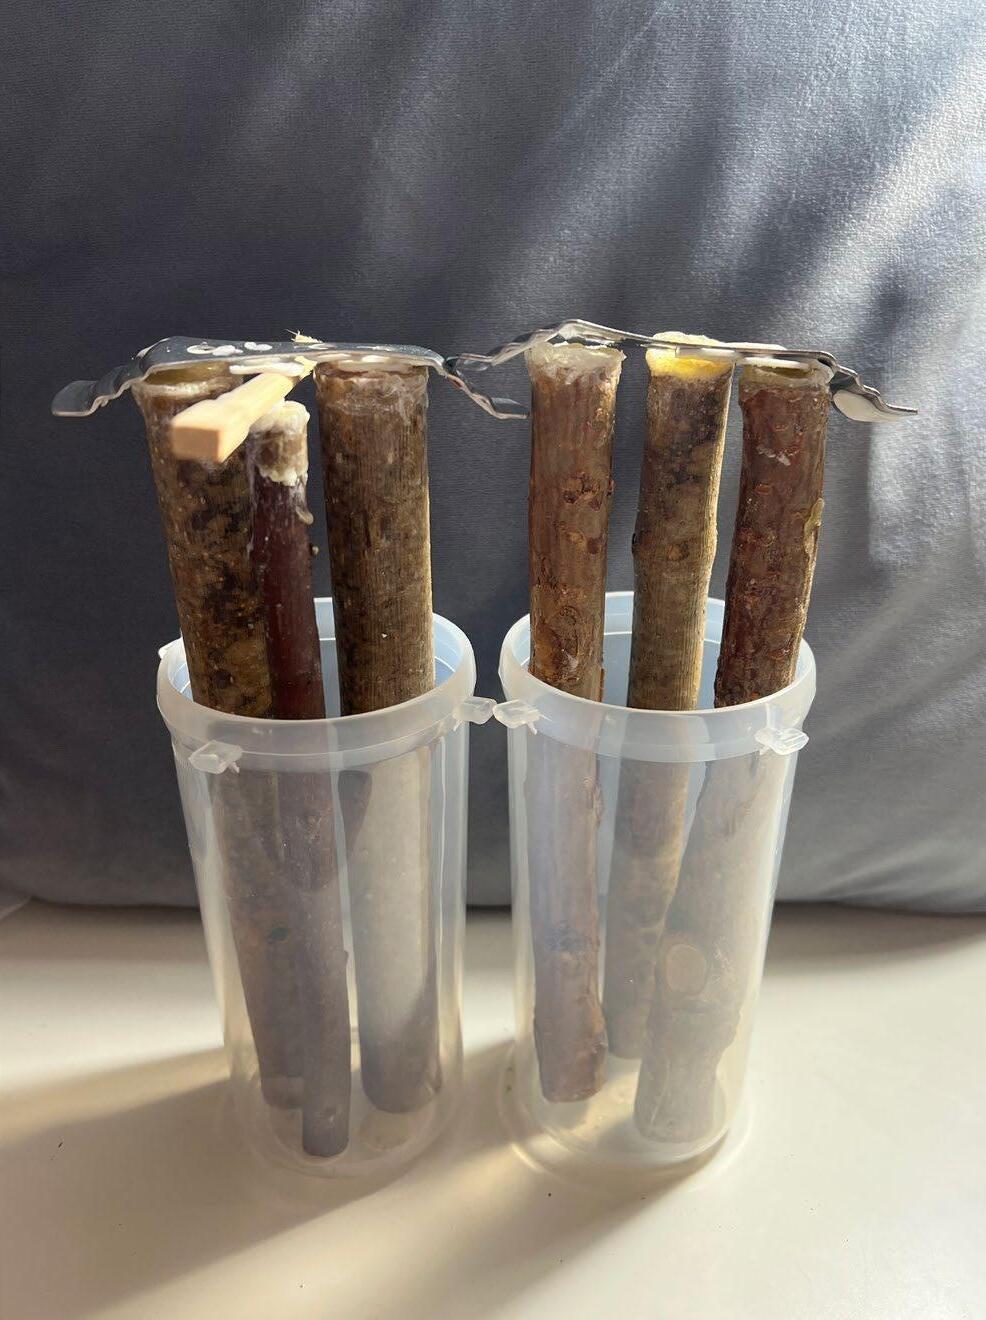
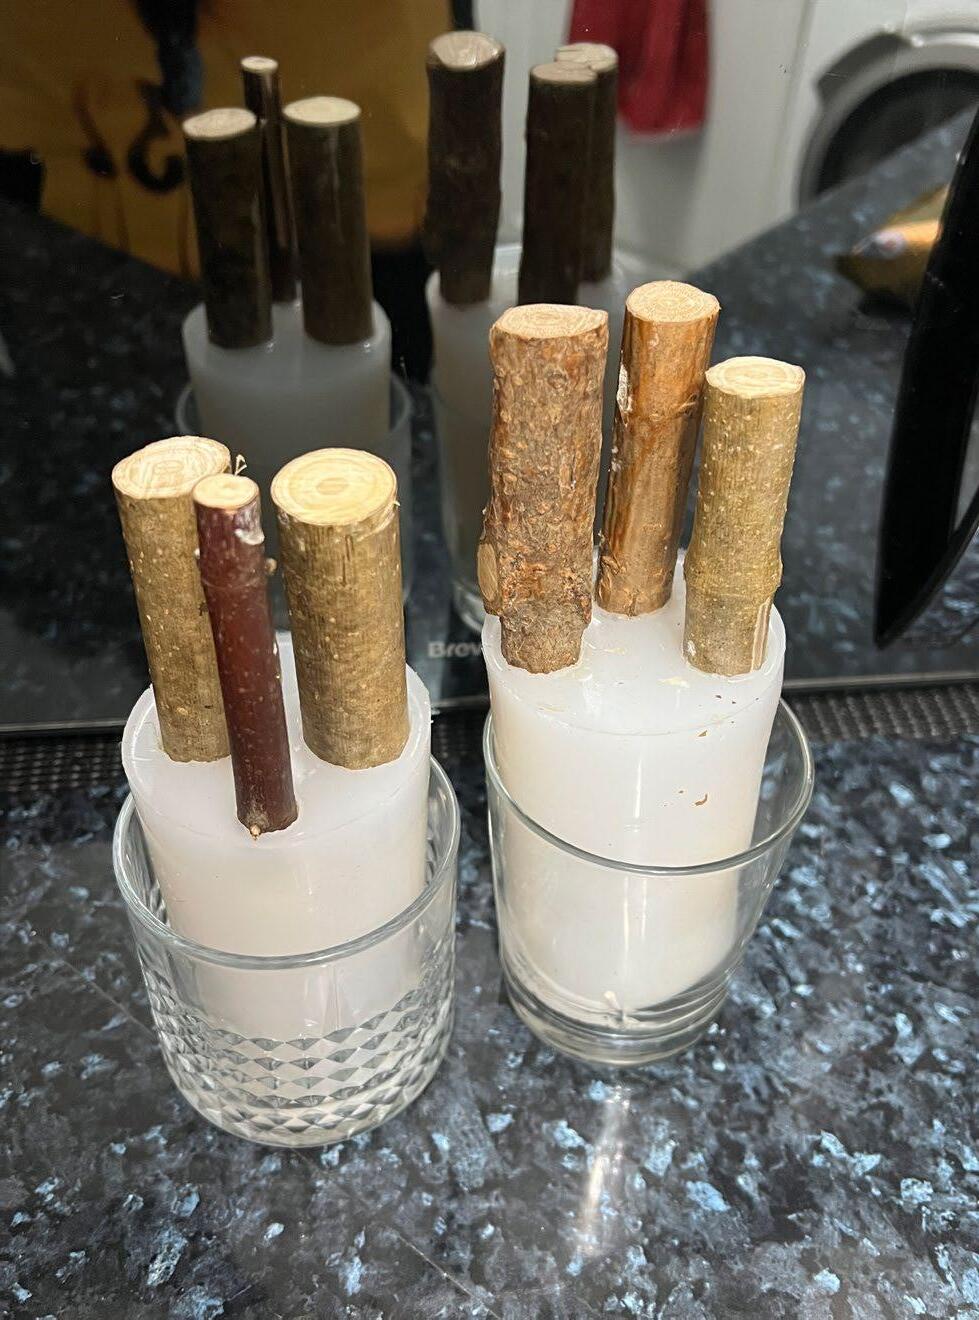
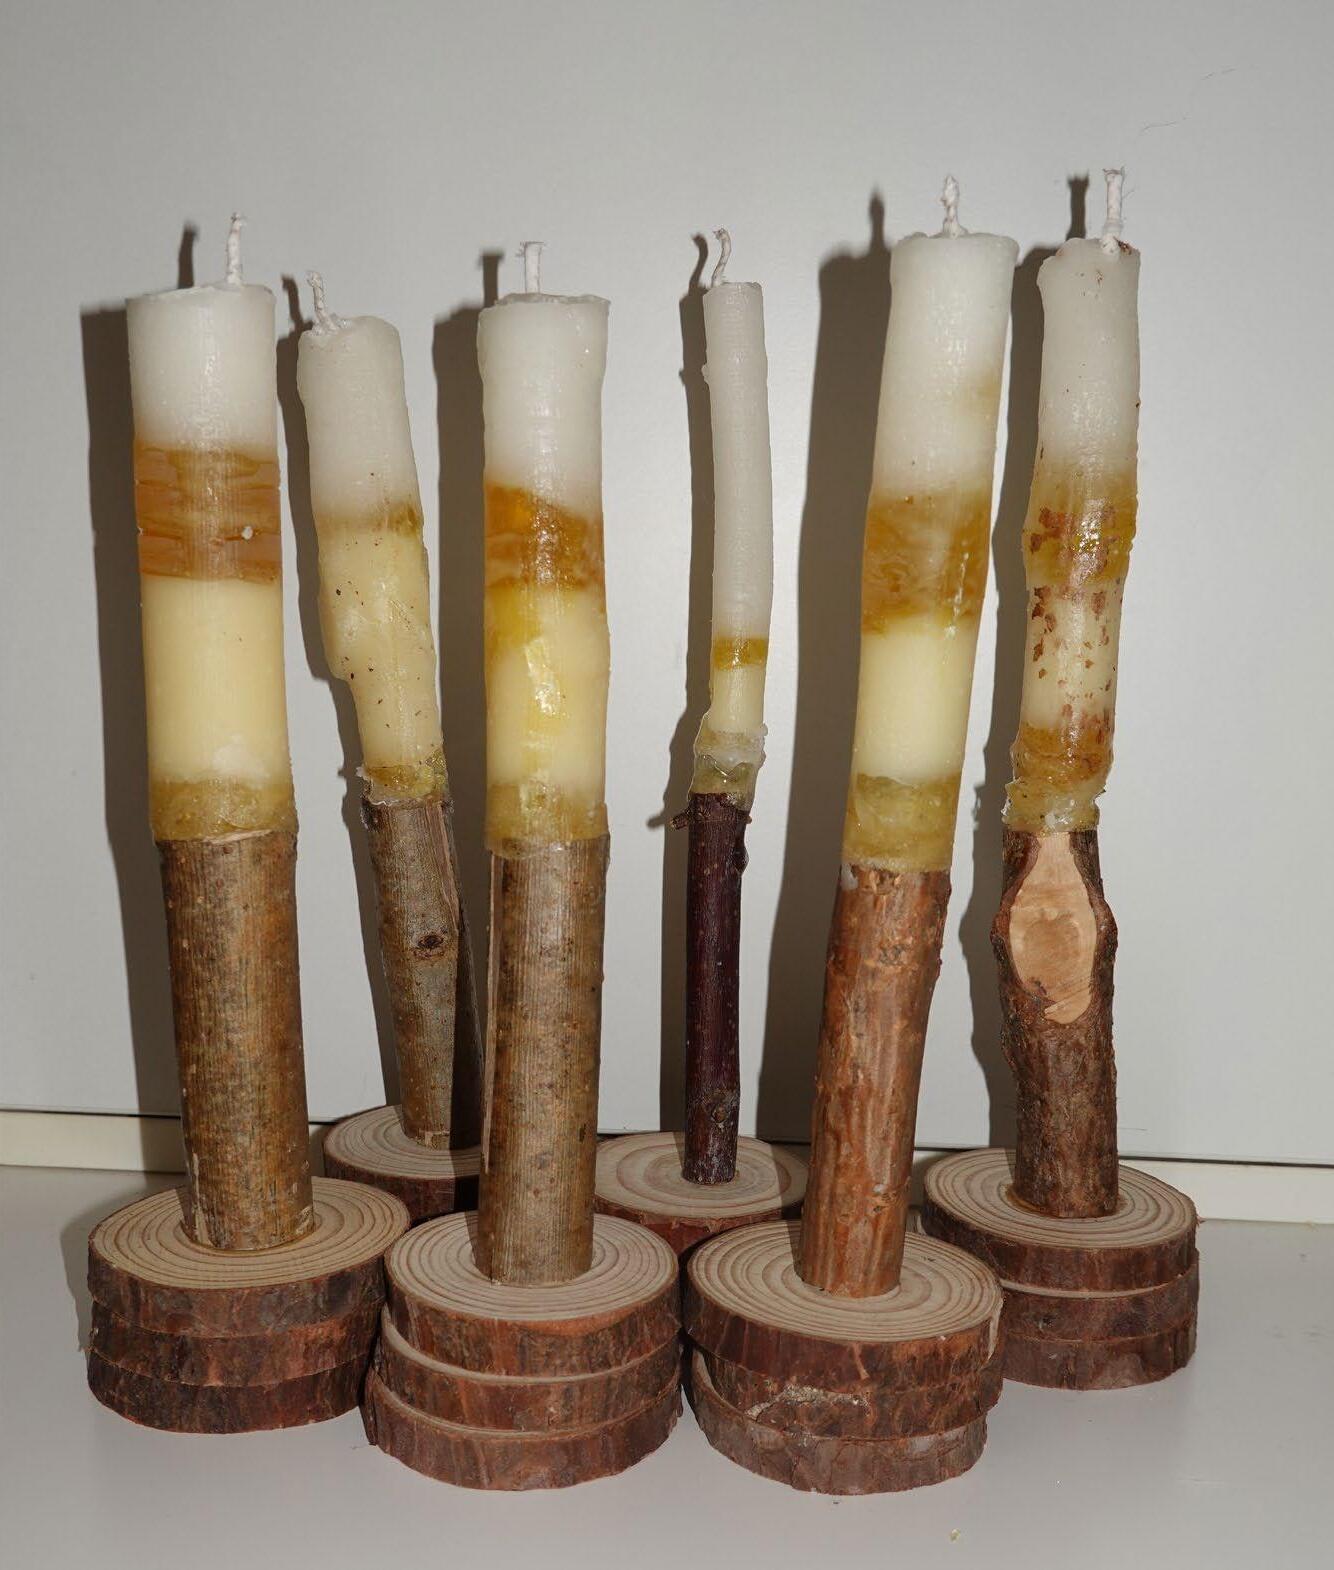
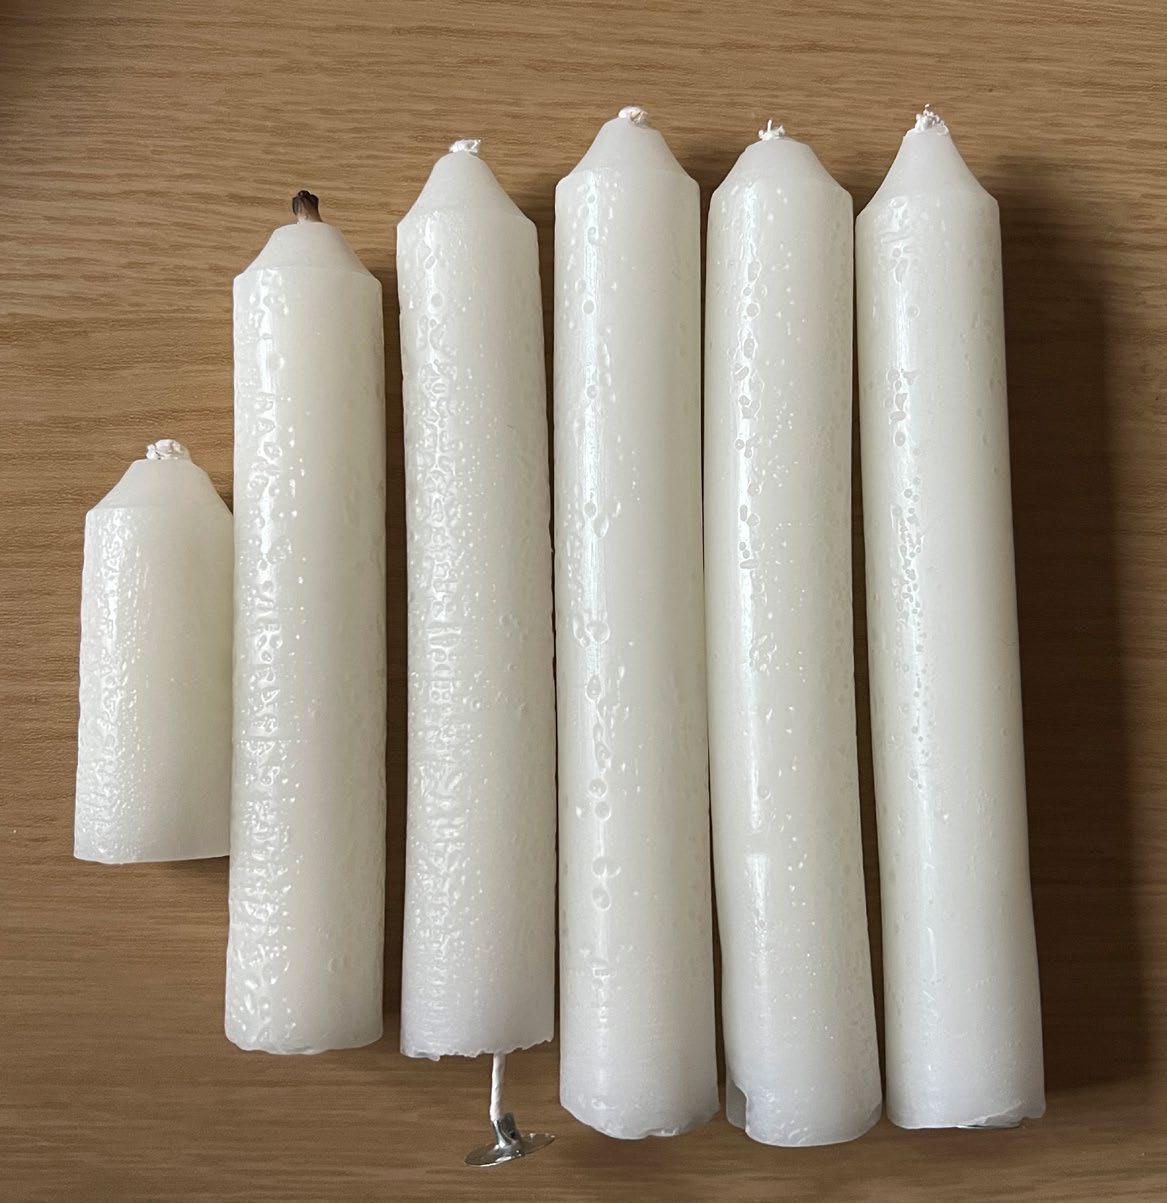
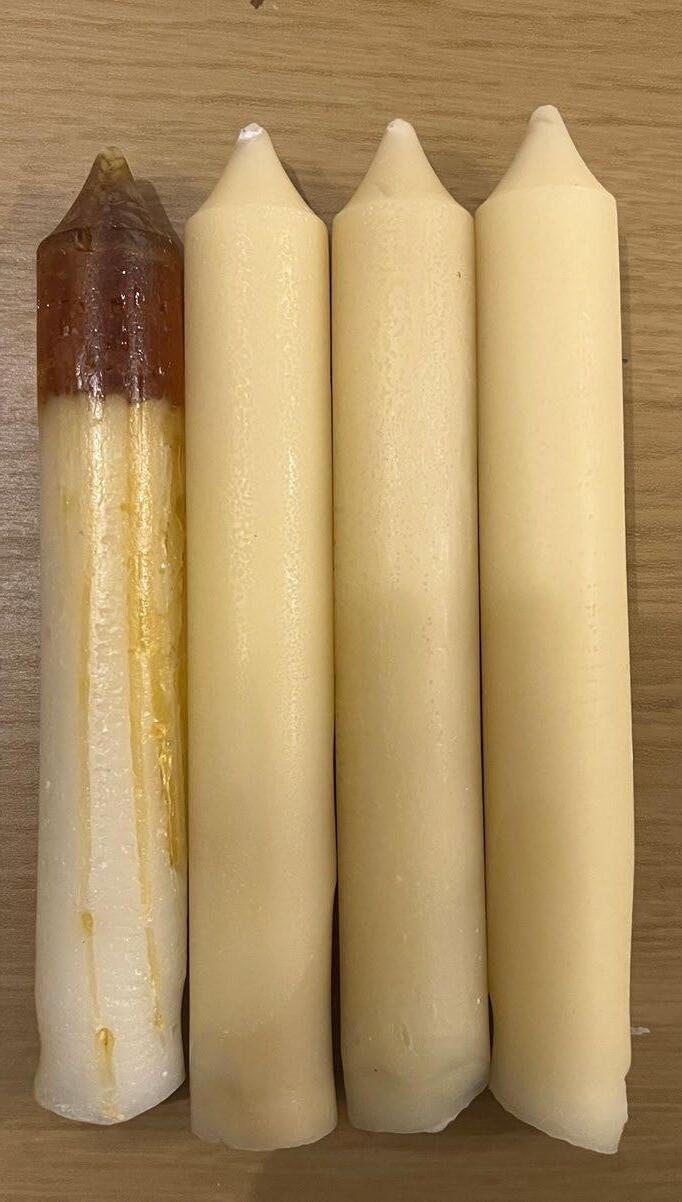
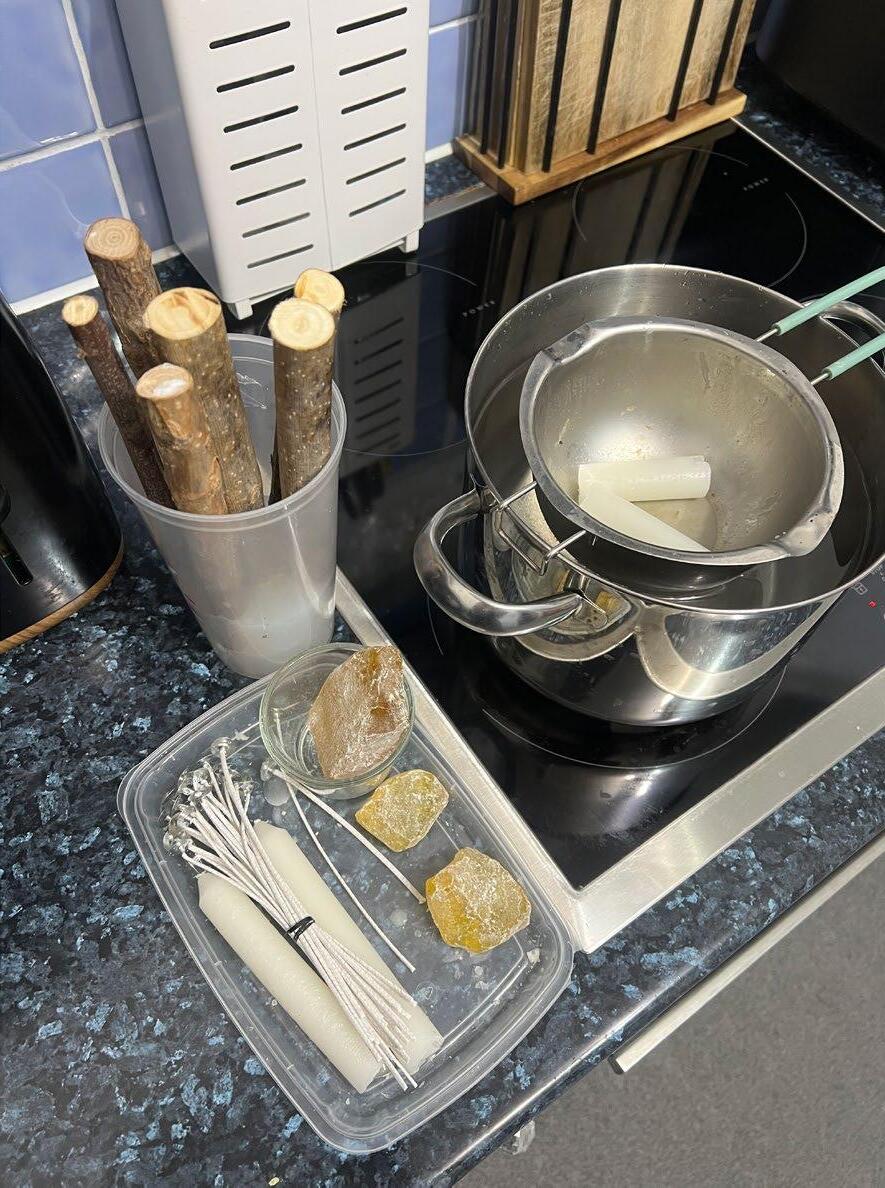
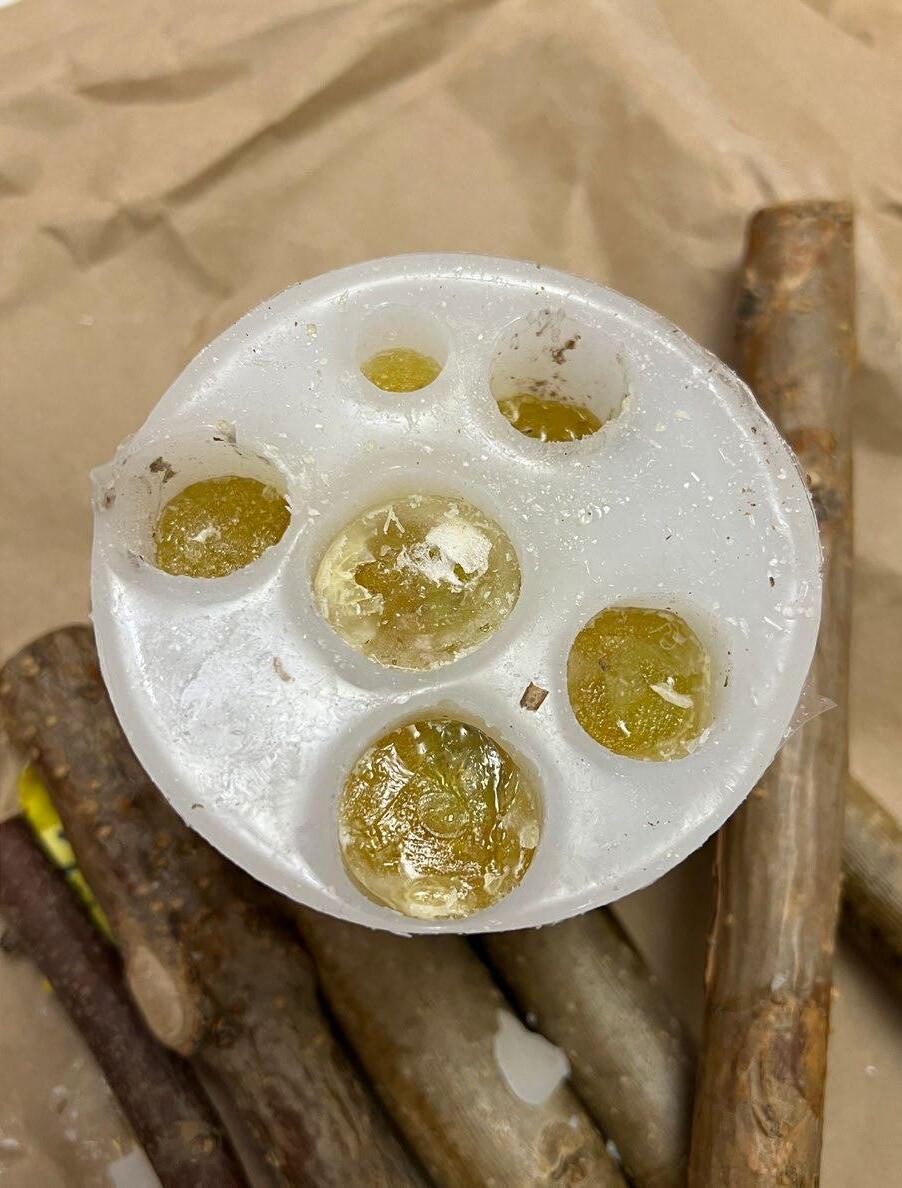
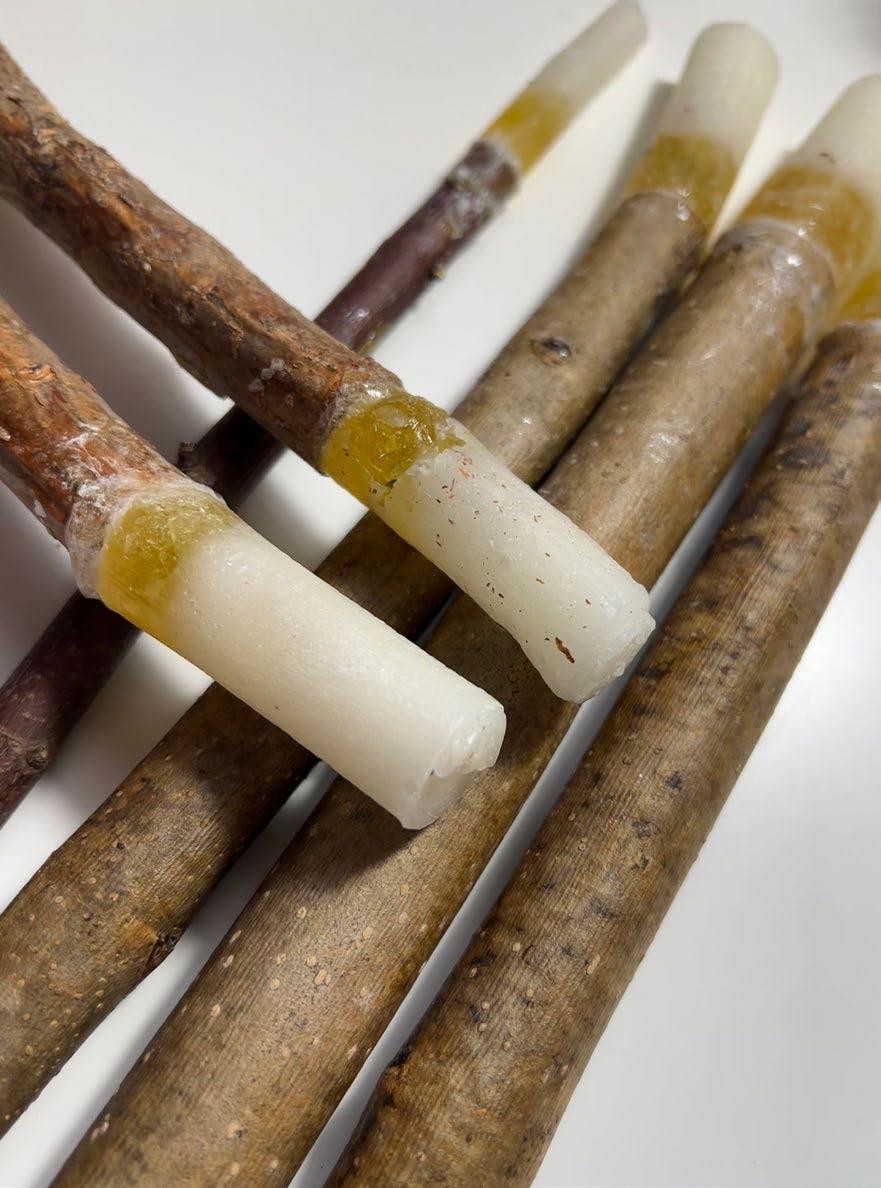
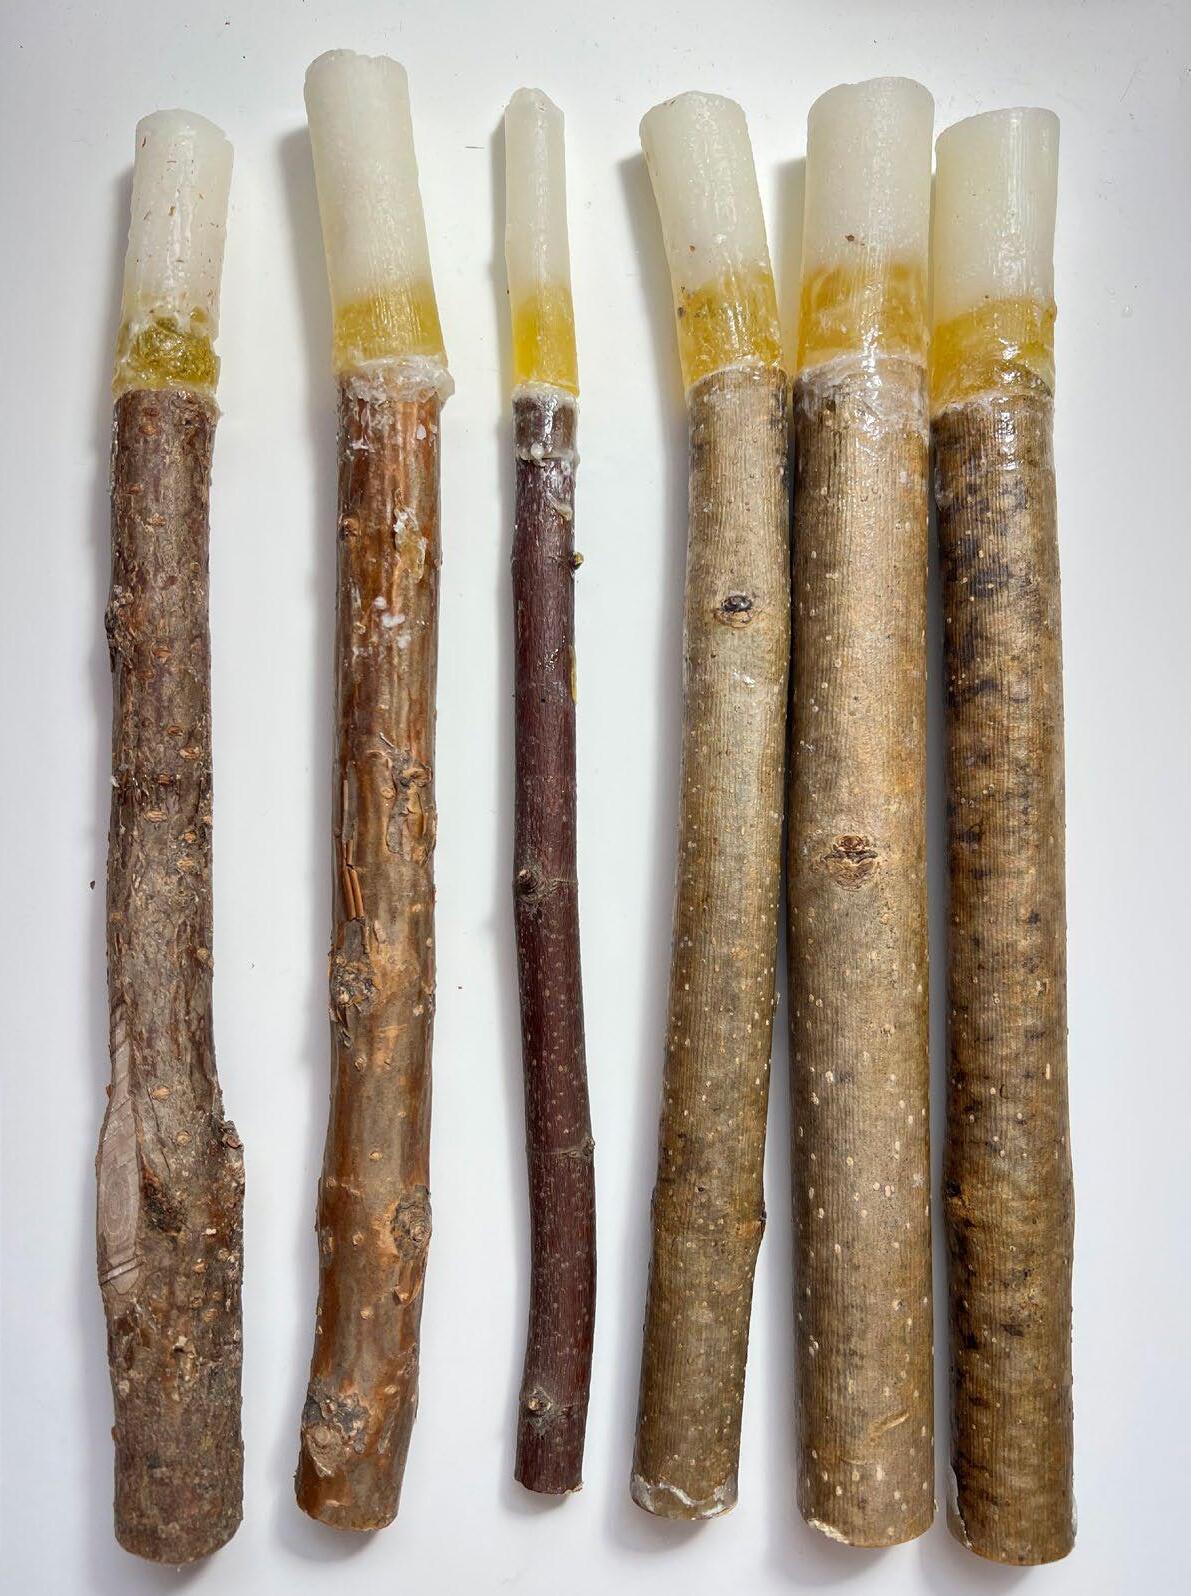
To improve my candles, I fixed the mistake of not having enough silicone, and this time still incorporated the stick to the candle. In order from top of the candle to the bottom of the candle I used besswax with sandalwood essential oil, pine resin, pine resin and beeswax mix, andx mastiha resin. These layers were part of my theoroteical side of my project as each layer is part of the dinner.
PROJECT 1 - TREE CANDLES
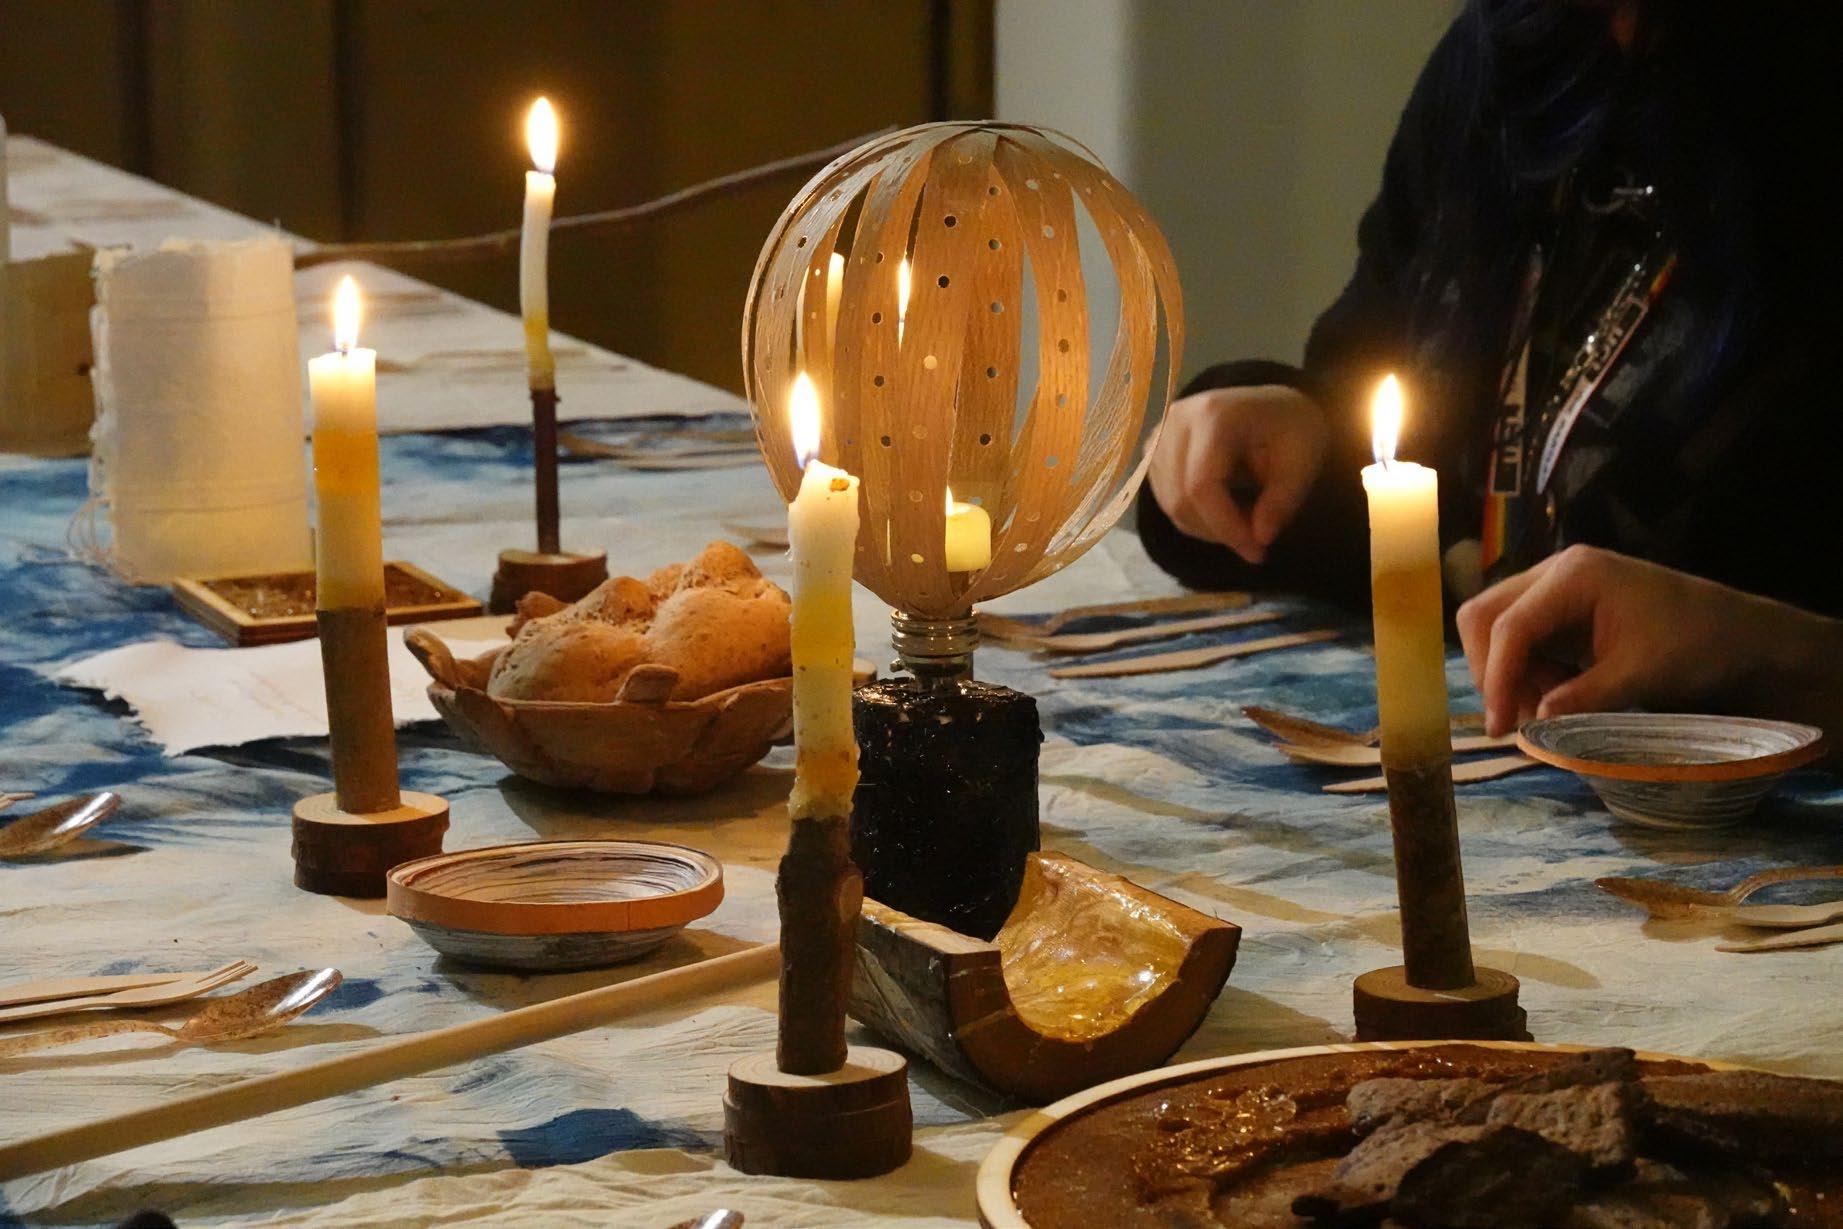
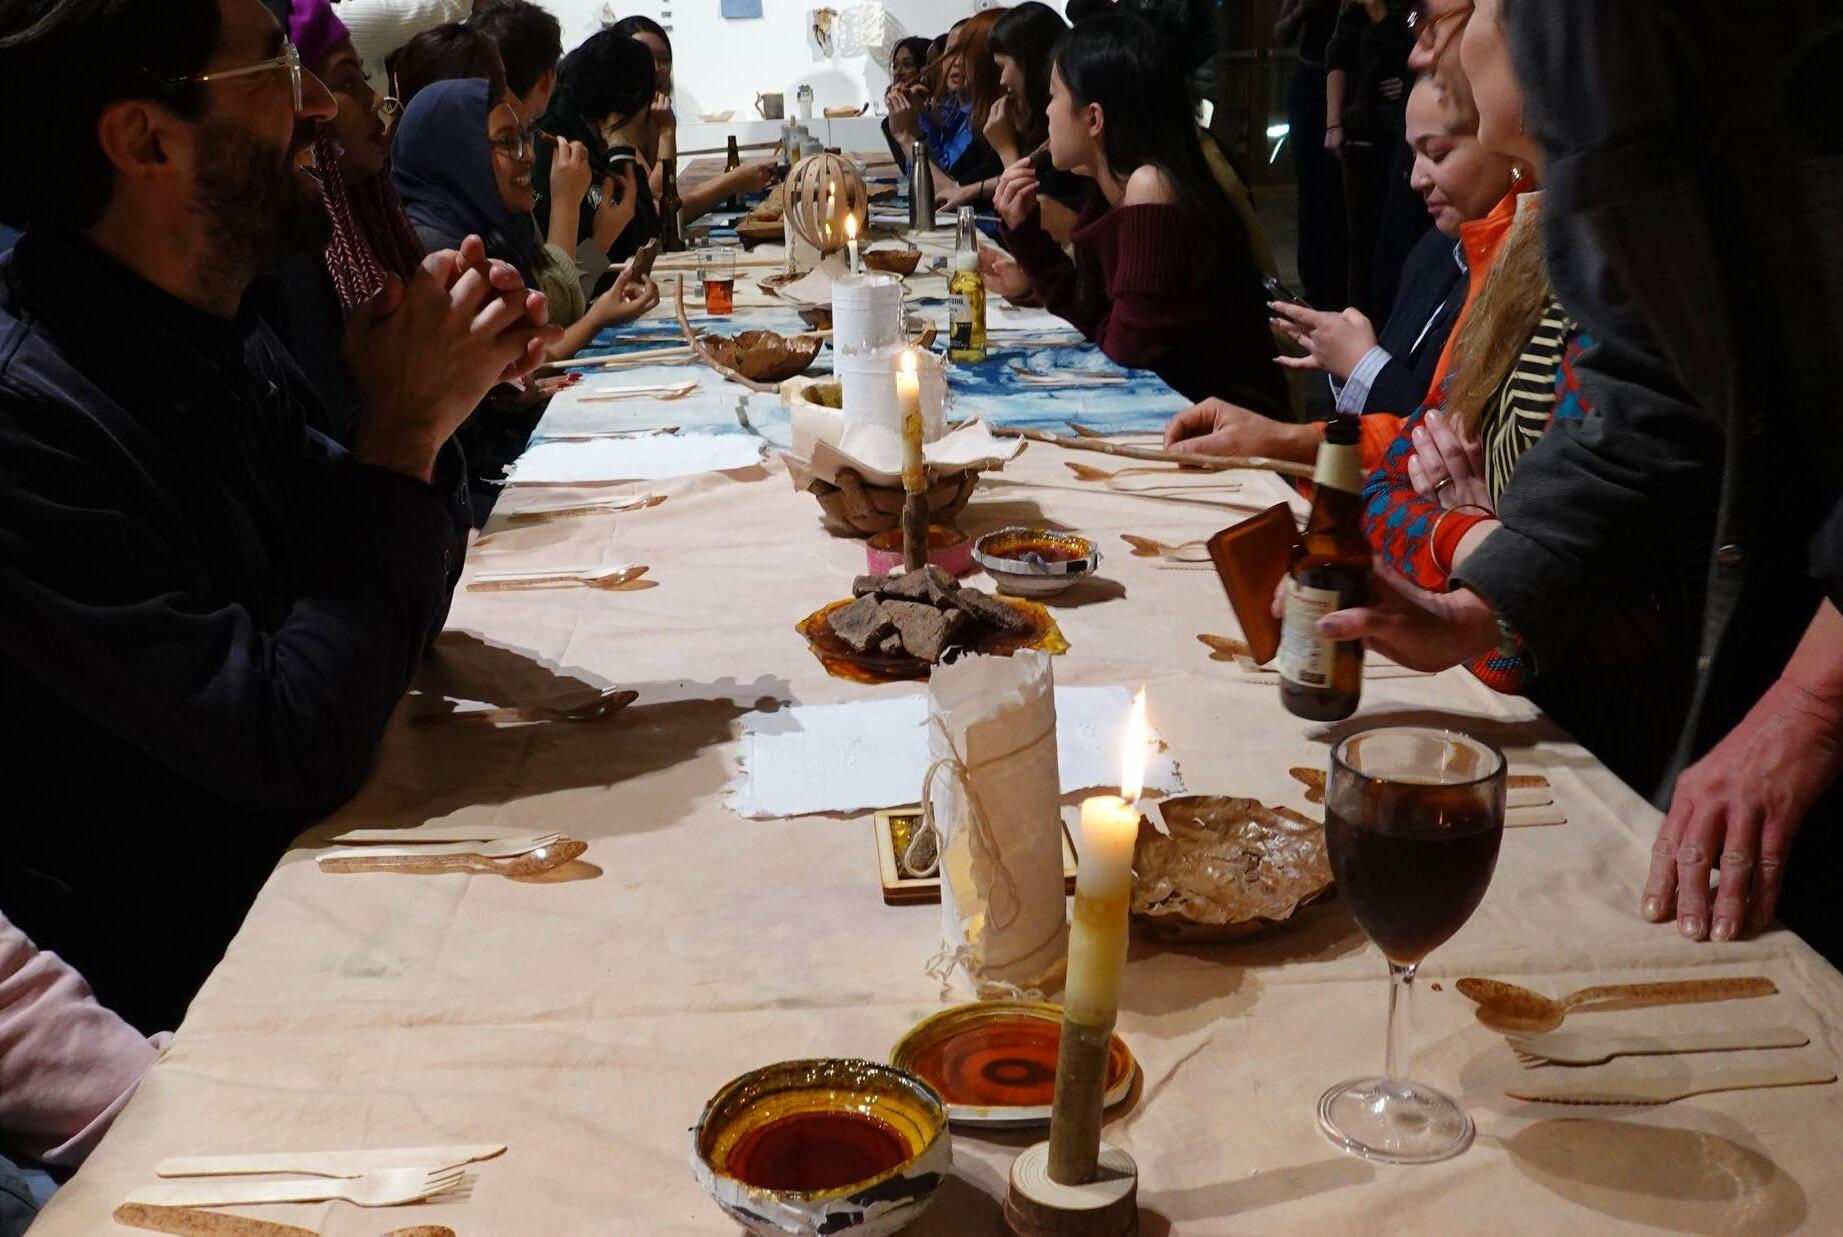

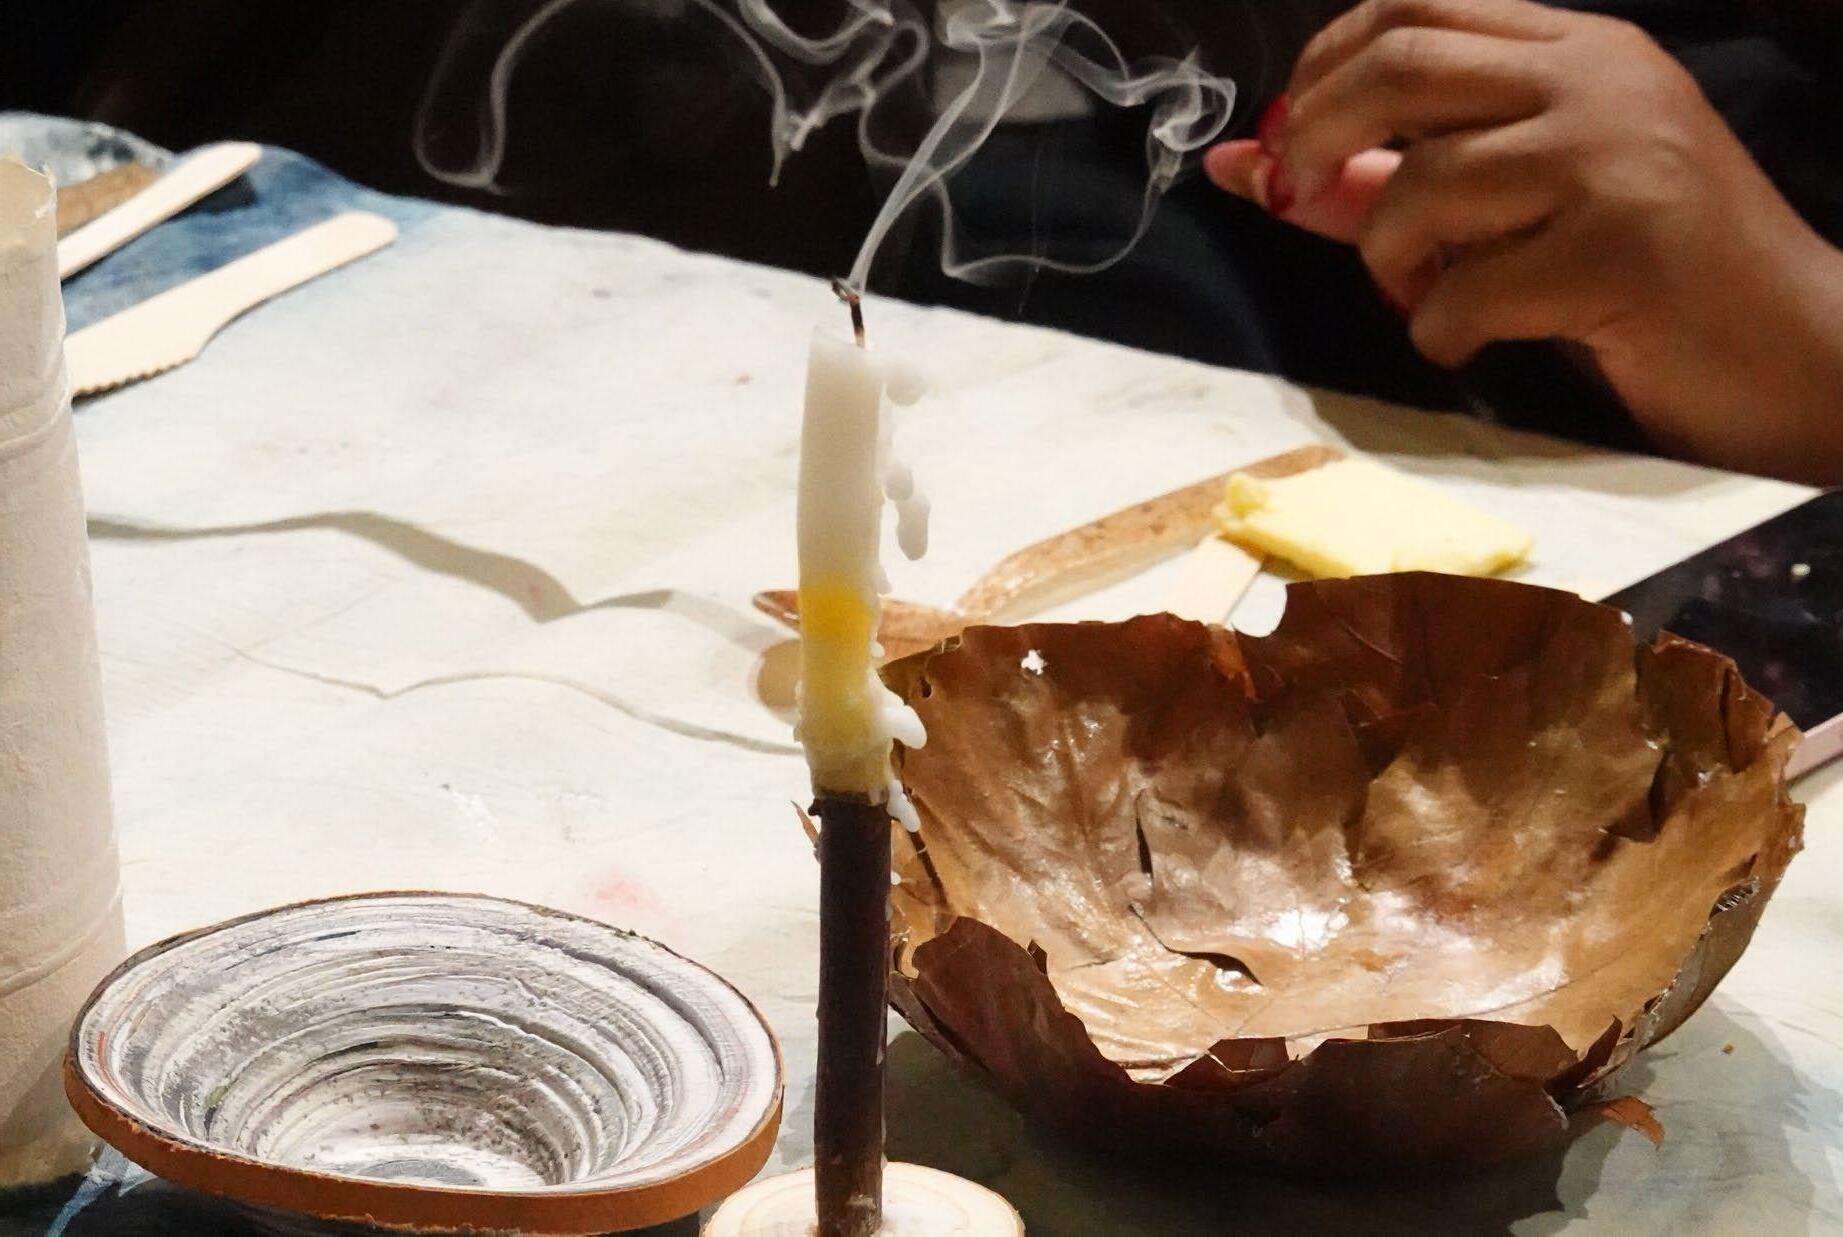
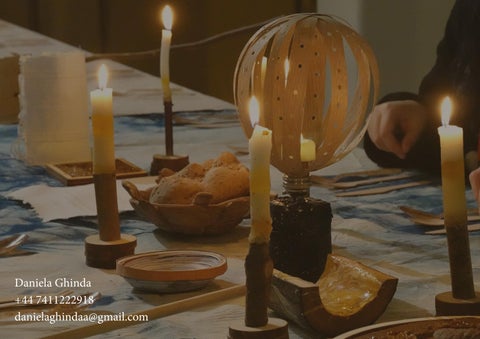
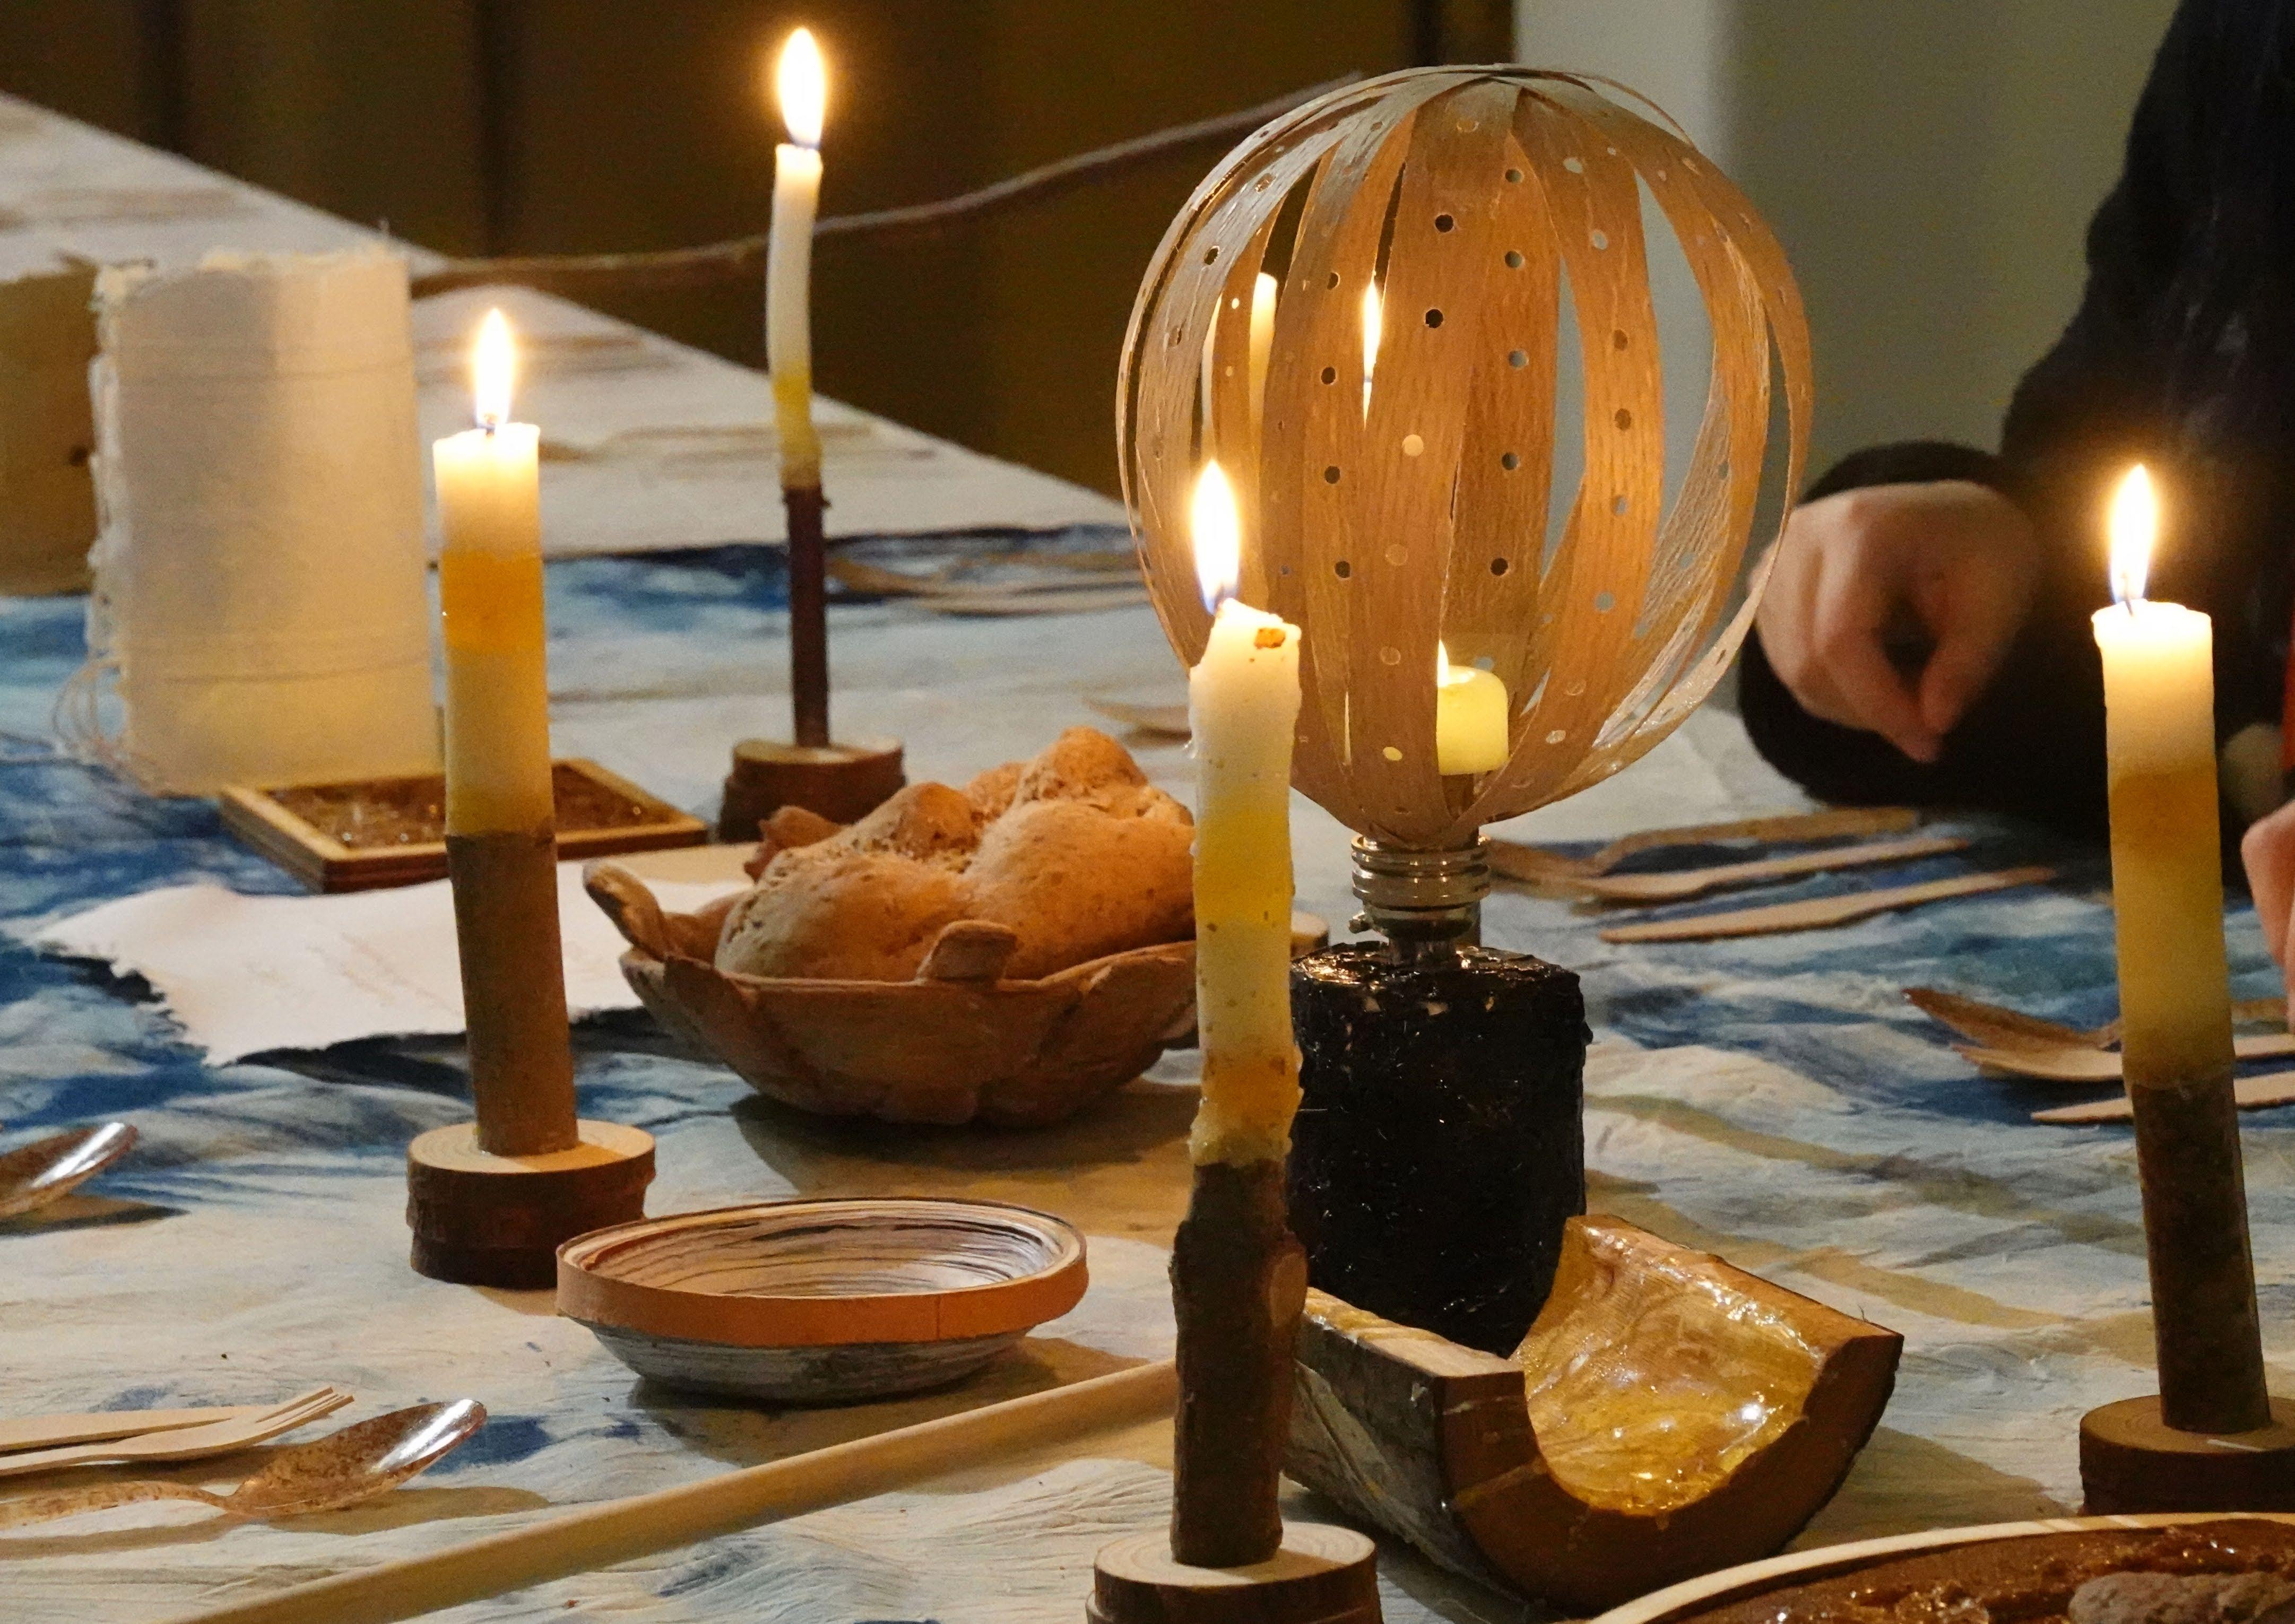
My tree candles in action with the rest of the De-constructing the Tree feast, my candles worked with being centre pieces, setting the atmosphere, giving scent and making the interior space feel alive. The first layer of beeswax and sandalwood essential oil being for introduction speech, welcoming and getting settled, the pine resin layer for the starter course with a strong aroma of the tree as we eat food made of trees, the pine resin and beeswax layer for a smooth transition of less tree smell and we get to dessert with mastiha tree scent an extremely strong tree scent.

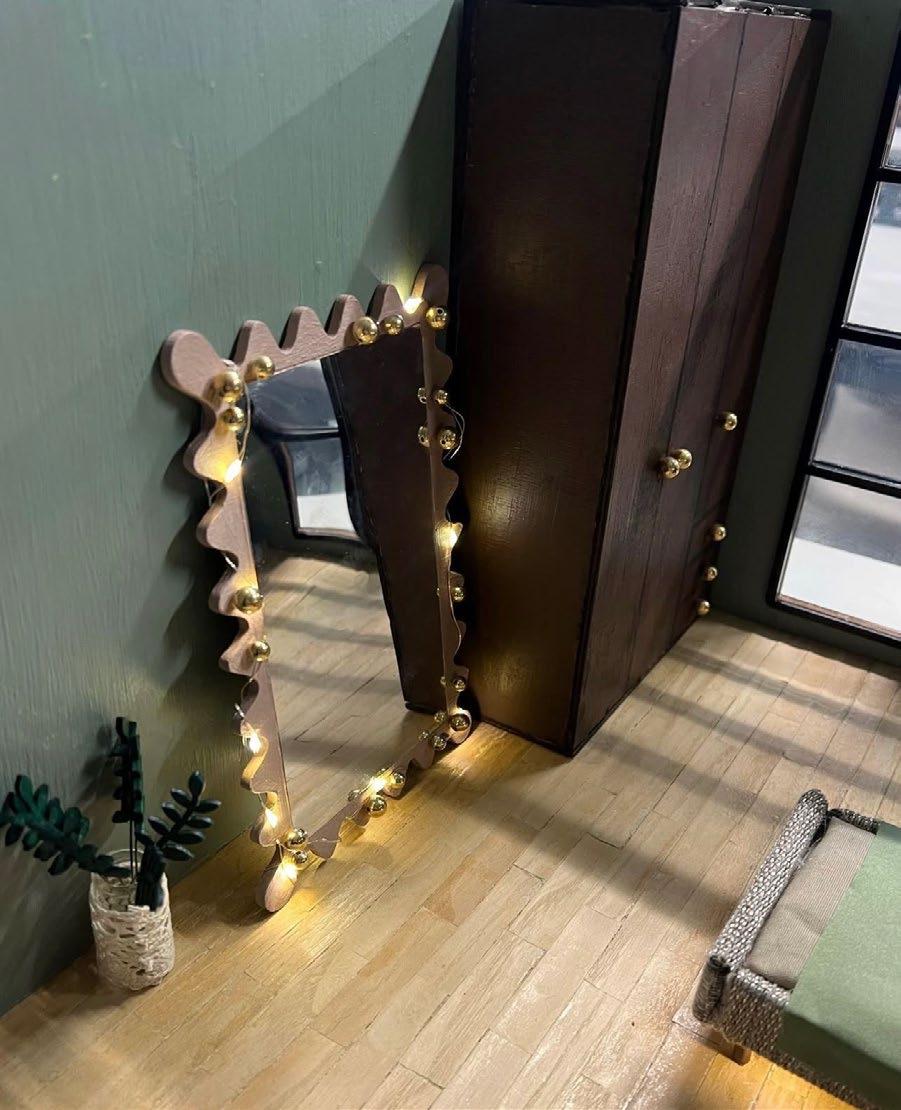
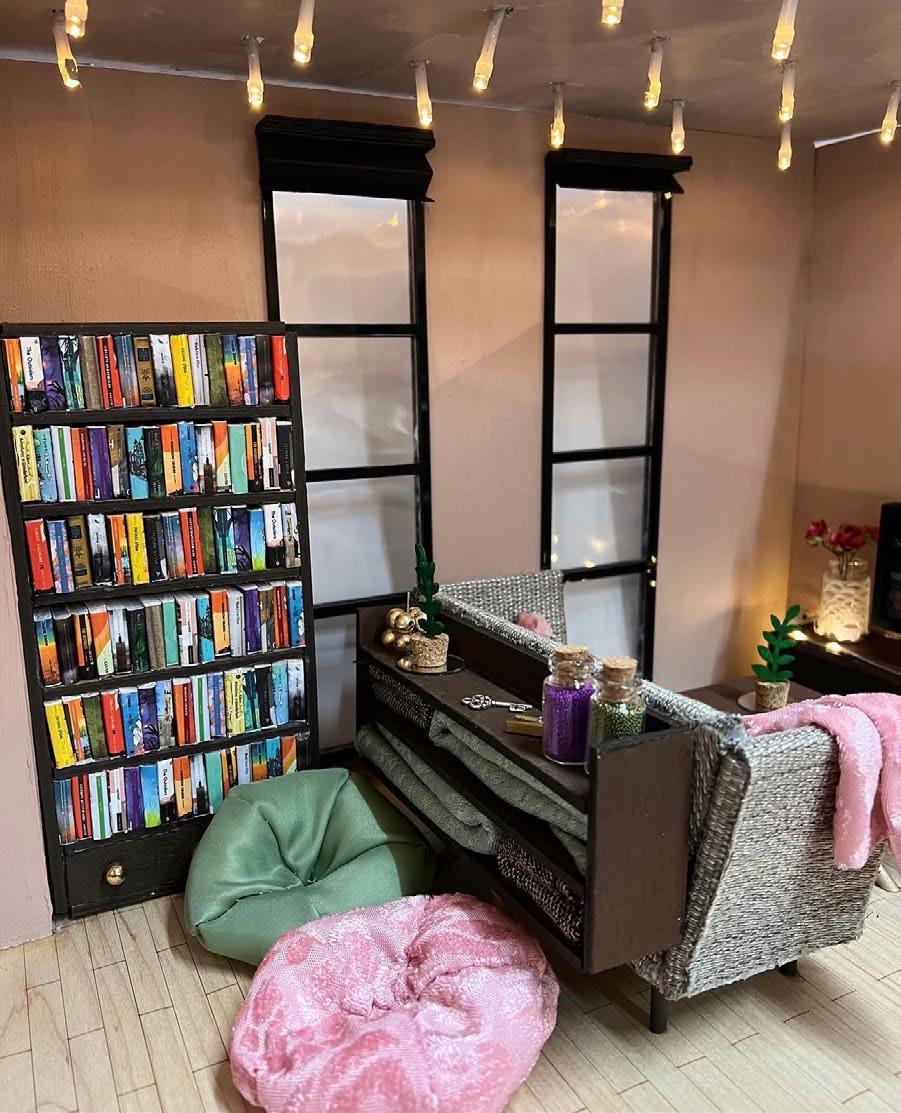
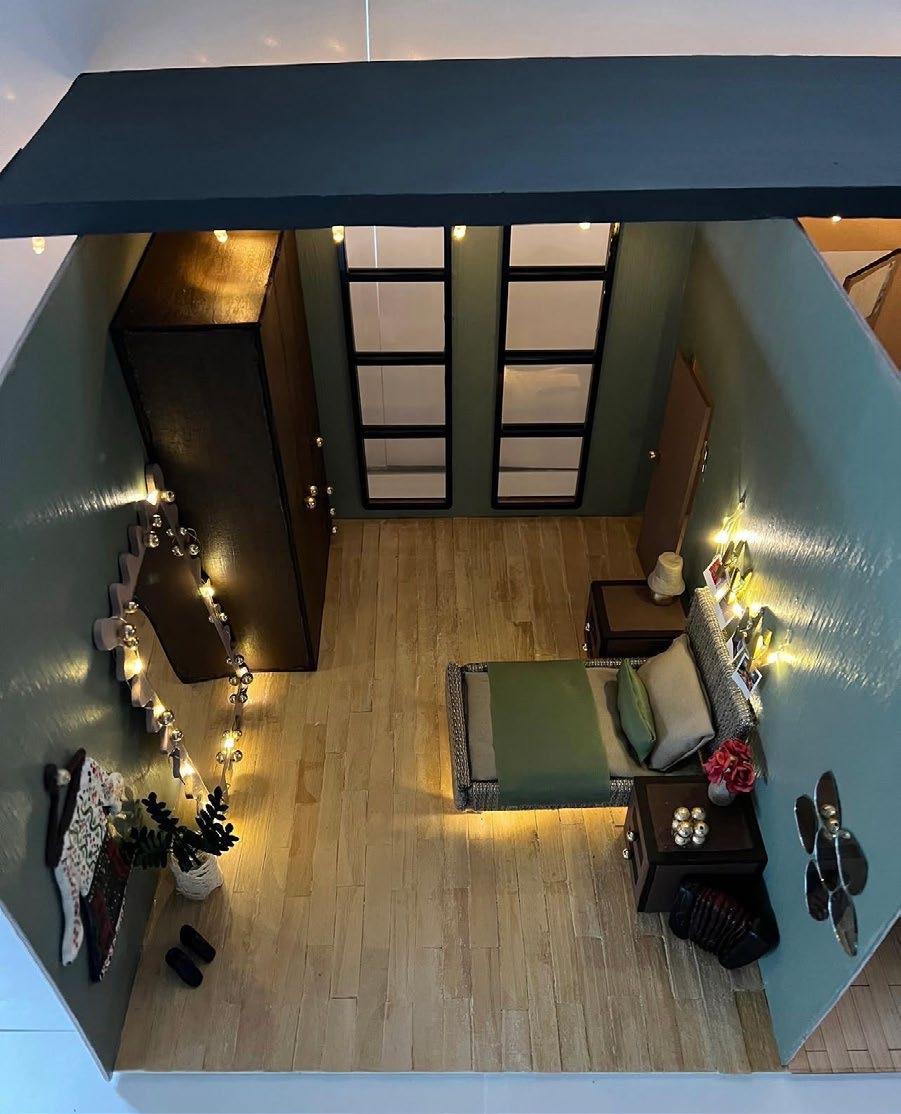
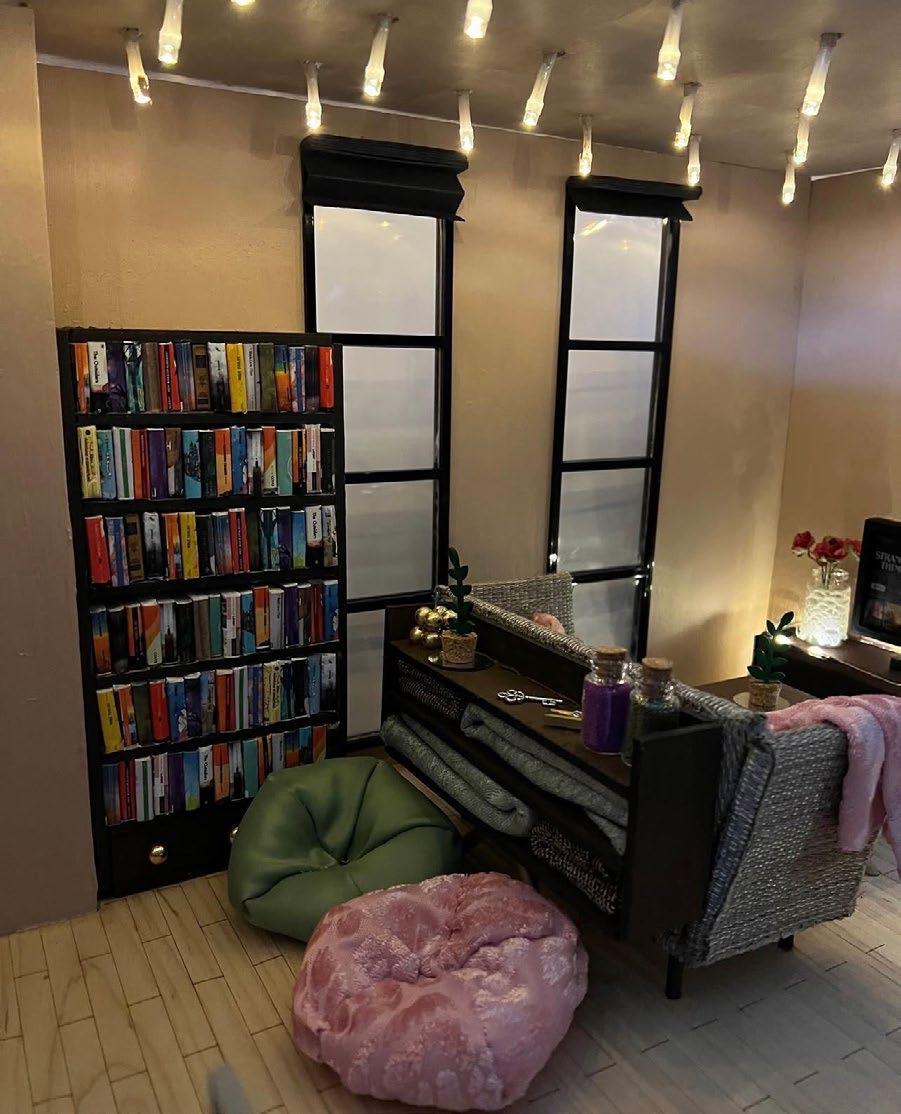
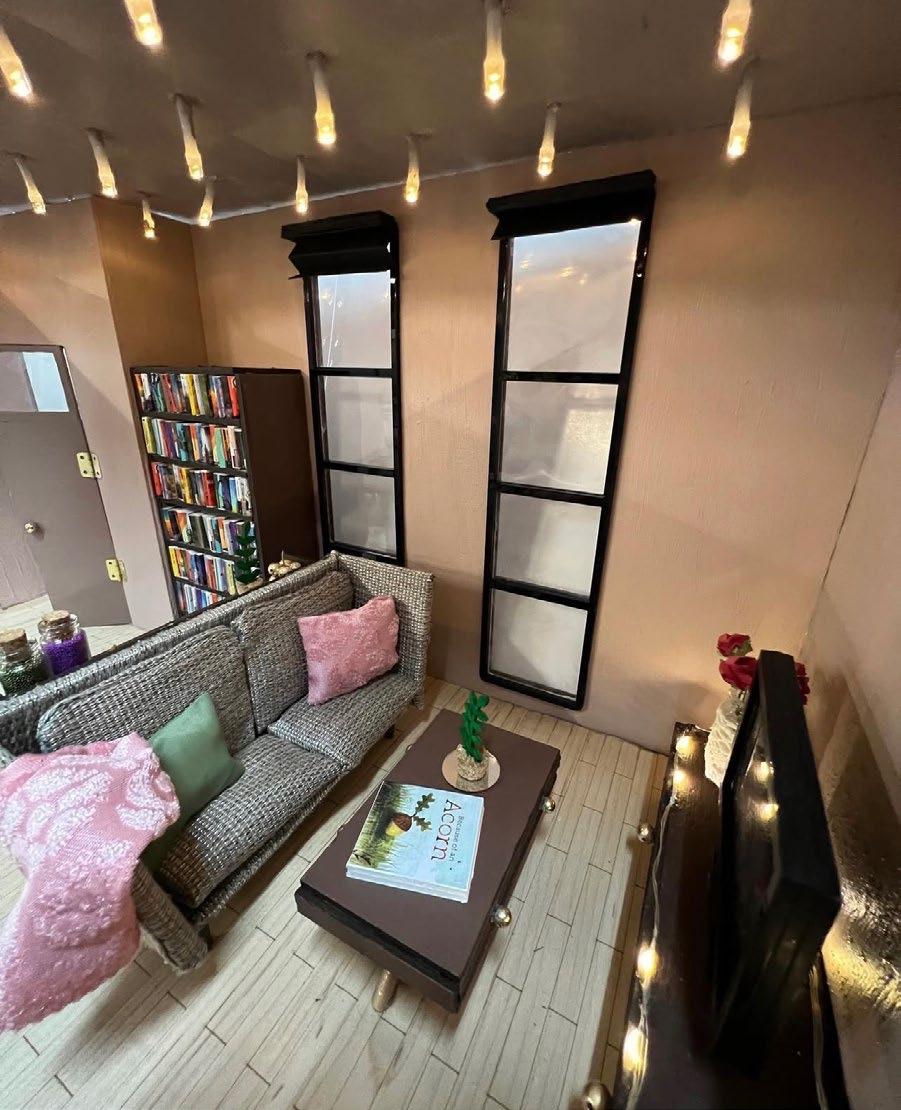


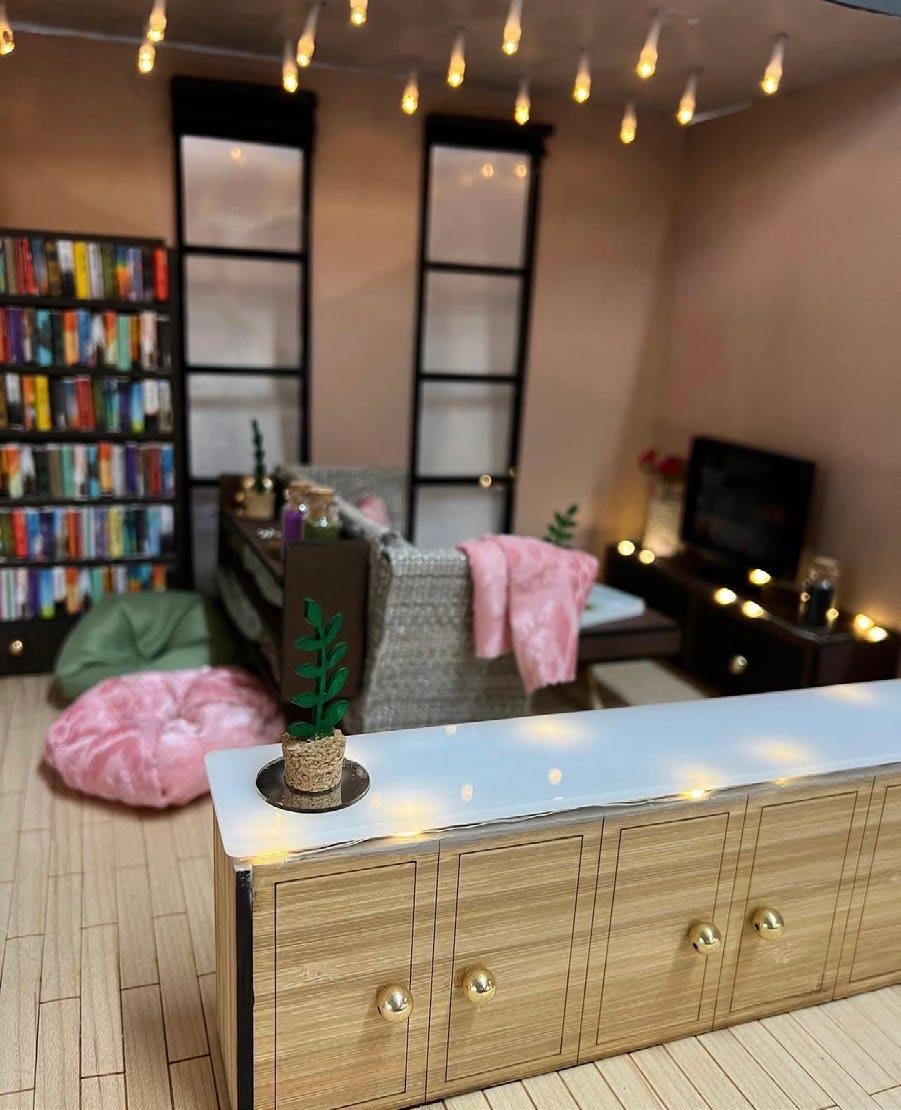
My first experiencing tipping my toe into creating a model, this 3D Design A-Level coursework unit allowed me to let all creative freedom out into hand crafting every item. I used 2D Design software for lazer cutting wood and acrylic to create shape nets and engravings for me to use and put together to make the furniture. Furthermore, using foam board and fabrics to create softer furniture and decorations. My personal brief was to explore my family and I’s history and heritage throughout the interior of this home. I had no prior experience or knowledge of interior design but I believe that is why I love this project as it shows my raw thoughts and processes to create the model with no experience and research as I go. Although this model is not perfect, it taught me basics of modelling through trying it and making mistakes.
PROJECT 2 - FAMILY TREE HOUSE
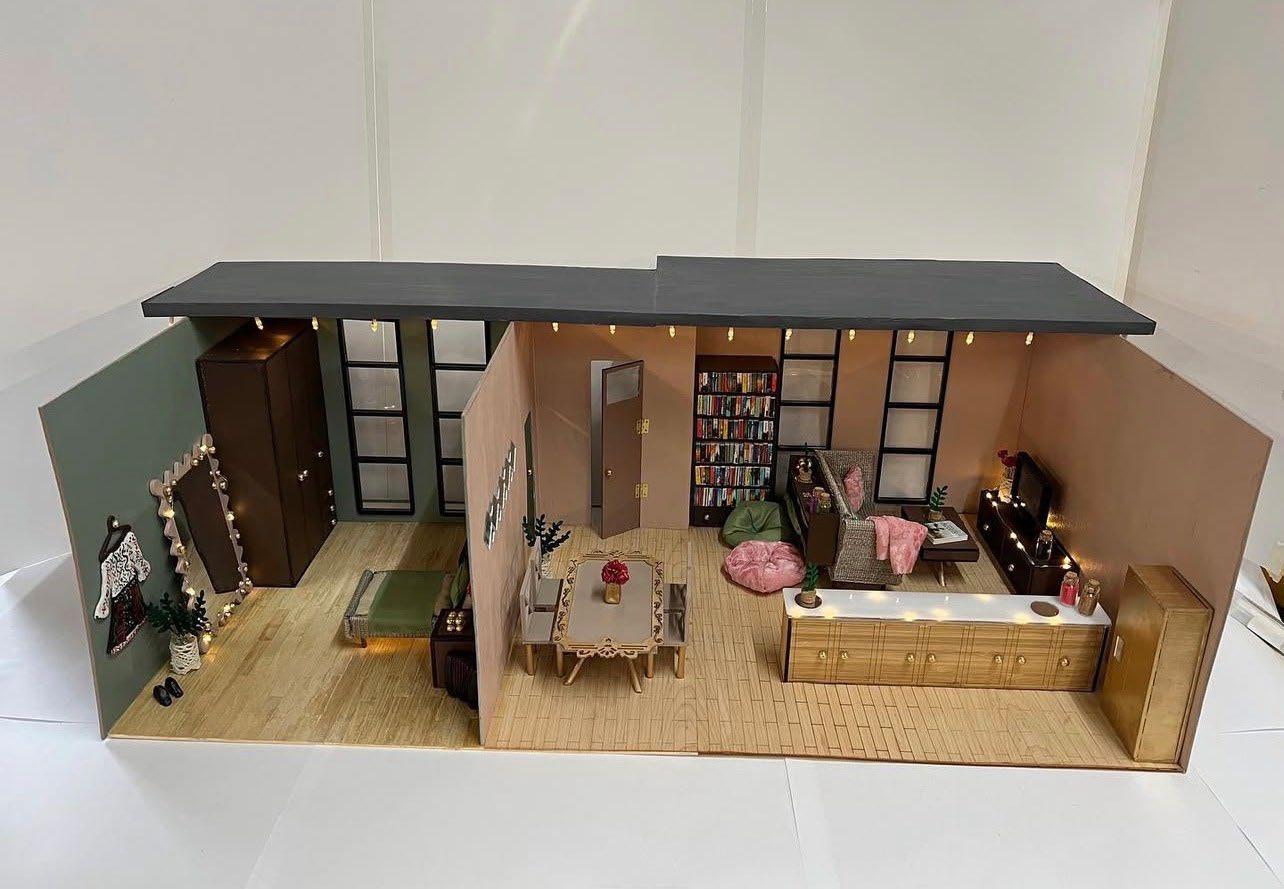
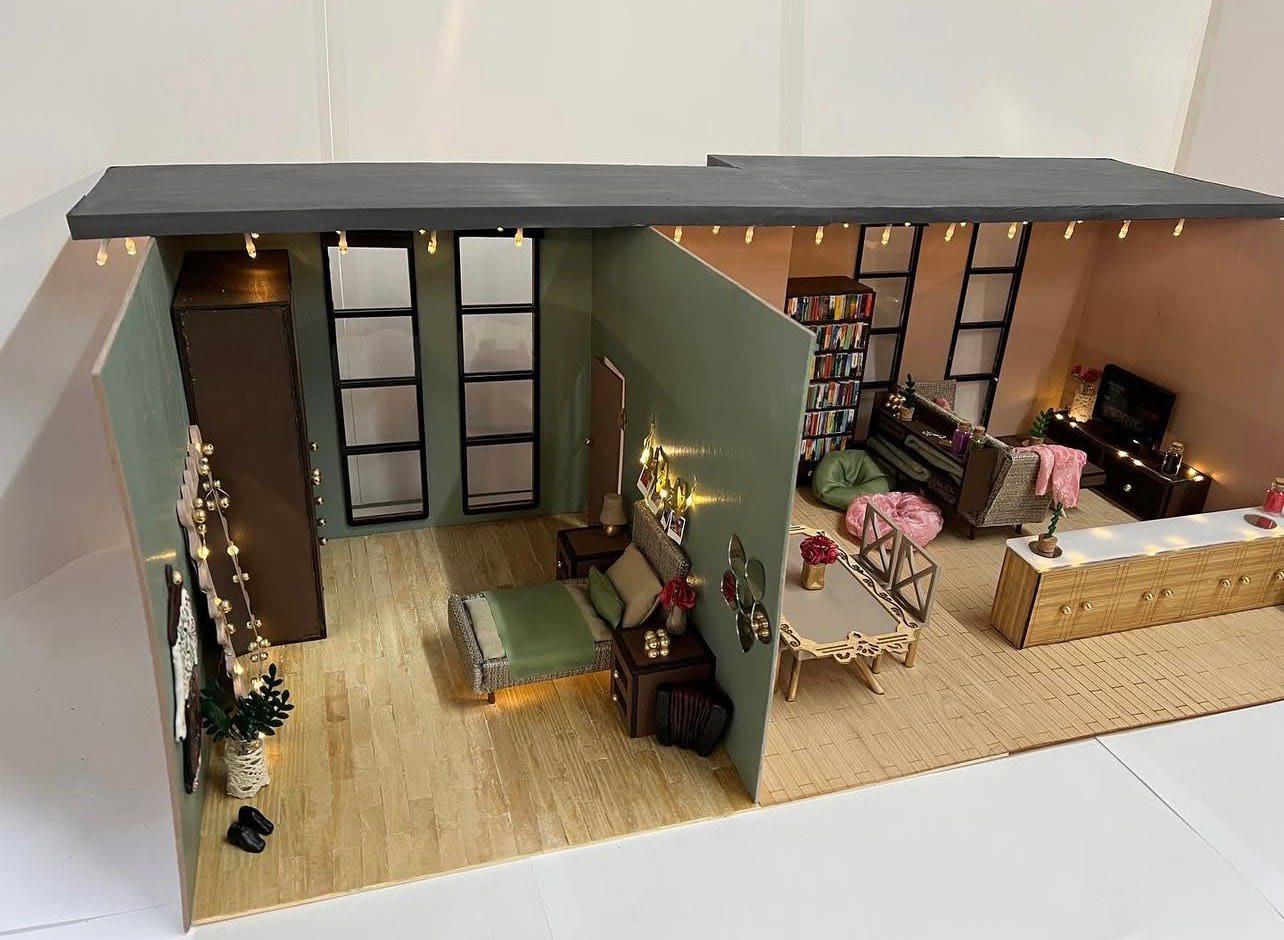
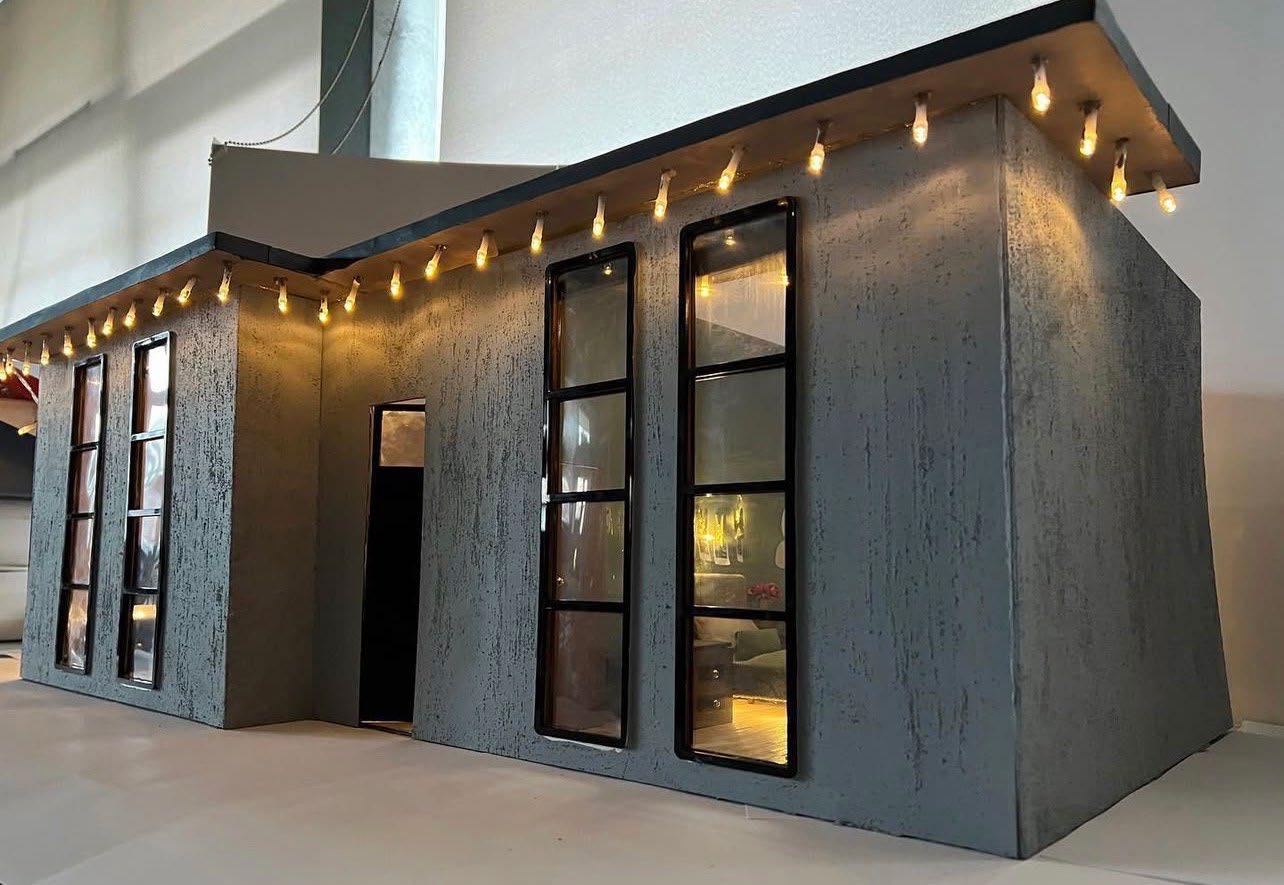
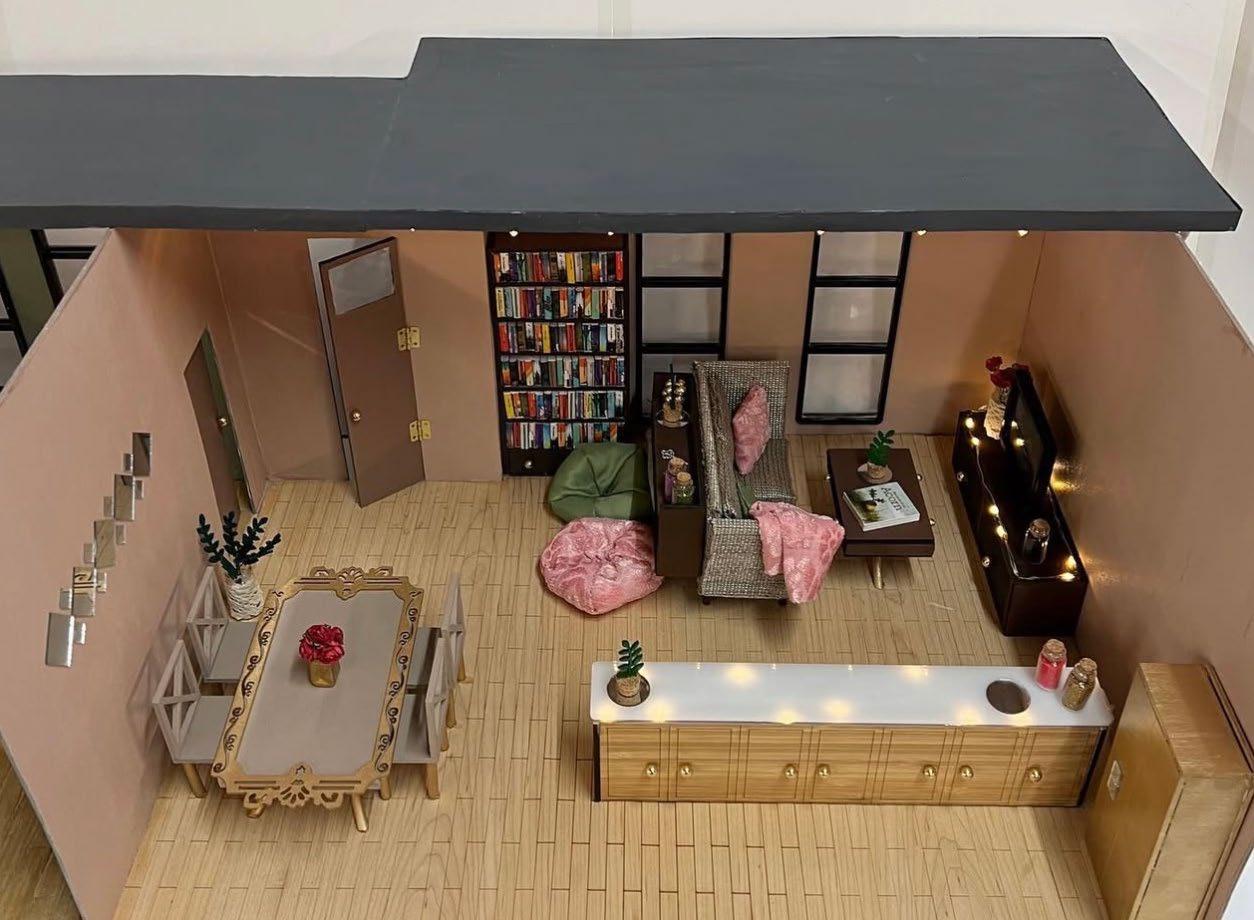
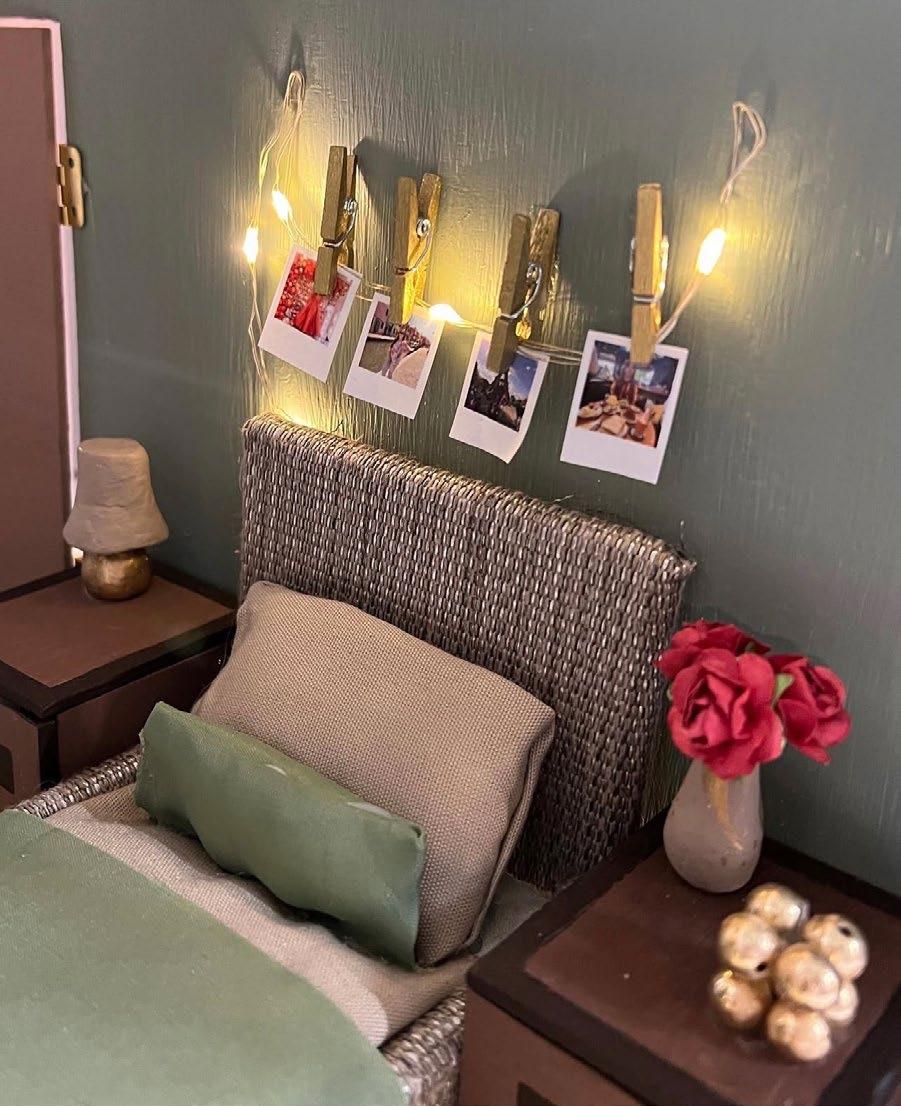
This full hand crafted interior/exterior model is made to explore my family heritage throughout the home, showing my family name ‘Ghinda’ translated to ‘Acorn’ in English with the book on the coffee table. Traditional Moldovan dancing dress on a hanger for my mother’s history as a dancer; an accordion representing my fathers history with being an accordionist in the same traditional dancing group. This model includes small polaroid pictures of myself and explores my hobbies and love throughout the home, e.g. books for my reading hobby. Overall, this project inspired me to want to learn real technicality and learn to understand interior design in a professional manner.
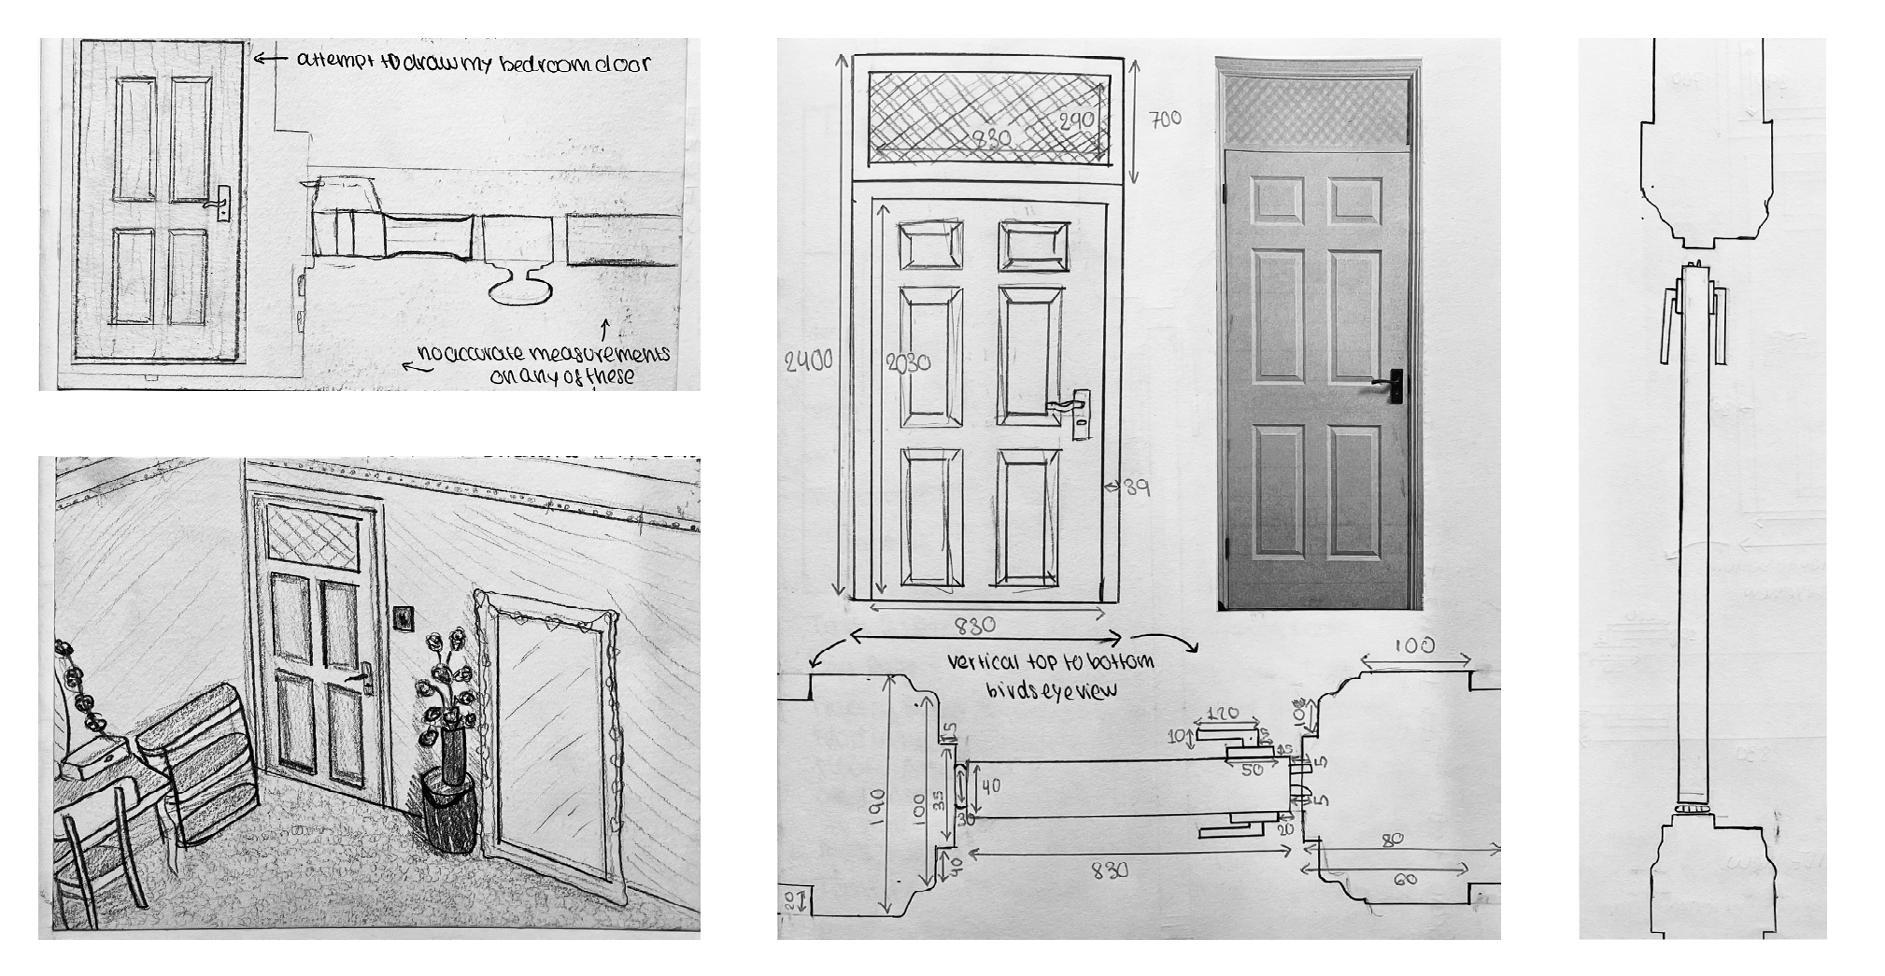
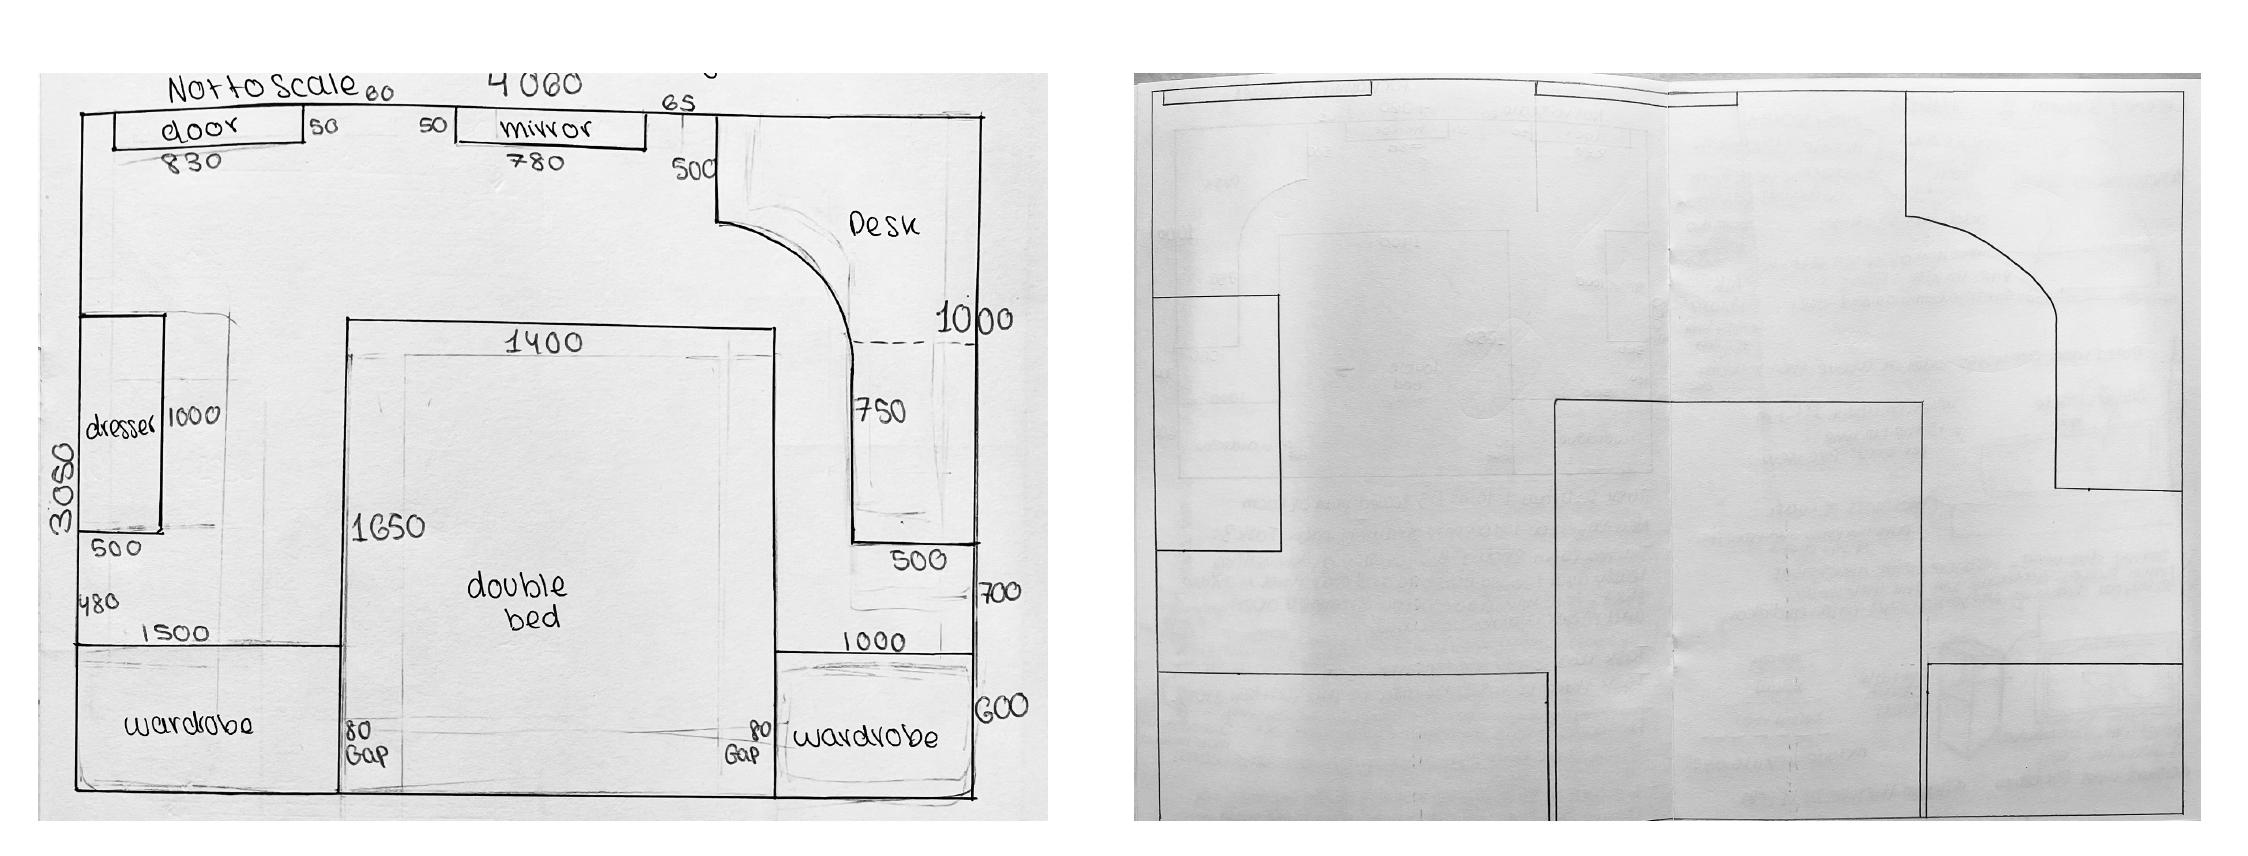
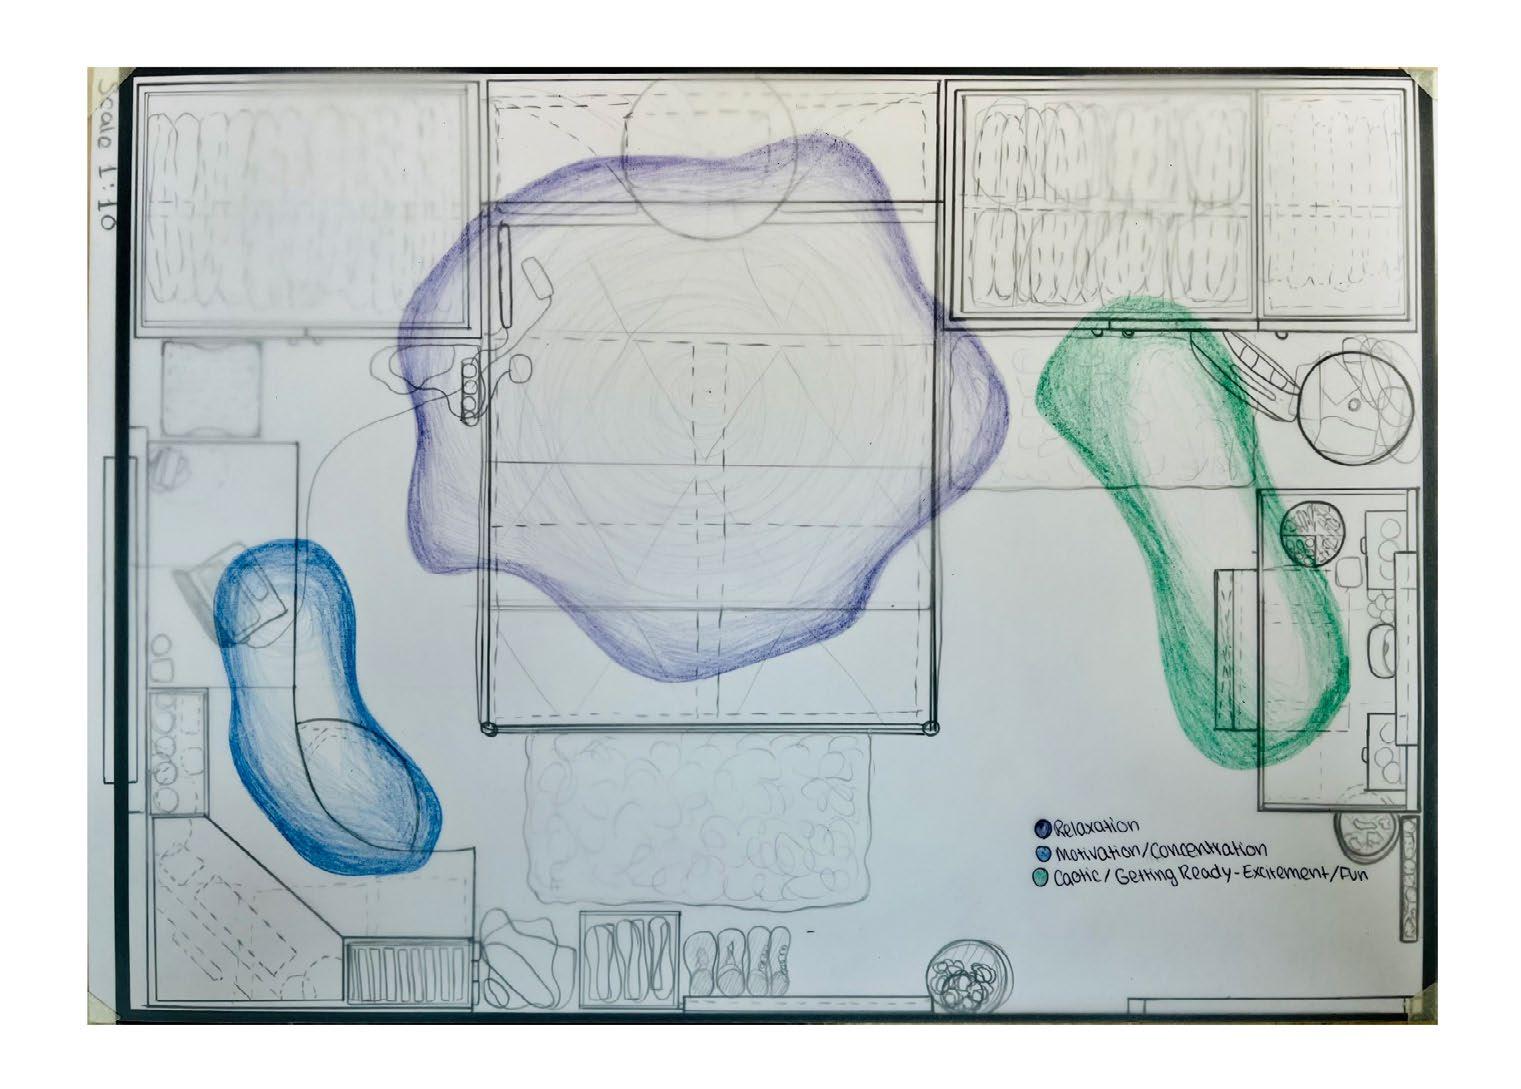
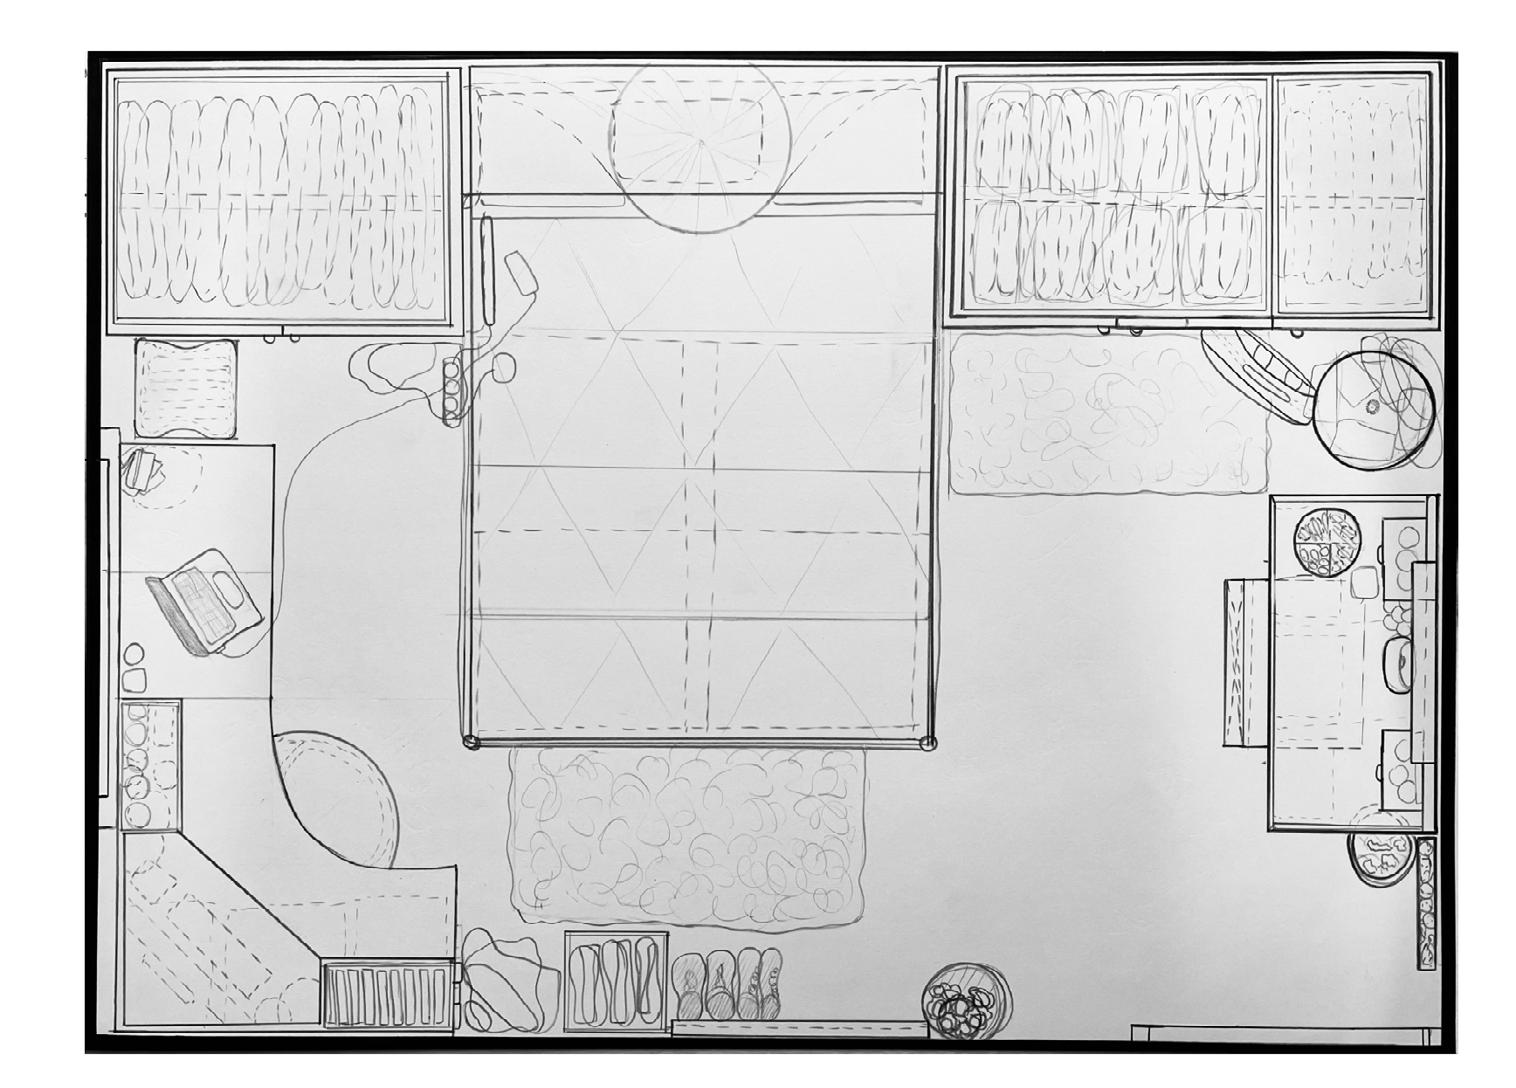
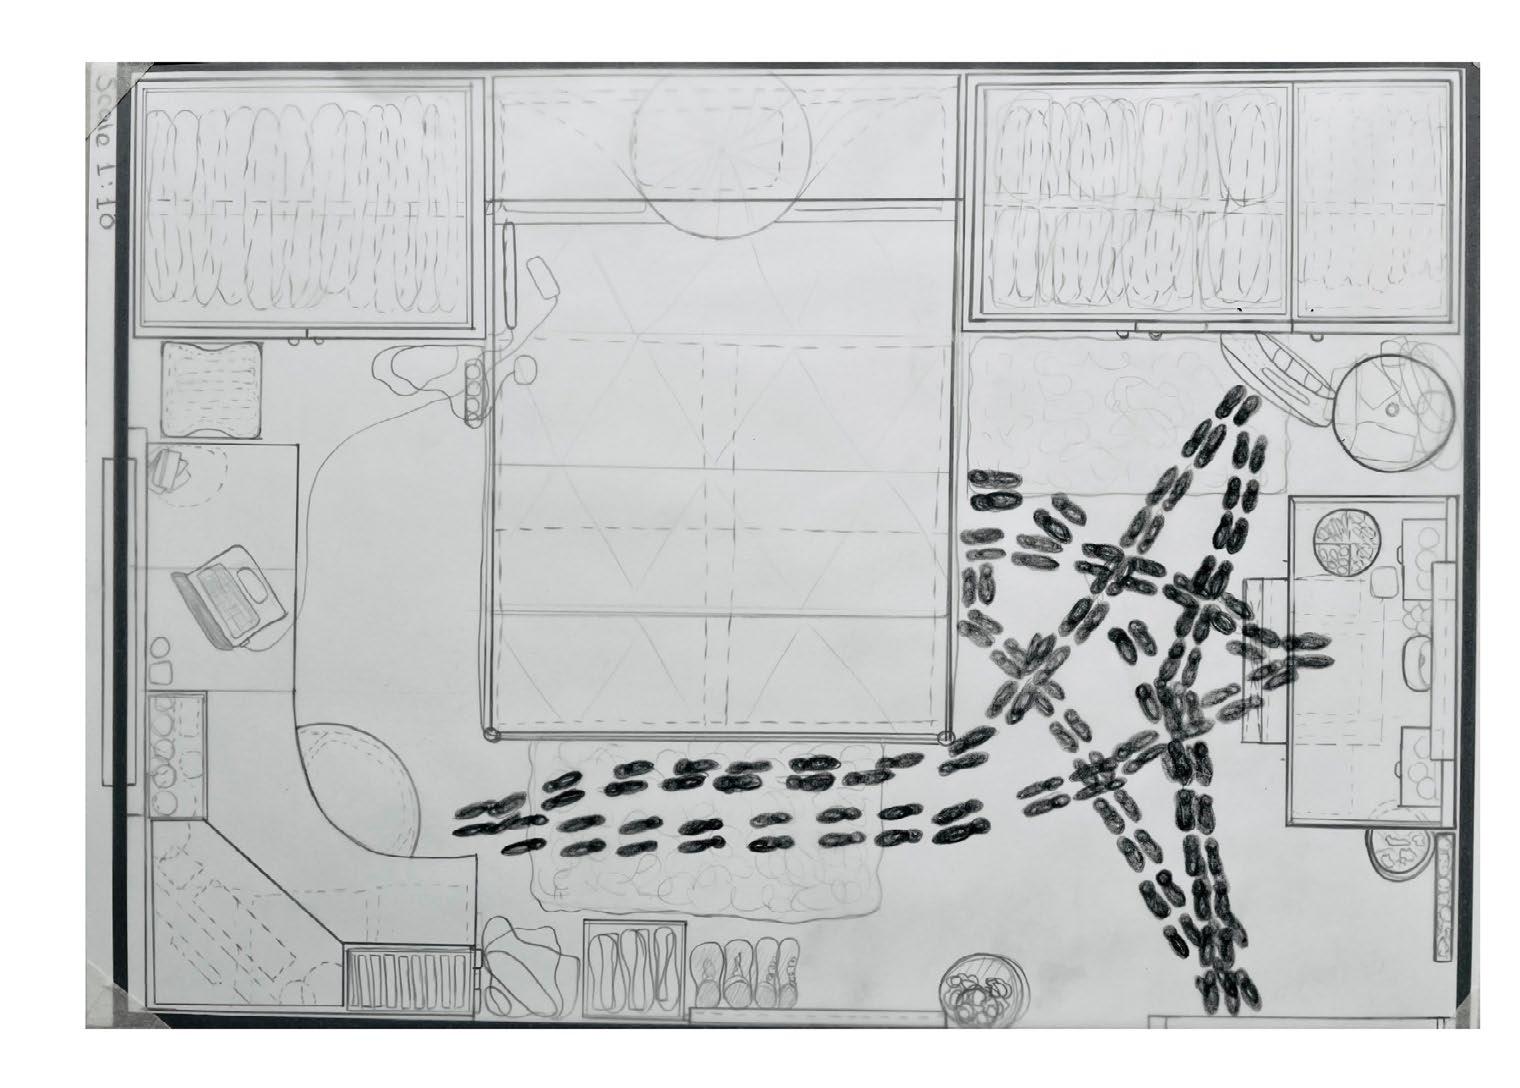
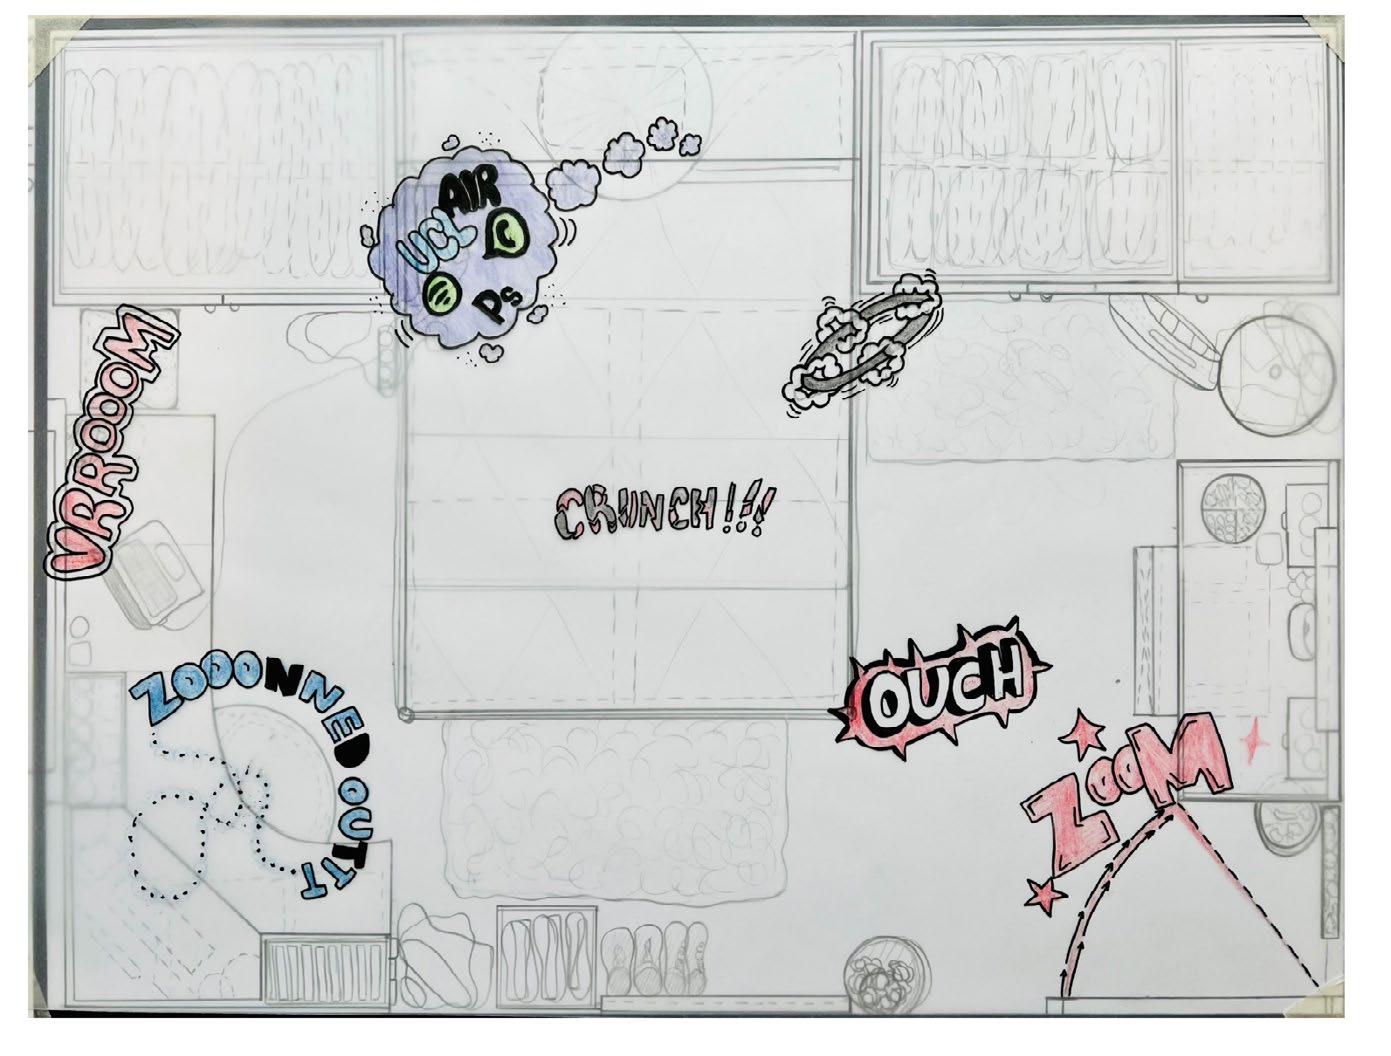
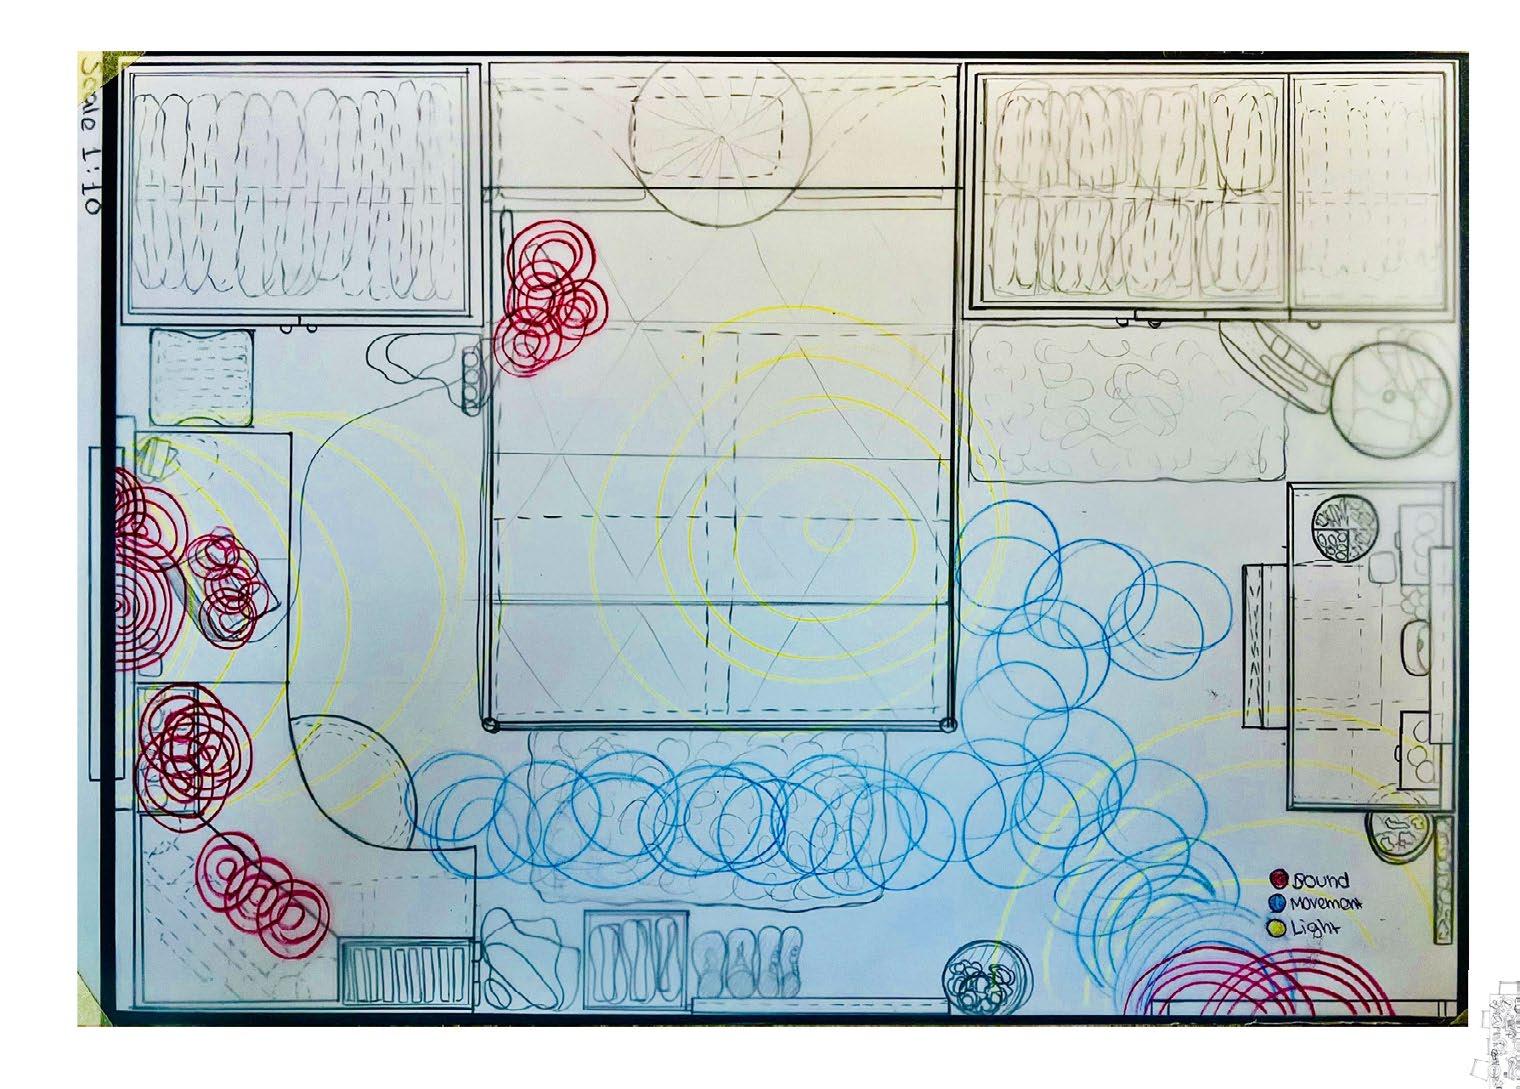
Starting at the Bartlett School of Architecture, we individually explored creating drawings of our own rooms, looking at orthographic drawings, and visual drawings. Additionally, I looked at representing sounds in my room, where I spend most of my time, foot traffic of my mornings, and combining sound light and movement. With the start of this project looking at drawings, I learnt how to create accurate scale drawings of a room. A3, Scale 1:10.
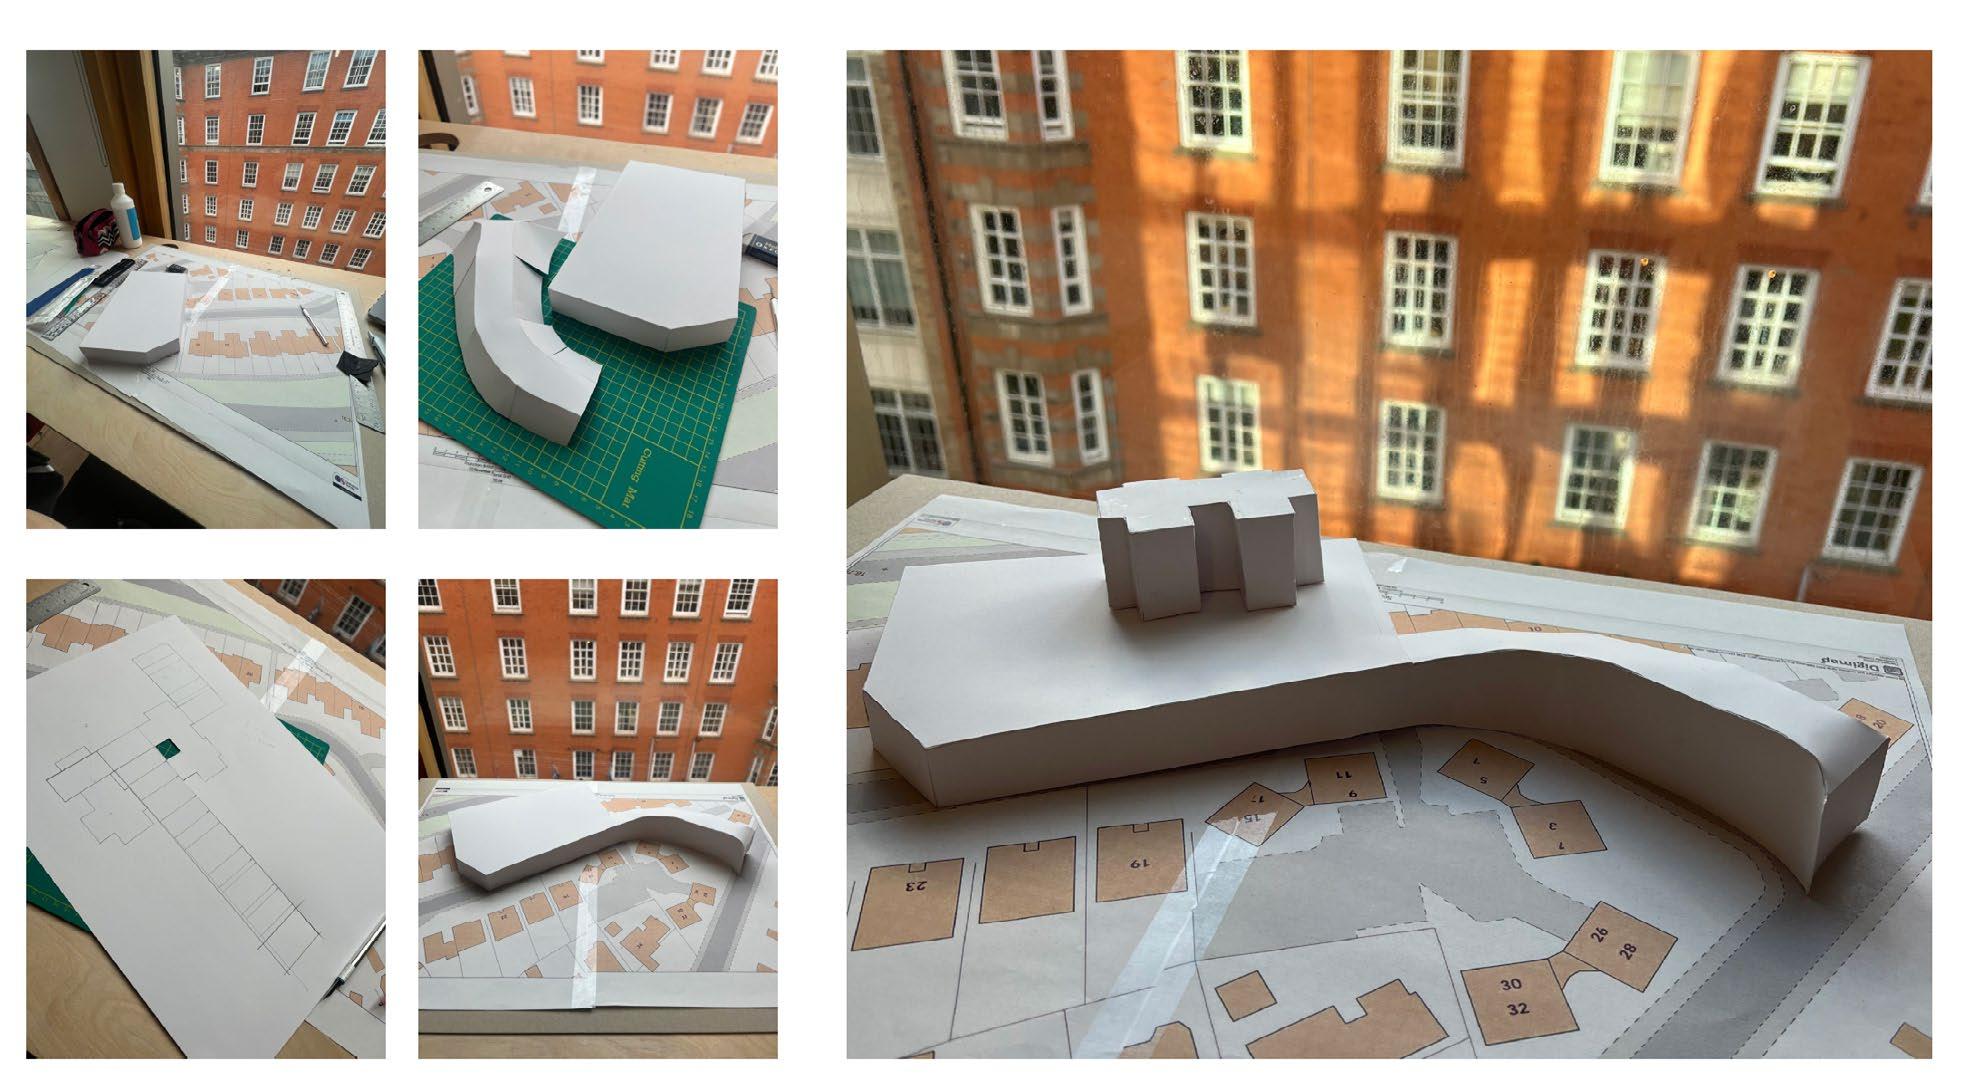
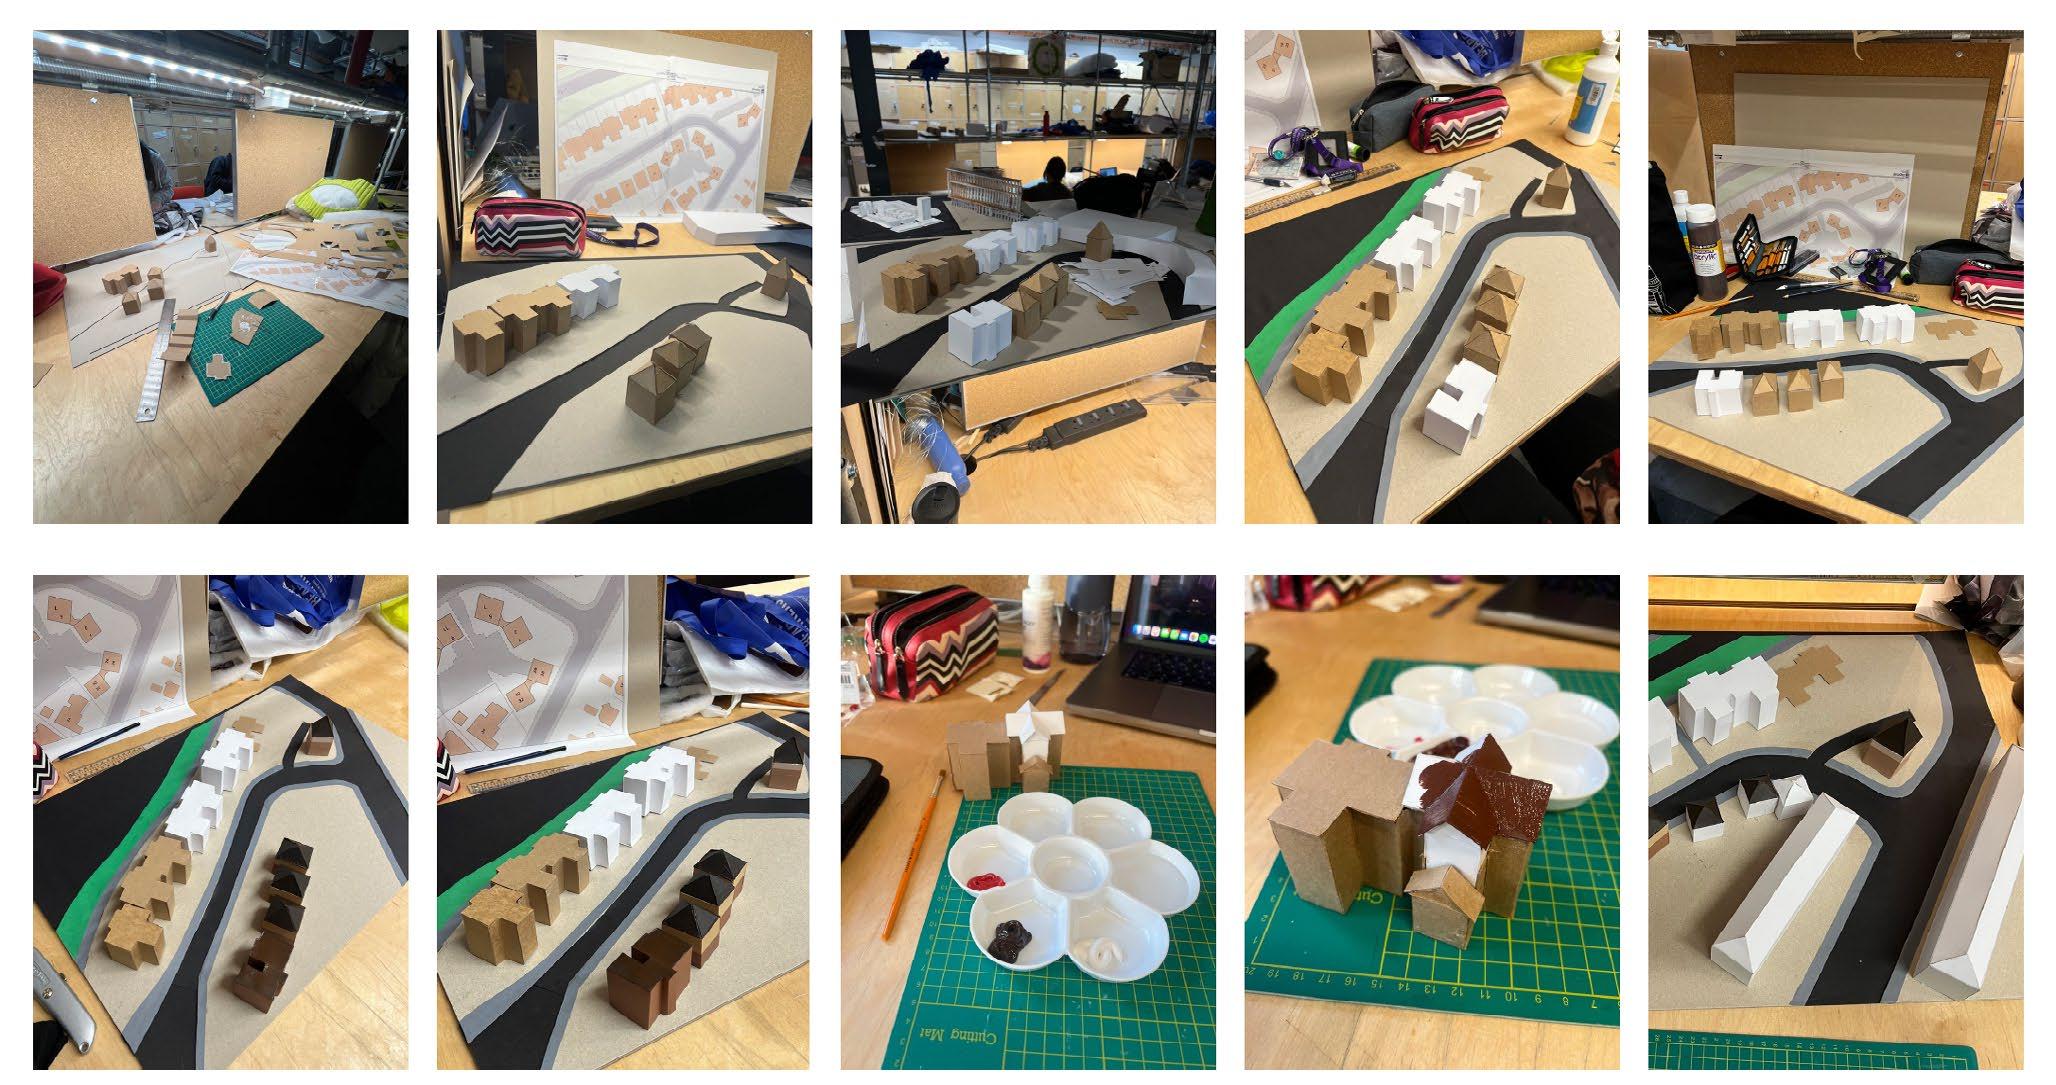
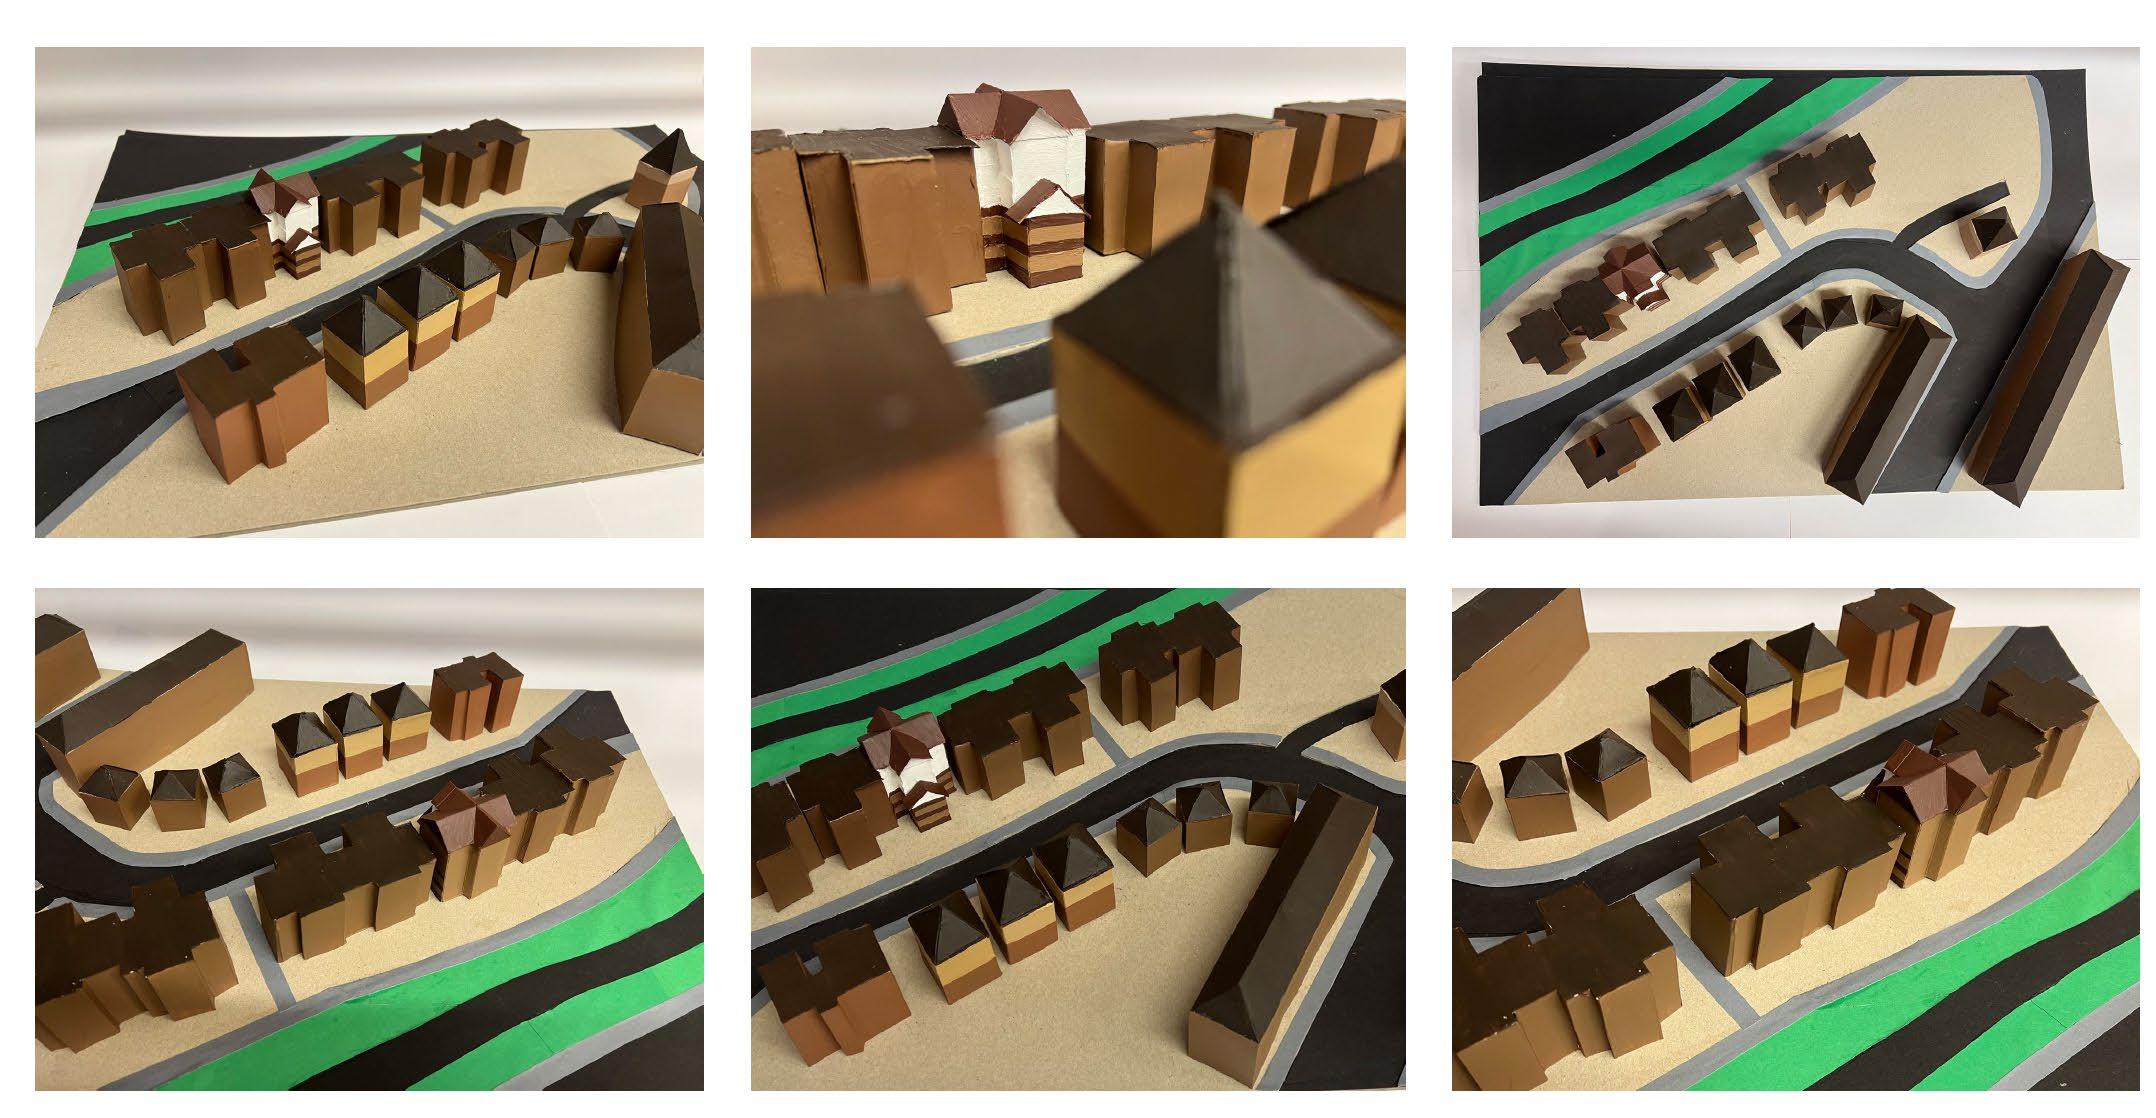
Following on, the next step of exploration in this project was studying and creating a model of my street, learning how to use digi map and making a scale model. I developed the model using coloured card to represent each part of the model; green for grass, black for roads, grey for pavement, brown for houses. Then, using further detail and paint for my house to stand out on the street. A3 Scale 1:250.
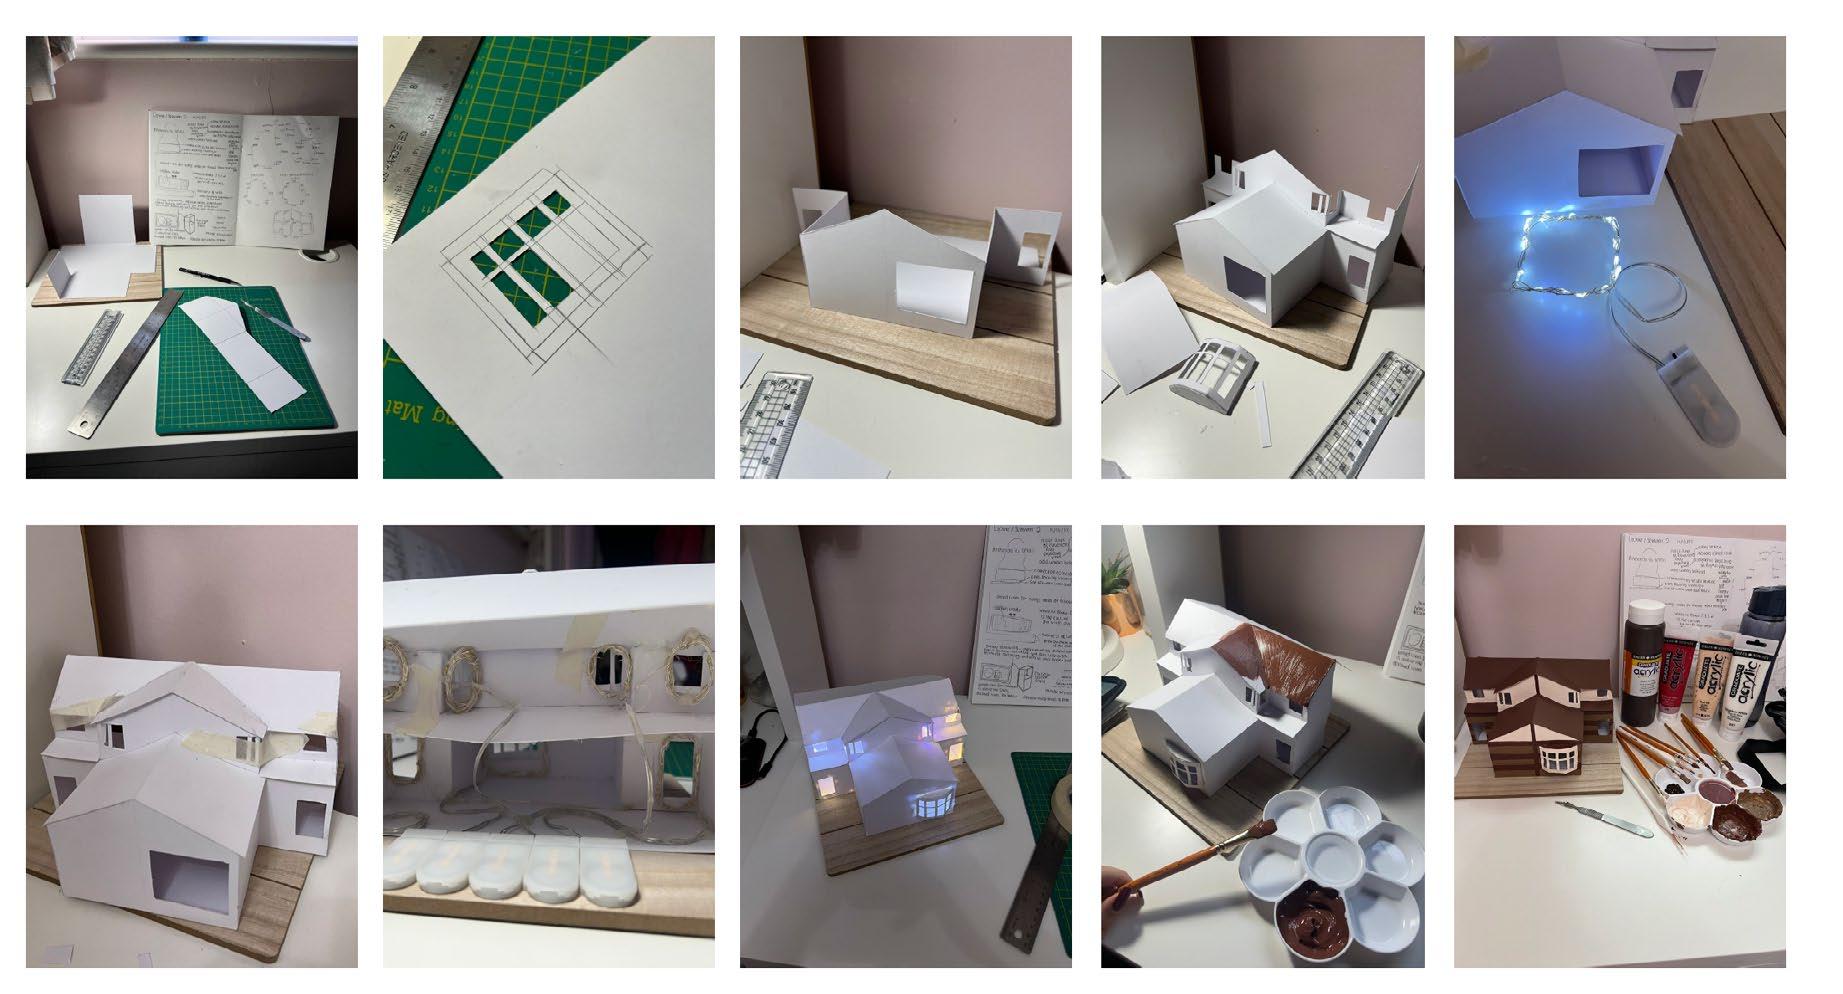
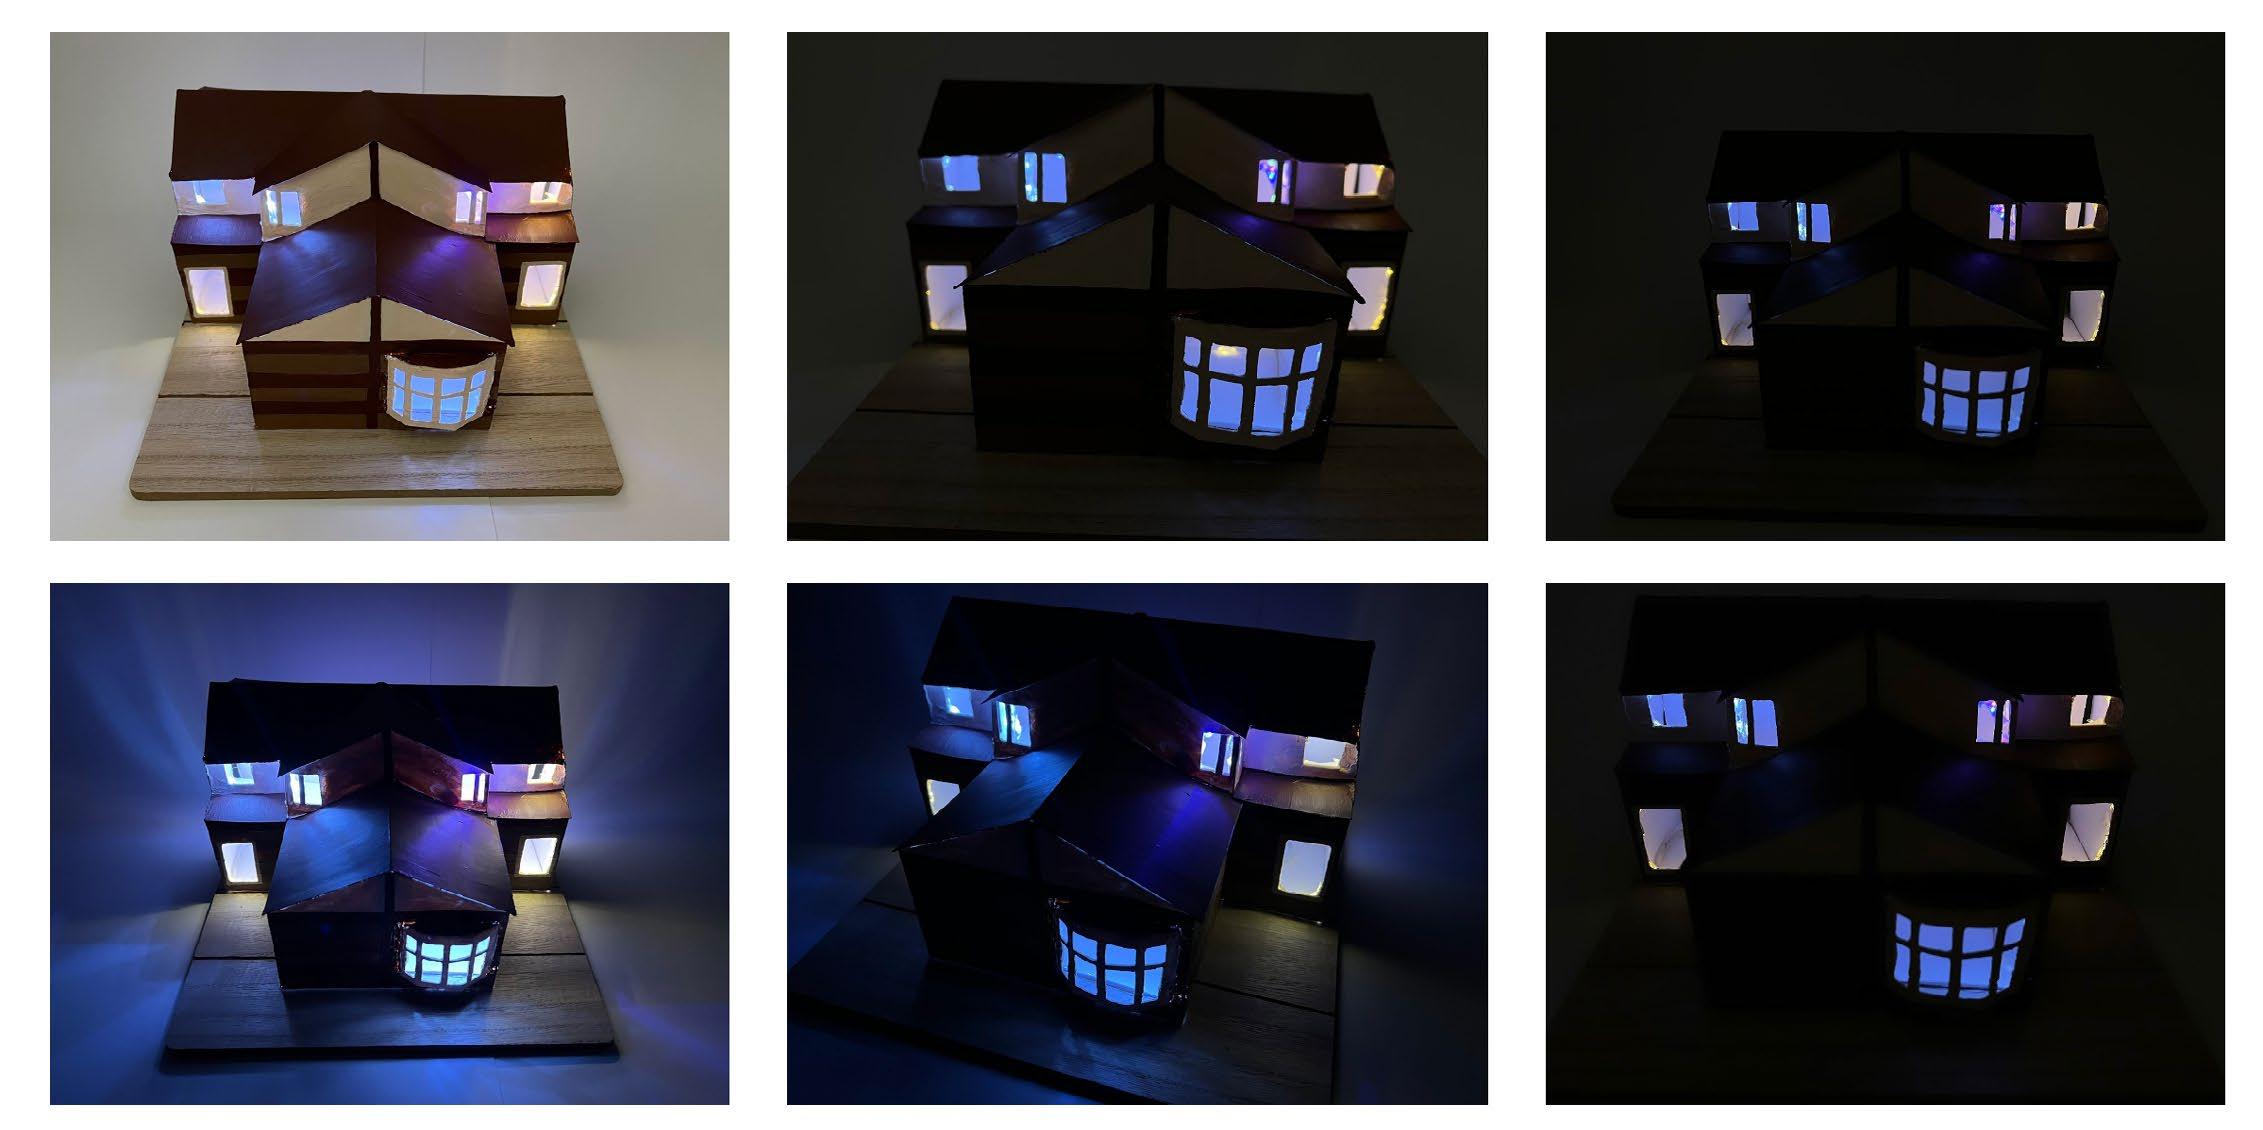
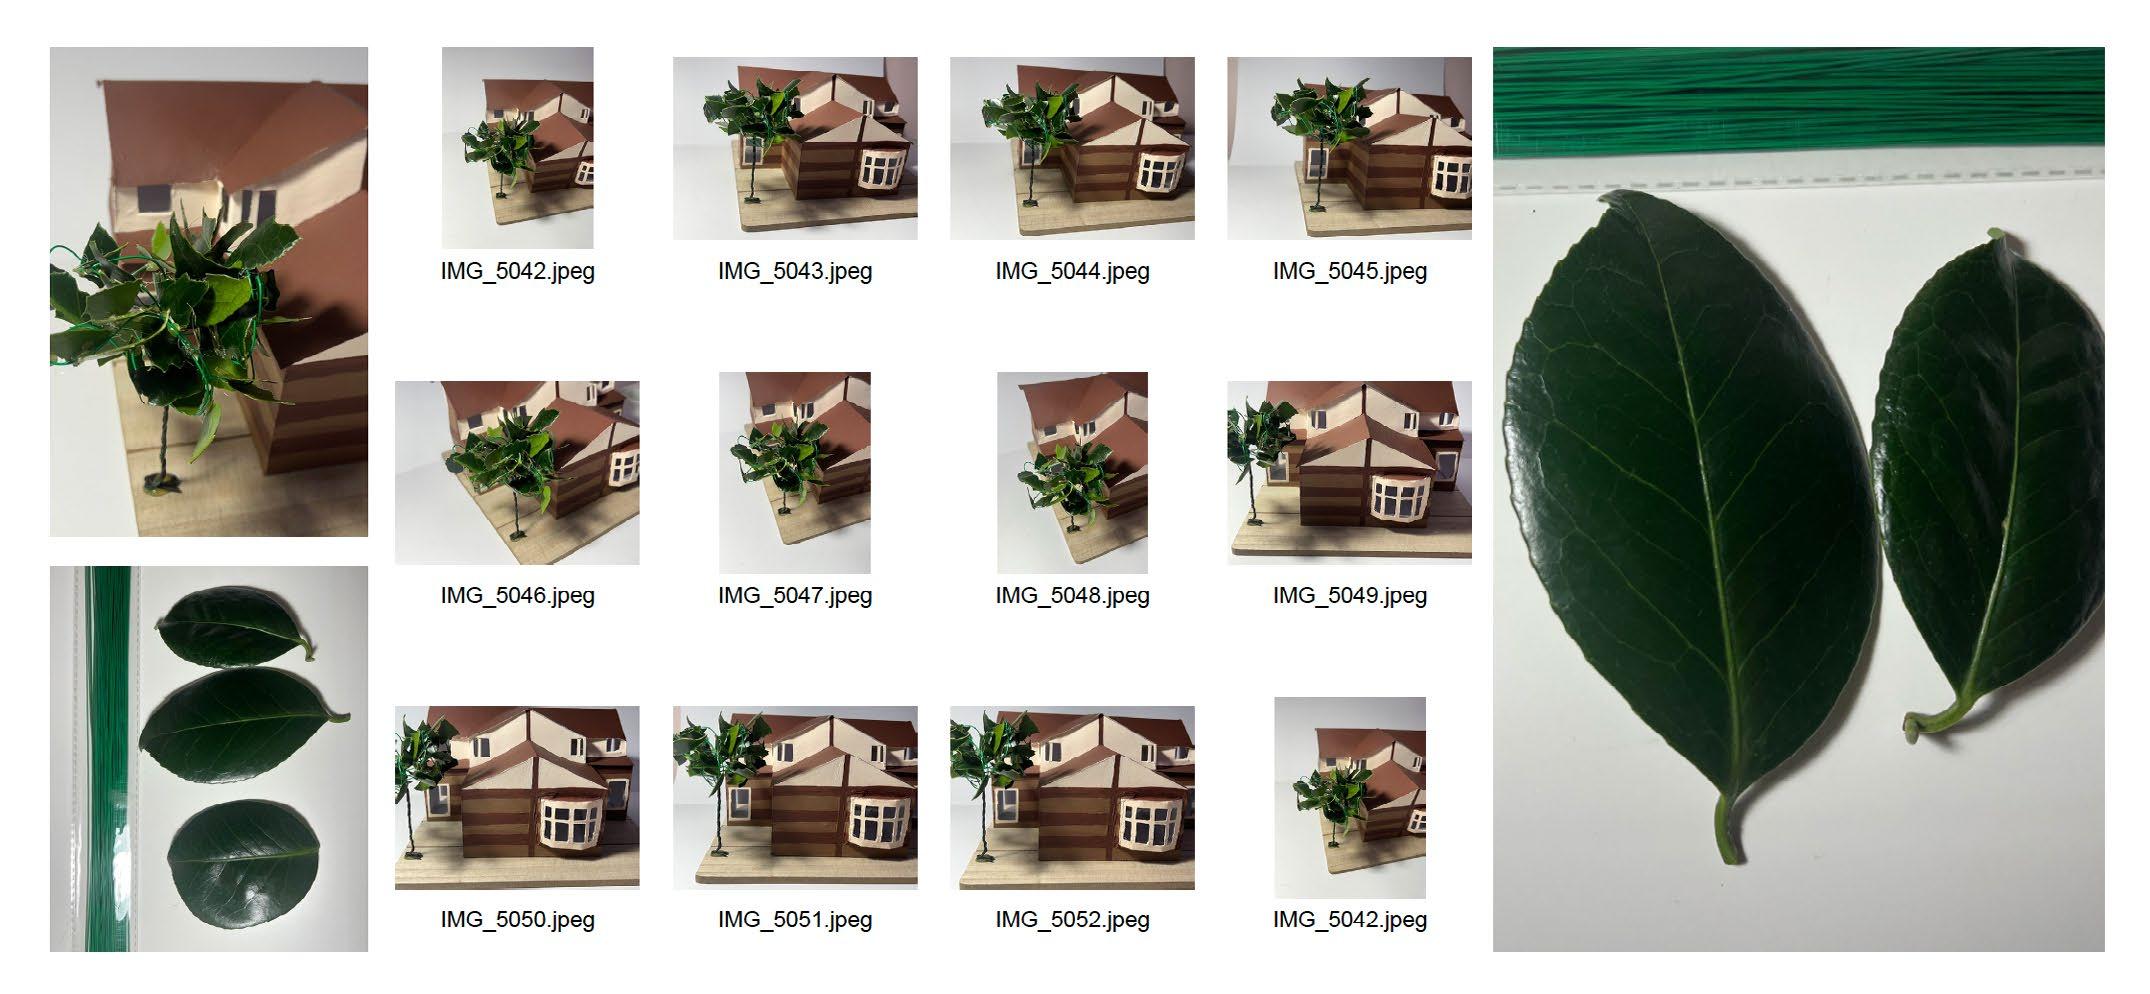
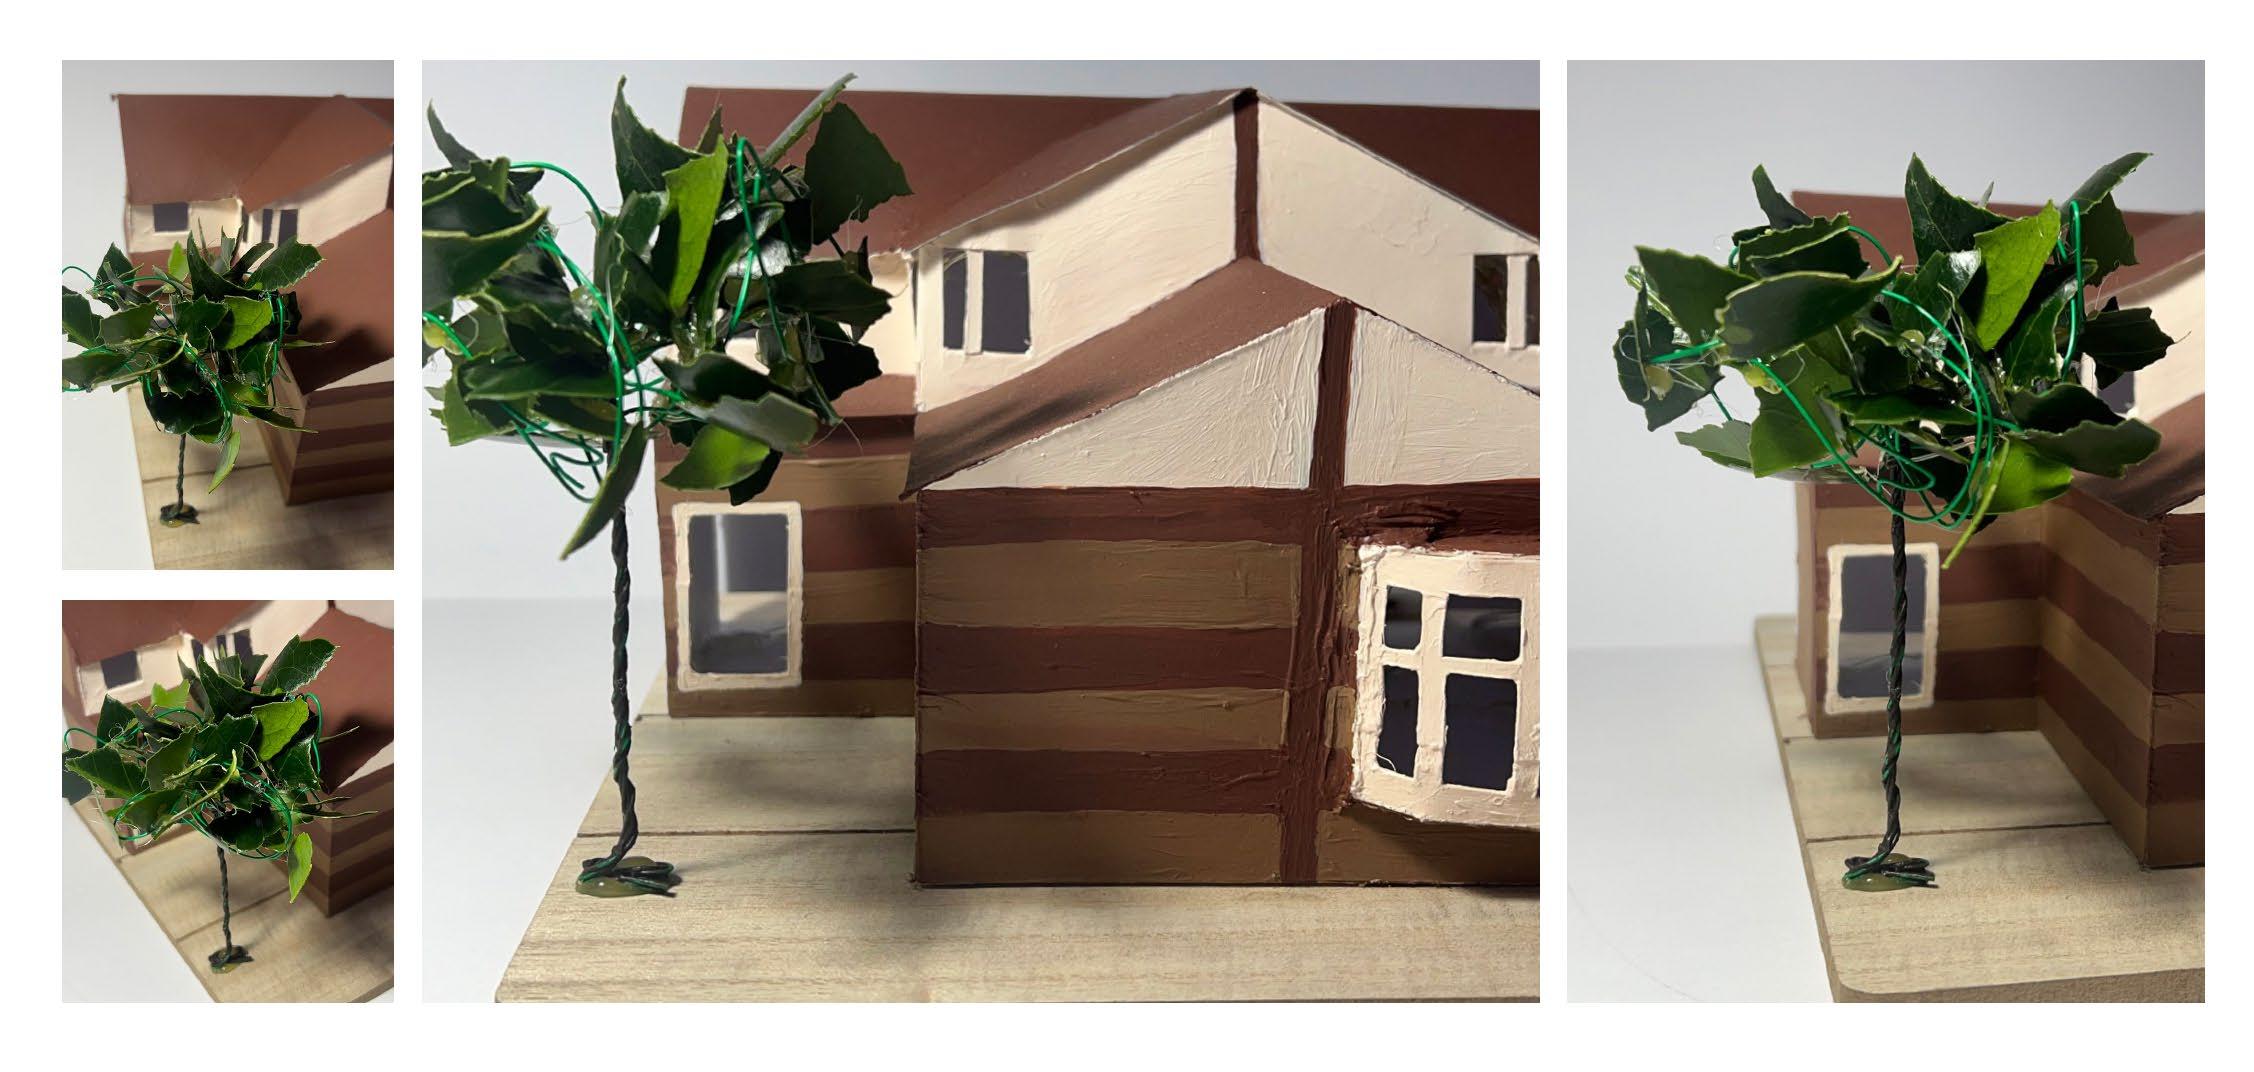
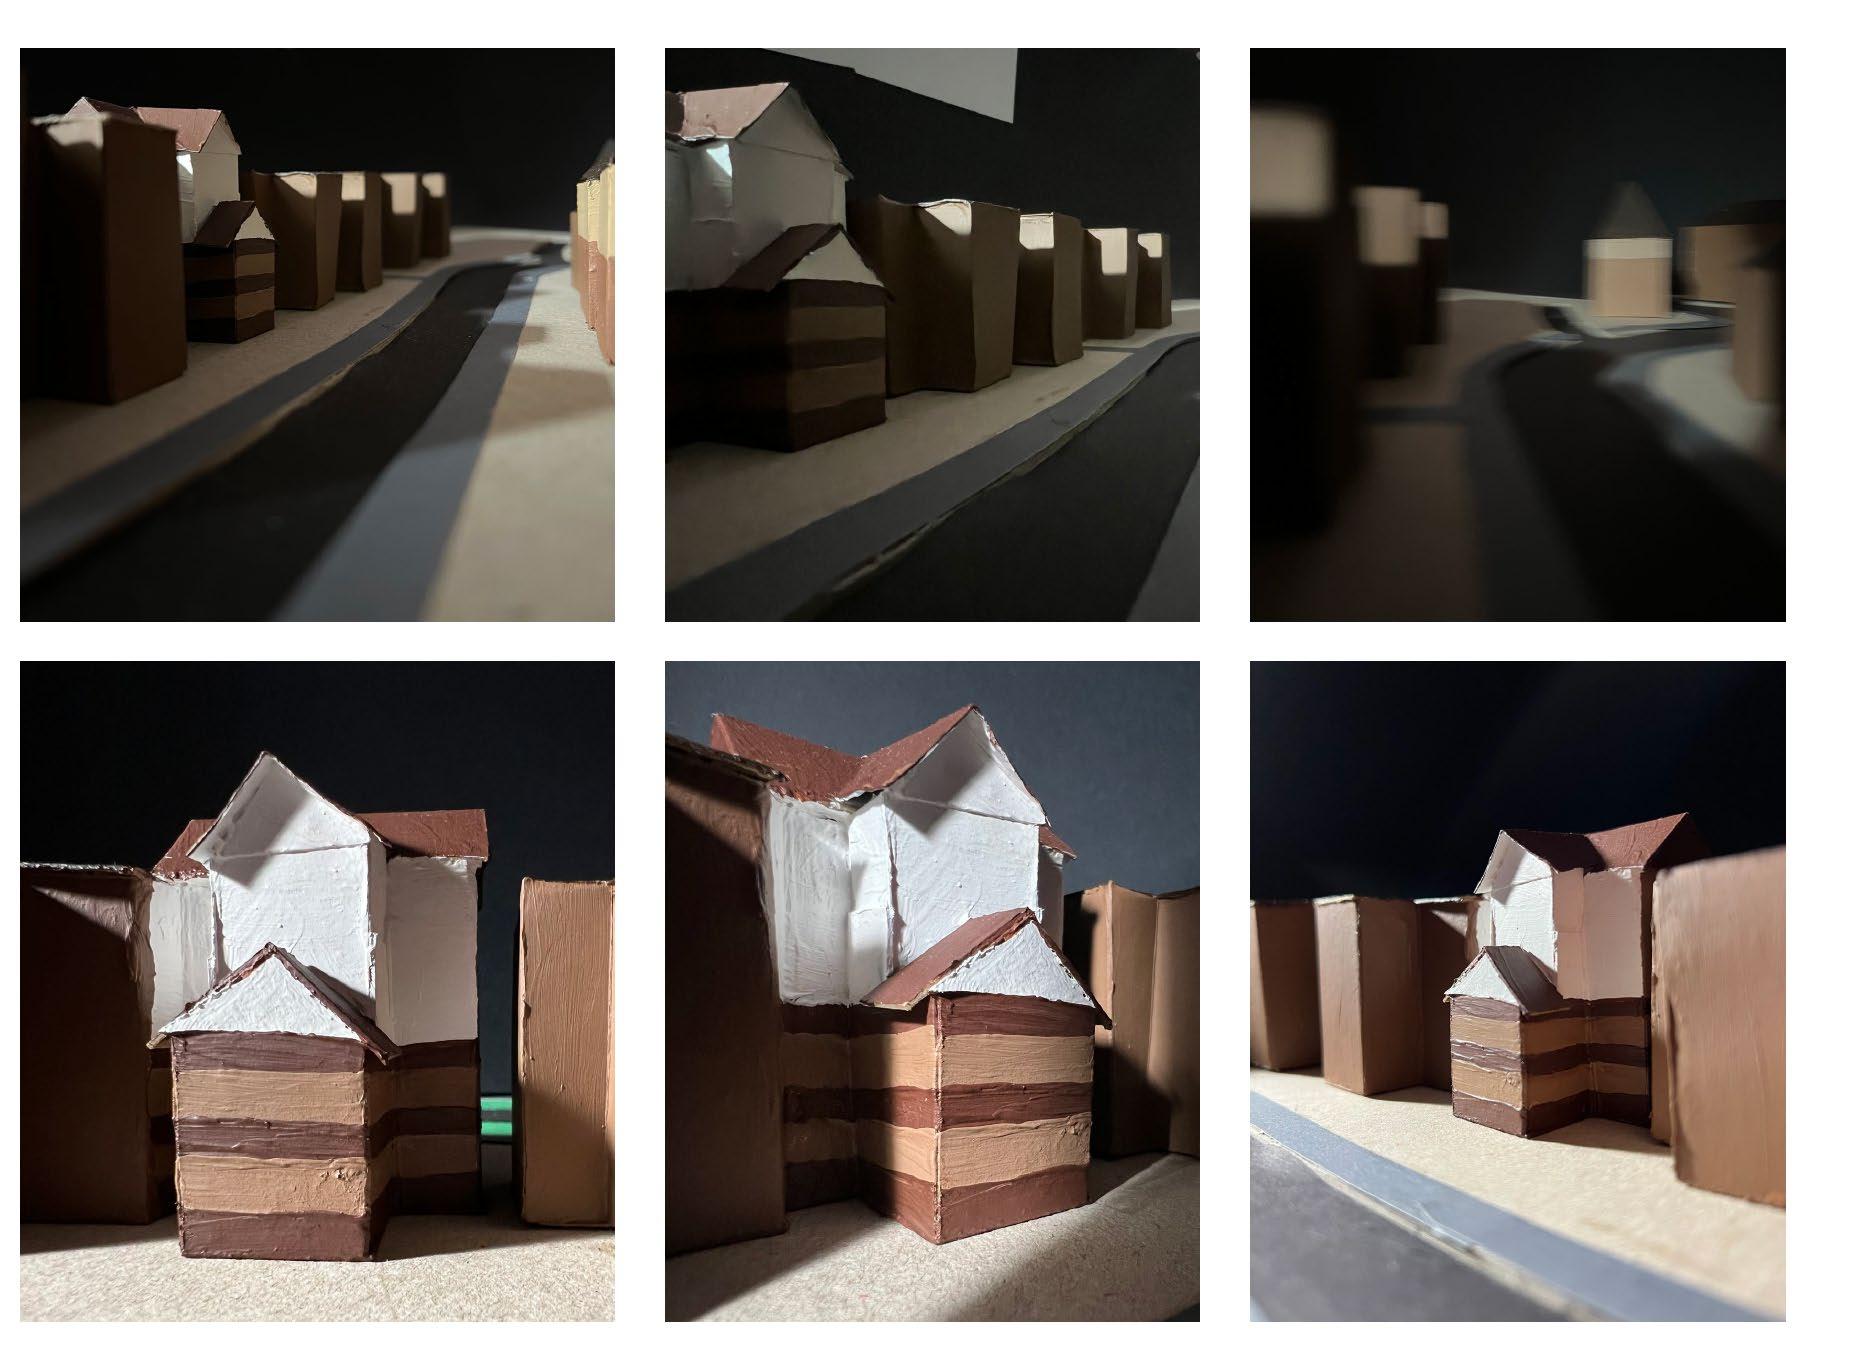
Additionally, to iterate my model I created a separate model of my house with a focal point of light. The photography side of this class influenced me to look at light within my model, specifically different colours in each room. I created this model to iterate my house model and I further developed it with adding greenery. Scale 1:50


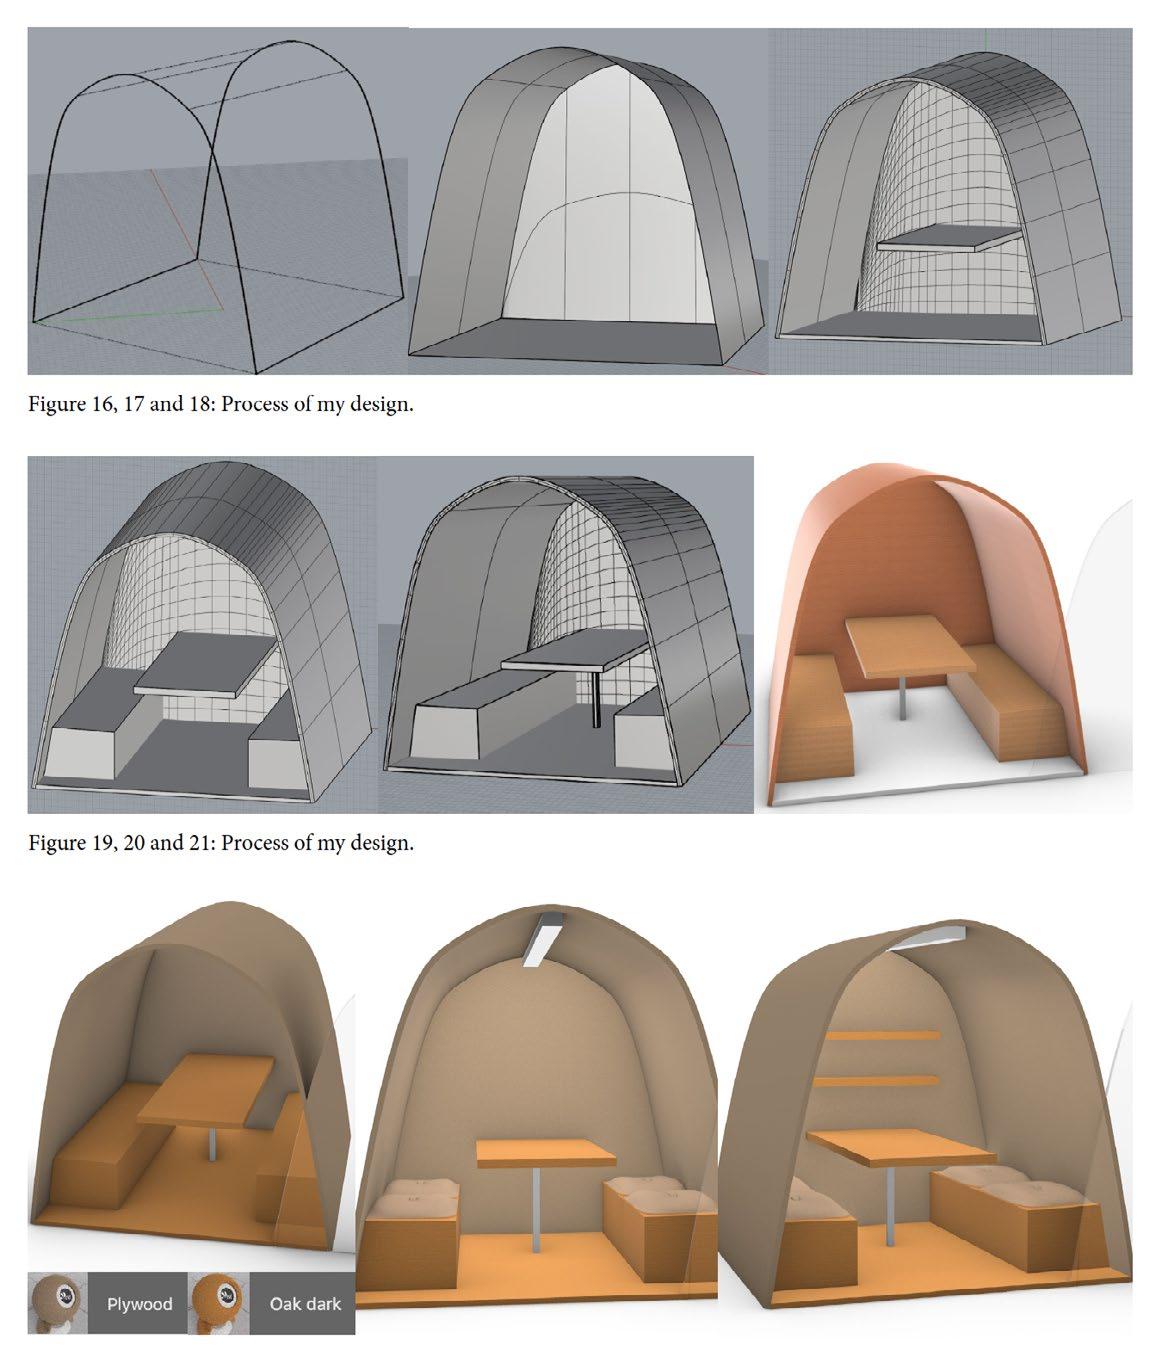
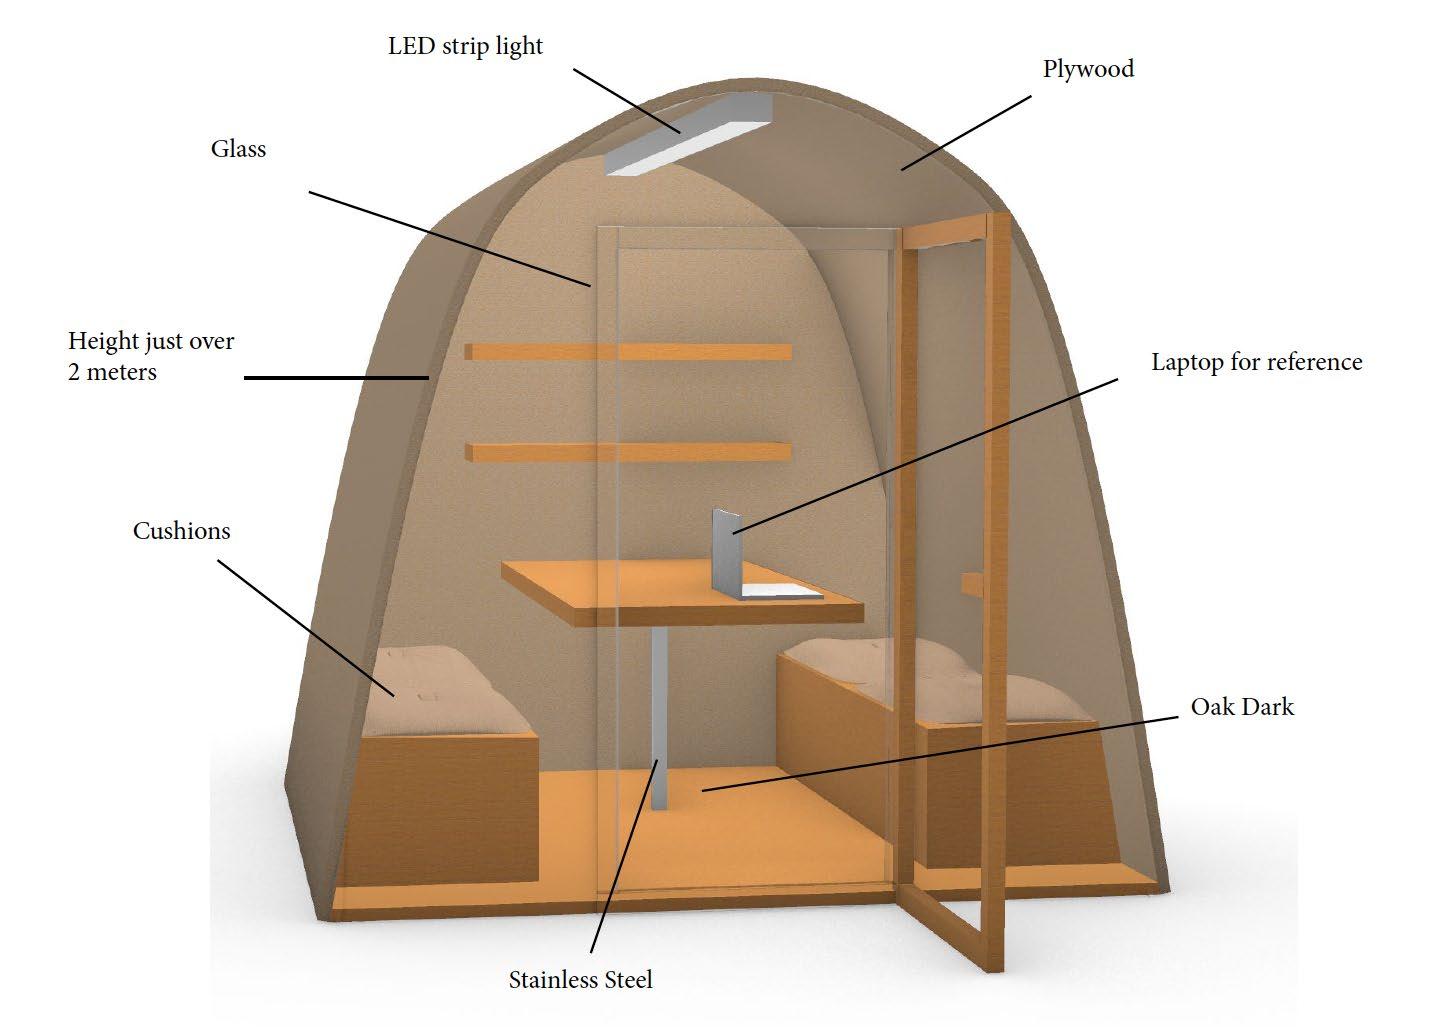
In Year 2 of my bachelors, I began to learn about using Rhino, we started by learning the basics and using digi map to create a street model. Then, following brief of creating something that students will benefit from in a campus location, I decided to make a study pod for all students to use. I focused on creating a round structure using stable materials. Researching materials and creating a circular structure was my overall goal.

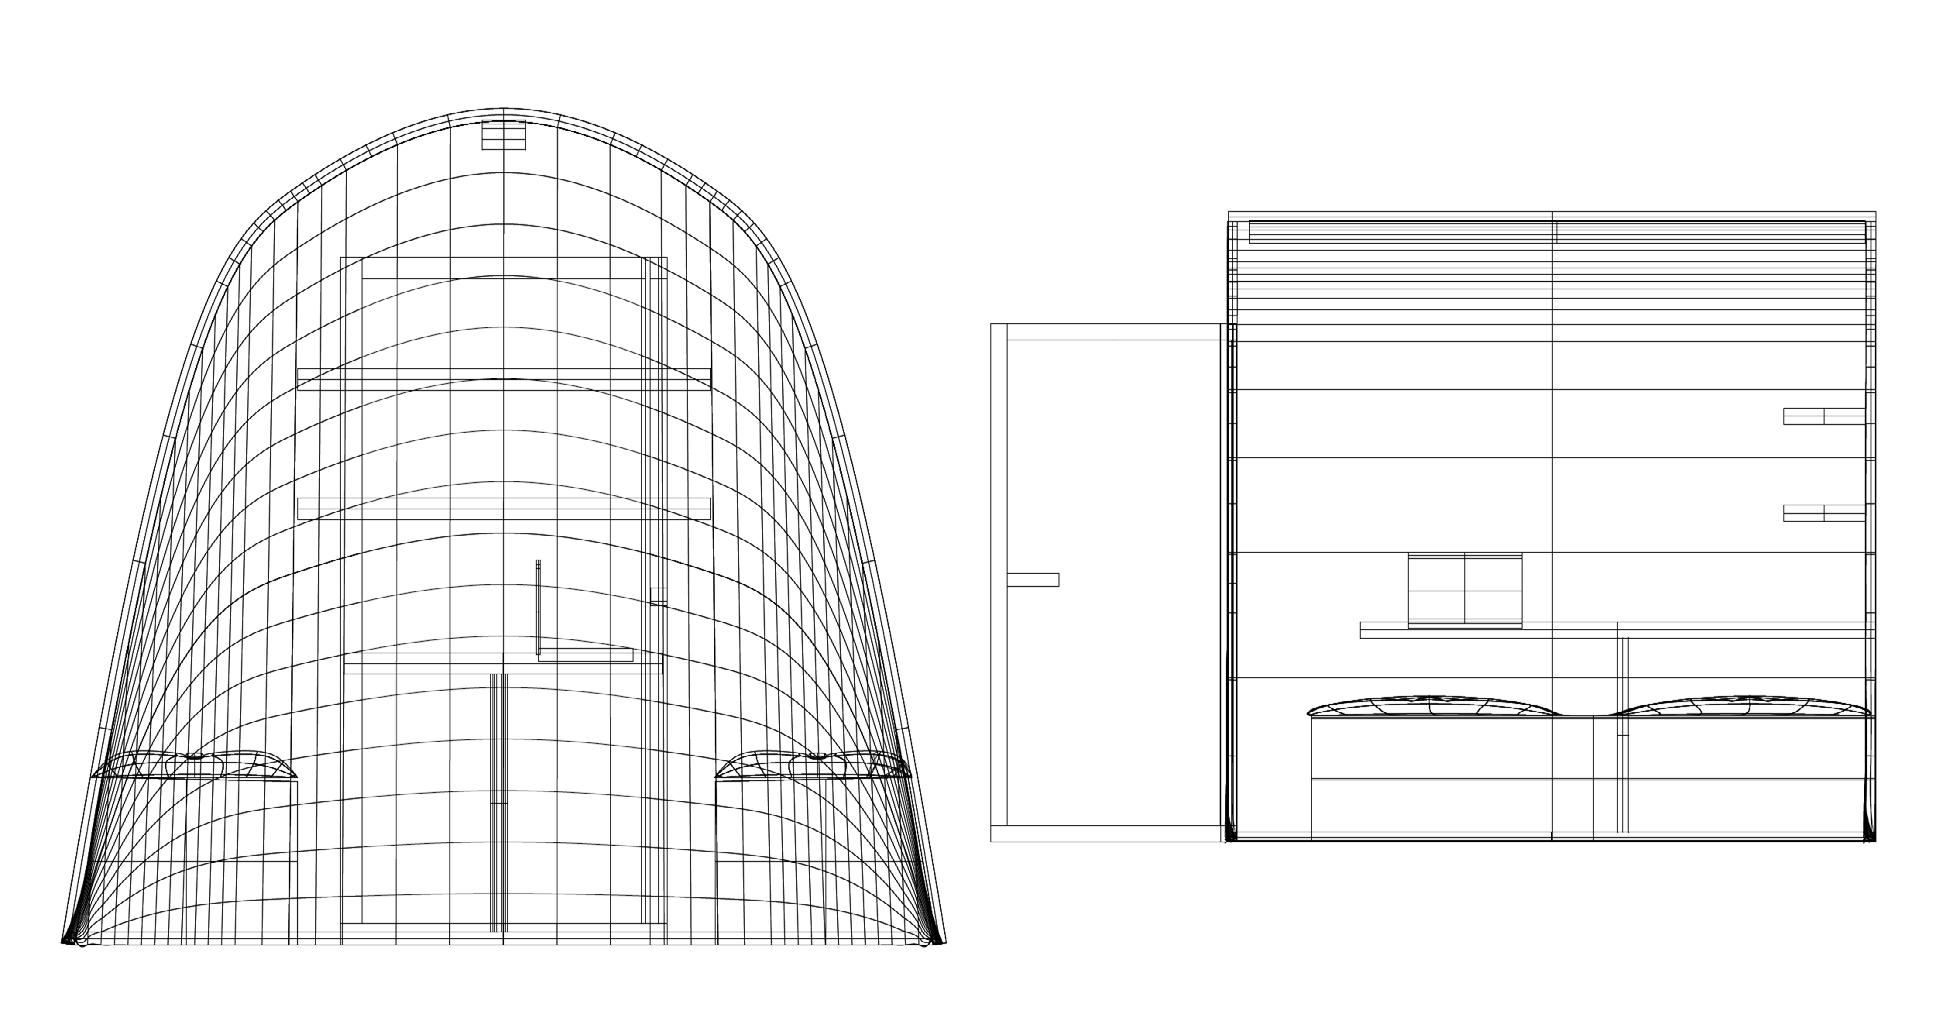
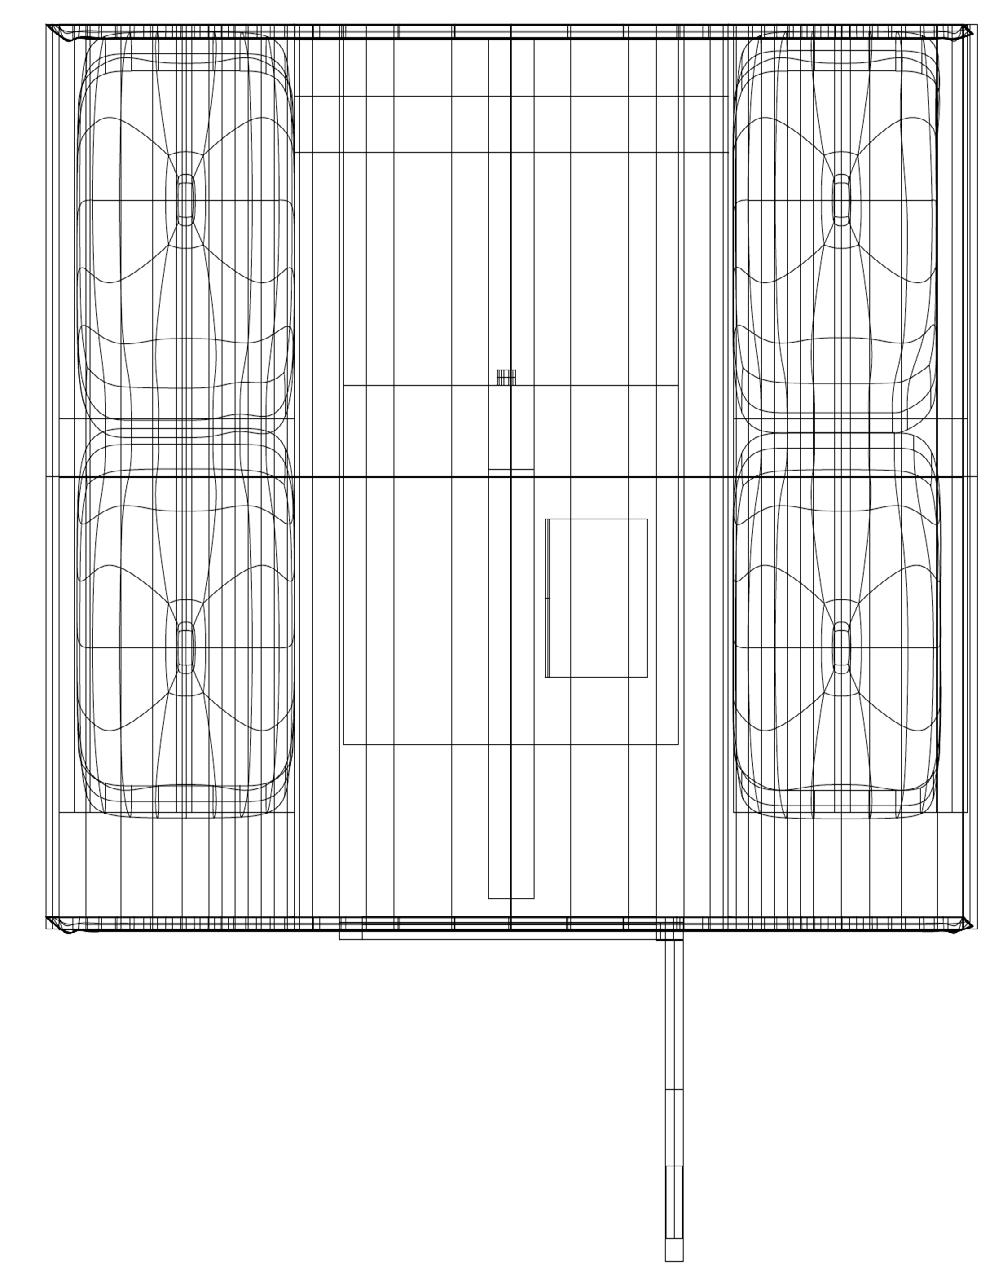
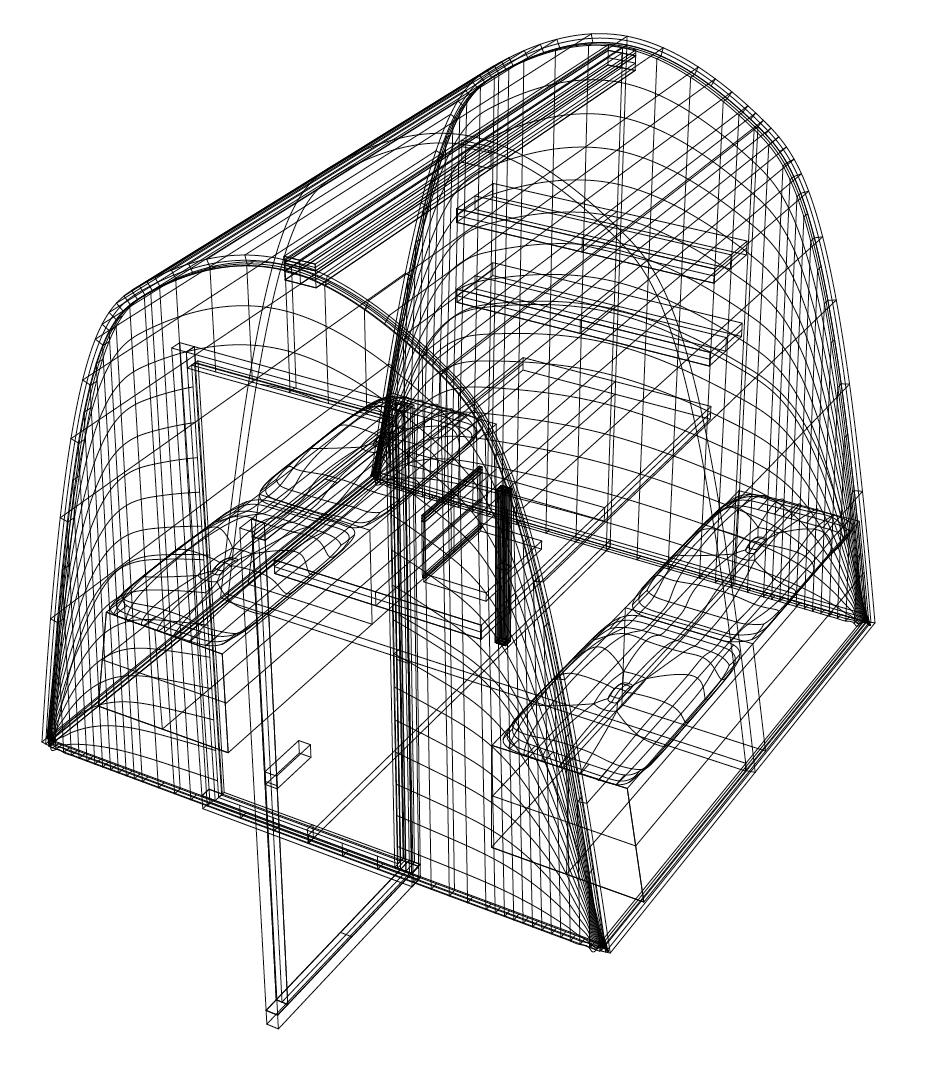

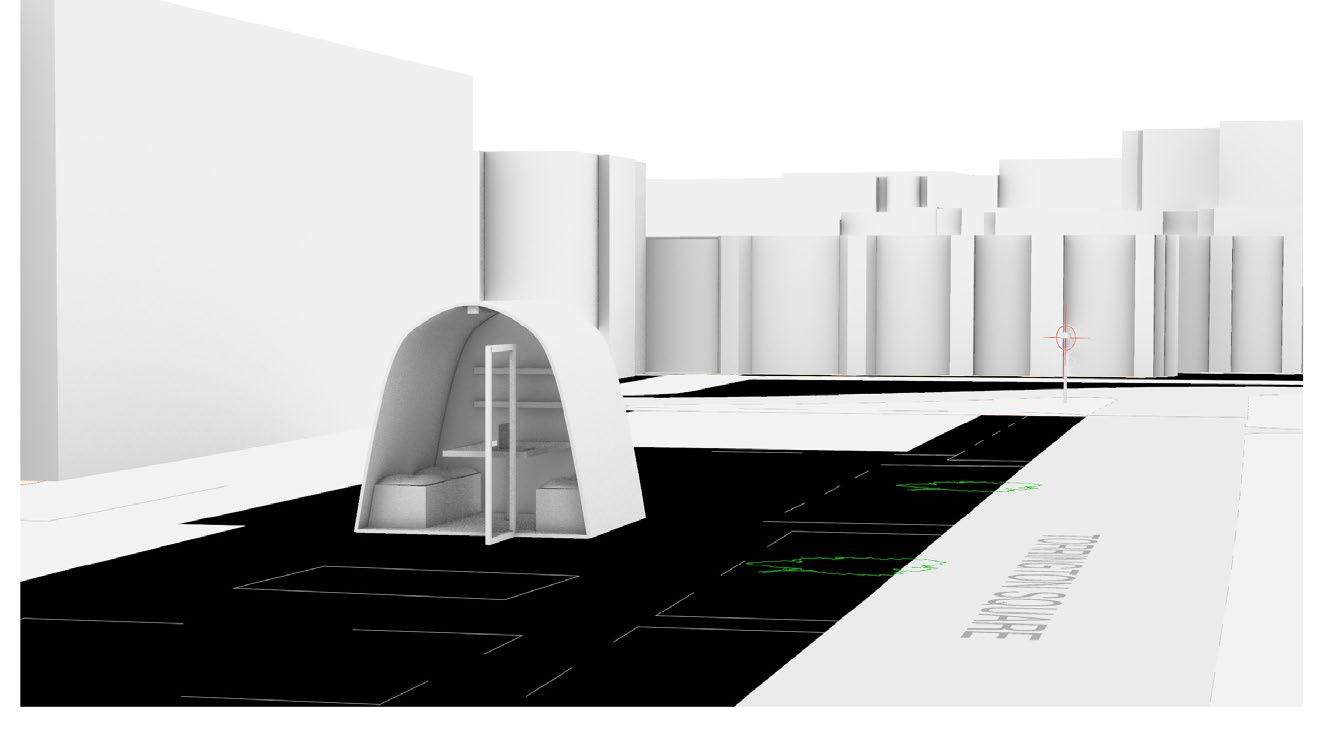
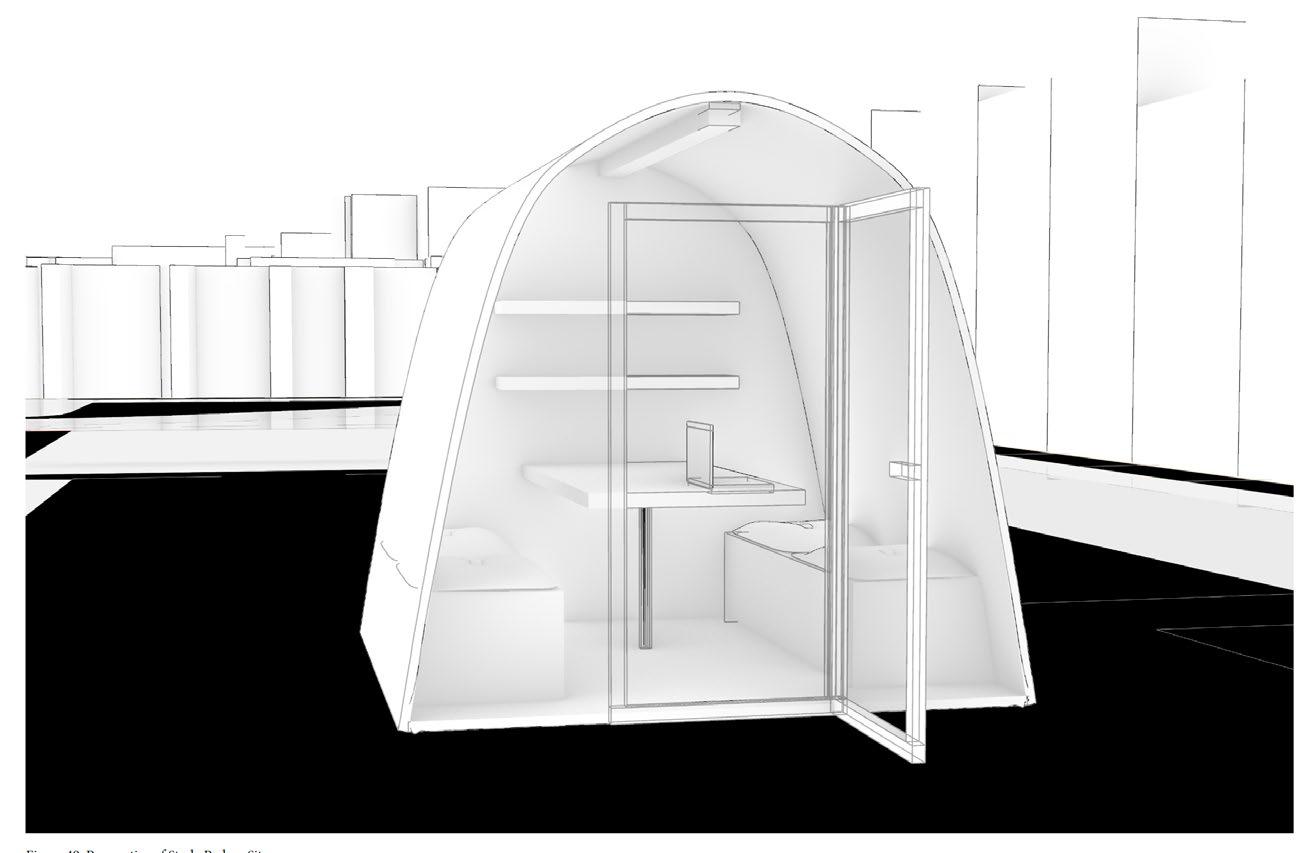
This page consists of renders and drawings from the rhino model. As my first time using the software, it was beneficial in learning how to work around Rhino and how to render the model and get the correct cut and plan drawings.
PROJECT 5 - CUBE LIGHT
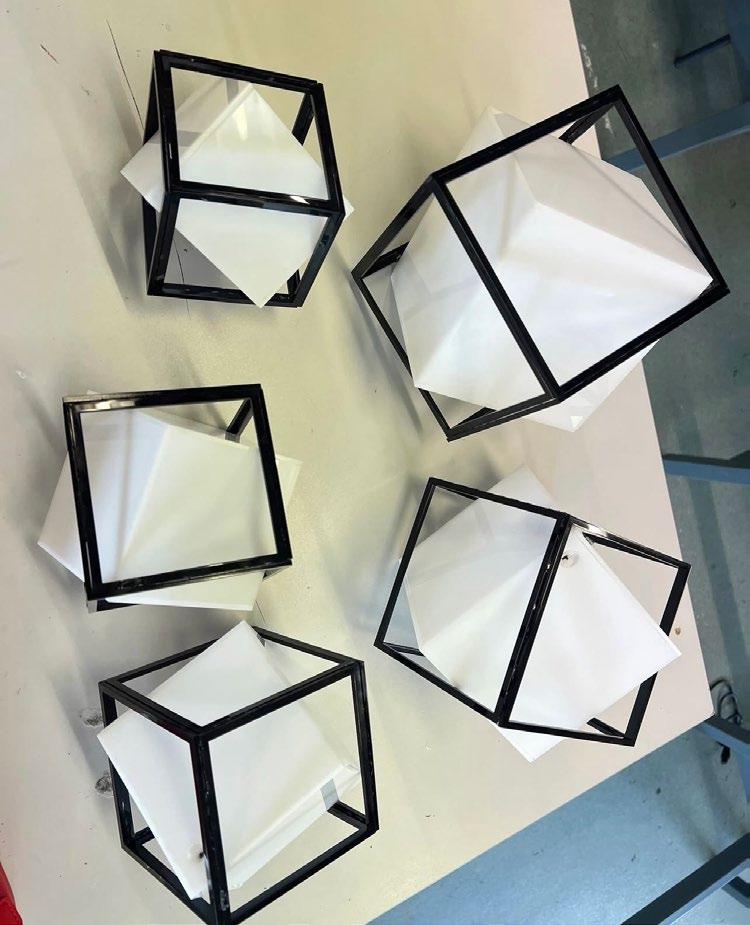
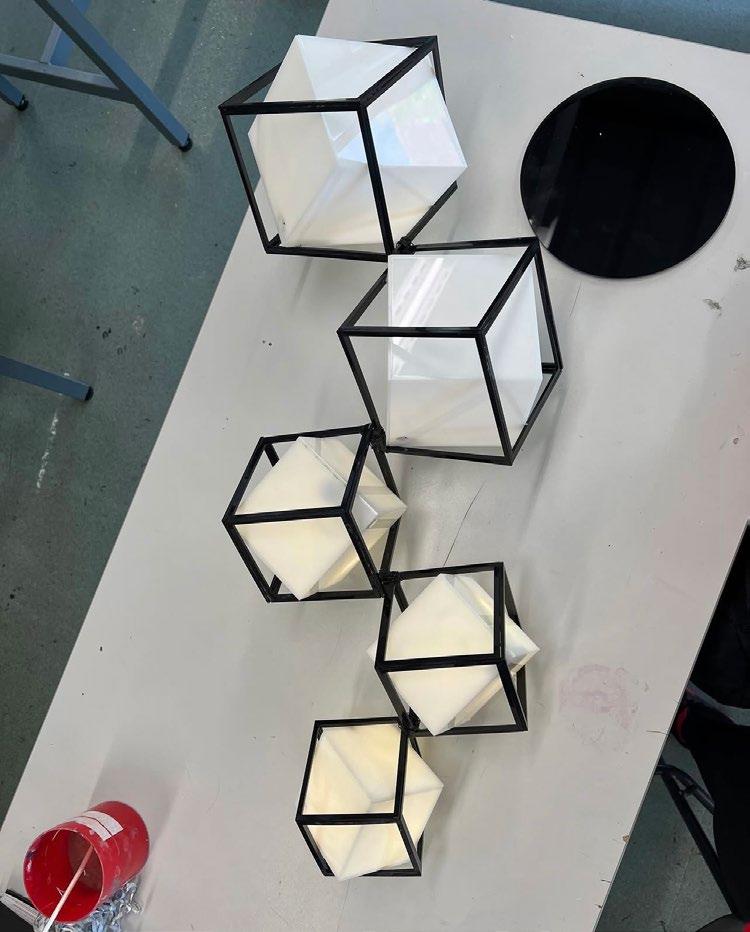
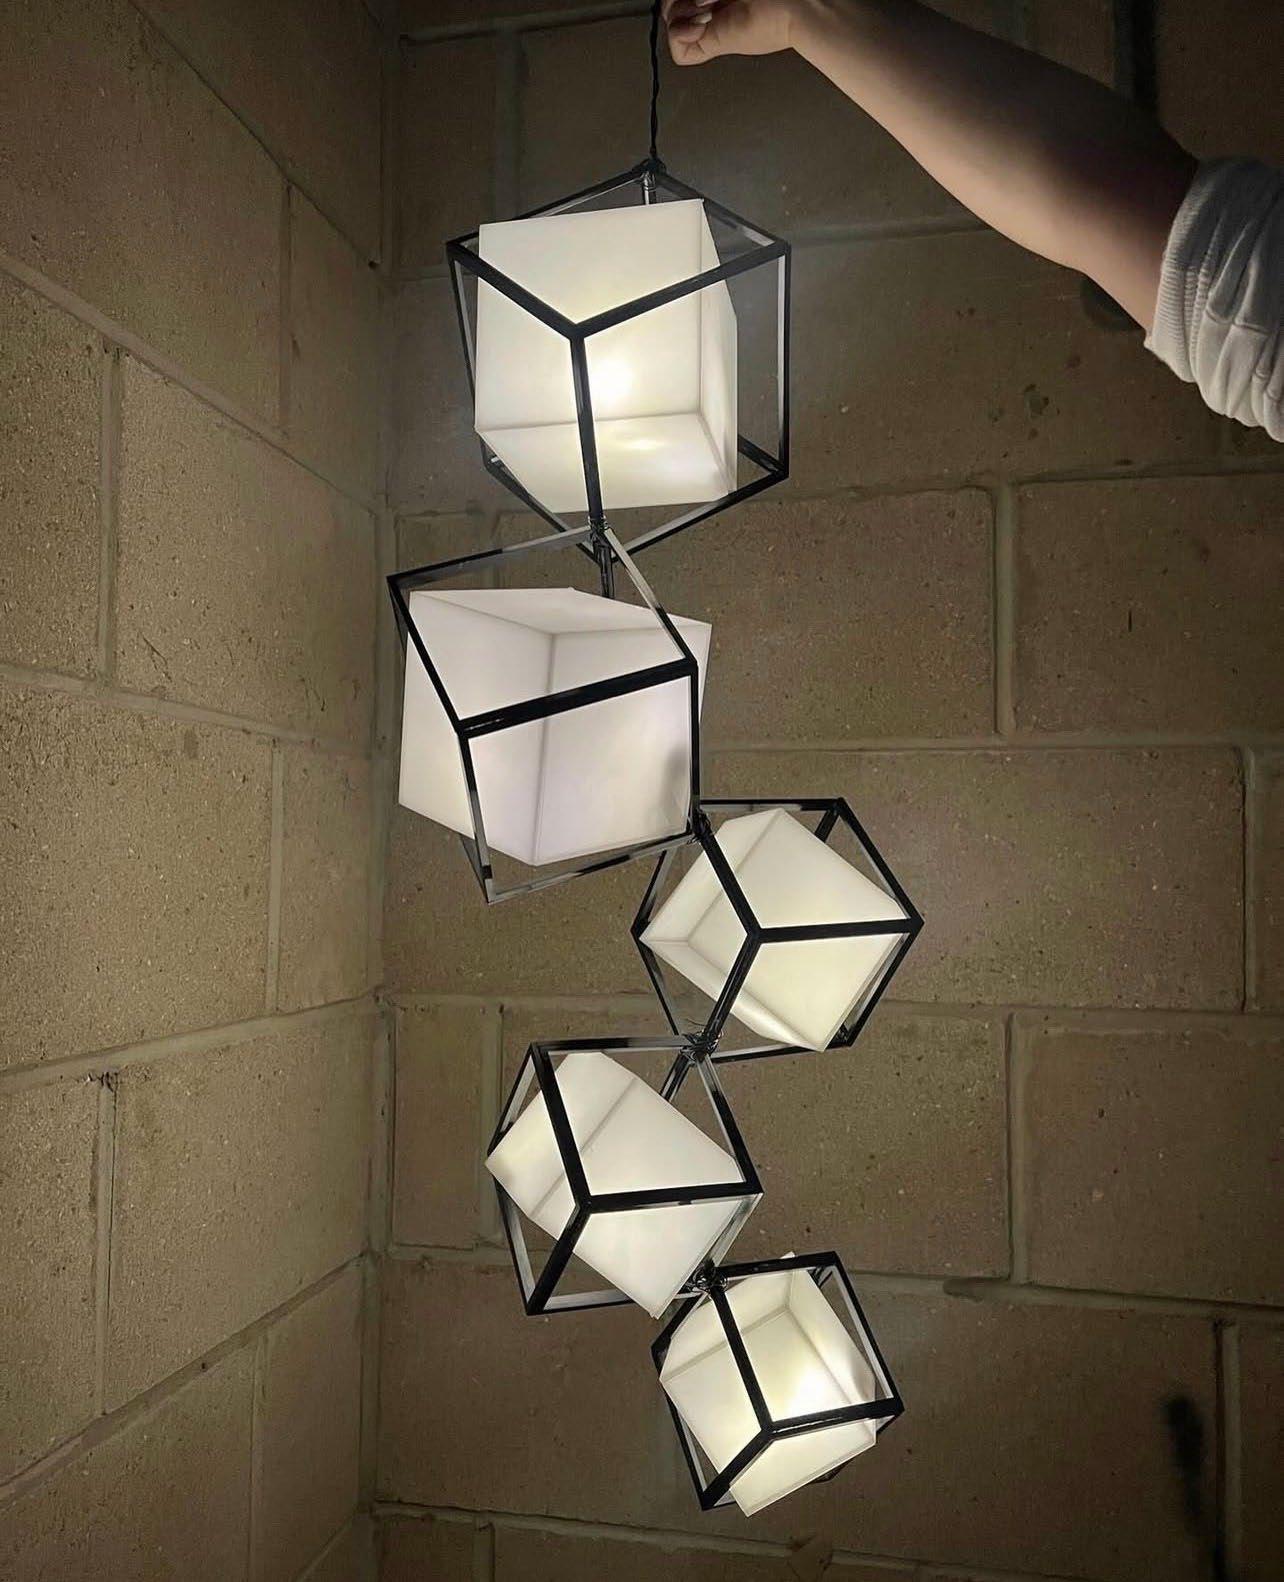

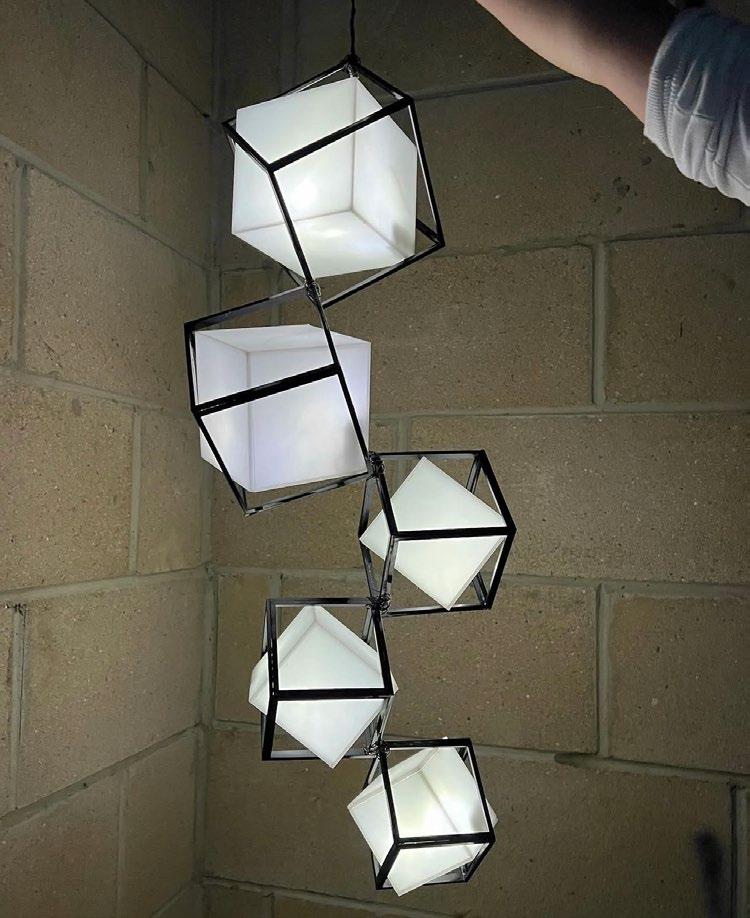
For my 3D Design A-Level Exam Unit, I created a functioning geometric cube chandelier. I used 2D Design and lazer cutting acrylic to get the desired shape. Using battery operated fairy lights inside of each cube, the slight translucency of the acrylic allowed the light to seep through and create a working cube light. Black wire was used to connect each cube together and it functioned to hang down from the ceiling.
PROJECT 6 - LEAFGUARD: PRESERVING NATURE’S BOUNTY
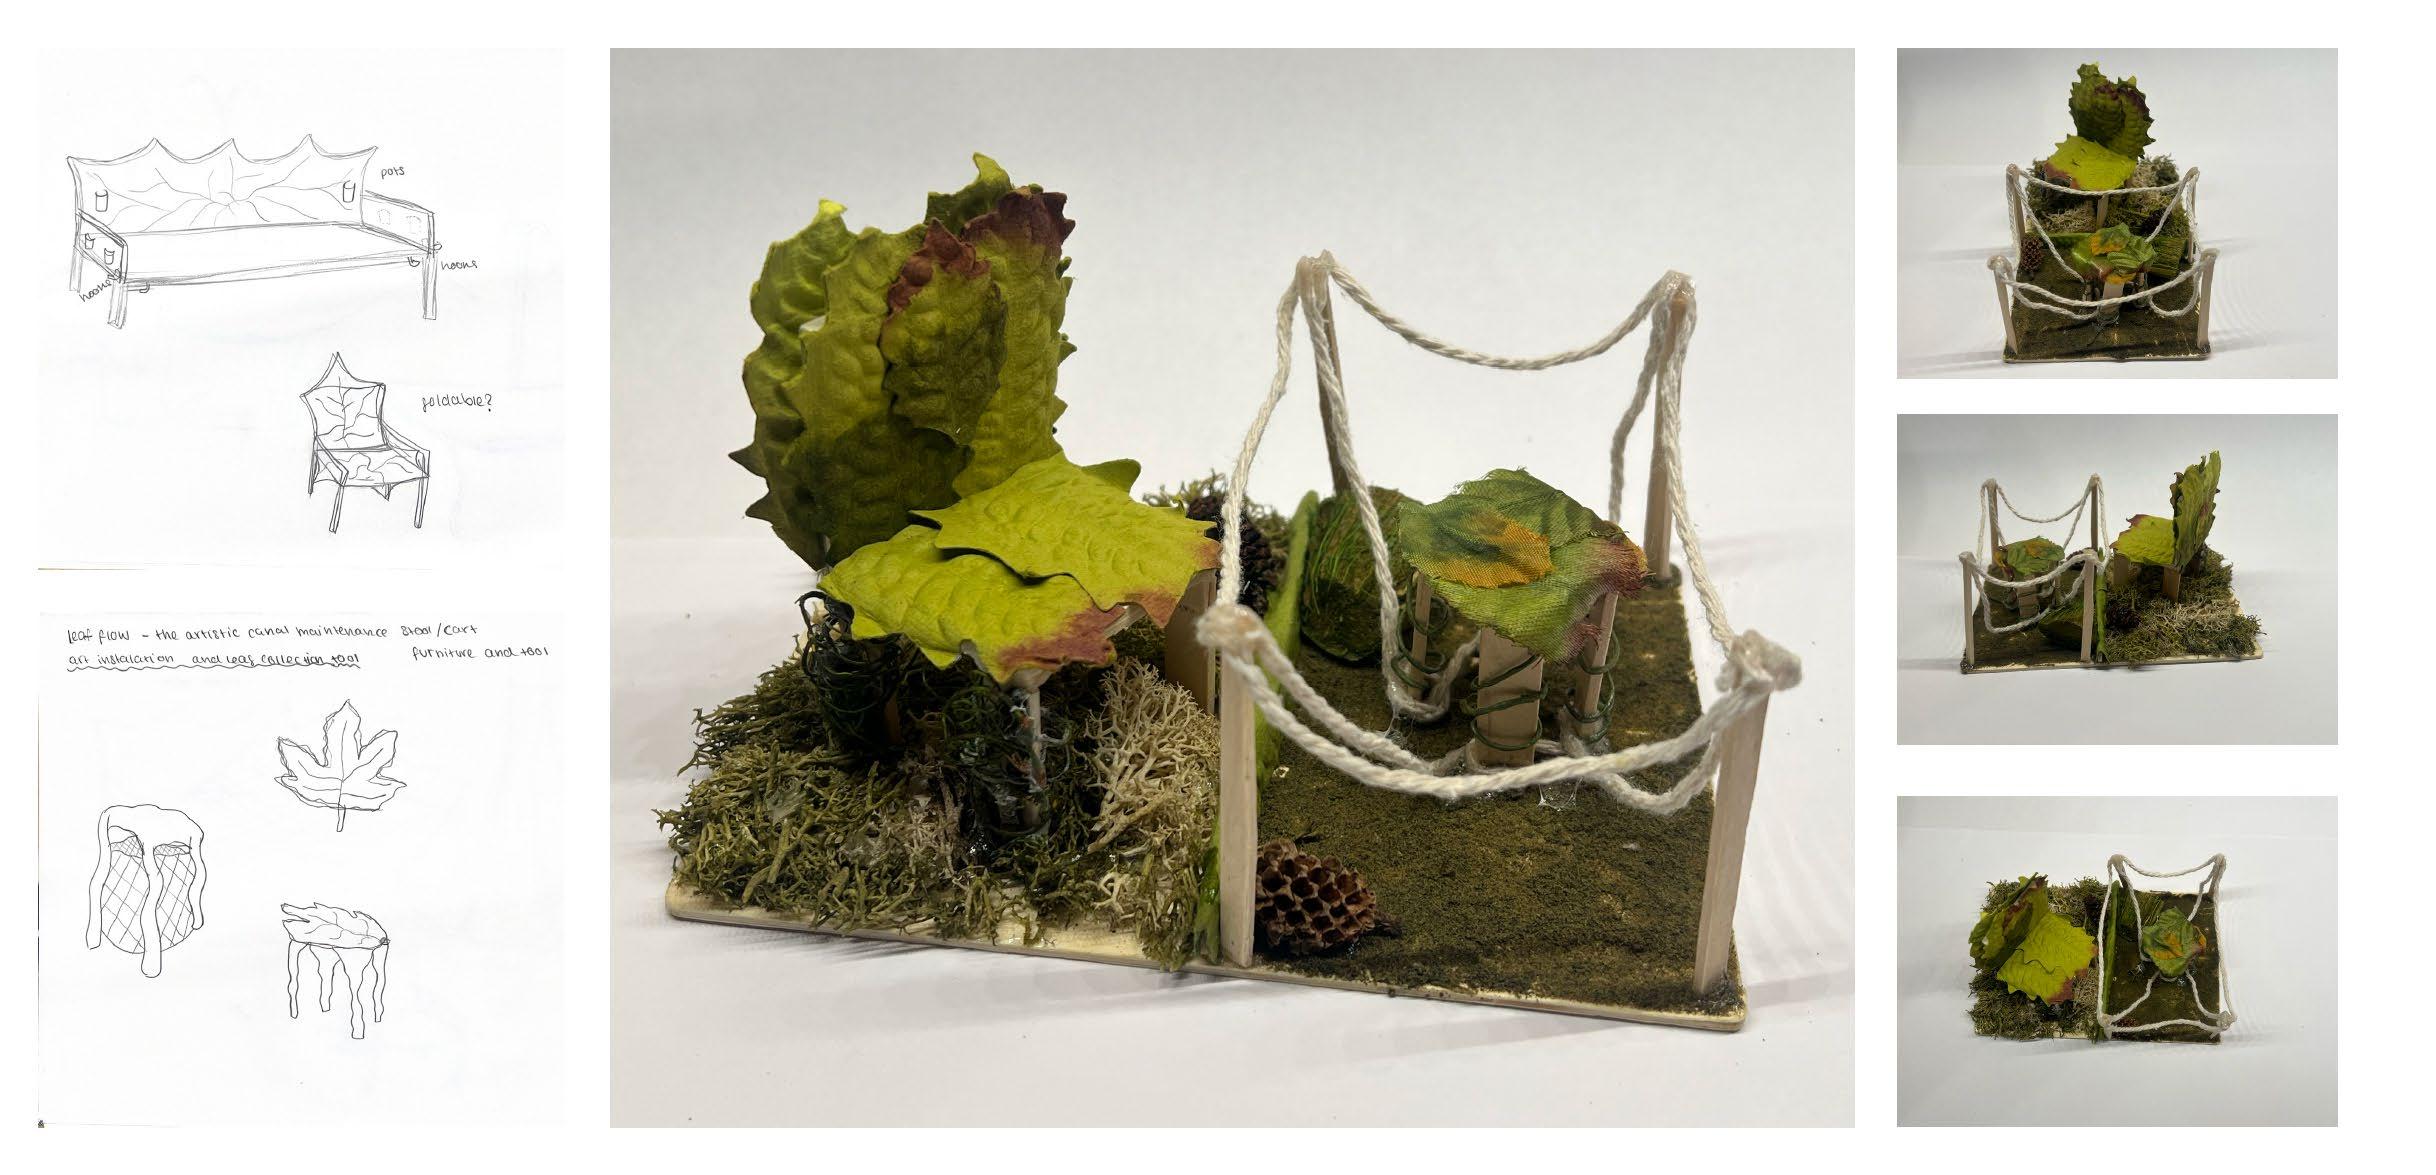
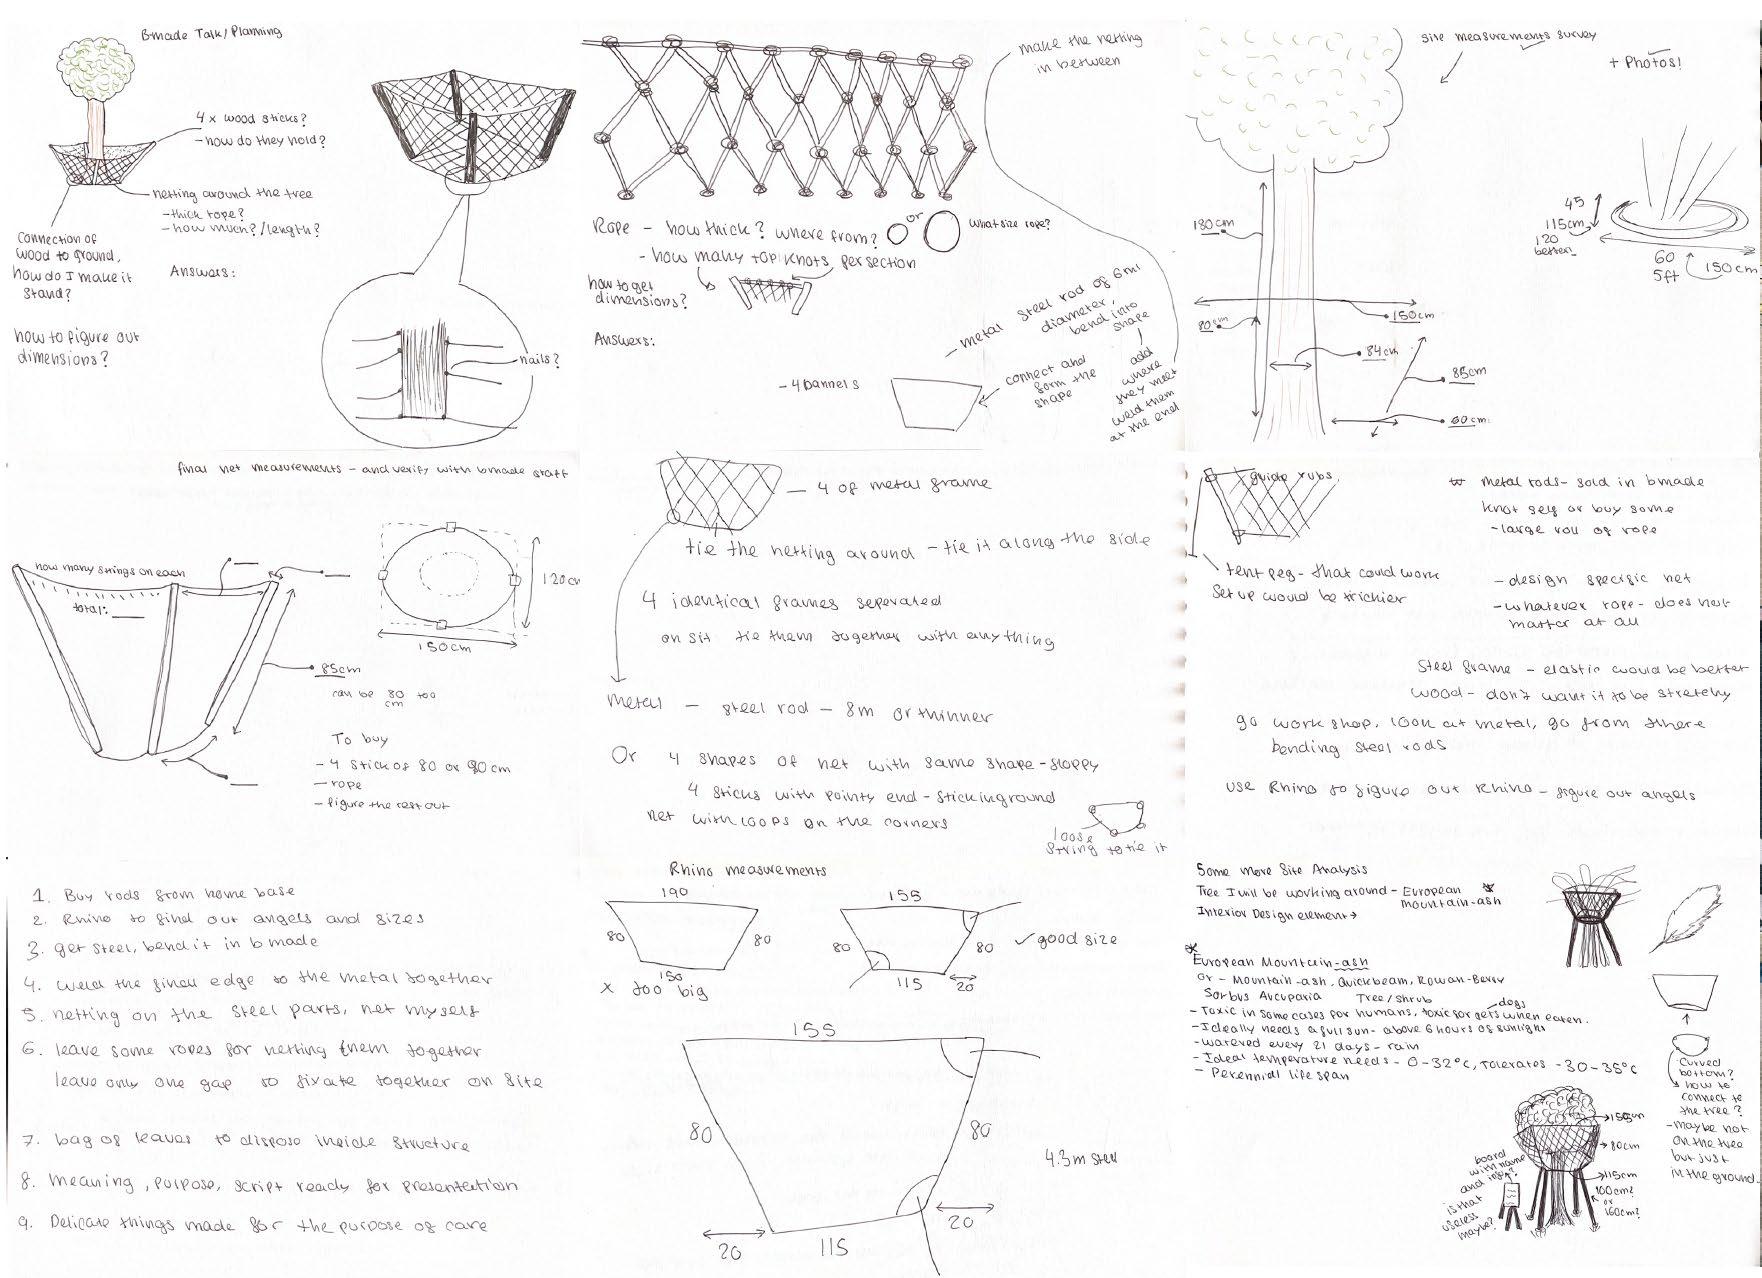
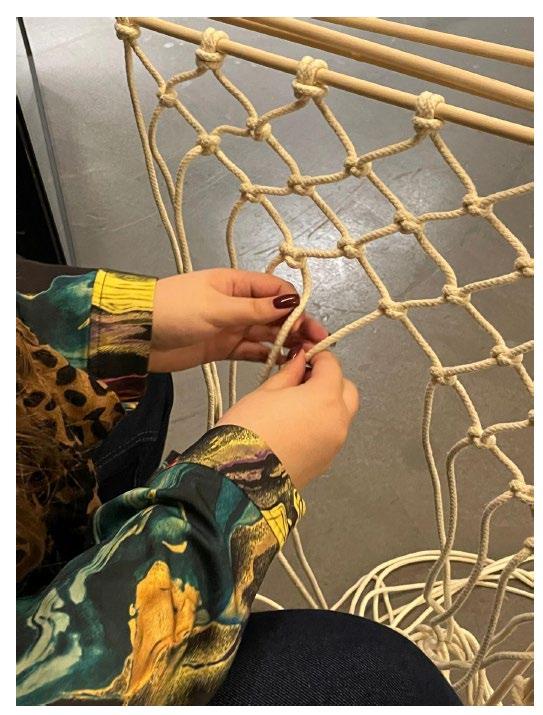
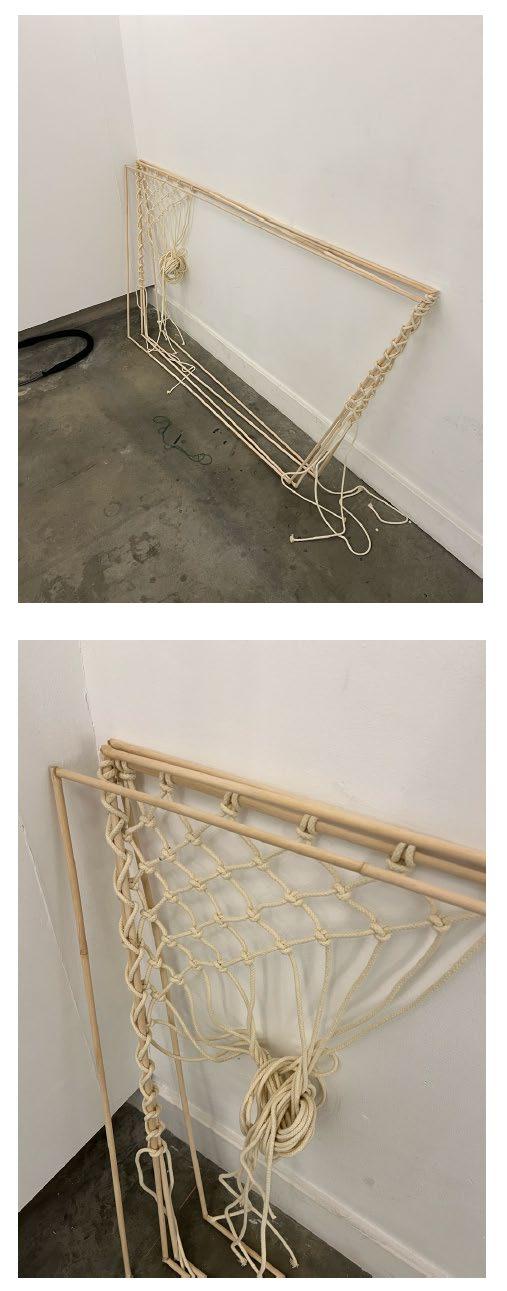

In my second year of university, my Design and Creative practice project was to look at trees, I chose to dive into protecting the tree. First I brainstormed through drawings and models to see what route I wanted to go down. I loved the idea of creating a netting around the tree to catch fallen leaves to be reused. After sketches, concepts, research and measurements from my designated site, I began to hand craft my project by netting a net after constructing a wooden outline.
PROJECT 6 - LEAFGUARD: PRESERVING NATURE’S BOUNTY
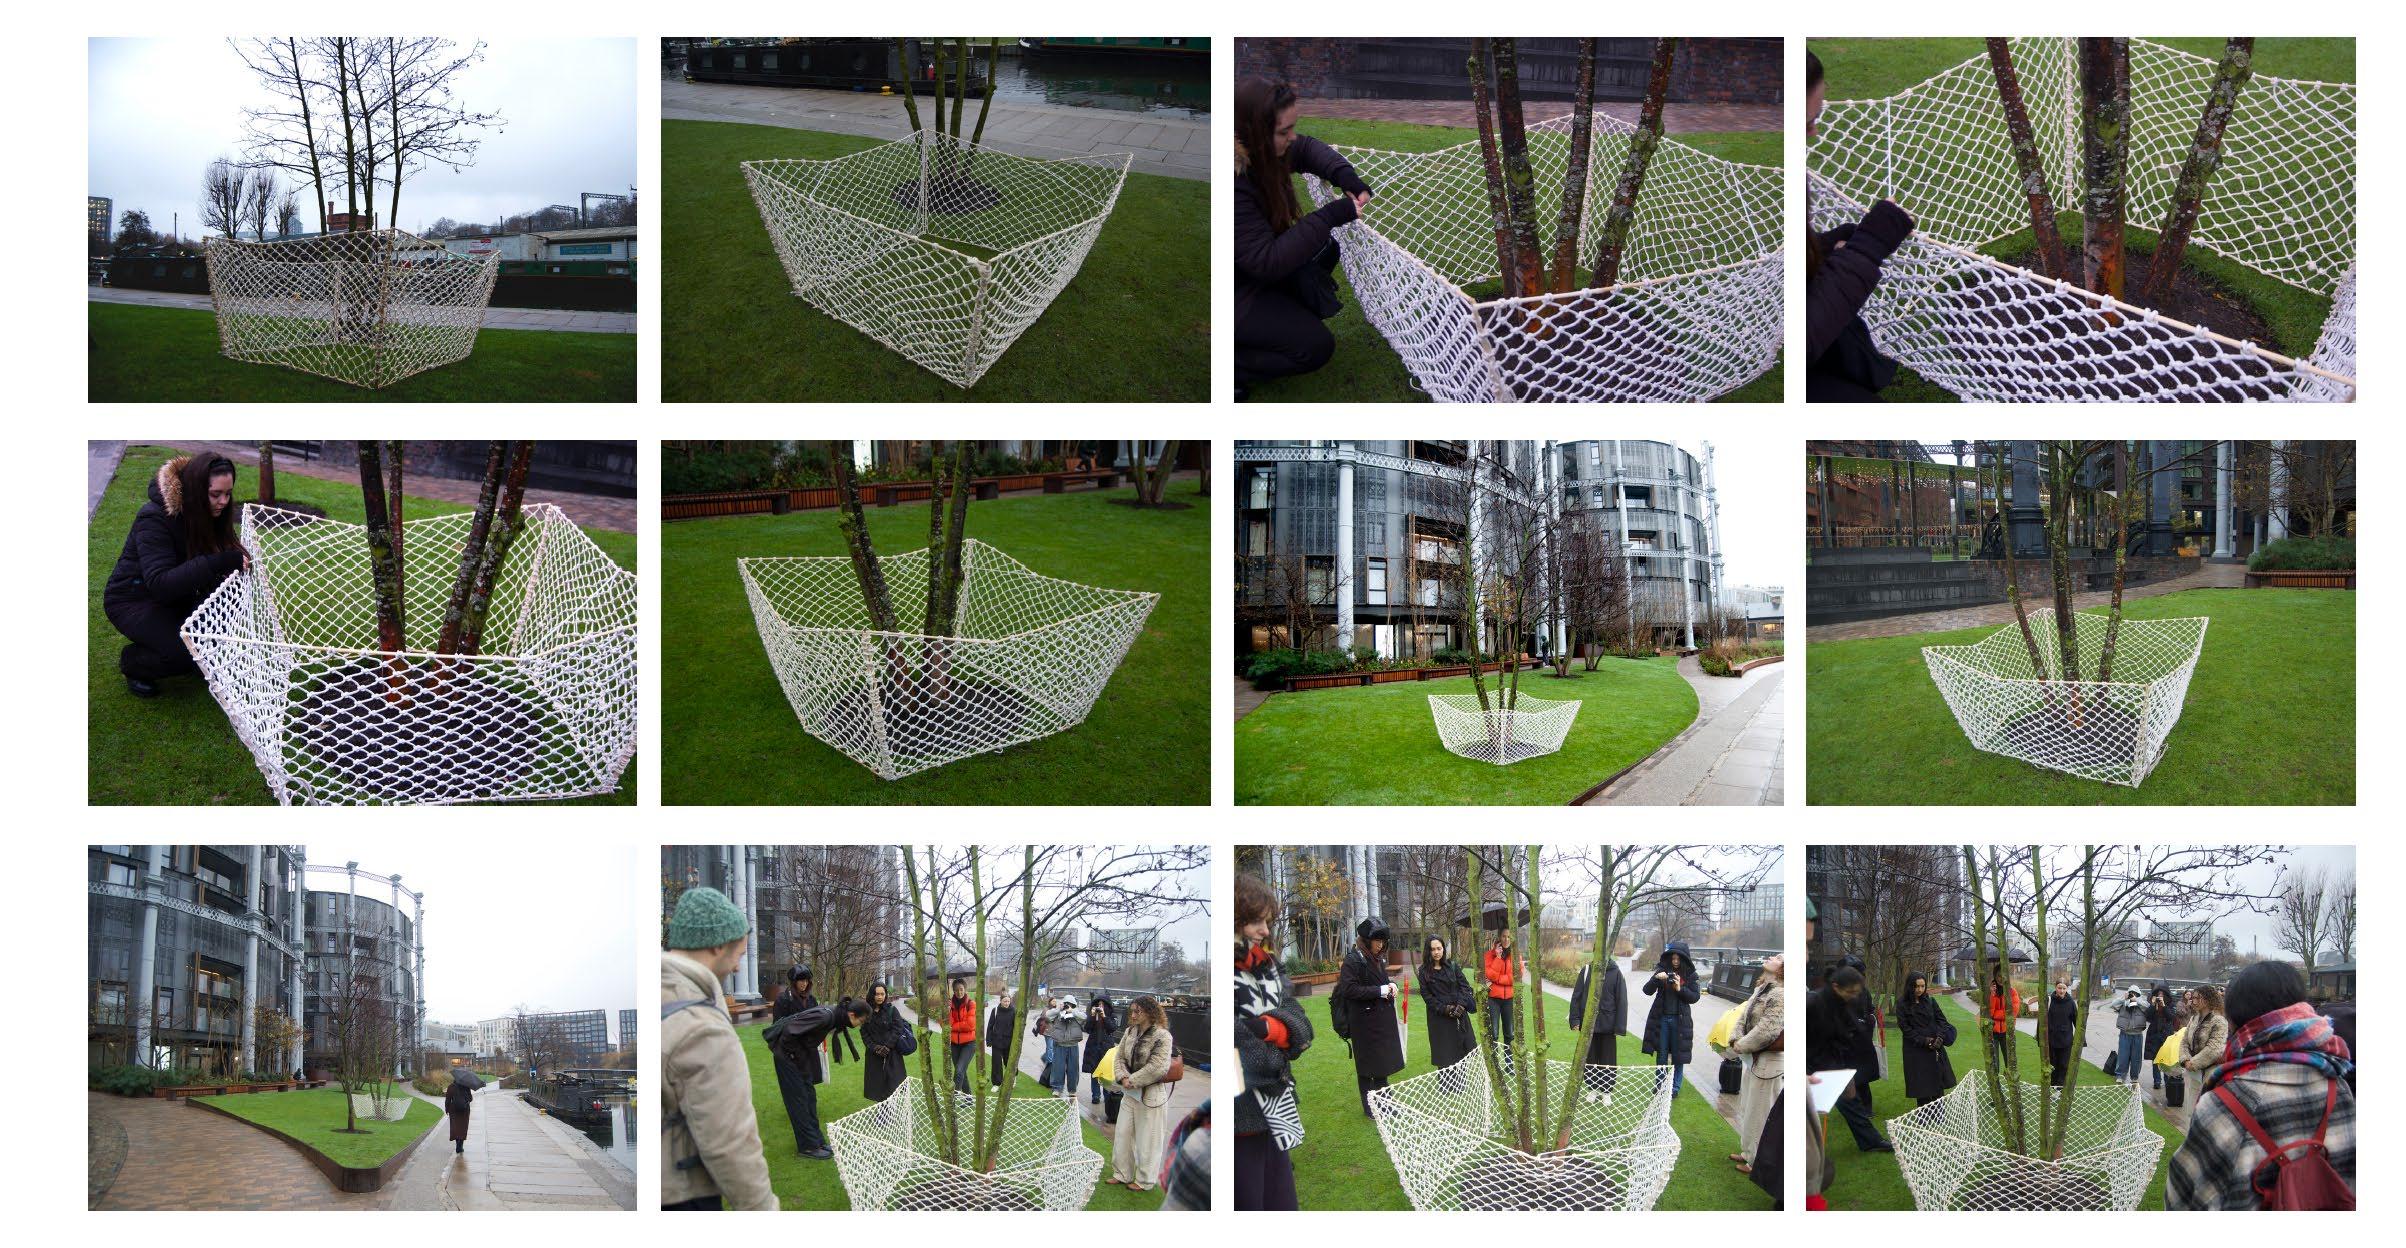
LeafGuard is a tree net designed to catch and collect fallen leaves to be used for multidisciplinary purposes. One method for the leaves to be reused is for compost, maintaining habitats and living nature that required soil nourishment. Another method would be delicate crafting such as jewellery making, which would be making statement pieces with the leaves as the beauty of the product. All of which are ways to care for and preserve the leaves for useful or delicate practices instead of being discarded as waste. With this protective net that extends out from the base of the tree, the natural treasures are saved from being overlooked and trashed.
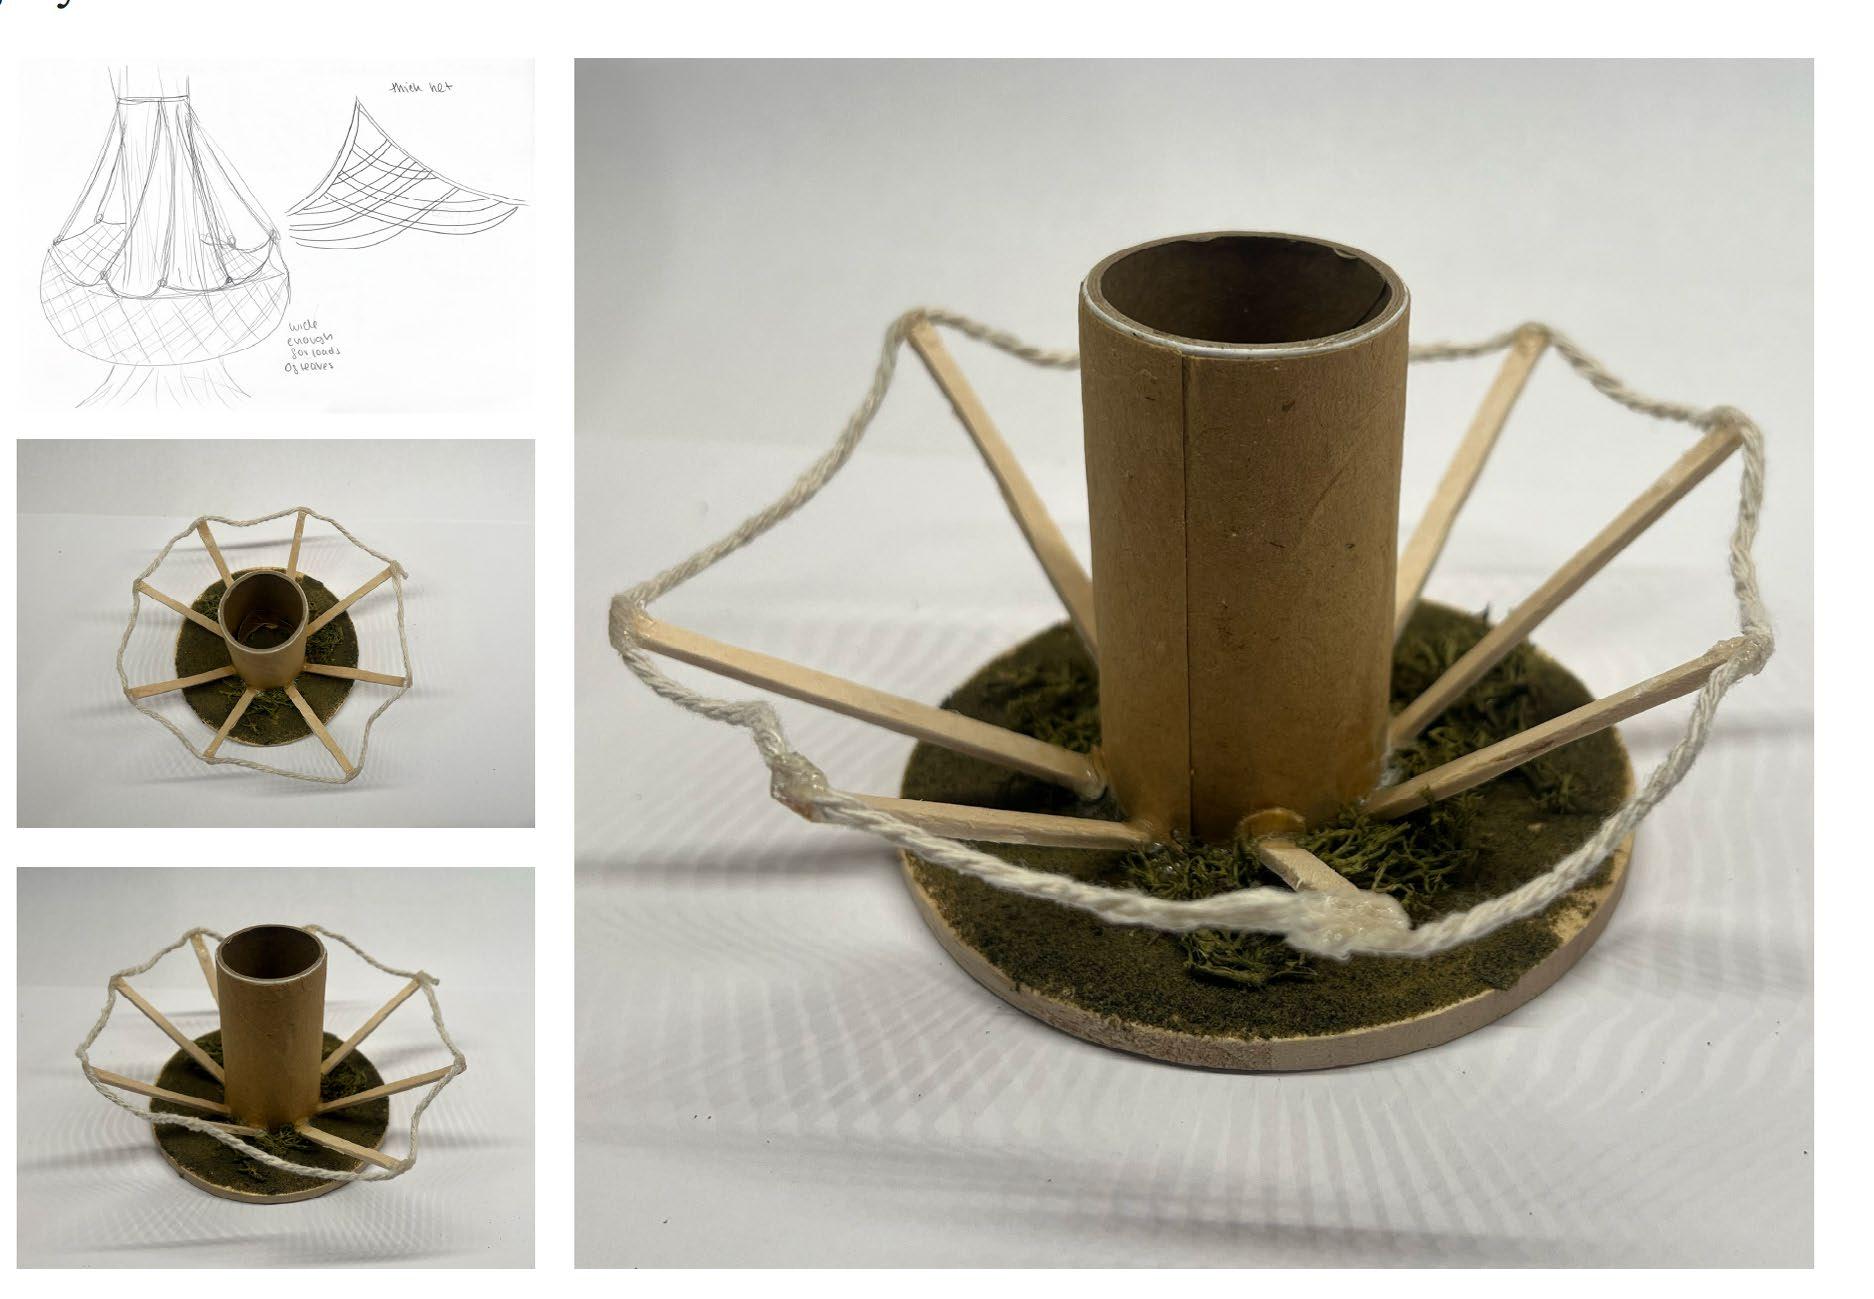
PROJECT 6 - LEAFGUARD: PRESERVING NATURE’S BOUNTY
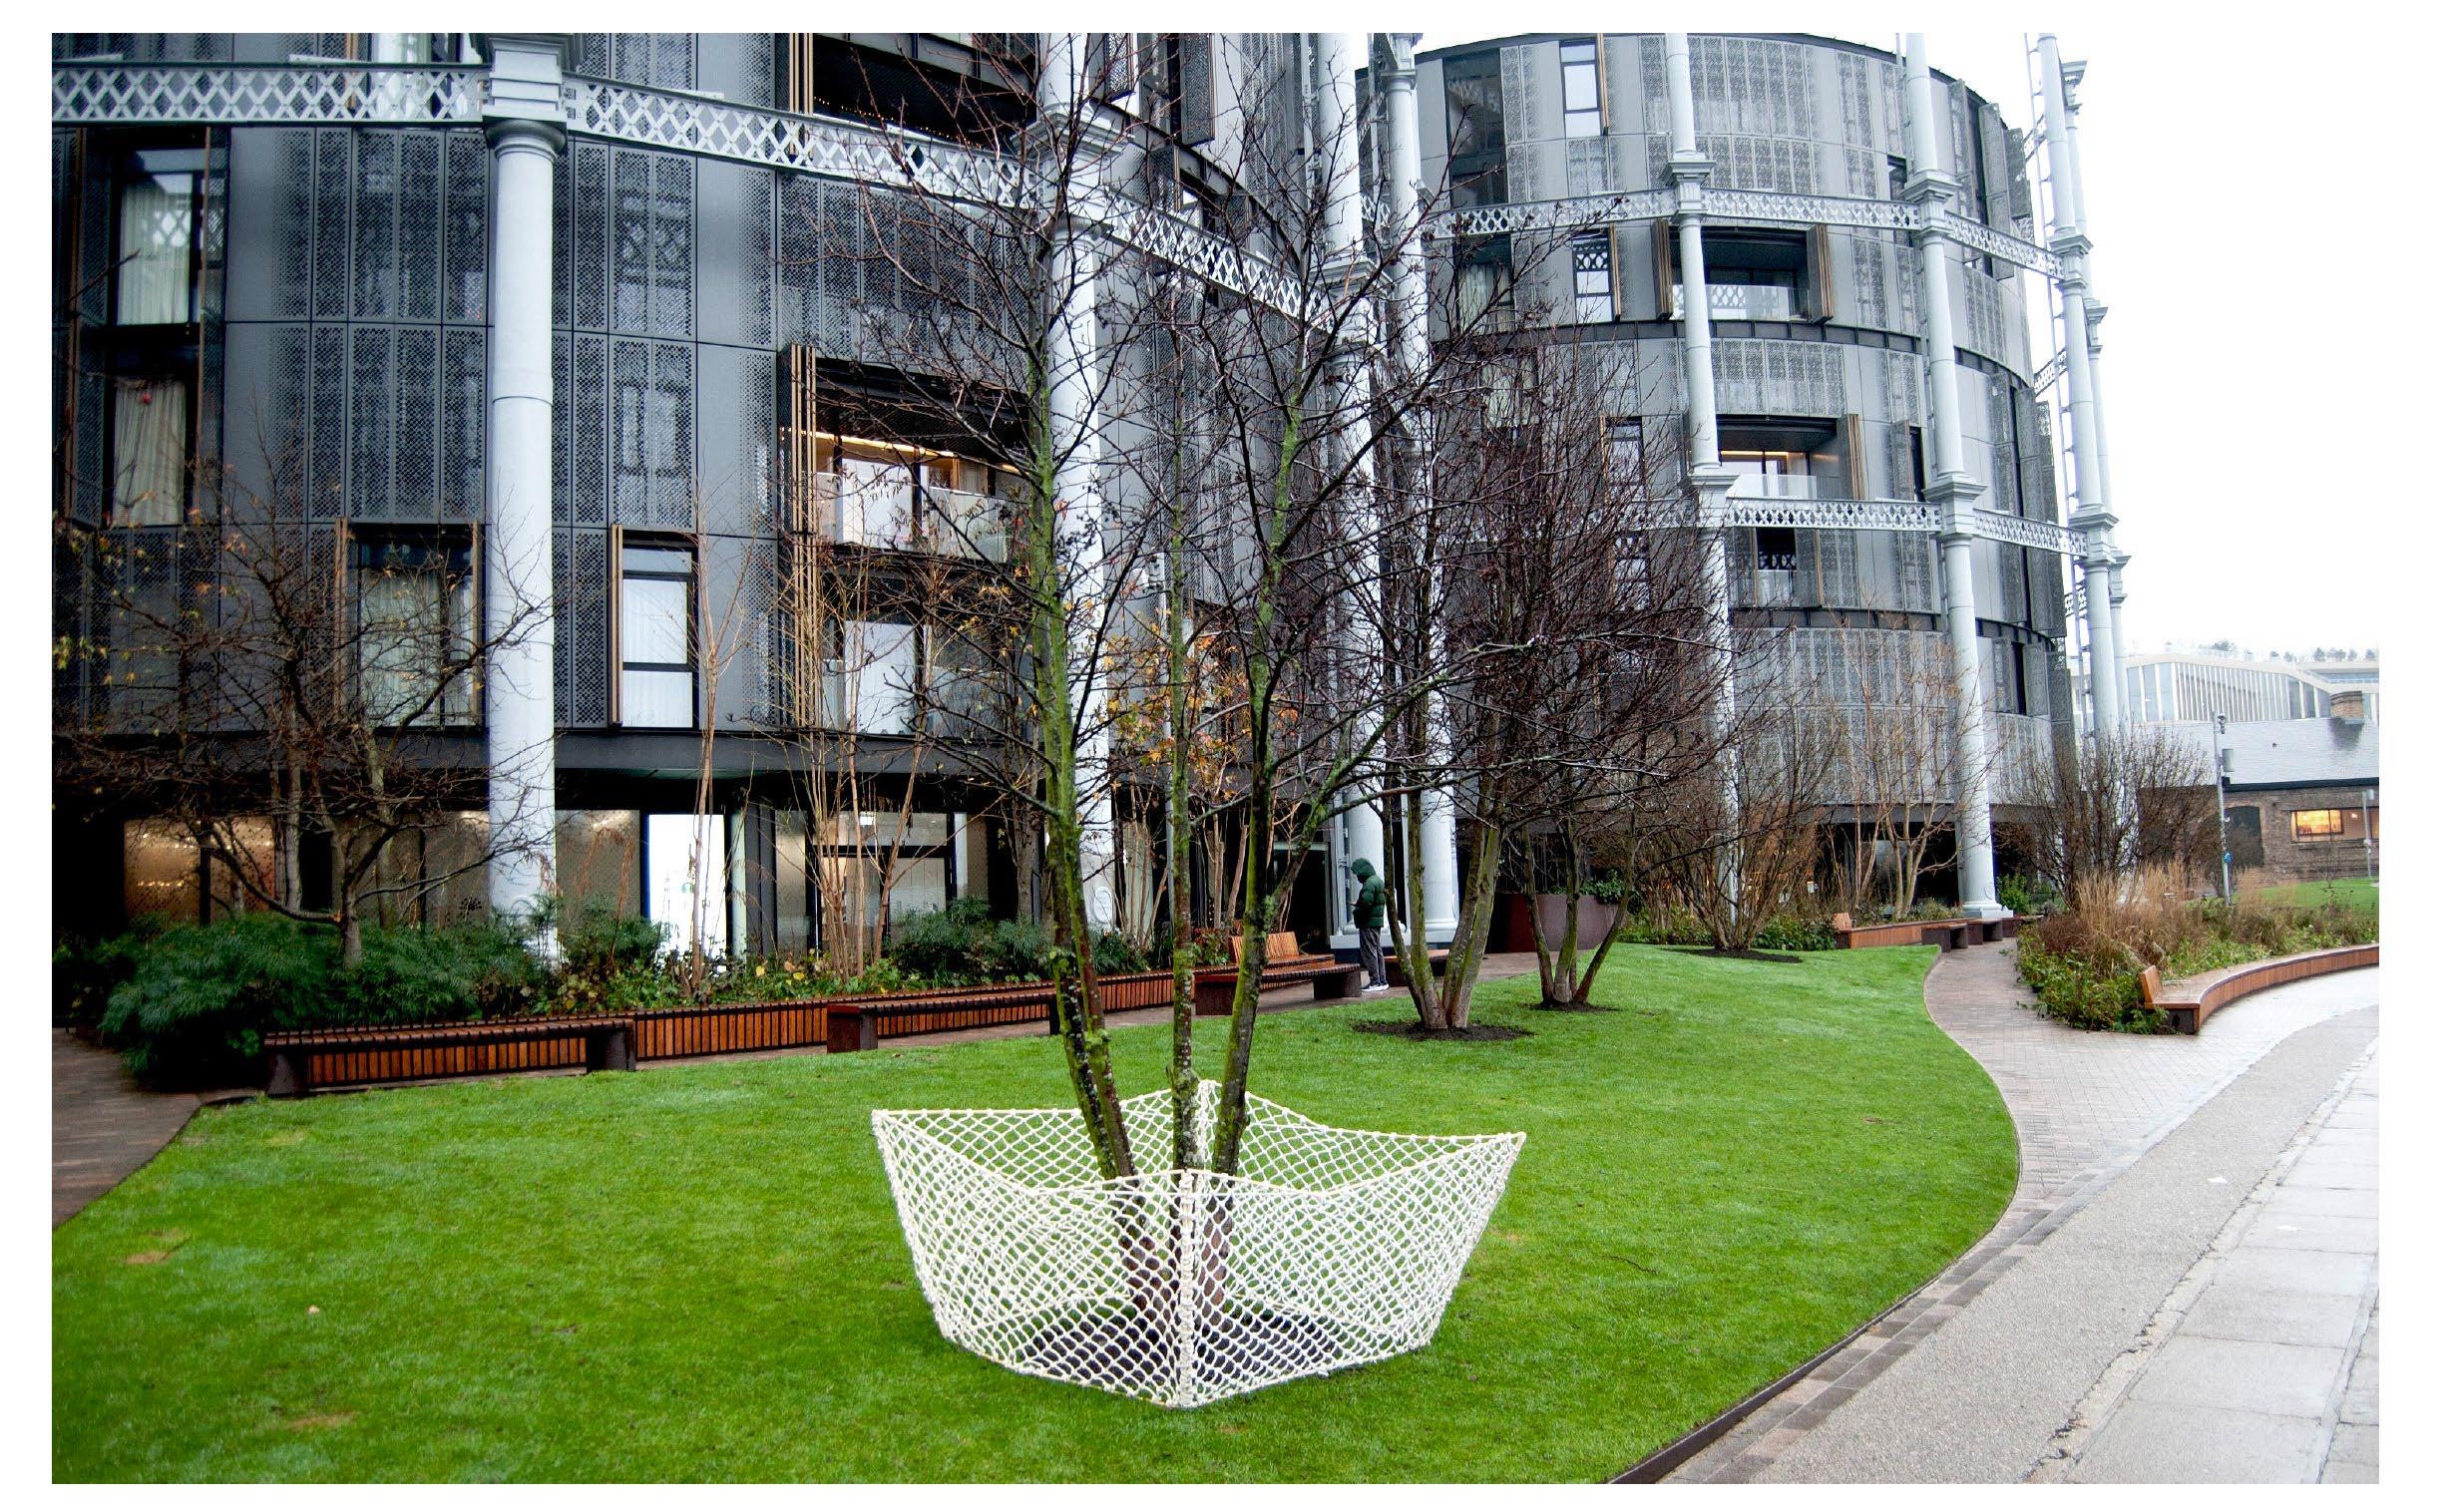
This project highlights the often-forgotten value of leaves, turning them into valuable resources for jewellery crafting, composting, and other sustainable uses, providing a purpose for these leaves while honouring nature’s gifts. This tree net can be developed to its full potential by hanging on the tree with a netting underneath hugging the tree to collect the leaves as soon as they fall; drawings and edits of the end goal of this net made at the end of the portfolio to showcase the furthest purpose of this net.
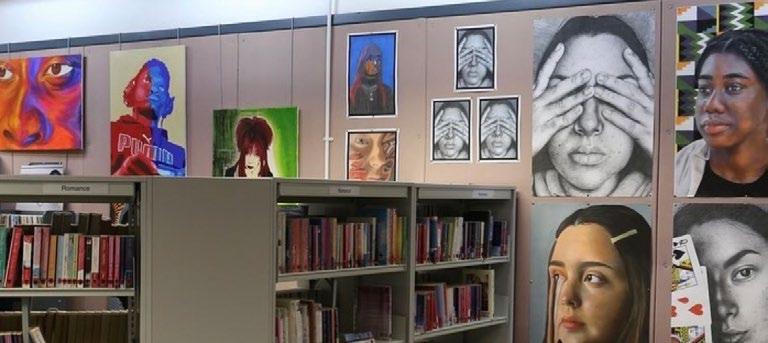
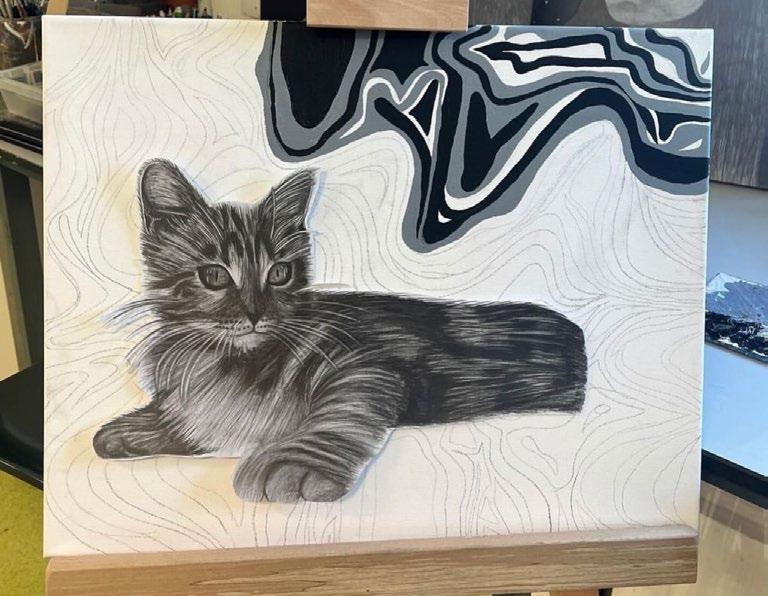
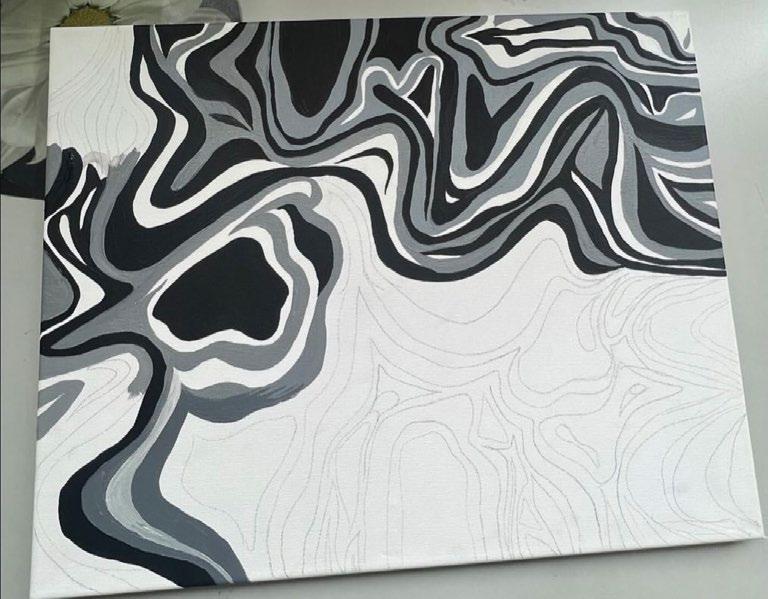
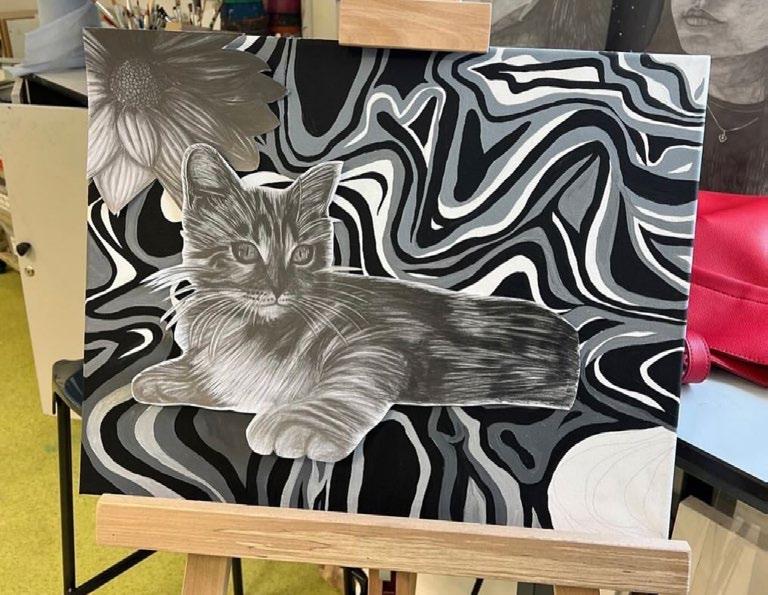
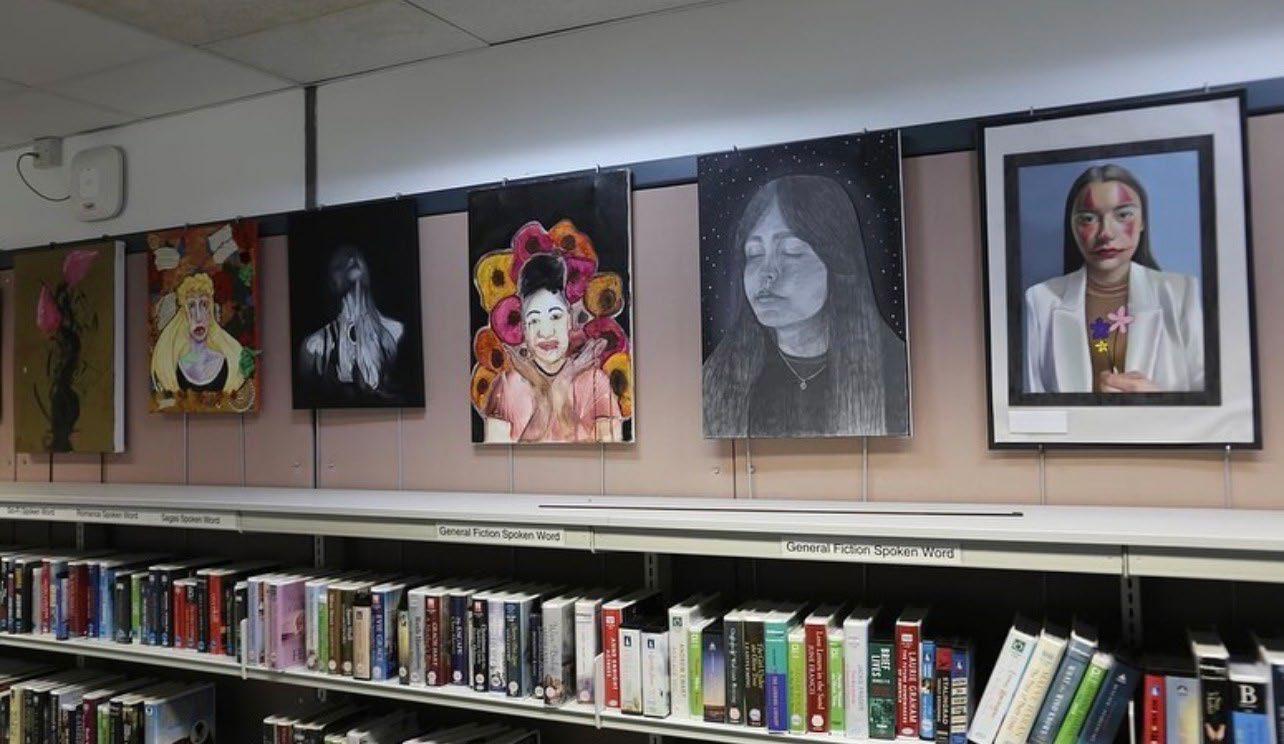
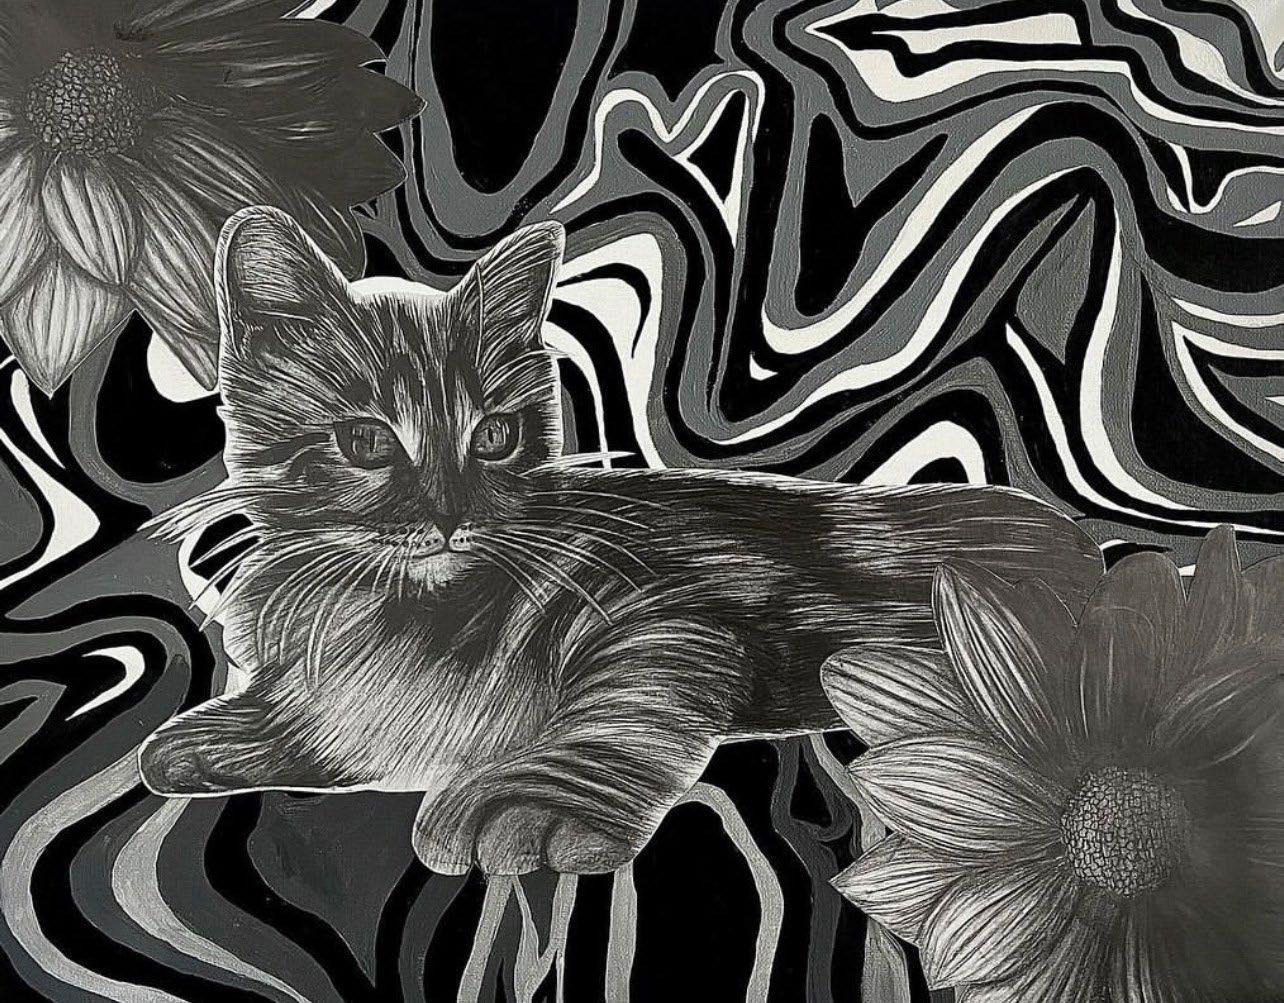
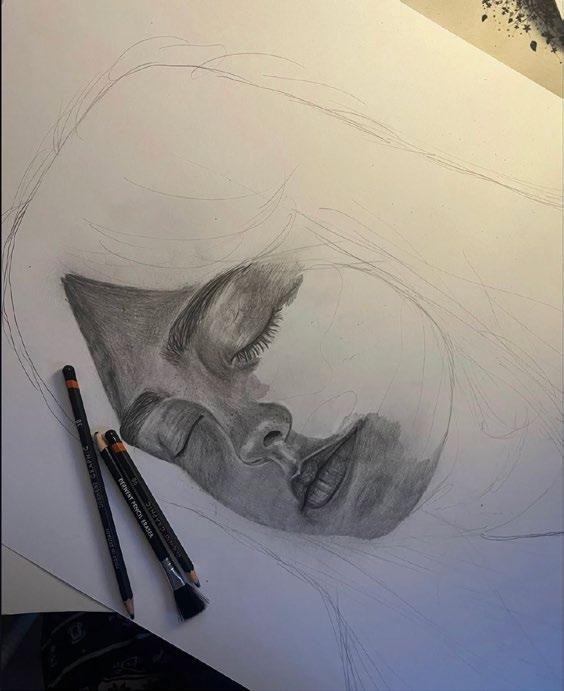
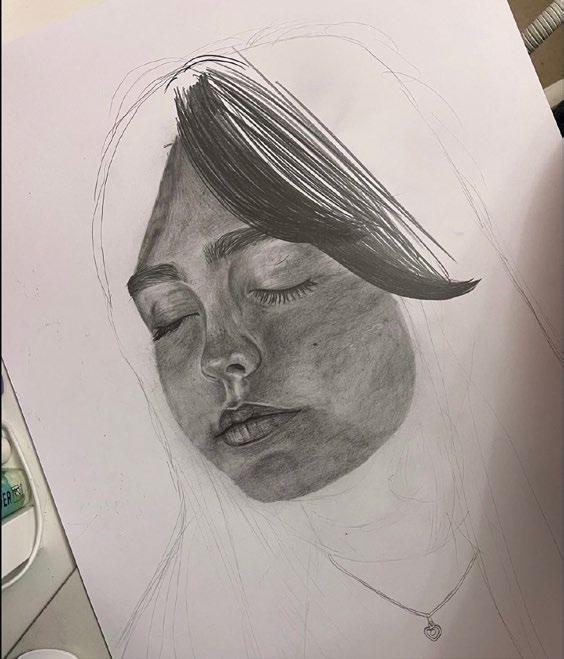
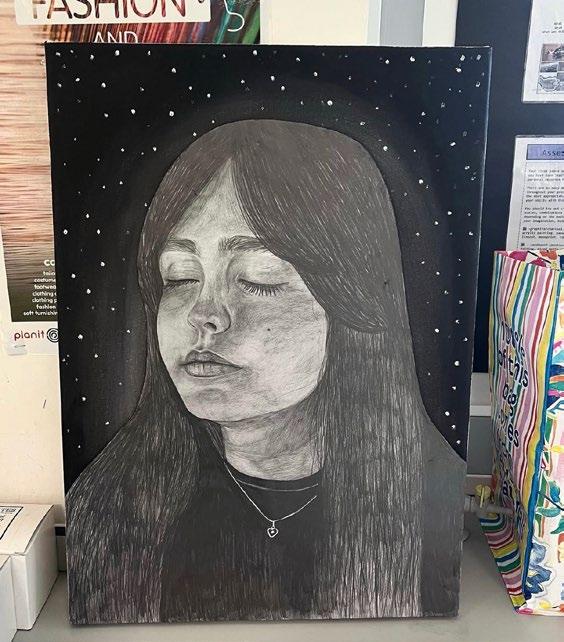
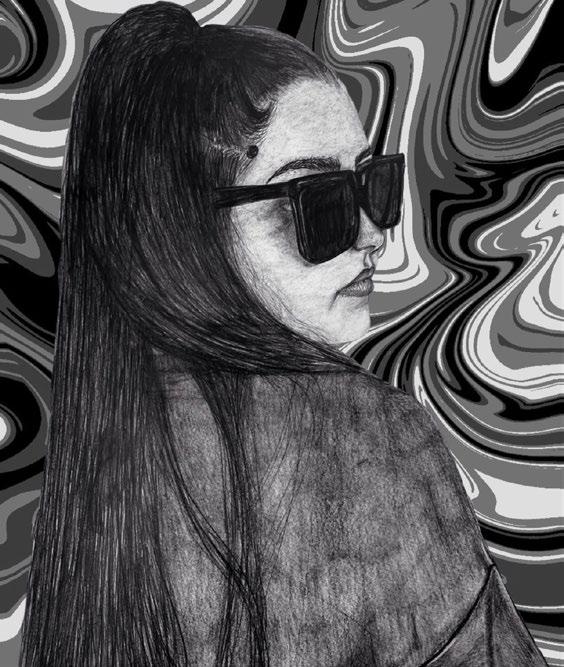
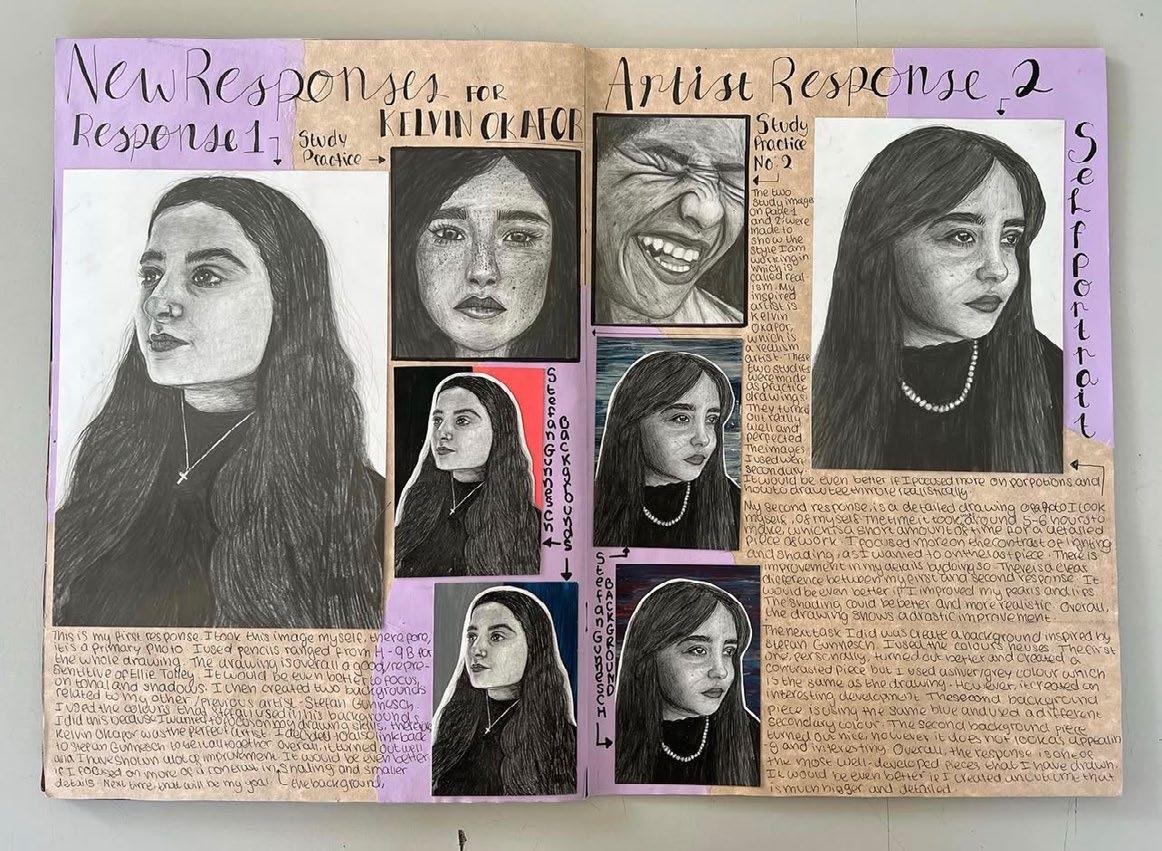
An exhibition at the Basildon Library showcased my Fine Art A-Level canvas piece. During my fine art coursework and exam unit I gathered large selections of drawings combined with painted backgrounds, digital backgrounds and experimenting with media. My brief of light vs. dark allowed me to take the direction of taking that concept into using white and black contrasts.
An exhibition photo is shown with a brief process on the right side including a digital combined drawing and a sketchbook page photo. On the left showing my exam unit canvas piece process with the final outcome on the bottom middle. With all of my interdisciplinary routes that have evolved over the years, fine art is where it all started with pencil drawings as my medium.

During my second year of Bachelors, we took a trip to Lisbon, Portugal, where we worked with Biolab Lisboa in groups to create a concept of a temporary structure in the Jardins do Bombarda, made out of mycelium blocks. The purpose was to learn about mycelium and how we can work with it to create a purposeful structure. Our purpose was a circular sanctuary which is a multifunctional space that supports both collect and personal spiritual activity. Overall, this project was a fascinating experience to work as an Architect for a couple of days.
PROJECT 9 - CREATING NATURE INSTRUMENTS
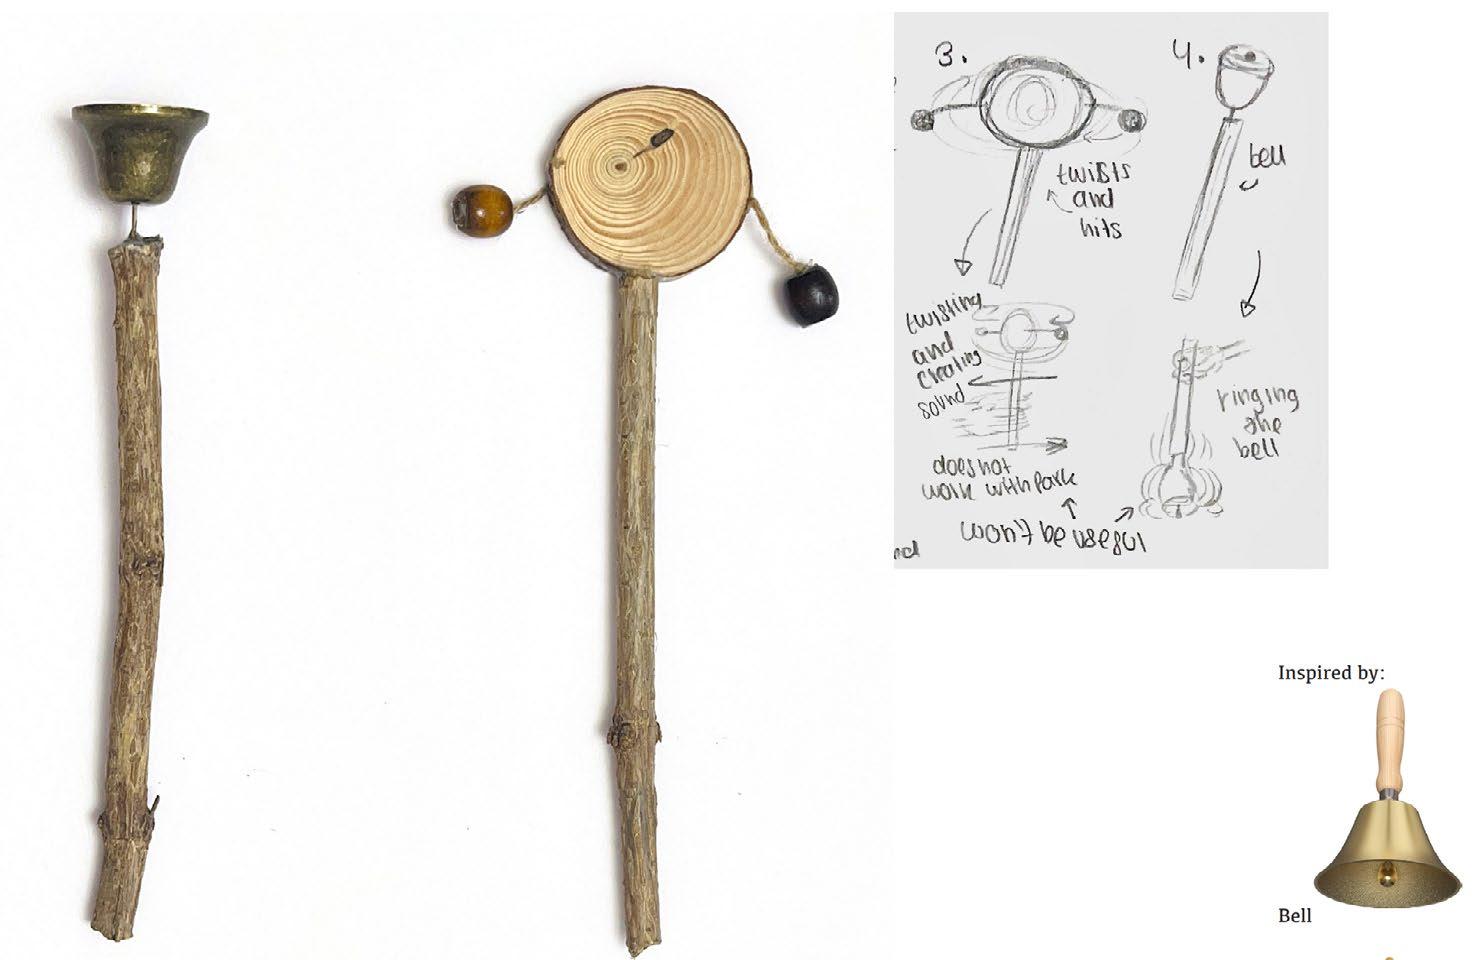
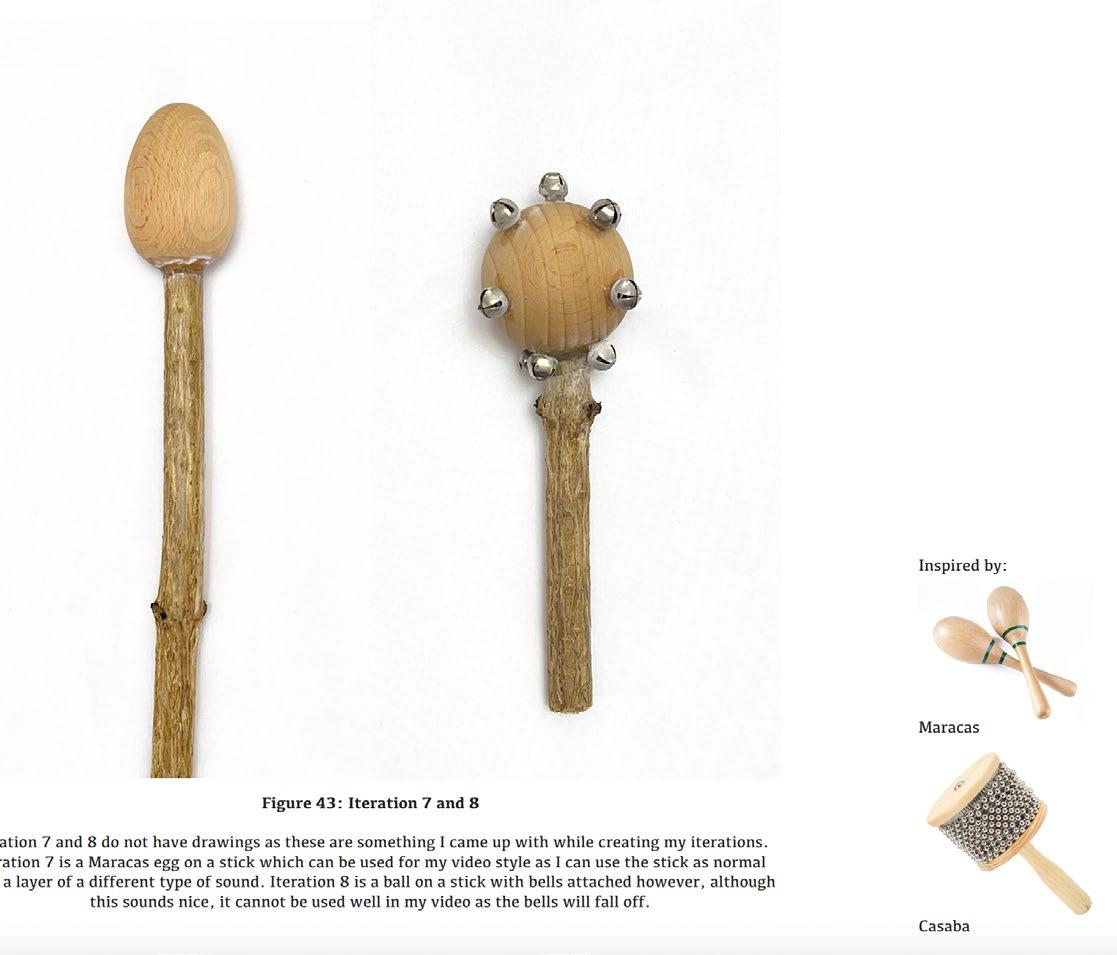


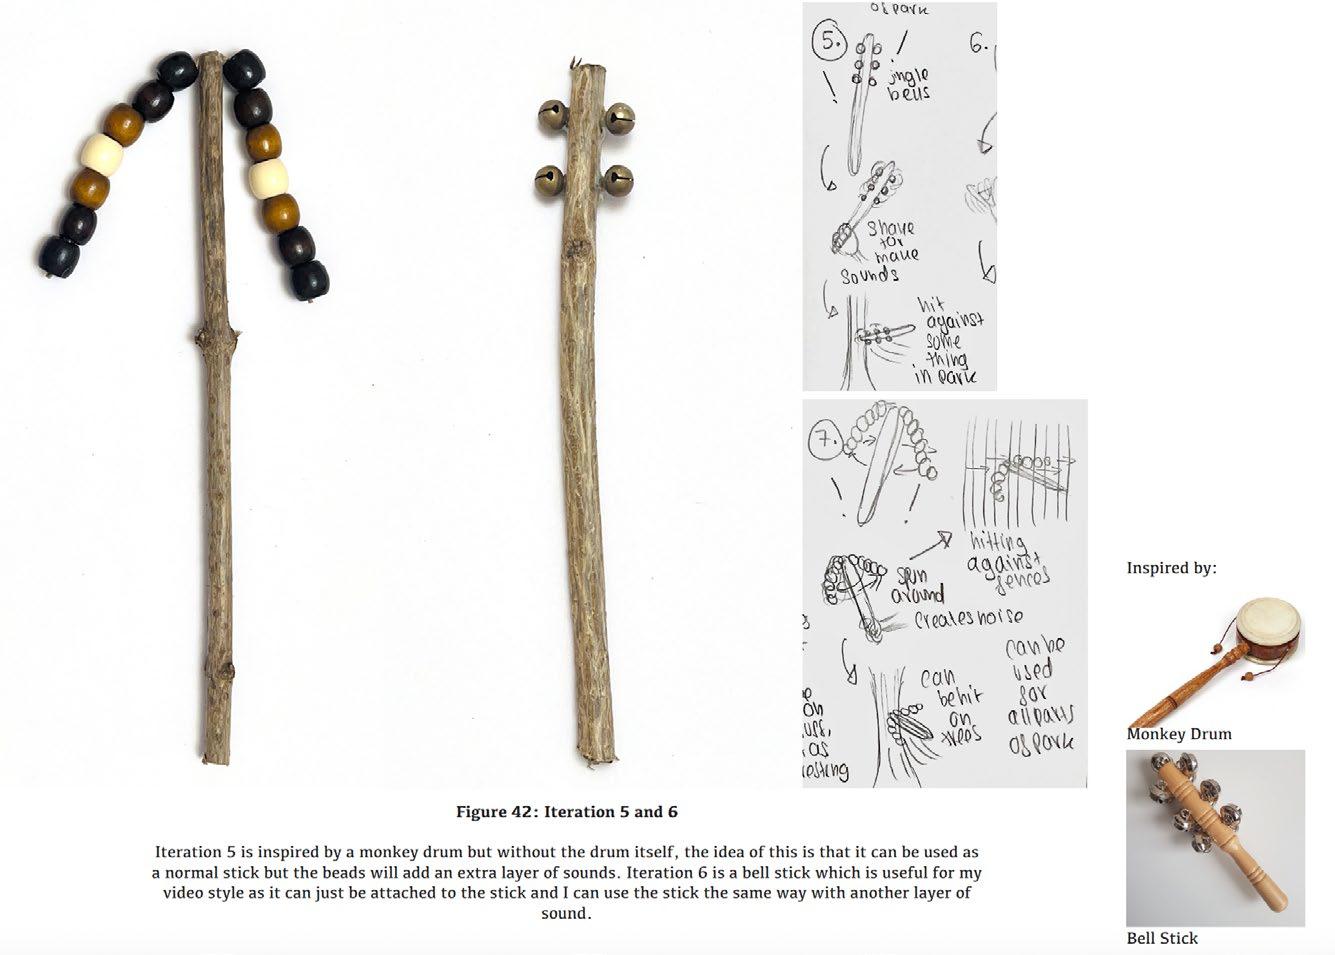
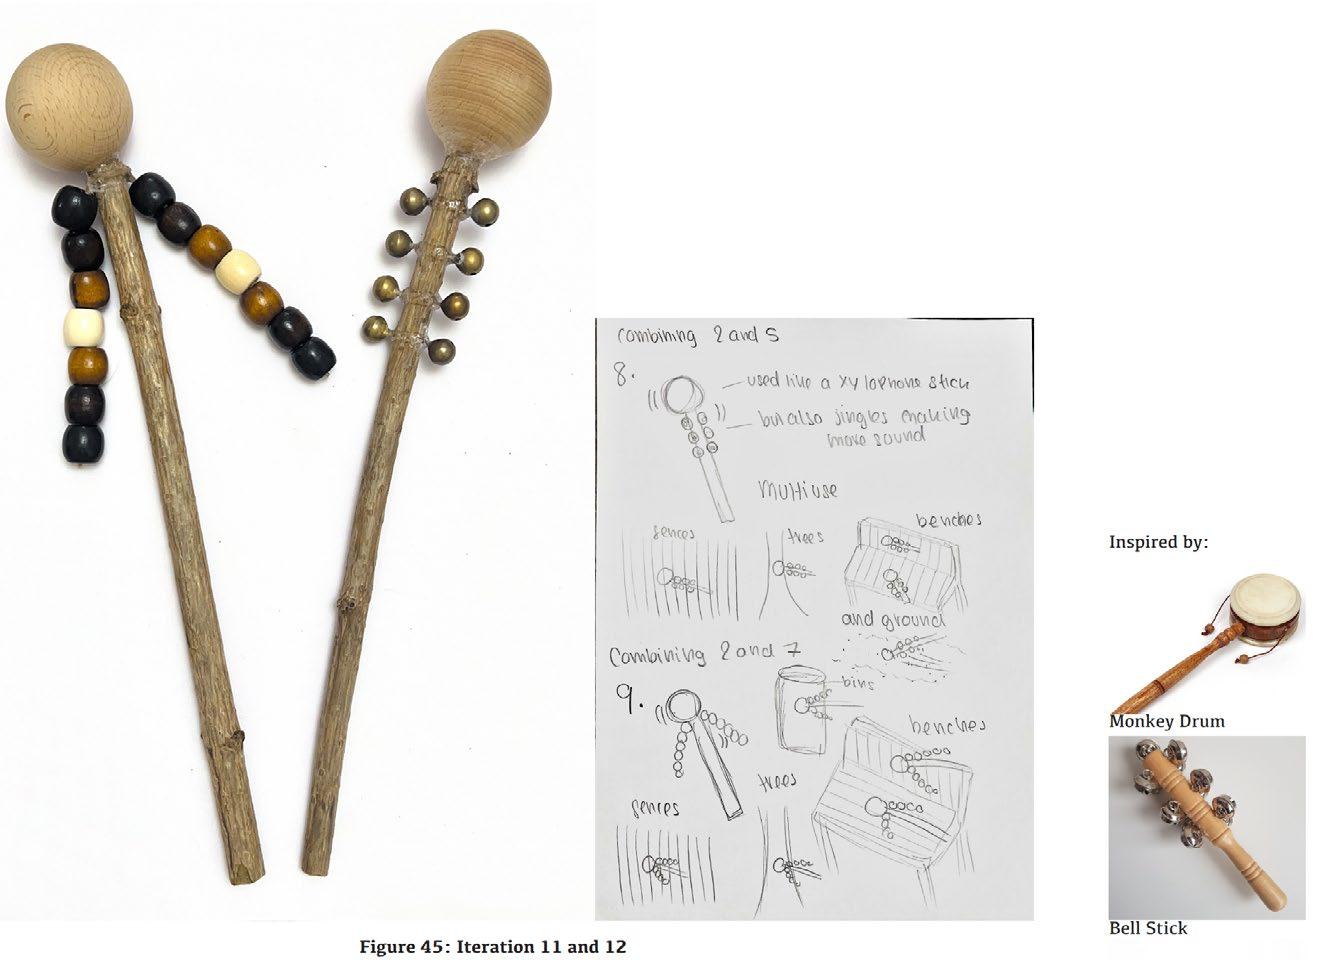
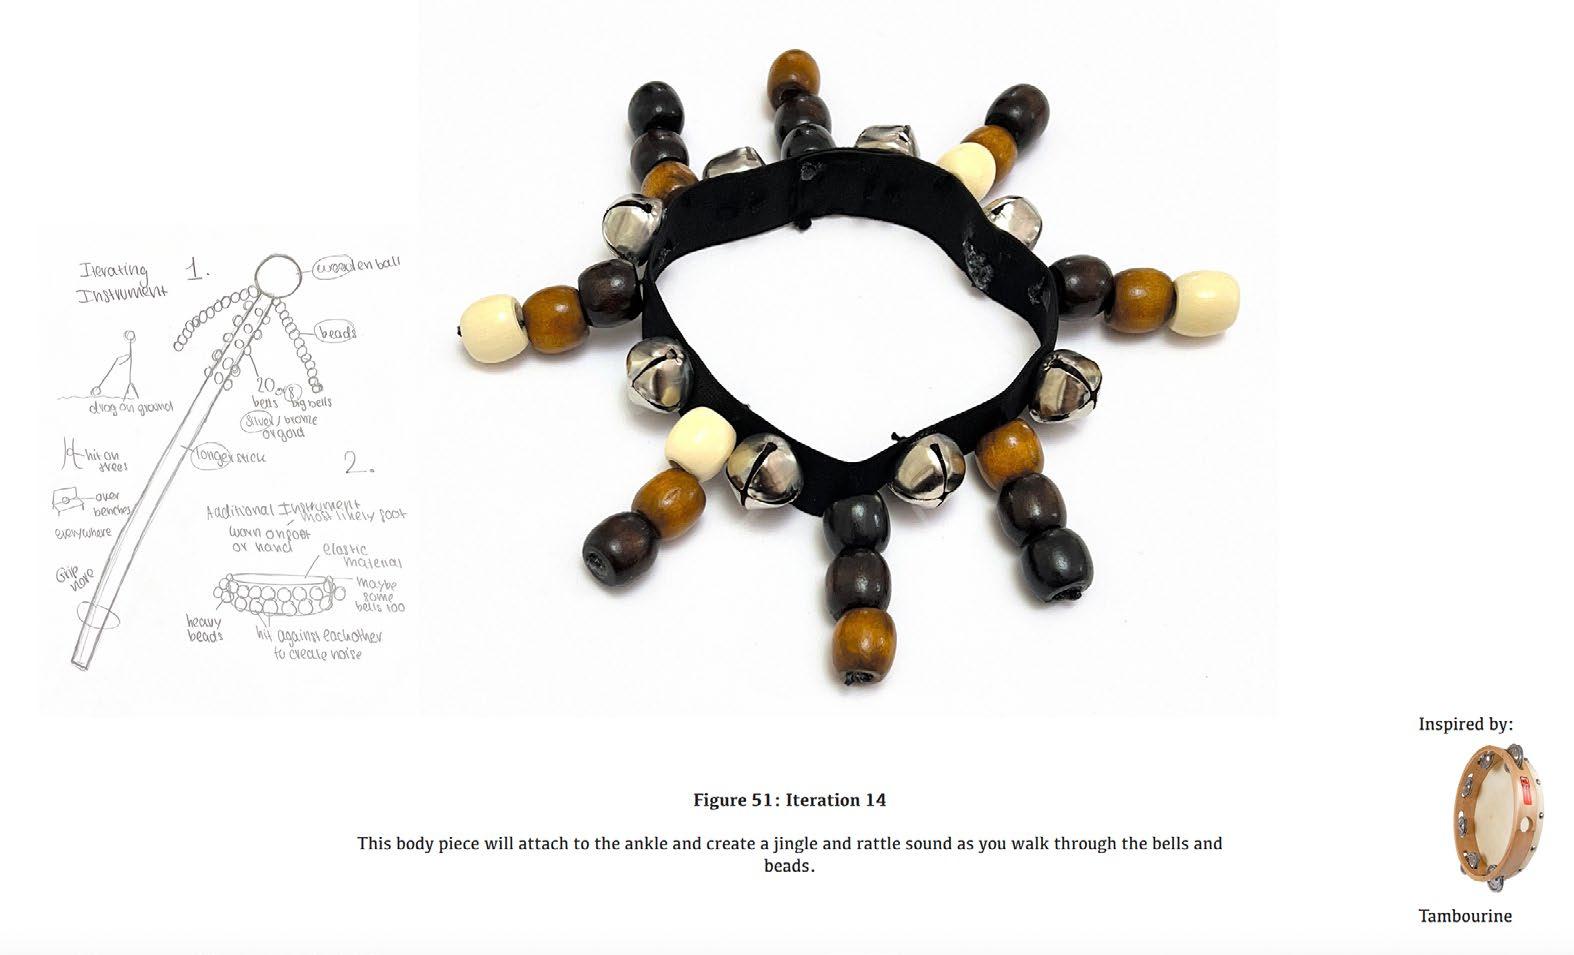
Creating Nature Instruments is a Year 1 Design and Creative Practice project at the Bartlett School of Architecture. This project began by using sticks to play the environment creating films focusing on the sounds, this developed into creating instruments to be used to play nature with, using inspiration from existing instruments. This is the process of developing a set of instruments, with drawings and inspiration references. This project was short and hands on, therefore, there was less research building and quick to develop the set of instruments.
PROJECT 9 - CREATING NATURE INSTRUMENTS
To finalise, I created a film playing a park with the most important instrument created, the development of film shooting improved as each instrument developed, however, the two final films show a complex song and a simple, natural song.
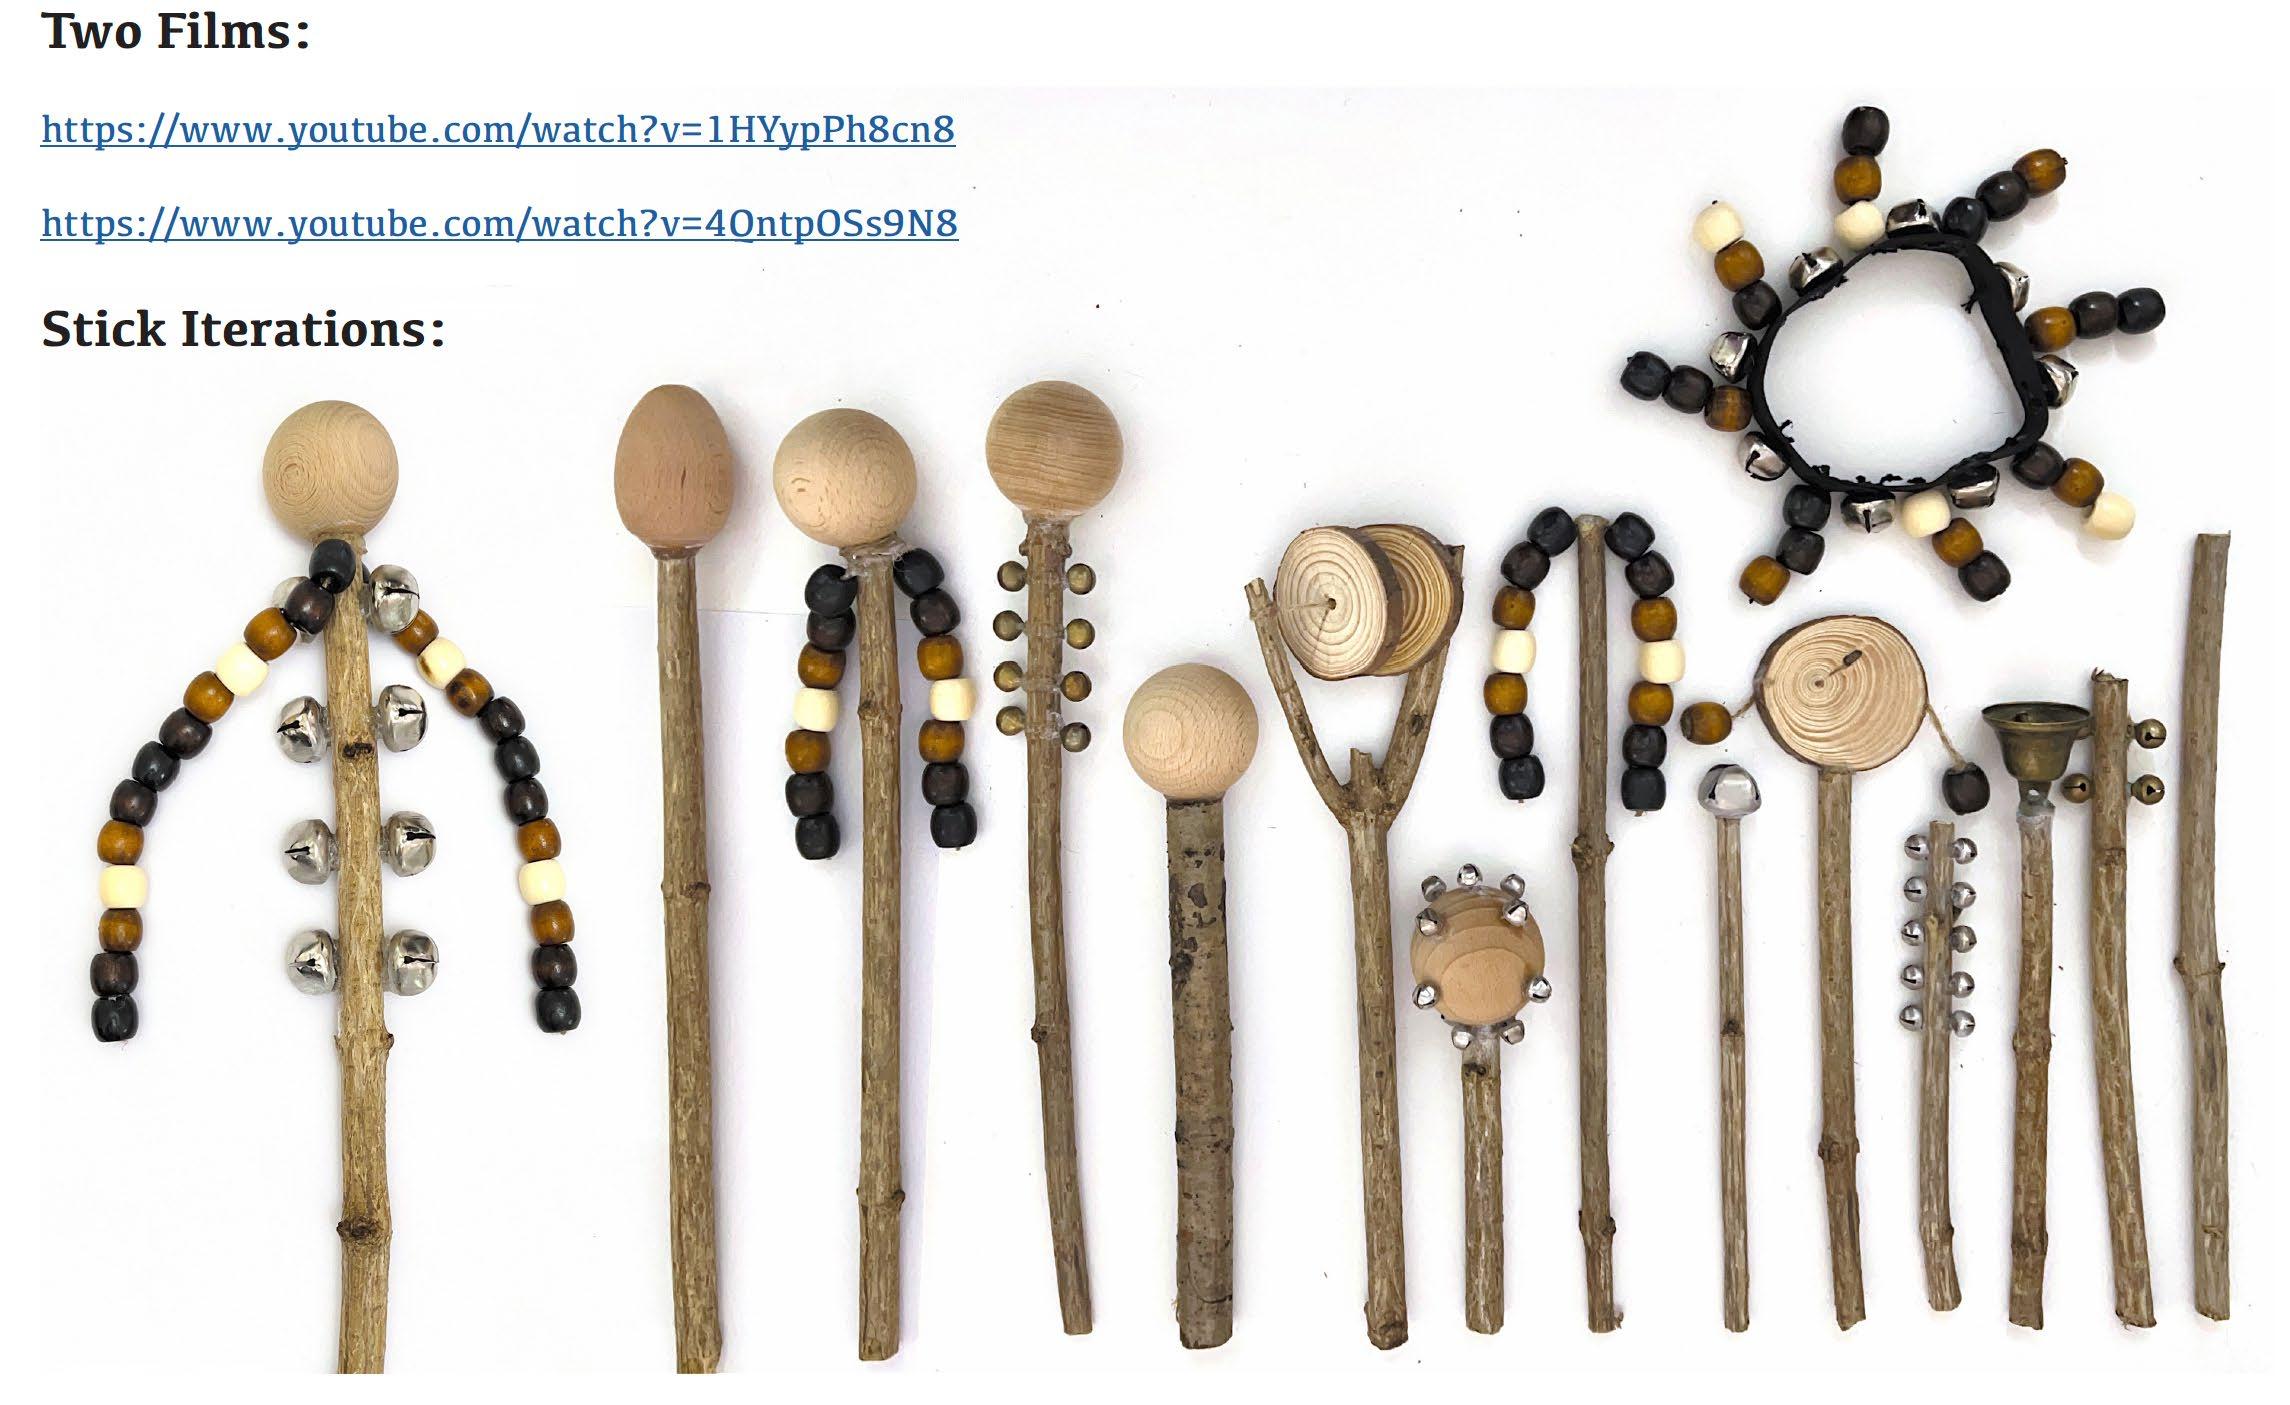
Film 1: https://www.youtube.com/watch?v=1HYypPh8cn8
Film 2: https://www.youtube.com/watch?v=4QntpOSs9N8