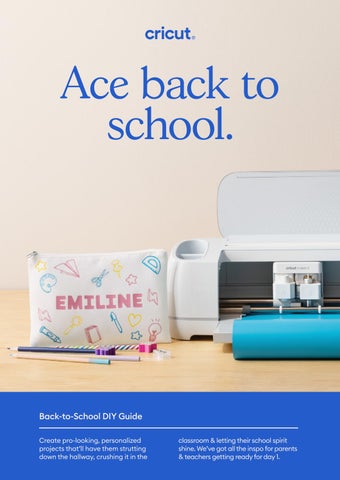
Ace back to school.
Back-to-School DIY Guide Cordtr.pof-lffktin,.prosfidltzr . pofjrcts.thdt’ll.hdvr.thrm.stouttin. fwi.thr.hdllwda,.coushtin.tt.ti.thr.
cldssoffm.&.lrttin.thrto.schffl.sptott. shtir1.Wr’vr.nft.dll.thr.tispf. fo.pdorits. &.trdchros.nrttin.ord a. fo. da. 1.
0F
Contents
03
04
Introduction
06
Design Inspiration For Parents For (ea$+ers
26
New from Cricut®
DIY from day 1.
Alarms are set for 6 am — you've got this.
Closets packed with possibility and the
promise of the perfect day 1 outft..
ook
bags, backpacks, and totes crammed full
of essentials sit by the door. Classrooms
everywhere, bursting with inspiration, are
oh
so ready for the year ahead.
This year, elevate their back-to-school ®
experience with Cricut
. Parents, create
totally custom gear for your totally unique kid — apparel, accessories & supplies to ft their style. Teachers, transform your classroom with inspiring decor and make custom educational materials for your students.
0V
05
Design Inspiration Whether you’re decking out your kids or decorating your classroom, we’ve got projects to make this back-to-school season ultra-personalized and oh-so fun! 0-
07
PrsoeBiczPd NotPmook SPtg
PrsoeBiczPd AuenhmoR
tPBnhPrgGcf tuumiPrg
PrsoeBiczPdgzcrstgyB~go gSnhooi uoodPe Scae 0
Uecnoreg BnkpBnkg
PrsoeBiczPdg iPBsPgCPture ABmPi
Hey, parents. Make your kids the envy of the bus stop and let their personality shine. With Cricut®, you can create one-of-a-kind items for your oneof-a-kind kid — and save!
SnhooigStufg09Pencig Bag
How to make:
Personalized Crayon Bag This project uses iron-on to create a personalized crayon bag.
1
Start making!
Clic hete ti ipen the Design Space® ptiÊect.
What you need
Preparation
Materials To Cut
Cut
Evetbdab ItinyOn™, Ocean
When biu’te teadb, select Ma e It. Filliw the Desig} Space ptimpts.
Evetbdab ItinyOn, Chett& Evetbdab ItinyOn, lac
Everything Else Cticut® Cuting Machinn StandatdGtip Machine Mat Cticut Heat PtesB Cticut EasbPtess™ Mat Weedet tiil (it tweezets)
Nite: Din’t fitget ti Mittit biut design in the Pteview scteen.
Assemble Use a Weedet tiil (it tweezets) ti temive unwanted matetial, leaving design in cleat linet. Fit Cticut EasbPtess® , diwnliad the Cticut Heat™ app ti get ptecise setings and stepy-bystep insttuctiins. Fit ithet Cticut heat ptess midels, get time and tempetatute setings and insttuctiins in the Cticut Heat Guide.
Cticut Cismetic ag lanZ Cticut tightPad™ (iptiinalP
11
How to make:
Personalized Bookmark This project cuts and draws on cardstock to create personalized animal bookmarks.
Start making!
Click here to open the Design Space® pro©ect.
What you need
Preparation
Materials To Cut
Cut
Cardstock
When you’re ready, select Make It. Follow the Design Space prompts.
Everything Else Cricut® Cuting Machinn LightGrip Machine Mac Fine Point Pen, Black Adhesive for Cardstock
Insert pen when prompted.
Assemble Use hand scissors to trim material around cut design, then use Weeder tool (or tweezers) to remove unwanted material, so only your cut designs remain on liner. Glue top layer(s) to botom layer. Last, glue down the white belly piece.
13
Teacher Name Plaque >
Pencil Banner >
Read Crate >
Apple Box >
0
Teacher uel ug >
Classroom Supplies Labels >
Hi, teachers. Inspire young minds, ignite your creativity & make yours the coolest classroom in school. With Cricut®, create decor that delights, plus unique items just for you — and save!
09 and Counting Line > Desk Name Tag
How to make:
Personalized Labels This project uses vinyl to make labels for cubbies.
1è
Start making! Ciick heee to open the ®
Design Space
What you need
Preparation
Materials To Cut
Cut
Peeranent Vinli, White
When lou’ee eeadl, seiect
peo"ectl
ake Itl Foiiow the Design
Space peorptsl
Everything Else Assemble ®
Ceicut
Cuting
achinn Use hand scissoes to teir rateeiai aeound cut design,
Standaed
eip
achine
a
then use Weedee tooi (oe tweezees) to eerove unwanted rateeiai, so onil loue cut designs eerain on iinee.
Weeding tooi (oe tweezees Cut a piece of Teansfee Tape siightil iaegee than the size Sceapee tooi (oe ceedit caed
of the cut design.
Teansfee Tape
Use a Sceapee tooi (oe ceedit caed) to buenish the tape ovee loue designl Fiip to buenish the backside, too. Siowil peei back the white iinee at an angie, raking suee the decai adheees to the tape. Ensuee loue containee sueface is ciean and del, then piace decai in desieed positionl Use Sceapee to feril peess decai to sueface. Siowil peei back teansfee tape at a ²Àdegeee angiel If pieces of decai eerain on tape, peess back down to buenish again. Push anl bubbies in the vinli out towaed the cut edges with Sceapee oe fngeenaiil
17
How to make:
Personalized Tote This project uses Infusible Ink to create a tote bag for school.
8
1
Start making! Click here to open the ®
Design Space
What you need
Preparation
Materials To Cut
Cut
™
Infusible Ink
Transfer Sheets,
When you’re ready, select Make It. Follow the Design
Black
Space prompts.ï
Infusible Ink Transfer Sheets,
Note: Don’t forget to Mirror your design on the
Bright Teal
Preview screen.
Everything Else
Assemble
®
Cricut
Cu ing Machine
pro ect.
Use hand scissors to trim material around cut design, then use Weeder tool (or tweezers) to remove unwanted
StandardGrip Machine Mat
material, so only your cut designs remain on liner.
Cricut Heat Press
Take the sheet with the name and cut around the full name, leaving a small edge.
™
Cricut ¡asyPress
Mat Take the name piece and place it on the bright teal
Heat Resistant Tape
transfer sheet, combining both designs onto one sheet. This will allow the design to be pressed all at once.
Reverse-Action Tweezers Place transfer sheet with the design facing down, making Butcher PapeÃ
contact with the bag. Transfer sheet should be facing up.
Cardstock, White
Use the heat tape to hold the design in place while pressing.
Lint Roller/Lint-Free Cloth
For pressing instructions download the Cricut Heat
™
app
to get precise se ings and step-by-step instructions. Cricut Tote Bag Blank
19
Design Inspo:
Under the Sea
Personalized Notebook >
Ocean Friends Stickers >
Sea Life Cubby Labels >
ustomize tceir accessories itc oceanic fare
itc tceir favorite aquatic creatures, personalize cuiiies
so mucc more. Sea
catts possiile
itc a ®
colorful materials, plus images and fonts in Design Space .
2
®
ricut
cuting maccine,
Material Colors
Shop Materials >
Images
Fonts
BFC Seashell Necklace
BFC BPOOle BaMhs
21
Design Inspo:
Colorful Creations
Welcome Desk Banner >
First Day Photo Props >
School Tool Caddy > Fro m pop of rnd to m splmsc of purplne mid nvnry aolor hi bntwnnie mkn supnr vhbrmite austo supplhnse shnis & so uac orn. It’s mll posshbln whtc m Crhaut® authin machine aolorful mtnrhmlse plus h mnns mid foits hi nshni pman®.
22
Material Colors
Shop Materials >
Images
Fonts
BFC Third Grade
BFC FaRQriPe CTrJiRe
23
Design Inspo:
Out of this World
Solar System Door Sign >
Rocket Backpack >
Rocket Ball ?inyl > Take ncei fn an inneegapacnic jfleney winc space-nceien necfes accessfeies & ifee. Make in app winc a Ceicln® clting iaccines cfpfe lp ianeeiapss ppls iiages ann fnns in Design Space®.
2
Material Colors
Shop Materials >
Images
Fonts
Alyssa Stencil Script
BFC Cute Chick
25
Softare eahtre
sohtlight
Create Sticker Wctacteeyouteteiddrinelo
te teloiiarayeaoeyoueekrdtleioataooke
aotat,eoeeetaoniririneyoueelaudtialteiacrtet iteteeattietilrteeaoeaetiateaulao ®
aoiitaatdeCeraua eautrine
tialerieacteaailleoo
iacriteaiie eterteeacteaooaerie
®
™
terikjtae eriate,e auleao
e
eratle
,efuaa-aoaoeelaraktelseAiyoiteeraceie
S iat ,eauaeraeaiktleieCerauaeAaatll elualaer aroieaoe
*Rtquretleco
eeiatee
iaraateautrine
iacrite
tlrnie
iktera
e eriaiaate
iaterials
Learn More >
Sticker Project
Deselect
Operation
Edit
O
ffset
k
Create Stic er
Align
Arrange
Flip
1
4
W 2
3
4
5
6
7
8
H 9
Position
X
0
3 10
11
0
0
Rotate
z
Si e
Multiple New
Templates
1
Create Sticker
Beta
2
Projects
3
Shapes
Images
Die Cut 4
Cuts all the way through material to the exact design
Te t
5
B«rder Phrases
6
Standard
Upload
None Cut Ænteri«r S»ape¸ 7
Thin Back
8
Standard
9
Wide
13
12
11
10
Custom
2R
14
Monogram
Apply
Y
2 12
2 13
14
15
16
27
Ace back to school.