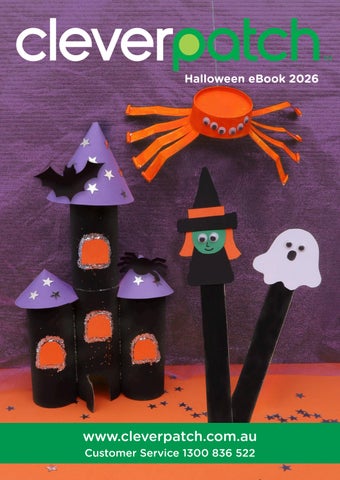
Halloween eBook 2026
www.cleverpatch.com.au Customer Service 1300 836 522
5 craft ideas for a spooky Halloween! Contents
Ghost Portrait.............................................................................................. 3 3D Paper Pumpkin Garland................................................................4-5 Haunted Castle............................................................................................ 6 Paper Cup Spider....................................................................................... 7 Halloween Popstick Characters............................................................ 8 Templates..................................................................................................9-11 We’ve supplied FREE templates just for you! Print as many times as you like.
KEY: Adult supervision is recommended when using scissors. Keep an eye out for this icon throughout the eBook and be sure to consult an adult if needed.
CleverPatch Pty Ltd ABN 48 130 866 885
ISBN:
978-1-922894-75-5
Live Chat:
www.cleverpatch.com.au
Submit an Enquiry: www.cleverpatch.com.au/contact
Click here for more Halloween ideas! 2
Phone:
1300 836 522
Fax:
1300 244 139
The Patch:
9 Balbu Close, Beresfield, NSW 2322 Australia
Mail:
PO Box 7, Hunter Region Mail Centre, NSW 2310 Australia © CleverPatch ™ 2026 - www.cleverpatch.com.au
Ghost Portrait Materials: • Egg Carton – 12 Wells – 12333 • CleverPatch™ Cover Paper Assorted – A4 – Pack of 275 – 13652 • CleverPatch™ Paint Markers – Bullet Tip – Metallic – Pack of 8 Colours – 21584 • CleverPatch™ Tacky Glue – 250ml – 16494 • Other materials required: Scissors and templates (page 9).
1. Cut out one of the pointed cone shaped pieces from inside the egg carton.
2. Colour the egg carton piece white with a paint marker. You may need to apply a few coats. Allow to dry after each coat.
3. Use a black paint marker to draw a ghost’s face on one side of the pointed egg carton piece. Allow to dry.
4. Print the templates provided on page 9. Choose a matching frame design and cut out the pieces. Trace the larger shape onto the egg carton lid. Trace the smaller shape onto cover paper. Cut out both shapes.
5. Use metallic paint markers to decorate the egg carton lid frame piece. Allow to dry.
6. Layer the smaller cover paper piece on top and secure with glue. Allow to dry. Decorate the background as you wish using metallic paint markers. Allow to dry.
7. Attach your ghost to the frame with glue and allow to dry. Your 3D Ghost Portrait is now ready to display!
© CleverPatch ™ 2026 - www.cleverpatch.com.au
3
3D Paper Pumpkin Garland Materials: • CleverPatch™ Cover Paper – A4 – Orange – Pack of 100 – 18161 • CleverPatch™ Cover Paper – A4 – Yellow – Pack of 100 – 18162 • CleverPatch™ Cover Paper – A4 – Green – Pack of 100 – 18163 • CleverPatch™ Tacky Glue – 250ml – 16494 • Chenille Stems – Bright – Pack of 100 – 10825 • Jute Twine – Thin – 70 Metres – 14037 • Other materials required: Scissors and template (page 10).
1. Print and cut out the template provided on page 10. Trace the template four times onto cover paper in either orange, yellow or green. Cut out the strips.
2. Take two of the strips and glue them together in a cross shape. Allow to dry.
3. Glue the other two strips diagonally on top of the cross to form an X. Allow to dry.
4. Curve two opposite paper strip ends and overlap them to create a circle. Use glue to secure and allow to dry.
5. Take another pair of opposite ends and glue them to the top of the circle you just made. Allow to dry.
6. Continue overlapping opposite ends and gluing each strip until you have a finished pumpkin shape. Allow to dry.
4
© CleverPatch ™ 2026 - www.cleverpatch.com.au
7. Loop the end of a chenille stem down approximately 3cm.
8. Wrap the rest of the stem around the short end a few times to secure in place and create a loop.
9. Curl the rest of the stem by wrapping it around a pencil or your finger.
A cute and easy decoration to delight trick-or-treaters! 10. Glue the stem to the top of your paper pumpkin. Allow to dry. Create as many pumpkins as you would like using yellow, green and orange paper. The more pumpkins you make, the longer your garland can be!
© CleverPatch ™ 2026 - www.cleverpatch.com.au
11. Cut a length of twine long enough to fit all of your pumpkins. Thread the twine through the chenille stem loops. Your 3D Paper Pumpkin Garland is now ready to display!
5
Haunted Castle Materials: • Cardboard Rolls – Pack of 110 – 10307 • CleverPatch™ Acrylic Paint Tube – Black – 100ml – 16885 • Battery LED Tealight Candles – Pack of 12 – 18915 • CleverPatch™ Cover Paper Assorted – A4 – Pack of 275 – 13652 • Glitter Star Sequins – Silver – 25g Pack – 11543 • CleverPatch™ Glitter – Silver – 245g Shaker Tub – 15239 • CleverPatch™ Tacky Glue – 250ml – 16494 • Other materials required: Scissors, a paint brush, a pencil and templates (page 10).
1. Paint the outside of four cardboard rolls black. Allow to dry.
2. Cut half an arch from the bottom of one of the cardboard rolls to make a door. Slightly fold it out.
3. Print and cut out the templates on page 10. Trace the cone pieces onto coloured cover paper. Make one large cone and two smaller cones. Glue a cone to the top of the three other painted cardboard rolls (without the door cutout). Allow to dry.
4. Glue the roll with the larger cone on top of the roll with the door. Glue the two rolls with smaller cone tops to either side of the roll with the door. Allow to dry.
5. Trace the window template four times onto orange cover paper and cut out. Glue one window to the front of each cardboard roll. Allow to dry.
6. Trace the bat and spider templates onto black cover paper and cut out. Glue them wherever you would like. Decorate the rest of the castle however you’d like with star sequins and glitter. Allow to dry.
7. Place an LED tealight candle behind the door of your castle and turn it on. Your Haunted Castle is now ready to display!
6
© CleverPatch ™ 2026 - www.cleverpatch.com.au
Paper Cup Spider Materials: • Paper Cups – Pack of 20 – 11085 • Wiggle Eyes Black – 0.7cm – Pack of 100 – 16477 • CleverPatch™ Acrylic Paint Tubes – 100ml Set of 12 Colours – 20811 • CleverPatch™ Tacky Glue – 250ml – 16494 • Other materials required: Scissors, a paint brush and template (page 11).
1. Print and cut out the template on page 11. Place the template onto the side of a paper cup, aligning the short edge with the lip of the cup. Trace the template onto the cup and cut out.
2. Cut four strips into the cup in 1cm intervals from the cutout piece. Make sure not to cut all the way, leaving at least 2cm from the base of the cup.
3. Raise the legs up and outwards then crease them inwards approximately 2.5cm from the end.
4. Repeat Steps 2 and 3 for the opposite side of the cup.
5. Cut out the remaining back part of the cup leaving just the legs and body.
6. Paint and decorate your spider however you’d like. Allow to dry.
Super simple and fun craft for a creepy Halloween! 7. Glue on some wiggle eyes. Allow to dry.
© CleverPatch ™ 2026 - www.cleverpatch.com.au
8. Your Paper Cup Spider is now ready to display! Create as many as you would like! 7
Halloween Popstick Characters Materials: • Giant Popsticks – Natural – Pack of 100 – 17931 • CleverPatch™ Acrylic Paint Tube – Black – 100ml – 16885 • CleverPatch™ Cover Paper Assorted – A4 – Pack of 275 – 13652 • CleverPatch™ Junior PVA Glue – 250ml – 10364 • Wiggle Eyes Black – 1.5cm – Pack of 100 – 10816 • EverZart Permanent Pens – Black – Pack of 20 – 19810 • Other materials required: Scissors, a paint brush and templates (page 11).
1. Paint a giant popstick black. Allow to dry.
2. Print and cut out the templates provided on page 11. Trace the templates of your chosen character onto your choice of coloured cover paper and cut out.
3. For the Witch, Frankenstein’s Monster and Vampire, glue the hair to the head piece, and the head onto the top part of the body. Allow to dry.
4. Attach any accessories for your character with glue. Allow to dry.
5. Add a pair of wiggle eyes with glue and allow to dry. Use a permanent pen to draw the rest of the face.
6. Glue your character to the end of the popstick. Allow to dry.
7. Your Halloween Popstick Character is now complete! Create the other characters or even come up with your own!
8
© CleverPatch ™ 2026 - www.cleverpatch.com.au
Ghost Portrait Use these templates to help you complete the activity on page 3.
© CleverPatch™ | cleverpatch.com.au
© CleverPatch™ | cleverpatch.com.au
©
Cl au ev m. erP co . h atc ™ h | cleverpatc
©C
© CleverPatch ™ 2026. Subject to terms of use at www.cleverpatch.com.au
lev e
rPat ™ ch
au om. | cleverpatch.c
9
3D Paper Pumpkin Garland Use this template to help you complete the activity on pages 4 and 5.
© CleverPatch™ | cleverpatch.com.au
Haunted Castle Use these templates to help you complete the activity on page 6. Spider
Large Cone ©
Cl
™
everPatch
Bat ©
v le C
er Pa
tc h™
Small Cone
.au
om
™
ch
©
C
lev
e
t rPa
at
rp
ve
le |c
.c ch
©
C
le
ve
rP
at
ch
™
|
cl
ev
er
pa
tc
h.
co
m
.a
u
Window
© CleverPatch™
10
© CleverPatch ™ 2026. Subject to terms of use at www.cleverpatch.com.au
Paper Cup Spider Use this template to help you complete the activity on page 7.
© CleverPatch™ | cleverpatch.com.au
Halloween Popstick Characters Use these templates to help you complete the activity on page 8. Witch
Hat
Head
Body
Hair Hat Band
© CleverPatch™ © CleverPatch™
© CleverPatch™
Vampire Head
Body
Hair
© CleverPatch™
© CleverPatch™
Frankenstein’s Monster Head
Cape
Ghost Body
Body
Mouth
Hair © CleverPatch™
© CleverPatch™
© CleverPatch™ © CleverPatch™
© CleverPatch ™ 2026. Subject to terms of use at www.cleverpatch.com.au
11