
Gadget
The term “computer cleaning” itself is somewhat ironic. If youʼre thinking that your computer needs cleaning, it definitely needs some adjustment or serious attention. Depending on whether itʼs a desktop, laptop, or gaming PC, monthly cleaning will help your computer run faster, avoid overheating, and increase its longevity This all-in-one guide will walk you through the whole process, from physical dusting to digital cleanup, so your PC is ready for use as it was at purchase.
Prevent Overheating: Dust blocks airflow in fans and vents. As a result, your system may overheat, slow down, or even shut off unexpectedly.
Improve Performance: The actual situation is somewhat paradoxical: the more untidy hard drives become, the slower the system performs. Therefore, thatʼs exactly where digital cleaning comes into action
Extend Hardware Life: The better a protocol is, the longer it lasts; consequently, it saves you money on repairs and replacements.
Enhance User Experience: A clean screen, keyboard, and peripherals are not only hygienic but also easier to use and comfortable.
Clearly, and more importantly, included in the spectrum of the cleaning process is not simply aesthetic appeal; rather, it is essential for both performance and longevity.
computer cleaning: Outside & Inside
We will go with the cleaning of the physicalpartsofyourPC
Step 1: Power O�
Before you clean anything, make sure that the computer is turned off and unplugged. This is to prevent any electrical damage or accidental shocks.
Step 2: Cleaning the Outside
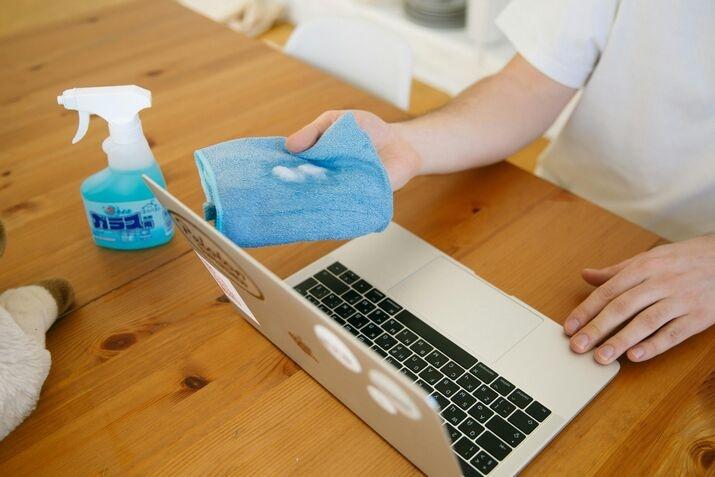
First, wipe the outer surface of your computer case, monitor, and peripherals using a dry microfiber cloth.
For any smudges, simply dab the cloth with a bit of distilled water or an electronicssafe cleaner.
Never spray directly onto the screen or device! Instead, spray onto the cloth.
Additionally, compressed air or a small soft brush works well for cleaning vents and ports.
. Also, these devices can help get rid of dirt in hard-to-reach places without doing any damage
Step 3: Clean the Keyboard & Mouse
Turn your keyboard upside down and shake it gently to dislodge crumb-sized debris. Use canned air between the keys. For the sticky parts, dampen a cotton swab with isopropyl alcohol, taking care not to overdo it. Similarly, wipe your mouse with a soft cloth, paying special emphasis on the buttons and optical sensor.
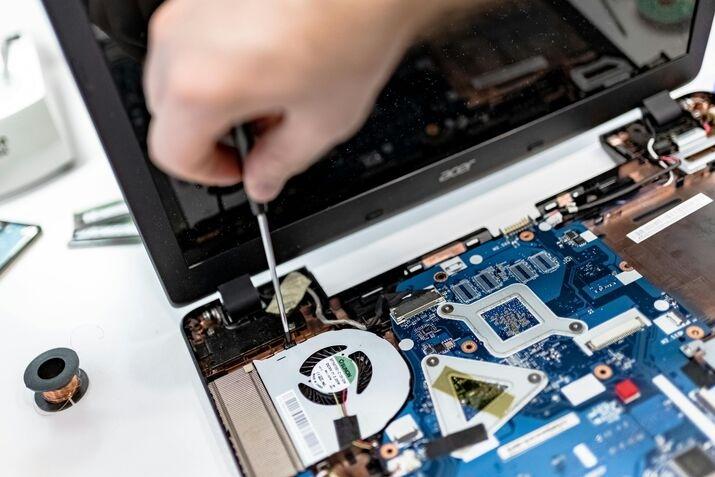
Step 4: Inside the Case Cleaning (Desktops Only)
Moreover, this step is crucial for desktops, which quickly accumulate dust.
To begin, open the case with a screwdriver or use a latch if your PC is equipped with one.
Take out any dust filters and clean them; a gentle rinse with water until completely dry will do
Use short bursts of compressed air to dislodge dust from fans, the power supply, and internal components. However, avoid allowing fans to spin from the force of the airblaster hold them still to prevent damage. If you feel confident enough, remove parts like the GPU or RAM to clean underneath. Just make sure you ground yourself beforehand to avoid static discharge
After cleaning, close the case, reconnect all cables, and power on the device to test.
Pro tip: For laptops, itʼs best to stick to cleaning the vents and keyboard. However, internal cleaning is much trickier and often voids your warranty.