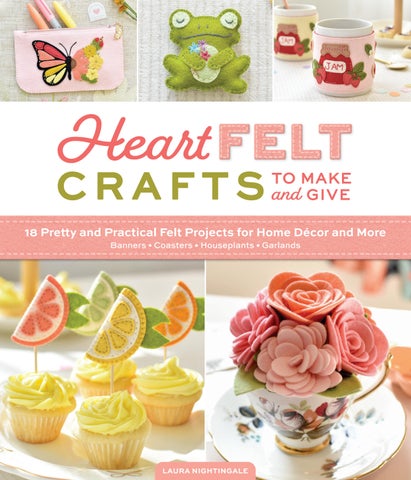


18 Pretty and Practical Felt Projects for Home Décor and More
Banners • Coasters • Houseplants • Garlands
18 Pretty and Practical Felt Projects for Home Décor and More
Banners • Coasters • Houseplants • Garlands
♥ Select photography by Mallory Brisson Photography
HeartFELT Crafts to Make and Give © 2026 by Laura Nightingale and Better Day Books, an imprint of Schiffer Publishing, Ltd.
Publisher: Peg Couch
Cover Designer: Lindsay Hess
Book Designer: Llara Pazdan
Editor: Colleen Dorsey
All rights reserved. No part of this work may be reproduced or used in any form or by any means — graphic, electronic, or mechanical, including photocopying or information storage and retrieval systems — without written permission from the publisher.
The scanning, uploading, and distribution of this book or any part thereof via the internet or any other means without the permission of the publisher is illegal and punishable by law. Please purchase only authorized editions and do not participate in or encourage the electronic piracy of copyrighted materials.
“Better Day Books,” the floral book logo, and “It’s a Good Day to Have a Better Day” are registered trademarks of Schiffer Publishing, Ltd.
“Schiffer,” “Schiffer Publishing, Ltd.,” and the pen and inkwell logo are registered trademarks of Schiffer Publishing, Ltd.
Library of Congress Control Number: 2025941556
ISBN: 978-0-7643-7066-3
Printed in China
10 9 8 7 6 5 4 3 2 1
Published by Better Day Books, an imprint of Schiffer Publishing, Ltd.
Better Day Books
Email: hello@betterdaybooks.com
Web: www.betterdaybooks.com
Visit us on Instagram! @better_day_books
Schiffer Publishing 4880 Lower Valley Road
Atglen, PA 19310
Phone: 610-593-1777
Fax: 610-593-2002
Email: info@schifferbooks.com
Web: www.schifferbooks.com
For our complete selection of fine books on this and related subjects, please visit our website at www.betterdaybooks.com. You may also write for a free catalog.
Better Day Books titles are available at special discounts for bulk purchases for sales promotions or premiums. Special editions, including personalized covers, corporate imprints, and excerpts, can be created in large quantities for special needs. For more information, contact the publisher.
For my boys, who are the most loving, supportive, and encouraging little hype squad I could have ever dreamed of.
William, you are sweeter than cupcakes. Ezra, you shine brighter than any disco ball.
Peter, you make my dreams a priority and keep the ship afloat while I chase them.
I love you all to the moon and back.
And for the family and friends who have checked in on me, cheered me on, and celebrated my wins. I am grateful for you. ♥
Hi—I’m absolutely delighted that you’ve picked up this book! Writing it has been a dream come true, and it is an honor to be able to share it with you.
My love for craft books has long been a constant in my life. As a preteen, I used to sit on the floor of bookstores and libraries and spend hours flipping through the craft books. I’m pretty sure I read through every single craft book my local library branch had to offer! Some projects I made, some simply inspired me, and many I just enjoyed looking at because the pictures were so pretty. Reading those books, I knew that one day, I wanted to write something equally inspiring and beautiful that might also end up on library shelves!
My vision for the designs in this book was for all of them to coexist together in one colorful tea-party world. I wanted the projects to feel cohesive, elegant, and charming, with just a touch of whimsy to keep things playful. Imagine hosting an afternoon tea party for your friends where the table is bursting with fresh colors, treats, and décor; trinket dishes hold sugar packets, teacups sit on daisy coasters, cupcakes have citrus toppers, there are garlands and banners on the walls, and every guest goes home with their own monogram key chain gift. All of those projects are here in this book for you to make and enchant your guests with this dreamy setup!
Whether you make one project for your desk or 10 projects for a tea party, I hope they brighten a corner of your life and spark joy every time you see them. And, if you’re currently sitting on the floor of your local bookstore, flipping through these pages looking for ideas and inspiration, I see you. I am you. And I wrote this for you.
Please enjoy the pretty pictures. ♥
♥ What’s your story? What led you to this art form?
I grew up watching my mom make, bake, grow, and sew as much as she could in our home. From pouring soap to stitching curtains to tending chickens and bees, she created so many items and experiences from scratch for me and my siblings. So, the influence to be resourceful and crafty has been present in my life from some of my earliest memories.
I got my first sewing machine as a birthday gift when I was 16 (it’s the same one I use today!), and I went on to do an undergraduate degree in costume studies at Dalhousie University, which gave me a lot of confidence in my sewing abilities as well as job opportunities working in theater. Fast forward a few years, and I discovered crafting with felt to create easy projects while my firstborn, William, was napping. I doubled down after my second son, Ezra, was born, and turned my love for felt into a side hustle called The Yellow Birdhouse that I could do while still being a full-time mom. Once my boys were in school full time, I scaled up, and the side hustle became a legit business I could make a reliable income with. My business combines so many of my interests and strengths: sewing, designing, business management, budgeting—plus, I LOVE having a flexible schedule. I’ve always known I wanted to be crafty for a living, and I’m incredibly grateful that I get to be so on my own terms!
♥ What is your workspace like?
I’m very blessed to have a dedicated workroom on the main floor in my home. I have a big 12-foot desk, storage cabinets for all my felty supplies, and a cute teal sofa I bought last year that I can relax on while
stitching. I have two windows overlooking a wooded lot, and I watch my little squirrel friend Dalton hopping around looking for snacks while I work.
But when I first started this felt journey, I had just a little corner of my living room to work in, big enough for only a small table, a chair, and three drawers for storage. My toddlers played around me while I worked. Humble workspaces can be the home of incredible creativity, so don’t let yourself feel limited if the only space you have is your dining-room table!
♥ How do you dream up your designs?
Ideas often come to me when I’m out and about, and hardly ever when I’m sitting at my desk staring at a blank page. A flower in a neighbor’s garden, a child talking about an animal, or a trip to the farmers’ market all can help keep my running list of ideas full. I might see a bouquet at a grocery store and wonder if I could re-create one of the flowers out of felt, or I’ll go on a beach walk with a friend and spot a bird I’d like to try making. I’ll go home and look up photos of the flower or bird from different angles, which usually leads to more ideas popping into my head as I see the subject in a different habitat, which piques my curiosity again. This world is so interesting and beautiful that I never seem to run out of ideas!
♥ What appeals to you most about felt as a medium?
About stitching?
I truly love and enjoy hand sewing, far and above using a sewing machine—and wool felt just lends itself
so perfectly to hand stitching. I love the way felt fabric feels in my hands and the endless opportunities for creativity it offers. Felt has almost no limitations and is extremely portable. I get enormous satisfaction from crafting projects from scratch, and, when people come to my home, look around, and ask, “Did you make that?,” my answer is always “If it looks homemade, then I home-made it!” In the last 12 years of sewing with felt, I’ve never once considered switching to a different job or a different medium. It’s true love!
What is one piece of advice you wish you’d heard early in your maker journey?
People can see right through inauthenticity. If you’re crafting something because you think it will get views, clicks, or likes but it’s not coming from a place of true inspiration, the result will fall flat every time. Craft what speaks to you, what inspires you, and what you want to see existing out in the world. Others will recognize that intention and authenticity in your creations and will love them for it.
Also, don’t let a failed first attempt dull your determination to create something. I made six (!) apple prototypes for the project on page 88 before I was finally happy with the design. Sometimes the creative process is messy and frustrating, but the results are usually worth it!
♥ What do you hope readers will take away from this book?
That crafting a thoughtful, colorful home doesn’t have to be difficult. That there are opportunities for personalizing your space in small ways that are easily achievable. I hope you’ll feel inspired by the designs I share here, and then adapt the designs to make them your own in ways that would surprise and delight me!
Laura Nightingale is a professional designer and felt artist whose small business, The Yellow Birdhouse, has been connecting crafters with unique and charming felt sewing designs for a decade. Her blog focuses on tips and DIYs to help readers lead their best crafty lives, and she also sells handmade items made with highquality wool-blend felt. She aims to infuse life’s small moments with designs that add color, vibrance, intention, and fun and which can be reused year after year. Laura has a degree in Costume Studies from Dalhousie University and has been featured in Homespun and Country Woman magazines. She lives by the ocean with her husband and two sons in beautiful Dartmouth, Nova Scotia, Canada. Learn more at www.theyellowbirdhouse.com.
Whether you’ve never worked with felt before or have already dabbled in it, this section of the book includes a wealth of information you’ll want to read! First you’ll learn about the different types of felt and why you might want to choose one product over another. Then I’ll walk you through the tools you’ll use to manipulate and shape felt into all the fantastic creations in this book. We’ll touch on how to work with templates and how to care for felt items, and then we’ll wrap up the section with a visual guide to the 10 embroidery stitches used throughout the book. Refer back to this section as needed!
If you’ve never crafted with felt sheets before, you’re in for a real treat!
Felt is the perfect medium for beginner crafters because it is incredibly versatile and easy to work with. You can create flat art pieces or stuffed plushie toys, beautifully realistic plants or whimsical décor, structured vessels or flexible flags . . . if you can dream it, there’s probably a way it can be made with felt!
Felt is also well suited to more-experienced crafters. Intricate cutting, layering, and embroidery can create complex and visually compelling art pieces that will leave people wondering, “How did you make that?” Felt lends itself so well to experimentation with color mixing, embroidery stitches, and assembly techniques.
It’s important to note that felt creations are meant to be moments of colorful joy, loved and admired, not priceless heirlooms to last for generations hidden away in a box. Yes, if you leave an item in the sun, the colors will fade, and yes, if an item is well used, the felt will eventually pill and lose its structural integrity. But felt creations are meant to be seen, used, and enjoyed, not treated as precious and untouchable.
I believe that the things we craft out of thoughtfulness, intention, and love leave a lasting impression on our hearts long after the physical item is worn out. The peace the process brings, the energy we get from stretching our creative muscles, and the joy we feel at gifting, sharing, or displaying our creation is the real purpose of making art.
The most convenient quality of felt is that is doesn’t fray. Unlike other fabrics, whose edges will begin to shred and come apart, felt’s fibers are matted together and will not shred. Because of this, you can cut it into small and complex shapes and achieve a lot of detail without worrying that your project will fall apart.
Since felt doesn’t fray, it allows for different seamfinishing options, because you don’t need to worry about containing the edges of the fabric. Seams can be hidden, like in the apple project, or they can be visible, like in the zip pouch project. You can use a variety of stitches for seams as well. My preferred method is the blanket stitch for visible seams, but sometimes a backstitch or a straight stitch makes more sense.
Felt is wonderfully versatile, a perfect canvas for expressing creativity. It can be colored with markers, makeup, or pastels. It can be airbrushed with paint or stamped with ink. It can be embellished with beads, sequins, or embroidery. It can have fabric, glitter, or metallics adhered to it. It can also be stiffened or reinforced to create morestructured shapes. And it can be used as a base for needle felting. Is there any other type of fabric that can achieve so much?
Felt is an incredibly forgiving fabric as well. It can be gently stretched or squished and made to fit into a space even if the pieces have been inaccurately cut. Heat shaping is a great addition to florals and foliage to add extra dimension and movement. Using heat is also a great way to reshape feltpieces that have gotten bent or creased. And mistakes in felt are easily undone, since pinholes can be carefully rubbed out. So don’t be afraid to experiment, try new techniques, or make mistakes! It’s all part of the process.
There are three common types of felt: acrylic, wool blend, and 100% wool.
ACRYLIC FELT is 100% polyester and is sometimes made with recycled materials, so it may be labeled “eco.” It is the least expensive option and can be found easily at local dollar stores or craft shops, usually sold in 9" x 12" (23 x 30.5 cm) sheets. It is a suitable option for crafters with allergies to wool. However, it is typically thicker, fuzzier around cut edges, and more difficult to cut accurately. The color options are generally limited to saturated, primary colors, with few pastels and neutrals available. It is more difficult to manipulate, and although it can be embroidered, other embellishment techniques, like coloring, will not work well. None of the projects in this book use acrylic felt, but I do use it on occasion to test out techniques or patterns so as not to waste my precious wool felt on rough drafts!
WOOL-BLEND FELT is made with a mix of wool and rayon fibers. The price point is midrange, but it is more difficult to find locally. Boutique fabric stores might carry it, but you’ll have the most luck shopping online. Wool-blend felt comes in a wide range of colors, from pastels to rich hues and lots of neutrals. It cuts well and is easily manipulated and embellished. It has a little bit of fuzziness but significantly less than acrylic felt, and fuzziness appears usually only if the felt has been handled roughly. Another big advantage to wool-blend felt is that it can be purchased both in 9" x 12" (23 x 30.5 cm) and 12" x 18" (30.5 x 45.7 cm) sheets, and some shops offer yardages as well. The larger sheets can be very useful for longer templates, like the notebook cover. Be aware, though, that sometimes the thickness of wool-blend felt can vary slightly across different colors.
100% WOOL FELT is a dream to work with. It cuts crisply, has limited fuzziness, and is perfect for adding embroidery and embellishment. It is the most expensive option and the most difficult to find in stores. You’re unlikely to find it locally, but there are lots of online shops that carry it. The color range is stunning, including lots of jewel tones that are hard to find even in a wool-blend product.
It is also perhaps the most sustainable option because it contains no plastic and because wool is more biodegradable. It typically comes in 8" x 12" (20.3 x 30.5 cm) sheets and has the mostuniform thickness across the color options of all three felt types.
Note: 100% wool felt can be purchased in a few different thicknesses. For crafting and for making the projects in this book, you want a 1 mm thickness. Anything thicker will be difficult to work with and is generally manufactured for purposes other than crafting.
I use a mix of wool blend and 100% wool in all my own work and throughout this book. You’ll also see a few instances of glitter felt in this book, like in the raindrop garland and monogram key chains. Glitter felt can either be purchased premade or homemade by adhering a glitter heat-transfer
vinyl (HTV) directly to the felt. That type of HTV is typically used for Cricut (or other smart cutting machine) crafts and can often be found at large craft stores.
I know shopping for felt sheets online can seem overwhelming. A quick Google search makes it looks like there are endless options to choose from. However, many of the online retailers are actually selling the same products from the same two manufacturers: National Nonwovens and Barefoot Fibers.
Small shops and online retailers will sometimes re-name the felt colors in order to differentiate themselves from the manufacturers and from other retailers. I did the same thing when I sold felt sheets as part of my business a few years ago. So, there aren’t nearly as many options out there as it looks like. My rule of thumb is, if the felt
thickness is 1 mm, it’s a wool blend or 100% wool, and you like the color, then go for it! The felt quality between different small shops will at minimum be comparable, if not identical.
To help you get started, check out these online shops:
♥ www.benziedesign.com
♥ www.thefeltpod.com
♥ www.canadianfeltshop.com
I’ve purchased from all three of these shops and can attest to the quality of their products and their good customer service. And a quick search on Etsy will turn up a number of other shops selling goodquality felt as well. You may even find one that’s located locally!
If you’re curious about a specific color used in this book, feel free to reach out to me and I’ll be happy to share the color name and where I purchased it from.
The very basic tools you need to get started crafting with felt are scissors, thread, a needle, and some felt. You can accomplish a lot with those alone! But here is a comprehensive list of tools, supplies, and materials that will make your feltcrafting journey more productive and fun.
I recommend that you keep three pairs on hand.
FABRIC (OR DRESSMAKER’S) SHEARS are best for cutting out large felt pieces. These are a larger scissor, with a total length of about 8" (20.3 cm), well sharpened, and sometimes labeled as a knife-edge blade. It is worth the investment to get a good-quality pair of shears because inexpensive or craft scissors may not give you crisp cuts. A midrange price point is a good indicator of acceptable quality. I’ve had a pair of Gingher’s for almost 20 years that have served me extremely well.
SMALL EMBROIDERY SCISSORS are great for cutting thread and detailed pieces of felt. These are usually around 3 1/2" (8.9 cm) long and have a sharp, pointy tip perfect for snipping in small spaces. I have two pairs, one with a 1" (2.5 cm) blade and another with a 1 1/4" (3.2 cm) blade.
PAPER SCISSORS are necessary for cutting out templates. Any scissor that does not have blunt ends (like children’s scissors do) will do the trick.
A HEAT-ERASABLE PEN is a great tool for marking embroidery placement or transferring templates. Just a touch of heat from an iron makes the markings disappear. I like the FriXion Clicker brand in black ink with a fine tip. Warning: Don’t get the extra-fine-tip version—it’s too pointy and will get stuck on the felt fibers.
An AIR-ERASABLE PEN works well too, but it requires you to stitch quickly before the lines fade away. I used one successfully for years before I discovered the heat-erasable version.
Tip: Always test out new pens on scrap felt to make sure the markings will indeed disappear in the way they are intended to before you use them on a project.
A MECHANICAL PENCIL will do in a pinch for marking embroidery lines on light-colored fabrics, but it won’t work on felt.
A good-quality GLUE GUN will make your life so much easier, and they aren’t costly! I’ve used a Surebonder detail-tip glue gun for years, and it has
been a very dependable tool. A dollar-store glue gun will probably leak and lead to frustration. It’s worth the effort to track down a good-quality glue gun with a fine tip so you can better control the flow of glue onto small areas. Note: You may need to use the same brand of glue sticks as your glue gun— check the manufacturer’s recommendations.
An IRON is essential for removing wrinkles from large pieces of felt and for adhering interfacing.
I also like to use a MINI HAIR STRAIGHTENER for small pieces of felt and for removing pen markings. A hair straightener is convenient to use because it heats up quickly and can get into small areas that are harder to reach with an iron.
For embroidery and regular hand sewing, use the size of HAND-SEWING NEEDLE that you’re most comfortable with. I prefer a size 9 embroidery (a.k.a. crewel) needle because it has an elongated eye, which is useful when stitching with more than one strand of thread. I also have an extra-long needle for threading through finished or semifinished projects, like the apples and the birds. A blunt-end darning needle is useful to have for stringing garlands.
A few projects in this book make use of a SEWING MACHINE, but alternative instructions are given if you don’t have one. If you do want to use a sewing machine, all you will need is a simple machine with standard stitch options.
Having a wide selection of 100% COTTON EMBROIDERY THREAD (FLOSS) to choose from will make your life easier. You don’t want to be running to the store for every project! I also like
Important Note: Embroidery floss is made of six strands of thread. For the projects in this book, you will be working with only one or two strands at a time. To separate the threads, cut a length of floss no longer than 18" (45.7 cm). Pinch the floss at one end and use your other hand to carefully pull one strand out at a time.
having some metallic and variegated options to keep projects interesting. I prefer using DMC brand embroidery thread, but Anchor brand is of equal quality. Stay away from discount brands if you can—the quality is not dependable or durable.
As long as your STRAIGHT PINS are sharp, use what you have! Mine are a very inexpensive option from the craft store.
Finally, a SEAM RIPPER can be handy in case of mistakes. Personally, I use my embroidery scissors to snip stitches and pull the thread bits out with tweezers, because I find that a seam ripper can sometimes put unwanted stress on the felt fabric. Use whatever method you prefer!
You’ll need a CLEAR RULER for marking straight lines. It’s convenient to have them in different sizes—I have several on hand—but a 12" (30 cm) ruler is versatile.
CLEAR SCOTCH TAPE is convenient for sticking small paper templates to felt. Use a good-quality brand, because it could be risky to use dollar-store tape.
Curve-ended TWEEZERS are great for stuffing projects or for picking up tiny pieces of felt or embellishments as you work.
I find BASEBALL-CARD SLEEVES very useful for keeping paper templates organized! I purchase them at the dollar store and cut them apart so I can keep them stacked in a small box on my desk. You’ll also see them used in the photo-frame project as well.
Plain white TISSUE PAPER is what you’ll need for transferring embroidery designs.
I’ve tried both cheap and expensive EMBROIDERY HOOPS. Honestly, for felt, I think the best value is
middle-of-the-road bamboo or wooden hoops that can be found in craft shops or online. You can also often find embroidery hoops, embroidery thread, buttons, and beads at thrift stores!
NEEDLE-NOSE PLIERS are used for trimming and bending floral wire (see below). They can be a standard pair from the hardware store.
Many projects call for EMBELLISHMENTS! Beads, sequins, buttons, bits of ribbon, felt balls in different sizes, and fabrics are great to have in your supply box.
For STUFFING in 3-D projects, you can use polyester stuffing, wool roving, or a combination of whatever you have on hand. I like to mix some shredded felt and thread scraps into my poly stuffing as a way of using them up and bulking up the stuffing. You’ll see this done both in the apple and bird projects. But don’t add colorful bits of felt into the stuffing for projects made with white felt, like the cloud—you’ll be able to see the colors through the felt.
IRON-ON ADHESIVE is great for fusing layers of felt or fabric together. I prefer using the Heat n Bond brand in a light to medium weight.
A lightweight, nonwoven, fusible INTERFACING adds structure and support to certain projects. It is available at local fabric stores.
Finally, you may need GREEN FLORAL WIRE, usually available at local craft stores: 18-gauge wire is perfect for felt florals, 20-gauge wire will work for small flower buds or leaves but isn’t sturdy enough for fuller flowers, and 16-gauge wire is not flexible enough. I prefer to purchase wire in precut 18" (45.7 cm) lengths rather than wrapped in a coil because it’s difficult to straighten out after it has been wrapped.
Whether you’re a seasoned felt crafter or you’re new to the medium, there’s a project in this book for you. I wanted the projects to be approachable and accessible, no matter your skill level. Embellishments can be scaled up or down on the basis of your confidence level and time availability. For example, you could make a single flower from the teacup bouquet and put it in a bud vase or make 30 flowers for a full-sized arrangement!
To this end, each project has a difficulty scale indicated on it from 1 to 5 both for the base design and the embellishment details. That way you’ll know which part of the project may or may not be challenging for you.
DIFFICULTY:
Light tracing
Great news! All the templates at the back of the book are 100% full size and ready to use. There’s no need to enlarge them unless you want to! There are several options for how to transfer the templates out of the book in order to cut the felt pattern pieces.
The template pages are perforated, so you have the option to remove the pages from the book and cut out the templates directly. However, you’ll lose whatever templates are on the back of the page this way.
With a photocopier, you can copy the pages you need out of the book and cut pieces out of the photocopy. This is an easy and accurate method that also saves the book! You can also download and print the pattern pages directly—see the link on page 143.
You can use white tissue paper or tracing paper and a pencil to trace the templates out of the book. However, tissue paper is delicate and difficult to cut around when it is pinned to felt. Regular printer paper is a sturdier and better option.
If you want to try tracing the templates onto sturdier printer paper, place a light source, like a small light pad or your phone with the flashlight turned on, under the book page. This will make the lines more visible through the thicker layers of paper.
There’s typically not much prep work involved with felt. But if your felt is creased or wrinkled, you should iron it out before you cut out any pattern pieces. You can directly iron both wool-blend and 100% wool felt with a medium-high heat and little to no steam. Creases in felt will iron out beautifully—just apply a light pressure with the iron so you don’t accidentally flatten the felt too much by compressing the fibers. For small or scrap pieces of felt, I like to use a mini hair straightener to gently flatten out the wrinkles. A quick, gentle ironing, even with a little steam, will not shrink the felt in any significant way.
WARNING: If you’re using acrylic felt, it might melt under high heat! Begin with a low heat and place a piece of cotton fabric between the felt and iron, to be safe.
A lot of sewing projects using cotton fabrics require you to prewash the fabric, so if you’re coming from a quilting or sewing background, you may be inclined to wash the felt before you start a project. But I never prewash my felt. It’s not necessary unless the finished item will need laundering in the future, like clothing with felt appliqué—but none of the projects in this book involve clothing. If you would still feel more comfortable prewashing your felt, there is an explanation of how to do it on page 27.
Once you’ve gotten your paper templates transferred and cut out, there are four main methods you can use for cutting out the felt pattern pieces, depending on the size and shape of the template you’re working with.
PIN AND CUT: For medium to large pattern pieces, simply pin the paper template directly to the felt using straight pins and cut around it.
TAPE AND CUT: For small, detailed, or curved pieces, place your paper template on the felt and secure it in place with a piece of clear Scotch tape that extends slightly past either side of the template. Cut through both the tape and the felt at the same time using small embroidery scissors. Gently peel the template off the felt. Don’t worry, the tape will not damage the felt.
DUPLICATE AND CUT: For projects that require the front and back of an item to be identical, such as the cloud, coasters, and photo frame, the most accurate strategy is to cut the first side out using one of the first two methods, then use the piece you’ve just cut out as a guide by pinning it onto a second piece of felt and cutting around it.
TRACE AND CUT: For really large templates, like the trinket dish, zip pouch, and notebook cover, you can lay the paper template on the felt and carefully trace around it using an appropriate marking tool such as a heat-erasable pen. Cut out the felt along the lines you’ve marked. This strategy works well for templates that have long, straight edges.
I don’t recommend cutting out two layers of felt at once unless you’re extremely confident in your cutting skills and have excellent scissors. This is an option only if the front and back of the project are the exact same shape and color, like the raindrops. However, the layers of felt will probably shift as the scissors run through them, and you are unlikely to end up with well-matching pieces.
If you realize, while you’re assembling your project, that the front and back don’t match up perfectly, don’t fret! Simply trim one (or both) of the layers to fit. Perfection is not necessary when working with felt.
If the piece you’ve cut turns out to be too small, you’d be surprised how much stretch and give felt has. Gently wiggle and push the felt into the space it’s supposed to fit. This is often the case when two felt pieces need to fit together side by side, like the rainbow arcs on the banner. It’s very difficult to cut felt so accurately that there will never be gaps or the need for adjustments.
Trimming to get a better match
Felt is susceptible to the effects of the elements and to everyday wear and tear. There’s no such thing as stain-resistant, wrinkle-proof felt. But don’t let that scare you off from using felt to create useful, usable items! Here are a few ways to care for your felt creations to help them last as long as possible.
If your felt item gets lightly soiled with a beverage, food crumbs, or a makeup mishap, it may be possible to tidy it up with spot cleaning. If you’re facing a significant oily stain or tomato sauce, it might not be salvageable, but it’s always worth a try.
HOW TO DO IT: Dampen, but don’t soak, a clean cloth or sponge with cool water and a mild soap. Dab gently at the spot, but be careful not to rub the felt, which could both damage the felt and spread the stain. Take a fresh cloth and gently press it into the spot to soak up any excess water or soap left behind.
Tip: To help prevent stains or soiling, you can spray your finished felt projects with a fabric protector like Scotchgard. However, don’t attempt to use an iron or straightener to heat-reshape any projects that have been sprayed. Carefully review the manufacturer’s instructions before use.
Spot cleaning
Removing pilling
Prewashing is really only necessary if the finished item will need laundering in the future. Prewashing will shrink and thicken the felt, so make sure the felt piece you start with is about 20% larger than what you will need for your project. For example, if you need a 10" x 10" (25.5 x 25.5 cm) piece for your project, prewash a 12" x 12" (30.5 x 30.5 cm) piece.
HOW TO DO IT: Under a running tap of hot water, add a bit of mild soap to the felt and soak it in the water. Then gently squeeze the water out of the felt. Repeat several more times with water alone until the water runs clear. Lay flat to dry, then iron out the wrinkles.
Note: Not all colors will run. Reds, pinks, and warmer tones are more likely to run than cooler blues and greens.
Well-used felt projects, like a key chain tossed into a purse or a pouch tossed into a makeup bag, will eventually pill and get fuzzy from the constant contact with other objects.
HOW TO DO IT: Use the point of a small pair of embroidery scissors to carefully snip away any larger pills that are protruding from the item. Next, very carefully shave off the remaining fuzziness by holding your scissors flat against the felt and slowly making shallow cuts.
Sometimes flower petals and leaves get bent or misshapen from being handled and moved around. But a bit of heat, carefully applied, will easily breathe new life back into felt florals.
HOW TO DO IT: Use a small hair straightener to reshape bent leaves. Just be careful to avoid areas that have hot glue in them, because the glue will melt with heat and could seep out into your project.
Flat items, like coasters, may develop indents from cups or other objects sitting on them.
HOW TO DO IT: A gentle ironing, with little to no steam, can work out those indents. (Just make sure there’s no prior stains on the felt, or ironing could set the stain further.)
If you’re consistent with regular dusting in your home, then a gentle once-over with a feather duster should keep your felt décor looking fresh. But if your busy home gets dusted as (in)frequently as mine does, try one of these techniques.
HOW TO DO IT: A light coating of dust can be removed with a lint roller or balled-up piece of tape. Harder-to-reach areas could benefit from a gentle brushing with a soft-bristled toothbrush. If the piece has collected several weeks’ (or months’) worth of dust, you can try using a blast from either a hairdryer (on a low, cool setting) or a canister of compressed air and following up with a lint roller.
Note: If the piece was located near a kitchen and has layers of greasy, grimy dust on it, thank it for its service and bid it a fond farewell. There’s no coming back from that.
Felt will fade if left in the sun, and there’s nothing you can do to reverse it. Just be aware of this when you’re deciding where to display your crafty felt achievements.
So, to sum up, how durable are felt creations? Well, art pieces that are never roughly handled and get hung up, kept out of the sun, and regularly dusted
will last a good long time. But the pieces that are loved, used, shared, and displayed prominently will sooner or later show signs of a life well lived. And isn’t that the goal? For us as well as our creations? I want my home to speak volumes about who I am, what I love, and how I’ve spent my time crafting a life that I adore. So, if my felt flowers are a little dusty and faded? That just means I’ve loved them a long time!
These are the 10 hand-embroidery stitches required for completing the projects in this book. If some of them are unfamiliar to you, I recommend practicing them by using acrylic felt or felt scraps before beginning the project. The French knot and the ladder stitch in particular can be tricky to get the hang of, but your confidence will grow the more you practice!
Bring the needle up at 1 and down at 2, creating a simple, single stitch in the required length.
USED FOR: Creating a running line of stitches to join two pieces of fabric and adding detailing stitches to embroidery
Bring the needle up at 1 and down at 2 to create one stitch. Bring the needle back up at 3, one stitch width ahead from 2, and then go backward to bring the needle down at 4 (the same hole as 1). Repeat to create an unbroken line of stitching.
USED FOR: Outlining and layering felt pieces onto projects
Bring the needle up at 1 and down at 2 to create a single stitch. Bring the needle back up at 3, through the middle of the threads in the previous stitch, splitting them in half. Bring the needle back down at 4, creating another stitch. Repeat.
USED FOR: Embroidering text and creating smooth, curved lines
Bring the needle out at 1, along the raw edge of the fabric. Put the needle back down through the fabric at 2 to create a loose stitch, at a position diagonal from 1 and equal to the distance of one stitch width both across and down. Pull the needle out from the back of the fabric, bringing it up at 3, catching the thread under the needle and pulling the stitch gently taut against the edge of the fabric.
USED FOR: Joining fronts and backs of projects together and finishing the edges of projects
Bring the needle up at 1. Holding the thread taut in your opposite hand and perpendicular to the fabric, wrap the thread around the point of the needle three times. As you pull the needle back down at 2 (through the same hole as 1), gently pull the thread taut around the needle to create a tight stitch.
USED FOR: Embroidery designs
Bring the needle up at 1 and back down at 1 to create a loop on the top of the fabric. Pull the needle out through the back of the fabric, but don’t pull the thread all the way through yet. Bring the needle back up at 2, one stitch length away from 1, inside the thread loop. Pull the loop thread gently snug, then put the needle down at 3 to lock the petallike stitch in place. You can repeat in a circle to create a whole flower shape.
USED FOR: Creating petals or leaves in an embroidery design
Create a straight stitch about 3/16" (0.5 cm) long by coming up at 1 and down at 2. Next, create two shorter straight stitches on either side of the first, at 3 and 4 and 5 and 6.
USED FOR: Creating tiny embroidered leaves and as the base for creating tiny bees (this stitch is of my own creation— you won’t find it in any other embroidery guides!)
Begin by creating a foundational line of backstitching. With a matching or a contrasting thread color, bring the needle up at the first backstitch at 1. Whip the thread around the backstitches by carefully working the needle under the stitches but not through the fabric. Put the needle back down at 2, at the end of the complete line.
USED FOR: Creating more-seamless outlines or a baker’s twine effect in embroidery designs
With your fabrics overlapping, bring the needle up at 1 and back down at 2 over the edge of the first fabric and into the second. Angle the needle and bring it back up at 3, one stitch width away from where you began at 1. Continue up the seam.
USED FOR: Joining two pieces of fabric together where a blanket stitch or a backstitch would be too awkward to achieve
With the raw edges of the seam allowance folded toward the inside of the project, bring the needle up at 1 on one side of the opening. Bring the needle across the opening and into the fabric at 2. Bring the needle up at 3, one stitch width away from 2, then across the opening again and back down into the fabric at 4. Once you have created three to four stitches, begin gently pulling the thread to draw the opening closed.
USED FOR: Creating an invisible seam between two fabrics in order to contain the seam allowance inside a project
It’s finally time to dive into the projects! In this section of the book, you’ll find detailed instructions for making 18 unique and lovely projects that I hope will inspire you and quench your thirst for creativity. Each project includes a detailed materials list, including how much felt you’ll need, and there are many tips mixed in throughout to give you ideas for how to customize projects and adapt them to your own tools and skillset. I can’t wait
to see what you make!
BASE DESIGN DIFFICULTY: | EMBELLISHMENT DIFFICULTY:
The brilliance of the rose and the whiteness of the lily do not lessen the perfume of the violet or the sweet simplicity of the daisy.
I CONFESS: I’M A LITTLE TIMID WHEN IT COMES TO HOME
DECORATING. I usually play it safe with light paint colors and neutral furniture And yet, my Pinterest boards are full of vibrant colors, bold patterns, and fun décor! So I’m challenging myself, one color and item at a time, to infuse my home with the whimsical style I aspire to . These daisy coasters are an easy way to experiment with adding a floral-themed pop of color to an otherwise neutral coffee-table surface I went with pastel shades, but these simple and sweet daisies would also shine in brights or jewel tones!
• Color of choice felt for coaster front and back: 5" x 10" (12.7 x 25.5 cm)
• Cream or white felt for petals: 2" x 8" (5 x 20.3 cm)
• Yellow felt for flower center: 1 1/4" x 1 1/4" (3.2 x 3.2 cm)
• Embroidery thread colors: to match all felt colors, and pale yellow
• Pins and sewing needle
• Embroidery scissors
• Fabric shears
• Templates (page 159)
Cut eight cream-colored petals, one yellow circle, and two large flower shapes in the color of your choice.
NOTE: Of all the projects in this book, these coasters are the most likely to suffer stains from tea or coffee. Try to deal with beverage spills as soon as they happen, but know that your coasters are likely to remain stained over time. And that’s okay; it just means you used them well!
Find the flower’s center. Fold the paper-flower template into quarters Hold it against the felt flower front and mark the center of the flower with a pin at the point created by the paper
Sew the yellow circle. Position the yellow circle in the center of the flower, using the pin placement as a guide Stitch the circle in place using a single strand of matching embroidery thread and a small backstitch .
Sew all the petals. Stitch the petals in place one at a time using a single strand of matching embroidery thread and a small backstitch, making sure they’re centered in their allotted space .
Add the petal-detailing stitches. use two strands of matching cream-colored thread to add a downwardfacing cluster of three lazy-daisy stitches at the top of each petal Make the middle stitch slightly longer than the left and right stitches . 4
Add the yellow stitching details. Choose a thread color that is a couple of shades lighter than the yellow circle center use two strands of thread to create three lazy-daisy stitches at the base of each petal Make the stitches emerge from the seam between the petal and yellow center
Add the stitching between petals. using a thread color that matches the flower color, add two lazy-daisy stitches in a “V” shape between all the white petals 6 7
Sew the front and back together. Layer and pin together the finished coaster top and the backing piece use two strands of matching thread and a small blanket stitch to join them all around the outer edge .
BASE DESIGN DIFFICULTY: | EMBELLISHMENT DIFFICULTY:
And to all this she must yet add something more substantial, in the improvement of her mind by extensive reading.
—JANE AUSTEN, Pride & Prejudice
IF YOU’RE A BOOKISH INTROVERT LIKE ME, then you probably agree that holding a steaming drink in one hand and a book in the other, while tucked under a cozy blanket, is pure bliss The rest of the world slips away, and for a few quiet moments, all that matters is the story you’ve sunk into So, for such a cherished experience, why is it that bookmarks are usually a tattered grocery receipt, a paint-chip sample, or a forgotten bit of homework?! It’s time to level up the reading experience with a beautiful bookmark that reflects our love and respect for the pages
• Color of choice felt for bookmark: 5" x 5" (12.7 x 12.7 cm)
• Yellow felt for sun: 1 1/4" x 2 1/4" (3.2 x 5.7 cm)
• Embroidery thread colors: to match all felt colors, darker yellow, pale pink, coral, and
metallic gold (or additional shade of yellow)
• Lightweight fusible interfacing: 4" x 4" (10.1 x 10.1 cm)
• Pins and sewing needle
• Embroidery scissors
• Fabric shears
• Heat-erasable pen
• Ruler
• Heat source (hair straightener or iron)
• Templates (page 151)
Cut two felt triangles in the color of your choice, one triangle in fusible interfacing, and one yellow felt half sun.
Attach the sun. Center the sun on one of the felt triangles about 3/16" (0 .5 cm) from the long edge . use a single strand of matching embroidery thread to attach the sun with a small backstitch
the edge of the sun and back down into the holes from the backstitches to create an outline of tiny triangles around the sun .
Mark the lines for the rays. use a ruler and a heat-erasable pen to draw 16 lines around the sun The lines should start 1/8" (0 .3 cm) from the curve of the sun and stop 3/16" (0 5 cm) from the edge of the bookmark Feel free to add more or fewer sunshine lines, but you must have an even number of them .
Tip: Alternatively, you can use the tissue-paper method of transferring the embroidery lines using the guide on the template page. Find this method described in steps 3–4 of the rainbow banner project on pages 60–61.
Begin the sun’s rays. The rays are made with a whipped backstitch Begin by using two strands of a darkeryellow thread to stitch the straight, foundational lines with a small backstitch use a heat source to gently remove the embroidery markings .
Finish the rays. use two strands of metallic-gold thread to finish the rays by bringing the needle up in the hole of the first backstitch, whipping it around each stitch down the ray, and then passing it back down in the hole of the last backstitch
Tip: Metallic thread can be tricky to work with. Using shorter lengths, no more than 10" (25.5 cm) long, will reduce the chances of tangles.
Add embroidery between the rays. use a single strand of pale-pink thread to add tiny stars in the eight alternating sections between the rays Three tiny, overlapping straight stitches will form one six-pointed star Add three to four stars per space . use a single strand of coral thread to fill in the gaps between the stars with French knots
Adhere the interfacing. Follow the manufacturer’s instructions to gently iron the interfacing to the backside of the sun embroidery To be extra safe, you can layer a thin piece of cotton fabric between the bookmark and the iron
Finish the raw edge. Finish the angled edge of the front of the bookmark with two strands of matching thread and a small blanket stitch This will further hide and secure the interfacing in place while creating a clean look for the front of the bookmark to match the other edges
Sew the front and back together. Layer the front and back of the bookmark and pin (or hold) them together Join them with a blanket stitch using two strands of matching thread
You could embroider a name, an initial, or something fun like “well read,” “bookish,” or “do not disturb” to personalize the back of the bookmark!
BASE DESIGN DIFFICULTY: | EMBELLISHMENT DIFFICULTY:
It’ll be spring soon. And the orchards will be in blossom; and the birds will be nesting in the hazel thicket; and they’ll be sowing the summer barley in the lower fields; and eating the first of the strawberries with cream. Do you remember the taste of strawberries?
—J. R. R. TOLKIEN, The Return of the King
I LOVE FINDING LITTLE WAYS to romanticize my life and add extra whimsy to daily occurrences I also value making the most of the goodquality belongings I already own and finding new ways to give them life after their decorative appeal has worn off I’d hazard a guess that we all have a few mugs lying around that are either very plain or very ugly but otherwise perfectly functional . A charming cozy can give an old mug a new lease on life, all while elevating the experience of enjoying a hot beverage . Pair it with a batch of homemade jam cookies for a delightful hostess gift!
• Color of choice felt for cozy front and back: 7" x 11" (17.8 x 28 cm)
• Dark-red felt for jam pot and cookie centers: 4" x 2" (10.1 x 5 cm)
• White felt for label and flowers: 1" x 3" (2.5 x 7.6 cm)
• Medium-red felt for strawberries: 1 1/4" x 3" (3.2 x 7.6 cm)
• Green felt for leaves: 2" x 3" (5 x 7.6 cm)
• Light-brown felt for jam lid: 1" x 2" (2.5 x 5 cm)
• Oat-colored felt for cookies: 2 1/2" x 2 1/2" (6.4 x 6.4 cm)
• Embroidery thread colors: to match all felt colors, medium bright yellow, pale yellowish green, and to match button choice
• Flat button: 3/4" (2 cm) in a coordinating color
• 1/8" (0.3 cm) wide elastic: 3"–3 1/2" (7.6–8.9 cm) long
• Sewing-machine thread to match the cozy (optional)
• Pins and sewing needle
• Embroidery scissors
• Fabric shears
• Heat-erasable pen
• Heat source
• Sewing machine (optional)
• Templates (page 145)
Cut out one cozy front and back, one jam pot, one jam-pot top, one jampot label, four cookie hearts, four jam hearts, two large strawberries, two small strawberries, two large leaves, four small leaves, and two flowers.
NOTE: This cozy is designed to fit a standard-sized mug that is 3 3/4" (9.5 cm) tall and 3 1/8" (8 cm) across, but it will still fit slight variations to these measurements because of the stretch in the elastic.
Attach the jam pot. Center the jam pot on the front of the cozy and stitch it in place with a single strand of matching red thread and a small backstitch Switch to a single strand of white thread and repeat some stitches along the lower left and bottom right of the pot, using the same needle holes . This extra stitching gives the jar the illusion of shine and dimension
Add the jam lid. Overlap the ruffles of the lid on top of the jam pot and stitch it in place with a single strand of matching thread . Add a line of whipstitching across the lid, using white for the foundational backstitching and red to whip around to mimic baker’s twine use one strand of red and one strand of white together to add two lazy-daisy stitches for the bow of the twine
Embroider the text. use a heat-erasable pen to draw the text onto the jam label Stitch the text with two strands of red thread and some long backstitches . Remove the embroidery markings Sew the label to the jam pot with a single strand of matching white thread and a backstitch .
Prepare the strawberries and cookies. Sew the small red hearts onto the cookie hearts using a single strand of matching red thread and a tiny backstitch Add seeds to the strawberries with a single strand of paleyellowish-green thread and several teeny-tiny straight stitches
6 5 7
Add the strawberries. use a single strand of matching thread and a backstitch to attach the strawberries use two strands of green thread to add four lazy-daisy stitches to the top of each strawberry to create its leaves
Attach the leaves. Attach two large and two small leaves around the base of the jam pot and two small leaves on either side for the flowers use a single strand of matching green thread, and stitch a line of small backstitches down the center of each leaf . Create veins on each leaf by adding longer stitches that stem from the holes between backstitches and extend almost to the edge of the leaf
Add the flowers. use a single strand of matching white thread to attach each of the flowers with five straight stitches down the center of each petal, all of which meet in the middle of the flower Switch to two strands of bright-yellow thread and add six French knots to the center of each flower .
Attach the cookies. use a single strand of matching thread and a backstitch to sew down the cookies, scattered around the cozy Tilt the cookies slightly to the left or right to keep things playful .
Sew on the button. use two strands of matching thread to sew the button securely in place inside the extension of the cozy Make sure to leave space around the button for the sewing-machine foot to get around, about 1/4"–3/8" (0 6–1 cm) from the end of the extension
Join the front and back together. Pin the front and back of the cozy together Fold the piece of elastic in half and tuck the ends, about 1/2"—3/4" (1 .3–2 cm), between the layers of felt, at the opposite end from the button Pin the elastic in place use a sewing machine to stitch the layers together about 1/8" (0 .3 cm) from the edge of the felt, using a straight stitch
Tip: Alternatively, you can hand-sew the layers together using a blanket stitch and two strands of matching thread. Just be sure to add a few extra stitches to lock the elastic in place.
Opportunity for creativity: Feel free to add more or fewer of each design element as you prefer! If you want only strawberries, then add a dozen. Or you could do three pots of jam in different colors for strawberry, blueberry, and grape. Or do three rows of cookies and nothing else. The joy is in mixing it up and making it personal!
BASE DESIGN DIFFICULTY: | EMBELLISHMENT DIFFICULTY: N/A
Oh, look, there’s one little early wild rose out! Isn’t it lovely? Don’t you think it must be glad to be a rose? Wouldn’t it be nice if roses could talk? I’m sure they could tell us such lovely things.
—LUCY MAUD MONTGOMERY, Anne of Green Gables
I LOVE FLOWERS, but I’m really bad at keeping the real ones alive, so despite Anne’s proclamation, I’m relieved mine can’t talk! Felt florals are the perfect solution for me because they’re beautiful and thrive on neglect! Teacup bouquets can be made in whatever color scheme suits your space and are perfect for dressing up a shelf, creating a vignette, or being used as name-card holders in a tablescape using a pretty teacup as a vase is a great upcycle of a family treasure you don’t want to part with, or they can be thrifted for only a few dollars apiece
• For one rose (three are required per bouquet):
• Color of choice felt for petals: 6" x 8" (15.3 x 20.3 cm)
• Green felt for four-pointed leaf: 2 1/2" x 2 1/2" (6.4 x 6.4 cm)
• For one carnation (three are required per bouquet):
• Color of choice felt for petals: 6" x 6" (15.3 x 15.3 cm)
• Green felt for four-pointed leaf: 2 1/2" x 2 1/2" (6.4 x 6.4 cm)
• Green felt for filler leaves and circle: 3" x 5 1/2" (7.6 x 14 cm)
• 18-gauge floral wire
• A pretty teacup
• Hot-glue gun
• Needle-nose pliers
• Embroidery scissors
• Fabric shears
• Templates (page 146)
For each rose, cut four small circles, nine medium circles, four large circles, and one green four-pointed leaf. For each carnation, cut one small heart, four flower spirals, and one green fourpointed leaf. Additionally, cut five large green leaves and one green circle per bouquet. Cut the floral wire into six 4 1/2" (11.4 cm) lengths using the pliers.
NOTE: One bouquet large enough to fill a teacup requires three roses and three carnations. Yes, cutting out all those petals will take forever; put on a movie to keep you company, and enjoy the process!
Create the flower center. Glue the end of a wire onto one side of the heart-shaped piece . Add glue to the other half of the heart, fold it over onto the wire, and hold it closed until the glue sets The end of the wire should now be completely encased in felt
Wrap the first petal layer. Add a dot of glue to one end of a flower spiral and adhere it to the flower center Hold until the glue sets . Add a thin line of the glue along the inner edge of the spiral and wrap it around the flower center
Add the next two petal layers. Add a dot of glue to the end of the second spiral and stick it in place on the flower where the previous spiral ended . Wrap and glue the rest of the spiral in place Repeat with a third spiral
Wrap the remaining petal layer. Decide on the best positioning for the remaining spiral so that the petals appear evenly distributed and aren’t too stacked, one on top of the other Add a thin line of glue along the inner edge of the spiral and wrap it around the flower . Hold it in place until the glue sets
Add the leaf. Snip a tiny hole into the center of the fourpointed leaf and feed it up the wire Add a dot of glue to the base of all four leaves and secure them to the flower
Tip: When wrapping in step 4, make sure to keep the inner edges of the spirals flush as you wrap them, so that the finished flower has a relatively flat bottom.
Tip: It may take some practice before you feel comfortable rolling flower petals for roses. Use some scraps or some acrylic felt to try it a few times until you get the hang of it.
Roll the center. Add a squiggle of glue to the bottom half of one of the small circles . Lay the end of a wire in the glue, as close to the right side of the circle as possible and making sure that the wire does not extend up beyond the glue Carefully roll the circle around itself and the wire Hold until the glue sets . The wire end should be completely hidden .
Add the remaining small petals. Working one at a time, add glue to the bottom half of each of the remaining three small circles and wrap them around the flower center They will overlap, but should be spaced out evenly and not stacked . Make sure that the bottom of each circle is flush with the circles already on the stem
Finish the flower. Space and glue the last four large circles evenly around the flower, in a north, south, east, west configuration . Add a four-pointed leaf in the same manner as with the carnation in step 5
Add the medium-sized petals. The nine medium-sized circles are added to the flower in three layers of three circles Space three circles around the flower center evenly, then do another layer of three circles spaced evenly around, and then do the final layer of three circles
don’t shift, fit all six stems through the hole in the green circle Add a generous amount of glue all around the circle and pinch it upward around the group of stems Hold until the glue sets Add more glue if needed to prevent any of the stems from shifting
Size the bouquet. use pliers to begin bending the bottom ends of the wires into curves of equal height that will rest on the bottom of the teacup Test the bouquet in the cup The flowers should be at a height where they rest slightly on the rim of the cup . If necessary, adjust the curves in the wire ends to get a good fit
Finish the arrangement. Glue the remaining five large green leaves around the perimeter of the arrangement, between the flowers, so the inside of the teacup will not be visible Set the arrangement in the teacup and enjoy!
Adaptability: It is not necessary for the bouquet stems to be glued to the bottom of the cup— the weight of the flowers resting on the rim will keep them in place. This makes it easy either to swap out the bouquets or to actually use the teacups for teatime. I love multifunctional décor!
BASE DESIGN DIFFICULTY: | EMBELLISHMENT DIFFICULTY:
The way I see it, if you want the rainbow, you got to put up with the rain.
—DOLLY PARTON
I LOVE CREATING PROJECTS THAT ARE EASILY ADAPTABLE TO SUIT A SPACE. This rainbow banner can be customized to decorate a child’s bedroom, an entryway gallery wall, or even a guest room . you can personalize the color scheme with neutrals, pastels, or jewel tones, and you could add you own flair to the text by changing it to say “welcome,” “be our guest,” or “please leave by 9”! you could swap out the butterflies for little hearts or stars or use glitter felt for one of the arcs It’s also lightweight enough to be hung with only a pushpin or some tape, so you can try it out in different locations like on a door or the back of a bookshelf, without risk of damage .
• Cream banner felt: 6 1/2" x 18" (16.5 x 45.7 cm)
• Color of choice felt for outer arc: 4" x 5 1/2" (10.1 x 14 cm)
• Color of choice felt for middle arc: 3 1/2" x 4 1/2" (8.9 x 11.4 cm)
• Color of choice felt for inner arc: 3" x 3" (7.6 x 7.6 cm)
• Yellow felt for butterflies: 1" x 2" (2.5 x 5 cm)
• Embroidery thread colors: to match rainbow arcs and background felt; dark navy blue; and copper
• Dowel (or stick): 1/4" (0.6 cm) thick x 7" (17.8 cm) long
• Thin cording: 10"–12" (25.5–30.5 cm)
• White tissue paper: 2 1/2" x 5" (6.4 x 12.7 cm)
• Pins and sewing needle
• Embroidery scissors
• Fabric shears
• Tweezers
• Heat source
• Pencil
• Sewing machine (optional)
• Templates (pages 150–151)
Cut out two banner pieces, one each of the outer, middle, and inner rainbow arcs, and two butterflies. Cut the dowel to size if necessary.
Sew the outer arc. Center and pin the largest outer arc of the rainbow onto the front of the banner Sew it in place around all the edges using a single strand of matching embroidery thread and a backstitch
Sew the middle and inner arcs. Attach the remaining two arcs using single strands of matching thread and a backstitch . Stitch the arcs so their edges lie snugly one against the other you may need to trim the straight bottom edges of the arcs to make them line up nicely This is normal when working with felt, since the fabric can stretch a little during cutting or sewing
Begin embroidering the text. Trace the text onto a piece of tissue paper using a pencil Center and pin the paper beneath the rainbow . Begin by embroidering the outline of the text with two strands of dark-navy-blue embroidery thread and a backstitch Stitch through the paper and felt together .
Finish the text embroidery. Once the outline of the text is complete, carefully tear away the paper use a pair of tweezers to release the smaller bits of paper from the stitching Fill in the hollow sections of the letters with more backstitching until no background felt remains visible
Attach the butterflies. use two strands of copper thread and a few long straight stitches both to secure the butterflies to the banner and to create the butterfly bodies Work the stitches around the creases of the butterflies rather than through them
Prepare the butterflies. use a small hair straightener or an iron to carefully press the butterflies closed and create creases down their centers This will allow the butterflies to pop off the banner and appear like they are flying . Sew the banner. Pin the front and back of the banner together using a few pins, mark a line 3/4" (2 cm) down from the top edge of the banner . use a single strand of matching embroidery thread and a running stitch to join the front and back together, first along this 3/4" (2 cm) line (a running stitch is simply a line of straight stitches with gaps between the stitches)
Finish sewing the banner. Continue sewing the banner front and back together using a running stitch around the left, bottom, and right edges . Add an additional line of stitching along the top edge to create a pocket for the dowel to be inserted
Add the dowel and cord. Insert the dowel into the pocket between the layers of felt at the top of the banner Tie the cord around the ends of the dowel to your preferred length for hanging
Tip: Alternatively, you could use a sewing machine to sew the front and back of the banner together if you prefer.
You could turn this banner into an adorable garland instead if you shrink the pattern down, omit the text embroidery, and string together 10–12 of them. Make the colors a rainbow of rainbows!
BASE DESIGN DIFFICULTY: | EMBELLISHMENT DIFFICULTY:
It is rarely the food that truly makes a meal, but the people we share it with. . . . A friend, lost in a memory, but alive in the taste of a half-burnt brownie. Love in a lemon pie.
—ASHLEY
I’M OBSESSED WITH CITRUS-FLAVORED ANYTHING. Teas, desserts, salads, pasta dishes—I live for lemons! Lemons are fresh and summery and brighten up a moment simply by existing I can see these citrus cupcake toppers being perfect for a sweet garden picnic, but I also love the idea of using them to celebrate life’s littlest wins too Don’t wait for a birthday or anniversary to do something special Did you finish your bookclub book on time? Celebrate . Did you hold your tongue when a coworker irritated you? Good job . Did the first tulips pop up after a long winter? Party time! It’s all about finding joy in the simple moments and adding whimsy to the celebrations
• For one citrus wedge (make four or more):
• Color of choice felt for rind and segments: 2 1/2" x 3 1/2" (6.4 x 8.9 cm)
• White felt for pith: 1 1/4" x 2" (3.2 x 5 cm)
• Green felt for leaf: 1 1/4" x 1 1/2" (3.2 x 3.8 cm)
• For one whole citrus fruit (make four or more):
• Color of choice felt for rind: 2 1/2" x 3 1/2" (6.4 x 8.9 cm)
• White felt for flower: 1 1/4" x 1 1/4" (3.2 x 3.2 cm)
• Green felt for leaf: 1" x 2" (2.5 x 5 cm)
• Embroidery thread colors: to match citrus color, white (for wedge design only), metallic gold (optional) (for wedge design only), and yellow (for whole design only)
• Yellow seed beads (optional)
• Seed beads in color to coordinate with felt (optional)
• Toothpicks
• Stuffing (polyester or wool)
• Hot-glue gun
• Pins and sewing needle
• Embroidery scissors
• Templates (page 153)
For one wedge, cut two colored rinds, one white pith, four colored segments, one green leaf, and one small circle. For one whole fruit, cut two colored rinds, one white flower, one green leaf, and one small circle.
Attach the pith. Sew a white pith to a rind using a single strand of matching white thread and a backstitch along the curved edge only . The straight edges should be flush and will be stitched at a later step
Add the segments. Space the four citrus segments out evenly around the pith, making sure to leave space for the edge stitching across the straight edge of the wedge use a single strand of gold or metallic thread (optional) and a small backstitch to attach each piece
Join the wedge front and back. Pin or hold the front and back of the wedge together use two strands of matching white thread to sew the sides together with a blanket stitch along the straight edge Decide on the placement for the leaf piece
Finish joining the front and back. Switch to two strands of matching thread and continue stitching around the curve of the wedge with a blanket stitch
As you stitch around, tuck the leaf piece between the front and back layers of the wedge, about 1/4" (0 .6 cm) inside, and catch it in place with the blanket stitching
Add the beading. use a single strand of matching thread to attach a selection of seed beads to the front of the fruit . Feel free to add as many or as few as you’d like and to play around with the placement
5
Prepare the flower. use a single strand of yellow thread to attach six yellow seed beads to the center of the flower Place one bead in the very center and distribute the remaining five around it
Tip: If you prefer not to use beads, you can create a similar effect by stitching French knots with two strands of thread in the appropriate colors.
Join the front and back. Pin or hold the front and back of the fruit together and use two strands of matching embroidery thread to start joining them together with a blanket stitch
Add the stuffing. Before fully stitching the fruit closed, add some stuffing A small to moderate amount of stuffing is sufficient; if the fruit is too plump, it will be difficult to glue on the remaining elements Finish sewing the fruit closed
Attach the leaf and flower. Add a small line of glue to the top of the fruit and adhere the leaf piece in place Add a dot of glue to the back of the flower and stick it to the top of the leaf
Add the toothpicks. For both types of cupcake topper, use hot glue to secure a toothpick to the back of the fruit Cover the end of the toothpick with the small felt circle and glue it in place
Opportunity for adaptation: These fruits and wedges would also be super fun strung together in a garland, if you copy the template at around 145% to enlarge it!
Business is personal at Better Day Books. We were founded on the belief that all people are creative and that making things by hand is inherently good for us. It’s important to us that you know how much we appreciate your support. The book you are holding in your hands was crafted with the artistic passion of the author and brought to life by a team of wildly enthusiastic creatives who believed it could inspire you. If it did, please drop us a line and let us know about it. Connect with us on Instagram, post a photo of your art, and let us know what other creative pursuits you are interested in learning about. It all matters to us. You’re kind of a big deal.
www.betterdaybooks.com better day books
LEARN HOW TO BRING A COZY, HANDMADE FEEL TO YOUR HOME WITH THESE 18 BEGINNER-FRIENDLY FELT CRAFTS THAT YOU CAN CREATE IN AN AFTERNOON!
Felt is a soft, colorful, and affordable material that’s perfect for beginners. And, with just a few simple supplies and the expert guidance of designer Laura Nightingale, you’ll be able to transform it into adorable decorations and practical home accessories that are sure to be loved for years—even if you’ve never sewn before!
Inside this book, you will learn how to choose felt, cut and shape it using the provided templates, and master 10 simple embroidery stitches. You’ll also find step-by-step instructions and beautiful photos for 18 projects, including faux houseplants, cozy coasters, cute party banners, a bird mobile, a trinket dish, a zip pouch, and more.
Here’s what’s inside:
18 step-by-step projects with detailed instructions and beautiful photography
Everything you need to get started, including tips for choosing felt, using templates, and customizing your designs
An embroidery stitch guide with 10 essential stitches used throughout the book
Over 20 pages of ready-to-use pull-out templates, plus a link to downloadable files you can print at home
You’ll be amazed at all you can stitch with one simple material!