10 minute read
Five Tips for Lighting that Makes a Difference


FIVE TIPS FOR LIGHTING
THAT MAKES A DIFFERENCE
Advertisement
By Roberto Valenzuela, Canon Explorer of Light
ROBERTO VALENZUELA WILL BE ONE OF THE TALENTED SPEAKERS AT THE 2022 CANADIAN IMAGING CONFERENCE AND EXPO (CICE). THE FOLLOWING IS A SHORT LIST OF FIVE TIPS THAT CAN HELP TO PROVIDE ATTRACTIVE AND FLATTERING LIGHT IN MANY DIFFERENT CONDITIONS
TIP 1: HAVE A LIGHTING BENCHMARK
When shooting with natural light, I strongly believe in the power of having a benchmark in mind regarding the quality of light. What I mean by this is, having a lighting quality goal to strive for, something quantifiable. Not all natural light falls the same way in your surroundings. The quality of light could literally double just a few feet from where you may be standing. In my book “Picture Perfect Lighting”, I wrote the benchmark I use for people photography. Here it is:
Outdoor Sunny Day Lighting Benchmark:
Shutter: 1/500 Aperture: f/4 ISO: 100
Cloudy Day or Large Open Shade Benchmark:
Shutter: 1/500 Aperture: f/4 ISO: 400
Indoors Benchmark:
Shutter: 1/500 Aperture: f/4 ISO: 800
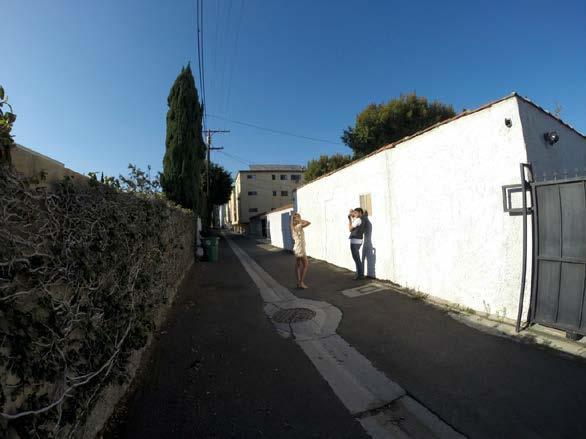
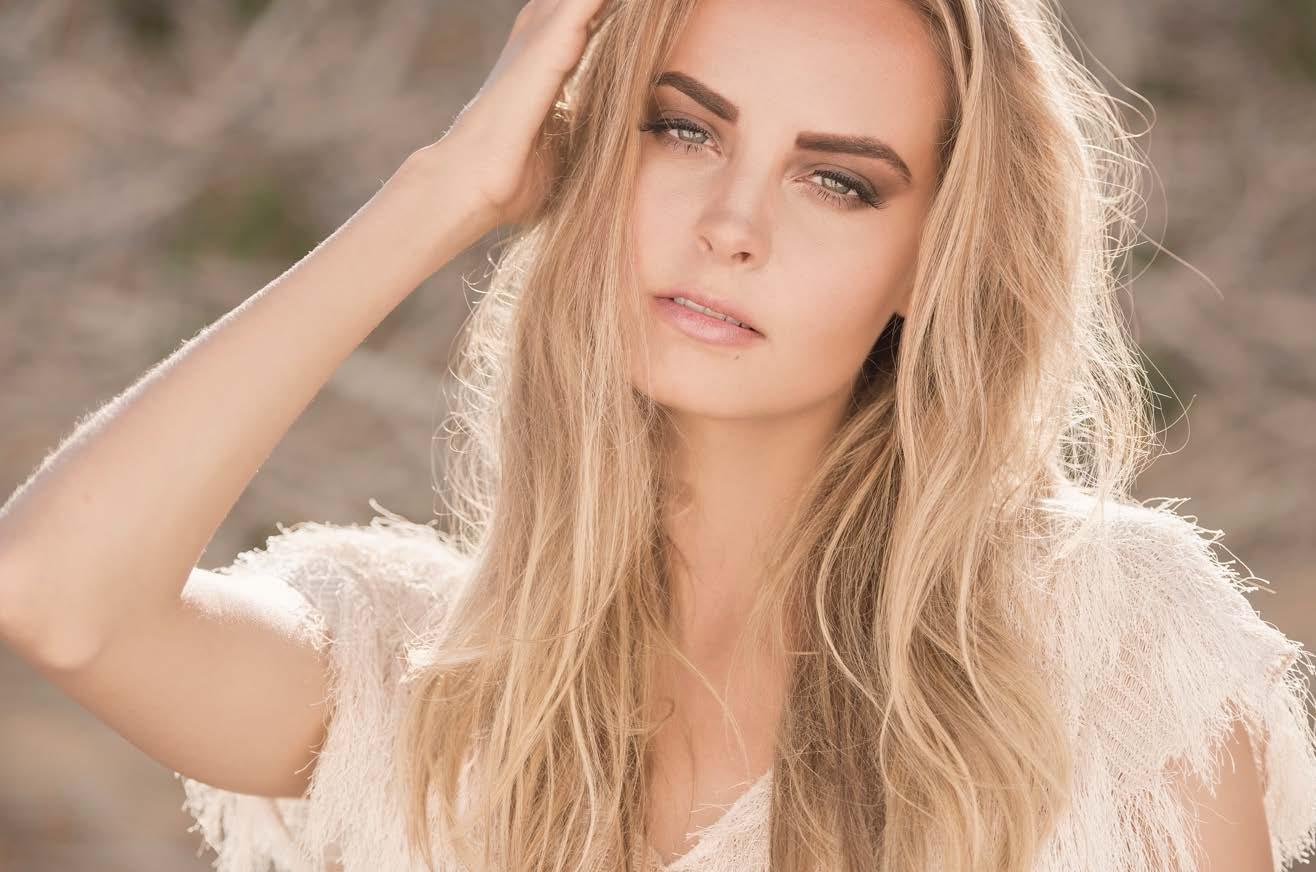
Sunny Benchmark achieved Sunny Benchmark not achieved Benchmark location
Final image
The way these benchmarks work is by setting your camera to these specific settings depending on whether it’s sunny, cloudy, or you are indoors, and trying to find the quality of light that would get you a good exposure on your subject’s face at these settings. Basically, you try to find the light to match those specific benchmark settings, instead of changing the camera settings to fit the light. I always give myself a 1-stop of light break. For example, if I’m shooting a client outdoors on a sunny day, and I can’t find the light quality needed to reach the Outdoor Sunny Day benchmark, I’m ok dropping the benchmark to 1-stop under. This means my shutter speed would be 1/250 instead of 1/500. I consider 1-stop under the benchmark totally ok. 2-stops under would not be good. Why a lighting benchmark? This benchmark has been responsible for my largest growth as a photographer when photographing people in natural light. It gives you an easy to follow “Good, Better, Best”’ scenario when working with just the sun. Without it, you are shooting blind. Because if the light is bad, you could simply increase the ISO to whatever number to make that poor quality of light work. But as professional photographers, we should want more than settling for low quality of light, we should be masters at finding the most amazing quality of light anywhere we go, cloudy or sunny. You can do that if you train your eye to recognize the quality of light at these benchmark settings. Even if you don’t use these benchmark settings with real paying clients, you could and should use them for training purposes. Training your eye to quickly recognize superior pockets of light will never serve you wrong. Try them! It’s not easy to find pockets of light that will allow you to have a good exposure on your subject’s face at these benchmark settings, but if you keep trying, keep looking, and keep pushing, you will begin to discover these amazing little gifts of light with higher frequency. You can find more on this on my book “Picture Perfect Lighting” published by Rocky Nook.
TIP 2: NOT ALL LIGHT MODIFIERS COME FROM CAMERA STORES.
Become an avid observer of the objects and structures around you as they all reflect or absorb light in different ways. As you read this, look around you. What objects do you see? What are their shape, texture, and colour? Photographers can’t carry every piece of equipment out there to every location, right? We only have two hands. But if you want to create flattering light on your subjects using only a flash or the sun, what do you do? One of the most important skills we photographers can have is the ability to predict how the sunlight or the light from our flashes would react to when it strikes any surface. For example, imagine you are doing a photoshoot in your neighborhood, and you are walking around with your client. Suddenly, there is a big white building to your right directly illuminated by the sun. Well, that building is actually acting like a huge light modifier creating the softest and most flattering light imaginable. At this point, you would stand close to the building with your back to the building and let that large flattering light source illuminate your subjects. A FedEx truck is not only smooth, it’s also white. A perfect light modifier! I have actually taken several photos of clients during paid shoots using the amazing light of a FedEx truck. Any white metal surface directly hit by the sun provides a striking strong light source. Hard light such as this can be a showstopper if used properly on your subjects. The same goes for a mirror. A small mirror or any side view mirror from any car can provide this kind of uber strong light source. There are also objects such as thin materials, cloths, fabrics, frosted windows, etc. that allow the light to pass through in different ways. These are opportunities! Last but not least, look for interesting shadow graphics on the wall from the sun. As the sun hits tree branches, window frames, buildings, etc. it will consequently create some very interesting graphics on walls. These graphics are great gifts because it would be incredibly difficult to replicate these designs artificially. Be smart with the naturally occurring light modifiers around you. Not to mention how fun it is to go on a lighting scavenger hunt.


TIP 3: DARKEN THE AMBIENT – LIGHT-UP
THE SUBJECT – HIGHLIGHT SOMETHING
This technique or approach has served me very well during my career. Here is how it works. On a portrait shoot, you do three steps: Step 1: Turn down the ambient. In other words, obtain the right exposure on the background and then dial it down a bit so it becomes ½ stop or even ¾ of a stop darker. Step 2: Use a modified flash or a reflector to direct soft light towards your subject. The balance of light between the subject and the background is up to you and what you like. I prefer my contrast to be subtle but still noticeable. Step 3: Use a flash with a snoot or a very small light modifier to highlight something of your choosing on their face, clothes, or accessories. This adds a little kiss of light to draw the viewers’ attention exactly where you want it. It’s a fantastic technique to attempt. Definitely more advanced, but not overwhelming by any means. You simply need two flashes, one equipped with a soft box or beauty dish, and the other with a snoot. The result of this technique is a very painterly and elegant look.


TIP 4: THE COLLAPSIBLE DIFFUSER – THE MOST VERSATILE LIGHT MODIFIER IN THE WORLD.
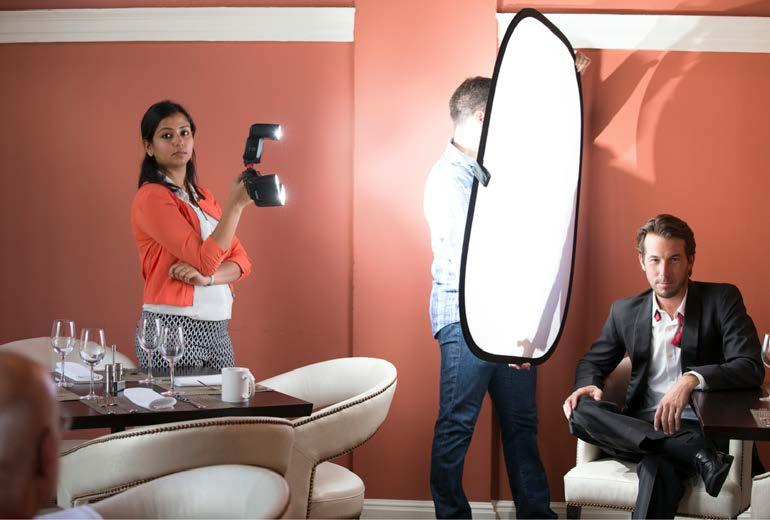
Hands down, there is not a more versatile light modifier in my opinion than a simple collapsible diffuser. Why? Because of its incredible versatility. When paired with a flash, you can achieve the look of many light modifiers with only one. Unlike many modifiers built to be used with a flash where the distance between the flash and the diffuser is fixed, with a collapsible diffuser, you can change the distance between the flash and the diffuser as much as you want. A person simply holds the diffuser with their left hand, and a flash with their right hand. By changing the distance between the flash and the diffuser, you are effectively creating different light size sources. Hold the flash very close to the diffuser and you have a very small light source. Hold the flash as far as you can from the diffuser, and you now have a very large light source providing you with beautiful soft light. When done, simply collapse the diffuser and put it away inside your camera bag. How cool is that?
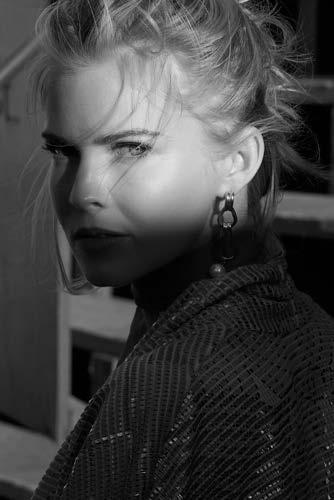
Diffuser lighting Before Final black and white


TIP 5: MAKE SURE TO USE LIGHT TO
COMMUNICATE NOT JUST TO ILLUMINATE.
During any of my lighting workshops and seminars, one element that I strongly believe and hope to pass on to my students, is the notion of using light to communicate something to the viewer, not just to illuminate the subject. Light, well placed, will draw the viewer’s attention to where you chose! You are the photographer, it’s your message. When you are working out how to illuminate someone, don’t just be satisfied by illuminating your subject so that you can accomplish a proper exposure. Instead, ask yourself “what do I want to say here?” or “what do I want to show?”. Use light as a means to communicate to your audience. Think of it as a language. If you begin to try this approach during your shoots, you will notice your lighting will exponentially become more interesting to the people viewing your photographs. Now you are truly painting with light.


About Roberto Valenzuela
Roberto Valenzuela is a photographer, author, and educator based in Beverly Hills, CA. As a member of the prestigious Canon Explorers of Light group, Roberto is considered to be one of the most influential photographers in the world. Roberto developed his unique teaching style by following the same rigorous regimen he developed as a professional concert classical guitarist and educator before becoming a photographer. Roberto believes that it is not talent but deliberate practice that is at the core of skill and achievement. He has traveled to every area of the world, motivating photographers to practice their craft as musicians practice their instruments before performing on stage. Roberto Valenzuela is one of the most well-known photography authors globally. His book trilogy Picture Perfect Practice, Picture Perfect Posing, and Picture Perfect Lighting have become staples in the photography industry and in academic photography departments. The books have been translated into numerous languages, including German, Chinese, Indonesian, Spanish, Portuguese, and Korean.
His new book series Wedding Storyteller Vol. 1 and 2 are the top selling wedding photography books in history. Roberto’s latest book titled “The Successful Professional Photographer” applies his college degree in Marketing, and Consumer Behavior to help photographers be recognized, hired, and maximize potential sales. Roberto serves as a chairman and judge for some of the largest photography competitions in the United States, Europe, Mexico, and South America. Roberto Valenzuela is an avid educator and has been the keynote speaker at some of the largest photography conventions and events worldwide. He also teaches private workshops on posing, lighting, and wedding photography. Roberto Valenzuela has been nominated by his peers as one of the ten most influential photographers and educators in the world. He has photographed the major campaigns for Canon USA for the 5D Mark IV. Recently, Roberto was commissioned by Canon to photograph the global campaign for Canon’s top mirrorless cameras, the Canon EOS R5 and EOS R6. Aside from Photography, Roberto is a dedicated student of the Culinary Arts. The Food Network program is always on at his house, and he is known to create a colossal mess when trying to replicate the dishes. So far, the only people who eat his food are his wife Kim, and his sons Lucas and Evan.


