2023 | VERSION 2 DECORATOR’S GUIDE


NEW BLUEY MINECRAFT MONSTER HIGH™ SONIC THE HEDGEHOG TED LASSO YELLOWSTONE


EASY TO LEARN PHOTOCAKE® INSTRUCTIONS INSIDE


PhotoCake® is a registered trademark of DecoPac. © 2023 Mojang AB. ™ Microsoft Corporation. © Ludo Studio
FAST FINDER
PHOTOCAKE® 101 | PAGES 3-43
UPDATING PHOTOCAKE SOFTWARE
MERCHANDISING LABELS
AVAILABLE POINT OF SALE MATERIALS
PHOTOCAKE SUPPLIES
PRINTER MAINTENANCE
CHOOSING DEFAULT MEDIA TYPE
ENTERING PINS
PRINTING ARTWORK
UPLOADING PHOTOS
PRINTING MULTIPLE PHOTOS
PRINTING FRAMES
NFL MATCHUP FRAMES
BIRTHDAYS & CELEBRATIONS | PAGES 44-57
BABY SHOWERS
BABY & KIDS
BIRTHDAYS
RETIREMENT
GENERAL PARTIES
GRADUATION
WEDDINGS
ANNIVERSARIES
LICENSED CHARACTERS | PAGES 58-81
DISNEY PRINCESS
HEROES & VILLAINS
LICENSED CHARACTERS
TV & STREAMING
SPORTS & ACTIVITIES | PAGES 82-95
NFL
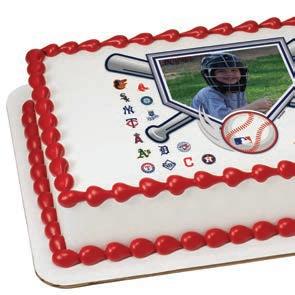
MLB®
NBA
NHL®
OUTDOORS
RECREATIONAL SPORTS
SEASONAL & HOLIDAY | PAGES 96-103
VALENTINE’S DAY
MOTHER’S DAY
FATHER’S DAY
FOURTH OF JULY
BACK TO SCHOOL
HALLOWEEN
PRINT & PATTERN | PAGES 104-106
STYLISH DESIGNS
STUNNING COLORS
ANIMAL PRINTS
FLORALS & NATURAL PATTERNS
TEXT ONLY MESSAGES
COLLAGES
SCREENSAVER
REPRINTING SAVED PROJECTS
INK PAD REPLACEMENT KIT INSTALLATION INSTRUCTIONS
GENERAL RELIGIOUS MILITARY/MEDICAL/ LAW ENFORCEMENT
GAMING
HOBBIES
VIDEO GAMES
THANKSGIVING
CHRISTMAS
SO MUCH MORE!
2
UPDATE YOUR PHOTOCAKE® PRINT ON DEMAND
SYSTEM/ACTUALICE SU SISTEMA DE IMPRESIÓN BAJO DEMANDA PHOTOCAKE®
To ensure a successful installation process, follow the steps below.
1 Select the power button to power on your PhotoCake System.
2 Place the Update DVD into the DVD drive. Touch the DVD drive button and the tray will open, touch it again and it will close.
3 Select the “Shut Down” button on the Main Screen.
4 Once the System is completely shut down, restart it by pressing the power button.
5 Read the on-screen instructions. Touch or Click anywhere on the screen to begin the installation process.
6 This process may take several minutes to complete. The screen will show a progress bar until completed.
7 Instructions will appear to remove the DVD from the tray. Then, touch or click to reboot the system.
8 Follow the on-screen instructions to calibrate your System.
9 Enter the Key Code into the keypad and select “Enter”.
REMINDER: Always power the PhotoCake System off by selecting the “Shut Down” button located on the left side of the Screen. Never power the System down from the Power Strip.
Para garantizar un proceso de instalación correcta, siga los siguientes pasos.
1 Oprima el botón de encendido de su Sistema de PhotoCake.
2 Coloque el DVD en el lector de DVD. Toque el botón del lector de DVD y la bandeja se abrirá, tóquelo otra vez y la bandeja se cerrara.
3 Seleccione el botón “Shut Down” de la pantalla principal.
4 Una vez que el sistema haya terminado de apagarse, préndalo otra vez con el botón de encendido.
5 Lea las instrucciones en la pantalla. Toque o haga clic en cualquier parte de la pantalla para iniciar el proceso de instalación.
6 Este proceso puede tomar varios minutos para terminar. La pantalla mostrará una barra de progreso hasta que se complete.
7 A continuación, instrucciones aparecerán para extraer el DVD de la bandeja. Luego, toque o haga clic en la pantalla para reiniciar el Sistema.
8 Siga las instrucciones de la pantalla para calibrar su Sistema.
9 Ingrese el Código en el teclado y seleccione “Enter”.
RECUERDE: Siempre apague el Sistema de PhotoCake oprimiendo el botón “Shut Down” de la Pantalla Táctil. Nunca apague el sistema desconectando el cordón de corriente.
Note: If installing 9.47 DVD, steps may vary. Please refer to directions provided in your update kit for more details.
Nota: Si instala el DVD 9.47, los pasos pueden variar. Consulte las instrucciones proporcionadas en su kit de actualización para obtener más detalles.
3 UPDATE INSTALLATION INSTRUCTIONS | INSTRUCCIONES PARA ACTUALIZAR EL SISTEMA
MERCHANDISING LABELS ON DEMAND/METIQUETAS DE MERCHANDISING BAJO DEMANDA
• Print pre-designed labels or design your own
• Use #21430 Blank Merchandising Labels which are specially formatted for use in PhotoCake edible printers

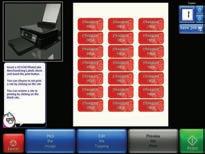
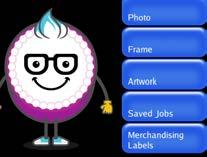
1 Click “Merchandising Labels”
2 Find or Create Label


•Use blue arrows to search labels, enter item number or click “Search” to search by name. Click on the image.

•Or create your own label. Select “Custom Label”. A variety of fonts and colors are available to use.

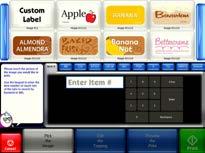
3 Print
• To adjust the print sites, click on the site that you want to remove or add. Use 'Copies' button if printing more than one sheet.
•Ensure you have the labels loaded into the printer. Select “Print”.

1 �Haga clic en el botón
2 Encuentre o Cree una Etiqueta
PRINTABLE BLANK MERCHANDISING LABELS
#21430 – 100 Sheets/Pkg
• Imprima etiquetas prediseñadas o diseñe su propio diseño
• Utilice las Etiquetas de Comercialización #21430 en blanco que están especialmente diseñadas para utilizarse con las impresoras de tinta comestible de PhotoCake
• Utilice las flechas azules para buscar etiquetas, ingrese el número del artículo o haga clic en el botón “Search” para buscar por nombre. Haga clic en la imagen.


•O cree su propia etiqueta. Seleccione el botón “Custom Label”. Una variedad de tipos de letras y colores están disponibles para usar.
3 Imprima
• Para ajustar los sitios de impresión, haga clic en el sitio que desea eliminar o agregar. Utilice el botón 'Copies' si desea imprimir más de una hoja.
• Asegúrese que las etiquetas esten cargadas en la impresora. Seleccione “Print”.
4 MERCHANDISING LABELS | ETIQUETAS DE MERCADOTECNIA
1
“Merchandising Labels”
3 3 3
2 2 2 2


5 MERCHANDISING LABELS | ETIQUETAS DE MERCADOTECNIA #21178 Sourdough #21177 Sliced #21925 Sesame #21180 Special of the Week #21174 Refrigerate #21176 Rye #24979 Root Beer #21182 Strawberry #21169 Raisin #21167 Pumpkin Spice #21166 Pumpkin #21171 Raspberry #21162 Pistachio #21164 Plain #24984 Pistachio Butter #21173 Red Velvet #21157 Piña #21156 Pecan #24978 Peanuts #21159 Piña Colada #24982 Passion Fruit #21155 Peanut Butter #21154 Peach #21161 Pineapple #21152 Oatmeal #21151 Non-Dairy Whipped Topping #21150 No Sugar Added #21920 Onion #21149 Marble #21918 New #21917 Multigrain #21153 Orange #21913 Lemon Poppyseed #21147 Lemon #21146 Key Lime #21148 Made Fresh In-Store #21143 Gum Paste #21145 Jalapeño Pepper #21144 Italian #21914 Mango #21124 Champagne #21123 Carrot #21122 Caramel #21125 Cheese #21898 Buttermilk #21899 Cappuccino #21121 Butterscotch #21126 Cherry #21142 Gluten Free #21141 German Chocolate #21140 Garlic #24981 Grape #21138 Flan #21139 Fudge #21926 Fresa #21912 Guava #21132 Coconut #21131 Cinnamon #21130 Chocolate Chip #24976 Contains Nuts #21127 Chocoflan #21129 Chocolate Cake #21128 Chocolate #21133 Cookies & Cream #24975 Dark Chocolate #21904 Custard #24986 Crème de Menthe #21137 Dulce de Leche #24985 Cotton Candy #21136 Cream Cheese #21135 Cranberry #24983 Espresso #21189 Walnut #21196 Yellow #21190 Wheat #21192 Whipped Icing #21194 White Cake #21118 Brownie #21896 Bran #21117 Blueberry #21119 Butter #21115 Bavarian #21116 Bettercreme® #21893 Berry #21120 Buttercream #24974 Vegan #21930 Strawberry Rhubarb #21186 Tres Leches #21187 Vanilla #22038 Thanksgiving #21183 Sugar #21184 Sweet Potato #24980 Tart Apple #21112 Baked Fresh #21892 Asiago Cheese #24977 Arroz con Leche #21113 Banana #21110 Almond #21891 Apricot #21111 Apple #21114 Banana Nut
Connect your existing PhotoCake system to the internet and e o t e e e t of oto a e
•Access to the hottest new images months early.
•Biannual updates are downloaded directly to the system—no need to wait for the DVD.
• Order Image Credits and print any licensed image, whenever you need! No more PIN numbers!
•Manage your CelebrationIQ order queue right in the application— quickly and easily accept and print your online orders.
•Save labor—easily print the order as-is!
• Easily align customer expectations with bakery staff.
Upgrading to PhotoCake is quick and easy. With a simple oft are ra e o a o e t o r exi ti oto a e te ia t er et or i i a a ter
o e te i te a exi te te e oto a e a ter et i fr te e o e e io e oto a e
•Acceso a las nuevas imágenes más populares con meses de antelación.
•Las actualizaciones semestrales se descargan directamente en el sistema, sin necesidad de esperar el DVD.
•¡Solicite créditos de imagen e imprima cualquier imagen con licencia, siempre que lo necesite! ¡No más números PIN!
• Administre sus pedidos de CelebrationIQ directamente en el sistema: acepte e imprima sus pedidos únicos de manera rápida y fácil.
•Ahorre trabajo—imprima fácilmente el pedido tal cual.
•Alinee fácilmente las expectativas del cliente con el personal de panadería.
6
PHOTOCAKE LIVE
t a i ar a oto a e e r i o f i o a i e a t a i a i e oft are e e o e tar i te a a t a e oto a e a tra e t er et o a a ta or i i ITEM#/ NÚMERO DE ARTÍCULO DESCRIPTION/DESCRIPCIÓN COST/COSTO N/A PhotoCake LIVE Upgrade FREE/GRATIS #24535 PhotoCake LIVE USB WiFi Adapter CALL FOR PRICING Contact us to learn how PhotoCake LIVE can help your bakery! 1.800.644.1228 or DecoPac.com/PhotoCake-LIVE UPGRADE YOUR PHOTOCAKE® SYSTEM TODAY!/¡ACTUALIZA TU SISTEMA PHOTOCAKE® HOY! LIVE
LIVE
MAXIMIZE YOUR CAKE DECORATING EXECUTION


MAXIMICE LA EJECUCIÓN DE LA DECORACIÓN DE PASTELES
PIN's no longer needed. Use image credits to print licensed images anytime

Integrate with CelebrationIQ
Internet connected
Real-time access to updates and exclusive images
Easy to use interface

ro e o eratio a ef ie
PINs ya no serán necesarios. Use créditos de imagen para imprimir imágenes con licencia en cualquier momento Integración con CelebrationIQ
Conectado a internet
Acceso en tiempo real a actualizaciones e imágenes exclusivas
Interfaz fácil de usar
e orar a e ie ia o erati a
TM 7
POINT OF SALE MATERIALS TO PROMOTE/PUNTO DE VENTA MATERIALES A PROMOCIONAR
From posters to header cards, we have what you need to drive awareness of PhotoCake® in your bakery.


Desde posters hasta letreros, tenemos lo que necesita para aumentar la promoción de PhotoCake® en su panadería.

Add to cake packaging to promote PhotoCake ® to your customers. #25335 – 3.5” × 4.5” - 100/roll – N o Charge
2 PHOTOCAKE CLING
Add a cling to your front door, display window or cake case.
#25334 – 6.75” × 6” – N o Charge
3 PHOTOCAKE EASEL-BACK COUNTER CARD

Add to the top of counters, display cases or The Magic of Cakes ® stand. #25336 – 7” × 11” – N o Charge
4 PHOTOCAKE POSTER
Display in-store to help draw attention to your PhotoCake ® Edible Image ® cakes! #25333 – 22 ” × 28 ” – N o Charge
8 PROMOTION MATERIALS | MATERIAL DE PROMOCIÓN
1 PHOTOCAKE STICKER
1 2 3 4 © & ™ Lucasfilm Ltd., TM & © 2023 Nintendo.


9 Make it Special. Make it Yours. Find your perfect photo and order your custom cake today. #PhotoCake #EdibleImage ©2022 DecoPac. PhotoCake® is a registered trademark of DecoPac. Edible Image® is registered trademark of The Lucks Company. Make it Special. Make it Yours. Find your perfect photo and order your custom cake today. #PhotoCake #EdibleImage ©2022 DecoPac. PhotoCake® is registered trademark of DecoPac. Edible Image® is a registered trademark of The Lucks Company. From posters to header cards, we have what you need to drive awareness of PhotoCake® in your bakery. Desde posters hasta letreros, tenemos lo que necesita para aumentar la presencia de PhotoCake® en su panadería. BE
TINTA Y CONSUMIBLES
10 INK & SUPPLIES|
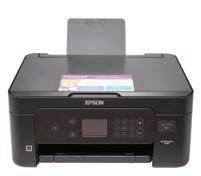
ITEM# DESCRIPTION QUANTITY XP-2100E, XP-4100E, XP-4105E, WF-2830E, WF-2850E "VERSION E" SERIES XP-4100U, XP-4105U, WF-2830U, WF-2850U "VERSION U" SERIES TS702XP-446XP-440XP-430XP-420XP-410IP4820IP3500 INK CARTRIDGES FOR PRINTERS MODIFIED FOR EDIBLE PRINTING #28011T603XL Yellow (Y) 2 Cartridges #28012T603XL Magenta (M) 2 Cartridges #28013T603XL Black (K) 2 Cartridges #28014T603XL Cyan (C) 2 Cartridges #28006T212XL Yellow (Y) 2 Cartridges #28007T212XL Magenta (M) 2 Cartridges #28008T212XL Black (K) 2 Cartridges #28009T212XL Cyan (C) 2 Cartridges #28016CLI281 Yellow (Y) 2 Cartridges #28017CLI281 Magenta (M) 2 Cartridges #28018CLI281 Slim Black (K) 2 Cartridges #28019CLI281 Cyan (C) 2 Cartridges #28020CLI281 Black (K) 2 Cartridges #22670T288XL Cyan (C) 2 Cartridges #22672T288XL Magenta (M) 2 Cartridges #22673T288XL Yellow (Y) 2 Cartridges #22671T288XL Black (K) 2 Cartridges #19359T220XL Cyan (C) 2 Cartridges #19356T220XL Magenta (M) 2 Cartridges #19349T220XL Yellow (Y) 2 Cartridges #19358T220XL Black (K) 2 Cartridges #23029T200XL Cyan (C) 2 Cartridges #23030T200XL Magenta (M) 2 Cartridges #23031T200XL Yellow (Y) 2 Cartridges #23032T200XL Black (K) 2 Cartridges #37773CCF-4BBLUE (Blue) 1 Cartridge #37776CCF-4BRED (Red) 1 Cartridge #37780CCF-4BYELLO (Yellow) 1 Cartridge #37771CCF-4BBK (Black LG) 1 Cartridge #37778CCF-4BSLBK (Black SM) 1 Cartridge #37707BCC-3ABLUE (Blue) 1 Cartridge #37710BCC-3ARED (Red) 1 Cartridge #37712BCC-3AYEL (Yellow) 1 Cartridge #37705BCC-3ABK (Black) 1 Cartridge PRINTABLE BLANK MERCHANDISING LABELS #21430Merchandising Labels 100 Sheets/Pkg PRINT HEADS #11463 Print head (only) *Limited availability 1 Print head #15095 Print head (only) *Limited availability 1 Print head #28082 Print head (only) 1 Print head CLEANING CARTRIDGES #23035DecoPac Cleaning Cartridges4 (C/M/Y/K) #19364DecoPac Cleaning Cartridges4 (C/M/Y/K) #22674DecoPac Cleaning Cartridges4 (C/M/Y/K) #28029Decopac Cleaning Cartridges5 (C,M,Y,K,SK) #28028Decopac Cleaning Cartridges4 (C,M,Y,K) #28026Decopac Cleaning Cartridges4 (C,M,Y,K)
11 EDIBLE PAPER|PAPEL COMESTIBLE ITEM# DESCRIPTION QUANTITY XP-2100E, XP-4100E, XP-4105E, WF-2830E, WF-2850E "VERSION E" SERIES XP-4100U, XP-4105U, WF-2830U, WF-2850U "VERSION U" SERIES TS702 XP-446XP-440XP-430XP-420XP-410IP4820IP3500 PHOTOCAKE® PREMIUM EDIBLE SHEETS #44626 1/4 Sheet Extended 24 Sheets/Box #446222" Circles (Pre-Cut) 24 Sheets/Box #446233" Circles (Pre-Cut) 24 Sheets/Box #446286" Circle (Pre-Cut) 24 Sheets/Box #446277.5" Circle (Pre-Cut) 24 Sheets/Box #240648.25" Circle (Pre-Cut) 24 Sheets/Box #240653" Donuts (Pre-Cut) 24 Sheets/Box #44629Strips (Pre-Cut) 6 Sheets/Box #44630Strips Extended (Pre-Cut)6 Sheets/Box #44625Business Cards (Pre-Cut)24 Sheets/Box PHOTOCAKE® PRINTABLES #88371/4 Sheet Extended 20 Sheets/Box #88361/4 Sheet 20 Sheets/Box PHOTOCAKE® FROSTING SHEETS *Limited quantities #52601/4 Sheet Extended 24 Sheets/Box #8421/4 Sheet 24 Sheets/Box #130562" Circles (Pre-Cut) 24 Sheets/Box #130583" Circles (Pre-Cut) 24 Sheets/Box #130577.5" Circle (Pre-Cut) 24 Sheets/Box PHOTOCAKE® PRINT-ONS® #52621/4 Sheet Extended 24 Sheets/Box #146221/4 Sheet 24 Sheets/Box #251562" Circles (Pre-Cut) 24 Sheets/Box #251553" Circles (Pre-Cut) 24 Sheets/Box #158876" Circle (Pre-Cut) 24 Sheets/Box #139937.5" Circle (Pre-Cut) 24 Sheets/Box #251548.25" Circle (Pre-Cut) 24 Sheets/Box #251573" Donuts (Pre-Cut) 24 Sheets/Box #251585" Bars (Pre-Cut) 24 Sheets/Box #13589Strips (Pre-Cut) 6 Sheets/Box #25160Strips Extended (Pre-Cut)6 Sheets/Box #25159Business Cards (Pre-Cut)24 Sheets/Box
12 INK & SUPPLIES|
ITEM# DESCRIPTION QUANTITY XP-2100E, XP-4100E, XP-4105E, WF-2830E, WF-2850E "VERSION E" SERIES XP-4100U, XP-4105U, WF-2830U, WF-2850U "VERSION U" SERIES XP-340 XP-352, XP-452 IP7220IP-4820IP-4700IP-3500 INK CARTRIDGES FOR PRINTERS MODIFIED FOR EDIBLE PRINTING #28011T603XL Yellow (Y) 2 Cartridges #28012T603XL Magenta (M) 2 Cartridges #28013T603XL Black (K) 2 Cartridges #28014T603XL Cyan (C) 2 Cartridges #28006T212XL Yellow (Y) 2 Cartridges #28007T212XL Magenta (M) 2 Cartridges #28008T212XL Black (K) 2 Cartridges #28009T212XL Cyan (C) 2 Cartridges #22670T288XL Cyan (C) 2 Cartridges #22672T288XL Magenta (M) 2 Cartridges #22673T288XL Yellow (Y) 2 Cartridges #22671T288XL Black (K) 2 Cartridges #25995T288XL Cyan (C) 1 Cartridge #25990T288XLMagenta (M) 1 Cartridge #25992T288XLYellow (Y) 1 Cartridge #25993T288XLBlack (K) 1 Cartridge #37783CCF-5C-(Blue) 1 Cartridge #37786CCF-5C-(Red) 1 Cartridge #37788CCF-5C (Yellow) 1 Cartridge #37782CCF-5C (Black) 1 Cartridge #37787CCF-5C (Slim Black) 1 Cartridge #37773CCF-4BBLUE (Blue) 1 Cartridge #37776CCF-4BRED (Red) 1 Cartridge #37780CCF-4BYELLO (Yellow) 1 Cartridge #37771CCF-4BBK (Black LG) 1 Cartridge #37778CCF-4BSLBK (Black SM) 1 Cartridge #37766CCF-4ABLUE (Blue) 1 Cartridge #37768CCF-4ARED (Red) 1 Cartridge #37770CCF-4AYELLOW (Yellow) 1 Cartridge #37765CCF-4ABLACK (Black LG) 1 Cartridge #37769CCF-4ABLACK (Black SM) 1 Cartridge #37707BCC-3ABLUE (Blue) 1 Cartridge #37710BCC-3ARED (Red) 1 Cartridge #37712BCC-3AYEL (Yellow) 1 Cartridge #37705BCC-3ABK (Black) 1 Cartridge PRINTABLE BLANK MERCHANDISING LABELS #21430 Merchandising Labels 100 Sheets/Pkg PRINT HEADS #37709 Print head (only) *Limited availability 1 Print head #37775 Print head (only) *Limited availability 1 Print head #37784 Print head (only) 1 Print head CLEANING CARTRIDGES #25994 DecoPac Cleaning Cartridges 4(C/M/Y/K) #22674 DecoPac Cleaning Cartridges 4(C/M/Y/K) #28028 DecoPac Cleaning Cartridges 4(C/M/Y/K) #28026 DecoPac Cleaning Cartridges 4(C/M/Y/K)
TINTA Y CONSUMIBLES
13 EDIBLE PAPER|PAPEL COMESTIBLE ITEM# DESCRIPTION QUANTITY XP-2100E, XP-4100E, XP-4105E, WF-2830E, WF-2850E "VERSION E" SERIES XP-4100U, XP-4105U, WF-2830U, WF-2850U "VERSION U" SERIES XP-340 XP-352 XP-452 IP7220IP4820IP4700IP3500 PHOTOCAKE® PREMIUM EDIBLE SHEETS #44626 1/4 Sheet Extended 24 Sheets/Box #446222" Circles (Pre-Cut) 24 Sheets/Box #446233" Circles (Pre-Cut) 24 Sheets/Box #446286" Circle (Pre-Cut) 24 Sheets/Box #446277.5" Circle (Pre-Cut) 24 Sheets/Box #240648.25" Circle (Pre-Cut) 24 Sheets/Box #240653" Donuts (Pre-Cut) 24 Sheets/Box #44629Strips (Pre-Cut) 6 Sheets/Box #44630Extended Strips (Pre-Cut) 6 Sheets/Box #44625Business Cards (Pre-Cut) 24 Sheets/Box PHOTOCAKE® PRINTABLES #88371/4 Sheet Extended 20 Sheets/Box #88361/4 Sheet 20 Sheets/Box PHOTOCAKE® FROSTING SHEETS *Limited quantities #52601/4 Sheet Extended 24 Sheets/Box #8421/4 Sheet 24 Sheets/Box #130562" Circles (Pre-Cut) 24 Sheets/Box #130583" Circles (Pre-Cut) 24 Sheets/Box #130577.5" Circle (Pre-Cut) 24 Sheets/Box PHOTOCAKE® PRINT-ONS® #52621/4 Sheet Extended 24 Sheets/Box #146221/4 Sheet 24 Sheets/Box #251562" Circles (Pre-Cut) 24 Sheets/Box #251553" Circles (Pre-Cut) 24 Sheets/Box #158876" Circle (Pre-Cut) 24 Sheets/Box #139937.5" Circle (Pre-Cut) 24 Sheets/Box #251548.25" Circle (Pre-Cut) 24 Sheets/Box #251573" Donuts (Pre-Cut) 24 Sheets/Box #251585" Bars (Pre-Cut) 24 Sheets/Box #13589Strips (Pre-Cut) 6 Sheets/Box #25160Extended Strips (Pre-Cut) 6 Sheets/Box #25159Business Cards (Pre-Cut) 24 Sheets/Box LUCKS COPY CONFECTION® PRINT-ONS® #379011/4 Sheet Narrow 24 Sheets/Box # 48111 1/4 Sheet 24 Sheets/Box #379082" Circles (Pre-Cut) 6 Sheets/Box #582773" Circles (Pre-Cut) 6 Sheets/Box #37909Strips with Gap (Pre-Cut) 6 Sheets/Box
AUTOMATED PHOTOCAKE®
MAINTENANCE/MANTENIMIENTO AUTOMATIZADO DE PHOTOCAKE®
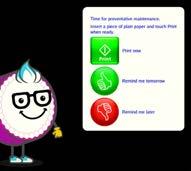
oo e o r ti i for a to ate ai te a e e t e ro t ree oa
1 Print now: will print the Color Test right away (Recommended).
2 Remind me tomorrow: will let you print the Color Test the next day.
3 Remind me later: will let you print the Color Test in 2 days’ time.
ri t o
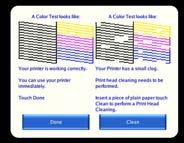
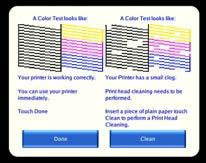
1 Color Test will determine the quality of the ink flow
A. Insert a piece of plain paper and select “Print” when ready.
B. Compare Color Test to on-screen images.
C. If Color Test matches the image on the left, select “Done”. If Color Test matches the image on the right, select “Clean” to clean your Print Head.
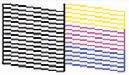
2 Print Head Cleaning will help alleviate distorted, faint, or streaked colors
A. Insert a piece of plain paper and select “Print” when ready.
B. A Color Test will print once Print Head Cleaning is complete (may take a few minutes).
C Compare Color Test to on-screen images.
D. If Color Test matches the image on the left, select “Done”. If Color Test matches the image on the right, select “Clean” to clean your Print Head.
Please note that a Print Head Cleaning will be done automatically every week. No paper is necessary, as no automatic Color Test will occur.
3 Color Bars
Perform this test to prime and push ink through the Print Head.
A. Select color(s) that are needing to be primed and printed.
B. Insert a piece of plain printer paper and select “Print” when ready.
C. Review printed color bar(s) for any distortion or absence (breaks) in the color bar(s).


If any distortion or absence, go to Print Head Cleaning option.
4 �Deep Clean
This process should only be completed with PhotoCake Tech Support
Perform this process if repeated Print Head Cleanings and Color Bars do not produce satisfactory results or preparing your printer for seasonal storage. This is a 7-step process that requires Cleaning Cartridges and several pieces of plain paper.
A. Select Thumbs Up sign after installing Cleaning Cartridges and plain paper into printer.
B. The 7 Steps will appear. Select the Thumbs Up sign.
C. Select Print when you are ready to begin the Deep Clean cycle process.
D. Follow the prompts to continue the process until all 7 steps have been completed. You can select “Cancel” at any point in this process.
E. Once complete, make sure you have replaced the Cleaning Cartridges with edible ink cartridges prior to additional printing.
5 Contact the PhotoCake Technical Support Team if your ink situation hasn’t been resolved by the above tests.
14
AUTOMATED MAINTENANCE
1 2 3 3 4 1 2
i a a i ro i a i ara e a te i ie to a to ati a o a o e cargue la pantalla del sistema.
1 Print now (Imprima ahora): Imprimirá La Prueba de color de inmediato (se recomienda).
2 Remind me tomorrow (Recuérdame mañana): le permitirá imprimir La Prueba de color al día siguiente.
3 Remind me later (Recuérdame más tarde): le dejará imprimir La Prueba de color en 2 días.
ri a a ora
1 La Prueba de color determinará la calidad del flujo de la tinta a través del Cabezal de Impresión
A. Inserte un papel normal y seleccione “Print” (Imprimir) cuando esté listo.
B. Compare La Prueba de color a la imagen en pantalla.
C Si La Prueba de color coincide con la imagen de la izquierda, seleccione “Done” (Hecho). Si La Prueba de color coincide con la imagen de la derecha, seleccione “Clean” (Limpie) para limpiar el Cabezal de Impresión.
2 La Limpieza del Cabezal de Impresión ayudará a mejorar colores distorsionados, débiles o rayas
A. Inserte un papel normal y seleccione “Print” (Imprimir) cuando esté listo.
B. Una Prueba de color se Imprimirá una vez que La Limpieza del Cabezal de Impresión esté completa (puede tardar unos minutos).
C Compare La Prueba de color a la imagen en pantalla.
D. Si La Prueba de color coincide con la imagen de la izquierda, seleccione “Done” (Hecho). Si La Prueba de color coincide con la imagen de la derecha, seleccione “Clean” (Limpie) para limpiar el Cabezal de Impresión. Favor de tomar nota que la Limpieza del Cabezal de Impresión se realizará automáticamente cada semana. El papel no es necessario ya que no se producira ninguna Prueba de color automatica.
3 Barras de Color
Realice esta prueba para preparar y empujar la tinta a través del Cabezal de Impresión.
A. Seleccione el (los) color(es) que necesita para purgar e imprimir.
B. Inserte un papel normal y seleccione “Print” (Imprimir) cuando esté listo.
C. Examine Las Barras de Color impresas para cualquier distorsión o ausencia (cortes) en la(s) barra(s) de color(es). Si tiene cualquier distorsión o ausencia, vaya a la opción de Limpieza de Cabezal de Impresión.
4 Limpieza Profunda
Este proceso solo debería ser completado con soporte Técnico de PhotoCake
Realice este proceso si las limpiezas repetidas del cabezal de impresión y las barras de color no producen resultados satisfactorios o para preparar su impresora para almacenamiento estacional. Este es un proceso de 7 pasos que requiere Cartuchos de Limpieza y varias piezas de papel normal.

A. Seleccione el símbolo del dedo verde después de instalar los Cartuchos de Limpieza y papel normal en la impresora.
B. Aparecerán los 7 pasos. Seleccione el símbolo del dedo verde.
C. Seleccione Print (Imprimir) cuando esté listo para comenzar el ciclo de Limpieza Profunda.
D. Siga las instrucciones para continuar el proceso hasta que los 7 pasos se han completado. Puede seleccionar “Cancel” (Cancelar) en cualquier punto del proceso.
E. Una vez finalizado el proceso, asegúrese de que ha reemplazado los Cartuchos de Limpieza con Cartuchos de tinta comestible antes de la impresión adicional.
5 Contacte Soporte Técnico de PhotoCake
si su situación de tinta no ha sido resuelta por las pruebas anteriores.
15 MANTENIMIENTO AUTOMATICO
2 1 3 3 4 1 2
PHOTOCAKE® MAINTENANCE
Daily
1 Print every day
Print an image or Color Test every day to keep your ink flowing smoothly.
2 Leave printer powered on The printer will run minor maintenance when not in use.
Weekly
1 Clean printer surface
Wipe the outer surface of your printer with a damp cloth. Allow to air dry before use.
2 Clean printer rollers
Power printer off. Wipe rollers (located inside the printer cover and printer bed) with a damp cloth. Do not use excessive moisture and do not drip liquid inside the printer. Allow to air dry before use. Always sanitize food contact surfaces per store/bakery procedures.
Troubleshooting
1 Print Color Tests
•From main menu, select “Maintenance”.
•Select “Color Test”
•Follow the on-screen instructions to complete the color test.
2 Print Head Cleaning
•Select “Print Head Cleaning”.
•Follow the on-screen instructions to complete the Print Head Cleaning. A color test will print upon completion.
•Repeat the Print Head Cleaning, up to 4 times, until the color test has no broken lines. If issue persists, please call PhotoCake Technical Support for Deep Clean instructions.
Note: Maintenance can be performed on regular printer paper. Printing Color Tests or Print Head Cleaning does not deduct media or image credits from your account.
Print every day to maximize your printer performance
A Diario
1 Imprima cada día
Imprima una imagen o una prueba de color cada día para mantener su tinta fluyendo sin problemas.
2 Deje la impresora encendida
La impresora funcionara con un mantenimiento menor cuando no esté en uso.
e a a
1 Limpie la superficie de la impresora
Limpie la superficie exterior de la impresora con un trapo húmedo. Déjelo secar al aire antes de usarlo.
2 Limpie los rodillos de la impresora
Apague la impresora. Limpie los rodillos (ubicados dentro de la tapa y al fondo de la impresora) con un trapo húmedo. No utilice humedad excesiva y no gotear liquido dentro de la impresora. Déjelo secar al aire antes de usarlo.
Siempre desinfecte las superficies de contacto del alimento por los procedimientos de la tienda/panadería.
a e o i e ro e a
1 Imprima las pruebas de color
• Seleccione el botón “Maintenance” ubicado en el menú principal de PhotoCake
•Seleccione “Color Test”
•Siga las instrucciones en la pantalla para completar la prueba de color.
2 Limpieza de cabezal de impresión
•Seleccione “Print Head Cleaning”.
•Siga las instrucciones en la pantalla para completar la limpieza de cabezal de impresión. Una prueba de color se imprimirá al finalizar.
•Repita la limpieza, hasta 4 veces, hasta que la prueba de color no tenga líneas rotas. Si el problema persiste, por favor llame a Soporte Técnico de PhotoCake para las instrucciones de Limpieza Profunda (Deep Clean).
Nota: El mantenimiento se puede realizar con papel normal de impresora. La impresión de pruebas de color o la limpieza de la cabeza de impresión no descuentan créditos de medios de impresión o imágenes de su cuenta.
16 MAINTENANCE | MANTENIMIENTO
Imprima todos los días para maximizar el rendimiento de su impresora
PHOTOCAKE® MAINTENANCE

Easy maintenance to maximize your printer performance

impresora
ri ter ai te a e te
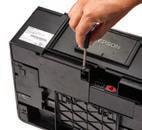
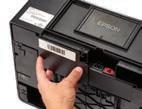
1 Remove ink cartridges.
2 Unplug the printer. Slide the carriage to the middle of the printer.
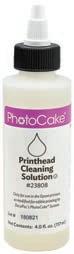
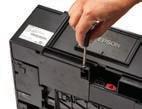
3 Apply Cleaning Solution to the Cleaning Swab (#23743). Do not oversaturate.
4 Using one cleaning swab per nozzle, gently clean clogged nozzle(s). 5-10 seconds each nozzle.

6 Use dry, clean swab to absorb excess. Let dry for 2-4 minutes.

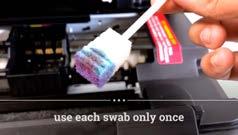
6 Power printer on and insert ink cartridges.
7 Perform Print Head Cleaning 2-3 times.
8 Print a color bar to check proper color flow. Repeat cleaning if necessary.
9 For further assistance, contact DecoPac Customer Support.
a o e a te i ie to e a re ora
1 Extraiga los cartuchos de tinta.
2 Desconecte la impresora. Mueva el carro al centro de la impresora.
3 Aplique la Solución de Limpieza a la Esponja de Limpieza (#23743) para el Cabezal de Impresión de PhotoCake. No sobresature.
4 Utilice una esponja de limpieza para un solo inyector, limpie suavemente el inyector obstruido. 5-10 segundos cada inyector.
5 Utilice otra esponja seca y limpia para absorber el exceso. Déjelo secar durante 2-4 minutos.
6 Encienda la impresora e inserte los cartuchos de tinta.
7 Realice una limpieza de cabezal de impresión 2-3 veces.
8 Imprima una prueba de barras de color para comprobar el flujo de color adecuado. Repita la limpieza si es necesario.
9 Para obtener más ayuda, póngase en contacto con los Servicios al Cliente de DecoPac.
17 MAINTENANCE | MANTENIMIENTO
Fácil mantenimiento para maximizar el rendimiento de su
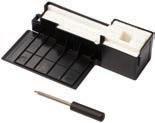
#23808 Print Head Cleaning Solution #23743 Print Head Cleaning Swabs
NEVER POWER THE PHOTOCAKE® SYSTEM DOWN FROM THE POWER STRIP
•Perform a Color Test on the printer upon starting the system up for the first time each day. Make sure all cartridges are functioning properly. If colors are not printing on the sheet and/or if there are broken lines within the color or black grids, perform a Print Head Cleaning.
•Clean the scanner glass and underside of the scanner lid with a mild detergent applied to a lint-free cloth once a month. DO NOT SPRAY ANY LIQUIDS DIRECTLY ONTO THE SCANNER.
Can I cut the edible paper in half prior to printing?
Any edible paper that has been cut should not be reinserted into your printer. Doing so creates a risk of debris getting caught in the printer, which can result in irreversible printer damage.
What is the difference between extended edible paper and the original edible paper?
Extended edible paper has an extended backing, allowing the printer to print to the edge of the paper to eliminate the extra white space - ideal for use with PhotoCake® Edible Image® DecoSet® Backgrounds.
Why am I getting smudges at the end of my edible paper when printing on my PhotoCake Printer?
Ensure your input tray and stationary output tray are fully extended and adjusted correctly. To stop any print head striking, always have your removable output tray installed. Always ensure your edible paper settings within the PhotoCake IV system match the edible paper you are currently using.
My PhotoCake System is displaying an “ink low” or “ink out” message, but it seems there is still ink in the cartridge. Why?
Ink levels are measured statistically and by a sensor (chip) in the cartridge. Ink estimates are conservative to ensure optimal performance and quality output. We recommend following the PhotoCake System indicators for ink cartridge replacement.
• After giving the system a command, wait for the system to respond before entering a new command. You can stall the system by giving it too many commands to process.
• Be patient when browsing for images from a CD/DVD or memory card. There will be a slight delay from when you press the scroll button until you see the system respond.
•If edible paper seems too soft, let paper sit out at room temperature for 15–20 minutes. Then place paper in freezer for 30 seconds.
I installed new ink cartridges and now I am receiving a “You have not installed genuine Epson Ink Cartridges” error on the touch screen of my printer. What do I do?
This message appears because you are using edible ink cartridges instead of OEM (original equipment manufacturer) ink. This is a standard message and you can continue using the edible inks. Continue to select “OK” until the printer asks you if you would like to continue using this ink, then select “Yes”.
What type of memory format can be used to transfer images to my PhotoCake IV system?
The controller supports JPEG, PNG, TIFF, and BMP files on a CD, a Compact Flash (CF) card, an xD card, a Smart Media card, a Memory Stick Card (MS card), a flash drive, or a Secure Digital (SD) card.
Why does the touchscreen say “No Input Signal”?
Verify that the controller is plugged in, turned on, and the blue light on the power button is lit. Ensure the power button on the touchscreen has a green light. Select “PC/AV” and set touchscreen to “PC” mode. Please call PhotoCake Technical Support at 1-800-644-1228 if none of these options alleviate the issue.
18 MAINTENANCE
a o er t e oto a e te off e e ti t e t o tto o ate o t e eft i e of t e ree For PhotoCake Technical Support call: 1- 800 - 644 -1228
NUNCA APAGUE EL SISTEMA DE PHOTOCAKE® DESCONECTANDO EL CORDÓN DE CORRIENTE
ie re a a e e i te a e oto a e o ri ie o e ot t o e a a ta a ti
•Realice una prueba de color en la impresora al encender el sistema por primera vez cada día. Asegúrese de que todos los cartuchos funcionen correctamente. Si los colores no están imprimiendo en la hoja y/o hay líneas rotas dentro del color o las rejillas negras, realice una limpieza del cabezal de impresión.
•Limpie el vidrio del escáner y la parte debajo de la tapa del escáner una vez al mes usando un detergente suave y un trapo que no tenga pelusa. NO ROCIE NINGUN LÍQUIDO DIRECTO AL ESCANER.
•Después de dar una orden o comando al sistema, espere a que le responda antes de dar otra orden nueva. Usted puede congelar el sistema cuando le da muchas órdenes a procesar.
• Tenga paciencia cuando esté buscando imágenes de un CD/DVD o de una tarjeta de memoria, cuando usted toque las flechas de los lados se va a dar cuenta que el sistema va a demorar en responder.
•Si la hoja comestible está muy blanda, coloque la hoja en temperatura ambiente por 15–20 minutos. Despues, coloque la hoja en el congelador por 30 segundos.
¿Puedo cortar el papel comestible por la mitad antes de imprimir?
Cualquier papel comestible que haya sido cortado, no debe ser recargado en su impresora. Al hacerlo se crea un riesgo de que los desechos queden atrapados en la impresora lo cual puede resultar en daños irreversibles a la impresora.
¿Cuál es la diferencia entre el papel comestible extendido (extended) y el papel comestible de original?
El papel comestible extendido tiene un respaldo extendido, lo que permite a la impresora imprimir en el borde del papel para eliminar el espacio en blanco adicional, ideal para su uso con fondos de Edible Image® de PhotoCake® DecoSet®
¿Por qué estoy recibiendo manchas en el borde de mi papel comestible cuando imprimo con mi impresora de PhotoCake?
Asegúrese de que la bandeja de entrada y la bandeja de salida sean totalmente ampliadas y ajustadas correctamente. Para detener cualquier choque de cabezal de impresión, tenga siempre su bandeja de salida extraíble instalada.
Asegúrese siempre de que la configuración de papel comestible dentro del sistema de PhotoCake IV coincida con el tipo de papel comestible que está utilizando actualmente.
Mi Sistema de PhotoCake está mostrando un mensaje de “ink low” (nivel de tinta bajo) o “ink out”, pero parece que todavía hay tinta en el cartucho. ¿Por qué?
Los niveles de tinta son medidos estadísticamente y por un sensor (chip) en el cartucho. Las estimaciones de tinta son conservadas para asegurar el rendimiento óptimo y un producto de calidad.
Recomendamos seguir los indicadores del Sistema de PhotoCake para el reemplazo del cartucho de tinta. He instalado nuevos cartuchos de tinta y ahora estoy recibiendo un mensaje de error “You have not installed genuine Epson Ink Cartridges” (No ha instalado cartuchos de tinta autentica de Epson) en la pantalla de mi impresora. ¿Qué puedo hacer?
Este mensaje aparece porque usted está utilizando cartuchos de tinta comestible en vez de tinta del OEM (fabricante de equipo original). Este es un mensaje estándar y usted puede continuar utilizando las tintas comestibles. Seleccione “Ok” hasta que a la impresora le preguntará si desea continuar utilizando esta tinta, y a continuación seleccione “Yes”.
¿Qué tipo de formato y memoria puede usar para transferir las imágenes a mi Sistema de PhotoCake IV?
El controlador es compatible con archivos JPEG, PNG, TIFF, y BMP en un CD, una tarjeta Compact Flash (CF), una tarjeta xD, tarjeta de Smart Media, una tarjeta de memoria (MS Card), una memoria USB, o una tarjeta Secure Digital (SD).
¿Por qué la pantalla táctil dice “No Input Signal” (Sin Señal de Entrada)?
Verifique que el controlador esté conectado, encendido, y la luz azul del botón de encendido se ilumina.
Asegúrese que el botón de encendido de la pantalla táctil tenga una luz verde. Seleccione “PC/AV” y configure la pantalla táctil a modo “PC”.
Por favor, llame al Apoyo Técnico de PhotoCake a 1-800-898-3063 si ninguna de estas opciones alivia el problema.
19 MANTENIMIENTO
Para Ayuda Técnica de PhotoCake llame al: 1- 800 - 898 - 3063
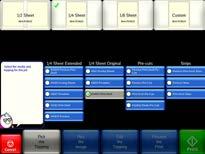
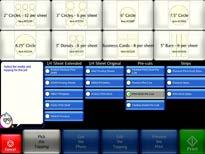
CHOOSING DEFAULT MEDIA
TYPE/TYPE/ELEGIR EL TIPO DE MEDIO PREDETERMINADO
Once you have installed your Update DVD, ensure you have selected your default media type.
Una vez que haya instalado su DVD de actualizacíon, asegúrese de haber seleccionado su tipo demedios predeterminado.
1 Select ‘Maintenance’

2 Select 'Default Topping'
3 Choose the edible paper type and size that is the most used in your bakery
The options available are divided into brand and size.
A. 1/4 Sheet Extended
B. 1/4 Sheet Original
C. Pre-Cuts (e.g. 2" Circles, 3" Donuts, etc.)
D.Strips
4 Select ‘Back’ to return to the main screen
Note: You can find the brand, size, and item number of the edible paper on the front of the packaging.
1 Seleccione ‘Maintenance’
2 Seleccione ‘Default Topping’
3 Elija el tipo y tamaño de papel comestible más utilizados en su panadería
Las opciones disponibles son divididas por marca y tamaño.
A. 1/4 Plancha Extendido
B. 1/4 Plancha
C. Precortados (e.j. Círculos de 2”, Donas de 3”, etc.)
D.Tiras
4 Seleccione ‘Back’ para volver al menú principal
Nota: Puede encontrar la marca, tamaño, y el número del artículo del papel comestible en la parte frontal del empaque.
20 DEFAULT MEDIA TYPE | ELEGIR EL TIPO DE MEDIO PREDETERMINADO
2 A B C D 1
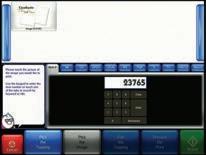
THE BASICS ENTERING PINS/ INTRODUCCIÓN DE PINES
Licensed images, frames and strips require a PIN before printing. Las imágenes, marcos, y tiras con licencia requieren un PIN antes de imprimir.
1 Select “Enter PIN”

2 Select Image, Frame or Strips ordered
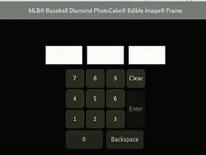
3 Enter PIN
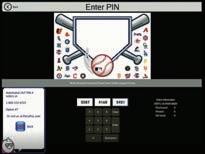
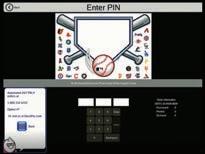
4 Message
The message “Your PIN has been accepted. The print(s) have been added to the on-hand inventory.” will appear.
5 Exit
1 Seleccione “Enter PIN”
2 Seleccione la Imagen, el Marco, o la Tira que ordenó
3 Ingrese el Número de Clave (PIN)
4 Mensaje
El mensaje “Your PIN has been accepted. The prints(s) have been added to the on-hand inventory.” (Su número de clave ha sido aceptado. La imagen(es) han sido añadidas a su inventario.) aparecerá.
5 Salga
21
2 1 3 3 BASICS | LOS BÁSICOS Major League Baseball trademarks and copyrights are used with permission of Major League Baseball Properties, Inc.
THE BASICS PRINT ARTWORK/ IMPRIMIR ARTWORK
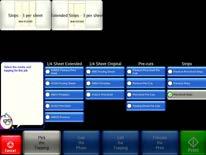
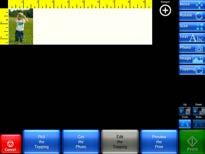
1 Select Artwork
From the PhotoCake home screen click on “Artwork”.
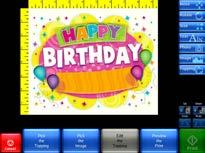
2 Select Edible Paper


Select the desired type of topping.
3 Pick Artwork
Enter the artwork number or click arrows to browse artwork options.

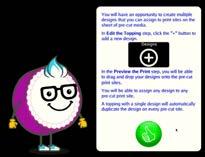
4 Edit the Topping
Edit the topping. When complete, select “Preview the Print”.
5 Print the Artwork
Ensure you have the edible paper loaded into the printer. Select “Print”.
Desde el menú principal de PhotoCake, haga clic en “Artwork”.
2 Seleccione el Papel Comestible

Elija el tipo de papel comestible deseado.
3 Escoja la Imagen
Ingrese el número de imagen o haga clic en las flechas para navegar las opciones de imágenes.
4 Modifique la Imagen
Modifique la imagen.
Cuando haya terminado, seleccione “Preview the Print”.
5 Imprima la Imagen
Asegúrese que tenga el papel comestible cargado en la impresora. Seleccione “Print”.
22 BASICS | LOS BÁSICOS
1 Seleccione la Imagen
2 3 3 5 4 1
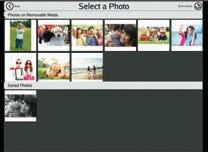
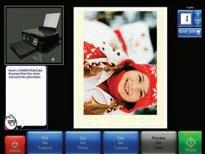
THE BASICS UPLOAD
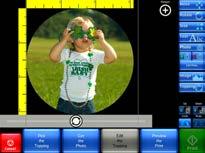
PHOTOS/ CARGAR FOTOS
1 Start the Project
From the PhotoCake home screen click on “Photo”.
2 Select Edible Paper
Choose the desired type of topping.
3 Get and Edit the Photo
•Agree to copyright warning. Choose a photo from the 'Select a Photo' screen if using a CD/DVD, flash drive, or memory card. Click on the scanner icon to scan a photo.


•Select photo.
•To crop or edit the photo, click on the photo selected.
•Click on the Photo button on the right and then the ‘Edit Photo’ option.
•You can choose to crop, change to gray scale, etc.
•Select ‘Save’ when done.

4 Edit the Topping
•Edit the Topping. When complete, select “Preview the Print”.
5 Print the Photo
Ensure you have the edible paper loaded into the printer. Select “Print”.
1 Inicie el Proyecto
Desde el menú principal de PhotoCake, haga clic en “Photo”.
2 Seleccione el Papel Comestible
Elija el tipo de papel comestible deseado.
3 Obtener y Editar la Foto
•Acepte los terminos de los derechos de autor. Elija una foto en la pantalla 'Select a Photo' (Seleccionar una foto) si utiliza un CD/DVD, memoria USB, o tarjeta de memoria. Haga clic en el icono del escáner para escanear una foto.
•Seleccione la foto
•Para recortar o editar la foto, haga clic en la foto seleccionada.
•Haga clic en el botón 'Photo' (Foto) de la derecha y luego en la opción 'Edit Photo' (Editar Foto).
•Puede elegir recortar, cambiar el color de la foto a gris, etc.,
•Seleccione "Save" (Guardar) cuando haya terminado.
4 Modifique la Imagen
•Haga los cambios.
• Una vez que finalice la edición, seleccione “Preview the Print”.
5 Imprima la Photo
Asegúrese que tenga el papel comestible cargado en la impresora. Seleccione “Print”.
23 BASICS | LOS BÁSICOS
3 3 2 5 4
1
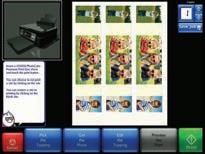
THE BASICS PRINTING MULTIPLE PHOTOS
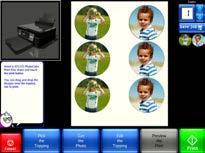
1 Start the Project
From the PhotoCake home screen click on “Photo”.
2 Select Edible Paper
Choose desired type of topping. Functionality applies to pre-cut media only.
3 Get and Edit the Photo
• Agree to copyright warning.
• Read and select green thumbs-up on instructions.
• Choose a photo from the ‘Select a Photo’ screen if using a CD/DVD, flash drive, memory card, or a previously saved photo. Click on the scanner icon to scan a photo.
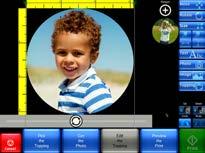
• To crop or edit the photo, click on the photo selected
• Click on the Photo button on the right and then the ‘Edit Photo’ option
• You can choose to crop, change to gray scale, etc.
• Select 'Save' when done.
4
Edit the Topping
Edit the topping.
5
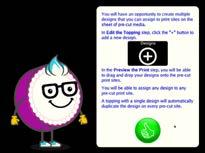
Add More Photos
Each print site can be customized.
A. To add another photo or image, click on the ‘+’ symbol under ‘Designs’
B. Click the ‘Photo’ or ‘Image’ button and then the icon with the + symbol to add an additional photo or image.
C. Continue to add photos or images as necessary. Photos or Images selected will appear under ‘Designs’.
D. Once editing is complete, select ‘Preview the Print’
6 Assign Designs to the Pre-Cut Print Sites
• Drag and drop the designs appearing on the right side over to the pre-cut sites desired
• You can choose to not print a site by clicking on the site or restore a site by clicking on the blank site again.
• A topping with a single design will automatically duplicate the design on every pre-cut site.
7
Print the Topping
Ensure you have the edible paper loaded into the printer. Select ‘Print’.
24 BASICS
2 3 5D 5B 5A 7 6 4 6 1
LOS BÁSICOS IMPRIMA MÚLTIPLES FOTOS
1 Inicie el Proyecto
Desde el menú principal de PhotoCake, haga clic en “Photo”.
2 Seleccione el Papel Comestible
Seleccione el tipo de papel comestible deseado. La funcionalidad solo se aplica a los estilos de papel comestible pre-cortados.
3 Obtener y Editar la Foto
• Acepte los derechos de autor.
• Lea y seleccione la paloma verde en la pantalla con instrucciones.
• Elija una foto en la pantalla 'Select a Photo' (Seleccionar una foto) si utiliza un CD/DVD, memoria USB, tarjeta de memoria, o una foto guardada previamente. Haga clic en el icono del escáner para escanear una foto.
• Para recortar o editar la foto, haga clic en la foto seleccionada.
• Haga clic en el botón 'Photo' (Foto) de la derecha y luego en la opción 'Edit Photo' (Editar Foto).
• Puede elegir recortar, cambiar el color de la foto a gris, etc.
• Seleccione "Save" (Guardar) cuando haya terminado.
4 Modifique la Imagen
Modifique la imagen.
5 Añadir Más Fotos
Cada sitio de impresión puede ser personalizado.
A. Para añadir otra foto o imagen, seleccione el símbolo ‘+’ debajo de ‘Designs’.
B. Seleccione el botón ‘Photo’ o ‘Image’ y luego el icono con el símbolo ‘+” para añadir una foto o imagen adicional.
C. Continúe agregando fotos o imágenes según sea necesario. Las fotos o imágenes seleccionada aparecerán debajo ‘Designs’.
D. Una vez finalizada la edición, seleccione ‘Preview the Print’
6 Asigne los diseños a los sitios de impresión pre-cortados.
• Arrastrar y soltar los diseños que aparecen en la derecha a los sitios pre-cortados deseados.
• Para eliminar un sitio haga clic en el sitio o para restaurar un sitio haga clic en el sitio en blanco de nuevo.
• Un trabajo con un solo diseño duplicará automáticamente el diseño en cada sitio pre-cortado.
7 Imprima la Photo
Asegúrese que tenga el papel comestible cargado en la impresora. Seleccione 'Print'.
25
LOS BÁSICOS 2 3 5D 5B 5A 7 6 4 6 1
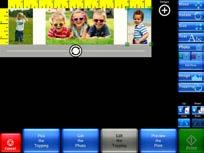
THE BASICS USE A FRAME
1 Start the Frame
From the PhotoCake home screen click on “Frame”.

2 Select Edible Paper
Select the desired type of topping.
3 Choose the Frame
Enter the frame number or click arrows to browse. Frames allow for multiple photos!

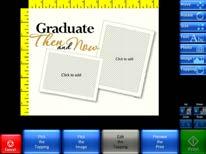
4 Get the Photo
• Select 'Click to Add'.
• Agree to copyright warning.
• Choose a photo from the 'Select a Photo' screen if using a CD/DVD, flash drive, memory card, or a previously saved photo. Click the scanner icon to scan a photo.
5 Edit the Photo
To crop or edit the photo, click on the photo selected
•Click on the Photo button on the right and then the ‘Edit Photo’ option
•You can choose to crop, change to gray scale, etc.
•Select 'Save’ when done
6 Add More Photos
•To add another photo to the frame, select the option ‘Click to Add’
•To add another photo or image outside of the frame, select the ‘Photo’ or ‘Image’
•Photo and Image Buttons:
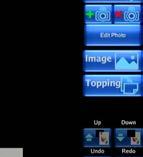

A. Add another photo or image to the Frame
B. Remove a photo or image form the Frame.
C. Crop or choose gray scale for photo
D. Move photo or image on top of another
E. Move photo beneath another.
7 Print the Frame
Ensure you have the edible paper loaded into the printer. Select “Print”.
26 BASICS
5 2 B E A D C 3 3 1 4
LOS BÁSICOS UTILICE UN MARCO
1 Inicie el Marco
Desde el menú principal de PhotoCake, haga clic en “Frame”.
2 Seleccione el Papel Comestible
Elija el tipo de papel comestible deseado.
3 Escoja el Marco
Ingrese el número de marco o haga clic en las flechas para navegar al marco. ¡Los marcos permiten múltiples fotos!
4 Obtener la Foto
• Seleccione 'Click to Add' (Haga clic para Añadir).
• Acepte los términos de los derechos de autor.
• Elija una foto en la pantalla 'Select a Photo' (Seleccionar una foto) si utiliza un CD/DVD, memoria USB, tarjeta de memoria o una foto guardada previamente. Haga clic en el icono del escáner para escanear una foto.
5 Modifique la Foto
Para recortar o editar la foto, haga clic en la foto seleccionada.
•Haga clic en el botón 'Photo' (Foto) de la derecha y luego en la opción 'Edit Photo' (Editar Foto).
•Puede elegir recortar, cambiar el color de la foto a gris, etc.
•Seleccione "Save" (Guardar) cuando haya terminado.
6 Añadir Más Fotos
•Para añadir una foto adicional al marco, seleccione la opción ‘Click to Add’.
•Para añadir una foto o imagen adicional, afuera del marco, seleccione el botón ‘Photo’ o ‘Image’.
•Botones para Editar Fotos y Imagenes
A. Añadir otra foto o imagen al marco
B. Elimine una foto o imagen al marco
C. Recortar o cambiar el color de la foto a gris
D. Mover la foto o imagen encima de otra
E. Mover la foto o imagen debajo de otra
7 Imprima el Marco
Asegúrese que tenga el papel comestible cargado en la impresora. Seleccione “Print”.
27 LOS BÁSICOS
5 2 B E A D C 3 3 1 4
THE BASICS USING THE NFL MATCHUP FRAME
1 Start the Frame
From the PhotoCake home screen click on "Frame".
2 Select Edible Paper
Select the desired type of topping.
3 Choose the Frame
Enter #26842 or click arrows to browse.
4 Select the NFL team helmets
• Click on the first helmet.
• Select the desired team helmet from the list generated.
• Click on the second helmet.
• Select the desired team for the second helmet.
Steelers can only be on right side.
5 Edit the Topping
Edit the Topping. When complete, select "Preview the Print".
6 Print the Frame
Ensure you have the edible paper loaded into the printer. Select "Print".
28 BASICS
3 4 2 TM & © NFL Properties, Inc. 4 1
decopac.com/videos/photocake
VIDEO DEMO
LOS BÁSICOS USAR EL MARCO QUE CORRESPONDE A LA NFL
1 Iniciar el marco
Desde la pantalla de inicio de PhotoCake, haga clic en "Frame" (Marco).
2 Seleccionar el papel comestible
Seleccione el tipo de papel comestible deseado.
3 Elegir el marco
Ingrese #26842 o haga clic en las flechas para desplazarse.
4 Seleccionar los cascos del equipo de la NFLs
• Haga clic en el primer casco.
• Seleccione el casco del equipo deseado de la lista generada.
• Haga clic en el segundo casco.
• Seleccione el equipo deseado para el segundo casco.
El Equipo Steelers solamente pueden estar en el lado derecho
Edite la imagen. Cuando termine, seleccione "Preview the Print" (Imprimir vista previa).
6 Imprimir el marco
Asegúrese de cargar el papel comestible en la impresora. Seleccione "Print" (Imprimir).
29 LOS BÁSICOS 3 4 2 TM & © NFL Properties, Inc. 4
5 Modificar la Imagen
1 DEMOSTRACIÓN DE VIDEO decopac.com/videos/photocake
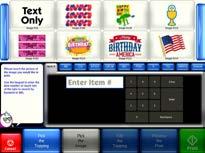
MESSAGE TOPPINGS PRINT TEXT ONLY MESSAGES/ IMPRIMIR SOLO MENSAJES DE TEXTO
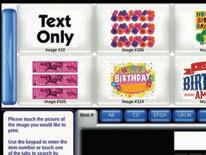
1 Select Artwork
From the PhotoCake home screen click on “Artwork”.

2 Select Edible Paper
Choose the desired type of topping.
3 Select “Text Only” Select “Text Only” under Artwork Options.
4 Add Message
•Type message or select from pre-loaded messages.
•Change font and color, if desired.
•Select "Add"
•If custom phrase will be used again, select "Save Phrase".
5 Edit the Topping
Edit the topping. When complete, select ”Preview the Print”.
6 Print the Message
Ensure you have the edible paper loaded into the printer. Select “Print”.
1 Seleccione “Artwork”
Seleccione el botón “Artwork” ubicado en el menú principal de PhotoCake.
2 Seleccione el Papel Comestible
Escoja el tipo de papel comestible deseado.
3 Seleccione “Text Only”
Seleccione el botón “Text Only” ubicado bajo de las Opciones de Artwork.
4 Agregue una Frase
•Escriba una frase o seleccione unas de las frases precargadas.
•Cambie el tipo de letra o el color, si lo desea.
•Seleccione 'Add' (Añadir).
•Si la frase personalizada será utilizada de nuevo, seleccione 'Save Phrase' (Guardar la frase).
5 Modifique la Frase
Haga los cambios. Una vez que finalice la edición, seleccione “Preview the Print”.
6 Imprima la Frase
Asegúrese que tenga el papel comestible cargado en la impresora. Seleccione “Print”.
30 BASICS | LOS BÁSICOS
4 5 3 6 1
MAKE IT PERSONAL
31 BASICS | LOS BÁSICOS
Black White
Purple
Orange Light Orange
Lavender LightPink
Red
Dark Red
LightBlue
Rose Pink Violet
DarkGray LightGray
Sky Blue Aqua
Plum Gold
Teal
Turquoise
Lime LightYellow Yellow Tan
Olive
Bright Green Sea Green
Blue Gray Blue
Brown Light Green
Avalon
Drina
KGDropsofJupiter
Peas&Carrots
Steelfish
Typewriter
AirmoleStripe
BeatnikBarbie
Foo
KGTwoisBetterThanOne
PictureHouse
Sundowners
Vademecum
Allstar
Colourbars
HickoryJack
MouseMemoirs Squealer
ThirstySoft VanillaShot
MAKE A COLLAGE HACER UN COLLAGE
1 Start the Collage
•From the PhotoCake home screen click on “Photo”.
• Collages can be created using customer provided photos and generic images or frames from the PhotoCake library.
2 Select Edible Paper
Select the desired type of topping.
3 Add the First Photo
•Agree to copyright warning.
•Read and select green thumbs up on instructions
•Choose a photo from the 'Select a Photo' screen if using a CD/DVD, flash drive, memory card, or a previously saved photo. Click the scanner icon to scan a photo.
4 Add a Photo
•Click the 'Photo' or 'Image' button and then the icon with the + symbol to add an additional photo or image.


5 Edit the Collage
A. Add another image to the photo collage.
B. Remove an image from the photo collage.
C. Move image up in order (place an image on top of another one).
D. Move image down in order (place image beneath another one).
E. Add text.
6 Print the Collage
1 Inicie el Collage
•Desde el menú principal de PhotoCake, haga clic en “Photo”.
• Los Collages se pueden crear usando fotos proporcionadas por el cliente e imágenes o marcos genericos de la biblioteca de PhotoCake.
2 Seleccione el Papel Comestible
Elija el tipo de papel comestible deseado.
3 Agregue la Primera Foto
•Lea y seleccione la paloma verde en la pantalla con instrucciones.
•Elija una foto en la pantalla 'Select a Photo' (Seleccionar una foto) si utiliza un CD/DVD, memoria USB, o tarjeta de memoria.
•Haga clic en el icono del escáner para escanear una foto.
4 Agregue otra Foto
•Seleccione el botón 'Photo' o 'Image' y luego el icono con el símbolo '+' para añadir una foto o imagen adicional.
5 Modifique el Collage
A. Añadir otra foto o imagen al collage
B. Elimine una foto o imagen al collage
C. Mover la foto o imagen encima de otra
D. Mover la foto o imagen debajo de otra
E. Añadir texto
6 Imprima el Collage
32 COLLAGE
2 3 4 4
6 B A D C E 5
CUSTOMERS WILL
L VE


THE COLLAGES YOU CREATE!
Decorate the cake to tell their story Decorar el pastel para contar su historia
Simply print and apply to cake Simplemente imprima y aplique al pastel


Create a custom collage by printing multiple photographs on one sheet of edible paper.
Crea un collage personalizado imprimiendo múltiples fotografías en una sola hoja del papel comestible.
Add image strips for extra flair Agregue tiras de imágenes para más estilo


33
You are awe-inspiring AJ
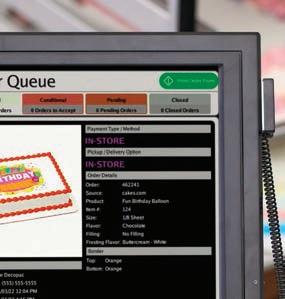
PRINTING .LIVE FILES ON PHOTOCAKE® IV
1 Log in to CelebrationIQ admin portal
•https://order.cakes.com/account-admin/
2 Select the drop-down option on the order you would like to print
•Note: the order must be Accepted.
3 Within the cake details, locate the PhotoCake Data Category
4 Select the XXXXX.live file
A. Do not open the file on your browser.
B. The file will save to your downloads folder.
5 Save file to a USB flash drive
6 While still on the PhotoCake IV home screen, insert the USB flash drive into the system
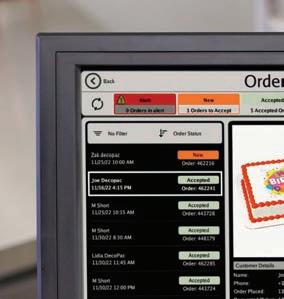
7 Select the ‘Order Queue’ button from the main menu
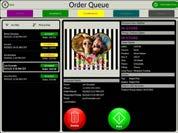
• This button will only appear if a .LIVE file is appearing on the flash drive connected.
8 Review Orders
• The list of .LIVE files will appear on the left


•Select the back arrow in the upper left to return to the main menu
9 Select an order
A. Notice all order details will appear on the right, along with the customer contact information.
B. Ability to 'Print Order Form' is available if necessary

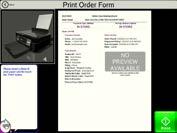
C. The 'Print' option will bring you to selecting Edible Media type.
D. The 'Delete' option will delete the file from the screen, but not from the USB flash drive.
10 Select, ‘Print’
11 Select the type of media the customer wants the image printed on
• The cake size information will appear above the edible media types for reference.
12 Once Edible Media type is selected, it will bring you to the Print Preview screen
• The option to backtrack and edit is available, but only if necessary.
13 Ensure you have the edible paper loaded into the printer
14 Select, ‘Print’
34 PRINTING .LIVE FILES
2 7 8 9B 1 5 3 12 9
IMPRIMIR ARCHIVOS .LIVE EN PHOTOCAKE® IV
1 Inicie sesión en el portal administrativo de CelebrationIQ
•https://order.cakes.com/account-admin/
2 Seleccione la orden que quiere imprimir en el menú desplegable
•Nota: la orden debe ser Aceptada.
3 Localice el archivo .LIVE dentro de los detalles de PhotoCake
4 Seleccione el archivo XXXXX.LIVE
A. No abra el archivo en su navegador.
B. El archivo se guardará en su carpeta de descargas.
5 Guarde el Archivo en una memoria USB
6 Mientras todavía está en el menú principal de su sistema PhotoCake, inserte la memoria USB en su sistema
7 Seleccione el botón 'Order Queue' desde el menú principal
• Nota: Este botón sólo aparecerá si un archivo de .LIVE está en la memoria USB conectada.
8 Revisar las Ordenes
•La lista de los Archivos .LIVE aparecerá en la izquierda
• Seleccione la flecha en la parte superior izquierda para volver al menú principal.
9 Seleccione una orden
A. Observe que todos los detalles del pedido aparecerán a la derecha, junto con la información de contacto del cliente.
B. La capacidad de 'Print Order Form' (imprimir una forma de pedido) está disponible si es necessario.
C. La opción 'Print' (imprimir) será dirigido a seleccionar el tipo de papel comestible.
D. La opción 'Delete' (borrar) eliminará el archivo de su sistema y no de la memoria USB.
10 Seleccione 'Print' (imprimir)
11 Seleccione el tipo de papel comestible que su cliente requiere para su imagen
• La información del tamaño del pastel aparecerá sobre la selecciones de la cobertura.
12 Una vez que seleccione el tipo de papel comestible, será dirigido al menú de impresión
• La opción para editar el diseño está disponible, pero solamente si es necesario.
13 Asegúrese que tenga el papel comestible cargado en la impresora
14 Seleccione 'Print' (imprimir)
35 IMPRIMIR ARCHIVOS .LIVE
8 5 3 12 9 9 2 1 7
GRAB THEIR ATTENTION YOUR PHOTOCAKE®

SYSTEM CAN SPEAK TO CUSTOMERS/ ATRAIGA SU ATENCIÓN SU SISTEMA

PHOTOCAKE® PUEDE HABLAR A LOS

36 SCREEN SAVER/GUARDA PANTALLA ro t e oto a e o e ree 1 Select “Maintenance” 2 Select “System Settings” 3 Select “Slide Show” 4 Select “Slide Show Manager” e e e e ri i a e oto a e 1 Seleccione“Maintenance” 2 Seleccione “System Settings” 3 Seleccione “Slide Show” 4 Seleccione “Slide Show Manager” 3 4 2 1 e t e ree a er to a e o r oto a e te a a e too ti i e e a a a ta a ree a er ara o ertir i te a e PhotoCake en una herramienta e e ta
CLIENTES
5 Add a Slide
The system comes loaded with the slides shown.
6 Add a Photo
•Use existing photos or create slides in a photo editing program to combine text, backgrounds and images. Use the dimensions: 1020 px × 768 px. Save as jpgs.
•Select “Add Photo” and select from your saved photos, thumb drive, DVD and/or memory card.
•Select the “Green Checkmark” to add the photo.
7 Add an Image
•Select “Add Image” and choose a generic image from the Image Library.
•Select the “Green Checkmark” to add the image.
8 Delete Slide
•Select the slide to be removed.
•Select “Delete Slide”.
5 Agregue una Diapositiva
El sistema viene cargado con las diapositivas mostradas.
6 Agregue una Foto
• Utilice las fotos existentes o cree diapositivas en un programa de edición de fotografías para combinar texto, fondos e imágenes. Utilice las dimensiones: 1020 px × 768 px. Guardelas como jpgs.
• Seleccione “Add Photo” y seleccione una de las fotos guardadas, memoria USB, DVD y/o tarjeta de memoria.
• Seleccione la marca de verificación verde para agregar la foto.
7 Agregue una Imagen
•Seleccione “Add Image” y elija una imagen genérica de la Biblioteca de Imágenes (Image Library).
• Seleccione la marca de verificación verde para agregar la imagen.
8 Eliminar la Diapositiva
•Seleccione la diapositiva que desea eliminar.
•Seleccione el botón “Delete Slide”.
9 Set Timing
Select the slide duration in seconds for the time between transitions from one image to next.


10 Transitions
Select the Transition effect for images to fade into the next one. You can select Sequential, Left, Right, Top, Bottom, Twirl and Fade.
11 Reorder
Select a slide and move forward or backward in the sequence.
12 Save
Select the 'Back' button in the upper left to save changes and exit this screen.
9
Establecer el Tiempo
Seleccione la duración de la diapositiva en segundos para el tiempo entre las transiciones de una imagen a la siguiente.
10 Transiciones
Seleccione el efecto de transición para que las imágenes desvanezcan en la siguiente. Puede seleccionar Secuencial (Sequential), Izquierda (Left), Derecha (Right), Superior (Top), Inferior (Bottom), Giro (Twirl), y Desvanezer (Fade).
11 Reordenar
Seleccione una diapositiva y muévala hacia adelante o hacia atrás en la secuencia.
12 Guardar
Seleccione el botón "Atrás" en la parte superior izquierda para guardar los cambios y salir de la pantalla.
37 SCREEN SAVER | GUARDA PANTALLA
6 7 5 8 9 11 10
SAVE TIME REPRINTING SAVE A PROJECT/GUARDE UN PROYECTO

1 Save a Job
•On the “Print” screen click “Save Job”.
•Name the job and select 'Save'.
2 Access a Saved Job
•On the home screen, click “Saved Jobs”.
•Click the job you want to reprint.
•Click the green "Print" button.
3 Delete a Saved Job
•Select a Saved Job as described in Step 2 above.

•Click on the red "Delete" button to delete the selected Saved Job.
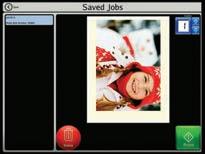
•Click on the green "Thumbs Up" button to confirm deletion.

•En la pantalla de “Print” haga clic en “Save Jobs”.
•Déle un nombre y seleccione 'Save' (Guardar)
2 Acceda a un Trabajo Guardado
•En el menú principal, haga clic en “Saved Job”.
• Haga clic en el trabajo que desea reimprimir.
•Haga clic en el botón verde “Imprimir”.
3 Elimine un Trabajo Guardado
•Seleccione un “Saved Job” como se describe en el paso 2.
•Haga clic en el botón rojo “Delete” para eliminar el trabajo guardado (Saved Job) seleccionado.
•Haga clic en el botón verde para confirmar la eliminación.
38 SAVE A JOB | GUARDE UN PROYECTO
1 Guarde un Trabajo
1 1 1 2 3 2 3 2
39 NOTES | NOTAS
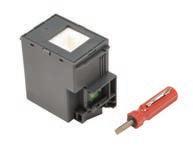
EPSON INK PAD REPLACEMENT KIT INSTALLATION INSTRUCTIONS
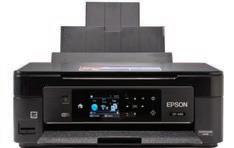
VISIT DECOPAC.COM FOR PHOTOCAKE PRINTER MAINTENANCE VIDEOS
AvailabletospecificEpsonprinters:
Before you start:
•Instructions shown are for PhotoCake IV 8.XX version
• Specific instructions for PhotoCake Online and PhotoCake IV 9.XX versions can be found on our website.
•Must be on Update 42 or newer
DIRECTIONS
1 From the printer menu, navigate to “Setup”; select “Maintenance”.
• For the XP-2100: Open the lid to the printer, then press and hold the Cancel button for 10 seconds.
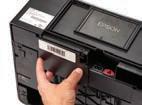
2 Select “Ink Cartridge Replacement” and remove ink cartridges.
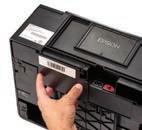
• For the XP-2100: Carriage will move to the right, remove inks
3 Power off the printer. Disconnect Power and USB cables from printer.
4 Remove extended output tray. Push in Paper Feed and connected Output trays.
5 Set Printer display side down so rear of printer is facing up.
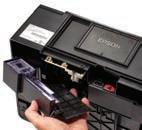
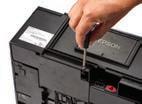
6 Using the #2 screwdriver (included in kit), remove screw and set aside.
7 Slide the Ink Pad tray to the right and remove.
8 Install new Ink Pad, reinsert screw.
9 Set printer right side up, reconnect trays and cables.
10 Power printer on and install ink cartridges.
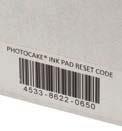
11 On PhotoCake System Screen, enter in the 12-digit Reset Code. Select 'Enter'.
12 Follow PhotoCake System Screen prompt to power off printer, select 'Ok' and then power printer back on.
5 Set printer display side down
6 Remove screw and slide ink pad to right
40 INK PAD REPLACEMENT KIT INSTRUCTIONS | INSTRUCCIONES DEL KIT DE SUSTITUCIÓN DE ALMOHADILLAS DE TINTA
XP-410XP-420XP-430XP-340XP-352XP-452XP-440XP-446XP-2100
PHOTOCAKE EPSON INK PAD REPLACEMENT KIT #27221 – Each
7 Slide the Ink Pad tray to right and remove
8 Insert new ink pad and reinsert screw
11 Enter Reset Code (located on front of box and on bottom of ink pad)
INSTRUCCIONES DE INSTALACIÓN DEL KIT DE REEMPLAZO DE ALMOHADILLA DE TINTA EPSON

VISITE DECOPAC.COM PARA VER VIDEOS DE MANTENIMIENTO DE LA IMPRESORA PHOTOCAKE
DisponibleparaimpresorasEpsonespecíficas:
XP-410XP-420XP-430XP-340XP-352XP-452XP-440XP-446XP-2100
Antes de comenzar:
• Las instrucciones mostradas son para la versión 8.XX de PhotoCake IV.
• Las instrucciones específicas para PhotoCake Online y las versiones 9.XX de PhotoCake IV se pueden encontrar en nuestro sitio web.
•Debe tener la actualización 42 o más reciente.
INSTRUCCIONES
1 En el menú de la impresora, vaya a “Configuración”; seleccione “Mantenimiento”.
•Para la XP-2100: Abra la tapa de la impresora y mantenga pulsado el botón Cancelar durante 10 segundos.
2 Seleccione “Reemplazo del cartucho de tinta” y retire los cartuchos de tinta.
• Para la XP-2100: El carro se moverá hacia la derecha, retire las tintas.
3 Apague la impresora. Desconecte cable de energía y los cables USB de la impresora.
4 Retire la bandeja de salida extendida. Empuje las bandejas de alimentación de papel y de salida conectadas.
5 Coloque la impresora con la pantalla hacia abajo, de modo que la parte posterior de la impresora quede hacia arriba.
6 Con el destornillador # 2 (que se incluye en el kit), retire en el tornillo y déjelo a un lado.
7 Deslice la bandeja de almohadilla de tinta hacia la derecha y retírela.
8 Instale la nueva almohadilla de tinta y vuelva a colocar el tornillo.
9 Coloque la impresora en posición correcta y vuelva a conectar las bandejas y los cables.
10 Encienda la impresora e instale los cartuchos de tinta.
11 En la pantalla del sistema de PhotoCake ingrese el código de restablecimiento de 12 dígitos. Seleccione “Ingresar”.

12 Siga las instrucciones de la pantalla del sistema de PhotoCake para apagar la impresora, seleccione “Aceptar” y vuelva a encenderla.
KIT DE REEMPLAZO DE ALMOHADILLA DE TINTA EPSON PHOTOCAKE #27221 – Cada uno
5 Coloque la pantalla de la impresora hacia abajo.
6 Con el destornillador # 2, retire el tornillo y déjelo a un lado.
7 Deslice la bandeja de almohadillas de tinta hacia la derecha y retírela
8 Inserte una nueva almohadilla de tinta y vuelva a colocar el tornillo.
11 Ingrese el código de restablecimiento. (que se encuentra en la parte frontal de la caja y en la parte inferior de la almohadilla de tinta)
41 INK PAD REPLACEMENT KIT INSTRUCTIONS | INSTRUCCIONES DEL KIT DE SUSTITUCIÓN DE ALMOHADILLAS DE TINTA
EPSON INK PAD REPLACEMENT KIT INSTALLATION INSTRUCTIONS
VISIT DECOPAC.COM FOR PHOTOCAKE PRINTER MAINTENANCE VIDEOS
AvailabletospecificEpsonprinters: XP-4100XP-4105 WF-2830WF-2850
Before you start:
•Instructions shown are for PhotoCake IV 8.XX version
•Must be on Update 42 or newer
DIRECTIONS
1 From the printer menu, navigate to “Setup”; select “Maintenance”.
2 Select “Ink Cartridge Replacement” and remove ink cartridges.
3 Power off the printer. Disconnect Power and USB cables from printer.
4 Remove extended output tray. Push in Paper Feed and connected Output trays.
5 Set Printer display side down so rear of printer is facing up.
6 Using the #2 screwdriver (included in kit), remove screw and set aside.
7 Slide the cover up to access the Ink Pad.
8 Slide the Ink Pad left to remove.
9 Install the new Ink Pad.
10 Reinsert the cover and screw.
11 Set printer right side up, reconnect trays and cables.
PHOTOCAKE
EPSON INK PAD REPLACEMENT KIT #28142 – Each
42 INK PAD REPLACEMENT KIT INSTRUCTIONS | INSTRUCCIONES DEL KIT DE SUSTITUCIÓN DE ALMOHADILLAS DE TINTA
12 Power printer on and install ink cartridges. PHOTOCAKE
5 Set printer display side down 6 Remove screw and set aside 8
Slide the Ink Pad left to remove
9 Install the new Ink Pad
INSTRUCCIONES DE INSTALACIÓN DEL KIT DE REEMPLAZO DE ALMOHADILLA DE TINTA EPSON

DisponibleparaimpresorasEpsonespecíficas:
Antes de comenzar:
• Las instrucciones mostradas son para la versión 8.XX de PhotoCake IV
• Debe tener la actualización 42 o más reciente.
INSTRUCCIONES
1 En el menú de la impresora, vaya a “Configuración”; seleccione “Mantenimiento”.

2 Seleccione “Reemplazo del cartucho de tinta” y retire los cartuchos de tinta.
3 Apague la impresora. Desconecte el cable de energía y los cables USB de la impresora.
4 Retire la bandeja de salida extendida. Empuje las bandejas de alimentación de papel y de salida conectadas.
5 Coloque la impresora con la pantalla hacia abajo, de modo que la parte posterior de la impresora quede hacia arriba.
6 Con el destornillador # 2 (que se incluye en el kit), retire en el tornillo y déjelo a un lado.
7 Deslice la tapa hacia arriba para acceder a la almohadilla de tinta.
8 Deslice la almohadilla de tinta hacia la izquierda para retirarla.
9 Instale la nueva almohadilla de tinta.
10 Vuelva a colocar la tapa y el tornillo.
11 Coloque la impresora en posición correcta y vuelva a conectar las bandejas y los cables.
12 Encienda la impresora e instale los cartuchos de tinta.
5 Coloque la pantalla de la impresora hacia abajo
6 Retire el tornillo y déjelo a un lado
7 Deslice la tapa hacia arriba para acceder a la almohadilla de tinta
8 Deslice la almohadilla de tinta hacia la izquierda para retirarla
KIT DE REEMPLAZO DE ALMOHADILLA DE TINTA EPSON PHOTOCAKE #28142 – Cada uno
43 INK PAD REPLACEMENT KIT INSTRUCTIONS | INSTRUCCIONES DEL KIT DE SUSTITUCIÓN DE ALMOHADILLAS DE TINTA
XP-4100XP-4105 WF-2830WF-2850 VISITE DECOPAC.COM PARA VER VIDEOS DE MANTENIMIENTO DE LA IMPRESORA PHOTOCAKE
BIRTHDAYS & CELEBRATIONS | CUMPLEAÑOS Y CELEBRACIONES


NEW! #28578 DecoSet® Background Locally Grown #28767 DecoSet® #47675 TMOC Page
NEW! #28579 DecoSet® Background Locally Grown #28767 DecoSet® #47677 TMOC Page


NEW! #28509 DecoSet® Background S is for Snail #28488 DecoSet® #47634 TMOC Page
NEW! #28510 DecoSet® Background S is for Snail #28488 DecoSet® #47636 TMOC Page


BIRTHDAYS & CELEBRA
NEW! #28574 DecoSet® Background Boho Rainbow #28768 DecoSet® #47680 TMOC Page
NEW! #28575 DecoSet® Background Boho Rainbow #28768 DecoSet® #47682 TMOC Page
NEW! #28718 DecoSet® Background Sunny Daze #28581 DecoSet® #47645 TMOC Page
NEW! #28719 DecoSet® Background Sunny Daze #28581 DecoSet® #47647 TMOC Page


#23421 DecoSet® Background Pink Baby Booties #13405 DecoSet® #44998 TMOC Page

#24870 DecoSet® Background Pink Baby Booties #13405 DecoSet® #46638 TMOC Page
#23377 DecoSet® Background Blue Baby Booties #13412 DecoSet® #44996 TMOC Page


#24871 DecoSet® Background Blue Baby Booties #13412 DecoSet® #45979 TMOC Page

#24848 DecoSet® Background Special Delivery Stork #10218 DecoSet® #46652 TMOC Page
#24945 DecoSet® Background Special Delivery Stork #10218 DecoSet® #46654 TMOC Page

#45415 DecoSet® Background Bath Toys #17892 DecoSet® #45414 TMOC Page
#24955 DecoSet® Background Bath Toys #17892 DecoSet® #45977 TMOC Page

44


45
#45424 DecoSet® Background First Birthday #24111 DecoSet® #45423 TMOC Page #24854 DecoSet® Background First Birthday #24111 DecoSet® #45998 TMOC Page #45363 DecoSet® Background Oh Baby Elephant #23806 DecoSet® #45361 TMOC Page #24858 DecoSet® Background Oh Baby Elephant #23806 DecoSet® #46635 TMOC Page #45366 DecoSet® Background Duckies #38210 DecoSet® #45365 TMOC Page #24964 DecoSet® Background Duckies #38210 DecoSet® #45988 TMOC Page #45412 DecoSet® Background B-A-B-Y Blocks #16301 DecoSet® #45411 TMOC Page #24948 DecoSet® Background B-A-B-Y Blocks #16301 DecoSet® #45975 TMOC Page #23374 DecoSet® Background Crown & Scepter #8798/43164 DecoSet® #45010 TMOC Page #45439 DecoSet® Background Crown & Scepter #8798/43164 DecoSet® #45471 TMOC Page #23371 DecoSet® Background Enchanting Unicorn #19509 DecoSet® #45016 TMOC Page #24862 DecoSet® Background Enchanting Unicorn #19509 DecoSet® #45989 TMOC Page #19503 DecoSet® Background Horses #16449 DecoSet® #45911 TMOC Page #24946 DecoSet® Background Horses #16449 DecoSet® #46620 TMOC Page #23366 DecoSet® Background Dinosaur Pals #11825/31201 DecoSet® #45014 TMOC Page #45440 DecoSet® Background Dinosaur Pals #11825/31201 DecoSet® #45472 TMOC Page
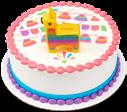
BIRTHDAYS & CELEBRATIONS | CUMPLEAÑOS Y CELEBRACIONES
& CELEBRATIONS | CUMPLEAÑOS Y CELEBRACIONES


46
#24958 DecoSet® Background Fire Truck & Station #15332 DecoSet® #45996 TMOC Page #23370 DecoSet® Background Fire Truck and Station #15332 DecoSet® #45018 TMOC Page #23365 DecoSet® Background Construction Dig #11826/31209 DecoSet® #45008 TMOC Page #24864 DecoSet® Background Construction Dig #11826/31209 DecoSet® #45983 TMOC Page #45421 DecoSet® Background Grim Reaper & Gravestone #17179 DecoSet® #45420 TMOC Page #24967 DecoSet® Background Grim Reaper & Gravestone #17179 DecoSet® #46600 TMOC Page #24849 DecoSet® Background Happy Birthday Neon Candles #15113/33661 DecoSet® #46612 TMOC Page #47480 DecoSet® Background Happy Birthday #27379 DecoSet® #47482 TMOC Page #24959 DecoSet® Background Happy Birthday Neon Candles #15113/33661 DecoSet® #46617 TMOC Page #47481 DecoSet® Background Happy Birthday #27379 DecoSet® #47483 TMOC Page #24584 DecoSet® Background Confetti Launcher #24380 DecoSet® #45562 TMOC Page #24856 DecoSet® Background Confetti Launcher #24380 DecoSet® #45982 TMOC Page NEW! #28706 DecoSet® Background Older Than Record Player #28704 DecoSet® #47654 TMOC Page NEW! #28705 DecoSet® Background Older Than Record Player #28704 DecoSet® #47652 TMOC Page #28706
BIRTHDAYS
BIRTHDAYS & CELEBRATIONS | CUMPLEAÑOS Y CELEBRACIONES


47
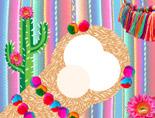
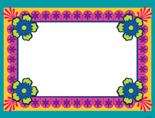
#24968 DecoSet® Background Fiesta #19527 DecoSet® #45995 TMOC Page #45387 DecoSet® Background Fiesta #19527 DecoSet® #45386 TMOC Page #23373 DecoSet® Background Confetti Donut #23129 DecoSet® #45006 TMOC Page #24965 DecoSet® Background Confetti Donut #23129 DecoSet® #45981 TMOC Page #45384 DecoSet® Background Mystical Mermaid #22856 DecoSet® #45383 TMOC Page #24861 DecoSet® Background Mystical Mermaid #22856 DecoSet® #46634 TMOC Page #45409 DecoSet® Background Unicorn Creations #22646/44419 DecoSet® #45408 TMOC Page #45438 DecoSet® Background Unicorn Creations #22646/44419 DecoSet® #45469 TMOC Page #45430 DecoSet® Background Pet Creations #23648 DecoSet® #45429 TMOC Page #24853 DecoSet® Background Pet Creations #23648 DecoSet® #46636 TMOC Page #25747 DecoSet® Background Piñata Coin Bank #25849 DecoSet® #47150 TMOC Page #25748 DecoSet® Background Piñata Coin Bank #25849 DecoSet® #47152 TMOC Page #24965 #24968


48 BIRTHDAYS
#23403 DecoSet® Background Silver Cross Blessed #5280/36422 DecoSet® #45032 TMOC Page #45451 DecoSet® Background Silver Cross Blessed #5280/36422 DecoSet® #45470 TMOC Page #45437 DecoSet® Background Religious #24112 DecoSet® #45436 TMOC Page #24855 DecoSet® Background Religious #24112 DecoSet® #46643 TMOC Page #47428 DecoSet® Background Foxy Fran #27195 DecoSet® #47429 TMOC Page #47423 DecoSet® Background Hunky Man #27194 DecoSet® #47424 TMOC Page #47434 DecoSet® Background Foxy Fran #27195 DecoSet® #47432 TMOC Page #47433 DecoSet® Background Hunky Man #27194 DecoSet® #47426 TMOC Page #45398 DecoSet® Background Sip Sip Hooray #23676 DecoSet® #45397 TMOC Page #24857 DecoSet® Background Sip Sip Hooray #23676 DecoSet® #46650 TMOC Page #45390 DecoSet® Background Shake it Up #19526 DecoSet® #45389 TMOC Page NEW! #28820 DecoSet® Background Peace Love & Happiness #28819 DecoSet® #47686 TMOC Page #24966 DecoSet® Background Shake it Up #19526 DecoSet® #46644 TMOC Page NEW! #28821 DecoSet® Background Peace Love & Happiness #28819 DecoSet® #47688 TMOC Page #28821
& CELEBRATIONS | CUMPLEAÑOS Y CELEBRACIONES


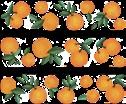


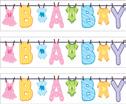


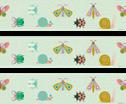


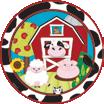

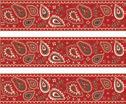


49 BIRTHDAYS & CELEBRATIONS
#28500 Image Little Sunshine
#28498 Frame Welcome Little One!
#27374 Image Little One on the Way
#27375 Strips Clementines
#27384 Image Oh Babies
#455 Image Boy or Girl
#26909 Image It’s a Boy
#26910 Image It’s a Girl
#19624 Image Stork and Baby
#20859 Image Anchor
#187 Image Baby Shower Noah’s Ark
#19281 Strips Baby Clothesline
#28497 Image Wild One
#28496 Image Wild One on the Way
#28494 Strips Wild Bugs
#28495 Frame Wild Flower
#19268 Image Jungle Animals
#463 Image Woodland Buddies
#505 Image Baby Barnyard
#508 Strips Baby Barnyard Black & White
#507 Strips Baby Barnyard Red
#19460 Frame First Birthday Butterfly
LICENSED IMAGES REQUIRE A PIN PHOTOCAKE PINS AVAILABLE 24/7 DECOPAC.COM | 1-800-644-1228
#19464 Frame First Birthday #27382 Image Pastel Rainbow
#28498
#28500
Photo
Photo
Photo Photo


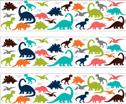


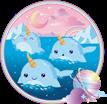


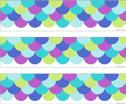

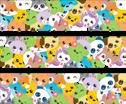

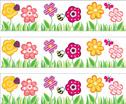

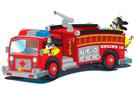


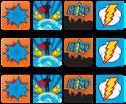

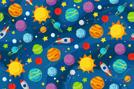
50 BIRTHDAYS & CELEBRATIONS
#19228 Image Dinosaur
#26921 Image You Are Dino-Mite!
#26445 Image Rawrsome Birthday Dino
#20733 Strips Dinosaur
#27830 Image Girl Power
#25752 Image Kitty With Glasses
#25753 Image Puppy With Glasses
#26450 Image Safari Animals Pattern
#25755 Image Sloth
#25754 Image Narwhal
#25628 Image Rainbow Unicorn
#19226 Image Unicorn
#22860 Frame Magical Unicorn
#551 Strips Princess
#24125 Image Mermaid Hair Don’t Care
#24126 Image Mermaid And Unicorn
#22915 Strips Mermaid Scales
#26449 Image Kawaii Clouds
#26928 Strips Kawaii Characters
#19588 Image Cutie Pie Birthday
#19280 Strips Cutie Pie Garden
#19949 Image Birthday Race Car
#19267 Image Firetruck
#504 Image Happy Birthday Truck
#26447 Image Construction Pattern
#27387 Image Comic Strip Burst
#27390 Strips Comic Strip Bursts
#19969 Image Space Birthday
#26488 Image Outer Space
#509 Strips Classic Stars
Photo


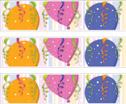


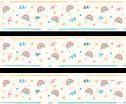

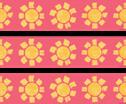
51 BIRTHDAYS & CELEBRATIONS
#28525 Image Party Like It’s Your Birthday #28562 Image Peace, Love & Birthday
#28563 Frame Make A Wish!
#27380 Frame Happy Birthday Collage
#20001 Strips Happy Birthday Balloons
#27832 Image Old School Birthday #27845 Image Classic Birthday
#19954 Image Birthday Cheers
#441 Image Camouflage Birthday
#618 Image Happy Birthday Gorgeous
#24878 Image Happy Birthday #625 Image Birthday Fiesta
#19979 Image Birthday Cake
#124 Image Fun Birthday Balloon
#442 Image Tie Dye Birthday
#19435 Frame Happy Birthday Party Hats #622 Image Very Happy Birthday Dots
#25904 Image Happy Bday
#19971 Image Rockin’ Birthday
#585 Strips Birthday Blowout Candles
#587 Strips Birthday Blowout
#19297 Strips Birthday Star Balloons
#28507
NEW! #28503 Image Happy Birthday Bash
NEW! #28505 Image Hooray! It’s Your Birthday
NEW! #28507 Image Happy Birthday Rainbow
NEW! #28506 Strips Rainbows and Stars
NEW! #28528 Image Happy Birthday Sun
NEW! #28529 Strips Sun
Photo
Photo
Photo Photo
Photo

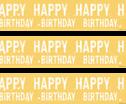


52 BIRTHDAYS & CELEBRATIONS
#28535 Strips Balloon Dog
#28539 Strips Happy Birthday
#28542 Image Feliz Cumpleaños
#28541 Frame Azul Feliz Cumpleaños
#26518 Image Feliz Cumpleaños
#28531 Image Happy Birthday King
#28530 Image Happy Birthday Queen
#633 Image Bonne Fête
#24123 Image Aries
#24140 Image Taurus
#24141 Image Gemini
#24142 Image Cancer
#24143 Image Leo
#24144 Image Virgo
#24145 Image Libra
#24146 Image Scorpio
#24147 Image Sagittarius
#24148 Image Capricorn
#24149 Image Aquarius
#24180 Image Pisces
#19470 Frame Fashionable 15
#384 Image Sweet 16
#22845 Frame Happy 16th Birthday
#20168 Frame Driver License
#22846 Frame Happy 20th Birthday #26902 Image 21st Birthday
#28541
#28530
Photo
Photo
Photo Photo Photo


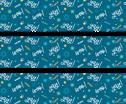


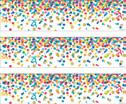
53 BIRTHDAYS & CELEBRATIONS
#26903 Image 30th birthday
#22847 Frame Happy 30th Birthday
#26904 Image 40th Birthday
#22848 Frame Happy 40th Birthday
#26905 Image 50th Birthday
#22849 Frame Happy 50th Birthday
#26906 Image 60th Birthday
#22850 Frame Happy 60th Birthday
#22851 Frame Happy 70th Birthday
#22852 Frame Happy 80th Birthday
#19448 Frame Aged To Perfection
#20013 Image Over The Hill Banner
#27831 Image Retirement
#20149 Image Happy Retirement
#28534 Image Be You Tiful
#28527 Frame Celebrating The Amazing You
#20126 Frame Stars
#27844 Image Congrats
NEW! #28624 Image Trophy
#27829 Image You Got This
#24923 Image Confetti
#20951 Image Oh Happy Day
#26908 Image Party Animals
NEW! #28554 Image Party Time NEW! #28504 Strips Yay!
#26926 Strips Hip Hip Hooray!
#25758 Image Fiesta Like There’s No Mañana
#19706 Image Let’s Party
#22418 Frame Raining Confetti #21700 Strips Party Confetti
Photo
Photo
Photo
Photo
Photo
Photo
Photo Photo
Photo
Photo


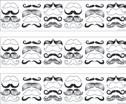
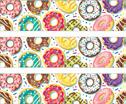

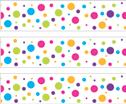


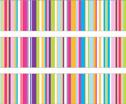
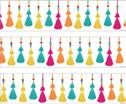


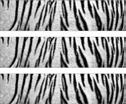


54 BIRTHDAYS & CELEBRATIONS
#24127 Image Treat Yo’ Self
#620 Image You the Man
#601 Strips Mustache
#22859 Strips Donuts
#483 Strips Classic Stripes
#484 Strips Black & White Chevron
#472 Strips Robot Blocks
#581 Strips Celebrate
#579 Strips Celebrate Dots
#279 Strips Happy Variety Dots
#22858 Strips Best Day Ever
#25761 Strips Bunting Banner
#19276 Strips Happy Variety Strips
#45450 Strips Tassels
#25751 Image Let’s Pawty
#19951 Image Birthday Cats
#19233 Image Grazing Horses
#24900 Image No Drama Llama
#26703 Image White Tiger
#26706 Strips White Tiger
#26704 Image Siberian Tiger
#26705 Strips Siberian Tiger
#620 #19951
#19985 Image Balloons #24127


55 LICENSED IMAGES REQUIRE A PIN BIRTHDAYS & CELEBRATIONS
#20132 Frame Silver Frame
#26907 Image Good Luck!
#26720 Image Thank You
#27260 Image Pride Flag
NEW! #28676 Image Pride Flag
NEW! #28677 Image Bisexual Pride Flag
NEW! #28679 Image Transgender Pride Flag
#25736 Image Marvel’s Spider-Man™ Graduation
#25640 Image emoji™ Cool Grad
#25642 Image emoji™ Smiling Poo Grad
#28556 Image Traditional Grad 2023
#28487 Frame 2023 Graduate
#28486 Frame 2023 Congratulations
#28485 Frame Gold 2023 Graduate
#25464 Strips Geometric Shapes
#25456 Frame Bright Inspiration
#25463 Strips Bright Inspiration
#26927 Strips Congrats
#544 Frame Congrats Grad
#23765 Frame Then and Now
#26918 Frame Grad Cap
#25457 Image Graduation Hat
#369 Image Grad Cap
#436 Strips Classic Contemporary Congrats
#28582 Image Carpe Diem
#28550 Frame Carpe Diem Graduate
#28676
#28582
Photo
Photo Photo Photo
Photo
Photo
Photo
Photo Photo Photo


56 BIRTHDAYS & CELEBRATIONS
#28470 Image Way to Use Your Noodle! #28471 Image Whale Done!
#24925 Image Mr. & Mrs.
#24926 Image Mr. & Mr.
#24928 Image Mrs. & Mrs.
#20398 Image Best Day Ever
#20456 Image Black & White Floral
#28584 Image Felicitaciones por tu Graduación Sarape
#28552 Frame Felicitaciones por tu Graduación Sarape
#28586 Strips Felicitaciones por tu Graduación Sarape
#28583 Image Felicitaciones por tu Graduación Floral
#28551 Frame Felicitaciones por tu Graduación Floral
#28585 Strips Felicitaciones por tu Graduación Floral
#26839 Image Run into the World
#26922 Image You Are Amazing
#26929 Strips Self Made
#43475 Image Big Deal Grad
#485 Strips Hats Off Silhouette
#20478 Image Congrats Grad Pennants
#22413 Image Adventure Awaits
#722 Image Grad Smiley Face
#28567 Strips More Clapping!
#26923 Image Future is So Bright
#28521 Frame You Did It!
#28551 #28470
Photo
Photo
Photo


57 LICENSED IMAGES REQUIRE A PIN BIRTHDAYS & CELEBRATIONS
#26900 Frame Floral Wreath
#27076 Frame Floral Geometric
#26901 Frame Leaves Circle
#27077 Frame Leaves Geometric
#19463 Frame Anniversary Modern
#20040 Frame Anniversary Heart #20027 Image Anniversary Flowers
#24929 Image 25th Anniversary
#24931 Image 50th Anniversary
#19935 Image Bless This Child Pink
#19936 Image Bless This Child Blue
#19379 Frame God Bless Cross
#22865 Image First Communion
#153 Image Communion Chalice
#22866 Image Primera Comunión
#19941 Image On Your Confirmation
#195 Image Cross with Flowers
#27386 Image Mazel Tov
#17905 Image Breast Cancer Awareness Ribbon of Hope
#8433 Image United States Army®
#8431 Image United States Air Force™
#20927 Image United States Navy
#8432 Image United States Marine Corps
#27843 Image Fire Safety Services
#27848 Strips Fire Safety Services
#27842 Image Law Enforcement
#27841 Image Medical Field
#27847 Strips Law Enforcement
#27846 Strips Medical Field
Photo Photo
Photo Photo
Photo Photo Photo
#26195 DecoSet® Background
Disney Princess Ariel Colors of the Sea #26235 DecoSet® #47222 TMOC Page


#45217 DecoSet® Background
Disney Princess Cinderella Transforms #18699 DecoSet® #45214 TMOC Page


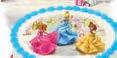


#26196 DecoSet® Background Disney Princess Ariel Colors of the Sea #26235 DecoSet® #47405 TMOC Page

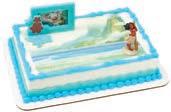

#45220 DecoSet® Background
Disney Princess Once Upon A Moment #6315/36983 DecoSet® #45218 TMOC Page

#21601 DecoSet® Background Disney Princess Belle Beautiful as a Rose #19164 DecoSet® #44894 TMOC Page
#45337 DecoSet® Background


Disney Princess Once Upon A Moment #6315/36983 DecoSet® #45487 TMOC Page
#25018 DecoSet® Background


Disney Princess Belle Beautiful as a Rose #19164 DecoSet® #45932 TMOC Page

#25017 DecoSet® Background Disney Princess Cinderella Transforms #18699 DecoSet® #45931 TMOC Page


#45261 DecoSet® Background Moana Adventures in Oceania #7941 DecoSet® #45255 TMOC Page
#45351 DecoSet® Background Moana Adventures in Oceania #7941 DecoSet® #45498 TMOC Page

NEW!
DecoSet® Background Disney Princess Tiana #47651 DecoSet® #47643 TMOC Page


NEW! #28740 DecoSet® Background Disney Princess Tiana #47651 DecoSet® #47642 TMOC Page


58 LICENSED CHARACTERS | PERSONAJES CON LICENCIA
#28739
#26196
#28740

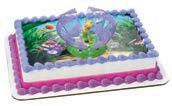

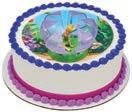


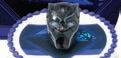

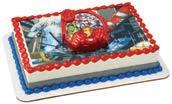

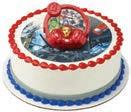
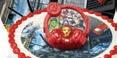


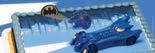

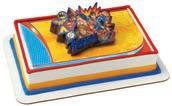


59 LICENSED CHARACTERS | PERSONAJES CON LICENCIA #18645 DecoSet® Background Tinker Bell in Flower #13162 DecoSet® #44981 TMOC Page #25009 DecoSet® Background Tinker Bell in Flower #13162 DecoSet® #45926 TMOC Page #45319 DecoSet® Background Aquaman™ #23837 DecoSet® #45045 TMOC Page #24990 DecoSet® Background Aquaman™ #23837 DecoSet® #45916 TMOC Page #26206 DecoSet® Background MARVEL Avengers Black Panther Warrior King #47197 DecoSet® #47206 TMOC Page #26207 DecoSet® Background MARVEL Avengers Black Panther Warrior King #47197 DecoSet® #47209 TMOC Page #23332 DecoSet® Background MARVEL Avengers Unify #22755/44421 DecoSet® #44879 TMOC Page #45236 DecoSet® Background MARVEL Avengers Unify #22755/44421 DecoSet® #45501 TMOC Page #27331 DecoSet® Background Batman™ Into Action #27329 DecoSet® #47468 TMOC Page #27255 DecoSet® Background Batman™ Into Action #27329 DecoSet® #47465 TMOC Page #23406 DecoSet® Background Justice League™ United #21790 DecoSet® #44721 TMOC Page #25032 DecoSet® Background Justice League™ United #21790 DecoSet® #45942 TMOC Page
#
#18645
#26207


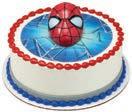


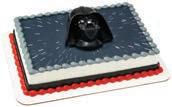


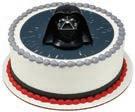


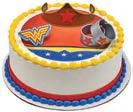

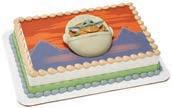


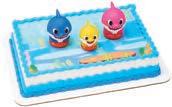


60 LICENSED CHARACTERS | PERSONAJES CON LICENCIA #45299 DecoSet® Background Marvel’s Spider-Man™ Ultimate Light Up Eyes #7891/39194 DecoSet® #45291 TMOC Page #45338 DecoSet® Background Marvel’s Spider-Man™ Ultimate Light Up Eyes #7891/39194 DecoSet® #45488 TMOC Page #45285 DecoSet® Background Star Wars™ Darth Vader™ #5303 DecoSet® #45273 TMOC Page #45357 DecoSet® Background Star Wars™ Darth Vader™ #5303 DecoSet® #45505 TMOC Page #22633 DecoSet® Background Wonder Woman™ Strength & Power #7222 DecoSet® #44992 TMOC Page #25083 DecoSet® Background Wonder Woman™ Strength & Power #7222 DecoSet® #45960 TMOC Page #26496 DecoSet® Background Star Wars™ The Mandalorian The Child #26495 DecoSet® #47322 TMOC Page #26497 DecoSet® Background Star Wars™ The Mandalorian The Child #26495 DecoSet® #47324 TMOC Page #26699 DecoSet® Background Baby Shark Family Fun #26698 DecoSet® #47360 TMOC Page #26700 DecoSet® Background Baby Shark Family Fun #26698 DecoSet® #47363 TMOC Page #26246 DecoSet® Background Barbie™ Dreamhouse Adventures #26245 DecoSet® #47224 TMOC Page #26247 DecoSet® Background Barbie™ Dreamhouse Adventures #26245 DecoSet® #47313 TMOC Page #45299 # #25083


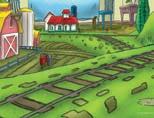
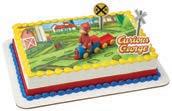


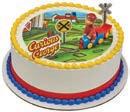

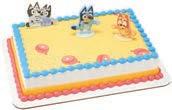
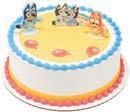
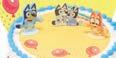

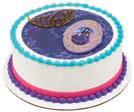

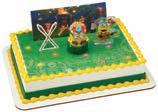

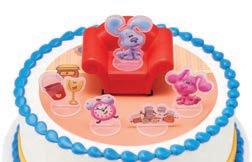

61 LICENSED CHARACTERS | PERSONAJES CON LICENCIA #26371 DecoSet® Background Blue’s Clues & You! #26492 DecoSet® #47317 TMOC Page #26372 DecoSet® Background Blue’s Clues & You! #26492 DecoSet® #47319 TMOC Page #45210 DecoSet® Background Disney and Pixar’s Cars 3 Ahead of The Curve #20680 DecoSet® #45208 TMOC Page #45342 DecoSet® Background Disney and Pixar’s Cars 3 Ahead of The Curve #20680 DecoSet® #45492 TMOC Page #23361 DecoSet® Background Curious George® Train #38255 DecoSet® #44711 TMOC Page #25002 DecoSet® Background Curious George® Train #38255 DecoSet® #45924 TMOC Page NEW! #28880 DecoSet® Background Bluey Dance Mode #28856 DecoSet® #47718 TMOC Page NEW! #28881 DecoSet® Background Bluey Dance Mode #28856 DecoSet® #47721 TMOC Page #24784 DecoSet® Background Disney Descendants 3 Good 2 B Bad #24327 DecoSet® #45540 TMOC Page #24540 DecoSet® Background Disney Descendants 3 Good 2 B Bad #24327 DecoSet® #45539 TMOC Page #23338 DecoSet® Background Despicable Me 3™ Hula Party #21272 DecoSet® #45358 DecoSet® Background Despicable Me 3™ Hula Party #21272 DecoSet® #26372 #28881


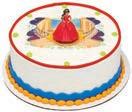

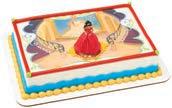


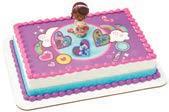
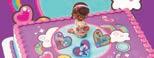

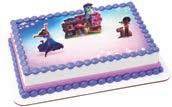
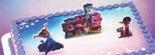

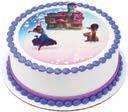


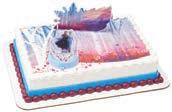


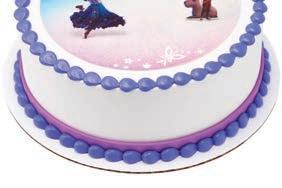

62 LICENSED CHARACTERS | PERSONAJES CON LICENCIA #18655 DecoSet® Background Despicable Me™ Beach Party #17251 DecoSet® #47147 TMOC Page #25791 DecoSet® Background Despicable Me™ Beach Party #17251 DecoSet® #47022 TMOC Page #25020 DecoSet® Background Elena of Avalor Crown Princess #8830 DecoSet® #45933 TMOC Page #45237 DecoSet® Background Elena of Avalor Crown Princess #8830 DecoSet® #45235 TMOC Page #45309 DecoSet® Background emoji™ I Am... #23726 DecoSet® #45308 TMOC Page #25021 DecoSet® Background emoji™ I Am... #23726 DecoSet® #45934 TMOC Page #25014 DecoSet® Background Doc McStuffins Doc and Lambie #17801 DecoSet® #45928 TMOC Page #45232 DecoSet® Background Doc McStuffins Doc and Lambie #17801 DecoSet® #45226 TMOC Page #27876 DecoSet® Background Disney Encanto #27920 DecoSet® #45084 TMOC Page #27877 DecoSet® Background Disney Encanto #27920 DecoSet® #47505 TMOC Page #25405 DecoSet® Background Disney Frozen II Mythical Journey #24246/46661 DecoSet® #47012 TMOC Page #25406 DecoSet® Background Disney Frozen II Mythical Journey #24246/46661 DecoSet® #47013 TMOC Page #18655 # #27877


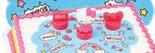

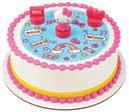


63 LICENSED CHARACTERS | PERSONAJES CON LICENCIA #21862 DecoSet® Background Frozen Olaf Chillin’ #7396 DecoSet® #44917 TMOC Page #25023 DecoSet® Background Frozen Olaf Chillin’ #7396 DecoSet® #45936 TMOC Page #25027 DecoSet® Background Hello Kitty® Stamper #38264 DecoSet® #45963 TMOC Page #25029 DecoSet® Background Hello Kitty® Stamper #38264 DecoSet® #45939 TMOC Page #21591 DecoSet® Background Hello Kitty® Kitty Style Hello Fun #19316 DecoSet® #44919 TMOC Page #25028 DecoSet® Background Hello Kitty® Kitty Style Hello Fun #19316 DecoSet® #45938 TMOC Page #25287 DecoSet® Background HARRY POTTER™ Quidditch™ Chase #25286 DecoSet® #46903 TMOC Page #25288 DecoSet® Background HARRY POTTER™ Quidditch™ Chase #25286 DecoSet® #46905 TMOC Page #26413 DecoSet® Background Hot Wheels™ Drift #6088 DecoSet® #47350 TMOC Page #26414 DecoSet® Background Hot Wheels™ Drift #6088 DecoSet® #47349 TMOC Page #26413 #25023 #25028

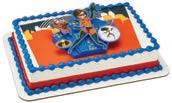


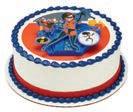


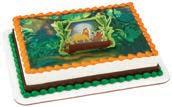

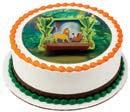


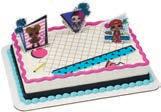

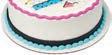

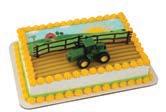
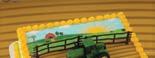


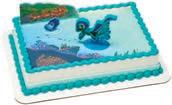


64 LICENSED CHARACTERS | PERSONAJES CON LICENCIA
Disney
We
#23253 DecoSet® Background
and Pixar’s Incredibles 2
are Incredible #22767/44430 DecoSet® #44730 TMOC Page
We are
#45345 DecoSet® Background Disney and Pixar’s Incredibles 2
Incredible #22767/44430 DecoSet® #45495 TMOC Page
#24785
DecoSet® Background Disney The Lion King Circle of Life #24724 DecoSet® #45900 TMOC Page
#24833 DecoSet® Background Disney The Lion King Circle of Life #24724 DecoSet® #45912 TMOC Page
L.O.L.
#26963 DecoSet® Background
SURPRISE!™ Born To Sparkle #27139 DecoSet® #47400 TMOC Page
L.O.L.
#26964 DecoSet® Background
SURPRISE!™ Born To Sparkle #27139 DecoSet® #47402 TMOC Page
#8396 DecoSet® Background John Deere Farm Tractor #38266 DecoSet® #44925 TMOC Page
#25031 DecoSet® Background John Deere Farm Tractor #38266 DecoSet® #45941 TMOC Page
#27263 DecoSet® Background Disney and Pixar’s Luca The World is Yours #27192 DecoSet® #47413 TMOC Page
The
#27287 DecoSet® Background Disney and Pixar’s Luca
World is Yours #27192 DecoSet® #47415 TMOC Page
#26963
#25031
#24833

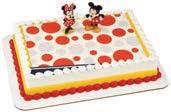

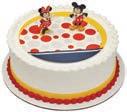
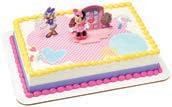
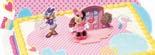


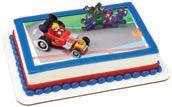
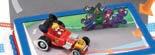

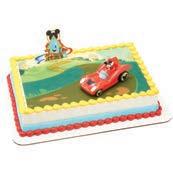

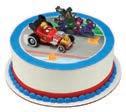
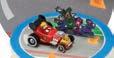


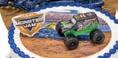


65 LICENSED CHARACTERS | PERSONAJES CON LICENCIA
DecoSet® Background Mickey Mouse and Minnie Mouse #24732 DecoSet® #45904 TMOC Page
DecoSet® Background Mickey Mouse and Minnie Mouse #24732 DecoSet® #44769 TMOC Page
DecoSet® Background Minnie Mouse Happy Helpers
DecoSet® #45250 TMOC Page
DecoSet® Background Minnie Mouse Happy Helpers #20682 DecoSet® #45491 TMOC Page
DecoSet® Background
and the Roadster Racers
DecoSet® #45247 TMOC Page
DecoSet® Background Mickey and the Roadster Racers
DecoSet®
TMOC Page
DecoSet® Background Mickey and the Roadster Racers #20683 DecoSet® #45489 TMOC Page
DecoSet® Background
and the Roadster Racers
DecoSet®
TMOC Page
DecoSet® Background Monster Jam® Full Throttle Fun #38269 DecoSet® #44939 TMOC Page #25053 DecoSet® Background Monster Jam® Full Throttle Fun #38269 DecoSet® #45944 TMOC Page
#45899
#24844
#45252
#20682
#45341
#45249
Mickey
#20683
#27886
#28053
#47520
#45339
#27887
Mickey
#28053
#47522
#8397
#24844
#25053 #45341


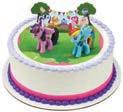


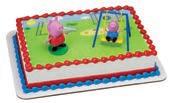


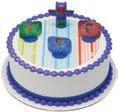


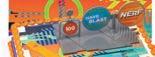

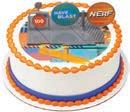


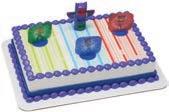


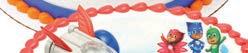
66 LICENSED CHARACTERS | PERSONAJES CON LICENCIA #7956 DecoSet® Background My Little Pony™ It’s a Pony Party! #38685 DecoSet® #44941 TMOC Page #45350 DecoSet® Background My Little Pony™ It’s a Pony Party! #38685 DecoSet® #45497 TMOC Page #45304 DecoSet® Background PAW Patrol™ Just Yelp For Help #6089/36814 DecoSet® #45301 TMOC Page NEW! #29052 DecoSet® Background PJ Masks Save the Day #29057 DecoSet® #47725 TMOC Page #45336 DecoSet® Background PAW Patrol™ Just Yelp For Help #6089/36814 DecoSet® #45475 TMOC Page NEW! #29053 DecoSet® Background PJ Masks Save the Day #29057 DecoSet® #47728 TMOC Page #19029 DecoSet® Background Peppa Pig™ Swing Set #38250 DecoSet® #44947 TMOC Page #45355 DecoSet® Background Peppa Pig™ Swing Set #38250 DecoSet® #45503 TMOC Page #27312 DecoSet® Background PJ Masks We’re On Our Way! #23313/44737 DecoSet® #47492 TMOC Page #26761 DecoSet® Background NERF™ This Is Nerf Nation #26603 DecoSet® #47343 TMOC Page #26760 DecoSet® Background NERF™ This Is Nerf Nation #26603 DecoSet® #47345 TMOC Page #27311 DecoSet® Background PJ Masks We’re On Our Way! #23313/44737 DecoSet® #47475 TMOC Page #26760 #29053


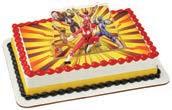


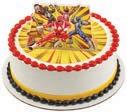

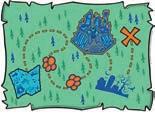
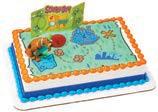


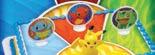

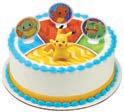
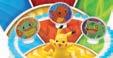


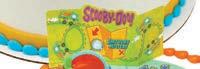

67 LICENSED CHARACTERS | PERSONAJES CON LICENCIA NEW! #29095 DecoSet® Background Pokémon Play! #29093/47739 DecoSet® #47738 TMOC Page NEW! #29094 DecoSet® Background Pokémon Play! #29093/47739 DecoSet® #47735 TMOC Page #23396 DecoSet® Background Power Rangers™ It’s Morphin Time #20746 DecoSet® #44720 TMOC Page #25062 DecoSet® Background Power Rangers™ It’s Morphin Time #20746 DecoSet® #45950 TMOC Page #26436 DecoSet® Background Scooby-Doo!™ Mystery Revealed #7221 DecoSet® #47352 TMOC Page #26437 DecoSet® Background Scooby-Doo!™ Mystery Revealed #7221 DecoSet® #47354 TMOC Page #21603 DecoSet® Background Pokémon Light Up Pikachu #38272/37855 DecoSet® #44950 TMOC Page #45352 DecoSet® Background Pokémon Light Up Pikachu #38272/37855 DecoSet® #45499 TMOC Page #20991 DecoSet® Background Sesame Street® Let’s Play #19021 DecoSet® #44957 TMOC Page #45359 DecoSet® Background Sesame Street® Let’s Play #19021 DecoSet® #45507 TMOC Page #45359 #45352
#26437
#7436 DecoSet® Background
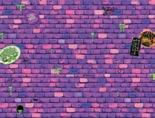


SpongeBob SquarePants™
Krabby Patty
#6086 DecoSet®
#44966 TMOC Page
#45335 DecoSet® Background
Teenage Mutant Ninja Turtles™ Rise Up!
#24103/45320 DecoSet®
#45334 TMOC Page
#26435 DecoSet® Background
SpongeBob SquarePants™
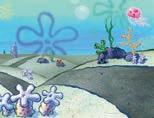
Krabby Patty

#6086 DecoSet®
#47351 TMOC Page
#45349 DecoSet® Background Teenage Mutant Ninja Turtles™ Rise Up!
#24103/45320 DecoSet®
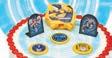


#45496 TMOC Page
NEW! #29091 DecoSet® Background TMNT Pizza Power! #29090 DecoSet® #47730 TMOC Page
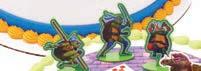

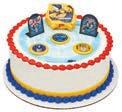

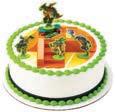
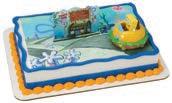
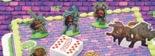

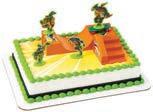
NEW! #29092 DecoSet® Background TMNT Pizza Power!
#29090 DecoSet® #47733 TMOC Page
#29092
#26435
#25075 DecoSet® Background Disney and Pixar’s Toy Story 4 Team Toy #24330/45549 DecoSet® #45552 TMOC Page
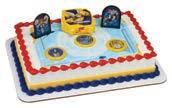

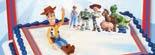

#25076 DecoSet® Background Disney and Pixar’s Toy Story 4 Team Toy #24330/45549 DecoSet® #45909 TMOC Page
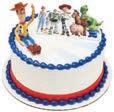
#22910 DecoSet® Background
Transformers™ Autobot Battle #21943 DecoSet® #44985 TMOC Page
#25077 DecoSet® Background
Transformers™ Autobot Battle #21943 DecoSet® #45957 TMOC Page
#24561 DecoSet® Background
DreamWorks Trolls Happy #24585 DecoSet® #45631 TMOC Page
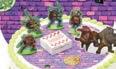
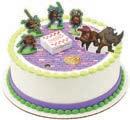
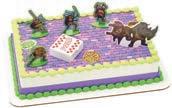


#24795 DecoSet® Background
DreamWorks Trolls Happy #24585 DecoSet® #44771 TMOC Page
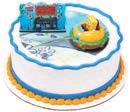

68 LICENSED CHARACTERS | PERSONAJES CON LICENCIA


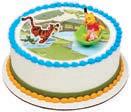


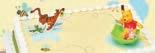

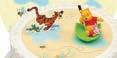


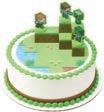


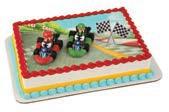


69 LICENSED CHARACTERS | PERSONAJES CON LICENCIA #25643 DecoSet® Background DreamWorks Trolls World Tour #24585 DecoSet® #47097 TMOC Page #25644 DecoSet® Background DreamWorks Trolls World Tour #24585 DecoSet® #47145 TMOC Page #26489 DecoSet® Background Ghostbusters™: Afterlife #26553 DecoSet® #47355 TMOC Page #26490 DecoSet® Background Ghostbusters™: Afterlife #26553 DecoSet® #47357 TMOC Page #27313 DecoSet® Background Jurassic World™ Warning #27393 DecoSet® #47486 TMOC Page #27314 DecoSet® Background Jurassic World™ Warning #27393 DecoSet® #47491 TMOC Page #23279 DecoSet® Background Winnie The Pooh Hunny Raindrops #23041 DecoSet® #44989 TMOC Page #25085 DecoSet® Background Winnie The Pooh Hunny Raindrops #23041 DecoSet® #44839 TMOC Page #23625 DecoSet® Background Winnie the Pooh Lovely Little Bear #23041 DecoSet® #44751 TMOC Page #25084 DecoSet® Background Winnie the Pooh Lovely Little Bear #23041 DecoSet® #45961 TMOC Page NEW! #29041 DecoSet® Background MINECRAFT Mobs Beware! #28831 DecoSet® #47699 TMOC Page NEW! #29060 DecoSet® Background MINECRAFT Mobs Beware! #28831 DecoSet® #47702 TMOC Page #7981 DecoSet® Background Super Mario™ Mario Kart™ #7630/37859 DecoSet® #44973 TMOC Page #27256 DecoSet® Background Space Jam: A New Legacy™ Tune Squad #27193 DecoSet® #47418 TMOC Page #45343 DecoSet® Background Super Mario™ Mario Kart™ #7630/37859 DecoSet® #45493 TMOC Page #27337 DecoSet® Background Space Jam: A New Legacy™ Tune Squad #27193 DecoSet® #47420 TMOC Page
LICENSED IMAGES REQUIRE A PIN PHOTOCAKE PINS AVAILABLE 24/7 DECOPAC.COM | 1-800-644-1228


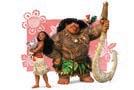


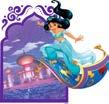

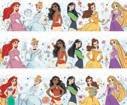


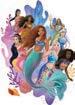


LICENSED CHARACTERS | PERSONAJES CON LICENCIA 70 LICENSED IMAGES REQUIRE A PIN
#28523 Image Disney Alice’s Wonderland Bakery Cup of Tea
#28524 Image Disney Alice’s Wonderland Bakery Merrier
NEW! #29082 Image Disney’s The Little Mermaid Find Your Voice
NEW! #29083 Image Disney’s The Little Mermaid Sisters of the Sea
#27324 Image Disney Princess Ariel
#43081 Image Disney Princess The Little Mermaid Make A Splash
#27289 Image Disney Princess Belle Bold Like A Rose
#27290 Frame Disney Princess Belle
#26212 Image Disney Princess Cinderella I’m Having a Ball!
#21358 Image Disney Princess Castle Silhouette
#26956 Image Disney Princess Together
#26953 Frame Disney Princess Best Friends
#27806 Strips Disney Princess Ultimate Princess
#27327 Image Disney Princess Jasmine
#23297 Image Disney Princess Escape To Agrabah
#27320 Image Disney and Pixar’s Princess Merida
#27008 Image Disney Princess Moana Island Adventurer
#25607 Image Disney Princess Moana
#18977 Image Moana We Know the Way
#27319 Image Disney Princess Mulan
#25578 Image Disney Princess Mulan
#27328 Image Disney Princess Pocahontas
#26895 Image Disney Princess Rapunzel Best Day Ever
#26955 Frame Disney Princess Rapunzel
#27326 Image Disney Princess Snow White
#27325 Image Disney Princess Tiana
#25574 Image Disney Princess Tiana
#8260 Image Disney’s Tinker Bell I Believe in Fairies
Disney Princess Photo
Photo
Photo
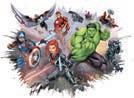


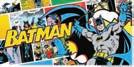

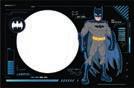
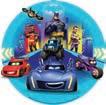


LICENSED CHARACTERS | PERSONAJES CON LICENCIA 71 LICENSED IMAGES REQUIRE A PIN
#8307 Image MARVEL Avengers I Am An Avenger
#25617 Image MARVEL Avengers Assemble
#25657 Frame MARVEL Avengers Assemble
#24495 Strips MARVEL Avengers
#27335 Image Batman™ The Joker
#25732 Image Batman™ Harley Quinn
#25724 Image Batman™ Emblem
#22761 Image Batman™ POP!
#37418 Image Batman™ You’re Amazing
#37417 Image Batman™ Kaa-Boom
#27333 Frame Batman™ Bat-Tech
#27336 Strips Batman™ Gotham City Hero
NEW! #29079 Image BATWHEELS Turbocharged Action
#28742 Image MARVEL Black Panther: Wakanda Forever
NEW! #28104 Image MARVEL Black Panther: Wakanda Forever Icon
NEW! #29080 Image Blue Beetle™ Host Selected
#20953 Image MARVEL Avengers Captain America Icon
#26226 Image Disney Villains Cruella
#26952 Image Marvel’s Deadpool Icon Approved for consumers 13+ only.
#25737 Image Justice League™ Flash
#20954 Image MARVEL Avengers Hulk Icon
#22909 Image Disney and Pixar’s Incredibles 2 Favorite Super Hero Family
NEW! #29085 Image Justice League™ The Flash
#27302 Image G.I. JOE
Heroes & Villains
Photo
Photo
#28742
#29080
#29079
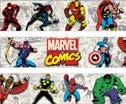


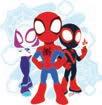

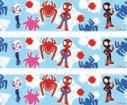
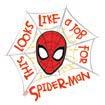
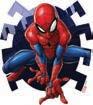


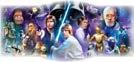


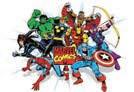


LICENSED CHARACTERS | PERSONAJES CON LICENCIA 72 LICENSED IMAGES REQUIRE A PIN
#8372 Strips MARVEL Comics Comic Pages
#26997 Image Power Rangers™ Morphin Time!
#47632 Image Marvel’s The Punisher Approved for consumers 18+.
#27362 Image MARVEL Spidey and His Amazing Friends Spinn
#27364 Image MARVEL Spidey and His Amazing Friends
#27361 Image MARVEL Spidey and His Amazing Friends Spidey Web
#27365 Strips MARVEL Spidey and His Amazing Friends
#26205 Image MARVEL Avengers Spider-Man™ Icon
#27304 Image Marvel’s Spider-Man™ A Job for Spider-Man
#27305 Image Marvel’s Spider-Man™ Web
#24191 Image Marvel’s Spider-Man™ Great Responsibility
#23622 Strips Marvel’s Spider-Man™ In Action
#26474 Image Star Wars™ The Mandalorian The Child
#26465 Image Star Wars™ The Mandalorian The Child in the Pram
#26466 Image Star Wars™ The Mandalorian The Mandalorian & The Bounty
#23439 Image Star Wars™ A Galaxy Far, Far Away
#36320 Strips Star Wars™ Galaxy
#22426 Image Star Wars™ The Force is Strong
#36293 Image Star Wars™ Yoda
#36294 Image Star Wars™ Darth Vader™
#25616 Image Disney Villains Maleficent
#8373 Image MARVEL Comics Originals Unite
#20952 Image MARVEL Avengers Iron Man Icon
#26962 Image Justice League™
#23439
#27305
#26962
Popular Characters
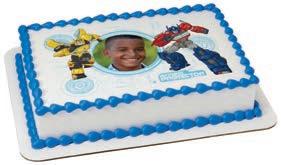

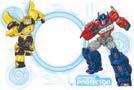


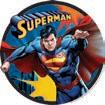

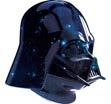


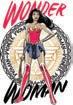
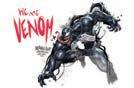
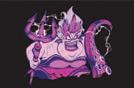
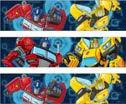
LICENSED CHARACTERS | PERSONAJES CON LICENCIA 73 LICENSED IMAGES REQUIRE A PIN
#22894 Strips Transformers™ Ready for Battle
#26225 Image Disney Villains Ursula
#25082 Image Venom We Are Venom Approved for consumers 18+.
#27367 Image Wonder Woman™
#22762 Image Wonder Woman™ Freedom
#37416 Image Wonder Woman™ Girl Power!
#28723 Image Afro Unicorn Unique
#28722 Image Afro Unicorn Magical
#28721 Image Afro Unicorn Divine
#26393 Image Disney Aristocats
#26396 Image Baby Shark Fun All Day
#26395 Image Baby Shark Jawsome!
#26394 Frame Baby Shark Sharktastic!
#23440 Image Star Wars™ Vader Galaxy
#7392 Strips Star Wars™ Darth Vader™ & Stormtroopers™
#23339 Image Superman™ Power Up
#37454 Image Superman™ Up, Up and Away
#7243 Frame Superman™ Saves the Day
#27366 Image Teen Titans Go!
#20955 Image MARVEL Avengers Thor Icon
#27310 Image Transformers™ Bumble Bee
#20978 Image Transformers™ One Team One Mission
#22893 Frame Transformers™ Defend Until the End
Photo
Photo
Photo
#23339
#22893
#26394
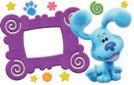
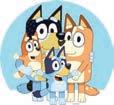

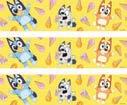


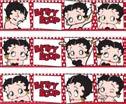


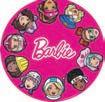
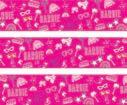


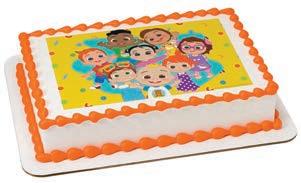
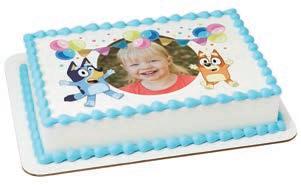
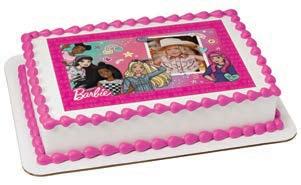
LICENSED CHARACTERS | PERSONAJES CON LICENCIA 74 LICENSED IMAGES REQUIRE A PIN
#26373 Frame Blue’s Clues & You! Good Thinking!
#28850 Image Bluey Family
NEW! #28882 Frame Bluey Party Fun
NEW! #28883 Strips Bluey It’s a sweet time!
#28851 Image Bluey-Dance Mode
#27734 Image Disney and Pixar’s Cars Lightning McQueen
#27791 Image Disney and Pixar’s Cars Lightning McQueen & Mater
#20900 Image Disney and Pixar’s Cars 3 Race Ready
#23434 Strips Disney and Pixar’s Cars Make Your Mark
#28113 Image CoComelon™ Fun Day!
#27814 Image CoComelon™ Happy Birthday!
#26397 Image Blue’s Clues & You! Let’s Think!
#58203 Strips Betty Boop™ Movie Star
#22624 Image Blaze and the Monster Machines™ Ride to the Rescue!
#26398 Image Blue’s Clues & You! Blue
#27005 Image Blippi™
#58191 Image Betty Boop™ Kiss & Wink
#22735 Image Barbie™ Silhouette
#8361 Image Barbie™ Forever Glam
#21942 Image Barbie™ Dreamtopia Imagine
#24993 Image Barbie™ She Does It All
#28124 Strips Barbie™ Malibu Style
#28122 Frame Barbie™ Best Friends
#28123 Image Barbie™ Friends Forever
Photo
Photo
Photo
#28113
#28882
#28122
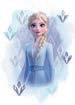


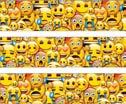


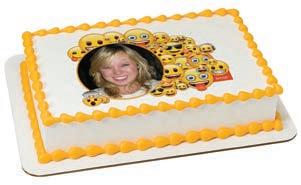

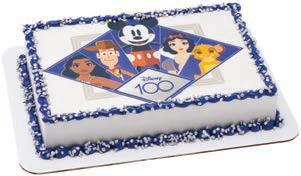
LICENSED CHARACTERS | PERSONAJES CON LICENCIA 75 LICENSED IMAGES REQUIRE A PIN
#25586 Image Disney Frozen II Elsa
#25623 Image Disney Frozen II Elsa, Anna and Olaf
#25587 Image Disney Frozen II Sisters
#25585 Image Disney Frozen II Destiny Awaits
#7504 Image Curious George® Let’s Celebrate
#26951 Image Disney Descendants 3 #25007 Image Disney Descendants 3 Wicked Showdown
#28726 Image Disney’s 100th Celebration Moments
#28735 Strips Disney’s 100th Celebration
#35341 Image Doc McStuffins Doc and Friends
#36881 Image Dora the Explorer™ Flowers
#23256 Image emoji™ Smiley Poo
#23040 Image emoji™ Rainbow Love Poo
#21814 Image emoji™ Full of Smiles
#21808 Image emoji™ Heart Eyes
#21811 Image emoji™ Sunglasses
#21813 Image emoji™ Winking
#21816 Frame emoji™ Mashup
#21815 Strips emoji™ Mashup
#27858 Image Disney Encanto Mirabel
#27878 Image Disney Encanto Sister Goals
#27880 Strips Disney Encanto
#27735 Image Disney and Pixar’s Finding Nemo Adventures
Photo
#21816
#25623
#28726


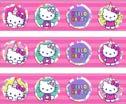
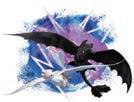
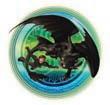
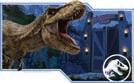
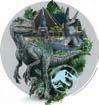
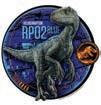
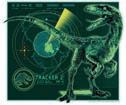


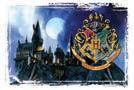

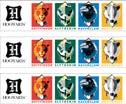


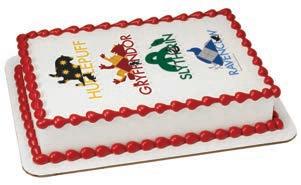
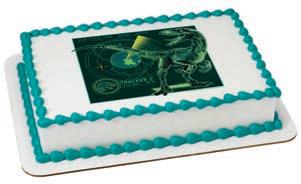
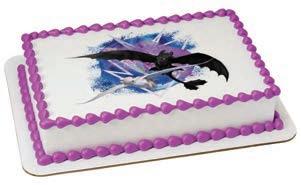
LICENSED CHARACTERS | PERSONAJES CON LICENCIA 76 LICENSED IMAGES REQUIRE A PIN
#26422 Image Hello Kitty® It’s
a Hello Kitty® Day!
#21594 Image Hello Kitty® Big Smiles
#38926 Image Hello Kitty® Party Hat
#58130 Strips Hello Kitty® Polka Dot Party
#24122 Image How To Train Your Dragon: The Hidden World Fly Free
#24121 Image How To Train Your Dragon: The Hidden World Gotta Keep Flying
#27264 Image Jurassic World™ Danger
#27257 Image Jurassic World™ Raptor Paddock
#44523 Image Jurassic World™ Fallen Kingdom Blue
#22897 Image Jurassic World™ Fallen Kingdom Molten
#22899 Image Jurassic World™ Fallen Kingdom Tracker
#26420 Image HARRY POTTER™ Waiting on my Letter
#26419 Image HARRY POTTER™ The Marauder’s Map
#22913 Image HARRY POTTER™ HOGWARTS™ Picturesque
#22914 Image HARRY POTTER™ HOGWARTS™ Houses
#25397 Strips HARRY POTTER™ HOGWARTS™ Houses
#25624 Strips Disney Frozen II The Free Spirit
#28143 Image Gabby’s Dollhouse
#26412 Image Ghostbusters™
#26411 Image Ghostbusters™ Stay Puft
#23600 Image HARRY POTTER™ Harry Potter and Friends
#26408 Image Disney Frozen II Enchanting Journey #28143
#22914
#22899
#24122


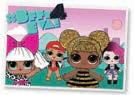
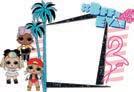


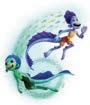

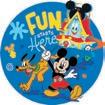
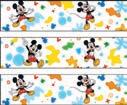

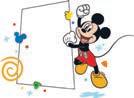


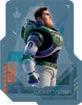


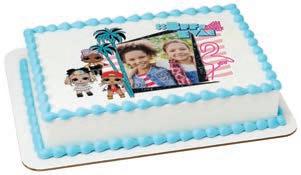


LICENSED CHARACTERS | PERSONAJES CON LICENCIA 77 LICENSED IMAGES REQUIRE A PIN
#28079 Strips Disney and Pixar’s Lightyear Reaching Hyperspeed
#27721 Image Disney Lilo and StitchStitch
#24128 Image Disney The Lion King Hakuna Matata
#24129 Image Disney The Lion King Simba and Nala
#26968 Image L.O.L. SURPRISE!™ Shine Bright
L.O.L.
#26967 Image
SURPRISE!™ You Glow Girl
L.O.L.
#26965 Frame
SURPRISE!™ #BFF’s 4 Eva!
#26966 Strips L.O.L. SURPRISE!™ Outrageous
#23580 Image Looney Tunes™ Classic Crew
#27283 Image Disney and Pixar’s Luca Sea Monsters
#27284 Image Disney and Pixar’s Luca We Ride Together
#27816 Image Disney Mickey Mouse Funhouse Fun Starts Here!
#27815 Strips Disney Mickey Mouse Funhouse Fun!
#27885 Image Disney Mickey Mouse Funhouse Epic Fun
#27884 Frame Disney Mickey Mouse Funhouse Fun on Repeat
#27338 Frame Disney Baby Mickey Mouse and Minnie Mouse
#20995 Image Disney Baby Baby Mickey
#20903 Image Minnie Too Sweet
#28078 Image Disney and Pixar’s Lightyear Space Ranger
#24989 Image JoJo Siwa™ Bday Girl
#25042 Image JoJo Siwa™
#28065 Image Disney and Pixar’s Lightyear On a Mission
Photo
Photo
Photo
#28065
#27283
#26965
#27338

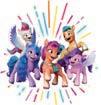
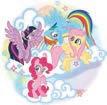


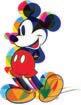
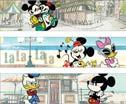
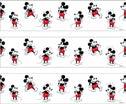

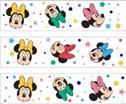
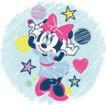

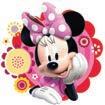
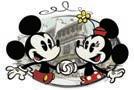
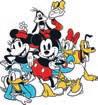

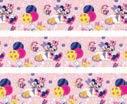

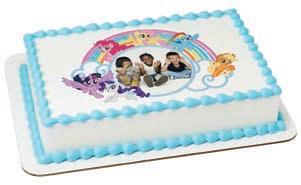
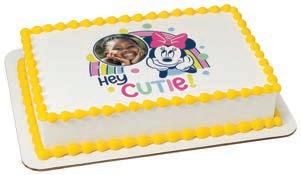
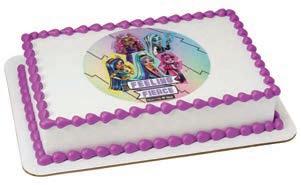
LICENSED CHARACTERS | PERSONAJES CON LICENCIA 78 LICENSED IMAGES REQUIRE A PIN
#28127 Frame My Little Pony™ Pony Pals
#27851 Image My Little Pony™: A New Generation Movie
#28128 Image My Little Pony™ Dream Team
#6079 Frame Minions™ Party!
NEW! #29078 Image Monster High™ Feeling Fierce
#26214 Image Disney and Pixar’s Monsters, Inc. Mike and Sulley
#23495 Image Disney and Pixar’s Monsters, Inc. Mike and Sulley
#34847 Image Despicable Me™ Party Time!
#24132 Image Mickey Mouse One Of A Kind Colorful
#7998 Strips Mickey Mouse & Friends Mickey Shorts
#23559 Strips Mickey Mouse Classic
#43975 Image Despicable Me 3™ Let’s Party
#25048 Strips Minnie Mouse Dots and Stars
#26893 Image Minnie Mouse Sweet and Cute
#26969 Frame Minnie Mouse Hey Cutie!
#8259 Image Minnie Dots & Daisies
#8243 Image Mickey Mouse & Friends Cafe Minnie
#26216 Image Mickey Mouse & Friends Sensational 6
#8249 Image Minnie Mouse Rockin’ My Dots
#22616 Image Minnie Mouse Splash
#28651 Strips Disney Minnie Mouse Party Time
#24675 Strips Mickey Mouse and Minnie Mouse
Photo
Photo
Photo
#6079
#28127
#26969
#29078


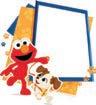
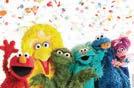

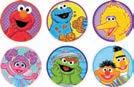


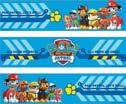


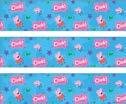


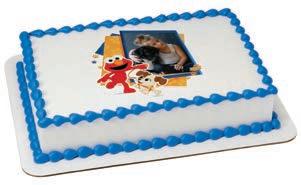

LICENSED CHARACTERS | PERSONAJES CON LICENCIA 79 LICENSED IMAGES REQUIRE A PIN
#37516 Image Scooby-Doo!™ Your Pal
#28737 Image Sesame Street® Happy Birthday
#28736 Frame Sesame Street® Elmo and Tango
#28738 Strips Sesame Street® It’s a Party!
#24133 Image Sesame Street® 50th Anniversary
#22434 Image Sesame Street® Elmo Happy Dance
#7568 Image Sesame Street® Celebration
#27368 Image Space Jam: A New Legacy™ Let’s Jam
#24192 Image Spirit Find Your Adventure #26463 Image Spirit Freedom
#4981 Image PAW Patrol™ Yelp for Help
#26994 Image PAW Patrol™ Anything Is Pawsible
#8430 Image PAW Patrol™ Skye, Everest, & Marshall
#20950 Image PAW Patrol™ Girl Pup Power
#28626 Frame PAW Patrol™ Roll with the Patrol
#7442 Strips PAW Patrol™ All Paws on Deck
#28492 Image Peppa Pig™ Hooray!!
#28491 Frame Peppa Pig™ Party!!
#21859 Image Peppa Pig™ Hip Hip Hooray
#26431 Image Peppa Pig™ Peppa the Pig
#21858 Strips Peppa Pig™ Peppa and George
NEW! #28999 Image PJ Masks Heroes Rule
#26433 Image Rugrats™ Since 1991
#26891 Image My Little Pony™
#26427 Image My Little Pony™
#27306 Image PAW Patrol™ The Movie
Photo
Photo
Photo
#28736
#28491
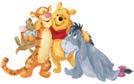
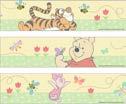
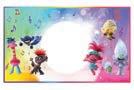


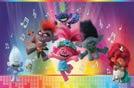
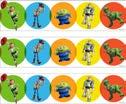

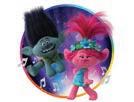


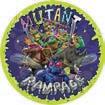


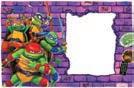


LICENSED CHARACTERS | PERSONAJES CON LICENCIA 80 LICENSED IMAGES REQUIRE A PIN
#20980 Image Disney Baby Winnie the Pooh 1st Birthday
#25086 Image Winnie the Pooh and Friends
#25087 Strips Winnie the Pooh
#25645 Frame DreamWorks Trolls World Tour Upbeat
#28103 Image Disney and Pixar’s Turning Red Party Animal
#27343 Image Disney Baby Winnie the Pooh
#27342 Frame Disney Baby Winnie the Pooh
#25646 Image DreamWorks Trolls World Tour Great Vibes!
#24499 Strips Disney and Pixar’s Toy Story Classic
#23417 Image DreamWorks Trolls Free to Sparkle
#25647 Image DreamWorks Trolls World Tour Let’s Dance!
#8283 Image Disney and Pixar’s Toy Story Toys in Action
NEW! #29075 Image TMNT Mutant Mayhem Surface Time!
NEW! #29076 Image TMNT Mutant Mayhem This is Epic!
#25803 Image TOM AND JERRY™
#24137 Image Disney and Pixar’s Toy Story
NEW! #29074 Frame TMNT Mutant Mayhem Super Mutant
#20776 Strips SpongeBob SquarePants™ Many Faces
#28573 Image That Girl Lay Lay Partay The Lay Lay Way
#28572 Image That Girl Lay Lay Birthday Slay
#28571 Strips That Girl Lay Lay Radiate
#22428 Image SpongeBob SquarePants™ Wacky
#28139 Frame SpongeBob SquarePants™ Life’s Sweet
#28140 Image SpongeBob SquarePants™ Happy Funday!
#27859 Image SpongeBob SquarePants™ Par-Tay
#22404 Image SpongeBob SquarePants™ Roped In
Photo
Photo
Photo
Photo
#29074
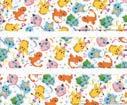

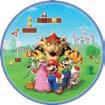
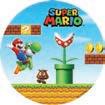


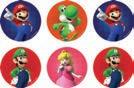
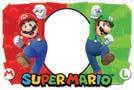

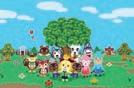


LICENSED CHARACTERS | PERSONAJES CON LICENCIA 81 LICENSED IMAGES REQUIRE A PIN
NEW! #28997 Strips Pokémon Happy Party
NEW! #29104 Image Sonic Still Unstoppable
#27002 Image Nintendo Super Mario™
#43686 Image Super Mario™ Mushroom Kingdom
#23364 Image Super Mario™ Luigi Okie Dokie!
#23368 Image Super Mario™ Mario Here We Go!
#7542 Image Super Mario™ Power Play
#20973 Frame Super Mario™ Here We Go! #7541 Strips Super Mario™ Game On
#26949 Image Animal Crossing™ Let’s Hang Out
NEW! #29084 Image Dungeons & Dragons Endless Adventures
NEW! #29054 Image MINECRAFT Survival Mode
NEW! #29043 Strips MINECRAFT Build
NEW! #29055 Image MINECRAFT Boom
#26973 Frame Hasbro Monopoly Everyday I’m Hustlin’
#26975 Strips Hasbro Monopoly Let’s Play!
NEW! #28996 Image Pokémon Pikachu
NEW! #29002 Image Pokémon Happy Party
NEW! #28995 Frame Pokémon Happy Party
Gaming
#26404 Image Friends Central Perk
#28115 Frame Friends The Best of Friends
#27813 Image The Office It Is Your Birthday.
#27861 Image The Office Statement of Fact.
#28588 Image Star Trek: Prodigy
#28516 Image Star Trek: Prodigy Dal
#27307 Image Star Trek
TV & Streaming
NEW! #29042 Image Ted Lasso Believe NEW! #29077 Image Yellowstone Cowboy Up
Photo
Photo
Photo
Photo


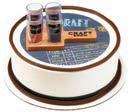


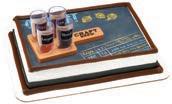


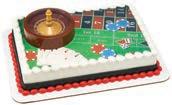


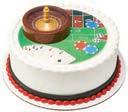


SPORTS & ACTIVITIES | DEPORTES
82 #23375 DecoSet® Background Dirt Track #14451 DecoSet® #46628 TMOC Page #24956 DecoSet® Background Dirt Track #14451 DecoSet® #46630 TMOC Page #45381 DecoSet® Background Fashion #17158 DecoSet® #45380 TMOC Page #24962 DecoSet® Background Fashion #17158 DecoSet® #45994 TMOC Page #25608 DecoSet® Background Craft Brew Flight #25124 DecoSet® #45967 TMOC Page #47060 DecoSet® Background Craft Brew Flight #25124 DecoSet® #45969 TMOC Page #25545 DecoSet® Background Rapid Roulette #25467 DecoSet® #47039 TMOC Page #25610 DecoSet® Background Rapid Roulette #25467 DecoSet® #47046 TMOC Page #25608 #24956 #24962
Y ACTIVIDADES
#25610

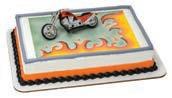


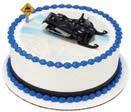
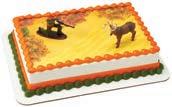

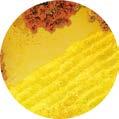
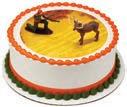


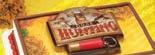


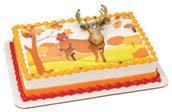


SPORTS & ACTIVITIES | DEPORTES Y ACTIVIDADES 83 #19556 DecoSet® Background Red Hot Chopper #15331 DecoSet® #45026 TMOC Page #24960 DecoSet® Background Red Hot Chopper #15331 DecoSet® #46642 TMOC Page #23375 DecoSet® Background Dirt Track #16144 DecoSet® #45000 TMOC Page #24956 DecoSet® Background Dirt Track #16144 DecoSet® #45974 TMOC Page #24846 DecoSet® Background Powder Power #17300 DecoSet® #46639 TMOC Page #24942 DecoSet® Background Powder Power #17300 DecoSet® #46641 TMOC Page #45372 DecoSet® Background Hunting #8305 DecoSet® #45371 TMOC Page #24937 DecoSet® Background Hunting #8305 DecoSet® #45985 TMOC Page #45372 DecoSet® Background Hunting #5298 DecoSet® #46625 TMOC Page #24937 DecoSet® Background Hunting #5298 DecoSet® #46626 TMOC Page #20377 DecoSet® Background Deer Head Magnet #16575 DecoSet® #45012 TMOC Page #24963 DecoSet® Background Deer Head Magnet #16575 DecoSet® #45984 TMOC Page #24963 #24942


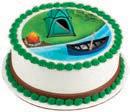


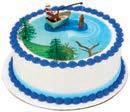


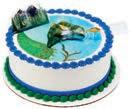


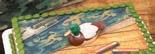


SPORTS & ACTIVITIES | DEPORTES Y ACTIVIDADES 84 #45433 DecoSet® Background Antler Creations #23460 DecoSet® #45432 TMOC Page #24850 DecoSet® Background Antler Creations #23460 DecoSet® #45973 TMOC Page #25546 DecoSet® Background Wild Black Bear #25466 DecoSet® #47033 TMOC Page #25609 DecoSet® Background Wild Black Bear #25466 DecoSet® #47035 TMOC Page #45378 DecoSet® Background Fireside Camp #8306 DecoSet® #45377 TMOC Page #24957 DecoSet® Background Fireside Camp #8306 DecoSet® #45997 TMOC Page #45447 DecoSet® Background Fishing #16334 DecoSet® #45446 TMOC Page #24950 DecoSet® Background Fishing #16334 DecoSet® #45999 TMOC Page #45447 DecoSet® Background Fishing #15412 DecoSet® #45449 TMOC Page #24950 DecoSet® Background Fishing #15412 DecoSet® #45980 TMOC Page #25544 DecoSet® Background Vintage Duck Decoy #25543 DecoSet® #47056 TMOC Page #25606 DecoSet® Background Vintage Duck Decoy #25543 DecoSet® #47058 TMOC Page #24957 #25606


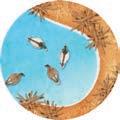


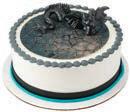


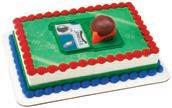

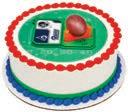


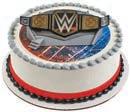


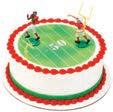

SPORTS & ACTIVITIES | DEPORTES Y ACTIVIDADES 85 #45393 DecoSet® Background Duck Hunting #8299 DecoSet® #45392 TMOC Page #24969 DecoSet® Background Duck Hunting #8299 DecoSet® #45987 TMOC Page #45406 DecoSet® Background Dragon Creations #23771 DecoSet® #45400 TMOC Page #24851 DecoSet® Background Dragon Creations #23771 DecoSet® #45986 TMOC Page #24102 DecoSet® Background NFL Football & Tee DecoSet # Varies. All Teams Available #45305 TMOC Page #25056 DecoSet® Background NFL Football & Tee DecoSet # Varies. All Teams Available #45947 TMOC Page #23299 DecoSet® Background NHL® Slap Shot DecoSet # Varies. All Teams Available #25517 TMOC Page #25059 DecoSet® Background NHL® Slap Shot DecoSet # Varies. All Teams Available #25519 TMOC Page #23423 DecoSet® Background WWE™ Championship Ring #7422 DecoSet® #44731 TMOC Page #25088 DecoSet® Background WWE™ Championship Ring #7422 DecoSet® #45962 TMOC Page #19519 DecoSet® Background Touchdown Football #12660 DecoSet® #45040 TMOC Page #24866 DecoSet® Background Touchdown Football #12660 DecoSet® #46662 TMOC Page #45406 #45393

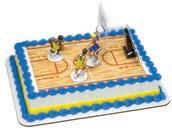


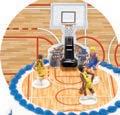


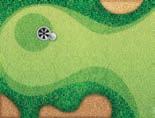


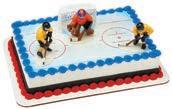

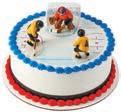


LICENSED IMAGES REQUIRE A PIN SPORTS & ACTIVITIES | DEPORTES Y ACTIVIDADES 86
#19520 DecoSet® Background Basketball All Net #14283 DecoSet® #45001 TMOC Page
#24868 DecoSet® Background Basketball All Net #14283 DecoSet® #45976 TMOC Page
#19522 DecoSet® Background Soccer Kick Off #14236 DecoSet® #45034 TMOC Page
#24865 DecoSet® Background Soccer Kick Off #14236 DecoSet® #46651 TMOC Page
#45375 DecoSet® Background Heading for the Green #17227 DecoSet® #45374 TMOC Page
#24953 DecoSet® Background Heading for the Green #17227 DecoSet® #46618 TMOC Page
DecoSet®
#23369 DecoSet® Background Hockey Face Off #14284
#45020 TMOC Page #24961 DecoSet® Background Hockey Face Off #14284 DecoSet® #46619 TMOC Page
#23367 DecoSet® Background Batter Up Baseball #12659 DecoSet® #45003 TMOC Page
#24869 DecoSet® Background Batter Up Baseball #12659 DecoSet® #45978 TMOC Page
#24868
#23367


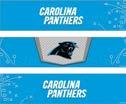


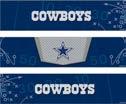


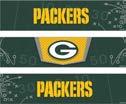

SPORTS & ACTIVITIES | DEPORTES Y ACTIVIDADES 87 LICENSED IMAGES REQUIRE A PIN
#4679 Image NFL Arizona Cardinals
#19121 Strips NFL Arizona Cardinals
#26881 Image NFL Atlanta Falcons
#26887 Strips NFL Atlanta Falcons #27895 Image NFL Baltimore Ravens
#19123 Strips NFL Baltimore Ravens
#4585 Image NFL Buffalo Bills
#19124 Strips NFL Buffalo Bills
#34192 Image NFL Carolina Panthers
#19125 Strips NFL Carolina Panthers
#4492 Image NFL Chicago Bears
#19126 Strips NFL Chicago Bears
#4680 Image NFL Cincinnati Bengals
#19127 Strips NFL Cincinnati Bengals
#26877 Image NFL Cleveland Browns
#26883 Strips NFL Cleveland Browns
#22877 Image NFL Dallas Cowboys
#19129 Strips NFL Dallas Cowboys
#25776 Image NFL Dallas Cowboys America’s Team
#4490 Image NFL Denver Broncos
#19130 Strips NFL Denver Broncos
#21843 Image NFL Detroit Lions
#21876 Strips NFL Detroit Lions
#4580 Image NFL Green Bay Packers
#19132 Strips NFL Green Bay Packers
LICENSED IMAGES REQUIRE A PIN PHOTOCAKE PINS AVAILABLE 24/7 DECOPAC.COM | 1-800-644-1228
#25777 Image NFL Green Bay Packers Go Pack Go
#4490

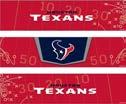


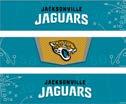

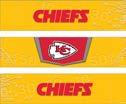

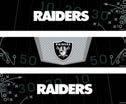


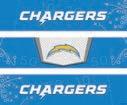


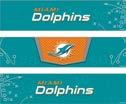

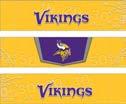

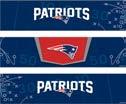

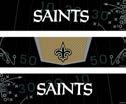


SPORTS & ACTIVITIES | DEPORTES Y ACTIVIDADES 88 LICENSED IMAGES REQUIRE A PIN
#4683 Image NFL Houston Texans
#19133 Strips NFL Houston Texans
#26876 Image NFL Indianapolis Colts
#26882 Strips NFL Indianapolis Colts #24130 Image NFL Jacksonville Jaguars
#19135 Strips NFL Jacksonville Jaguars
#4489 Image NFL Kansas City Chiefs
#19136 Strips NFL Kansas City Chiefs
#25883 Image NFL Las Vegas Raiders
#19144 Strips NFL Las Vegas Raiders
#25782 Image NFL Las Vegas Raiders Raider Nation
#26878 Image NFL Los Angeles Chargers
#26884 Strips NFL Los Angeles Chargers
#26879 Image NFL Los Angeles Rams
#26885 Strips NFL Los Angeles Rams
#35398 Image NFL Miami Dolphins
#19137 Strips NFL Miami Dolphins
#35399 Image NFL Minnesota Vikings
#19139 Strips NFL Minnesota Vikings
#35400 Image NFL New England Patriots
#19140 Strips NFL New England Patriots
#4685 Image NFL New Orleans Saints
#19141 Strips NFL New Orleans Saints
#4485 Image NFL New York Giants
#19142 Strips NFL New York Giants
#25885 Image NFL New York Jets
#24130
#35398


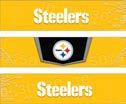


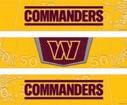


SPORTS & ACTIVITIES | DEPORTES Y ACTIVIDADES 89 LICENSED IMAGES REQUIRE A PIN
#25886 Strips NFL New York Jets
#25884 Image NFL Philadelphia Eagles
#19145 Strips NFL Philadelphia Eagles
#4581 Image NFL Pittsburgh Steelers #19146 Strips NFL Pittsburgh Steelers
#25785 Image NFL Pittsburgh Steelers Steel Curtain
#4584 Image NFL San Francisco 49ers
#19149 Strips NFL San Francisco 49ers
#4635 Image NFL Seattle Seahawks
#19148 Strips NFL Seattle Seahawks #26880 Image NFL Tampa Bay Buccaneers
#26886 Strips NFL Tampa Bay Buccaneers
#4616 Image NFL Tennessee Titans
#19151 Strips NFL Tennessee Titans
#28247 Image NFL Washington Commanders
#28248 Strips NFL Washington Commanders
#4942 Image NFL Shield
#26842 Frame NFL Match-Up
#28246 Frame NFL Teams
NEW! #29061 Image NFL Super Bowl LVIII Las Vegas Available 12/15/22
NEW! #29063 Strips NFL Super Bowl LVIII Las Vegas Available 12/15/22
#4581
#26880
#4584
#29061
©NFL Team Helmet ©NFL Team Helmet
Photo


SPORTS & ACTIVITIES | DEPORTES Y ACTIVIDADES 90 LICENSED IMAGES REQUIRE A PIN
#27018 Image NBA Philadelphia 76ers
#27019 Image NBA Phoenix Suns
#21754 Image NBA Portland Trail Blazers
#18949 Image NBA Sacramento Kings
#26977 Image NBA Atlanta Hawks
#4767 Image NBA Boston Celtics
#16791 Image NBA Brooklyn Nets
#26981 Image NBA Charlotte Hornets
#4703 Image NBA Chicago Bulls
#28130 Image NBA Cleveland Cavaliers
#4763 Image NBA Dallas Mavericks
#23570 Image NBA Denver Nuggets
#26982 Image NBA Detroit Pistons
#3696 Image NBA Golden State Warriors #3679 Image NBA Houston Rockets
#21757 Image NBA Indiana Pacers
#6450 Image NBA Los Angeles Clippers
#4706 Image NBA Los Angeles Lakers
#23571 Image NBA Memphis Grizzlies
#4702 Image NBA Miami Heat
#6449 Image NBA Milwaukee Bucks
#26983 Image NBA Minnesota Timberwolves
#27017 Image NBA New Orleans Pelicans
#10286 Image NBA New York Knicks
#4785 Image NBA Oklahoma City Thunder
#3703 Image NBA Orlando Magic
#27017
#26983


SPORTS & ACTIVITIES | DEPORTES Y ACTIVIDADES 91 LICENSED IMAGES REQUIRE A PIN
#21755 Image NBA San Antonio Spurs
#28146 Image NBA Toronto Raptors
#6447 Image NBA Washington Wizards
#28131 Image NBA Utah Jazz
#28129 Frame NBA Nothing But Net
#10295 Image
NHL® Anaheim Ducks®
#28106 Image NHL® Arizona Coyotes
#3735 Image NHL® Boston Bruins®
#26990 Image NHL® Buffalo Sabres®
#27009 Image NHL® Calgary Flames®
#3736 Image
NHL® Carolina Hurricanes®
#3673 Image NHL® Chicago Blackhawks®
#3671 Image NHL® Colorado Avalanche®
#3737 Image NHL® Columbus Blue Jackets®
NEW! #29065 Image NHL® Dallas Stars®
#10294 Image NHL® Detroit Red Wings®
NEW! #29066 Image NHL® Edmonton Oilers®
#23793 Image NHL® Florida Panthers®
#26430 Image NHL® Los Angeles Kings®
#10302 Image NHL® Minnesota Wild®
#10298 Image NHL® Montreal Canadiens® #3770 Image NHL® Nashville Predators®
#3675 Image NHL® New Jersey Devils®
#3771 Image NHL® New York Islanders® #3676 Image NHL® New York Rangers®
#26991 Image NHL® Ottawa Senators® #10301 Image NHL® Philadelphia Flyers®
#21276 Image NHL® Pittsburgh Penguins®
#3773 Image NHL® San Jose Sharks® #27308 Image NHL® Seattle Kraken™
NHL®
Photo


SPORTS & ACTIVITIES | DEPORTES Y ACTIVIDADES 92 LICENSED IMAGES REQUIRE A PIN
#4709 Image MLB® Arizona Diamondbacks™
#4678 Image MLB® Atlanta Braves™
#25035 Image MLB® Baltimore Orioles™
#4643 Image MLB® Boston Red Sox™
#4645 Image MLB® Chicago Cubs™
#4646 Image MLB® Chicago White Sox™
#4714 Image MLB® Cincinnati Reds™
#28087 Image MLB® Cleveland Guardians™
#20984 Image MLB® Colorado Rockies™
#42536 Image MLB® Detroit Tigers™
#34931 Image MLB® Houston Astros™
#25036 Image MLB® Kansas City Royals™
#27889 Image MLB® Angels™
#4651 Image MLB® Los Angeles Dodgers™
#25037 Image MLB® Miami Marlins™
#26425 Image MLB® Milwaukee Brewers™ NEW! #29087 Image MLB® Minnesota Twins™
#4667 Image MLB® New York Mets™
#4642 Image MLB® New York Yankees™
#4669 Image MLB® Oakland Athletics™
#3774 Image NHL® St. Louis Blues®
#3775 Image NHL® Tampa Bay Lightning®
#18999 Image NHL® Toronto Maple Leafs®
#25447 Image NHL® Vancouver Canucks®
#21448 Image NHL® Vegas Golden Knights®
#3776 Image NHL® Washington Capitals®
#15711 Image NHL® Winnipeg Jets™ NEW! #29064 Image NHL® Center Ice
MLB®
Photo
#15711


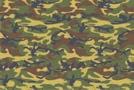
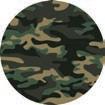
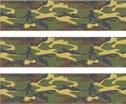
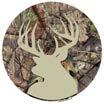
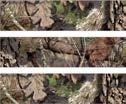
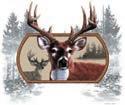
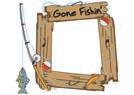


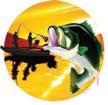

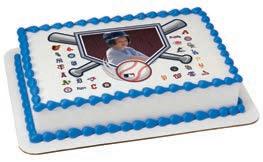
SPORTS & ACTIVITIES | DEPORTES Y ACTIVIDADES 93 LICENSED IMAGES REQUIRE A PIN
#25051 Image MLB® Philadelphia Phillies™
#35638 Image MLB® Pittsburgh Pirates™
#27890 Image MLB® St. Louis Cardinals™
#26424 Image MLB® San Diego Padres™
#4649 Image MLB® San Francisco Giants™
#4711 Image MLB® Seattle Mariners™
#25095 Image MLB® Tampa Bay Rays™
#4713 Image MLB® Texas Rangers™
#26970 Image MLB® Toronto Blue Jays
#4665 Image MLB® Washington Nationals™
NEW! #29086 Frame MLB® Baseball Diamond
NEW! #29004 Image WWE™
#27003 Image WWE™ Heavy Weight Championship
#24895 Frame Camo Hunting
#26475 Image Green Camouflage
#24921 Image Camo
#527 Strips Green Camo
#23551 Image Mossy Oak® Break-Up Country Deer
#23552 Strips Mossy Oak® Break Up Country
#434 Image Deer
#19399 Frame Gone Fishin’
#25102 Image Vintage Duck
#25103 Image Rustic Bear
#20286 Image Fishing
#435 Image Big Catch
#22391 Strips Urban Fish
Photo
Photo
Photo #25103
#29086


SPORTS & ACTIVITIES | DEPORTES Y ACTIVIDADES 94 LICENSED IMAGES REQUIRE A PIN
#7536 Image John Deere Johnny Tractor
#26499 Image Volleyball Love
#38314 Image John Deere Tractor
#27840 Image Golf Ball
#26415 Image Hot Wheels™ Race to Win!
#26417 Image Hot Wheels™ Stunt Zone
#37058 Image Hot Wheels™ Steer Clear
#6352 Frame Hot Wheels™ Driven to Thrill
#23507 Image Monster Jam® High Flyin’
#23506 Image Monster Jam® Monster Trucks
#23505 Frame Monster Jam® Crunch Time
#23508 Strips Monster Jam® Built to Crush
#19238 Image Hot Rod Car
#19598 Image Motorcycle
#20278 Image Bowling
#27834 Image Football
#27835 Image Hockey Puck
#26509 Image Hockey is My Favorite Season
#27836 Image Baseball
#20358 Image Baseball All-Stars
#26500 Image Dirt And Diamonds
#26501 Image Living Life by the Seams
#27837 Image Softball
#27838 Image Soccer Ball
#26512 Image Soccer Love
#26510 Image Eat, Sleep, Basketball, Repeat
#26513 Image I’ve Got Goals
#28085 Image Volleyball
#27839 Image Basketball
#26503 Image Hustle, Hit, Never Quit
Photo
Photo


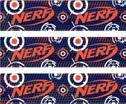
SPORTS & ACTIVITIES | DEPORTES Y ACTIVIDADES 95 LICENSED IMAGES REQUIRE A PIN
#27385 Image Disc Golf
#19308 Strips Golf
#26508 Image #LACROSSE
#28086 Image Tennis Ball
#20271 Image Tennis
#24893 Frame Sports Collage
#19196 Image Sports Collage
#20738 Strips All Sports
#19288 Image Cheerleading
#20269 Image Dance
#20283 Image Gymnastics
#26912 Image Ballerina Slippers
#26504 Image Live, Love, Tumble
#26506 Image Track Love
#20297 Image Swimming
#438 Image BMX
#20282 Image Cycling
#457 Image Motocross
#23602 Image NERF™ Blast
#629 Image High Roller
#351 Image Skateboarder
#26516 Image Gaming
#26849 Image Artist
#20289 Image Snowboarding
#22379 Image Beard and Hops
#26899 Frame Music #22374 Strips Beard And Hops
#444 Strips Music Notes Variety
#23603 Strips NERF™ Bring the Noise
Photo


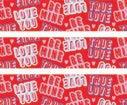
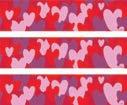


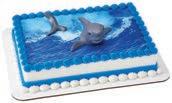


SEASONAL & HOLIDAY | TEMPORADA Y VACACIONES 96 LICENSED IMAGES REQUIRE A PIN LICENSED IMAGES REQUIRE A PIN PHOTOCAKE PINS AVAILABLE 24/7 DECOPAC.COM | 1-800-644-1228
Happy Galentine’s Day
NEW!
We’re Magical Together
NEW!
NEW!
#19110 Image Valentine’s
#21688
#658
Image
Valentine #23372 DecoSet® Background Beach #14168/33122 DecoSet® #45038 TMOC Page #45442 DecoSet® Background Beach #14168/33122 DecoSet® #45474 TMOC Page #23372 DecoSet® Background Beach #33154/33152 DecoSet® #45036 TMOC Page #45442 DecoSet® Background Beach #33154/33152 DecoSet® #45473 TMOC Page #45427 DecoSet® Background Shark Creations #23770 DecoSet® #45426 TMOC Page #24852 DecoSet® Background Shark Creations #23770 DecoSet® #46645 TMOC Page #45442
#26355 Image
#27882 Image DreamWorks Trolls Hugs #27883 Image DreamWorks Trolls Sparkle Hearts
#28989 Image
NEW! #28991 Image Every Pizza Me Loves You NEW! #28990 Image Over The Rainbow For You NEW! #28940 Image All Of Me Loves All Of You
#28939 Strips Be Mine
#28937 Strips Multi Hearts
Day Script
Image Red Hearts
Image Hearts #5850
I Love You


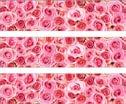


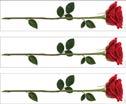


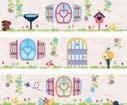
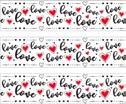
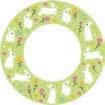
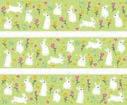
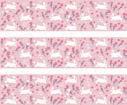


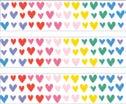


SEASONAL & HOLIDAY | TEMPORADA Y VACACIONES 97
#26343 Image Happy St. Patrick’s Day
#26354 Frame Love Languages
#26344 Image Rainbow Pot Of Gold
#344 Image Romantic Roses
#26342 Image Let The Shenanigans Begin
#19287 Strips Pink Roses
#27856 Image Ramadan
NEW! #28907 Image Mardi Gras Bead Dog
#27857 Strips Ramadan
#24554 Image Mardi Gras Mask
#28416 Image Hoppy Easter Doodle Bunny
#21685 Strips Stemmed Rose
#28424 Strips Hoppy Easter Doodle Bunny
#26358 Image Love
#28423 Strips Easter Cottage
#23265 Strips Love
#27769 Frame Nostalgic Easter Bunny
#27770 Strips Nostalgic Easter Bunny Green
#27811 Strips Nostalgic Easter Bunny Pink
#19311 Image Sweet Candy
#23392 Image Happy Easter Bunny
#24722 Image A Little S’more Every Day
#25484 Image Bunny And Chick
#26359 Strips Bright Rainbow Hearts
#26546 Image Hoppy Easter
#26545 Image Bunny Kisses Easter Wishes
#24722
#26358
Photo
Photo


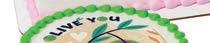


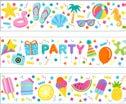


SEASONAL & HOLIDAY | TEMPORADA Y VACACIONES 98 LICENSED IMAGES REQUIRE A PIN
#28421
#28621
#28623 Image You’re Such a Fungi!
#28670 Image Best Dad Ever
#26913 Image Outta This World Dad
#26549 Image Feliz Pascua
#19594 Image Super Dad
#22549 Image Floral Easter Blessing
#25500 Image Happy Father’s Day Hero
#22550 Strips Fresh Rain Watercolor
#25501 Strips #1 Best Dad Ever!
#20911 Image Happy Father’s Day Crayon
#27072 Image Día del Padre
#25468 Image Happy Mother’s Day Floral
#23755 Image #Summer
#22645 Image I Love You Mom
#25906 Strips Happy Place Variety
#26541 Image Best Mom Ever
#26936 Image Float On
¡La
#28421 Image
Mejor Mama de Todas!
#28254 Strips Tiki
#28422 Strips Talavera Inspired Pattern
#426 Image Summer Grillin’
#20775 Image Superman™ You’re My Hero
#26935 Image Grill Top
#28621 Image Olive You Dad!
#28622 Image Nacho Average Dad


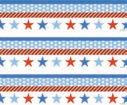


SEASONAL & HOLIDAY | TEMPORADA Y VACACIONES 99 LICENSED IMAGES REQUIRE A PIN
#19236 Image Canadian Flag
#19608 Image Celebrate America Flag
#25494 Image Canada Day
#152 Image Celebrate America Happy Birthday
#26931 Image Canadian Maple Leaf
#25663 Image Patriotic Eagle
#23760 Strips Crayons
#20909 Image Patriotic Round
#26937 Frame School Rules!
#19740 Strips Patriotic Banner
#28620 Image Cottagecore American Flag
#26948 Strips School Icons
#26932 Image Juneteenth
#28717 Strips Cottagecore Stars & Stripes
#26942 Image Composition Notebook
#26938 Image 100 Days Sharper
#20908 Image Apple
#26939 Image 100th Day of School
#28716 Image Celebrate Freedom
#28618 Image Star Spangled Summer
#28715 Strips Celebrate Freedom Silhouettes
#19237 Image Mexican Flag
#154 Image American Flag
#4878 Image Puerto Rican Flag
#20910 Image American Flag Round
#26937
#26939
Photo


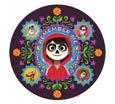


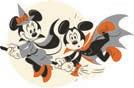
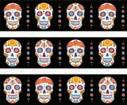


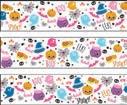
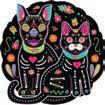


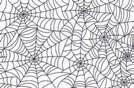

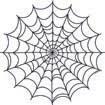
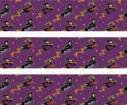

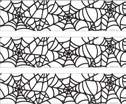

SEASONAL & HOLIDAY | TEMPORADA Y VACACIONES 100 LICENSED IMAGES REQUIRE A PIN
#28870
#28871
#23640 Image Disney and Pixar’s Coco Remember Me
#28132 Image The Nightmare Before Christmas Nightmare King
NEW! #28900 Image La Calavaera
#28133 Strips The Nightmare Before Christmas Authentic Mischief
NEW! #28909 Strips Marigolds
#26220 Image Mickey Mouse and Minnie Mouse Happy Halloween
NEW! #28899 Strips Dia de los Muertos Skulls
#28090 Image Vintage Fright Sheet
#28098 Image Halloween Cuties
#27251 Image White Sugar Skull #28084 Strips Halloween Cuties
#25746 Image Día de los Muertos Pet
NEW! #28870 Image Friday the 13th
NEW! #28871 Image IT Movie
NEW! #28872 Image A Nightmare on Elm Street
#28080 Image Spider Web Sheet
#27805 Image Star Wars™ The Mandalorian Grogu Happy Halloween
#28081 Image Spider Web
#26958 Image Disney Hocus Pocus
#28110 Image Disney Hocus Pocus Spell Book
#28125 Strips Disney Hocus Pocus Come, We Fly!
#26993 Image The Nightmare Before Christmas Best
#20449 Strips Spider Web
#26992 Image The Nightmare Before Christmas Love
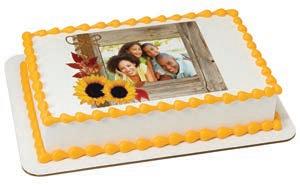

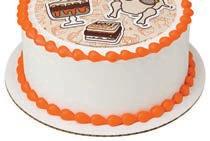
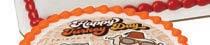


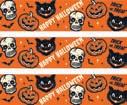


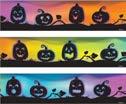
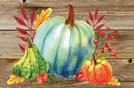
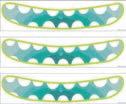
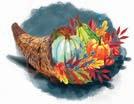


SEASONAL & HOLIDAY | TEMPORADA Y VACACIONES 101 LICENSED IMAGES REQUIRE A PIN
#20373
#27315
#28114
#27279 Image Football Turkey
#20367 Strips Fall Flowers
#27315 Image Autumn Leaves & Football Please
#20366 Strips Flowering Leaves
#22838 Image Give Thanks Pumpkin
#28083 Strips Frightful Halloween
#25097 Image Spooky Haunted House
#25720 Image Hello Fall Y’all
#21371 Strips Spooky Silhouettes
#162 Image Autumn Flowers
#28092 Image Black Magic
#22836 Strips Pumpkin Silhouette
#25723 Image Watercolor Fall Harvest
#597 Strips Monster Mouth Blue
#25719 Image Watercolor Cornucopia
#354 Image Happy Thanksgiving Turkey
#20375 Image Gobble ‘Till You Wobble
#598 Strips Monster Mouth Red
#20373 Frame Rustic Fall
#599 Strips Monster Mouth Green
#28114 Image Friends Thankful
#27231 Image Friends are the Family you Choose
#28091 Image Frightful Halloween Photo


SEASONAL & HOLIDAY | TEMPORADA Y VACACIONES 102 LICENSED IMAGES REQUIRE A PIN
#28927
#28895
#28877
#28894
NEW! #28895 Image Elf the Movie Santa’s Coming!
#26219 Image Mickey Mouse and Minnie Mouse Happy Holidays
#171 Image Merrymaking Merry Christmas
#27408 Image Happy Hanukkah Menorah
#21436 Image Playful Feliz Navidad
#27407 Image Love and Light
#21437 Image Playful Joyeux Noel
#27409 Image Happy Hanukkah
NEW! #28878 Image Let It Snow
NEW! #28877 Image Merry Christmas
NEW! #28879 Strips Christmas Ornaments
#27410 Strips Hanukkah
#20425 Image Red Check Plaid Deer
NEW! #28927 Image A Christmas Story Fra-GeeLay
#24482 Image Classic Red Truck with Tree
NEW! #28894 Image National Lampoon’s Christmas Vacation
#28255 Strips Poinsettias
#28251 Image Peppermint Candy
#25948 Frame Holiday Wreath
#526 Strips Candy Cane Stripes
#27458 Strips Christmas Lights
Photo
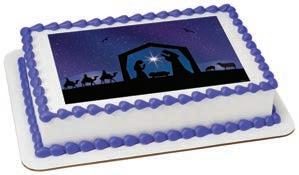


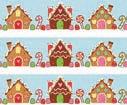
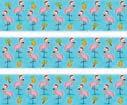

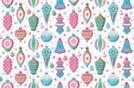

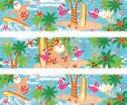


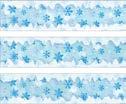

SEASONAL & HOLIDAY | TEMPORADA Y VACACIONES 103
#24278
#27402
#20391
#21701
#21725 Image Classic Santa Caucasian
#27412 Image Eat, Drink, and Be Merry
#21726 Image Classic Santa African American
#21701 Image Feliz Año Nuevo
#329 Image Happy Chinese New Year
#19339 Strips Santa’s Belt
#28253 Strips Gingerbread Village
#28252 Strips Fa La La Lamingo
#27402 Image Santa on Summer Holiday
#27420 Image Ornaments
#24278 Image Nativity
#27406 Strips Surfin’ Santa
#27403 Image Sleigh Bells Ringing
#27405 Image Delivering Toys
#24695 Image Happy New Year Confetti
#24691 Image Friendly Snowman
#27392 Image Merry Christmas Santa #25950 Image New Year’s Confetti
#20391 Image Cheers to the New Year!
#33470 Image Winter Buddies
#24694 Strips Winterland Snowflakes
#27391 Image Merry Christmas Jolly
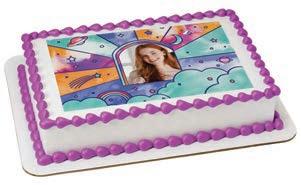


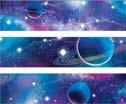
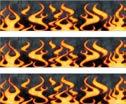
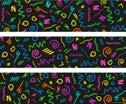
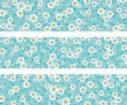
PRINT & PATTERN | IMPRESIÓN Y DISEÑO 104
#28561
#28420
#24918 Image Rainbow
#596 Strips Rainbow
#594 Strips Rainbow Zig Zag
#22548 Strips Pastel Rainbow
#23267 Strips Rainbow with Clouds
#27543 Strips Rainbow Prism
#28420 Image Bohemian Poppies
#28426 Strips Bohemian Poppies
#27760 Strips Abstract Butterflies
#27757 Image Abstract Watercolor
#27759 Strips Abstract Flowers
#27758 Strips Abstract Watercolor
#21939 Strips Bright Watercolor
#20402 Strips Watercolor Waves
#28559 Image Prismatic Sky
#28561 Frame Surreal Sense
#28587 Strips Sunshine
#529 Strips Damask
#19286 Strips Classic Dots Black
#20202 Strips Black Scroll
#602 Strips Classic Checks
#27414 Strips Euphoric #20736 Strips Galaxy Photoreal
#20259 Strips Flames #25631 Strips Bright and Vibrant #27764 Strips Blue Ditsy Print
Photo


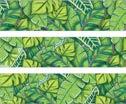

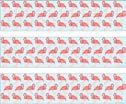

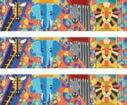
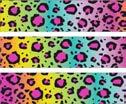
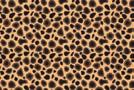
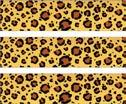

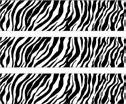

PRINT & PATTERN | IMPRESIÓN Y DISEÑO 105
#19326 Strips Brush Stroke
#28673 Image Plaid Sheet
#28093 Image Orange Plaid Sheet
#28094 Strips Black Plaid
#28145 Image Buffalo Check
#25489 Image Silver Cracked Glass #25625 Image Gold Cracked Glass
#25626 Image Pink Marble #22873 Strips Tropical Pineapples
#22874 Strips Tropical Watermelon
#22872 Strips Tropical Leaves
#22542 Strips Polynesian Flair
#19294 Image Pink Flamingos
#20732 Strips Flamingo
#19601 Image Bird on Blooming Branch
#28540 Image Butterfly
#26947 Strips Animal Tribe
#25632 Strips Animal Rainbow Print
#20043 Image Leopard Pattern
#19279 Strips Safari Print Leopard
#591 Strips Hottie Spots
#19278 Strips Safari Print Zebra
#28418 Image Lemon Pattern Sheet
#28419 Image Strawberry Pattern Sheet #28617 Image Cherry Pattern Sheet
#28417 Strips Honeycomb Blush
#27772 Strips Blue Gingham
#27771 Strips Pink Gingham
#27774 Strips Green Gingham
#27812 Strips Nostalgic Floral

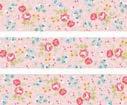
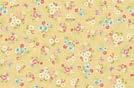
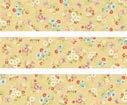


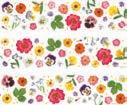
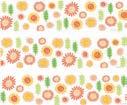

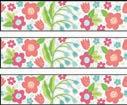

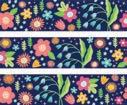
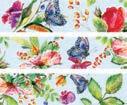

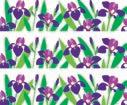

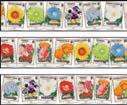


PRINT & PATTERN | IMPRESIÓN Y DISEÑO 106
#28428
#27761 Frame Pink Ditsy Print
#27763 Strips Pink Ditsy Print
#27762 Image Yellow Ditsy Print
#27765 Strips Yellow Ditsy Print
#27767 Image Soft Pressed Flowers
#27766 Image Bright Pressed Flowers
#27768 Strips Bright Pressed Flowers
#27779 Strips Delicate Daisies
#27776 Frame Delicate Florals Wreath
#27778 Strips Delicate Florals
#27777 Image Delicate Florals
#27780 Strips Spring Evening Florals
#25473 Strips Watercolor Floral
#28428 Frame Blooming Iris
#28425 Strips Blooming Iris
#22933 Strips Greenery
#26543 Frame Springtime Wreath
#27849 Frame Sow Pretty
#27850 Strips Sow Pretty
#24693 Image Wood Bark
#24692 Image Log Slice
#19630 Image Wood Grain
#7452 Strips Wood Grain
#19634 Image White Wash Barn Wood
#19632 Image Birch Bark
#7453 Strips Birch Bark
Photo
Photo
Photo
Photo
Photo

©2023 Smart Study Co., Ltd. All Rights Reserved. Pinkfong® and Baby Shark™ are trademarks of Smart Study Co., Ltd. © 2023 Viacom International Inc. Nickelodeon is a trademark of Viacom International Inc., TM & ©NFL Properties, Inc., emoji™ is a trademark. © 2015 - 2023.
PURCHASE YOUR LICENSED IMAGE PINS ANY TIME, DAY OR NIGHT!
PhotoCake PINs are required to print licensed images on PhotoCake IV and converted Copy Confection systems. Purchase PIN numbers 24 hours a day, 7 days a week, via our automated phone system.
Dial 1- 800 - 644 -1228
Important PIN Ordering Facts:
• The automated phone system is available 24 hours a day, 7 days a week!
• Available to Terms Customers and Credit Card customers.
• Always have your DecoPac Customer Number and PhotoCake System ID available when purchasing PINs
¡NÚMEROS DE CLAVE (PINS) DE PHOTOCAKE ESTÁN DISPONIBLE LAS 24/7!
¡COMPRE SUS NÚMEROS DE CLAVE (PIN) PARA LAS IMÁGENES CON MARCAS REGISTRADAS A CUALQUIER HORA DEL DÍA O NOCHE!
Números de PINs PhotoCake son requeridos para imprimir imágenes con licencia en sistemas PhotoCake IV y los sistemas convertidos de Copy Confection.
Ordene Números de PIN 24 horas al día, 7 días de la semana, mediante el sistema telefónico automatizado.
Marque al 1- 800 - 898-3063
Información Importante para ordenar números de clave (PIN):
• El sistema automatizado de teléfono está disponible las 24 horas del día, 7 días a la semana!
• Está disponible para clientes con Término de Crédito y Tarjetas de Crédito.
• Siempre tenga a la mano su Número de Cliente de DecoPac y su Número de Sistema de PhotoCake cuando esté ordenando PINs.
PINs AVAILABLE 24/7
108
WARNING ADVERTENCIA
It is a violation of the U.S. Copyright Law to reproduce, display, create a derivative work of, or distribute an original work of authorship without consent of the copyright owner. An original work is instantly protected by copyright when it is fixed in a tangible form. Therefore, a copyright symbol or legal notice is not necessary for an original work to be protected by copyright law.
Examples of copyrighted materials include photographs, designs, images, cartoon characters, logos, greeting cards, television and movie characters, as well as many other materials.
DecoPac's PhotoCake System may not be used to reproduce any copyrighted materials without the permission of the copyright owner. Anyone who uses the PhotoCake System in violation of a third party's intellectual property rights shall be personally liable for the infringement, including any civil and criminal penalties or damages. DecoPac shall not be responsible in any way.
Es una violación a la Ley del Derecho de Autor de los Estados Unidos la reproducción, exhibición, creación de un derivado de la obra, o la distribución de una obra original sin el consentimiento del dueño del derecho de autor. Una obra original es protegida al instante por el derecho de autor cuando es convertida en forma tangible. Por lo tanto, no es necesario de un símbolo del derecho de autor o un aviso legal para indicar que la obra está protegida por la ley del derecho de autor.
Algunos ejemplos de materiales protegidos por el derecho al autor incluyen fotografías, diseños, imágenes, personajes de dibujos animados, logos, tarjetas de felicitaciones, televisión y personajes de películas, como también muchos otros materiales.
El sistema de PhotoCake no se puede usar para reproducir cualquier material protegido por el derecho del autor sin el permiso del dueño del derecho de autor. Cualquiera que use el sistema de PhotoCake en violación de los derechos de propiedad intelectual de la tercera persona será responsable del delito que incluye penalidades civiles y criminales o daños. DecoPac no se hará responsable de
LICENSE LIMITATIONS
Licenses Not Available in Canada: National Football League; NFL Players; Star Trek; Top Gun; US Air Force; US Army; US Navy. Some licenses may not be available in all locations.
COPYRIGHT NOTICES
trademarks and trade dress are owned by, and used under license from, Mattel. © 2023 Mattel. All Rights Reserved., BATMAN and all related characters and elements © & ™ DC Comics (s23), ©2023 King Features Syndicate, Inc., ©2023 Viacom International Inc. All Rights Reserved. Nickelodeon, Blaze and the Monster Machines and all related titles, logos and characters are trademarks of Viacom International Inc., Blippi™ Copyright © 2023 Moonbug Entertainment. All Rights Reserved., © 2023 Viacom International Inc. All Rights Reserved. Nickelodeon, Blue’s Clues & You! and all related titles, logos and characters are trademarks of Viacom International Inc., A portion of DecoPac’s proceeds will be donated to The Breast Cancer Research Foundation., ©2023 Viacom International Inc. All Rights Reserved., CANDY LAND and all related characters are trademarks of Hasbro and are used with permission. © 2023 Hasbro. All Rights Reserved. Licensed by Hasbro., ©Disney/Pixar., © 2023 Paramount Pictures. All Rights Reserved., Curious George and related characters, created by Margret and H.A. Rey, are copyrighted, and registered by Houghton Mifflin Harcourt Publishing Company and used under license. All Rights Reserved., © 2023 MARVEL, © Universal City Studios LLC. All rights reserved., ©2023 Viacom International Inc. All Rights Reserved. Nickelodeon, Nick Jr., Dora the Explorer and all related titles, logos and characters are trademarks of Viacom International Inc., TM & © 2023 DreamWorks Animation LLC All Rights Reserved., TM & ©2023 Wizards of the Coast., emoji™ is a trademark. © 2015 - 2023., FRIENDS and all related characters and elements © & ™ Warner Bros. Entertainment Inc (s23), GI JOE and all related characters are trademarks of Hasbro and are used with permission. © 2023 Hasbro. All Rights Reserved. Licensed by Hasbro., ©2023 Columbia TriStar Marketing Group, Inc. All Rights Reserved., HARRY POTTER characters, names and related indicia are © & ™ Warner Bros. Entertainment Inc. Publishing Rights © JKR (s23), The MONOPOLY name and logo, the distinctive design of the game board, the four corner squares, the MR. MONOPOLY name and character, as well as each of the distinctive elements of the board and playing pieces are trademarks of Hasbro for its property trading game and game equipment. ©1935, 2023 Hasbro. All Rights Reserved. Licensed by Hasbro., ©1976, 2023, SANRIO CO., LTD. Used Under License. www.sanrio.com., ©2023 Mattel, Inc. All Rights Reserved., © How to Train Your Dragon 3 © 2023 DreamWorks Animation LLC. All Rights Reserved., IT and all related characters and elements © & ™ Warner Bros. Entertainment Inc. (s23), John Deere Licensed Product., Jojo Siwa is a trademark of Jojo Siwa Entertainment, LLC., JUSTICE LEAGUE and all related characters and elements © & ™ DC Comics. (s23), L.O.L. SURPRISE!™ is a trademark of MGA in the U.S. and other countries. All logos, names, characters, likenesses, images, slogans, and packaging appearance are the property of MGA. Used under license by DecoPac, Inc., LOONEY TUNES and all related characters and elements © & ™ Warner Bros Entertainment Inc (s23), © and TM Spin Master Ltd. All Rights Reserved., Major League Baseball trademarks and copyrights are used with permission of Major League Baseball., ©2023 Feld Motor Sports, Inc. All rights reserved. Official Licensed Product of Haas Outdoors, Inc., HASBRO, and its logo, MY LITTLE PONY and all related characters are trademarks of Hasbro and are used with permission. © 2023 Hasbro. All Rights Reserved. www.hasbro.com/mylittlepony., ©2023 NBA Properties, Inc., HASBRO, and its logo, NERF and all related characters are trademarks of Hasbro and are used with permission. © 2023 Hasbro. All Rights Reserved., TM & © NFL Properties, Inc. TM/© NFL, © Haas Outdoors, Inc., ©2023 Spin Master PAW Productions Inc. All Rights Reserved., PEPPA PIG and all related trademarks and characters TM & © 2023 Astley Baker Davies Ltd/Ent. One UK Ltd. and/or Hasbro. All Rights Reserved. Used with Permission., PJ MASKS and all related trademarks and characters TM & © 2023 Frog Box and/or Ent. One UK Ltd. and/or Hasbro. Les Pyjamasques by Romuald © 2007 Gallimard Jeunesse. All Rights Reserved. Used with Permission., ©2023 The Pokémon Company International. ©1995-2023 Nintendo / Creatures Inc. / GAME FREAK inc. TM, ®, and character names are trademarks of Nintendo., TM & © 2023 SCG Power Rangers LLC. All Rights Reserved., © 2023 Viacom International Inc. All Rights Reserved. Nickelodeon, Rugrats and all related titles, logos and characters are trademarks of Viacom International Inc. Created by Klasky Csupo., Saved by the Bell™ & © 2023 NBCUniversal Media, LLC. TM & © Universal Studios and U-Drive Joint Venture., SCOOBY-DOO and all related characters and elements © & ™ Hanna-Barbera. (s23), ©2023 Sesame Workshop. All Rights Reserved., SPACE JAM: A NEW LEGACY and all related characters and elements © & ™ Warner Bros. Entertainment Inc (s23), DreamWorks Spirit Riding Free © 2023 DreamWorks Animation LLC. All Rights Reserved., ©2023 Viacom International Inc. All Rights Reserved. Created by Stephen Hillenburg., © & TM Lucasfilm Ltd., SUPERMAN and all related characters and elements © & ™ DC Comics. (s23), TEEN TITANS GO! And all related characters and elements © & ™ DC Comics and Warner Bros. Entertainment Inc. (s23), TOM AND JERRY and all related characters and elements © & ™ Turner Entertainment Co. (s23), ©2023 Hasbro. All Rights Reserved., Officially Licensed Product of the U.S. Air Force. Endorsement by the U.S. Air Force is neither intended nor implied., Officially Licensed Product US Army®, Officially Licensed Product of the United States Marine Corps., Officially Licensed Product of the Navy., WONDER WOMAN and all related characters and elements © & ™ DC Comics. (s23), WONDER WOMAN 1984 and all related characters and elements © & ™ DC Comics and Warner Bros. Entertainment Inc. (s23), ©2023 WWE. All Rights Reserved., © 2023 Viacom International Inc. All Rights Reserved., © UTV. ™ & © Universal Studios., CoComelon™ Copyright © 2023 Moonbug Entertainment. All Rights Reserved., HASBRO, and its logo, MY LITTLE PONY and all related characters are trademarks of Hasbro and are used with permission. © 2023 Hasbro. All Rights Reserved. www.hasbro.com/mylittlepony.com., TRANSFORMERS and all related characters are trademarks of Hasbro and are used with permission. © 2023 Hasbro. All Rights Reserved. Licensed by Hasbro., © 2023 Viacom International Inc. All Rights Reserved. Nickelodeon, Teenage Mutant Ninja Turtles, and all related titles, logos and characters are trademarks of Viacom International Inc., © Universal Television LLC. All Rights Reserved., A NIGHTMARE ON ELM STREET and all related characters and elements © & ™ New Line Productions, Inc. (s23), IT CHAPTER 2 and all related characters and elements © & ™ Warner Bros. Entertainment Inc. (s23), FRIDAY THE 13TH and all related characters and elements © & ™ New Line Productions, Inc. (s23), TM & © Turner Entertainment Co. (s23), NATIONAL LAMPOON’S CHRISTMAS VACATION and all related characters and elements © & ™ Warner Bros. Entertainment Inc. (s23), ELF and all related characters and elements © & ™ New Line Productions, Inc. (s23), SEGA the SEGA logo, SONIC THE HEDGEHOG, SONIC BOOM are trademarks of SEGA Corporation. All Rights Reserved., BLUEY ™ and BLUEY character logos ™ & © Ludo Studio Pty Ltd 2018. Licensed by BBC Studios. BBC logo ™ & © BBC 1996, © 2023 Mojang AB. All Rights Reserved. Minecraft, the Minecraft logo, the Mojang Studios logo and the Creeper logo are trademarks of the Microsoft group of companies.
COPYRIGHT/PAUTAS DEL DERECHO DE AUTOR
109 ©Disney, TM & © 2023 Nintendo., ©2023 Smart Study Co., Ltd. All Rights Reserved. Pinkfong® and Baby Shark™ are trademarks of Smart Study Co., Ltd. © 2023 Viacom International Inc. Nickelodeon is a trademark of Viacom International Inc., © Universal City Studios LLC and Amblin Entertainment, Inc. All Rights Reserved., BARBIE and associated
ninguna manera.


©2023 DecoPac Availability subject to change without notice. DecoSet®, The Magic of Cakes®, Copy Confection® and PhotoCake® are registered trademarks of DecoPac. Edible Image® and Print-Ons® are registered trademarks of The Lucks Company, LLC. 3500 THURSTON AVENUE • ANOKA, MINNESOTA 55303 1-800-DECOPAC (1-800-332-6722) ESPAÑOL: 1-800-898-3063 FAX: 763-502-0534 PHOTOCAKE® TECHNICAL ASSISTANCE: 1-800-644-1228 FSC AREA #29118 Printed in USA

